
A beautiful manicure can change the entire mood of a look, even when the rest of the outfit is wonderfully simple. I’m always drawn to those little details that make nails feel special, whether it’s a sheer French tip, a pearly finish, tiny crystals, or delicate line art. But how do you find a design that feels fresh without becoming too complicated? And which details are actually worth trying when you want something polished enough for everyday life?
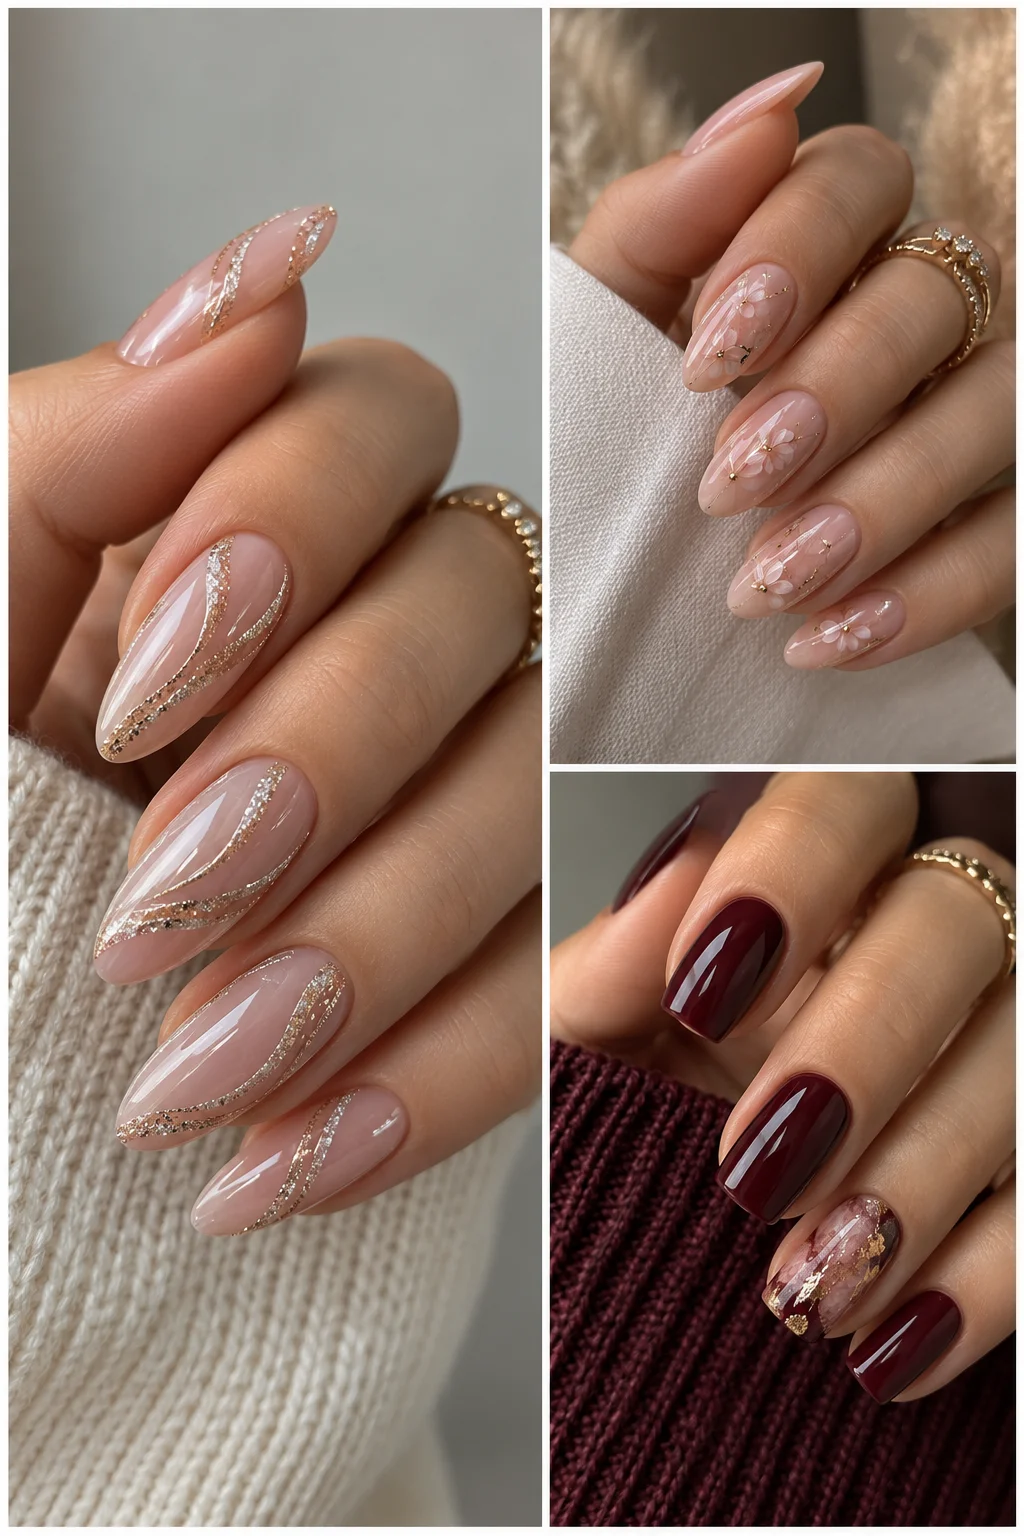
This season, soft pinks, milky whites, subtle shimmer, and refined nail art are giving classic manicures a fresh new direction. I especially love designs that keep the base clean and add one unexpected detail, because they look elegant from across the room and much more interesting up close. The right nail shape can make the effect even better, from short square nails to graceful almond silhouettes. If your next manicure appointment needs a little inspiration, these beautiful manicure details and design ideas are a perfect place to start.
Sheer Nude Nails With Blue Floral Details
I always notice a manicure like this because it manages to feel delicate and dressed up at the same time. The long almond nails start with a sheer pinky-nude base that keeps the natural nail softly visible, while pale blue flowers add a cool, airy accent. Tiny gold leaves bring warmth to the floral design, and the deep blue French-style tips create an unexpected contrast along the edges. The result feels especially pretty for late summer, when I want something feminine but not overly sweet.
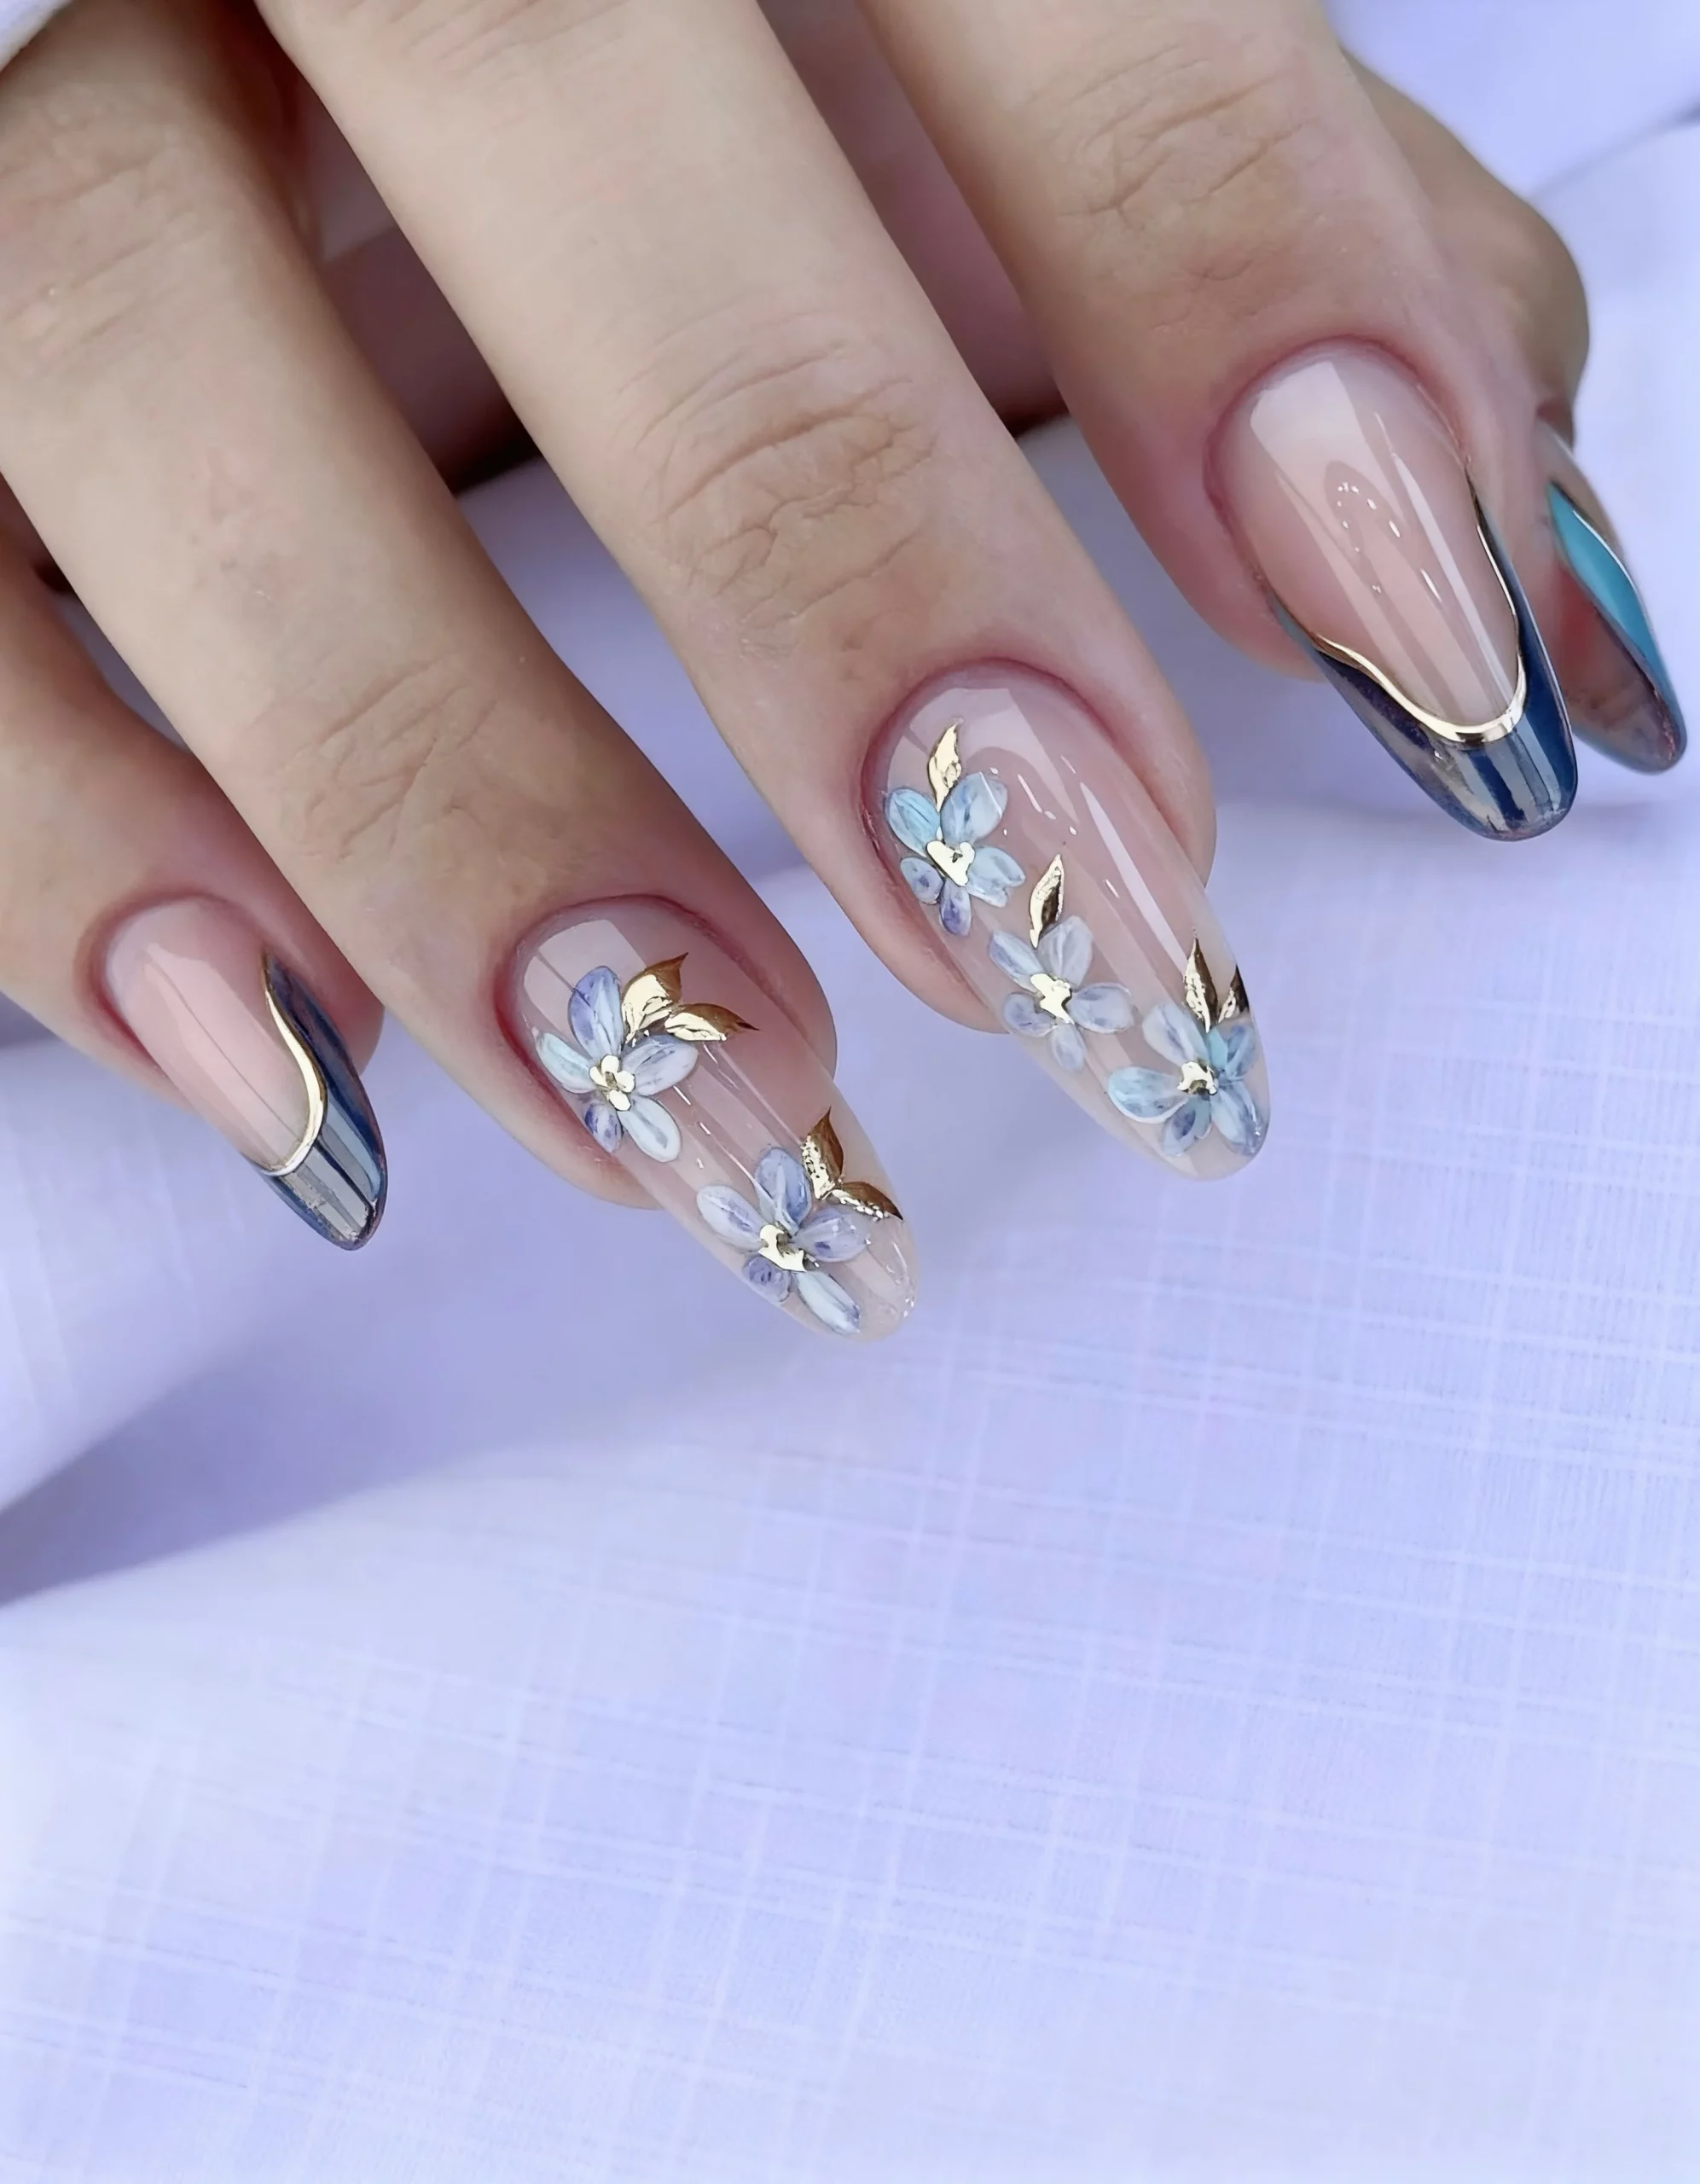
For a similar finish, I would start with a sheer nude gel such as OPI Bubble Bath or a comparable translucent pink-beige shade, then add pale blue and white gel colors for the flowers. A fine nail-art brush makes the petals much easier to control, while gold foil or metallic gel can create those delicate leaf accents. For the dark tips, I would choose a rich navy-blue gel with a high-shine top coat.
At home, I would shape the nails into a clean almond silhouette first and apply two very thin layers of the nude base. After curing, I would place the flowers slightly off-center rather than making every nail identical. That little bit of asymmetry makes the manicure feel more natural. I would finish the floral details and blue tips separately, cure everything carefully, and seal the design with glossy top coat.
I particularly like this combination when an outfit is simple. A white button-down, denim, or a soft neutral dress gives the nails room to do their thing. And honestly, the tiny gold details are the part I would keep even if I wanted to simplify the design.
Milky Pink French Tips With Delicate Sparkle
A soft French manicure never really disappears from my inspiration folder, but I love when it gets a little texture. Here, the translucent blush-pink base is covered with scattered iridescent flakes that catch the light without turning the nails into full-on glitter. Crisp white French tips frame the squared shape, giving the manicure a clean structure while the reflective pieces add a playful finish. It feels polished enough for everyday wear but still has that little surprise when the hands move.
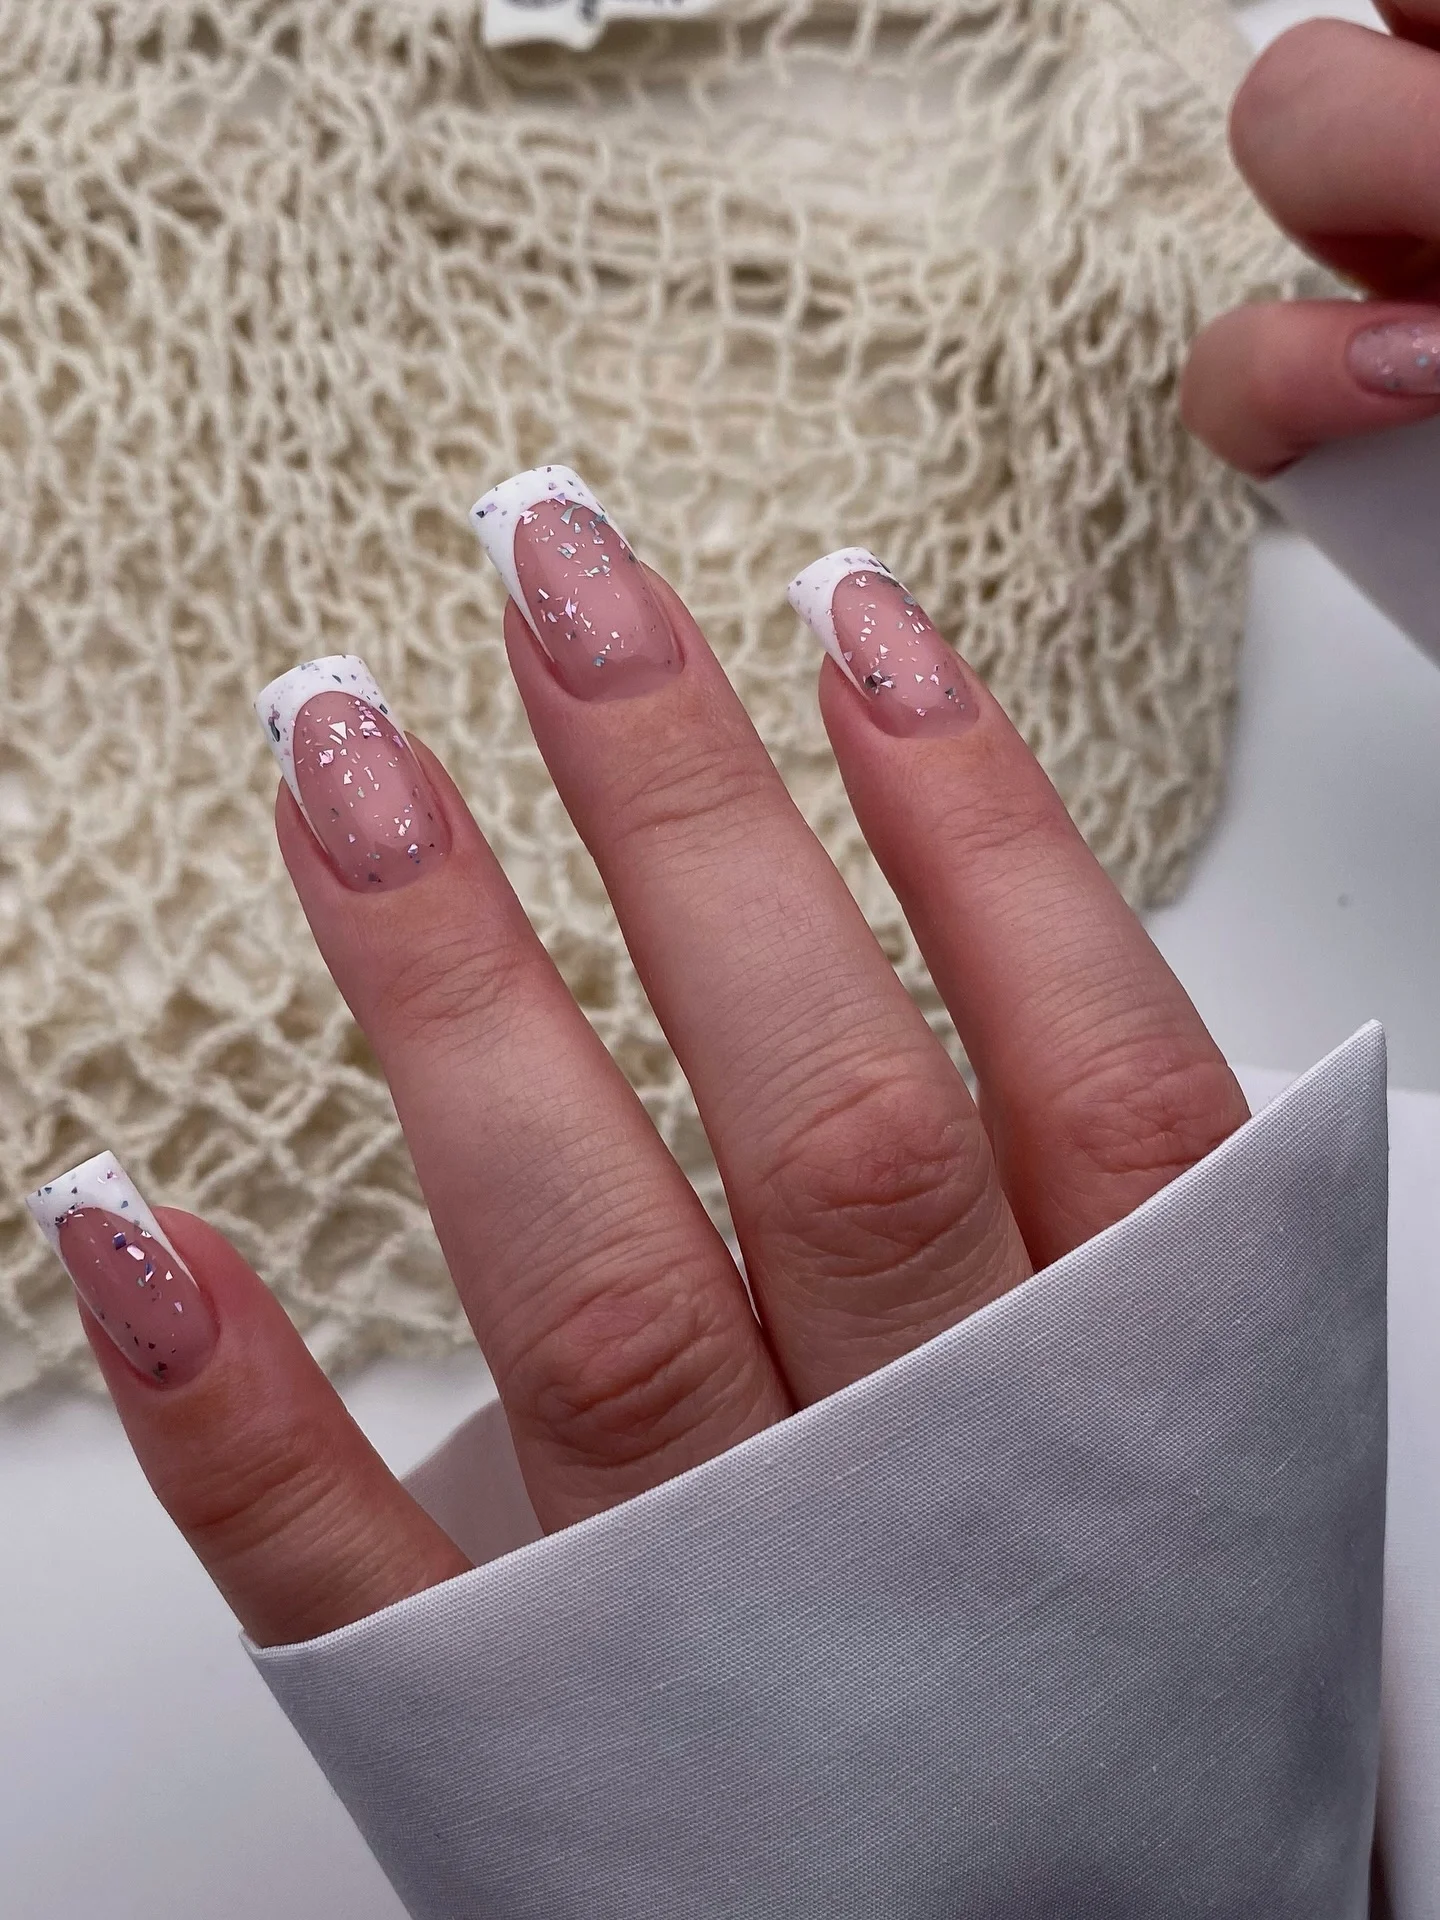
I would use a milky pink or sheer blush gel as the base, white gel polish for the tips, and very fine iridescent flakes or silver-white nail foil for the sparkle. A neutral glossy top coat is essential because it brings the different layers together. If I were recreating this at home, I would keep the flakes extremely small so the design stays refined rather than chunky.
The easiest way for me to approach this manicure is to build the base first and cure it completely before adding the French tips. I would use a thin liner brush or French-tip guide to keep the white edge even. Then I would place the flakes randomly over the nude section, concentrating them toward the center and tip instead of covering the entire nail. One final layer of top coat gives everything that smooth, glassy finish.
This is one of those manicures I would happily wear when I want my nails to look finished with almost any outfit. The combination of pink, white, and translucent sparkle is incredibly easy to style, and the short-to-medium length makes the idea more practical than an elaborate long set.
Warm Nude Nails With Gold Foil Accents
Warm beige nails can look surprisingly sophisticated when the details are kept intentional. I love the almond shape here because it gives the neutral base a graceful line, while irregular pieces of gold foil add just enough contrast. Tiny black handwritten words create another layer of personality, turning an otherwise minimal manicure into something that feels more editorial. It is subtle, but definitely not boring.
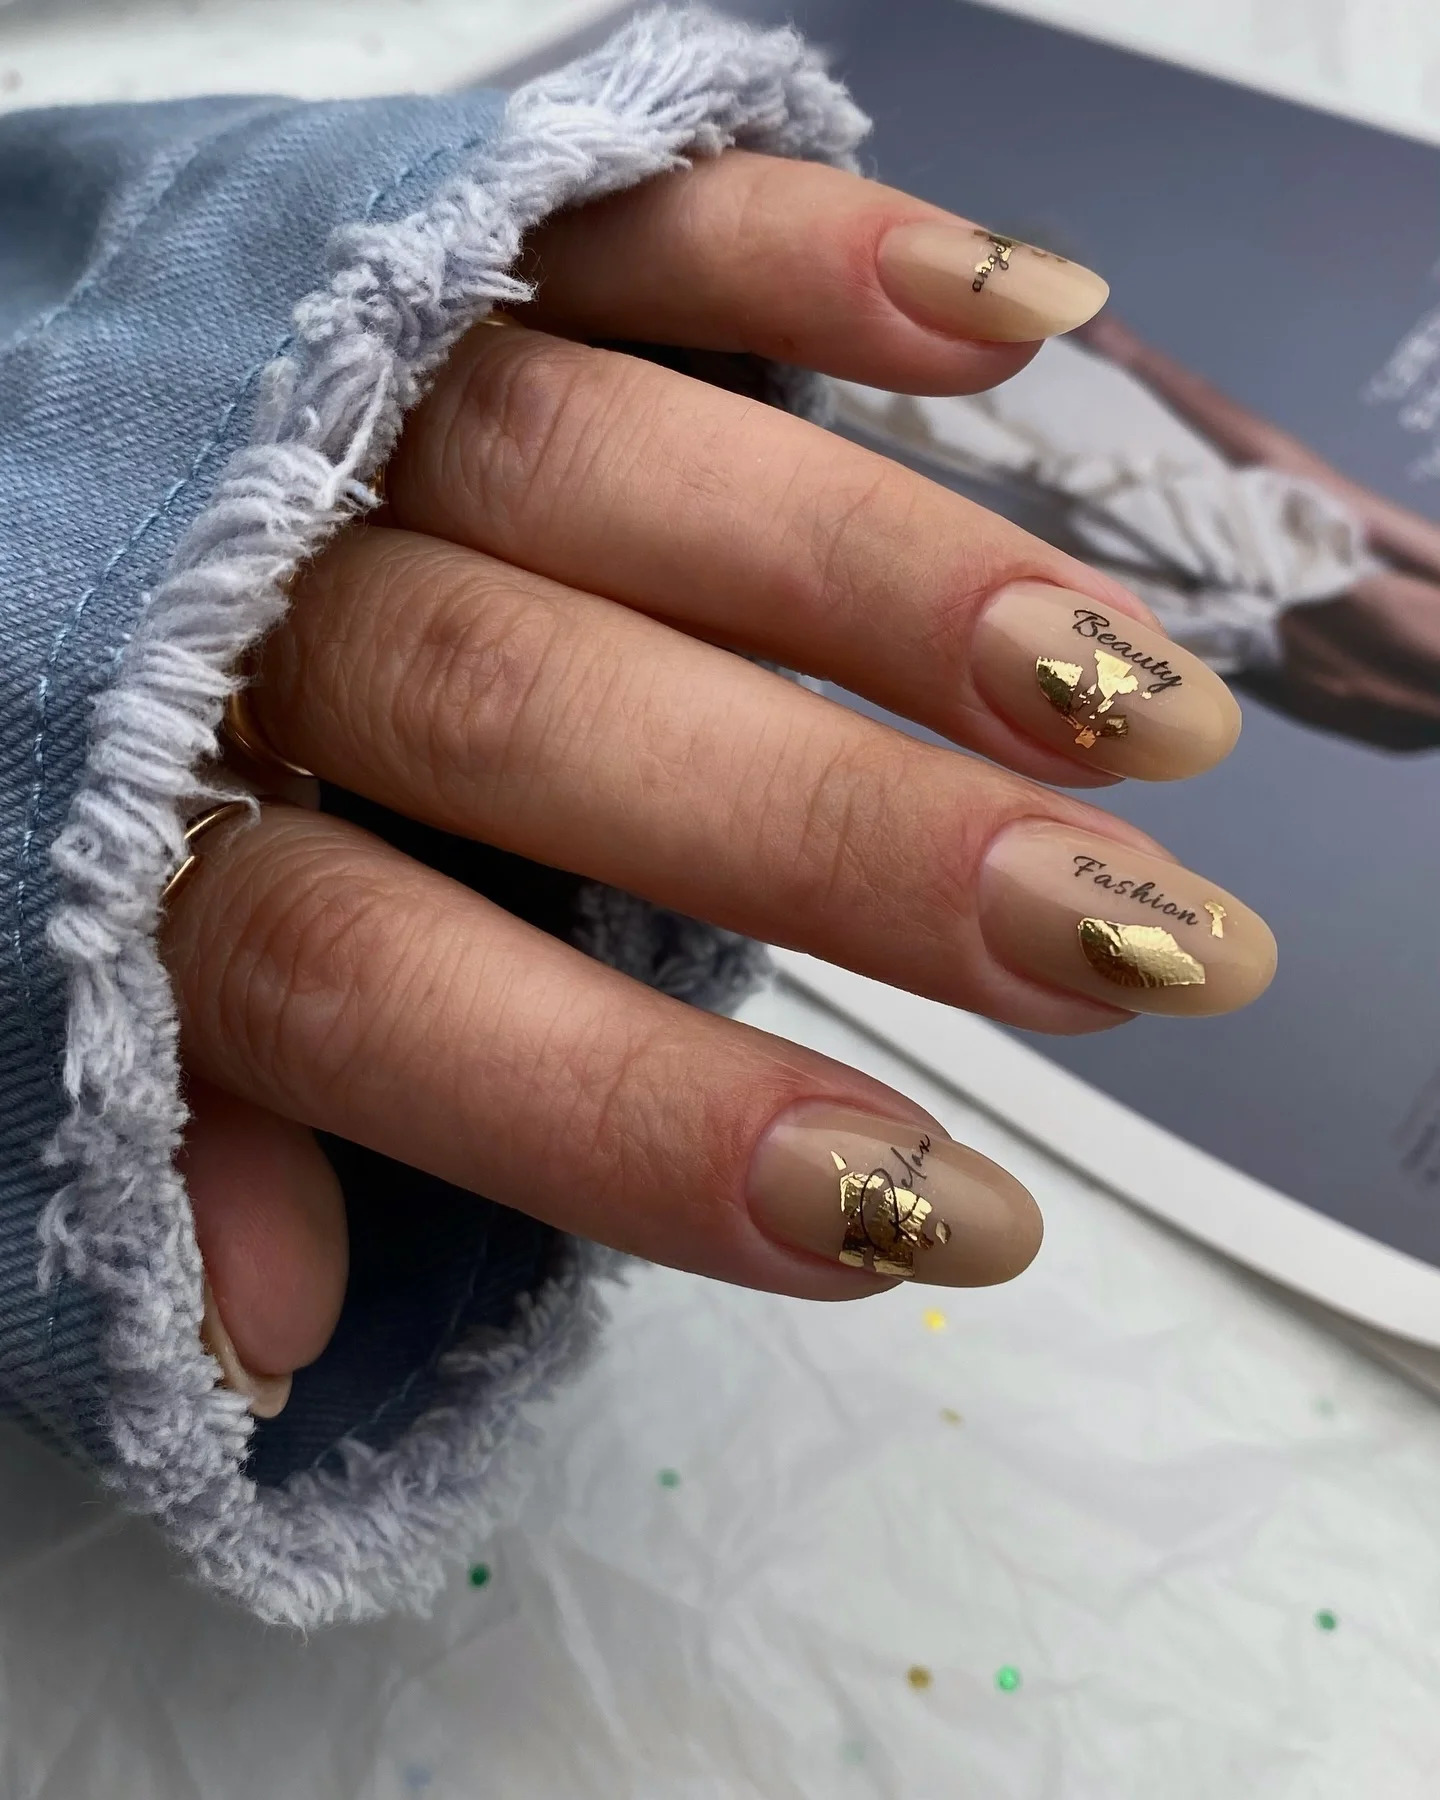
For the base, I would choose a creamy beige or warm nude gel with a glossy finish. Gold transfer foil works beautifully for the metallic pieces, and a very fine black nail-art pen or liner gel can create the delicate lettering. I would avoid using too many different finishes because the beauty of this manicure comes from the restrained palette.
I would begin by shaping the nails into a soft almond form and applying the nude color evenly. Once cured, I would press small, irregular pieces of gold foil onto selected areas rather than creating matching patterns on every nail. The lettering should be added with a very fine brush and a steady hand. If the words feel difficult to recreate, tiny abstract marks can give a similar handwritten effect without making the design look forced.
I find this style especially appealing with denim and gold jewelry. It has that effortless quality where the manicure feels connected to the rest of the outfit rather than competing with it. Sometimes one tiny gold accent says more than a whole handful of decorations.
Soft Butter Yellow Nails With a Crystal Accent
Butter yellow has a completely different personality from the deeper shades that usually dominate manicure inspiration. I love the soft, creamy version used here because it feels cheerful without becoming neon. The medium-length square shape keeps the color modern and wearable, while a narrow row of crystals across one nail creates a delicate jewelry-like detail. It is a very easy way to make a single-color manicure feel special.
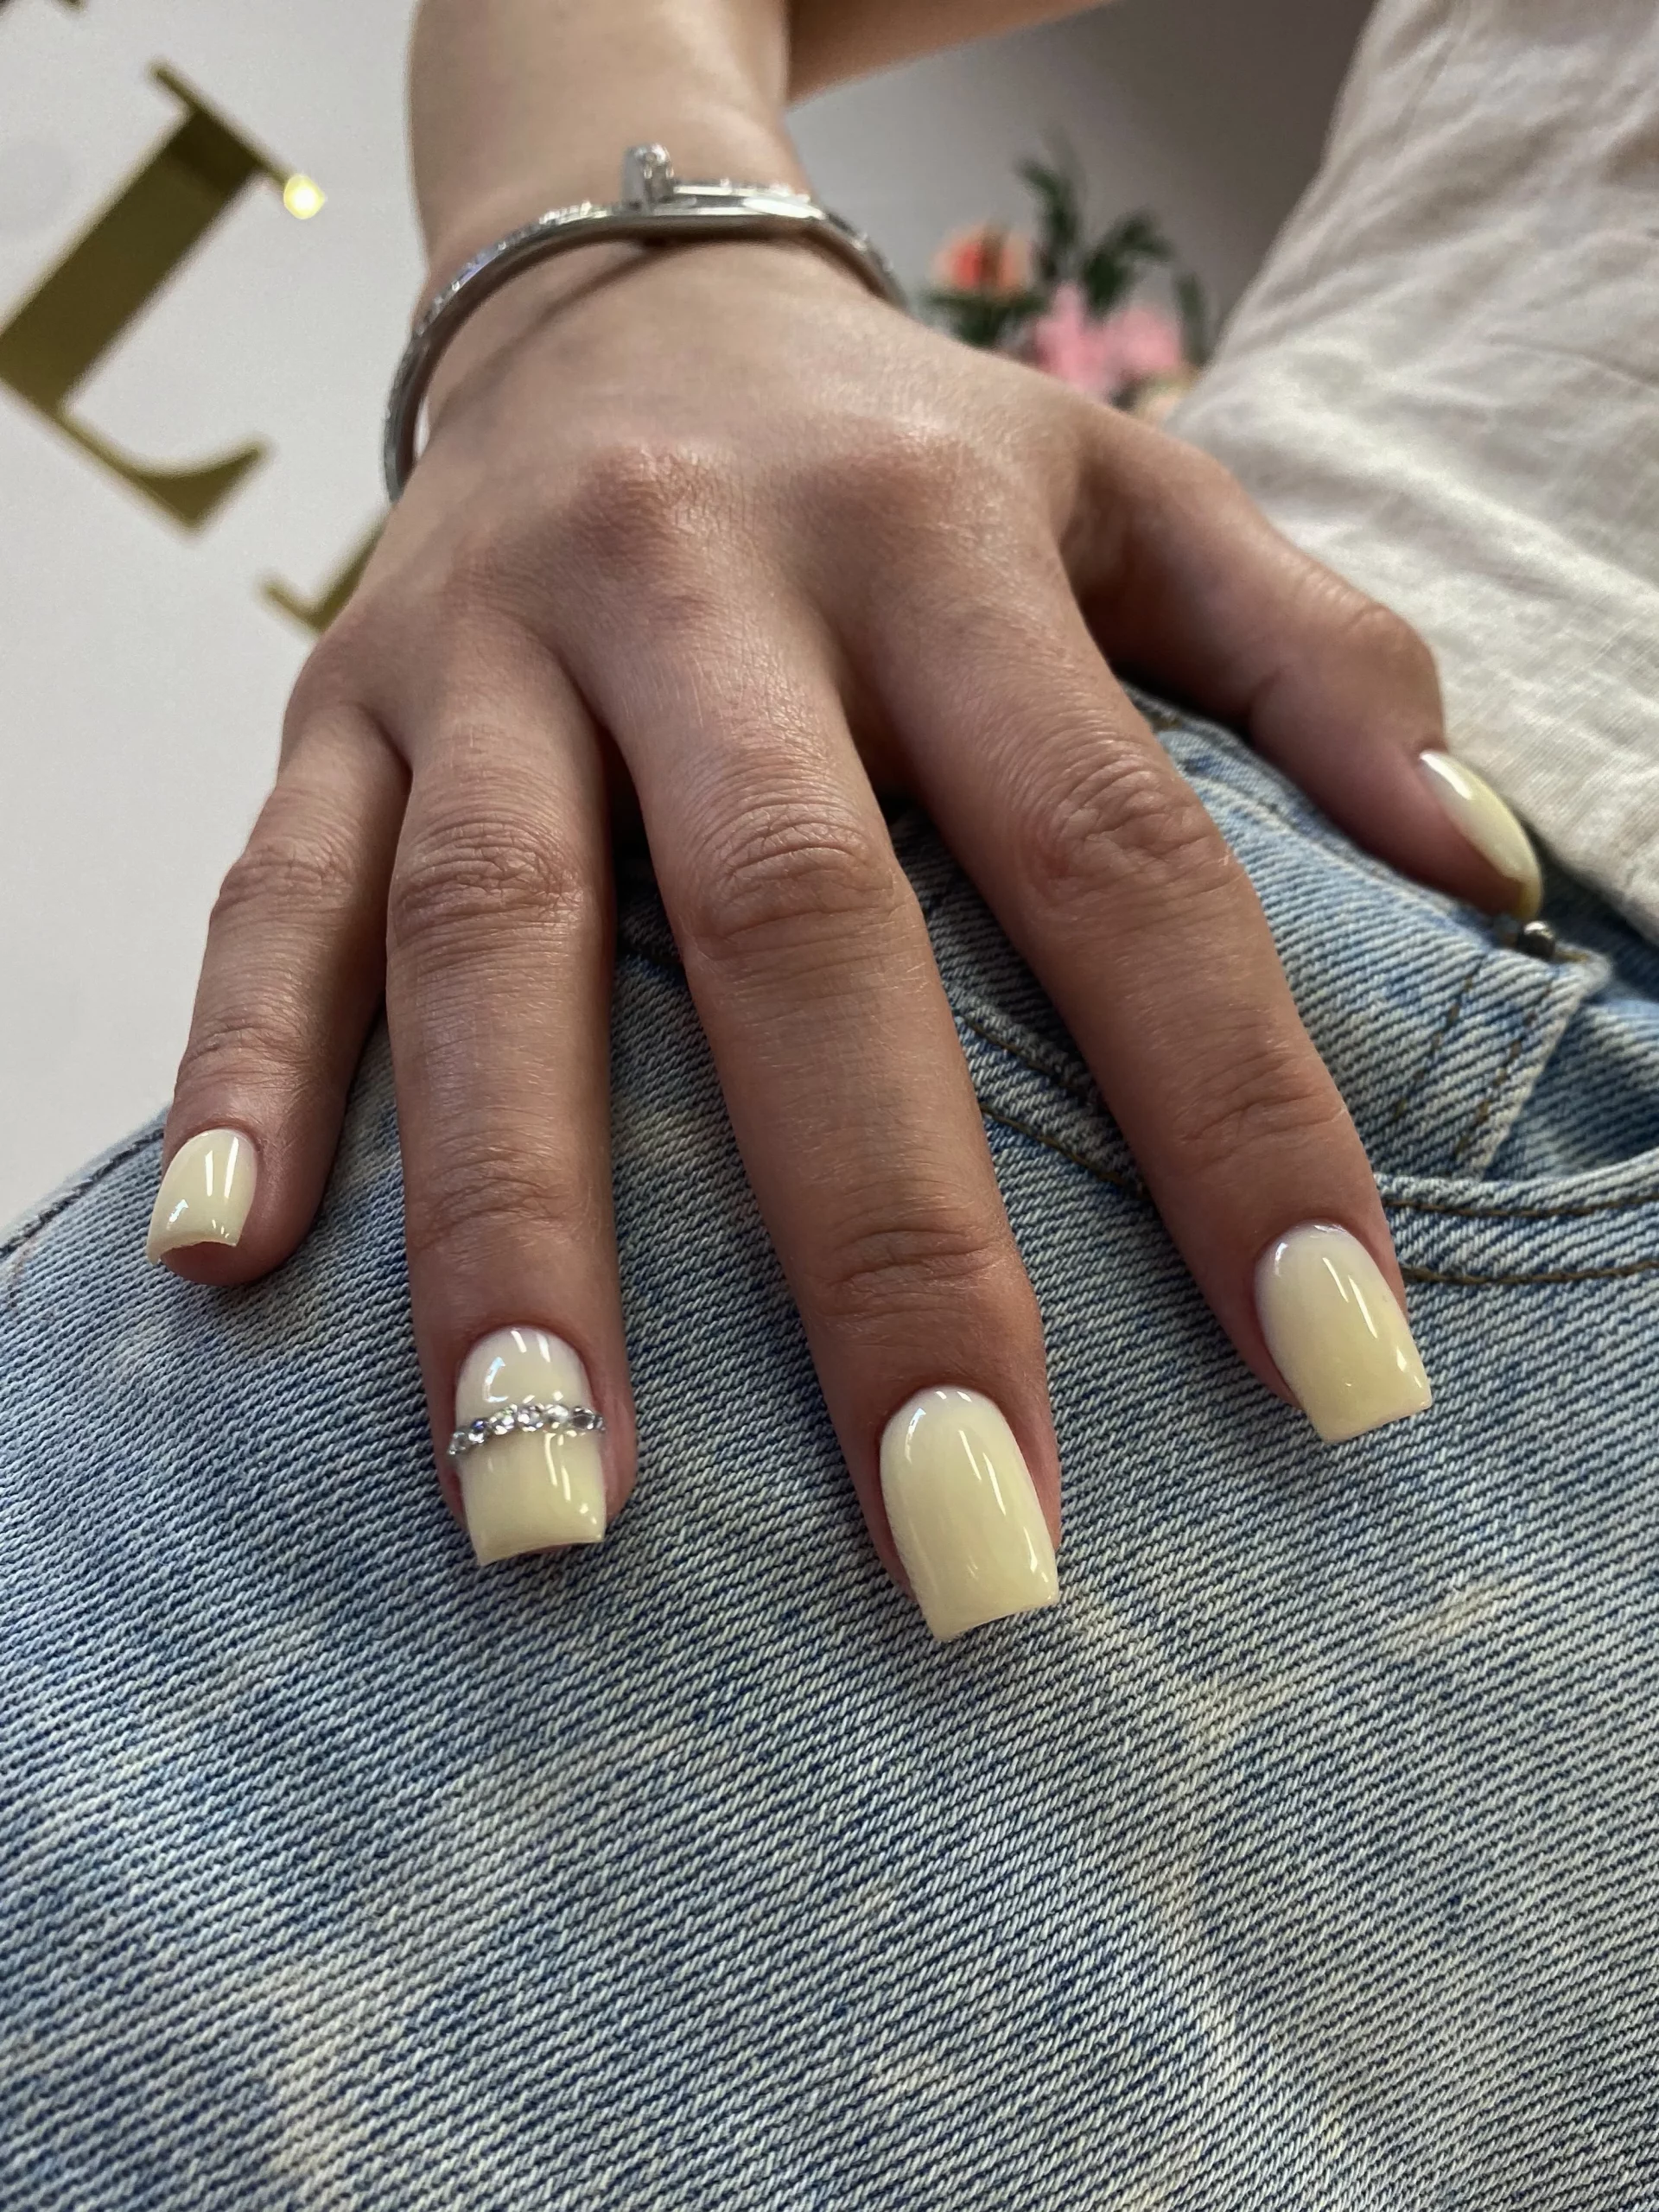
I would reach for a creamy pastel yellow gel polish with enough opacity to look smooth in two coats. A thin strip of crystal embellishments, tiny rhinestones, or silver nail jewelry can recreate the accent. For the most seamless result, I would use a strong nail-art adhesive gel beneath the crystals and finish around them with a glossy top coat.
The application is wonderfully straightforward. After preparing and shaping the nails, I would apply two thin coats of yellow, curing between each layer. On the accent nail, I would place the crystals in a slightly curved line following the natural width of the nail. The key is restraint: I would rather have one precise detail than cover the entire manicure with sparkle.
This shade makes me think of the last bright days of summer and those outfits that need almost nothing else. White denim, blue denim, soft gray, or even a simple black top would work beautifully with it. If I wanted an easy color change without committing to complicated nail art, this would be high on my list.
Soft Pink Nails With Silver Leaf Details
There is a quiet elegance to pale pink nails when the design is almost tone-on-tone. These square nails have a translucent blush base with delicate silver botanical-like accents placed near the cuticle and tips. The fine metallic lines create the illusion of little leaves or icy branches, while the soft base keeps the overall look light. I especially like how the details are positioned differently across the nails rather than copied exactly.
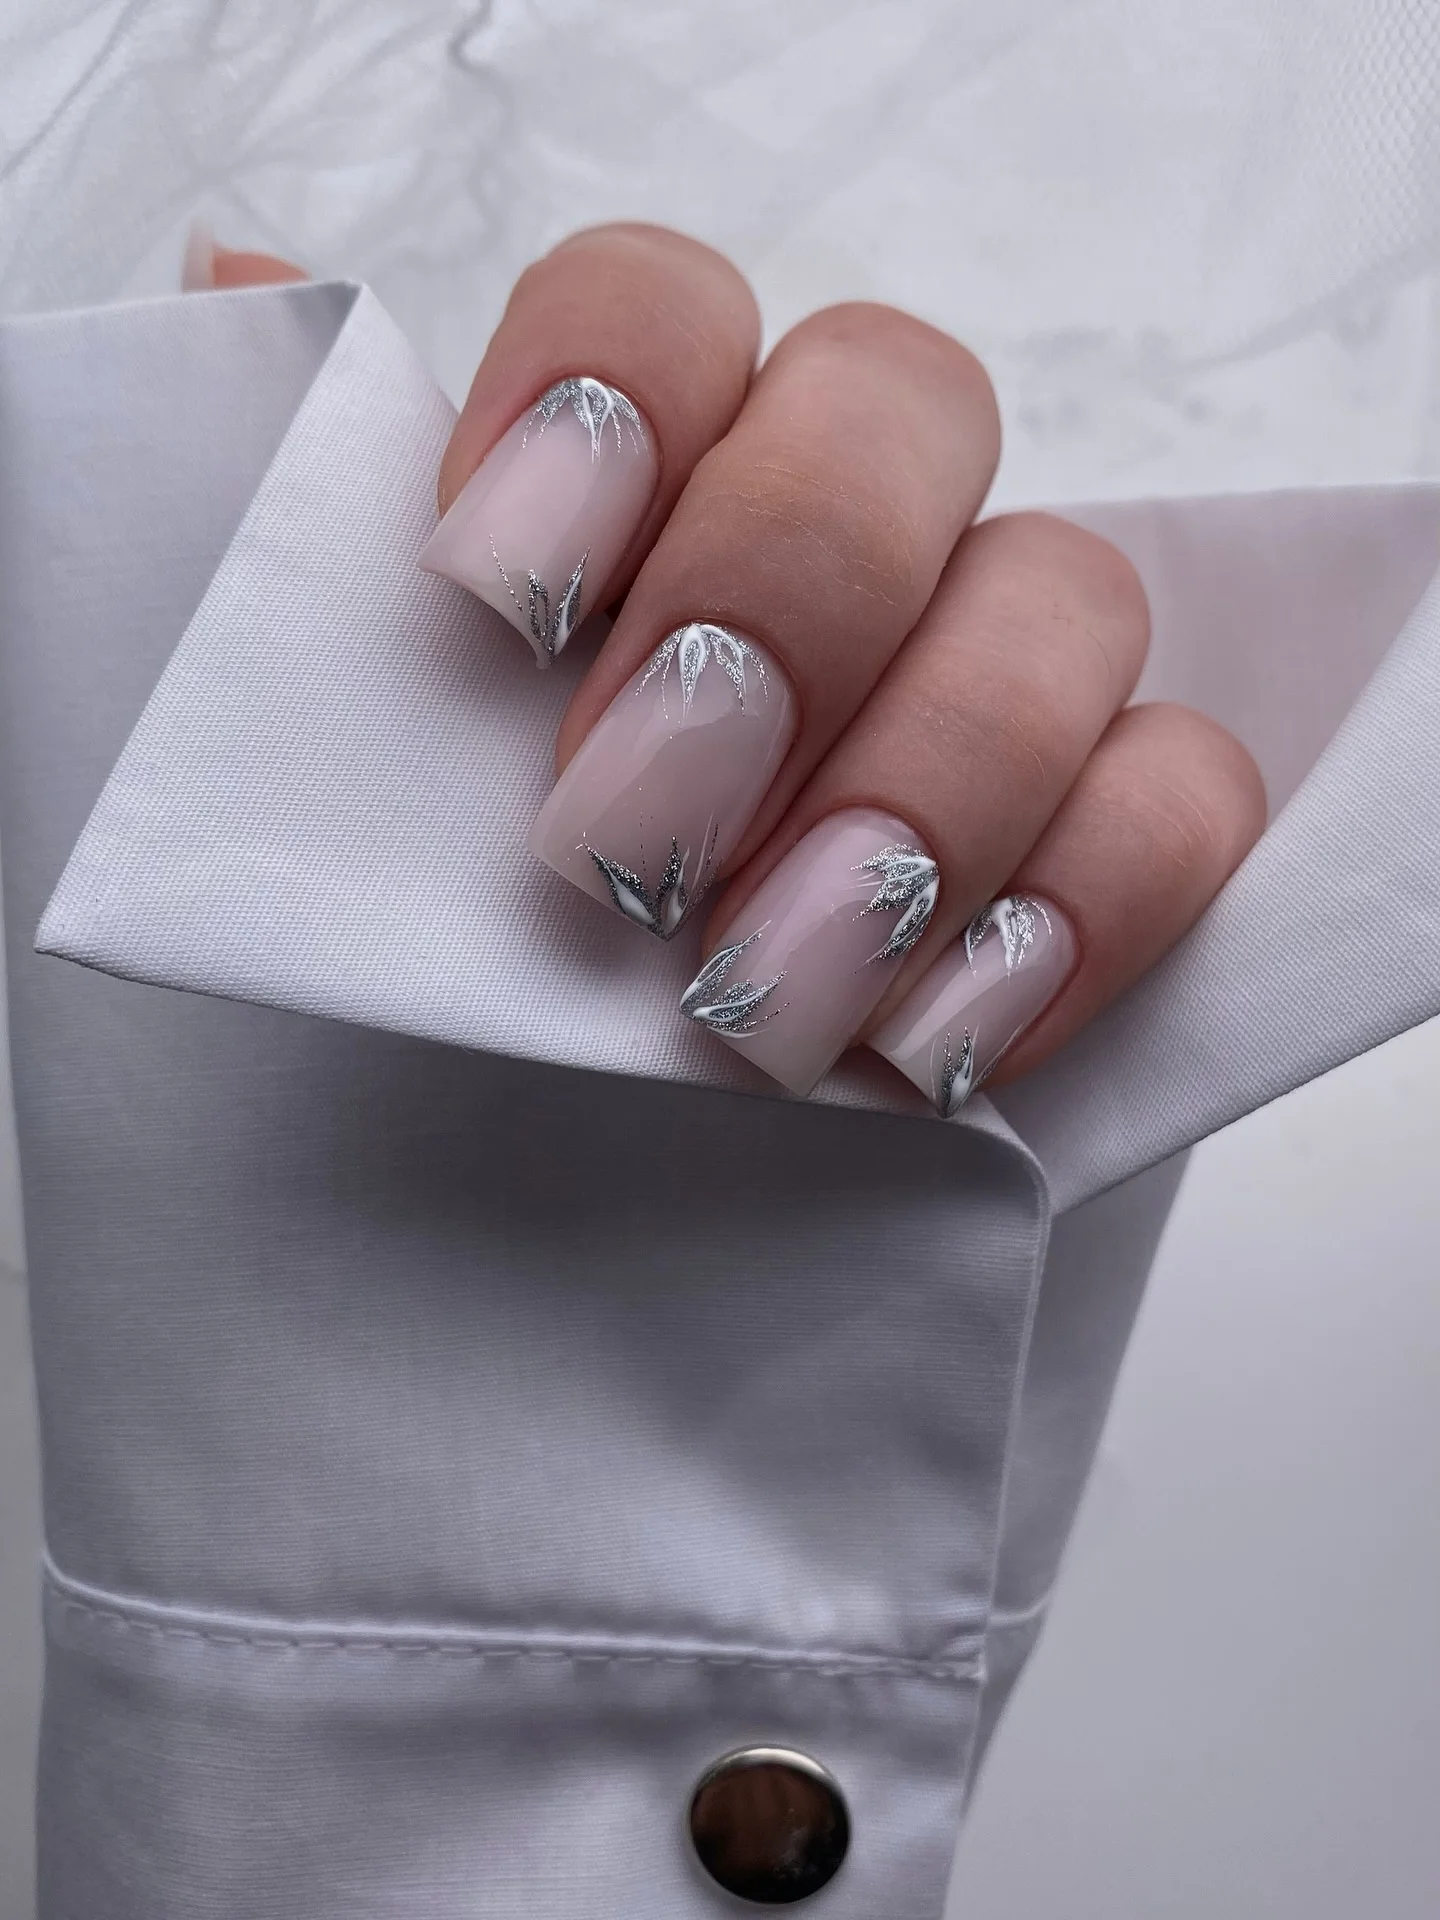
A sheer pink-beige gel polish would create the right foundation, while silver metallic gel, chrome powder, or very fine silver foil could provide the decorative elements. I would also keep a detail brush nearby because the narrow lines require more precision than a standard nail-art brush. A high-gloss top coat helps the metallic work look integrated rather than sitting on top of the manicure.
I would build this design from the base outward. Once the sheer pink color is cured, I would sketch the larger silver shapes first and then add the thinner lines around them. Working with small sections makes it much easier to keep the design delicate. I would finish with top coat, making sure the edges are completely sealed.
This is the sort of manicure I associate with a crisp white shirt, satin, or simple silver jewelry. It has a slightly dressed-up feeling without looking like a special-occasion manicure. And that is exactly why I would save it for a week when I know I have several different outfits to wear.
Glossy Almond Nails With Minimal Gold Outlining
Sometimes I want nail art that whispers instead of shouts, and this almond manicure gets that balance right. The creamy nude base looks almost like a polished natural nail, while thin gold lines trace parts of the outer edge and create tiny points of sparkle. A few crystals appear where the gold detailing meets, adding a jewelry-like finish. The almond shape does a lot of the visual work here, making the fingers look long and elegant.
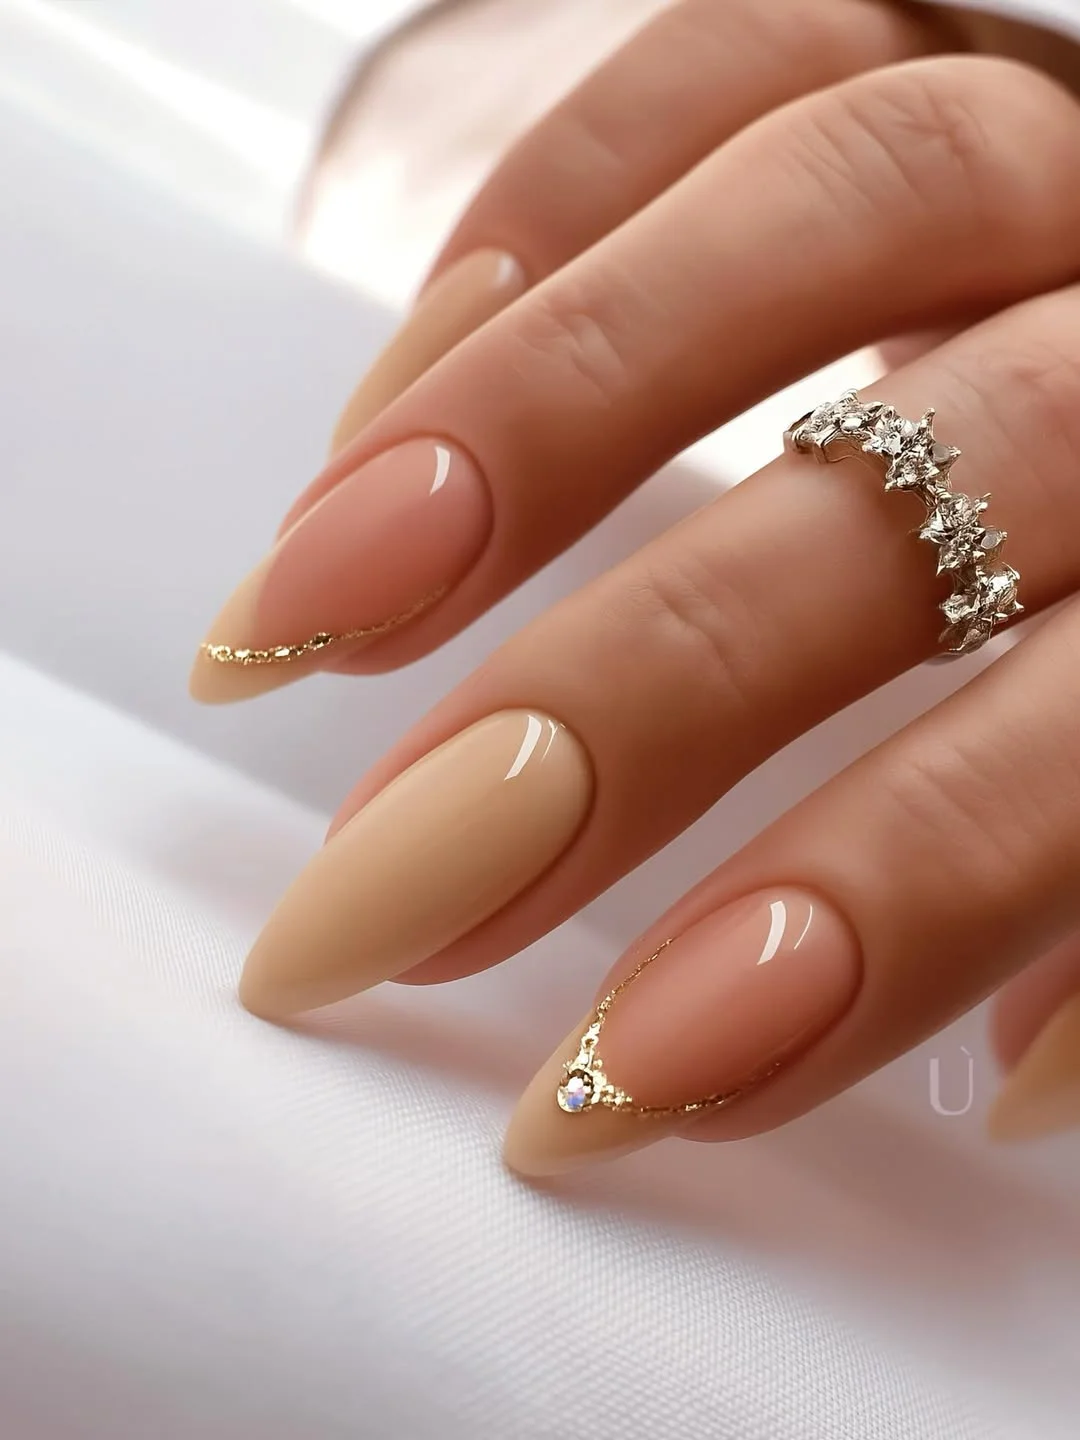
I would choose a creamy nude gel that sits somewhere between beige and blush, plus a fine metallic gold liner or gold striping gel. For the tiny accents, a few small crystals are enough. I would keep the top coat extremely glossy because the reflection is an important part of the look.
For the cleanest result, I would first perfect the almond shape before applying any color. After curing the nude base, I would draw the gold detail with a very thin brush and let the natural curve of the nail guide the line. The crystal can be placed at the point where the gold detail naturally ends. This keeps the decoration looking deliberate instead of randomly added.
I love this kind of manicure for someone who usually wears neutrals but still wants a little personality. It does not require a dramatic color change or a complicated pattern. The effect comes from precision, shine, and one tiny glint of gold.
Peach Nude Nails With Soft Floral Artwork
A warm peach nude immediately changes the mood of a manicure, and here it works beautifully with delicate floral artwork. The elongated almond nails have a translucent peach base, while soft peach flowers and silver leaves travel vertically across selected nails. A thin metallic outline around the tips gives the manicure a refined finish and visually connects the floral details. It feels romantic without becoming overly ornate.
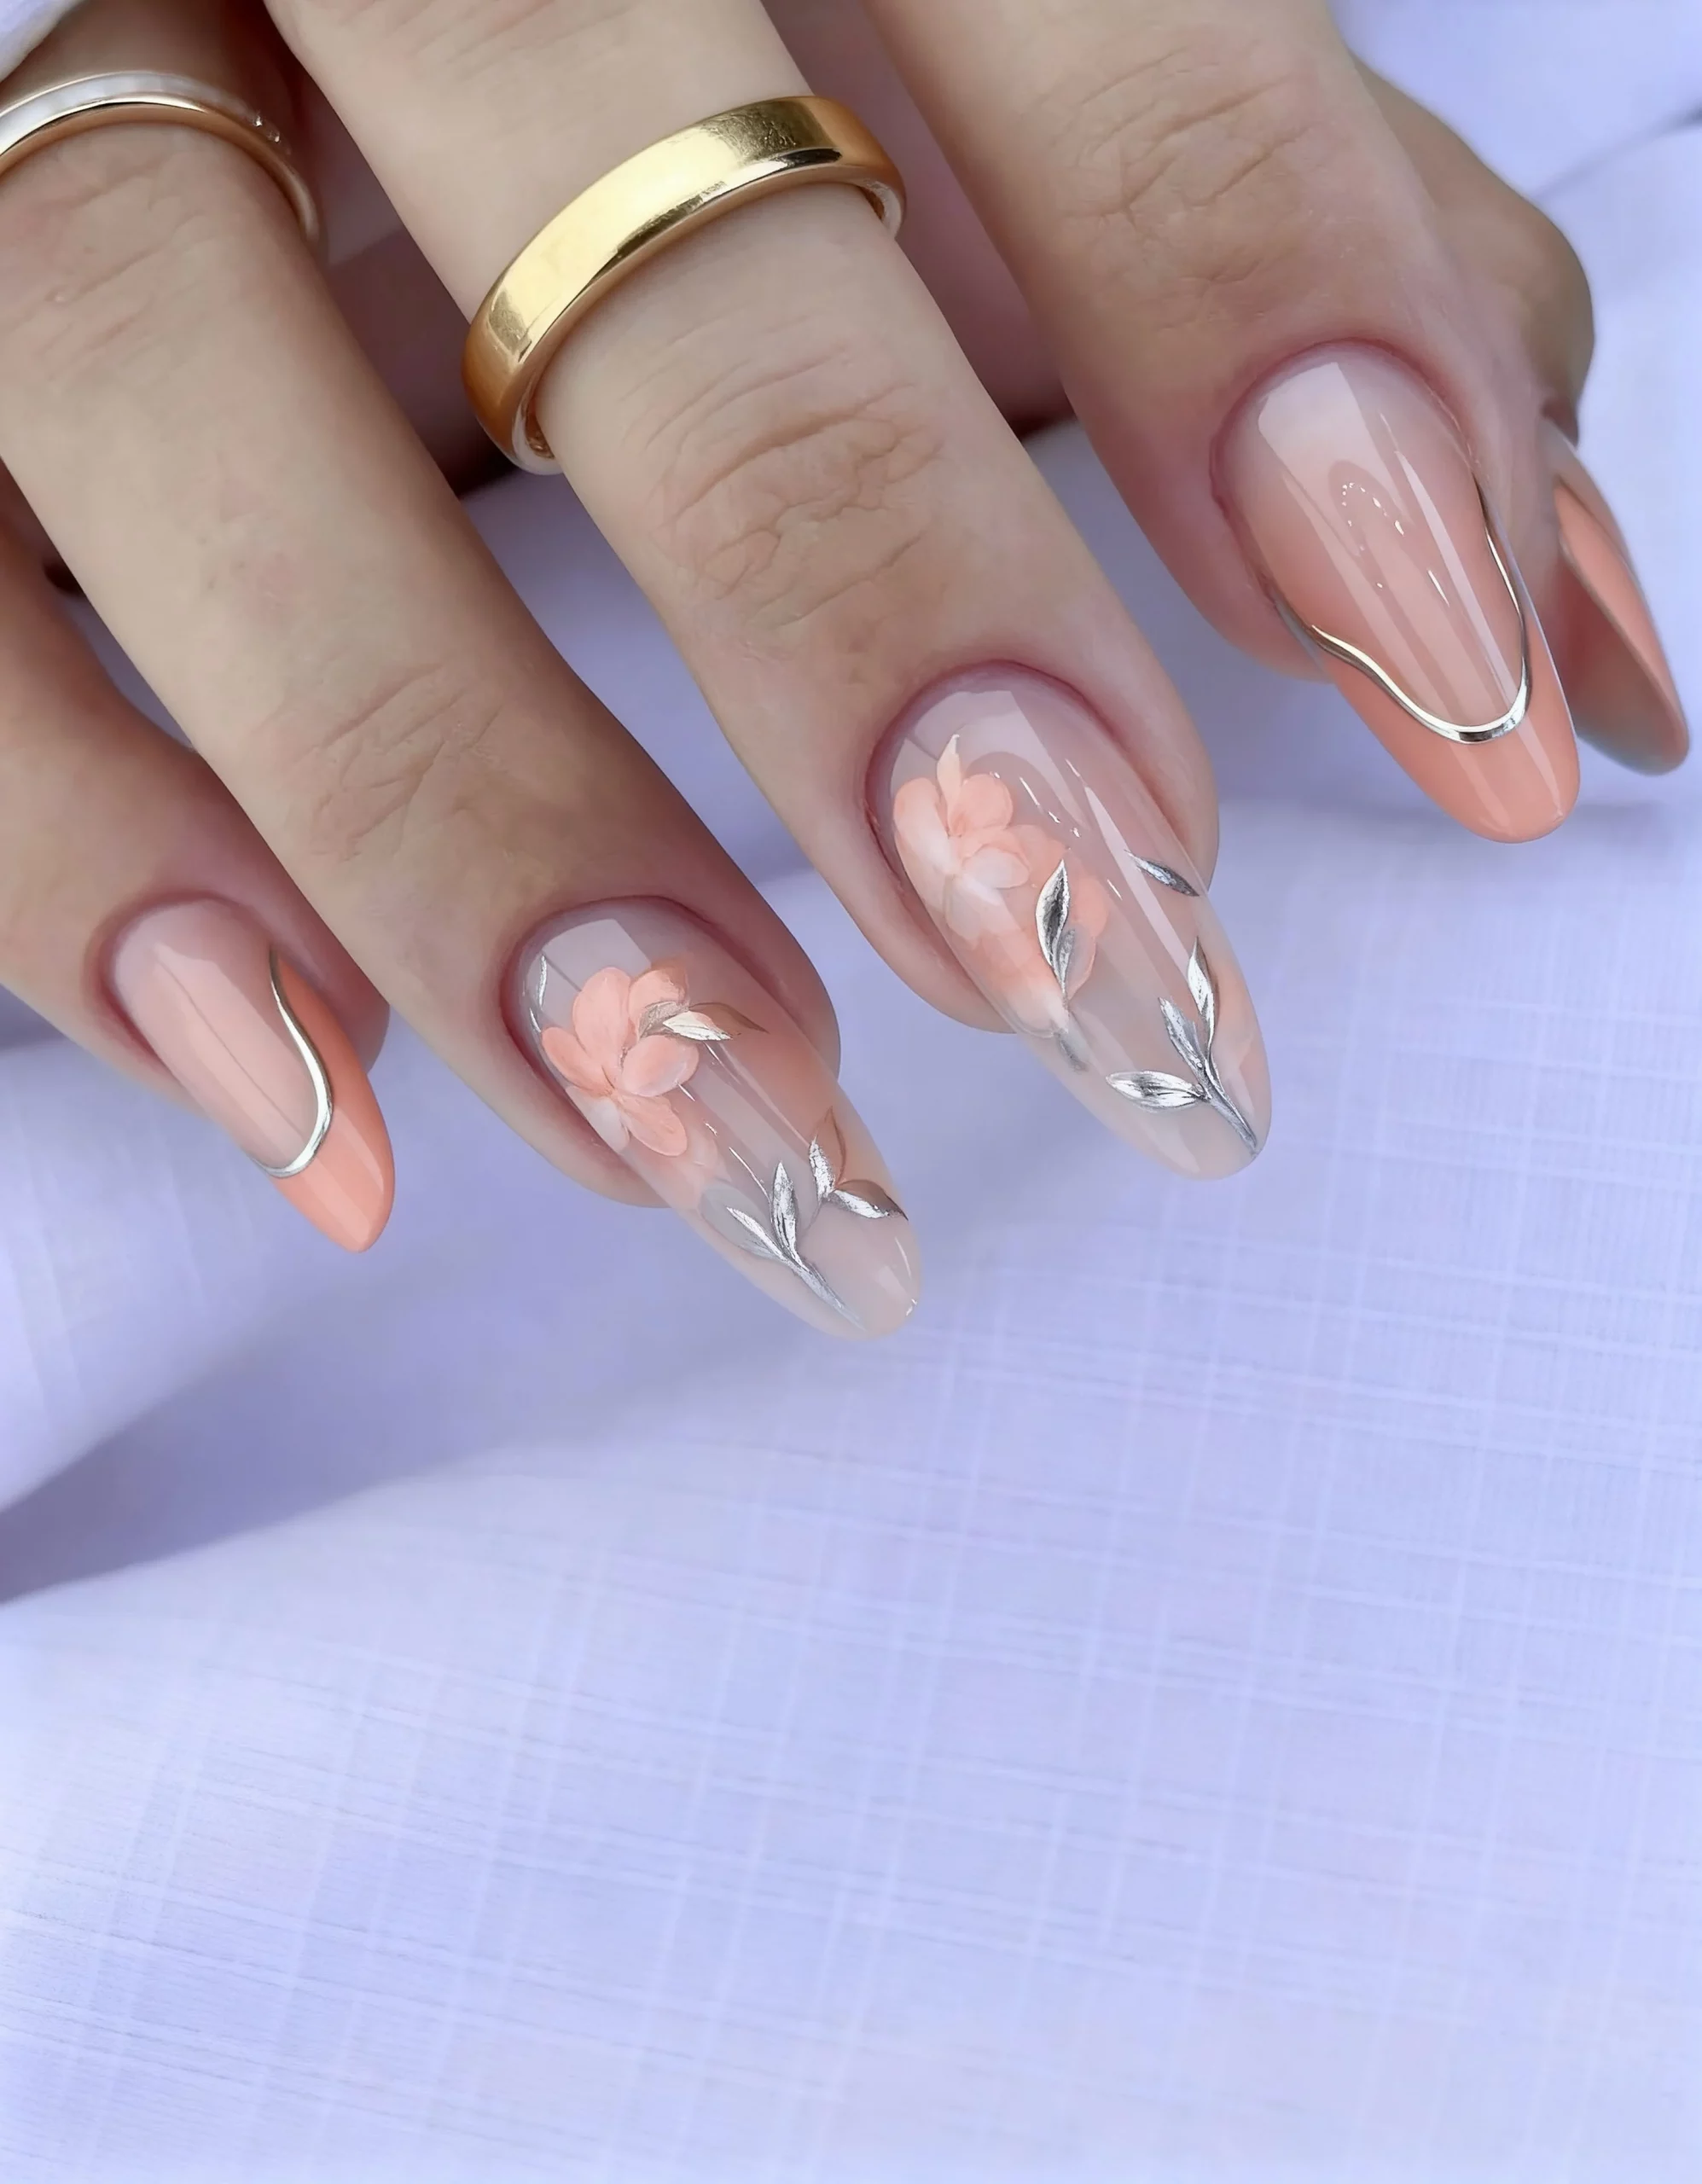
I would use a sheer peach or blush gel for the foundation, a slightly lighter peach for the flowers, and silver gel or foil for the leaves and fine outlines. A liner brush and a small detail brush are enough for most of the artwork. Because the base is so soft, I would avoid choosing a flower color that is too saturated.
I would apply the peach base first and then map out where the floral details should sit. Instead of placing the flowers directly in the center of every nail, I would allow some designs to begin closer to the sidewall or tip. The silver leaves can be added afterward with very fine strokes. A glossy top coat pulls the whole manicure together and gives the flowers a slightly dimensional appearance.
This is one I would wear for a late-summer dinner or a weekend when I want my hands to look especially polished. The peach tone feels warm and flattering, while the silver prevents the design from becoming too sugary. It is soft, feminine, and still has enough structure to feel current.
Blush Pink Nails With Refined Crystal Details
I keep coming back to this combination of blush pink, sheer nude, and delicate crystal decoration because it feels so easy to wear. The squared nails alternate between deeper dusty pink and translucent nude, creating a subtle color-blocked effect. One accent nail carries a fine gold curve with a small crystal cluster, while the glossy finish makes every surface look smooth and fresh. It is polished without trying too hard.
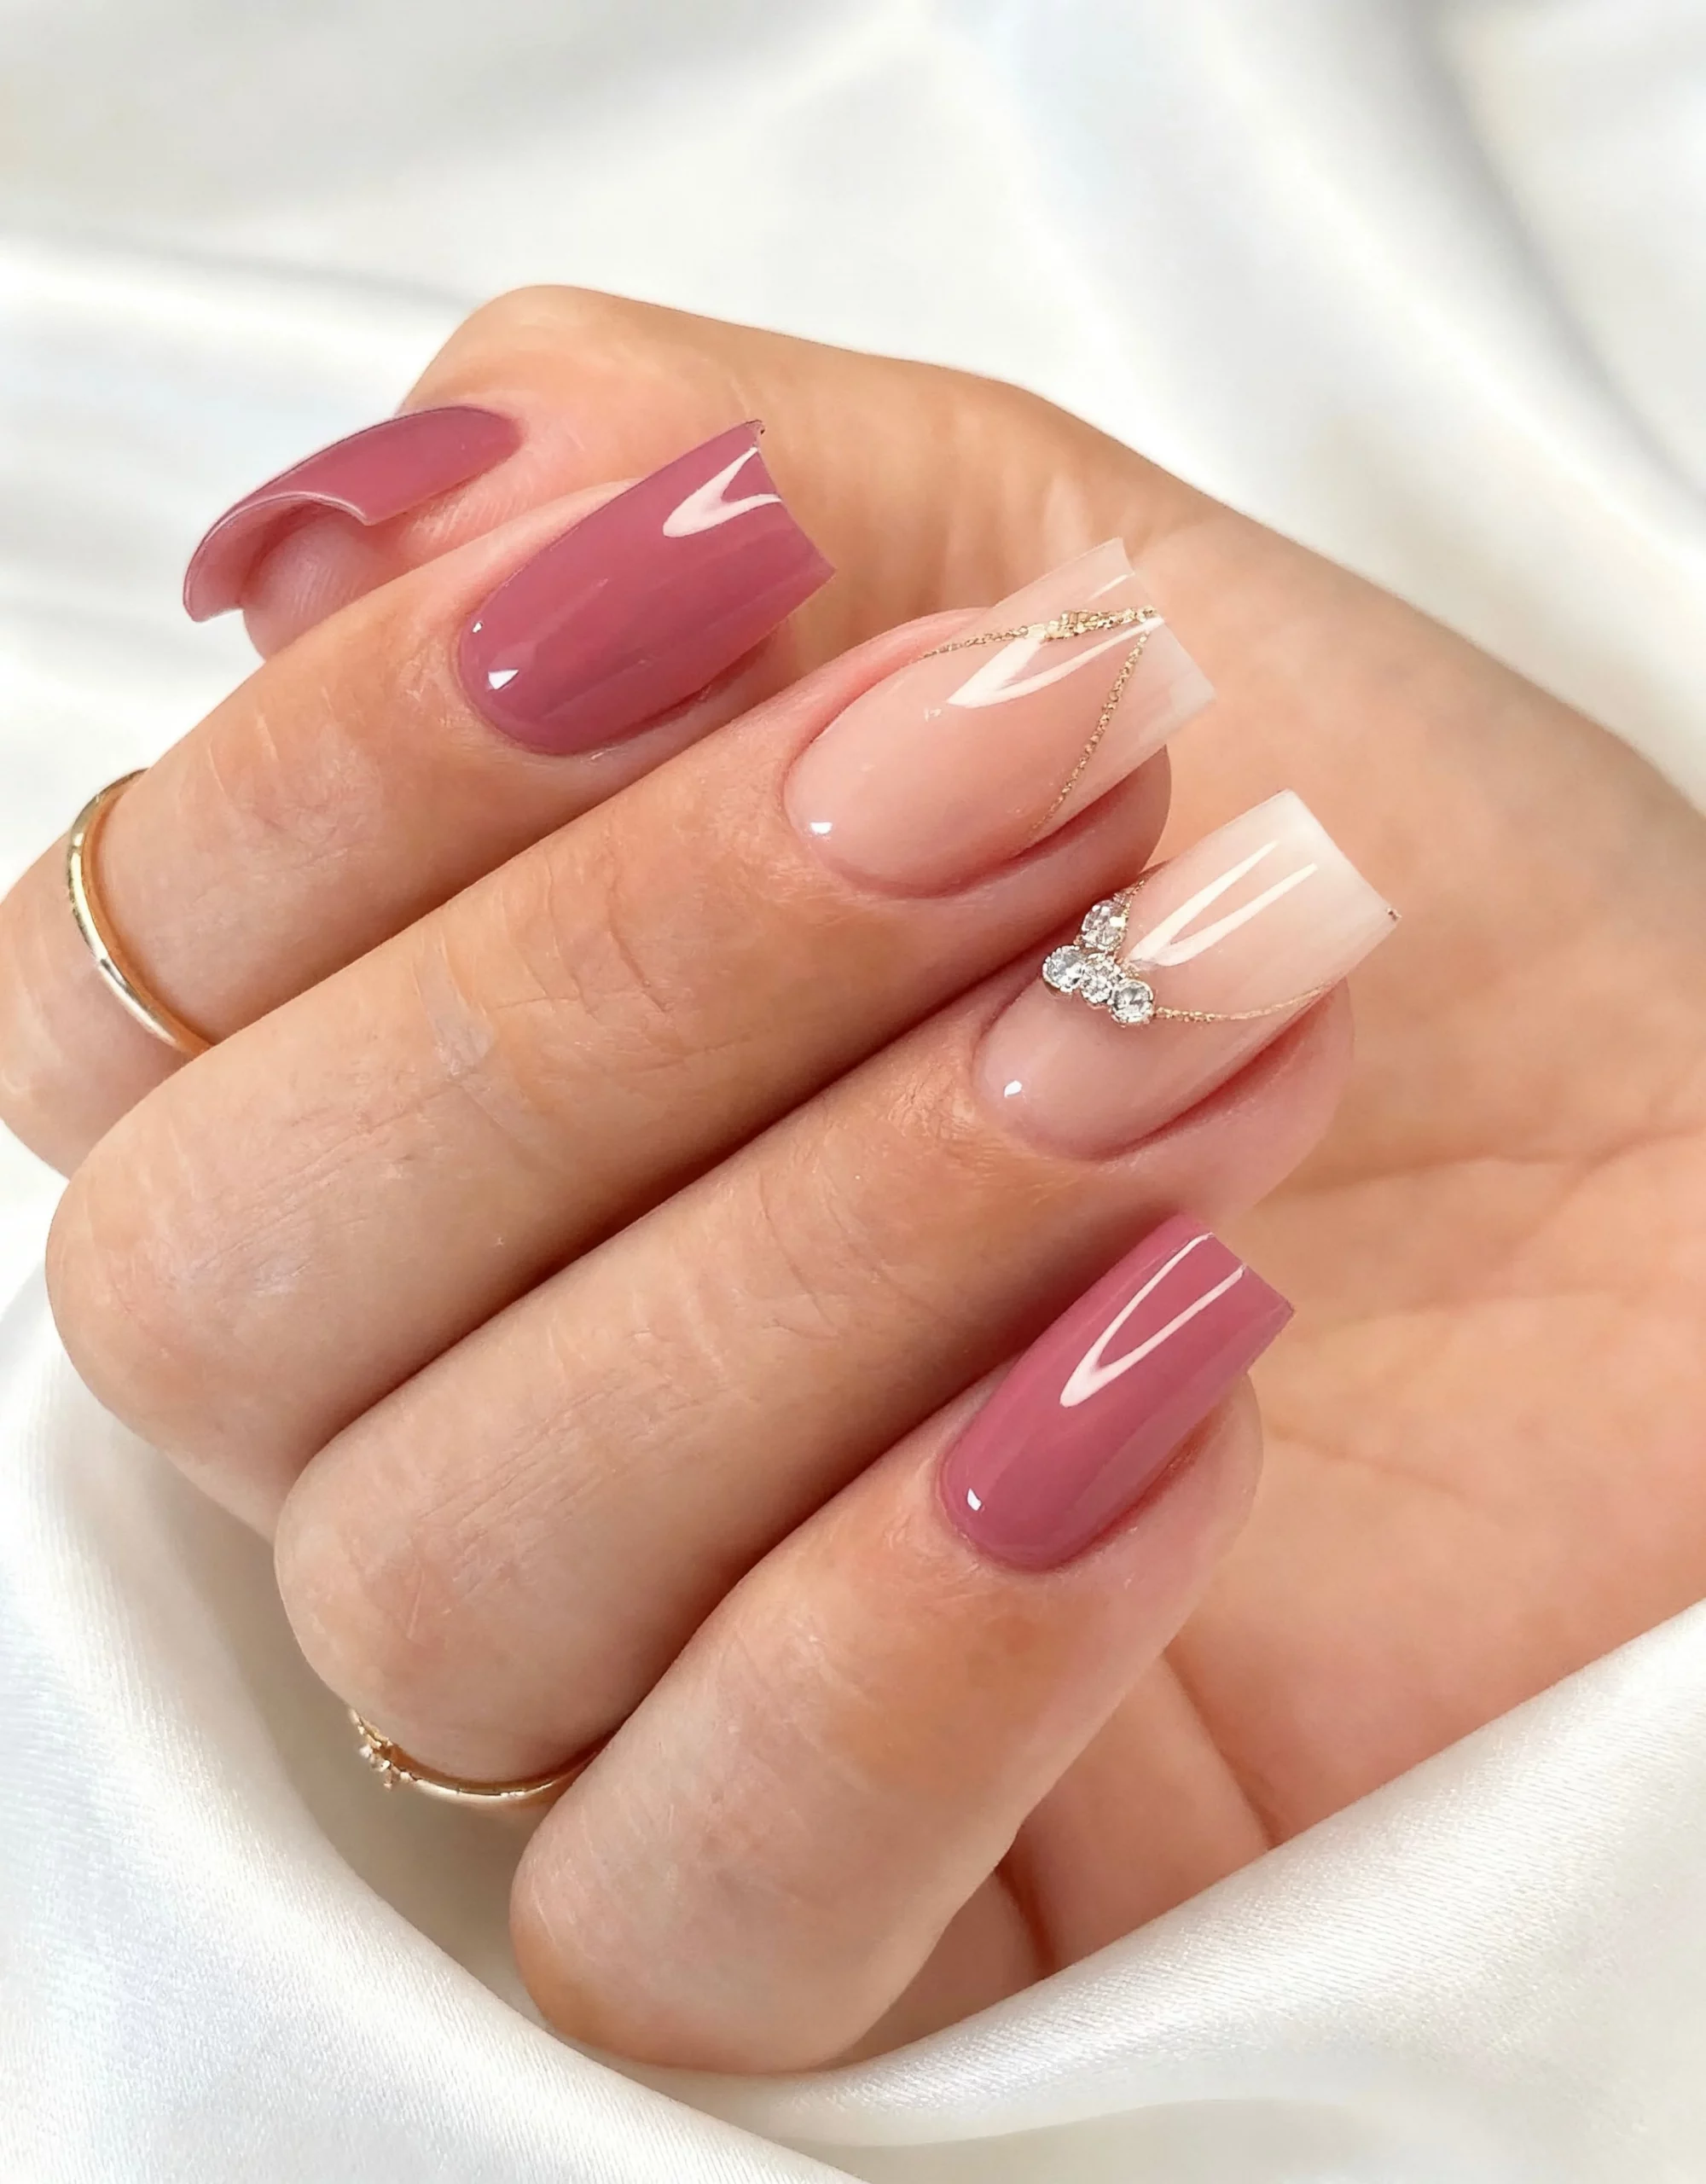
For the base, I would choose a dusty rose gel, a sheer pink nude, and a fine gold striping gel. A few small clear crystals provide the jewelry-like accent. I would also use a high-quality glossy top coat because this design depends heavily on the contrast between the creamy colors and reflective shine.
I would paint the deeper pink shades on selected nails first, then build the nude accent nails separately. The gold detail should follow a soft curved line rather than sitting as a rigid stripe. Once the line is cured, I would place the crystal cluster at one focal point. Keeping the decoration concentrated makes the manicure feel much more expensive than adding sparkle everywhere.
I particularly like this idea when I want a manicure that can move easily from daytime to evening. The dusty pink works with denim and casual pieces, while the crystals give it enough polish for dinner plans. It is proof that you do not need complicated nail art to make your hands memorable.
Sheer Nude Nails With Wavy White Lines
Wavy line art is one of my favorite ways to make a neutral manicure feel less predictable. These medium-length nails combine a translucent pink-beige base with soft white squiggles and very fine glitter accents along the tips. The lines are organic rather than perfectly symmetrical, which gives the manicure a relaxed, hand-painted character. I also like the way the nude base lets the natural shape of the nails remain visible.
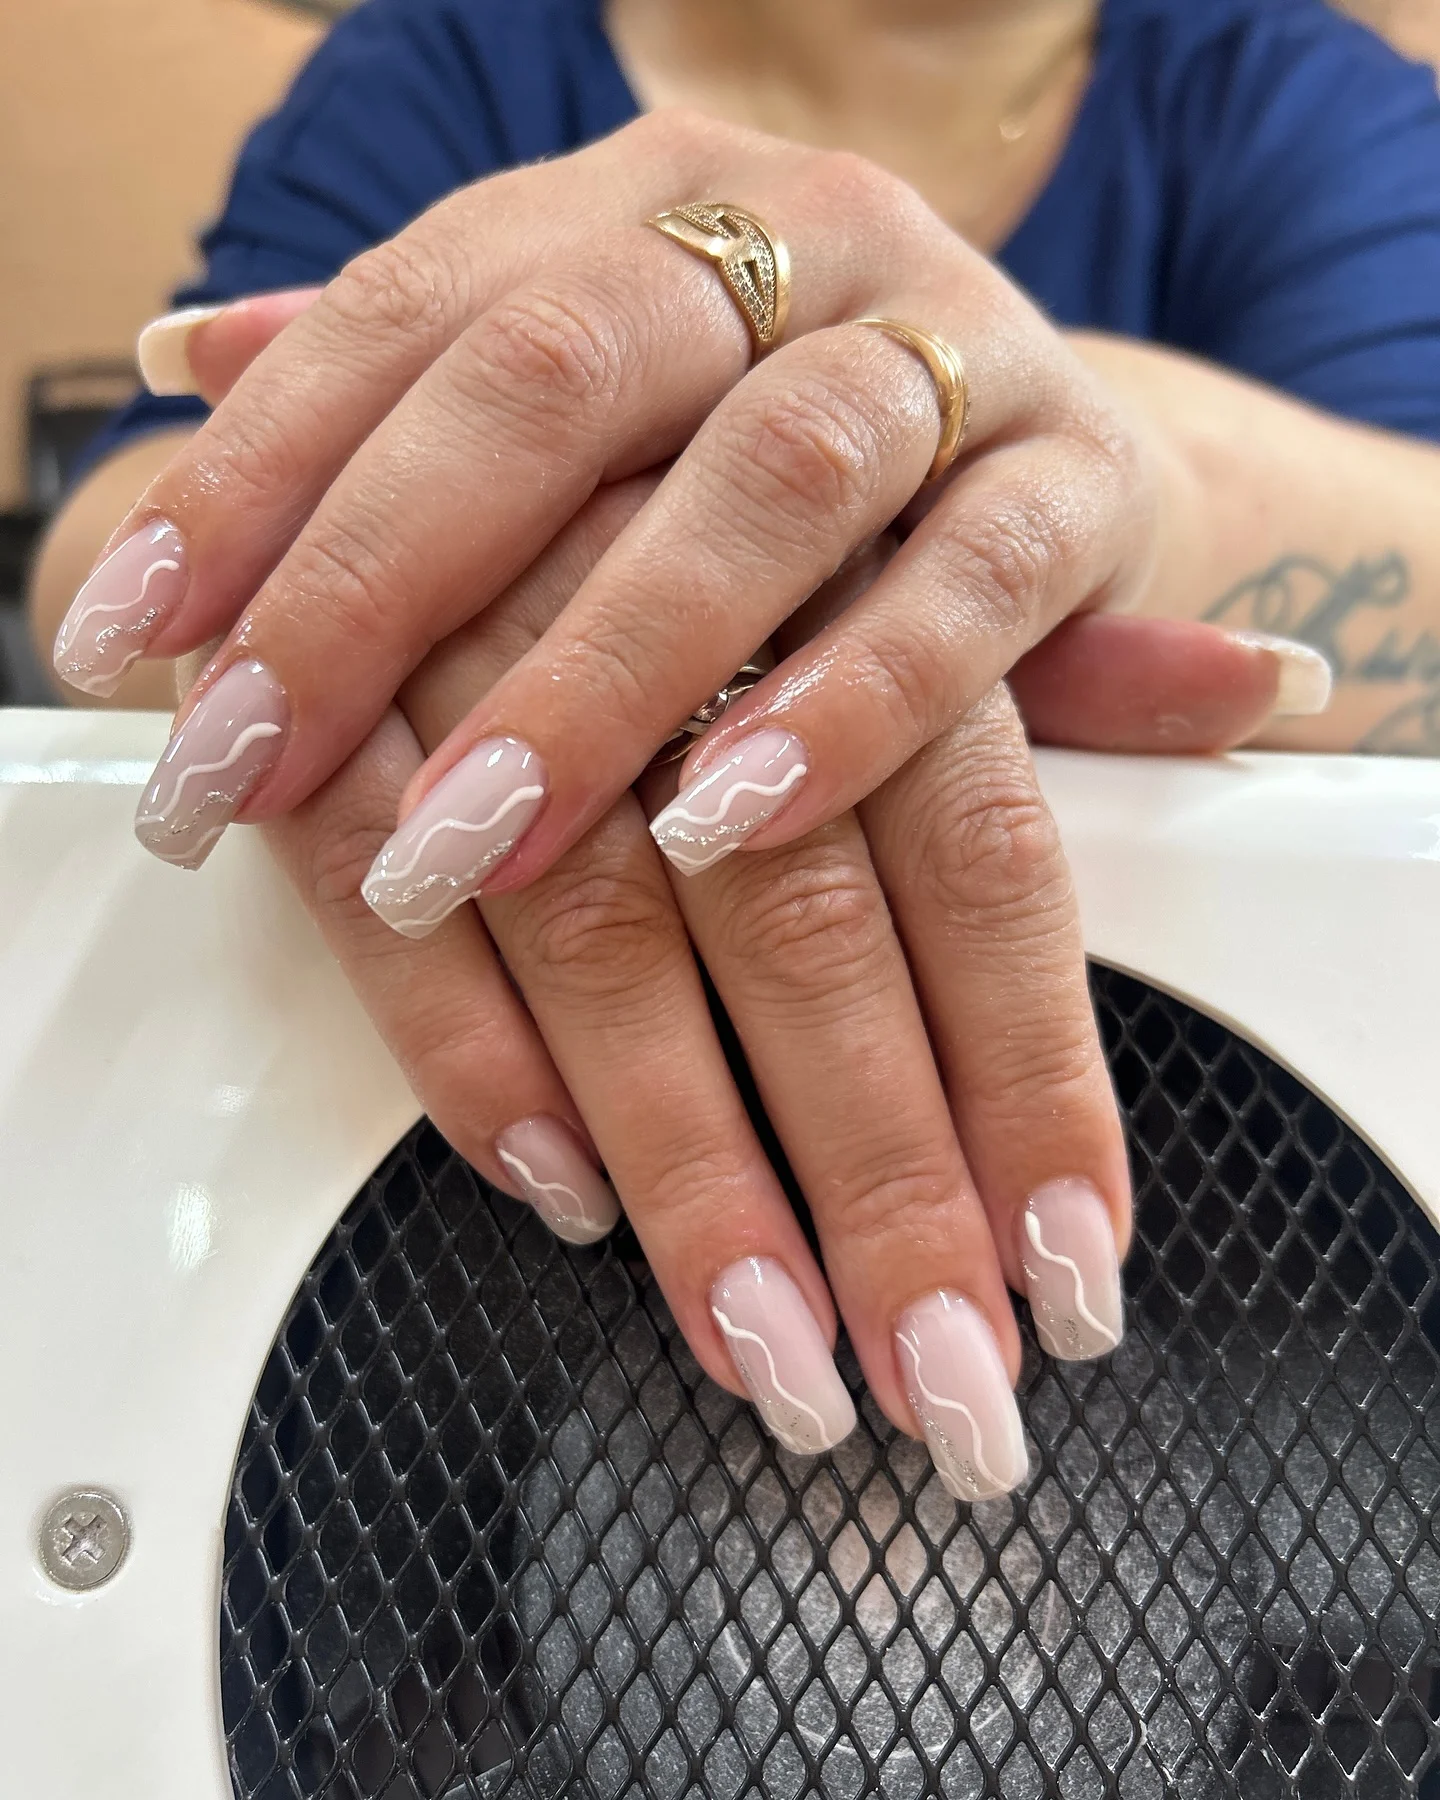
I would use a sheer nude or milky pink gel, opaque white gel paint, and a fine silver glitter liner. The white needs to be creamy enough to show clearly against the base without looking stark. A detail brush with a long, flexible tip makes the curved lines much easier to create.
I would start with the nude base and let it cure completely before adding the white waves. Rather than trying to make every line identical, I would vary their curves slightly while keeping their overall scale consistent. A thin glitter accent can follow part of the free edge, adding just enough reflection. After sealing everything with top coat, I would check the side edges carefully so the finish stays smooth.
This design feels particularly easygoing to me. It has enough detail to photograph beautifully for Pinterest, but it is not so elaborate that I would worry about matching every outfit. If I wanted a manicure that looked artistic without requiring a complicated color palette, I would absolutely keep this idea nearby.
Blush Almond Nails With Gold And Crystal Accents
This final combination brings together several details I love: a soft pink base, almond-shaped nails, delicate gold edging, tiny crystal accents, and subtle textured artwork. Some nails stay almost completely nude, while others feature gold lace-like detailing or scattered metallic pieces. That mix gives the manicure movement and keeps the eye traveling from one nail to another. Nothing feels randomly placed, even though the designs are intentionally different.
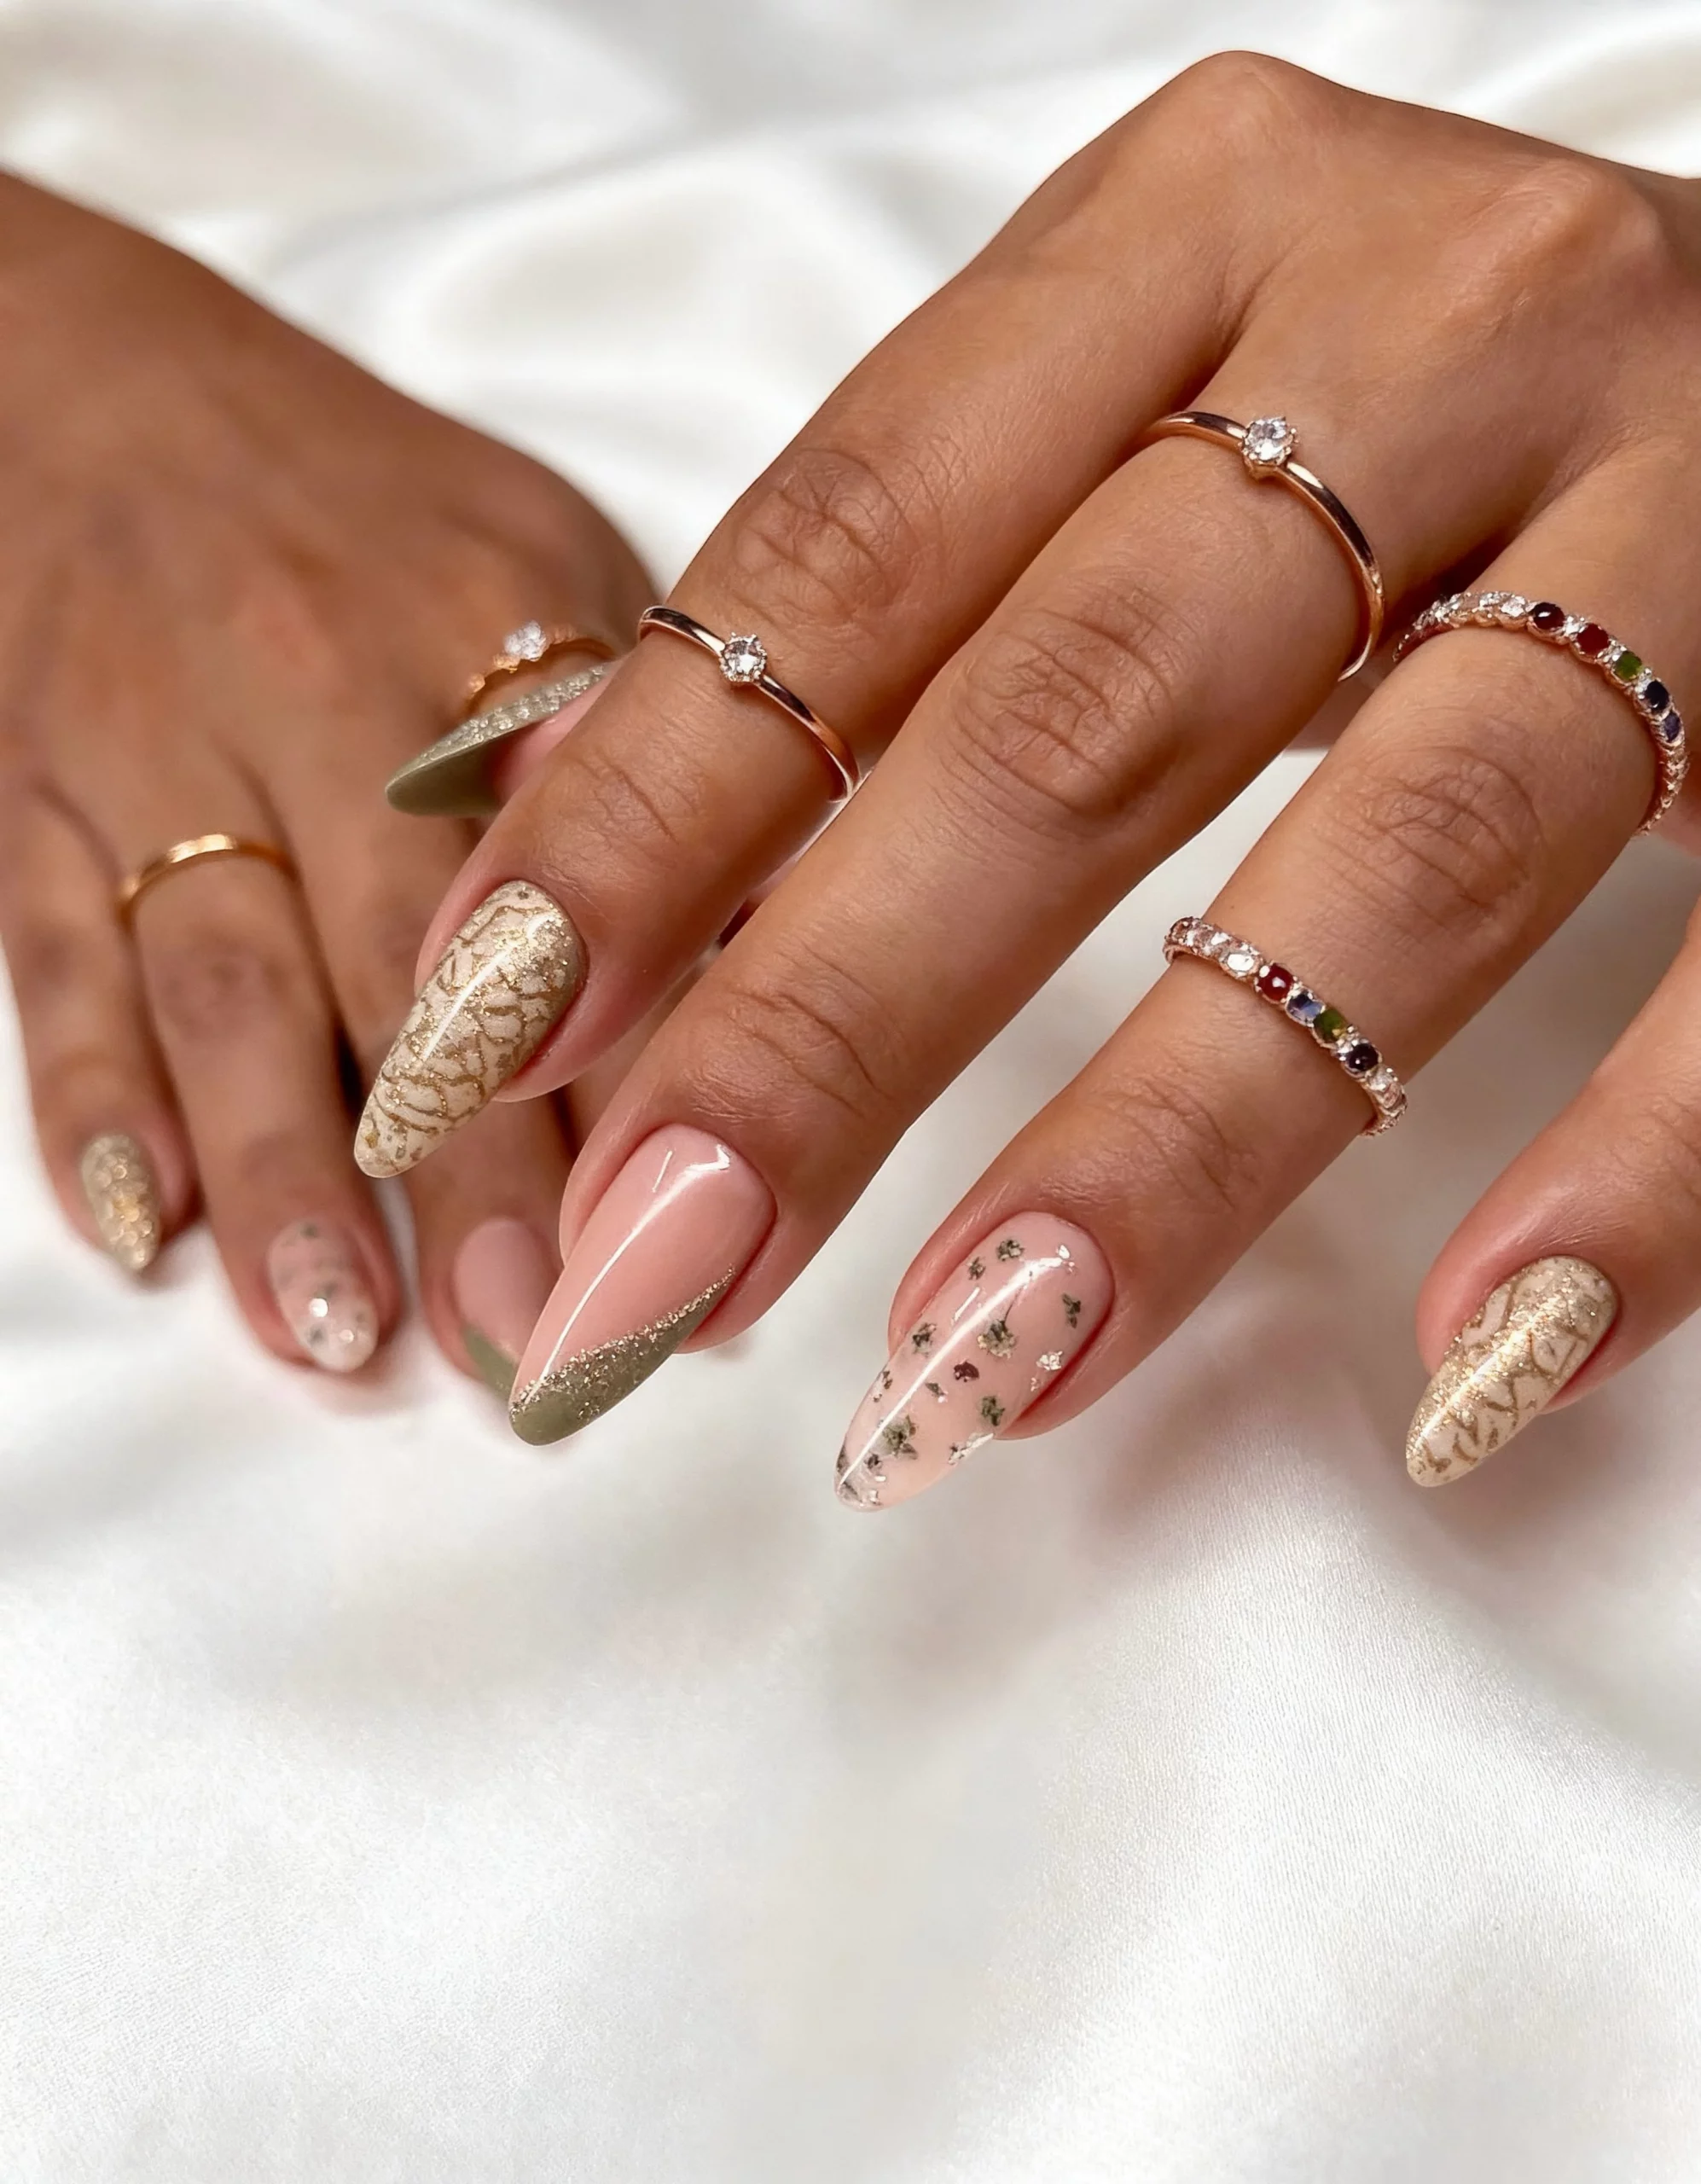
I would use a sheer blush gel, a soft pink nude, metallic gold gel or foil, and small clear crystals. For the patterned accent nails, a fine detail brush is essential. I would also keep a neutral glitter polish nearby for adding a restrained shimmer to selected areas. The trick is to keep all the materials within the same warm palette so the finished manicure feels cohesive.
At home, I would begin by creating a consistent almond shape and applying the nude base across all ten nails. Then I would choose two or three accent nails rather than decorating everything equally. The gold detailing can be built with thin overlapping lines, while tiny metallic pieces can be pressed into uncured gel before curing. I would finish with a glossy top coat, carefully sealing around the embellishments.
For me, this is the kind of manicure that makes jewelry almost unnecessary. It has the softness of a neutral manicure but enough gold and sparkle to catch the light when I reach for a coffee cup or adjust a bracelet. And isn’t that the best kind of nail design—the one that makes an ordinary little moment feel a bit more put together?
Blush Tones With Burgundy And Golden Details
I love how this manicure balances softness with a little unexpected depth. The base moves through delicate blush pink, muted mauve, and translucent nude tones, while selected nails introduce a deep burgundy accent that gives the whole set more definition. One of the prettiest details is the combination of glossy color with fine gold and white abstract lines, especially across the elongated square and almond-shaped nails. The result feels polished without becoming overly formal, and that makes it especially easy to wear with everything from a white summer dress to a simple evening outfit.
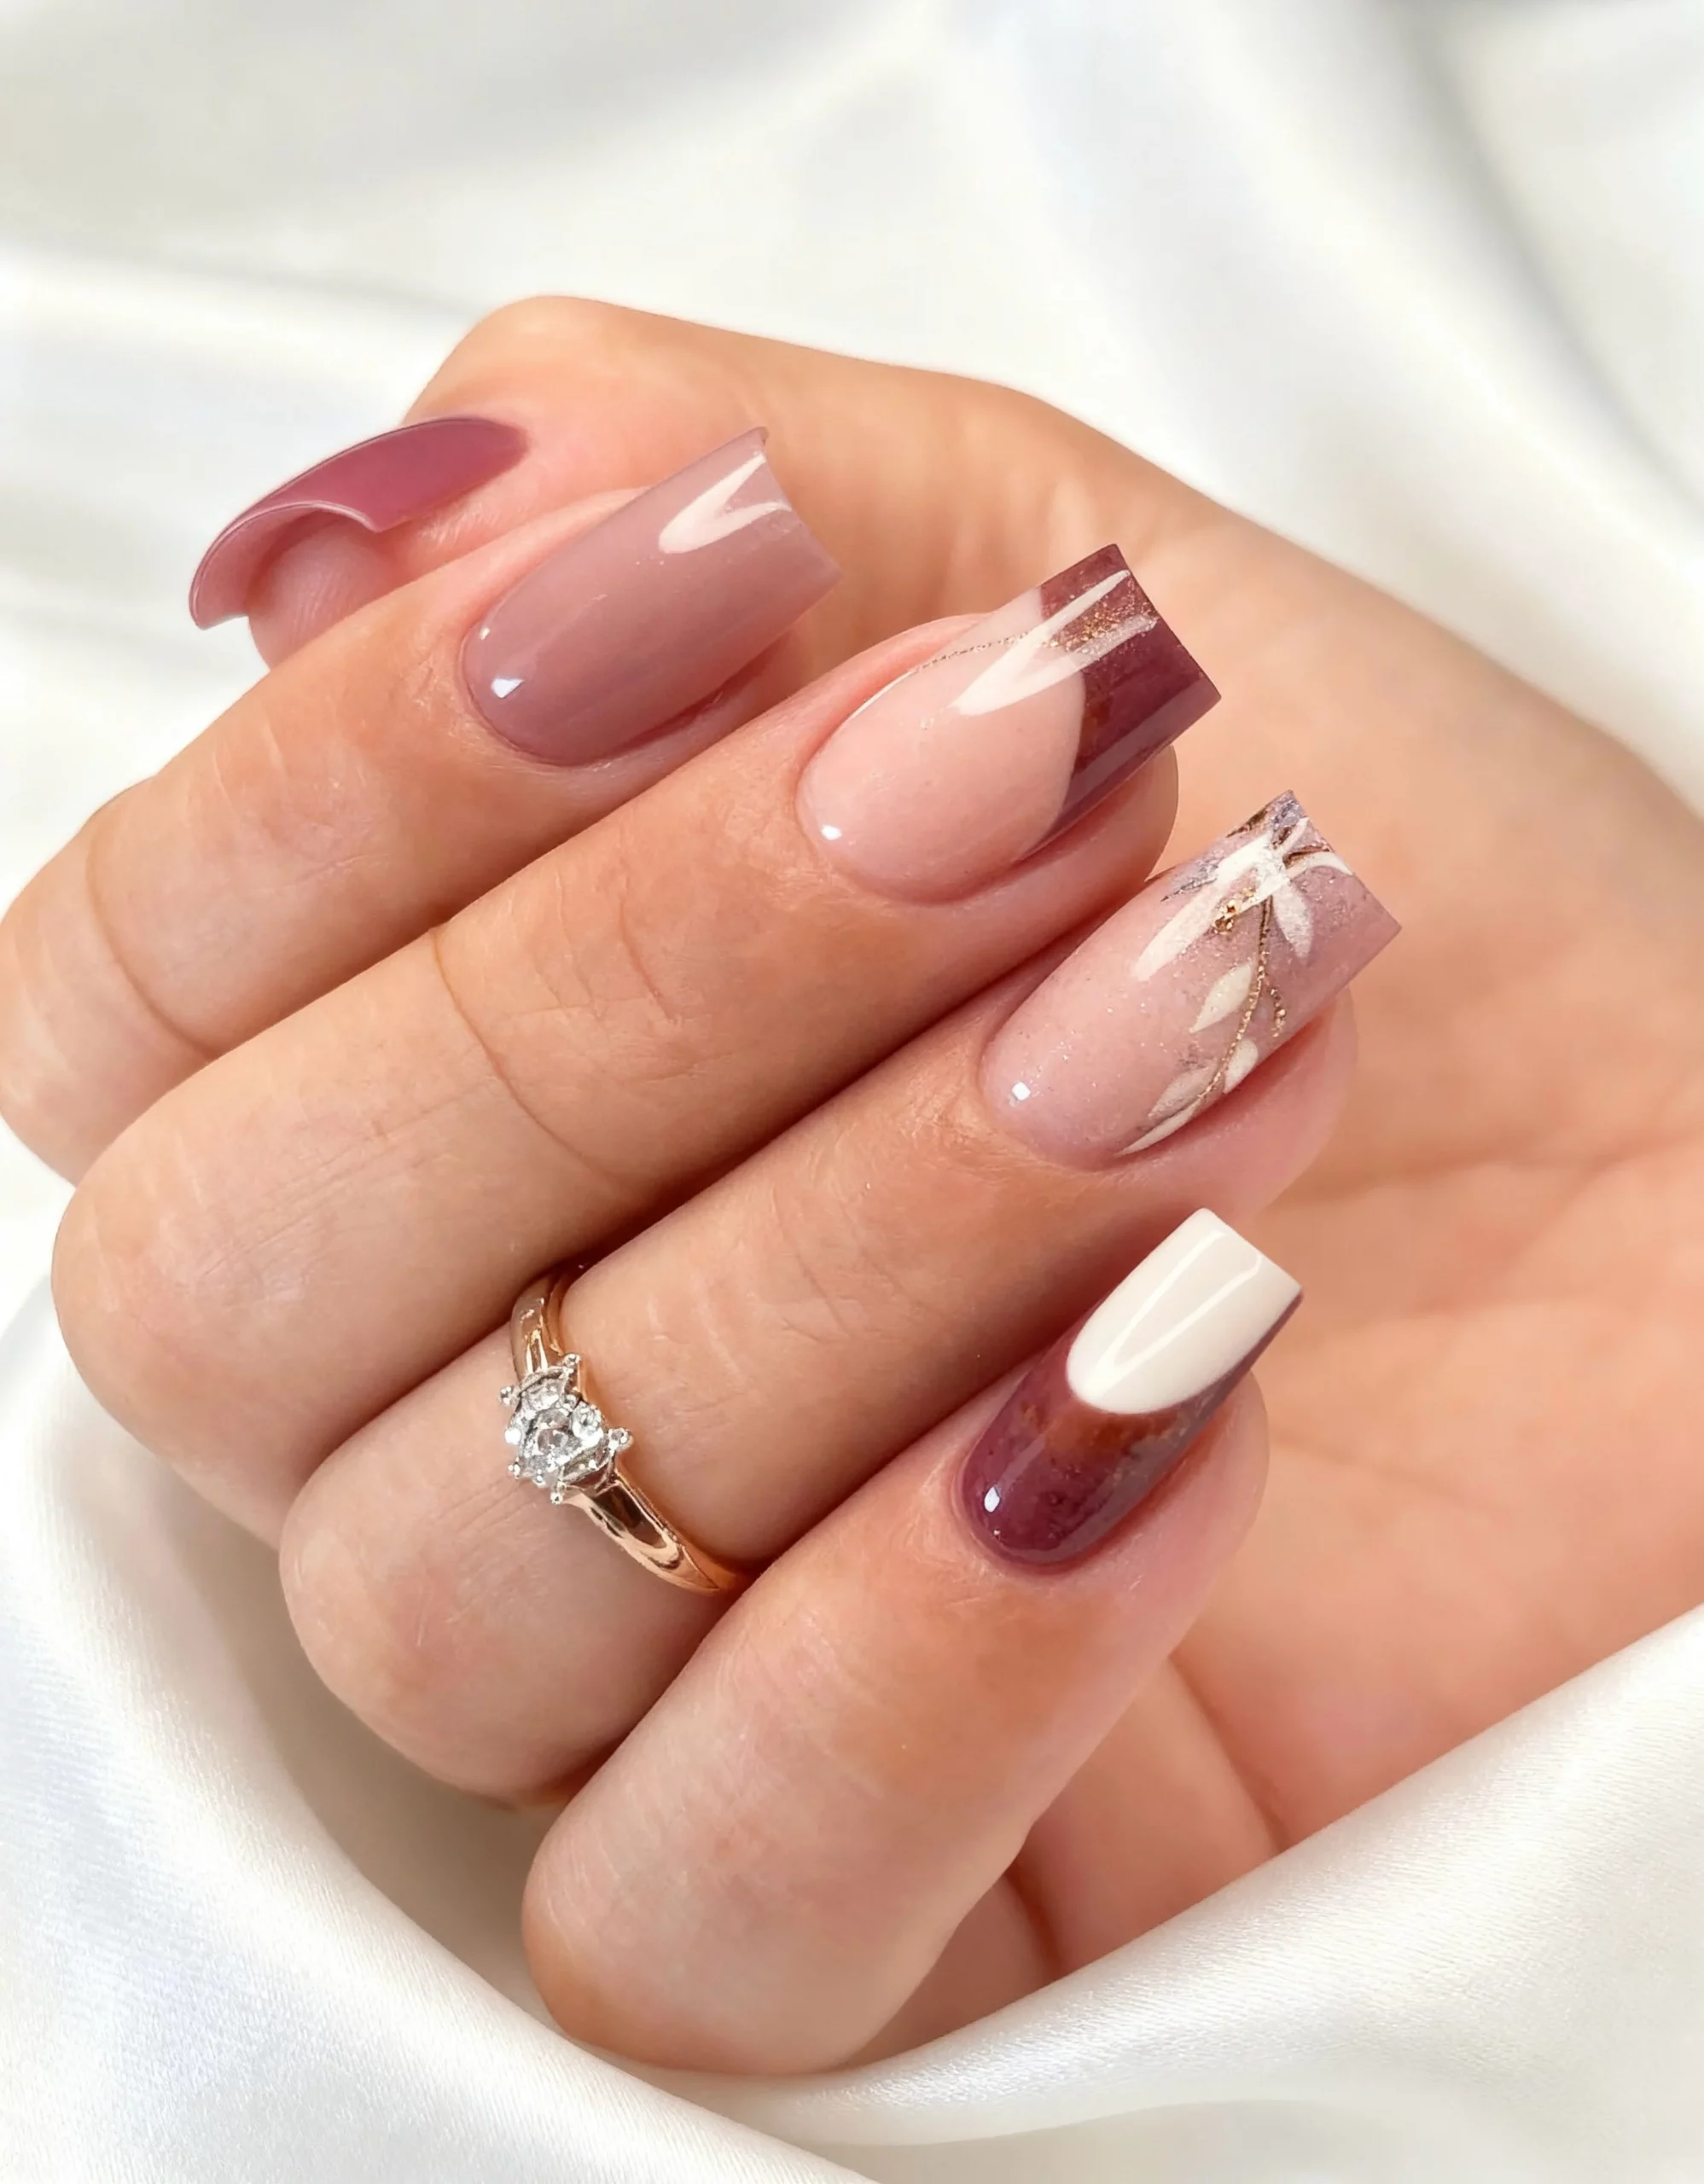
To recreate the look, I would start with a sheer pink or dusty rose gel polish, then add a muted burgundy shade for the accent areas. A creamy white gel paint and an ultra-thin gold liner would handle the delicate decoration, while a high-shine top coat would bring out the glassy finish. I would keep the color palette deliberately close in tone rather than introducing too many contrasting shades. That small decision is what makes the manicure feel cohesive.
At home, I would shape the nails first and make sure the surface is completely smooth before applying the base color. After curing each layer, I would add the burgundy sections with a fine brush and let the color become the focal point on only a few nails. The white and gold lines should be thin and slightly organic rather than perfectly geometric. I have found that trying to make every line identical can actually make a delicate manicure look less natural.
For me, this is the kind of manicure that works especially well when I want something feminine but not predictable. The glossy finish catches summer light beautifully, while the deeper burgundy accents keep the pink from feeling too sweet. If I were choosing a design for a dinner, wedding guest outfit, or weekend getaway, this would be very high on my list.
Chocolate Tortoiseshell With Glossy Negative Space
There is something instantly sophisticated about chocolate brown nails, especially when the color is mixed with translucent sections instead of covering every nail completely. I like the way the deep brown appears on some nails as a solid glossy shade and then transforms into tortoiseshell-inspired patches on others. The elongated almond shape makes the pattern look particularly sleek, while the transparent base keeps the design from becoming visually heavy. It has that effortless summer-to-fall quality I always look for in a manicure.
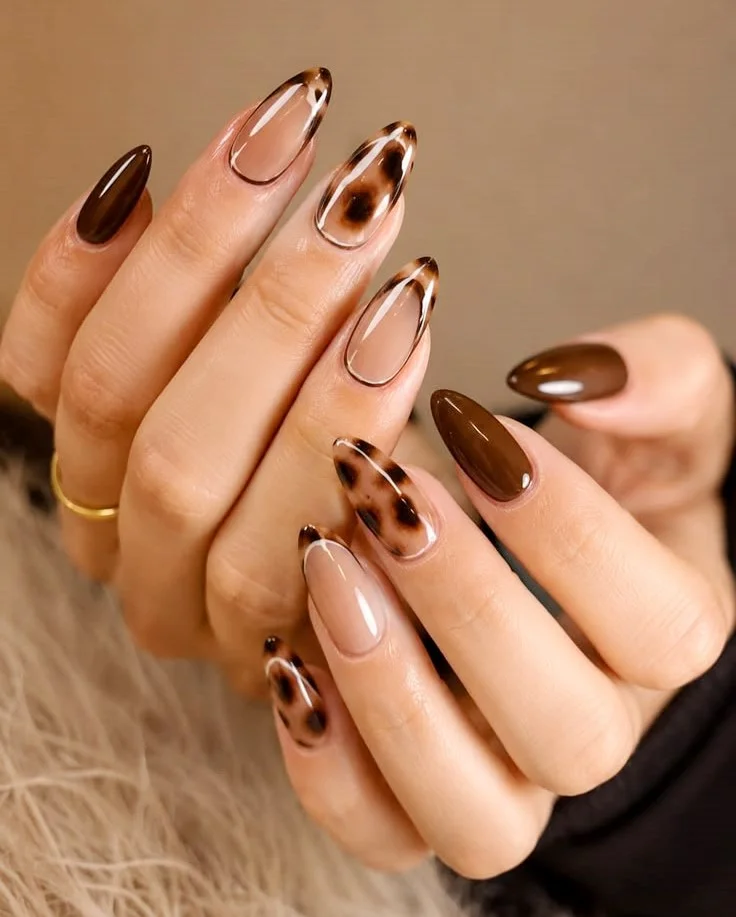
For the color palette, I would use a sheer nude or pink-beige base, a deep espresso brown, a medium caramel brown, and a slightly translucent amber shade. A fine detailing brush is useful for creating irregular tortoiseshell patches, while a glossy top coat is essential because the design depends so much on the contrast between clear depth and rich brown pigment. I would avoid using a completely opaque nude underneath the patterned nails because the transparency is part of the charm.
The easiest way I would approach the design is to apply the sheer base first and cure it thoroughly. Then I would place irregular brown and caramel shapes rather than trying to draw an exact pattern. Small variations actually make the tortoiseshell effect look more convincing. For the solid chocolate nails, I would build the color in thin layers, allowing each coat to cure before adding the next one.
I particularly like this idea for someone who wants to experiment with brown without committing to a full set of dark nails. The negative space keeps everything light enough for summer, while the chocolate accents add sophistication. And honestly, this is one of those manicures that looks even better when paired with simple gold jewelry.
Blush Almond Nails With Black Tips And Tiny Accents
This manicure takes a soft pink base and gives it a sharper personality with black French tips, tiny dark dots, and scattered metallic embellishments. I like the contrast between the luminous blush finish and the crisp black edges, especially on the long almond nails. Some nails remain almost entirely pink, while others receive more decoration, which creates a deliberate mix instead of a repetitive pattern. The tiny details are important here because they make the manicure feel styled rather than simply painted.
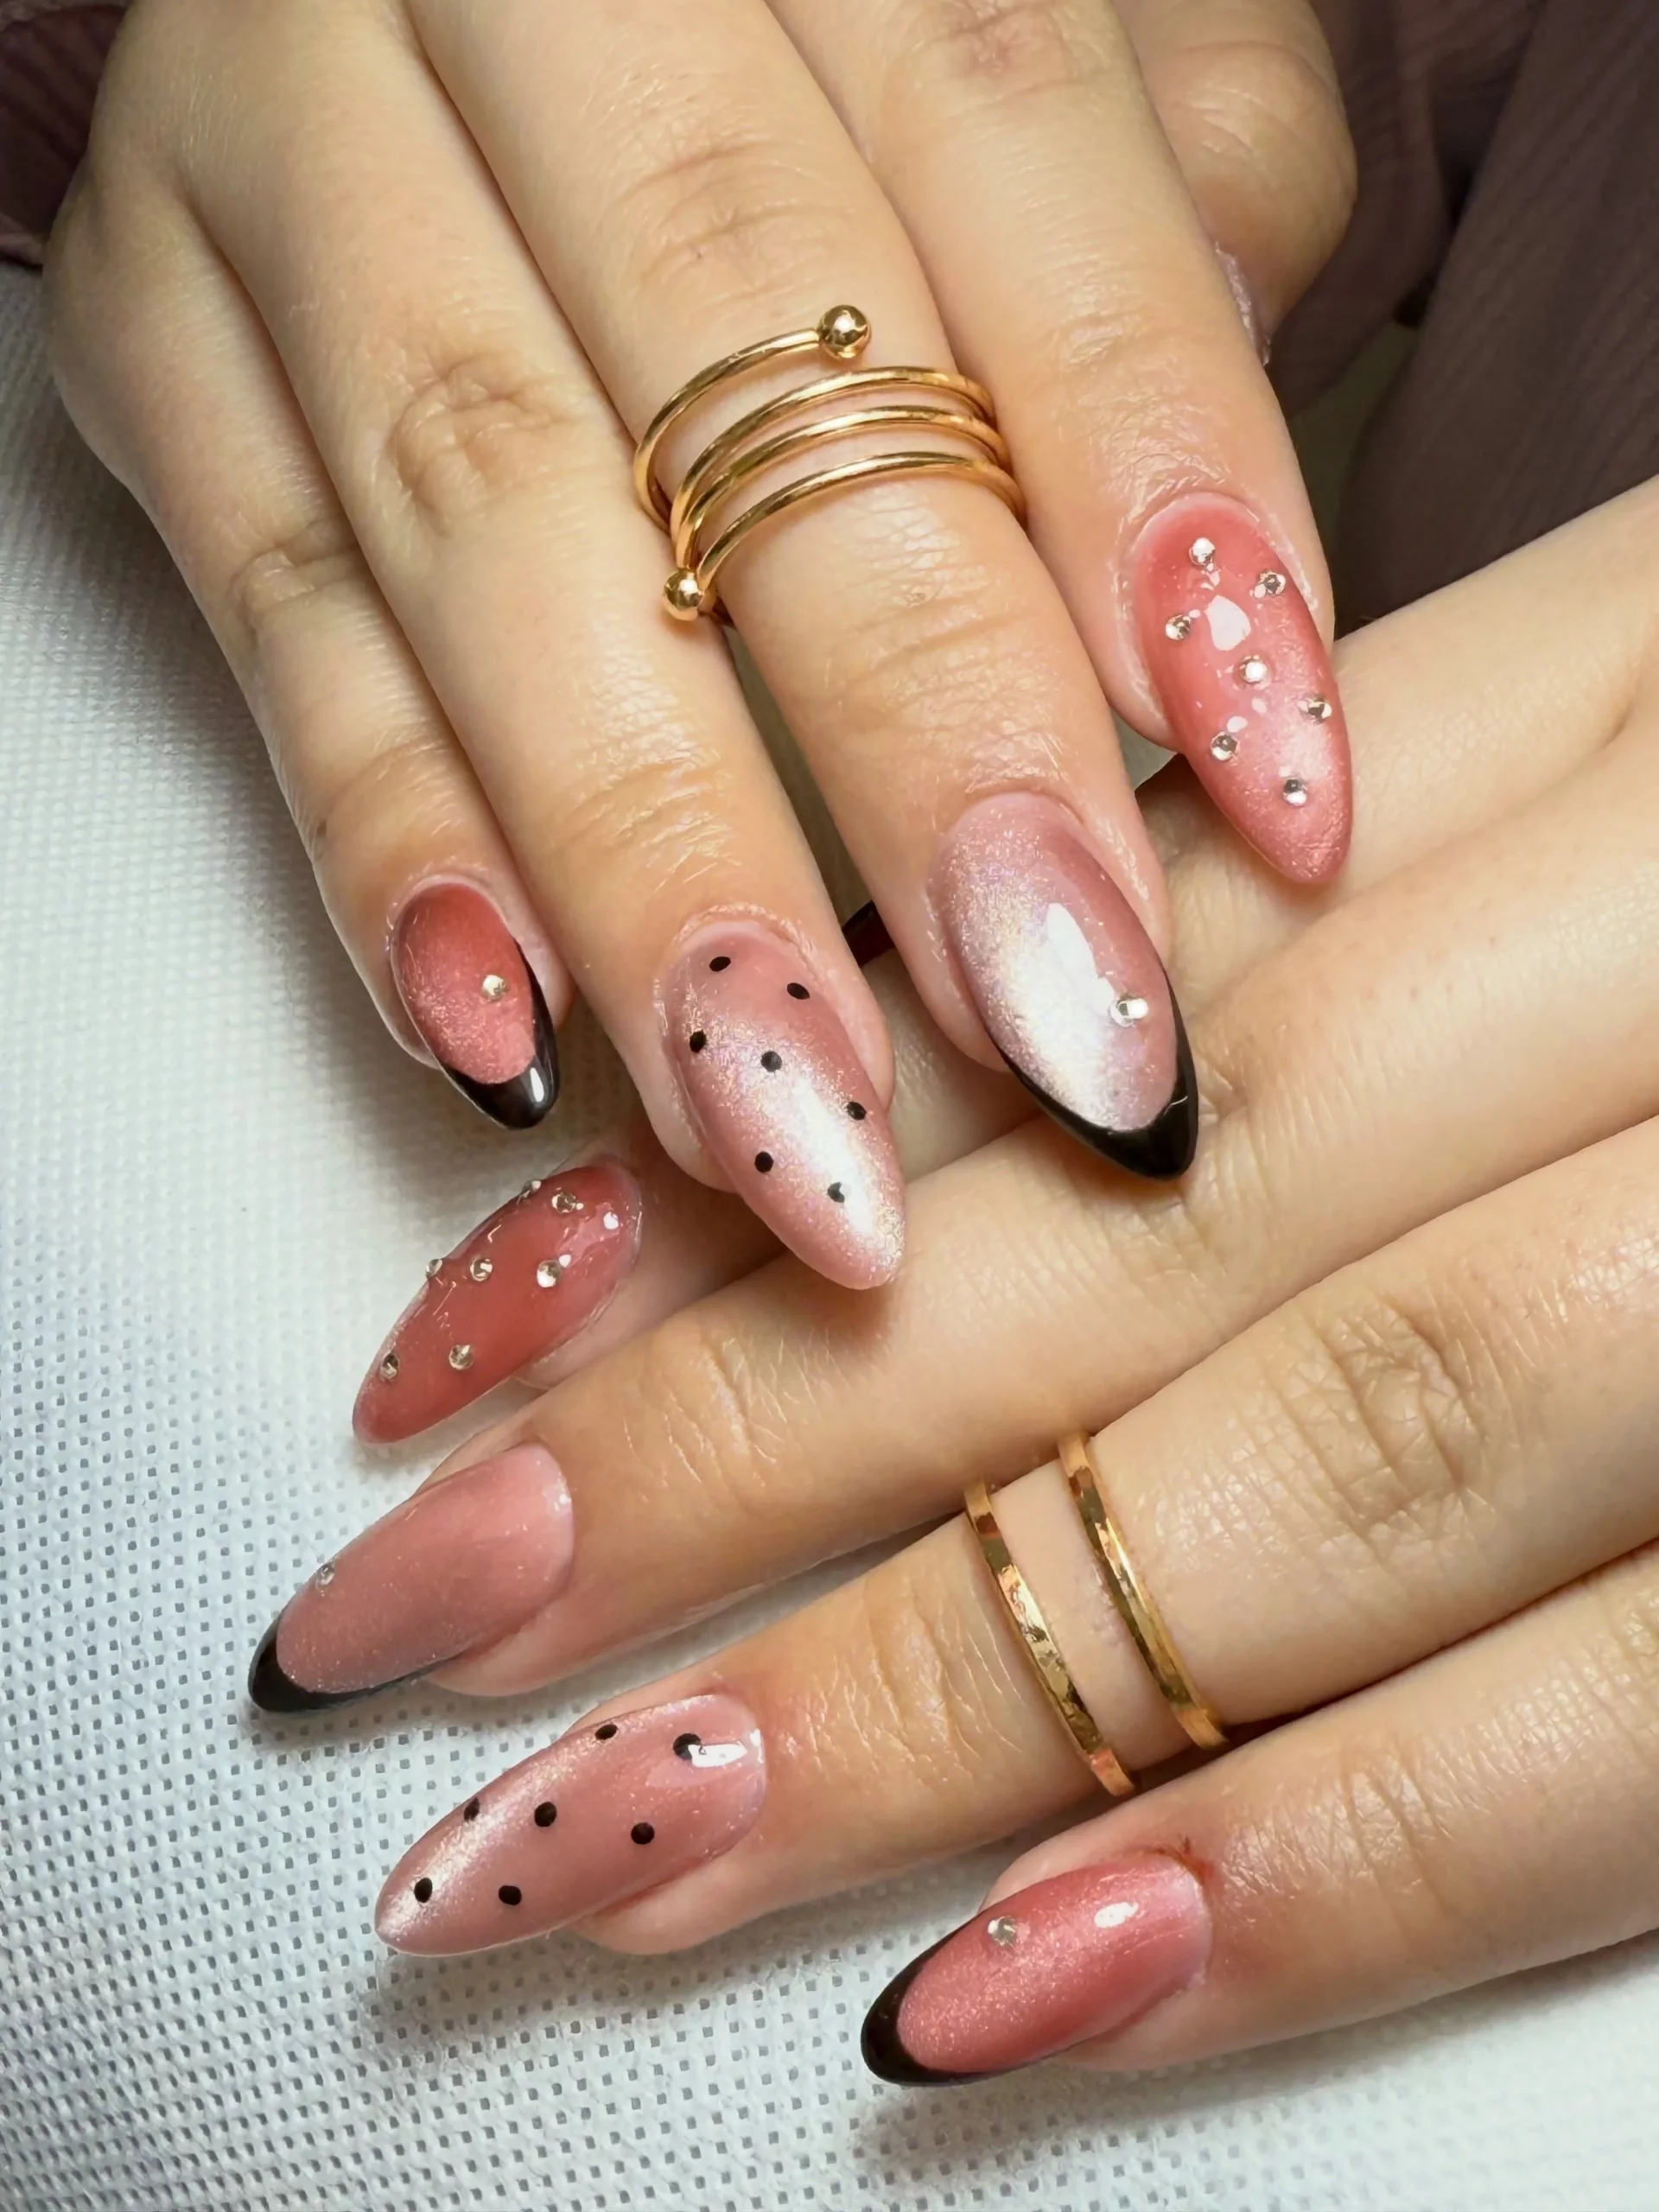
I would use a sheer blush-pink gel polish with a subtle pearly or shimmer finish, plus a deep black gel for the tips and dots. Small silver or clear rhinestones can be placed sparingly across selected nails, and a fine nail-art brush makes the black detailing much easier to control. For the glossy finish, I would choose a top coat that does not dull the shimmer underneath.
When I create a French tip on a long almond shape, I prefer to establish the center point first and then connect each side toward it. That gives me more control over the symmetry. Once the black tips are cured, I would add the tiny dots and rhinestones only where the composition needs them. Less really does more with this type of manicure.
I could easily see myself wearing this for a summer night out because it has that perfect balance of pretty and slightly edgy. The pink keeps it delicate, while the black gives the manicure some attitude. If a traditional French manicure feels too predictable but a full black set feels like too much, this is a clever middle ground.
Sheer Pink Lace French For A Romantic Finish
A lace-inspired French manicure is one of those ideas that can look intricate while still feeling surprisingly refined. I love the combination of a translucent pink base, crisp black French tips, and delicate lace-like linework across the free edge. The pattern has an almost textile quality, with overlapping curved shapes that create the impression of fine lace without covering the entire nail. Because the base remains soft and transparent, the black detailing has plenty of room to breathe.
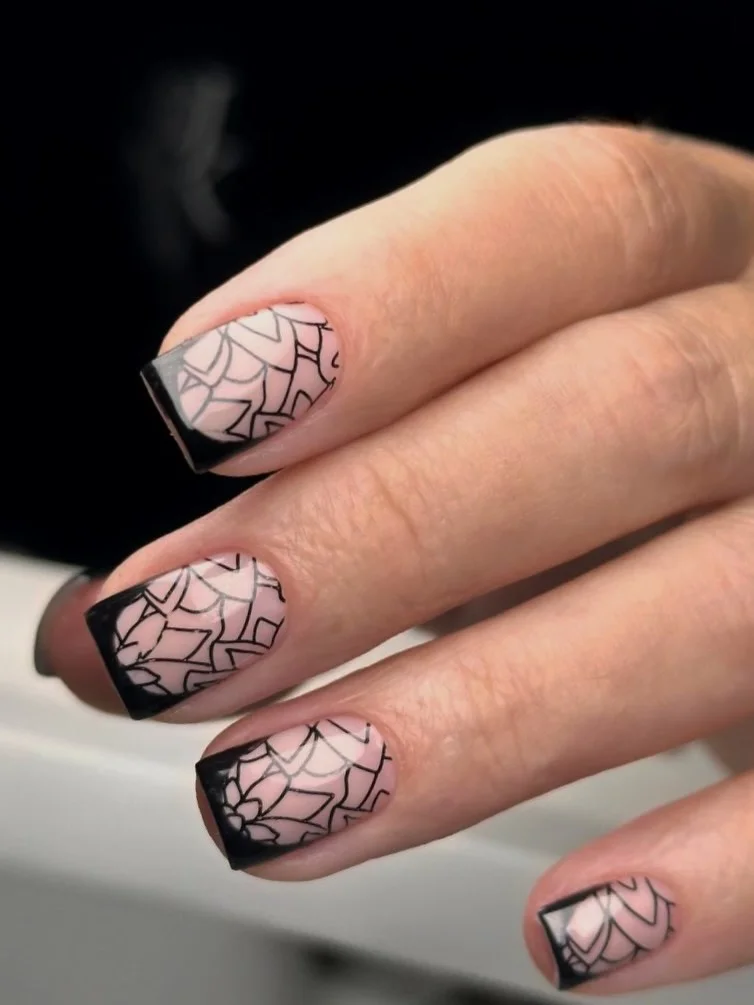
The materials are fairly simple: a sheer pink or nude gel polish, a highly pigmented black gel paint, a very fine liner brush, and a glossy top coat. I would choose a black with a fluid consistency that can produce thin lines without becoming bulky. If precision is difficult, a stamping plate with a lace motif can also create a similar effect, although hand-painted lines give the manicure a more individual finish.
I would begin with the sheer pink base and carefully map out the French tip before adding the lace pattern. Rather than filling the entire tip with black, I would create a clean border and then build the delicate curved lines inside it. Working in small sections helps prevent the design from becoming crowded. A final layer of top coat smooths everything out and gives the pattern that polished salon finish.
This feels like a beautiful choice for anyone who loves feminine details but wants something less conventional than tiny hearts or classic French tips. I also like how easily the idea can be changed: black lace creates a dramatic contrast, while a softer brown or burgundy could make the same concept feel warmer for the next season.
Sheer Nude Nails With Fine Golden Swirls
Sometimes the most beautiful manicure is the one that barely raises its voice. Here, a translucent pink-nude base creates an almost natural-looking canvas, while ultra-thin golden lines sweep across the nails in loose, elegant curves. Tiny metallic accents appear along some of the lines, adding just enough sparkle to catch the light. The almond shape works beautifully with this design because the elongated silhouette makes every curved detail look even more graceful.
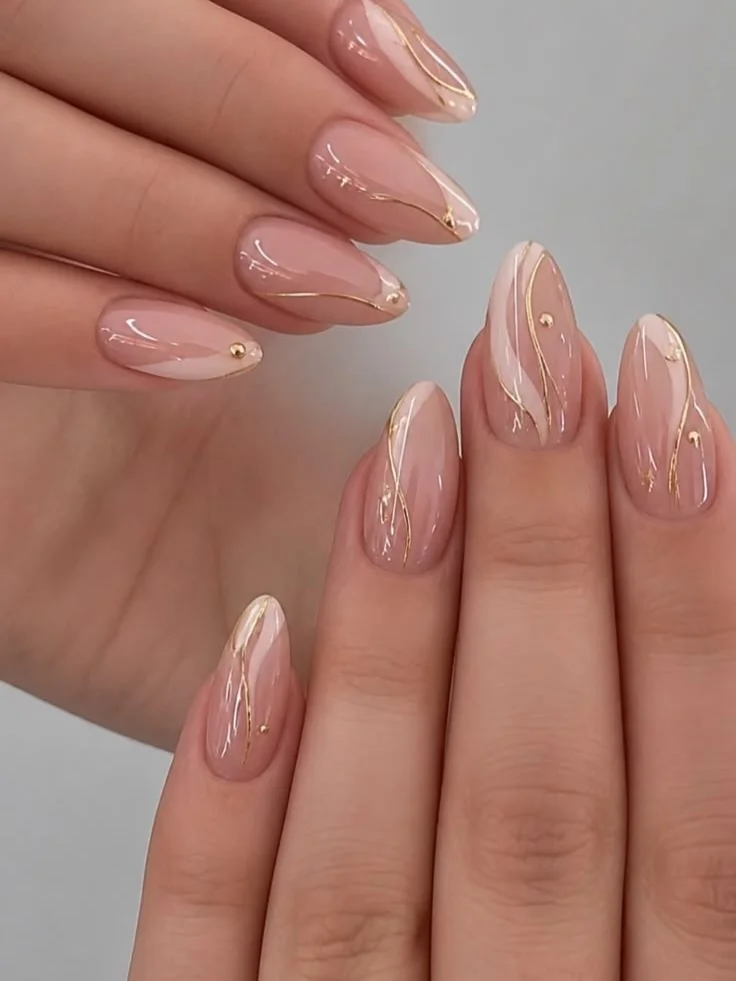
I would reach for a milky sheer pink gel polish, a fine gold nail-art liner, and a handful of tiny gold studs or micro-beads. The gold should be delicate rather than chunky because the entire appeal of this design comes from its lightness. A smooth glossy top coat is the finishing step I would not skip, since it makes the nude base look almost glass-like.
For the linework, I would use a very small amount of gel paint and let the brush glide instead of pressing it firmly into the nail. The curves can begin near the cuticle, travel toward the sidewall, and finish closer to the tip. I would deliberately vary the placement from nail to nail so the set feels fluid rather than copied and pasted.
This is probably the easiest manicure in this collection for me to imagine wearing every day. It looks beautiful with denim, workwear, dresses, and jewelry, and the sheer base makes regrowth less noticeable. If you are looking for a design that feels polished in the morning but still catches the light during an evening dinner, this one gets it exactly right.
Cherry Red Nails With Tiny White Floral Accents
A glossy red manicure already has plenty of personality, but tiny white floral details give it a completely different energy. I love the almost retro quality of the vivid red base paired with small white petals and dark centers. The flowers are deliberately simple rather than hyper-detailed, which keeps the manicure playful and wearable. On a summer day, this kind of red feels especially lively against light clothing and sun-kissed skin.
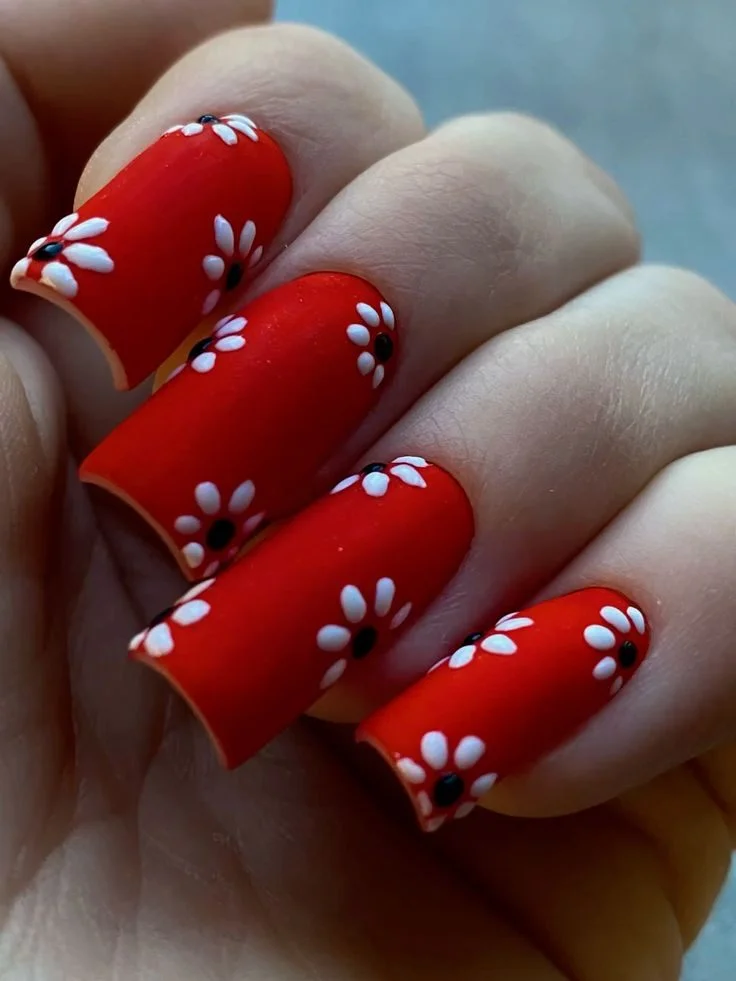
I would use a saturated cherry-red gel polish, an opaque white gel paint, and a small amount of black gel for the flower centers. A dotting tool is helpful for creating the petals because each one can be built from a small teardrop shape. I would finish with a glossy top coat unless I specifically wanted a softer modern effect.
The trick is not to make every flower identical. I would place small groups of petals near the edges of some nails and leave others almost completely red. For a beginner, the easiest method is to create five small white dots around a central black dot, then slightly pull each dot outward with a fine brush. It creates a flower effect without requiring advanced painting skills.
This manicure instantly makes me think of a summer weekend, a red sundress, and a cold drink somewhere outside. It is cheerful without being childish, and the short visual story of red, white, and tiny dark centers is incredibly easy to recognize. When I want my nails to become part of the outfit rather than simply complement it, I would choose something like this.
Black Lace Details On A Soft Pink Base
Here is another lace-inspired idea, but the mood is completely different from a classic French manicure. The nails begin with a soft translucent pink base, while black lace motifs cover the tips and extend slightly upward onto selected nails. Tiny black bow details add another layer of decoration without overwhelming the pattern. The square shape gives the design a clean framework, which is important because the lace itself is intricate.
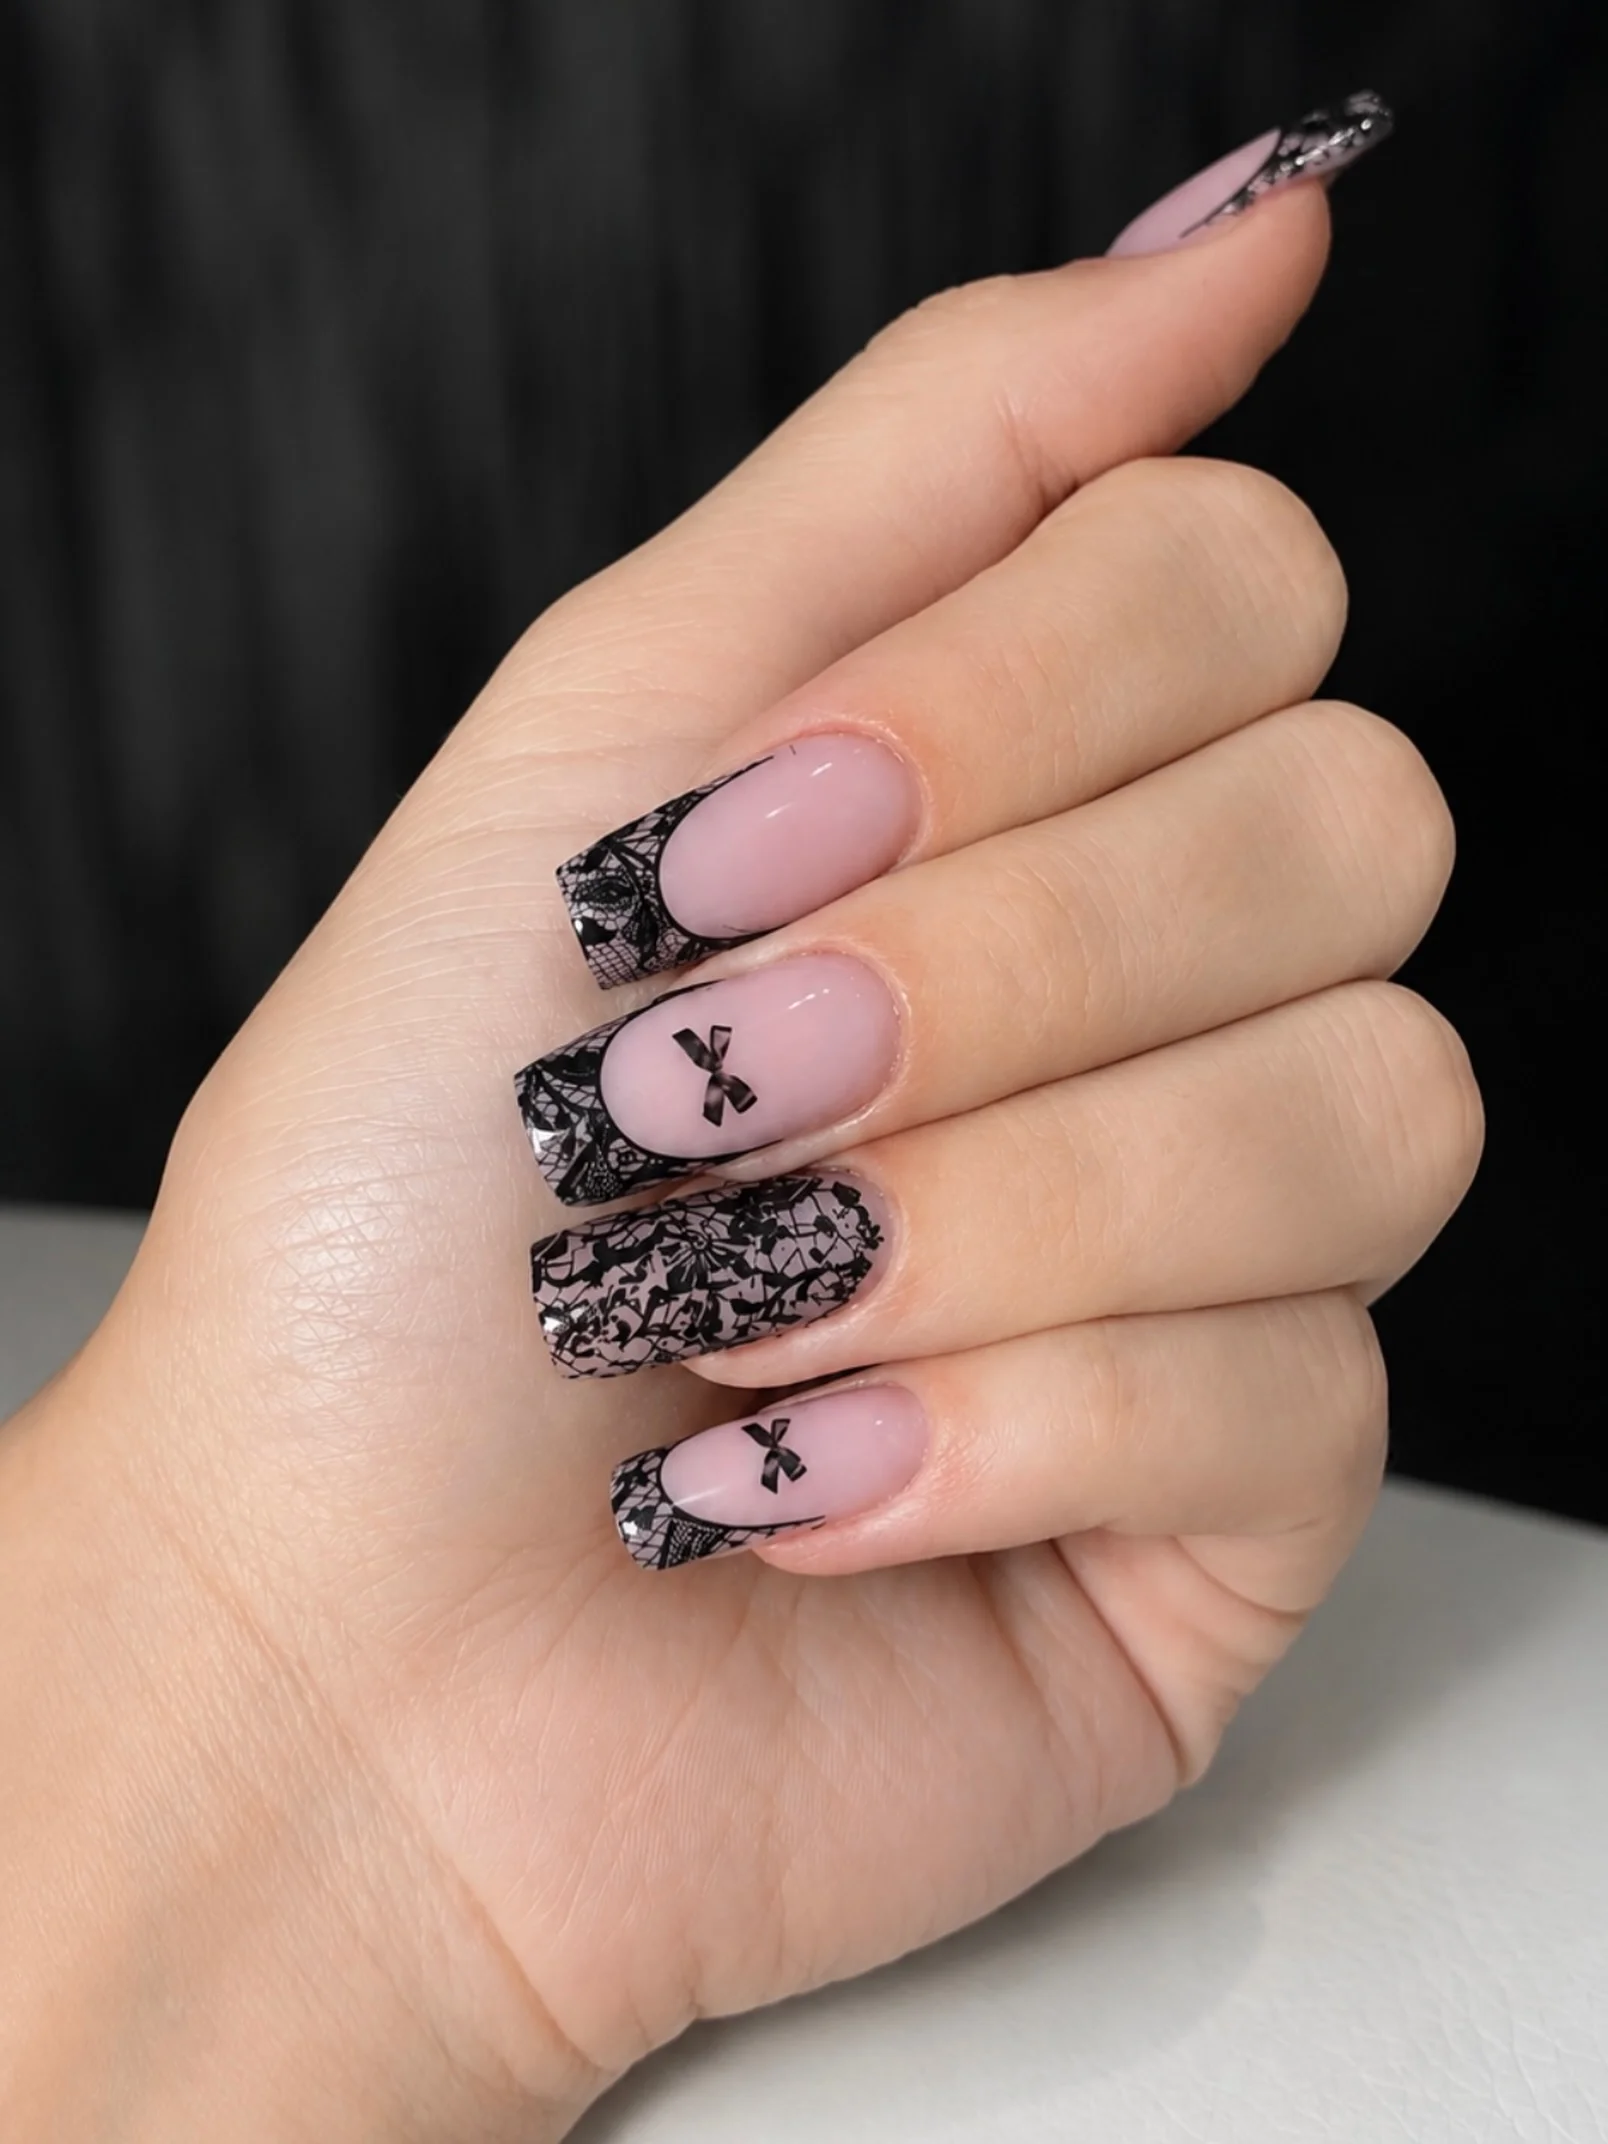
For this version, I would use a translucent blush or baby-pink base, black gel paint, a very fine liner brush, and a glossy top coat. A lace stamping plate could make the process faster, especially for someone who does not feel comfortable drawing tiny patterns. For the little bows, a fine brush or dotting tool is enough to create the simple loops and center detail.
I would first establish a consistent French-tip area on each nail, then add the lace pattern within that section. Keeping the pattern concentrated toward the ends makes the manicure much easier to wear and prevents the nail from looking visually crowded. I would add the bows only to a couple of nails so they function as small surprises rather than competing with the lace.
I like this design because it proves that pink does not have to mean ultra-sweet. The black detailing gives it structure and a slightly mysterious edge, while the translucent base keeps everything feminine. It would be particularly pretty with black accessories, a simple evening outfit, or even a white summer look that needs one stronger detail.
Soft Pink Almond Nails With Minimal Rhinestone Details
The beauty of this manicure is restraint. The nails are shaped into a neat almond silhouette and covered in a soft, translucent pink that looks clean, glossy, and almost weightless. Instead of adding elaborate artwork, the design relies on tiny silver rhinestones placed on just a few nails. That small amount of sparkle is enough to catch the light without changing the overall minimalist character.
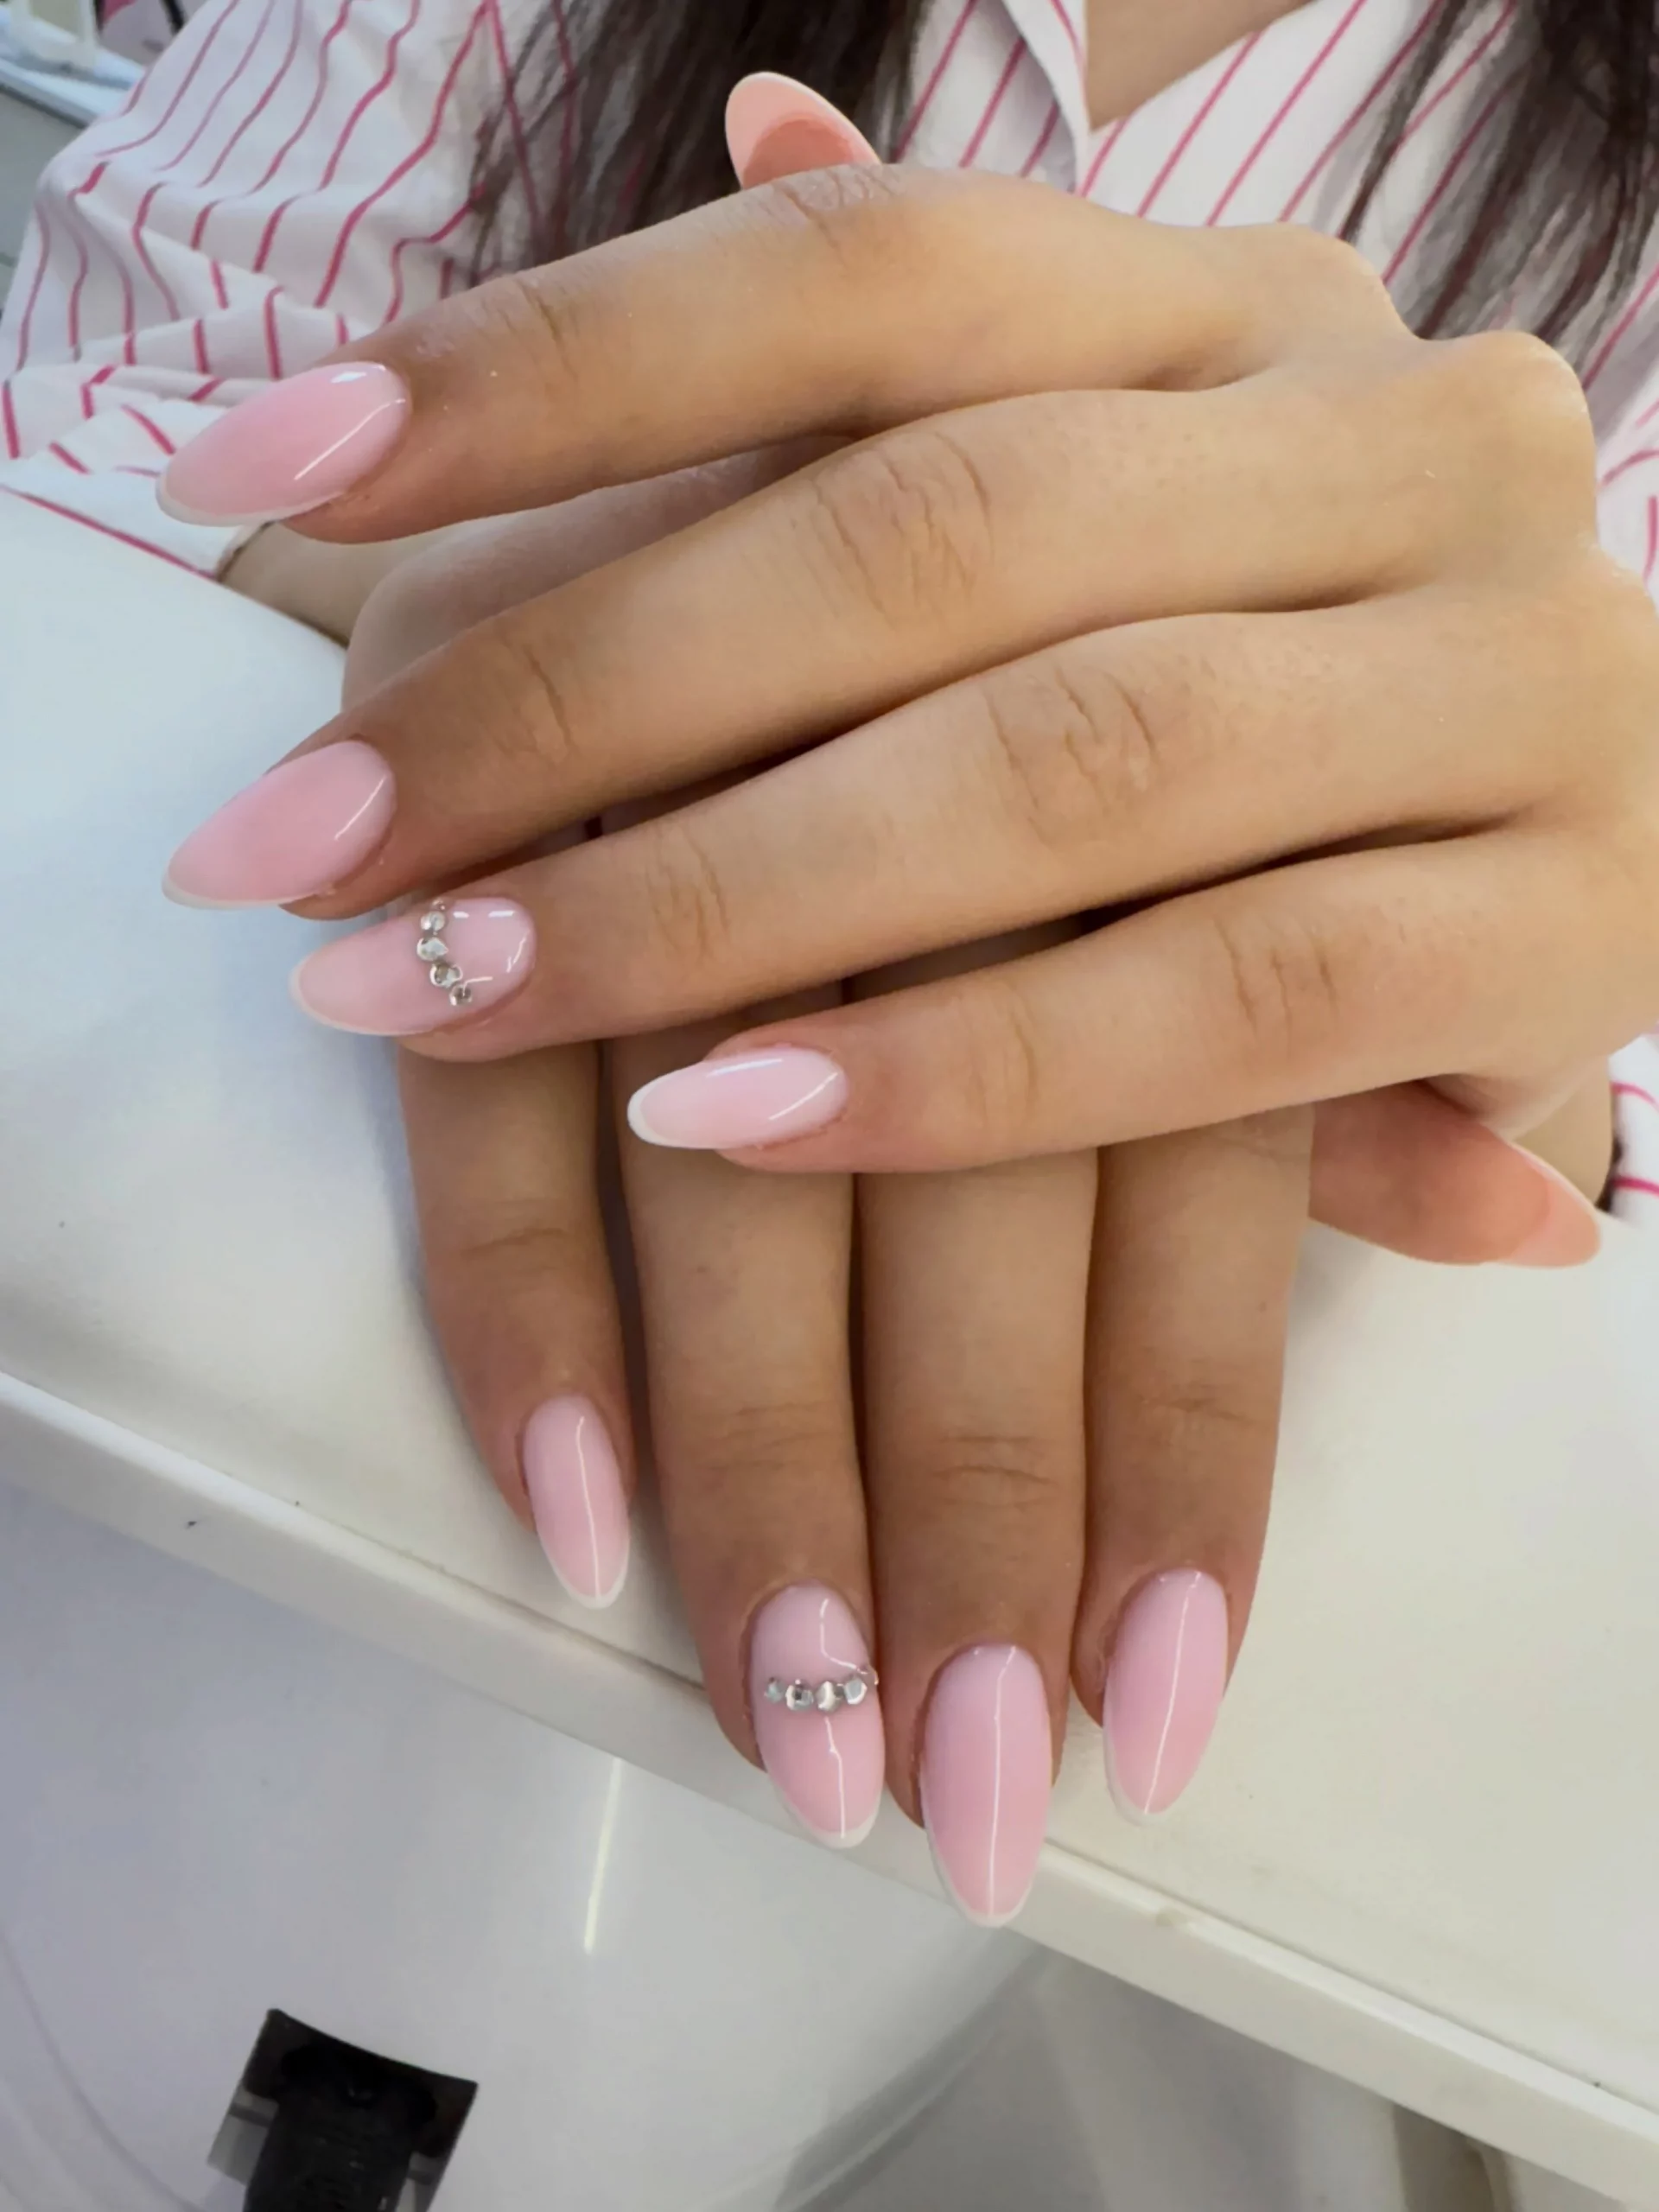
I would choose a sheer pink gel polish with a slightly milky finish, small silver or clear rhinestones, nail adhesive or a suitable builder-gel method for securing the stones, and a glossy top coat. The shade of pink matters more than it might seem. I would look for one that complements the natural undertone of the skin instead of choosing an extremely opaque pastel.
After preparing and shaping the nails, I would apply two thin layers of the sheer pink shade. Once cured, I would position the rhinestones while the surface is ready for secure placement, keeping them close to the center or toward the side of selected nails. I would avoid putting embellishments on every nail because the empty space is what makes the manicure look expensive and polished.
This is my idea of a quiet manicure that still feels special. It would work for an office, vacation, wedding guest look, or simply those weeks when I want my hands to look beautifully maintained without making a statement. Sometimes that is exactly what I want from a manicure: clean lines, glossy nails, and one tiny flash of sparkle when I move my hand.
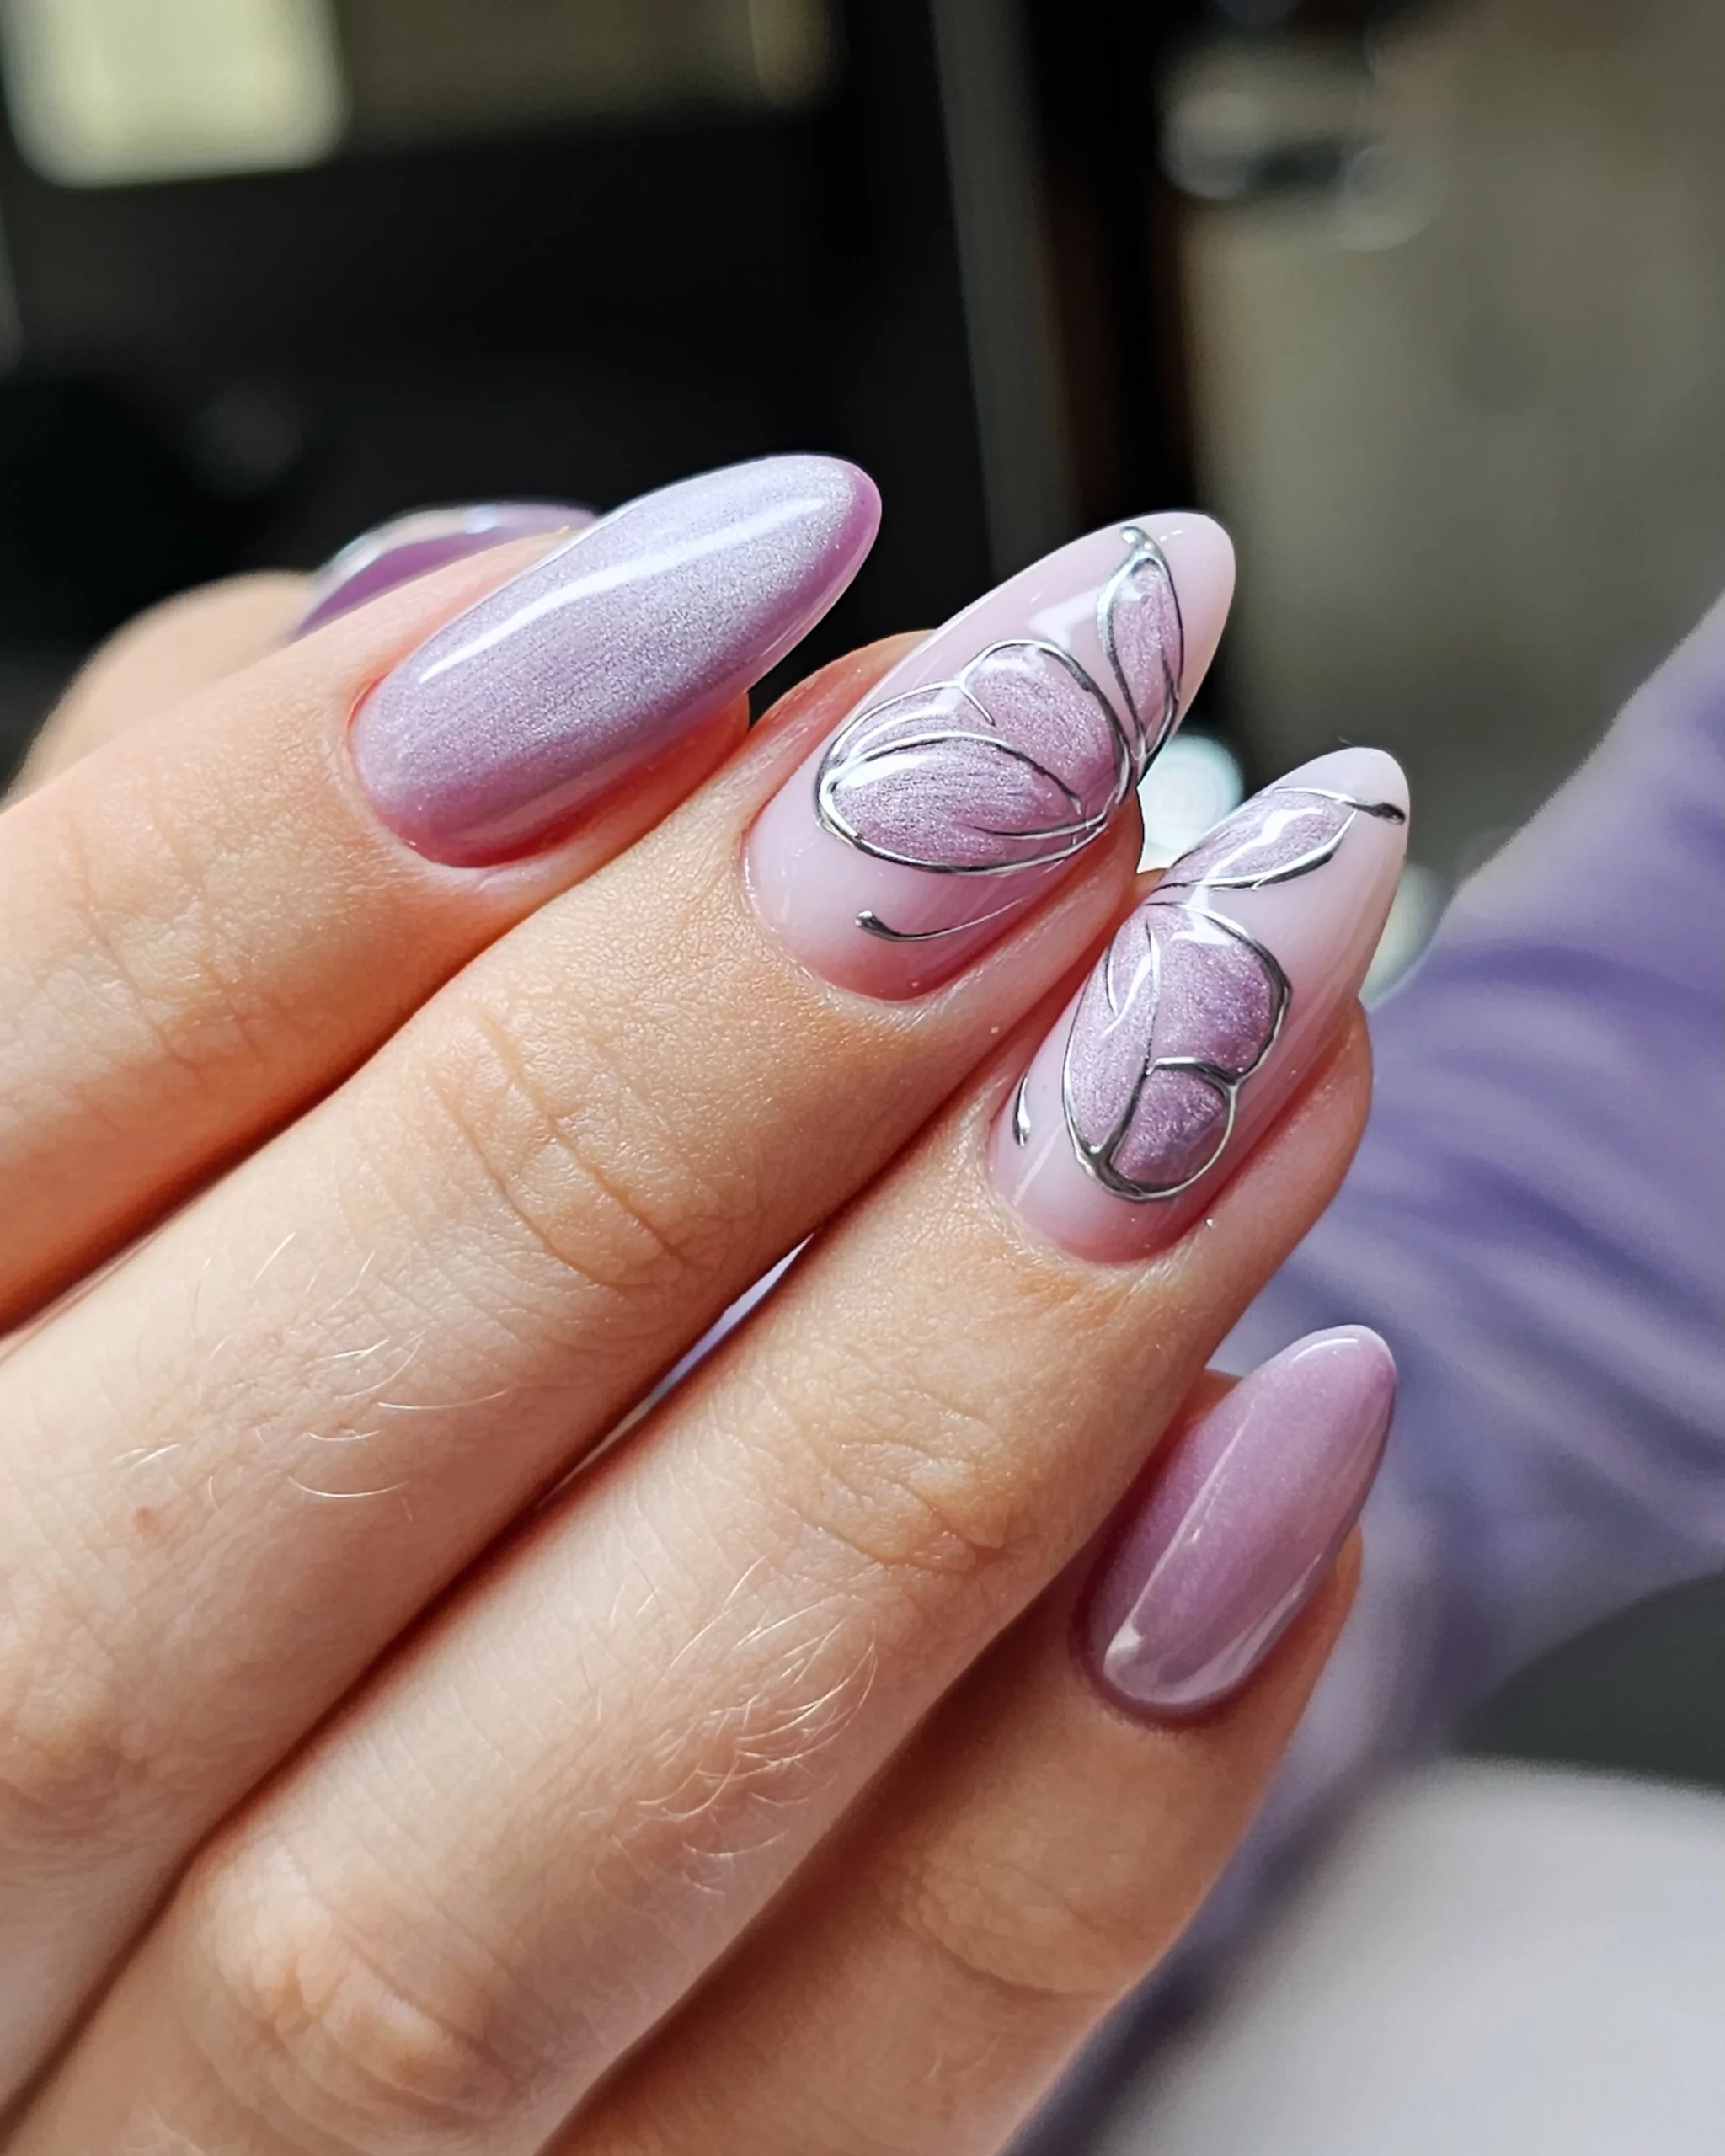
Lavender Shine With Sculptural Silver Butterfly Details
Lavender and silver make an unexpectedly dreamy combination, especially when the color has a softly reflective finish. The base here shifts between pale lavender and pink-lilac tones, while selected nails feature raised-looking butterfly shapes outlined in silver. The metallic contours give the design dimension, while the shimmering base keeps the overall effect delicate rather than heavy. I particularly like how the butterflies are placed across only a few nails, allowing the solid lavender nails to act as visual pauses.
For the base, I would use a pale lavender gel polish or a pink-lilac chrome powder over a compatible base. A silver gel liner can create the butterfly outlines, while a slightly textured lavender or shimmer gel can add depth inside the shapes. I would finish with a glossy top coat, carefully sealing around the raised decorative elements without covering their dimensional character.
Creating the butterfly shape at home is easier if I break it into simple sections. I would first sketch two upper wings and two smaller lower wings with a fine silver brush, then add a central body and a few curved lines. There is no need to make the butterfly perfectly symmetrical; a slightly organic shape actually works better with the soft, reflective base.
For me, this is the manicure I would save for a moment when I want something more artistic. It still feels wearable because the palette is restrained, but the butterflies make it memorable. The lavender tone is especially pretty during summer because it feels cool and airy, while the silver catches natural light beautifully.
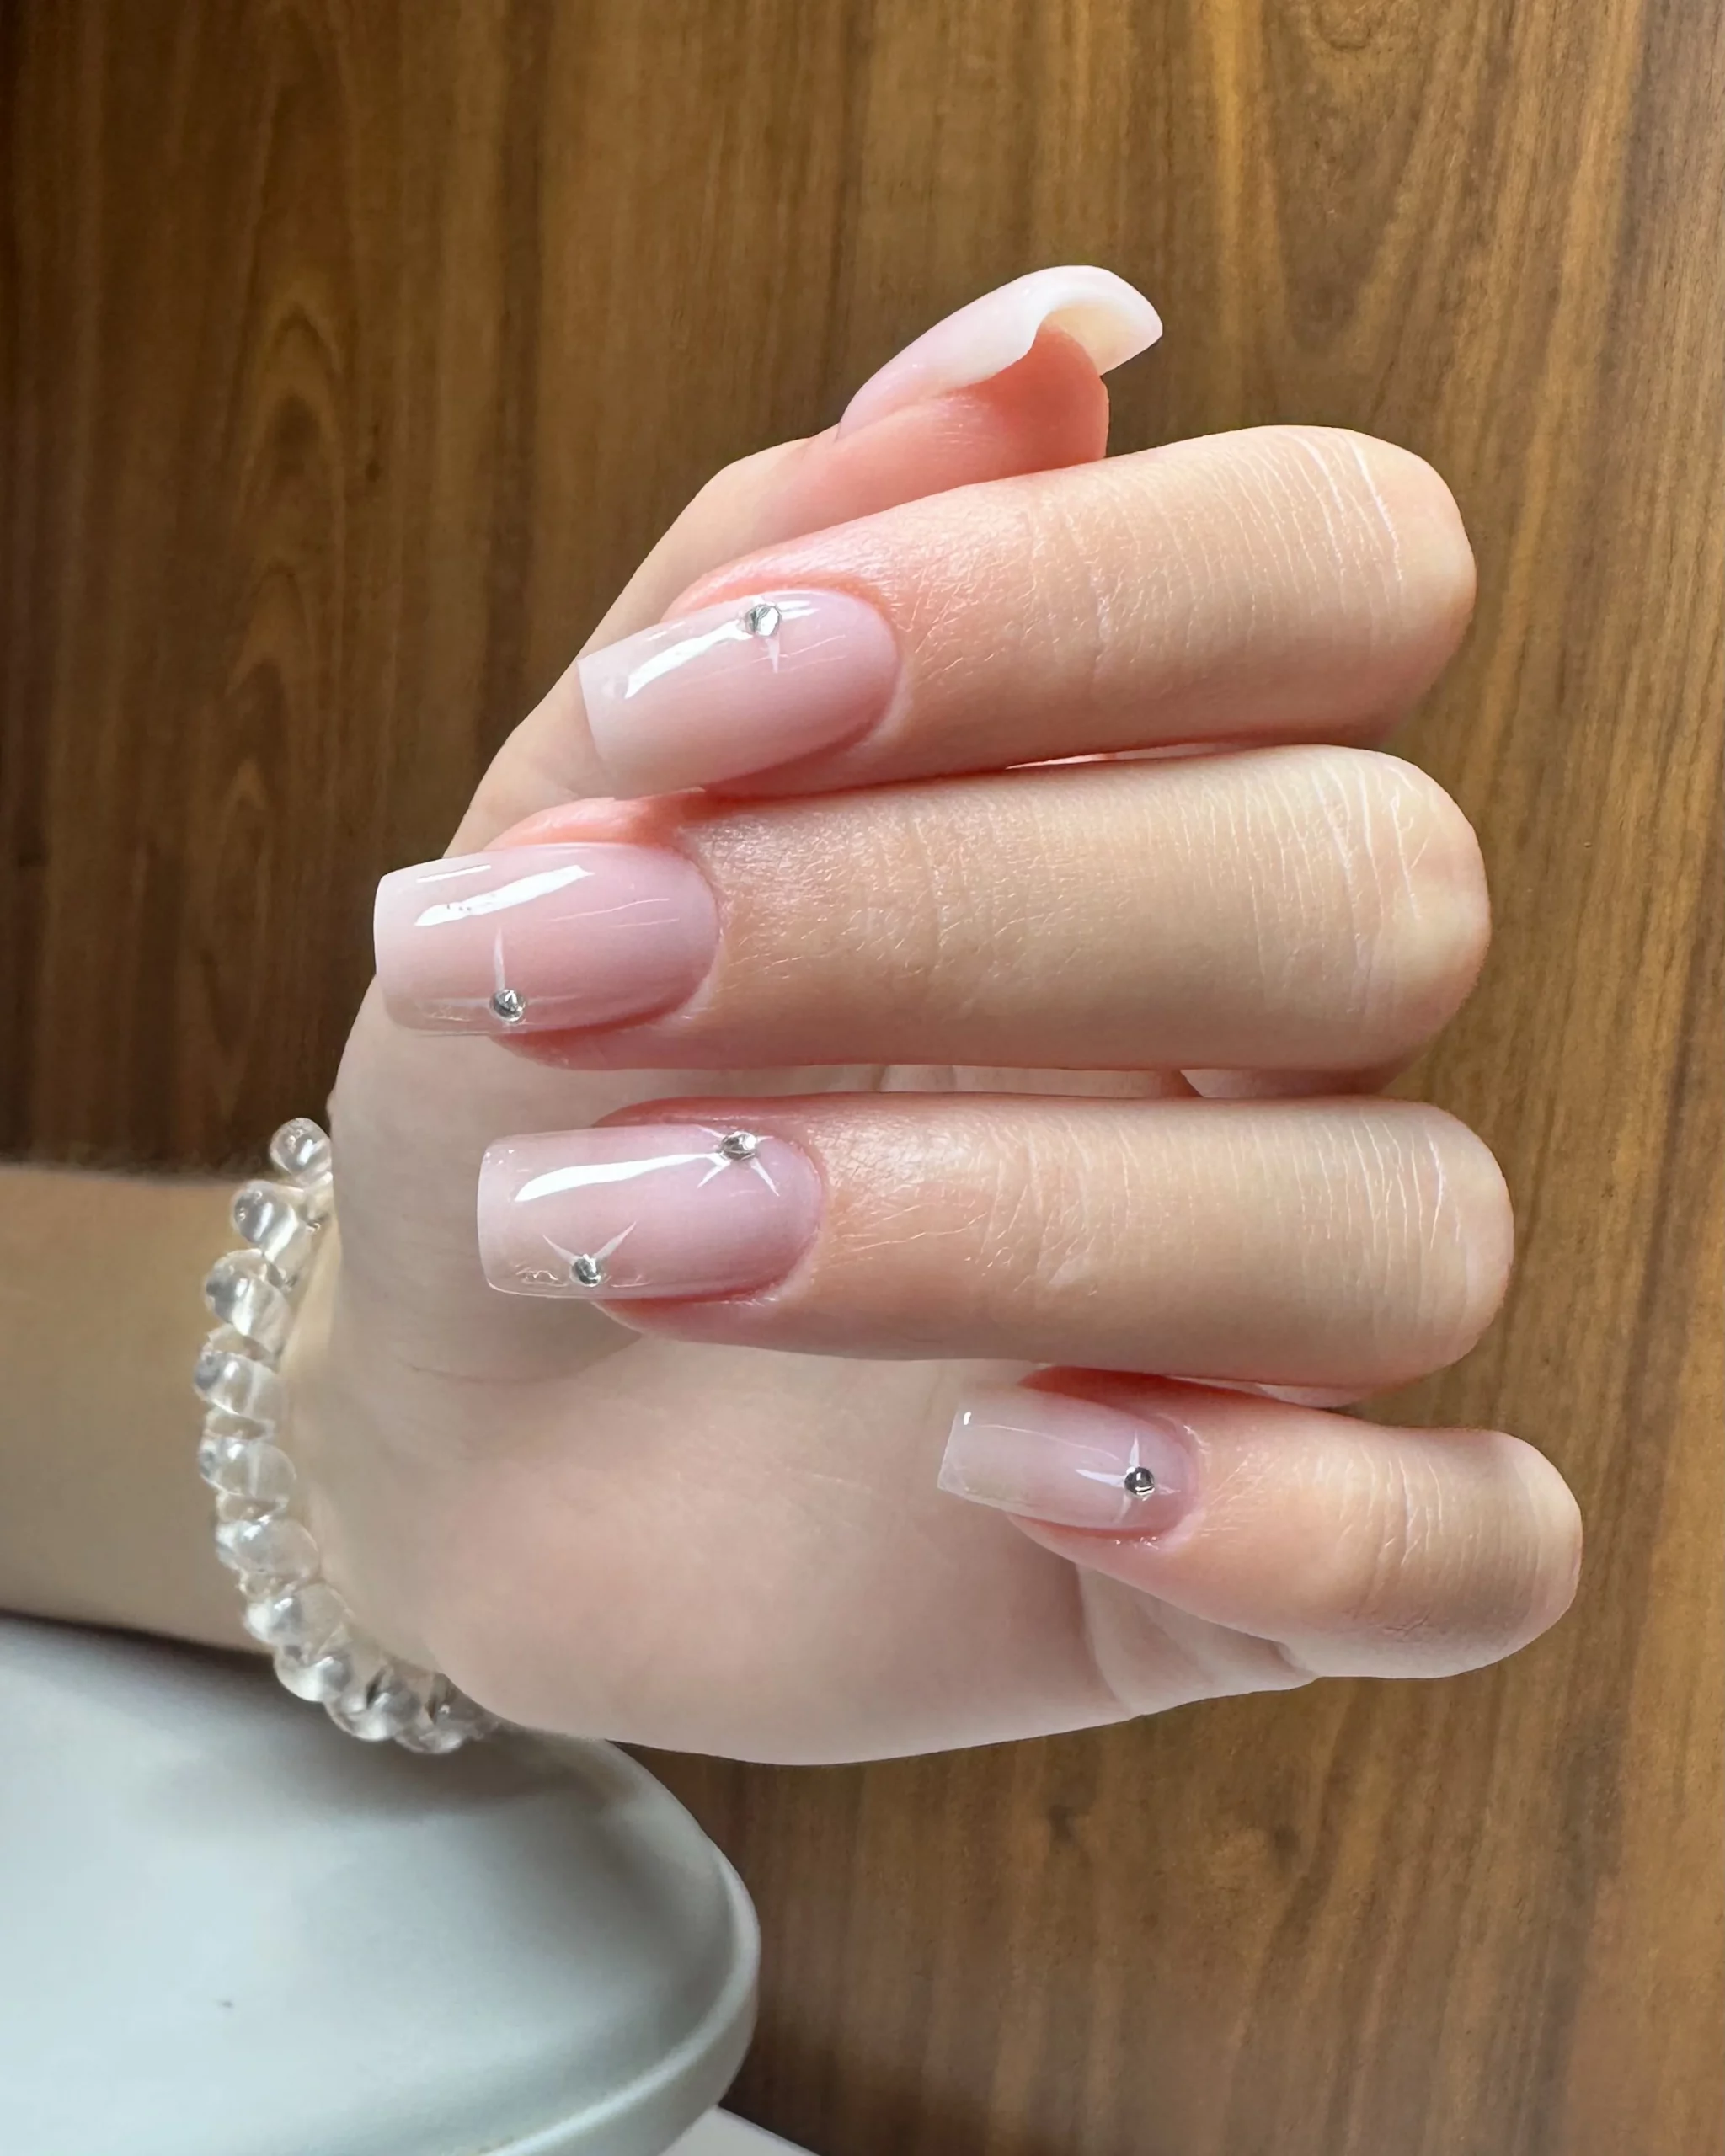
Clean Blush Manicure With Tiny Crystal Accents
There is a reason sheer pink manicures keep returning to my inspiration boards. This version takes the idea even further with a translucent blush base, a smooth glossy finish, and tiny crystals positioned individually across the nails. The shape is neat and softly squared, allowing the manicure to look polished without becoming too formal. The little stones are almost like jewelry for the nails, but because they are so small, the effect stays remarkably subtle.
I would use a translucent pink gel polish, a high-gloss top coat, and very small clear or silver crystals. For secure placement, I would use nail adhesive or a small amount of builder gel designed for embellishments. A wax pencil or fine placement tool makes it much easier to pick up tiny stones without disturbing the polish underneath.
I would keep the application simple: prepare the nails carefully, create the sheer pink base in thin layers, cure completely, and then position the crystals one at a time. Placement does not need to be identical on every nail. I actually prefer a few slightly different positions because it gives the manicure a more effortless rhythm. Once everything is secure, a careful top coat around the embellishments helps protect the design while keeping the surface glossy.
This is the kind of manicure I would choose when I want my hands to look instantly put together without committing to a complicated design. It feels fresh for summer, but it can easily move into another season because the color is so adaptable. And that tiny flash of crystal when the light hits it? That is the detail that makes an otherwise simple manicure feel finished.
Soft Almond French With a Polished White Edge
I love how this almond manicure makes a familiar French tip feel softer and more refined. The base is a sheer blush-pink nude that follows the natural tone of the nail, while the crisp white tips trace the elongated almond shape without looking too heavy. One accent nail adds a tiny metallic detail near the lower edge, giving the otherwise classic design just enough sparkle. It is the kind of manicure I could wear with a white button-down one day and a silk dress the next.
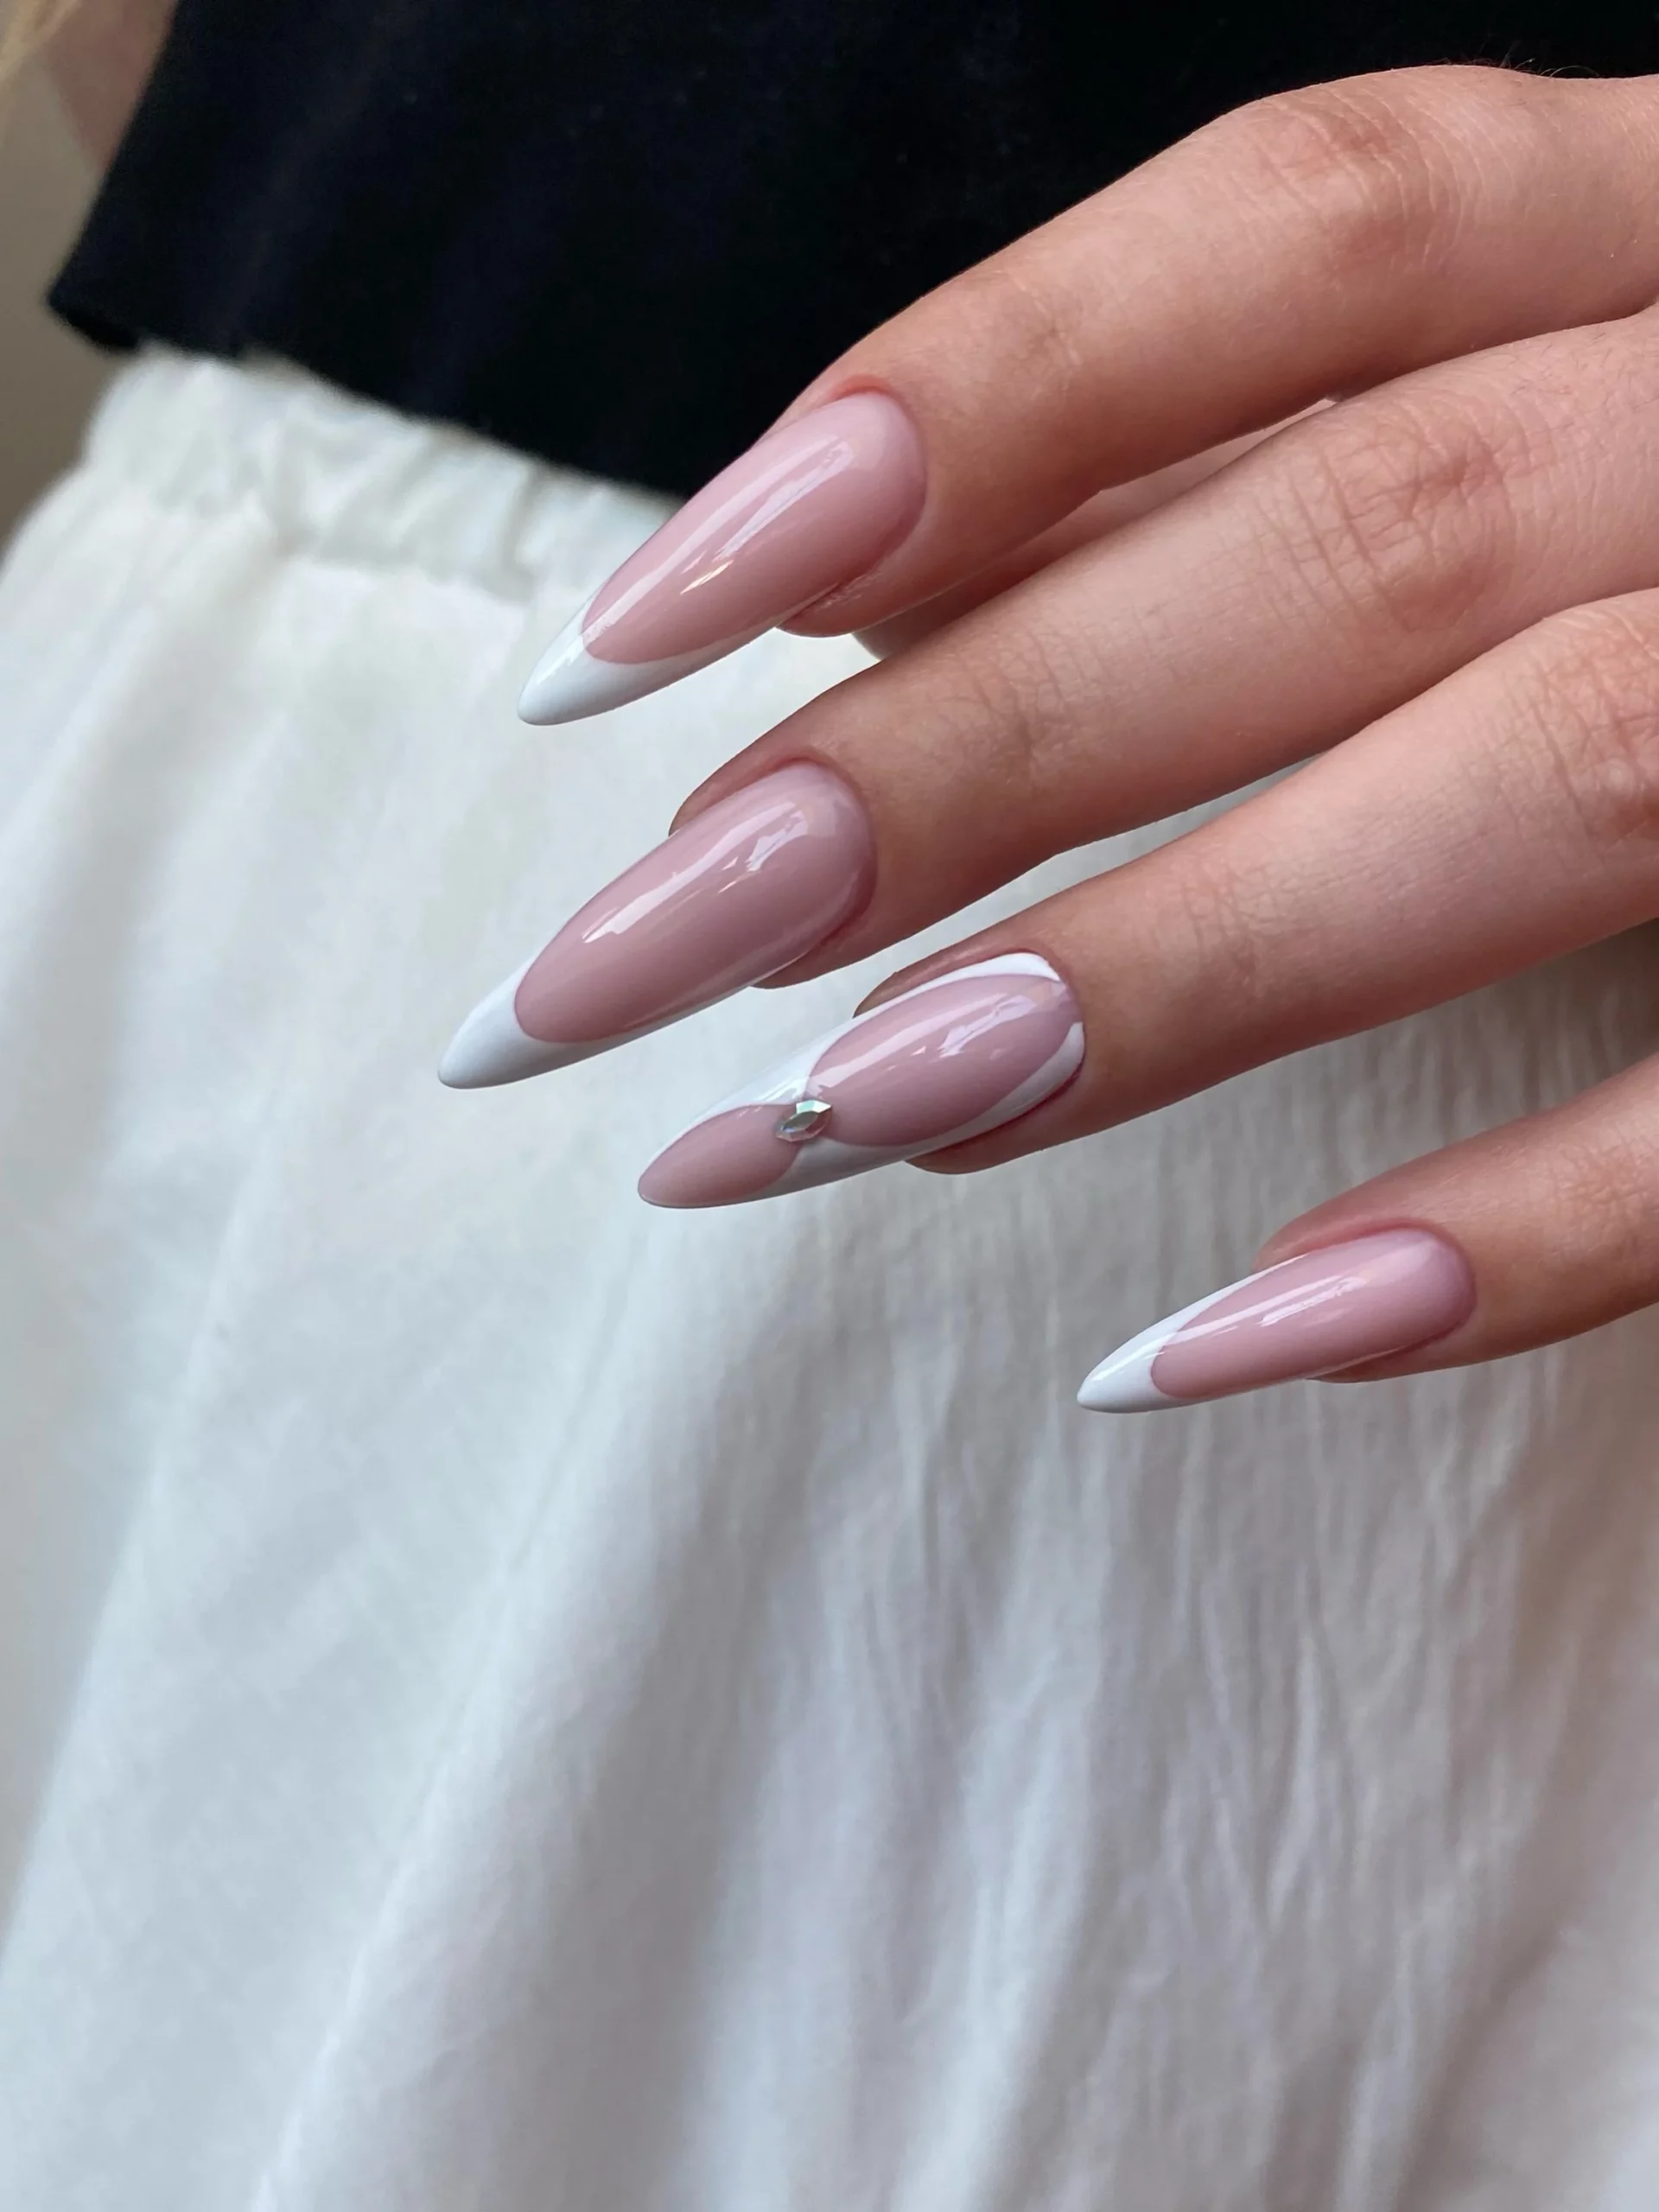
For this look, I would use a sheer pink or milky nude gel polish, a clean white gel for the tips, a fine liner brush, and a high-shine top coat. A tiny silver or clear crystal is enough for the accent, so I would resist the temptation to add more. The beauty here is the balance between the translucent base, bright tip, and delicate embellishment.
I usually find a French manicure easiest to control when I first mark the smile line lightly with a fine brush rather than trying to create the entire tip in one sweep. After curing the nude base, I would paint the white edge in thin layers, keeping the center of the tip slightly lower to complement the almond silhouette. Once everything is cured, I would secure the small embellishment with nail adhesive or a tiny amount of builder gel before finishing with top coat.
This is one of those designs I would save for a special occasion and then realize I actually want to wear it every week. It feels feminine without being overly decorated, and the almond shape gives the hands a beautifully elongated appearance. If you want a manicure that never has to compete with your outfit, this is a very easy yes.
Speckled Lilac With a Delicate French Finish
A pale lilac-pink base brings a completely different mood to the French manicure. I like the way the soft color is paired with translucent white tips, while tiny dark speckles and scattered shimmer create a subtle confetti effect across the nail. The oval shape keeps everything gentle and wearable, so the decoration never takes over the manicure. It feels playful, but still surprisingly polished.
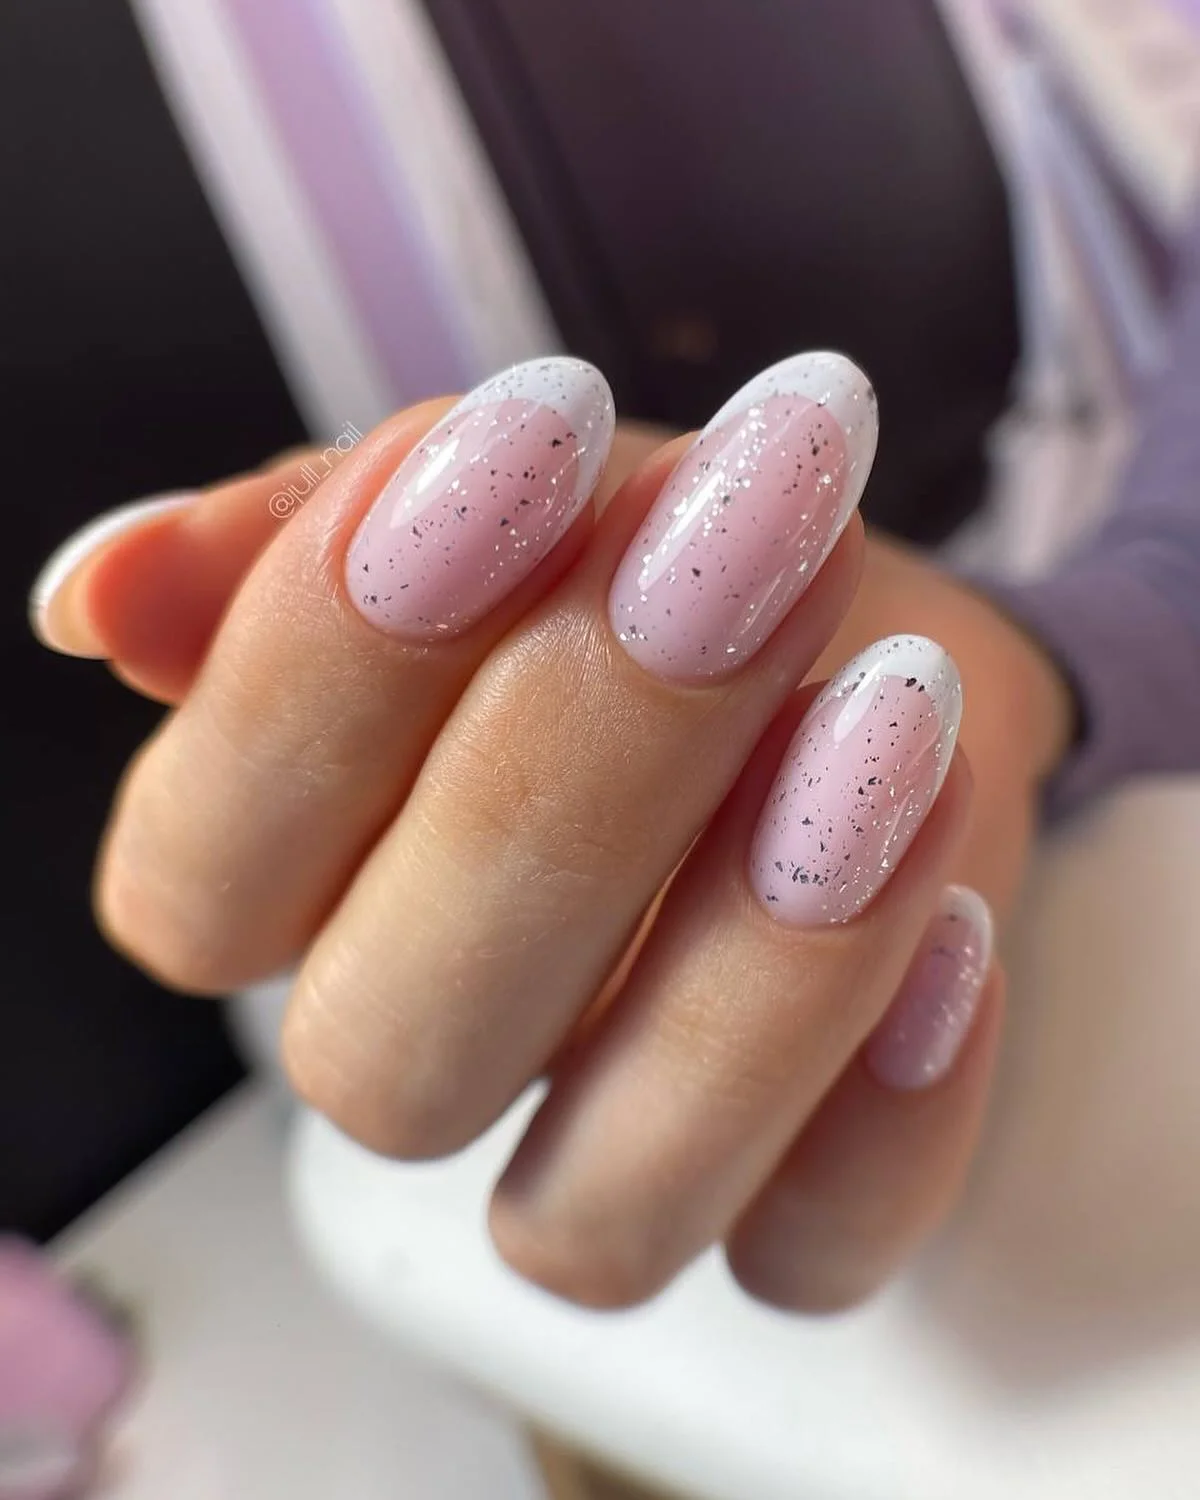
I would reach for a muted lavender-pink gel polish, a translucent white shade for the tips, a fine glitter or speckled topper, and a glossy top coat. The little flecks can be created with a ready-made speckled polish, which makes this style much easier to recreate at home. A thin detail brush is useful for refining the French edge, especially on shorter oval nails.
I would start with two thin coats of the lilac-pink base, curing each layer carefully. Then I would add the white tips with a small brush, keeping their curve delicate rather than creating a thick block of white. The speckled layer comes next, followed by a generous but even glossy top coat to bring the different textures together.
For me, this is the manicure that makes a simple outfit feel more considered. The little flecks catch the light as the hands move, while the lavender undertone keeps the whole look soft. It would be especially pretty during the warmer months when sheer colors and barely-there details feel right at home.
Milky White Nails With Rainbow Crystal Details
There is something wonderfully clean about milky white nails, but the tiny multicolored crystals make this version much more interesting. The square shape gives the manicure a crisp modern outline, while the slightly translucent white base keeps it from looking flat. Each nail carries a handful of iridescent stones, so the color appears only when the light hits them. That little flash is the whole point.
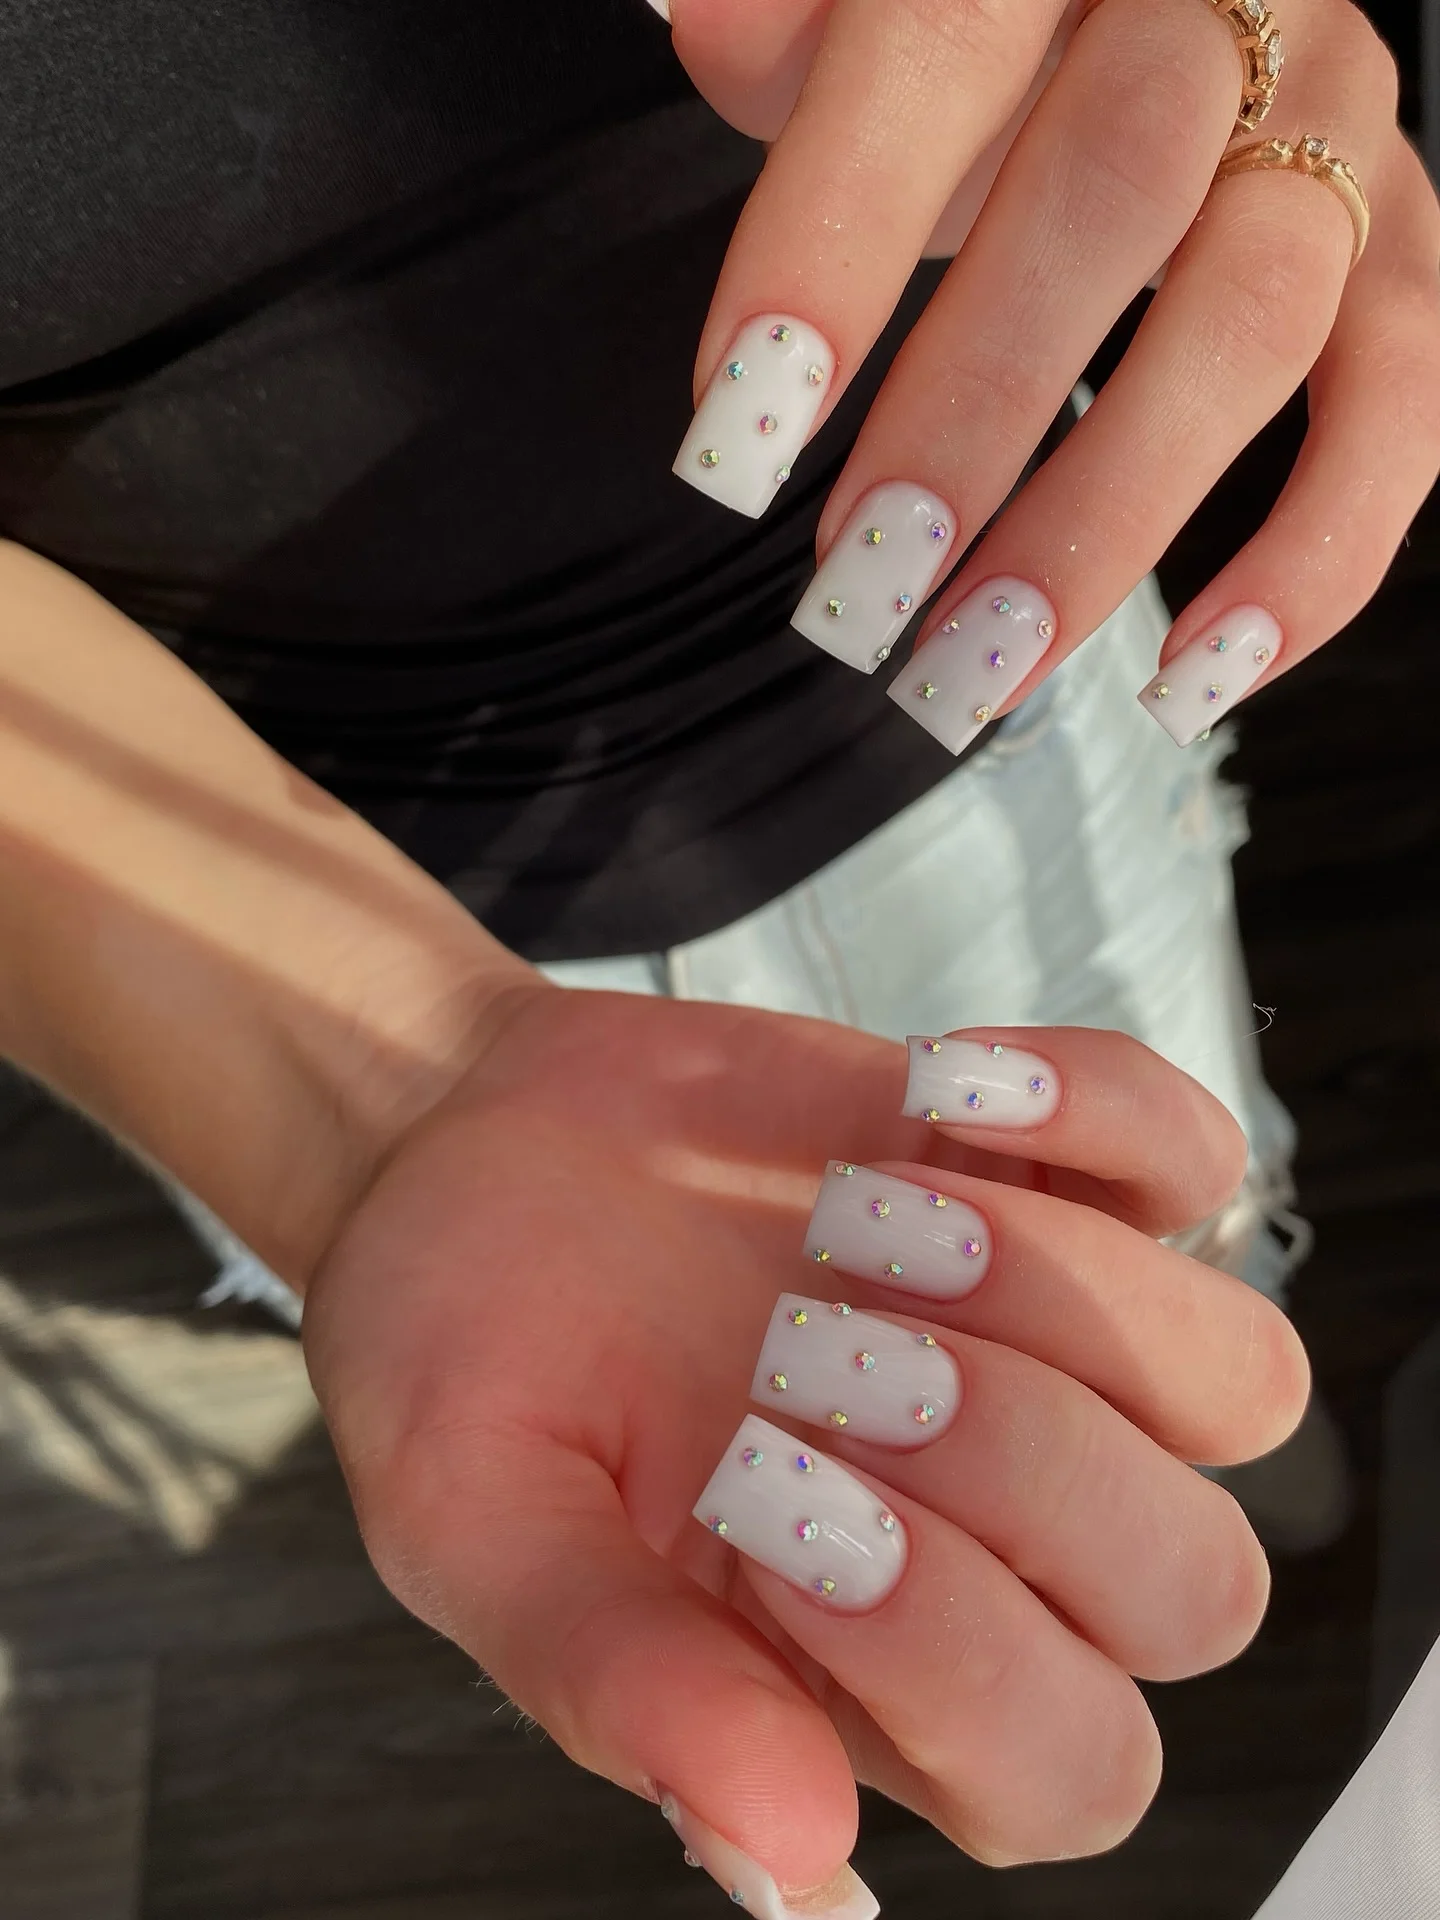
For the base, I would choose a soft milky-white gel rather than an opaque paper white. I would also need small iridescent crystals in different pastel tones, crystal gel or nail adhesive, a wax pencil for picking up the stones, and a glossy top coat. The crystals should remain small because their scattered placement is what keeps this design elegant.
After shaping and preparing the nails, I would apply the milky white color in thin coats. Once cured, I would place the crystals individually, varying their positions slightly from nail to nail instead of creating identical patterns. I would finish by carefully sealing around the embellishments without completely covering their reflective surfaces.
I particularly like this idea when I want something festive without committing to a complicated design. The white base works with almost everything, while the tiny flashes of pink, blue, green, and violet add personality. It has that pretty little surprise that only appears once your hands catch the light.
Blush Almond Nails With Champagne Glitter Tips
This manicure takes a soft blush base and gives it a whisper of sparkle at the tips. The long almond shape creates an elegant silhouette, while the fine champagne-toned shimmer appears almost like light dusted across the free edge. A few tiny botanical-inspired accents add another layer of detail without making the nails feel crowded. I would describe the overall effect as delicate, glossy, and quietly dressed up.
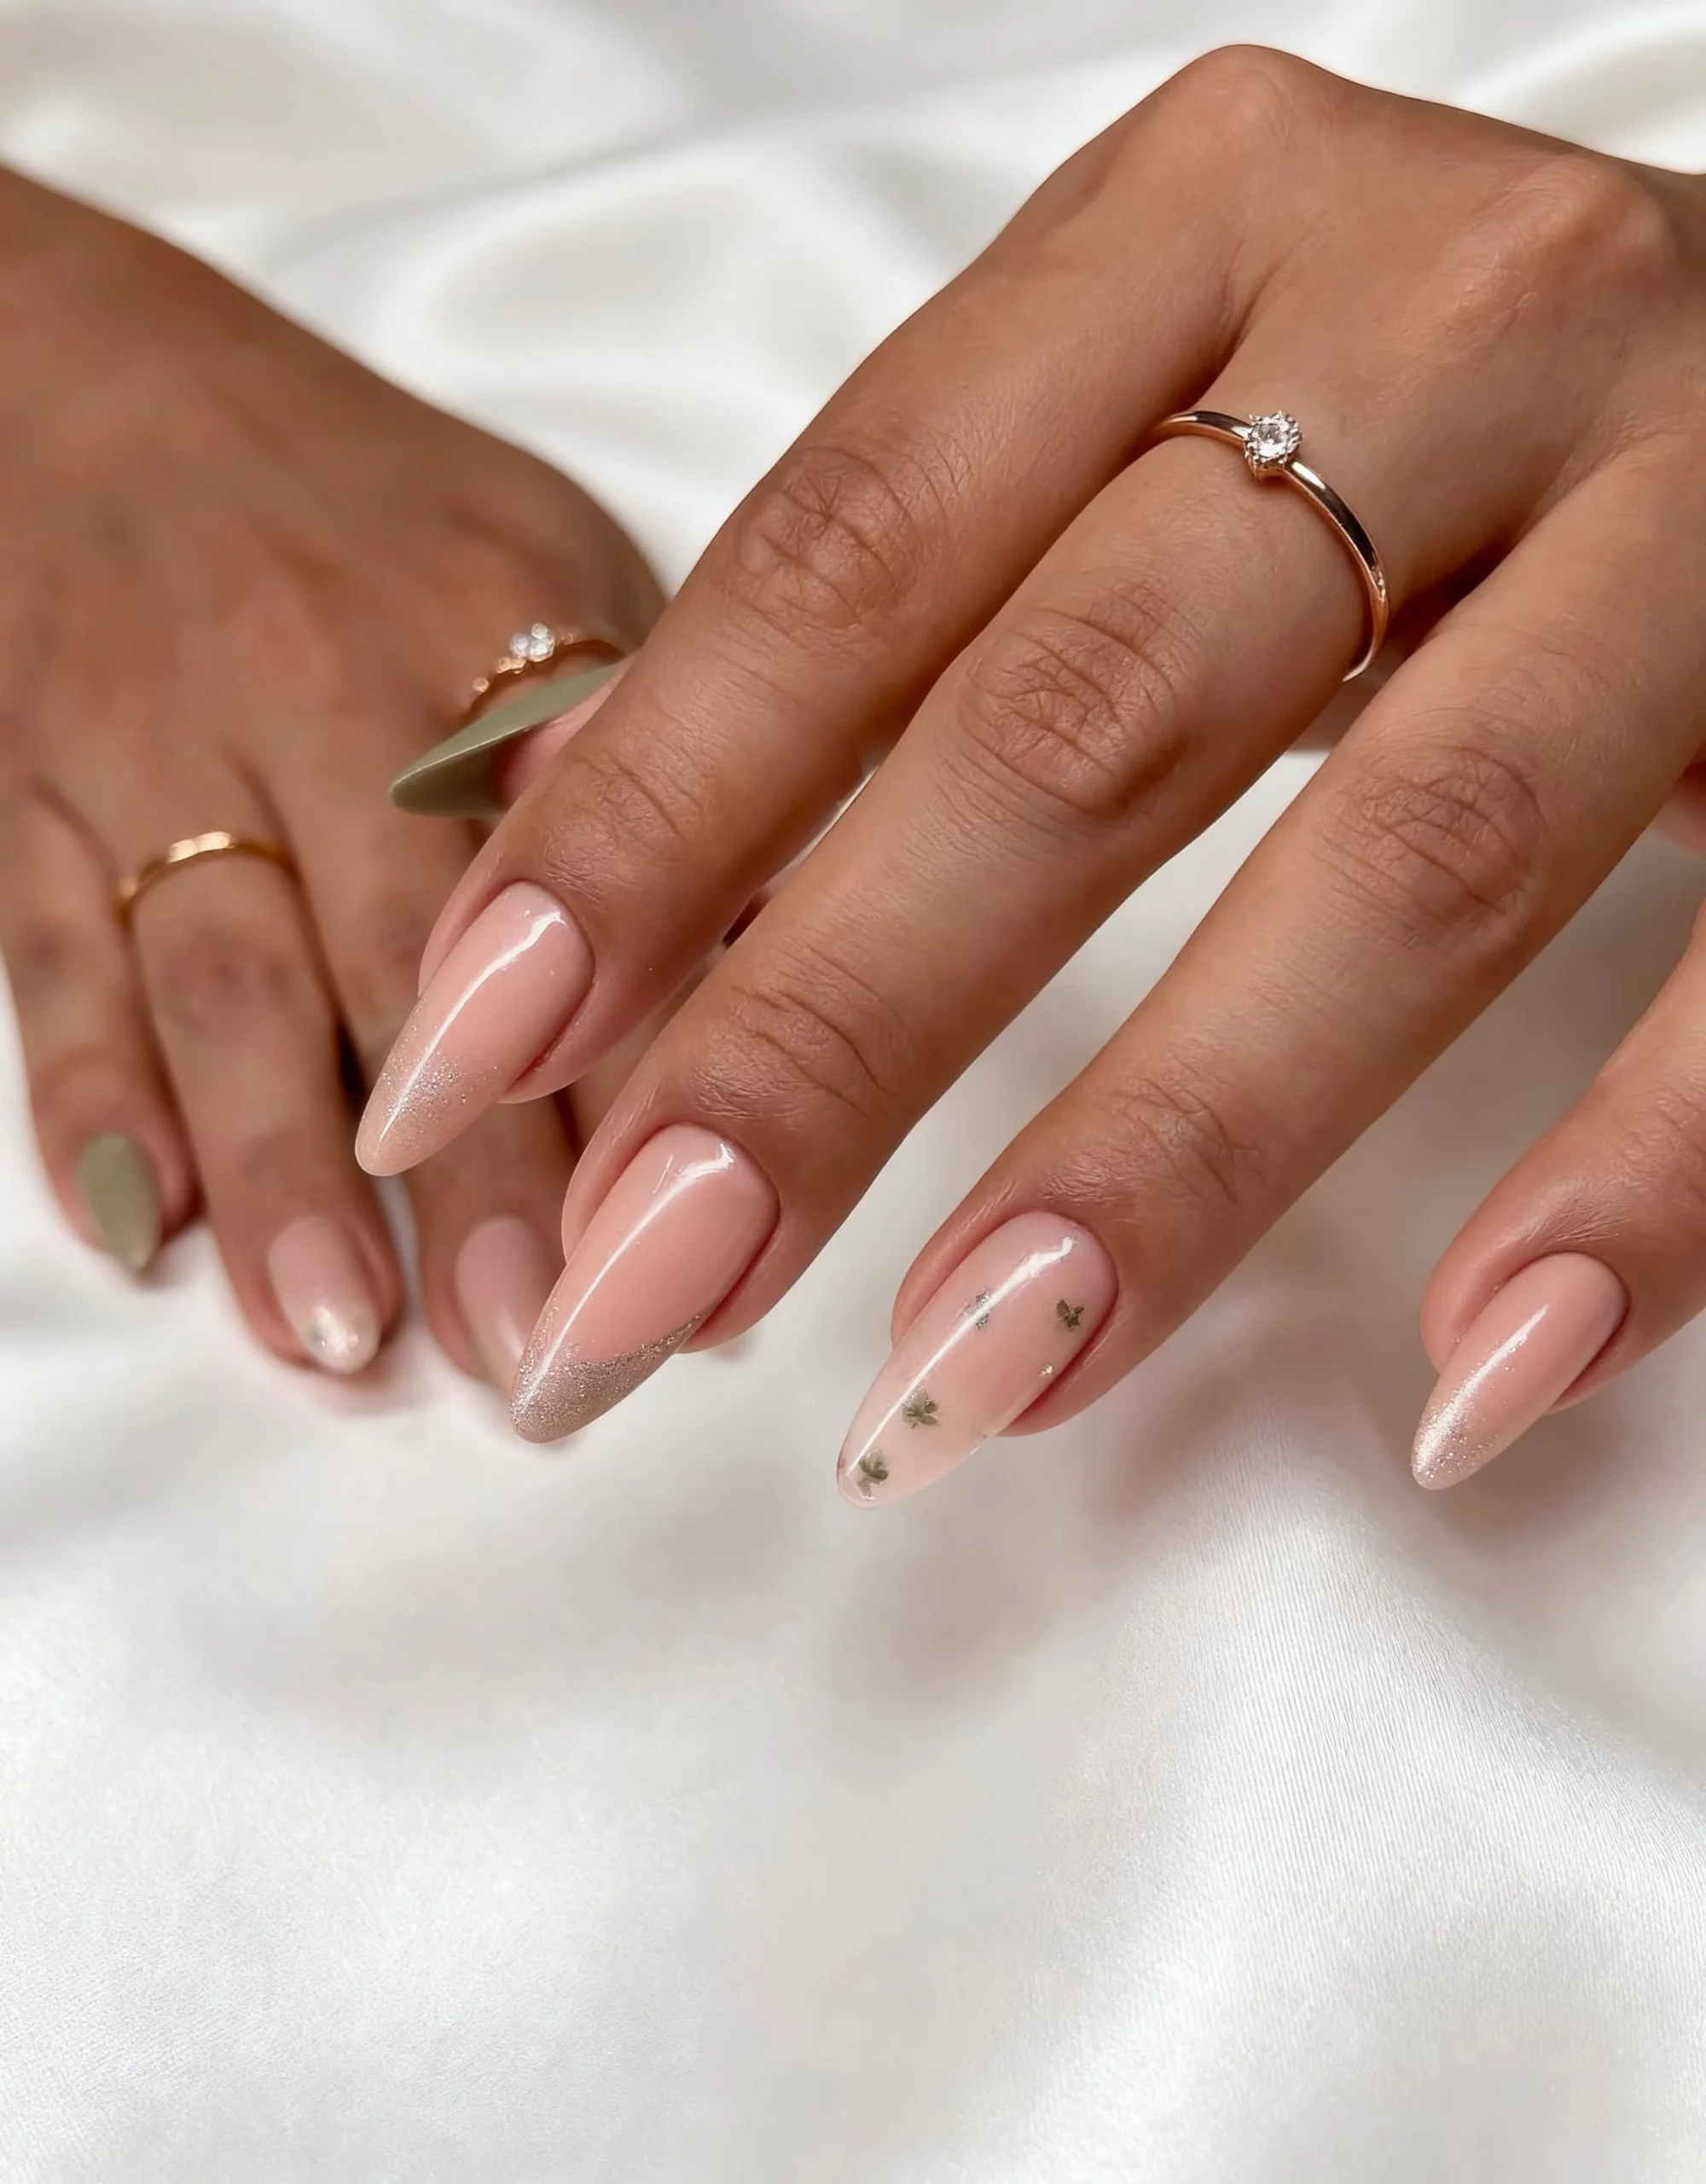
I would use a warm blush-pink gel, a fine champagne or rose-gold glitter, a very thin detailing brush, and a glossy top coat. For the tiny accent details, metallic nail art gel or miniature decals would work beautifully. I would keep the shimmer extremely fine because chunky glitter would change the character of this particular manicure.
I would begin with the blush base and make sure the almond edges are symmetrical before adding anything decorative. The glitter can be concentrated toward the tips and softly faded inward, creating that almost airbrushed transition. The small accent details should be placed sparingly, then everything can be sealed under a smooth top coat.
This is the kind of manicure I would choose when I want my nails to look special but still feel effortless. The champagne shimmer is especially flattering with gold jewelry, while the blush base keeps the result soft. It would work beautifully for a date night, wedding guest look, or simply one of those weeks when I want a little extra polish in my routine.
Pearl White Marble With Delicate Metallic Accents
Pearl finishes become much more interesting when they are layered with translucent marble lines. Here, the nails have a luminous white base with subtle pearlescent movement, while irregular white veining creates an almost liquid effect across the surface. Small metallic embellishments sit near the base of a few nails, giving the design a tiny flash of detail. The almond shape makes the whole manicure feel elongated and graceful.
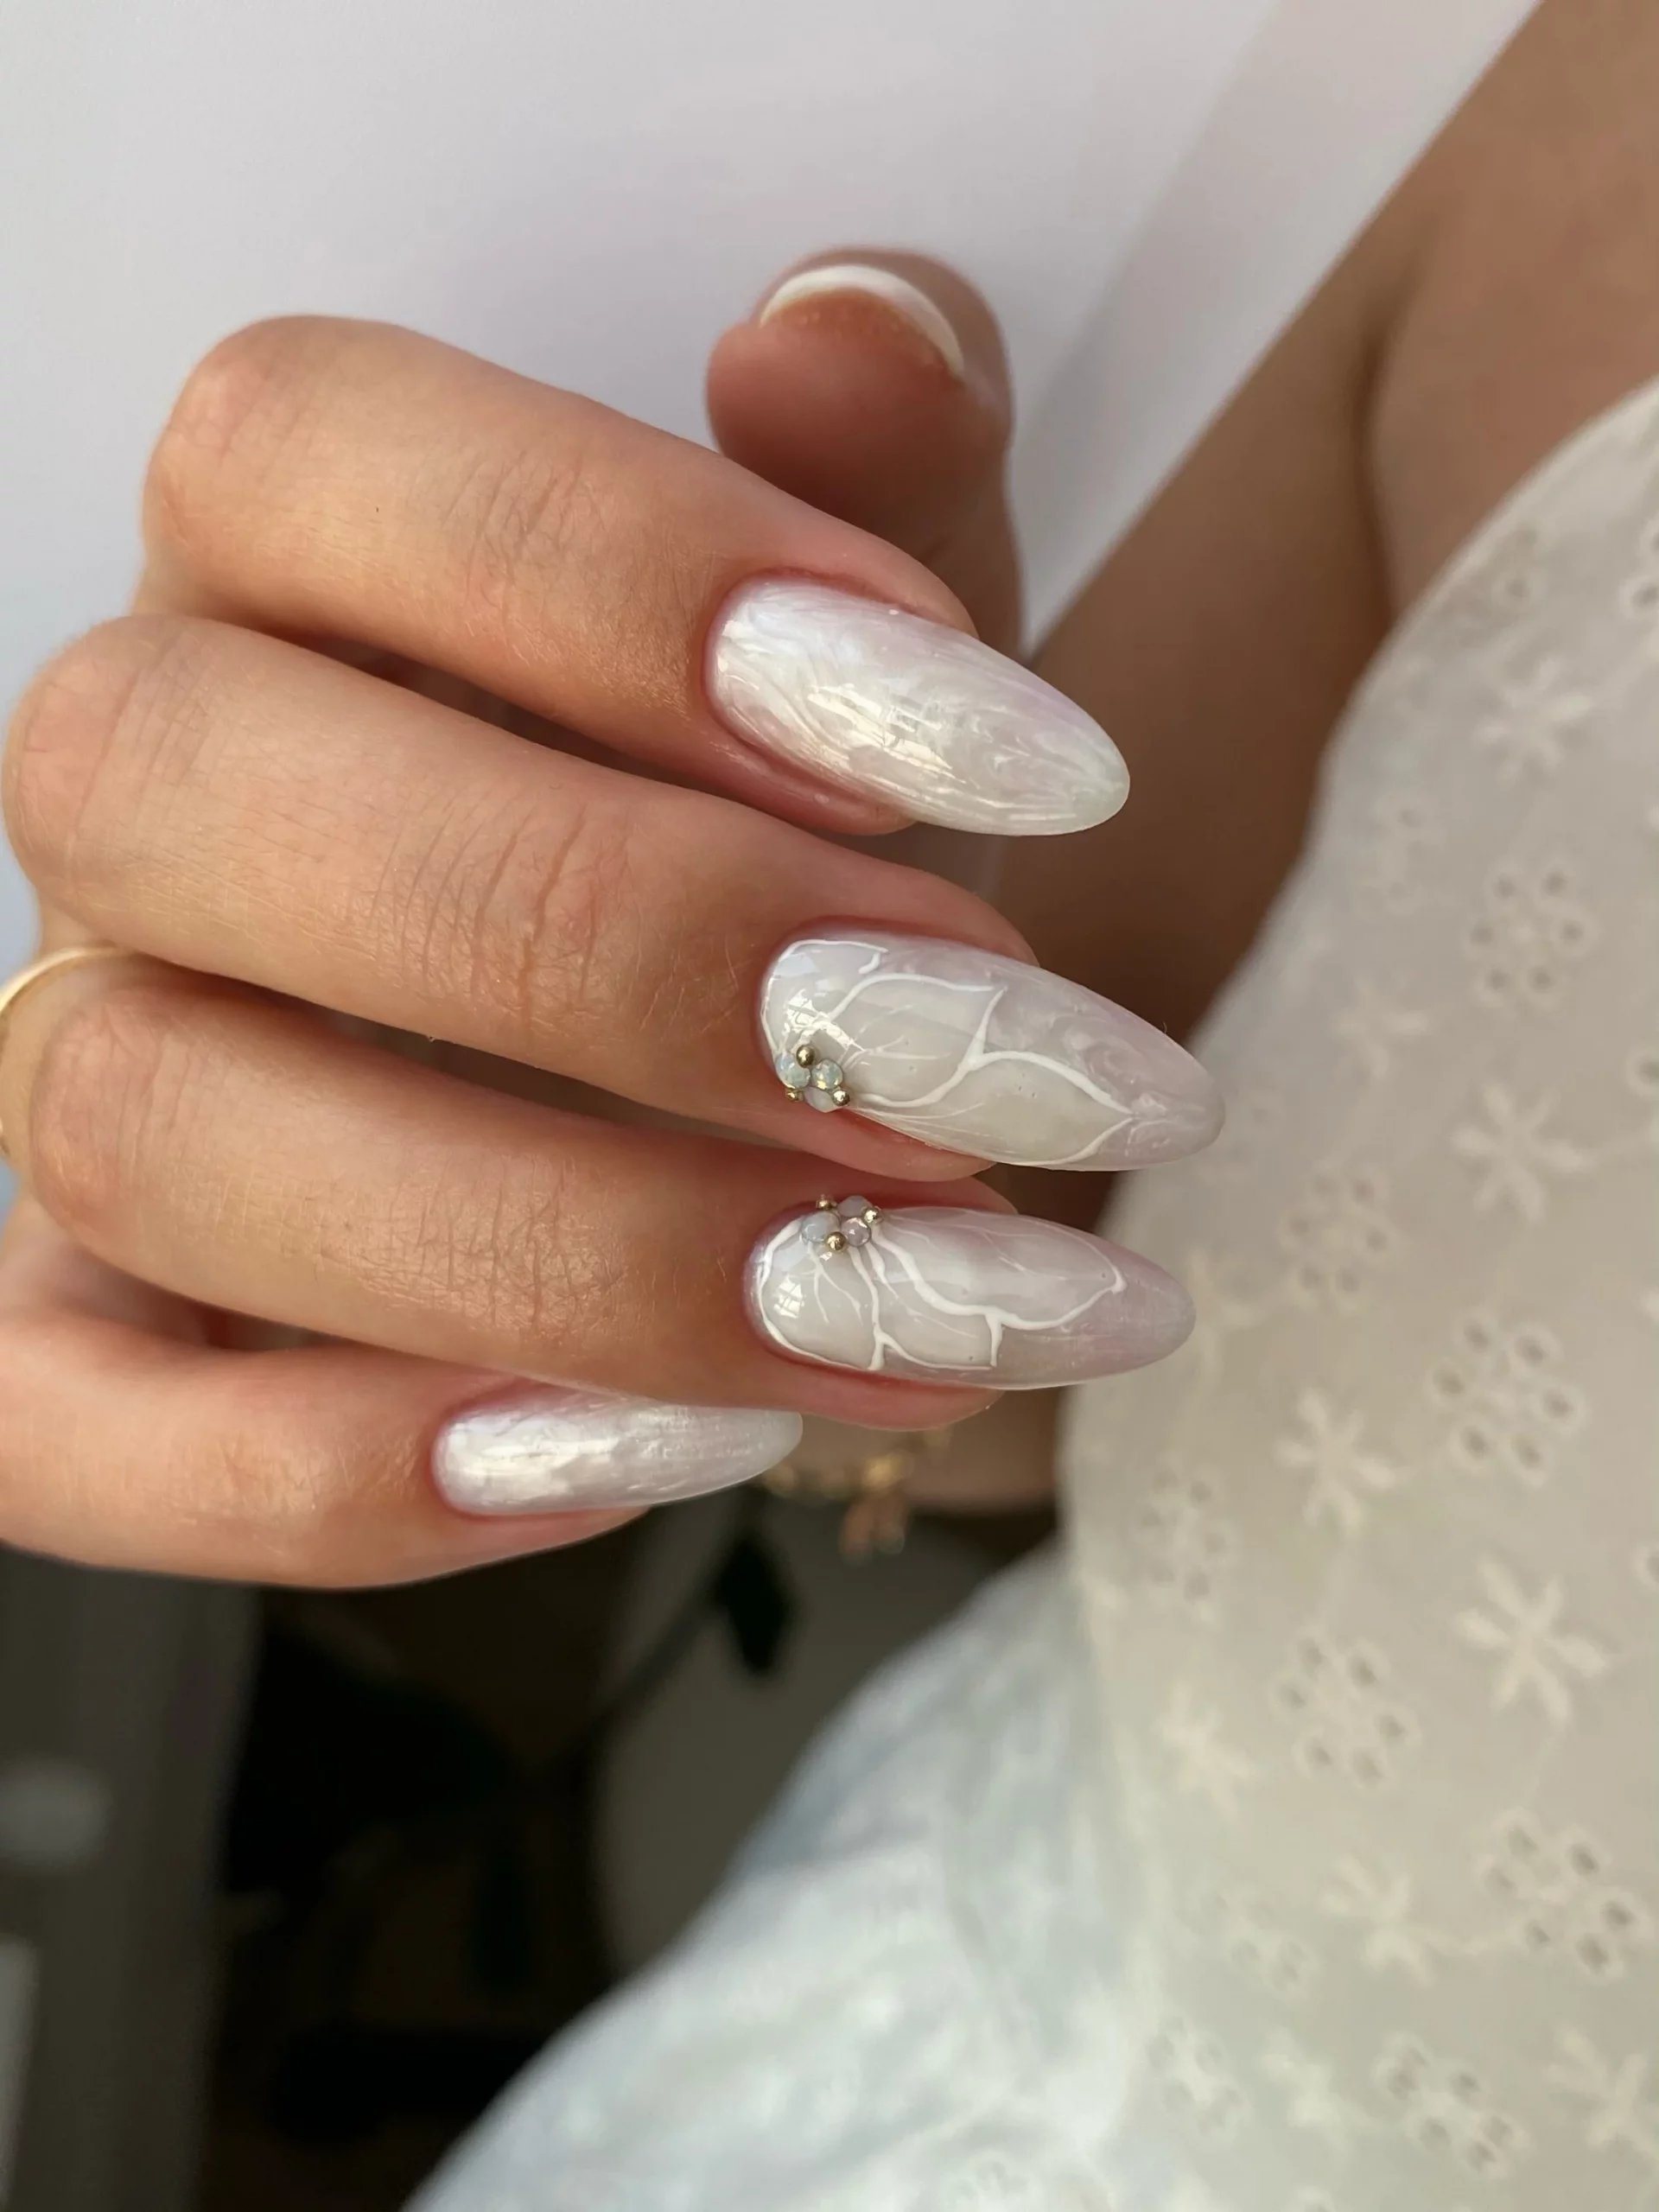
I would build this look with a milky white or translucent pearl gel, a sheer white art gel for the veining, a very fine liner brush, and a chrome or pearl powder if extra dimension is wanted. Small gold or champagne-toned beads can provide the raised detail near the cuticle. A glossy top coat is essential because the marble effect looks best when the surface is perfectly smooth.
The trick I would use is avoiding perfectly controlled lines. After applying the pearl base, I would draw irregular, branching strokes with diluted white gel, allowing some areas to remain almost transparent. A soft blending brush can blur the edges before curing, creating a more natural marble movement. Then I would add the tiny metallic accents and finish with top coat.
I find this style especially beautiful when the manicure needs to feel elegant without relying on obvious decoration. The pearly surface changes as the hands move, which makes the design feel different from one angle to another. It is sophisticated enough for an evening event but not so formal that I would hesitate to wear it with jeans.
Sheer Pink Almond Nails With Tiny Crystal Sparks
A sheer pink manicure does not need much to feel special, and this design proves it. The translucent rosy base allows the natural nail tone to remain visible, while a fine shimmer gives the surface a soft glow. Tiny crystals are positioned individually across the nails, almost like little points of light rather than a full embellishment design. The almond shape keeps the result feminine and streamlined.
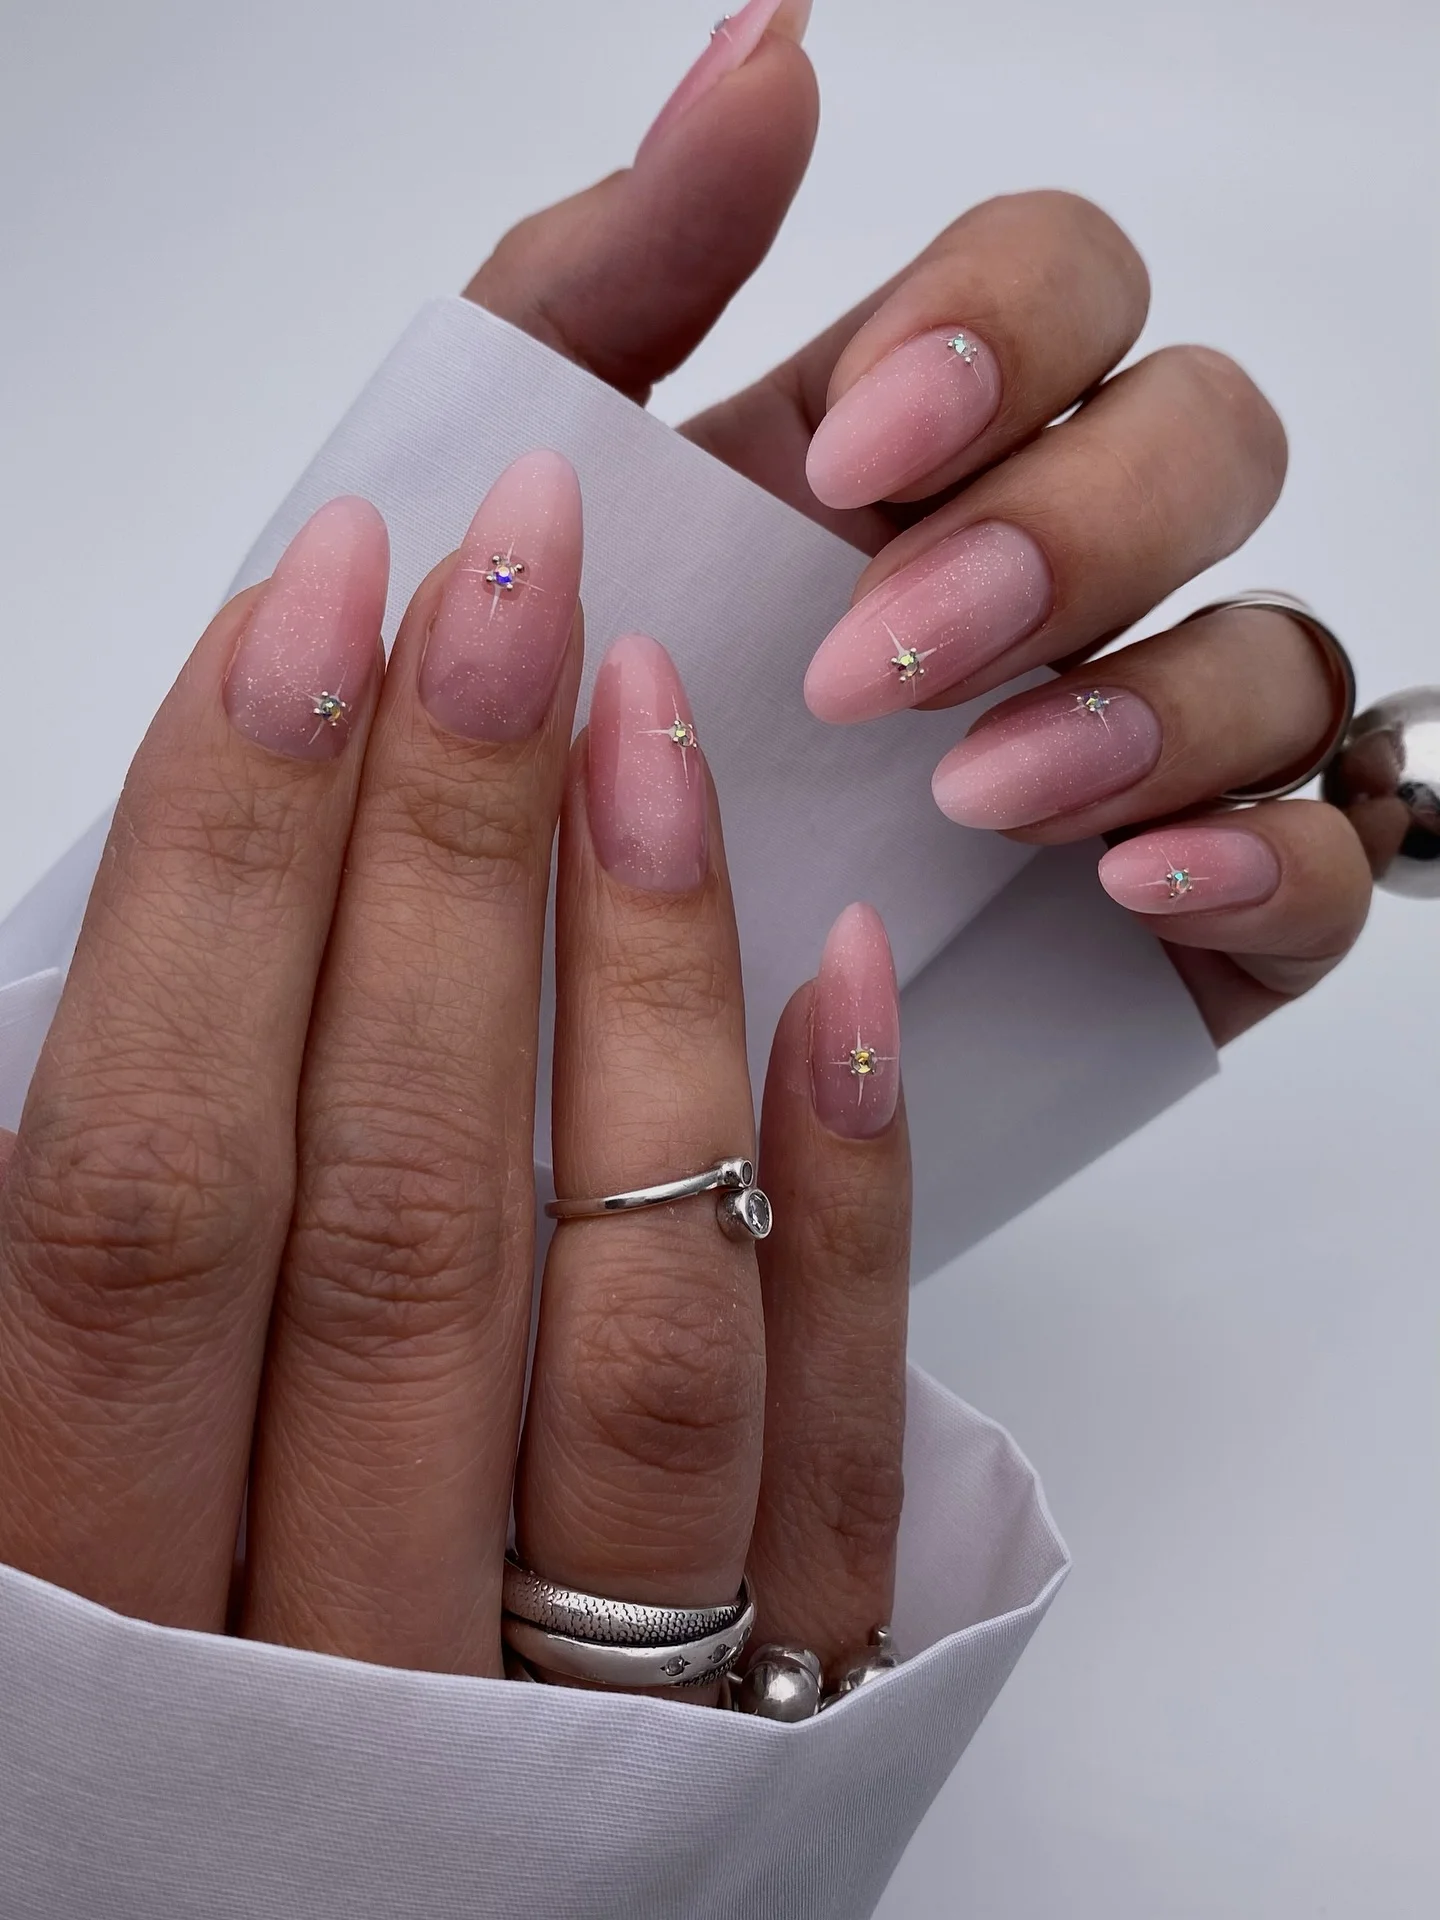
I would choose a sheer pink builder gel or jelly polish, a subtle shimmer top coat, tiny clear or iridescent crystals, and crystal adhesive. A small dotting tool or wax pencil makes the placement much easier. I would avoid a heavily pigmented pink because the transparency is what gives this manicure its airy quality.
After preparing the nails, I would apply the sheer pink in one or two thin coats, depending on the coverage I want. Once cured, I would place one or two crystals on each nail, deliberately changing their positions so the design feels organic. A final glossy layer around the stones locks everything into place while preserving that glassy finish.
This is probably the easiest design in the group for me to imagine wearing every day. It does not demand attention, but the tiny crystals reward anyone who notices. If you have been leaning toward a minimal manicure but still want something a little prettier than plain nude, this is a lovely middle ground.
Milky Almond Nails With Scattered Crystal Jewelry
Milky white is having one of those moments where simplicity feels incredibly fresh. The softly translucent base here is paired with a long almond shape and tiny crystals scattered across the surface. The embellishments are intentionally irregular, which keeps the manicure from looking overly planned. The result feels almost like delicate jewelry laid over a glossy nail.
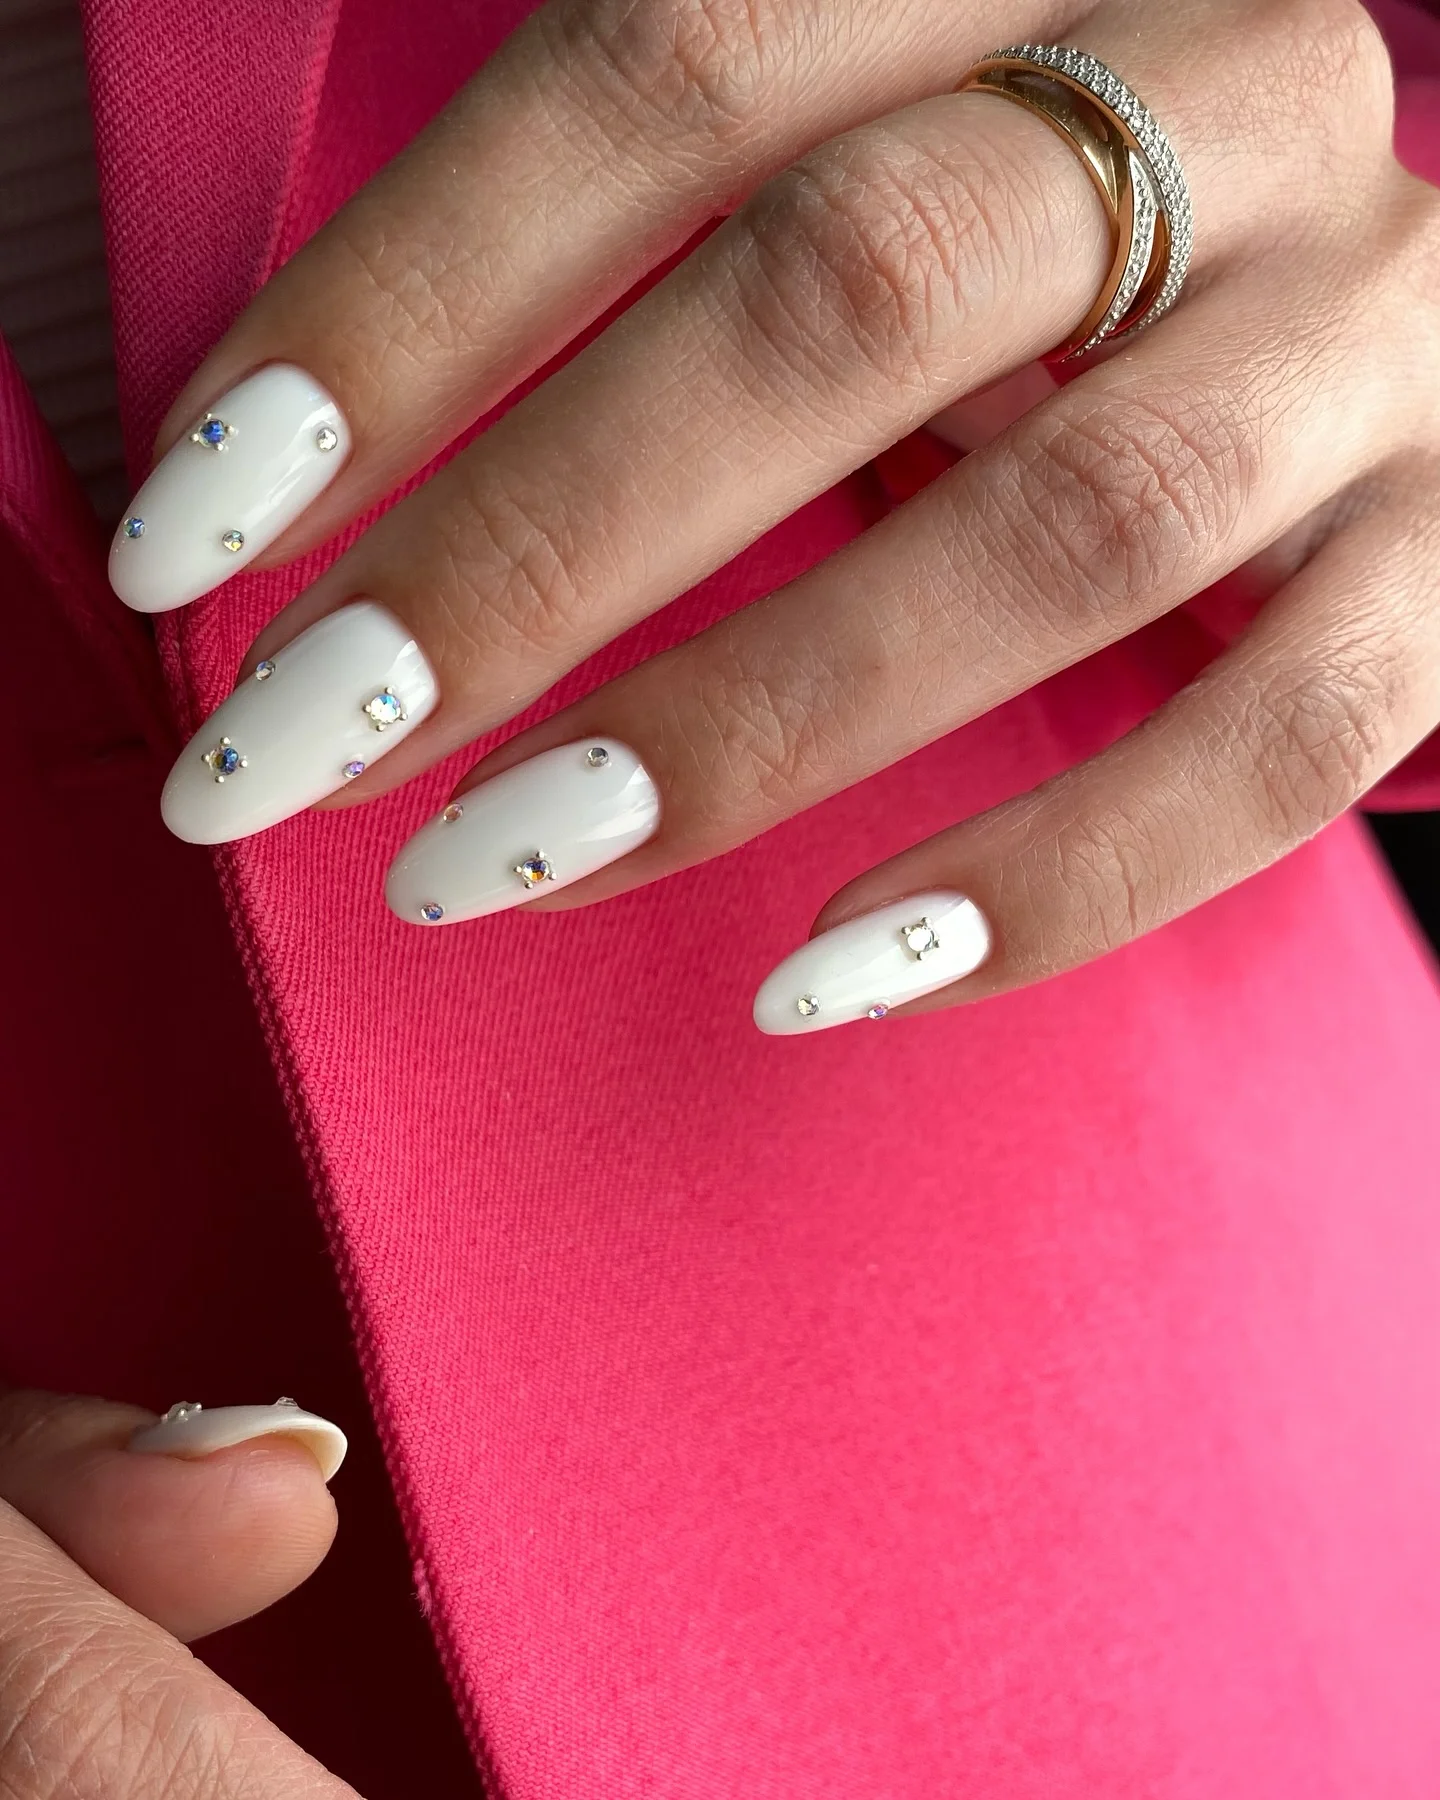
I would use a semi-sheer milky white gel, a clear glossy top coat, and several sizes of tiny crystals in clear and iridescent finishes. A little crystal gel is enough to hold each piece, and I would keep the stones relatively small so the almond silhouette remains the star. This design does not need glitter, chrome, or complicated artwork to make an impression.
I would apply the milky base carefully, making sure the color stays smooth around the cuticle and free edge. After curing, I would place the crystals with slightly different spacing on each nail. I like this less symmetrical approach because it makes the finished manicure look more personal and less like a repeating template.
There is something incredibly wearable about this combination. I could see it with a tailored blazer, a soft knit, or even a simple white tee. The manicure feels polished from a distance and much more interesting up close, which is exactly the kind of detail I tend to appreciate most.
Blush Nails With Sculptural Silver Line Art
Thin metallic lines can completely change the mood of a nude manicure. This design uses a soft blush-pink base as a quiet background for sweeping silver lines that curve, overlap, and create abstract shapes across selected nails. The lines are intentionally irregular rather than geometric, which gives the manicure a more artistic feel. Long squared tips add a clean contrast to the fluid artwork.
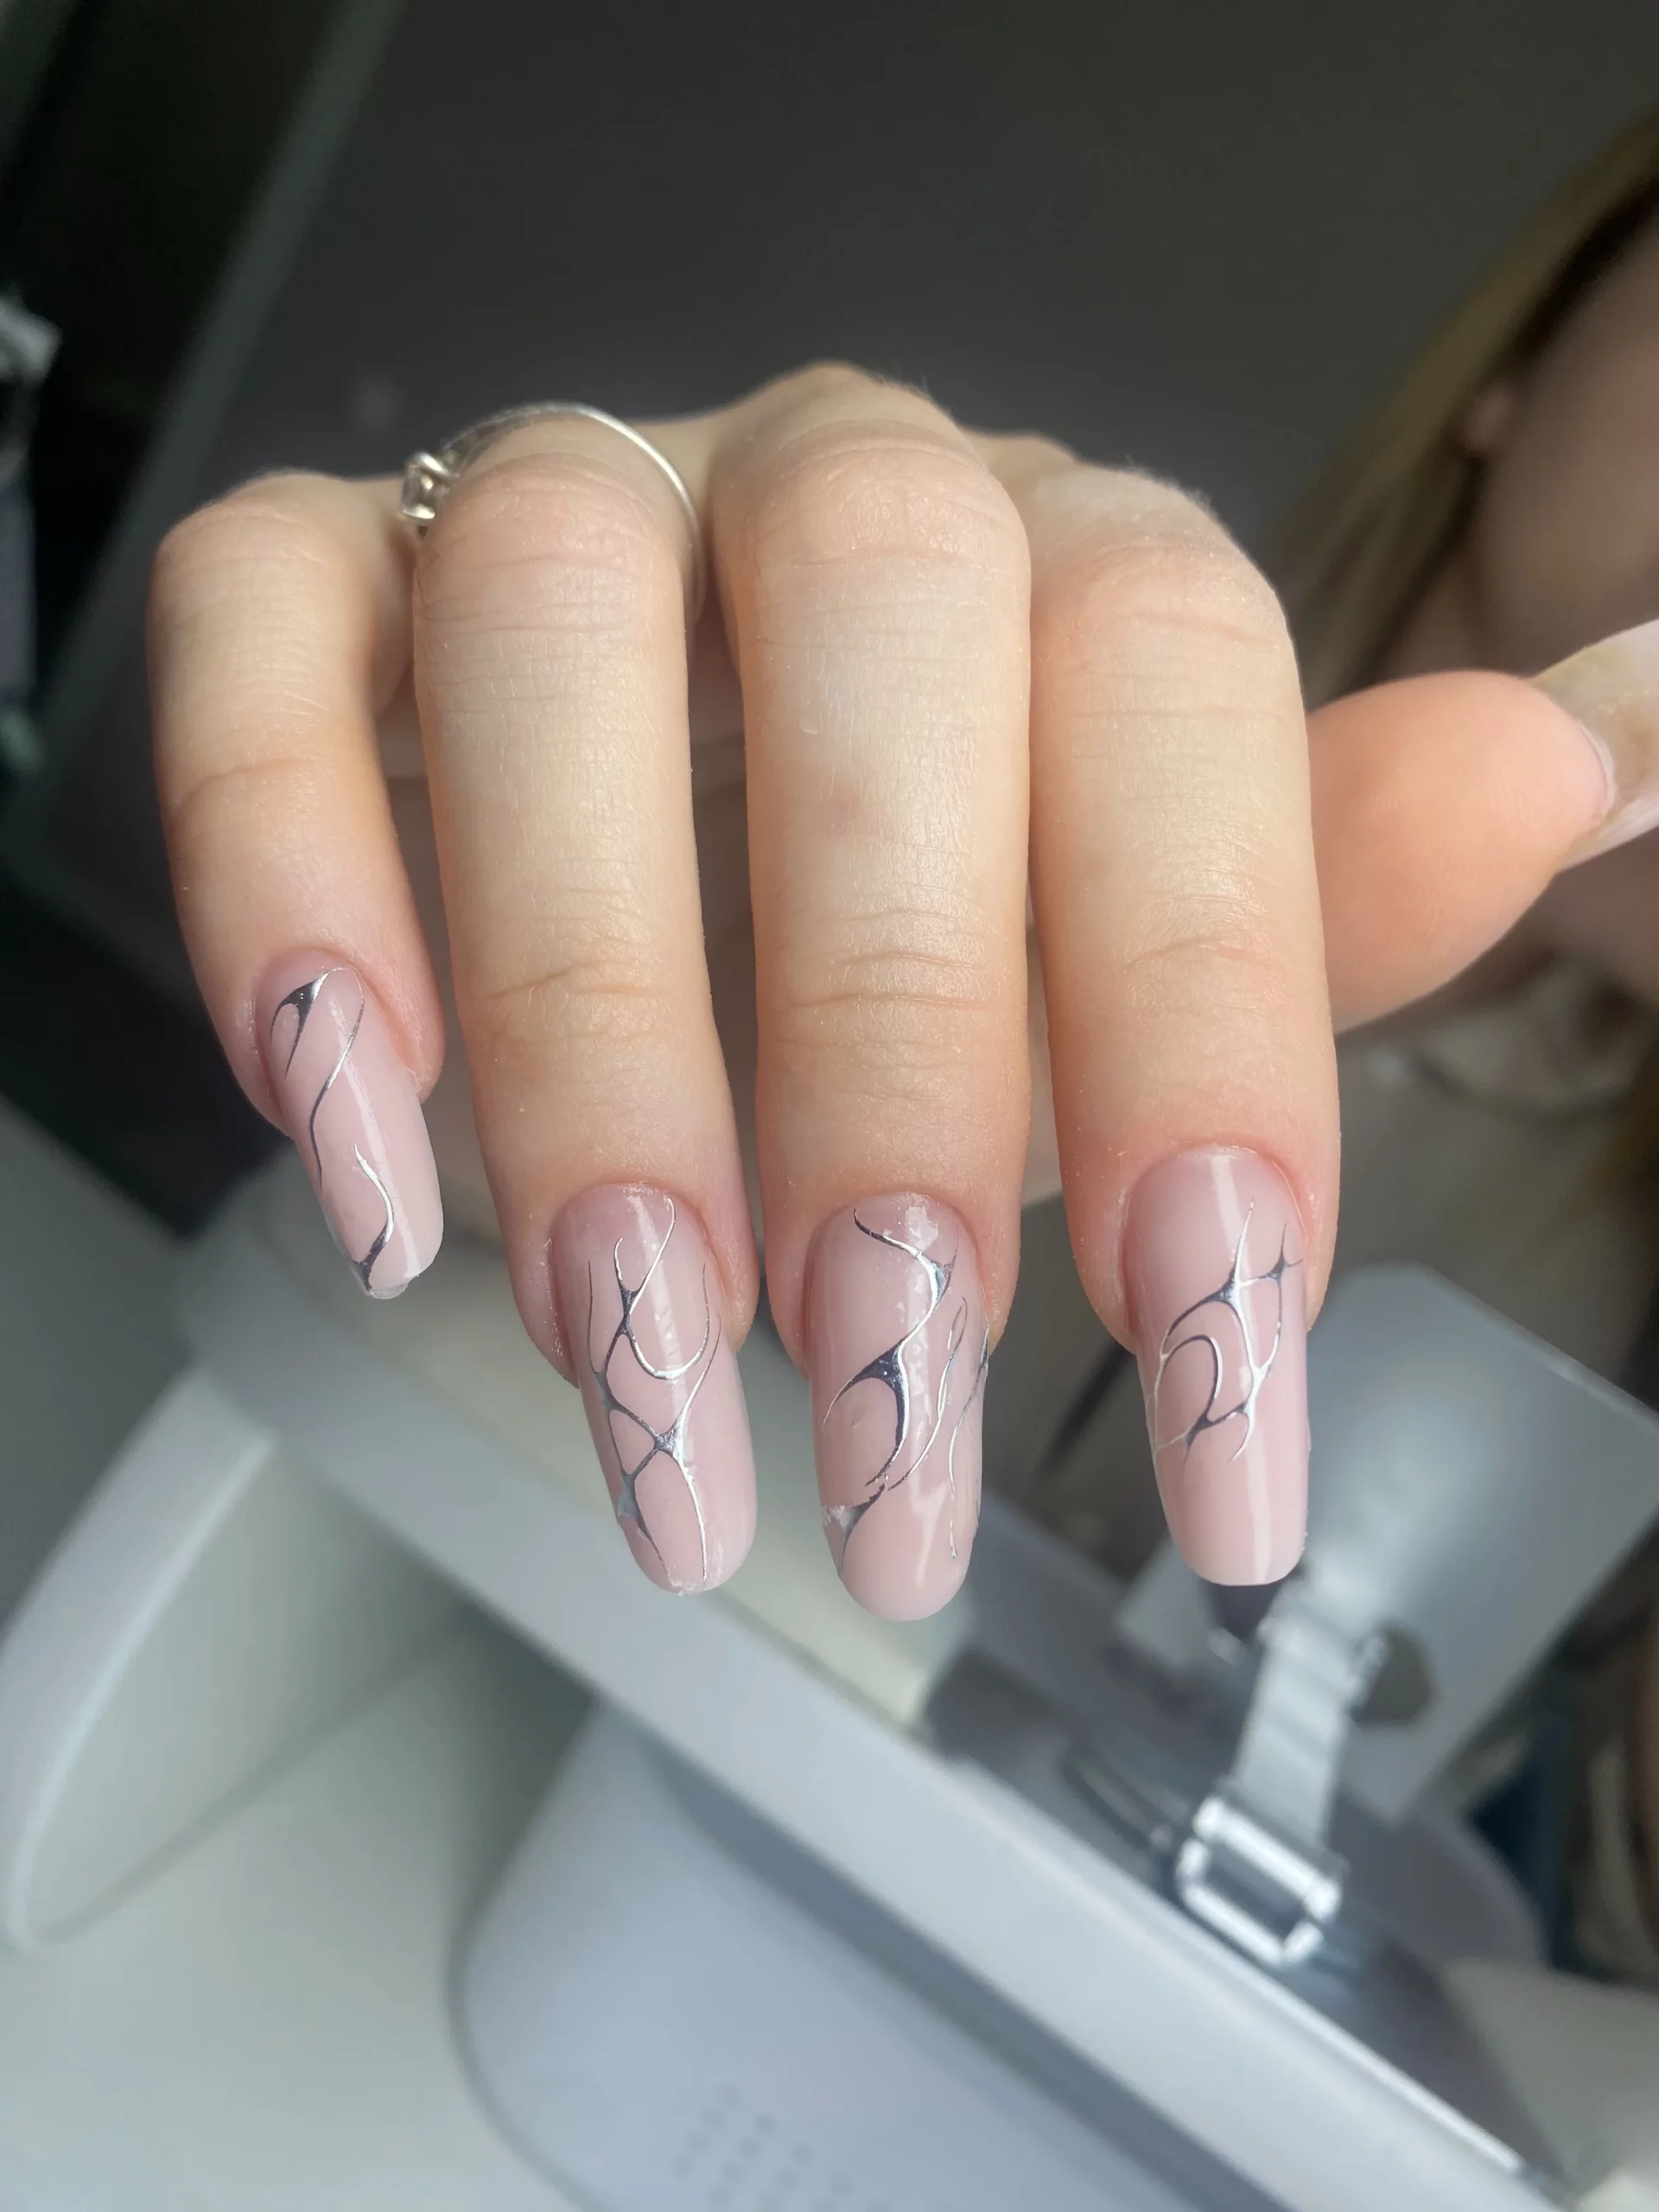
For this style, I would use a neutral blush gel polish, silver nail art gel or metallic polish, an ultra-fine liner brush, and a glossy top coat. The silver needs to be highly pigmented so the lines remain crisp even when they are extremely thin. I would also keep a cleanup brush and a little gel cleanser nearby because abstract line work rewards precision.
I would begin with the blush base and cure it completely before touching the nail art. Then I would draw each silver curve separately, allowing the lines to cross or change direction naturally. I would not try to make every nail identical; instead, I would repeat the same visual language across several nails and let each design develop differently.
I love this idea for someone who thinks traditional nail art feels too sweet. The blush base keeps it approachable, while the metallic line work introduces a cooler, almost gallery-like quality. It is also a clever way to make a simple manicure feel custom without covering every nail in decoration.
White French Nails With a Black Lace Accent
A classic white French manicure gets a sharper personality with one lace-inspired accent. The base remains clean and glossy, while the black detailing introduces a delicate contrast on a single nail. The square shape makes the white tips feel particularly crisp, and the restraint of the accent keeps the design from becoming costume-like. I like that the manicure can move between feminine and slightly edgy depending on what I wear.
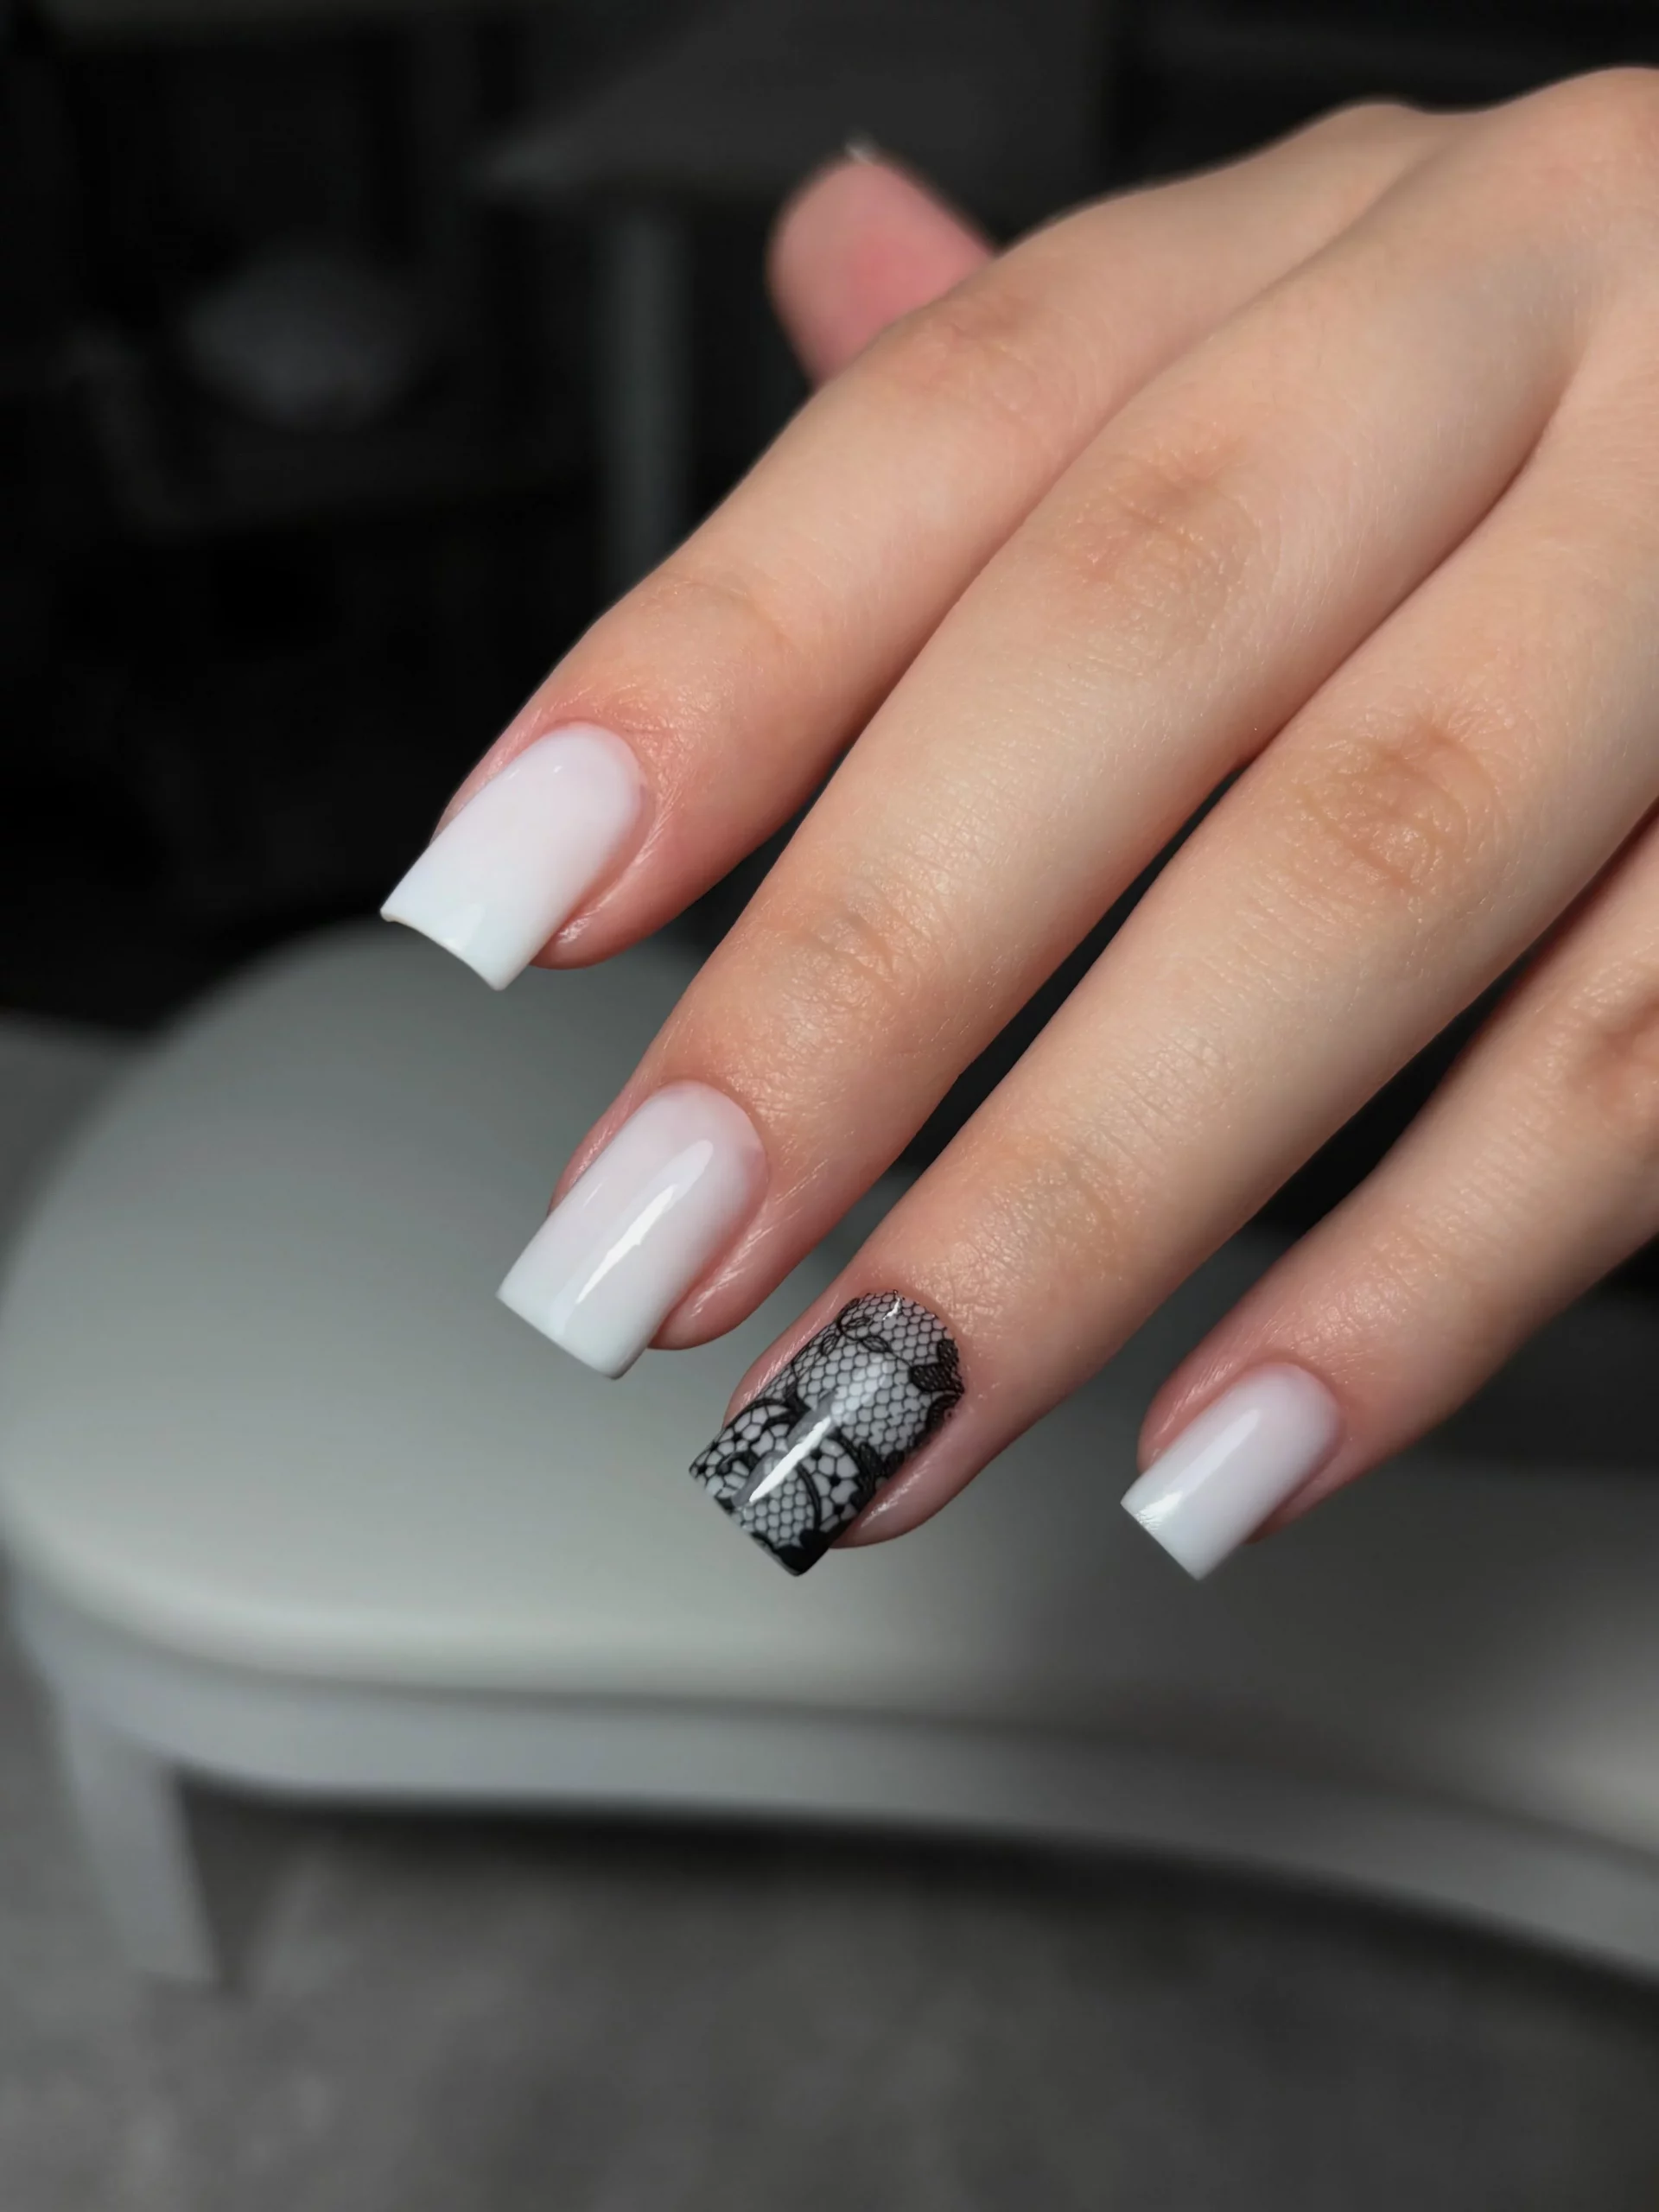
I would use a sheer pink or neutral base, a soft white gel for the French tips, black nail art gel, a very fine detail brush, and a high-gloss top coat. For the lace effect, a stamping plate or fine nail-art decals could make the process easier at home. The key is using a true black with good pigmentation so the lace lines stay delicate rather than blurry.
I would shape the nails evenly first, then apply the sheer base and create the white tips. For the accent, I would work over a cured base and draw small interconnected lines that resemble lace rather than filling the entire nail with black. A thin layer of top coat seals the design and brings the white and black elements into the same glossy finish.
This is one of those manicures I would choose when a traditional French feels almost too predictable. One carefully placed dark accent changes everything. It would look particularly striking with black accessories, but the white base keeps it versatile enough for everyday outfits.
White Marble French With Graphic Black Veining
Here is where the French manicure becomes much more graphic. A glossy white base creates a clean canvas, while irregular black marble veining runs across the tips and selected areas of the nails. Some nails remain almost completely white, which gives the stronger marble accents room to stand out. The short square shape makes the contrast feel modern and confident rather than overly delicate.
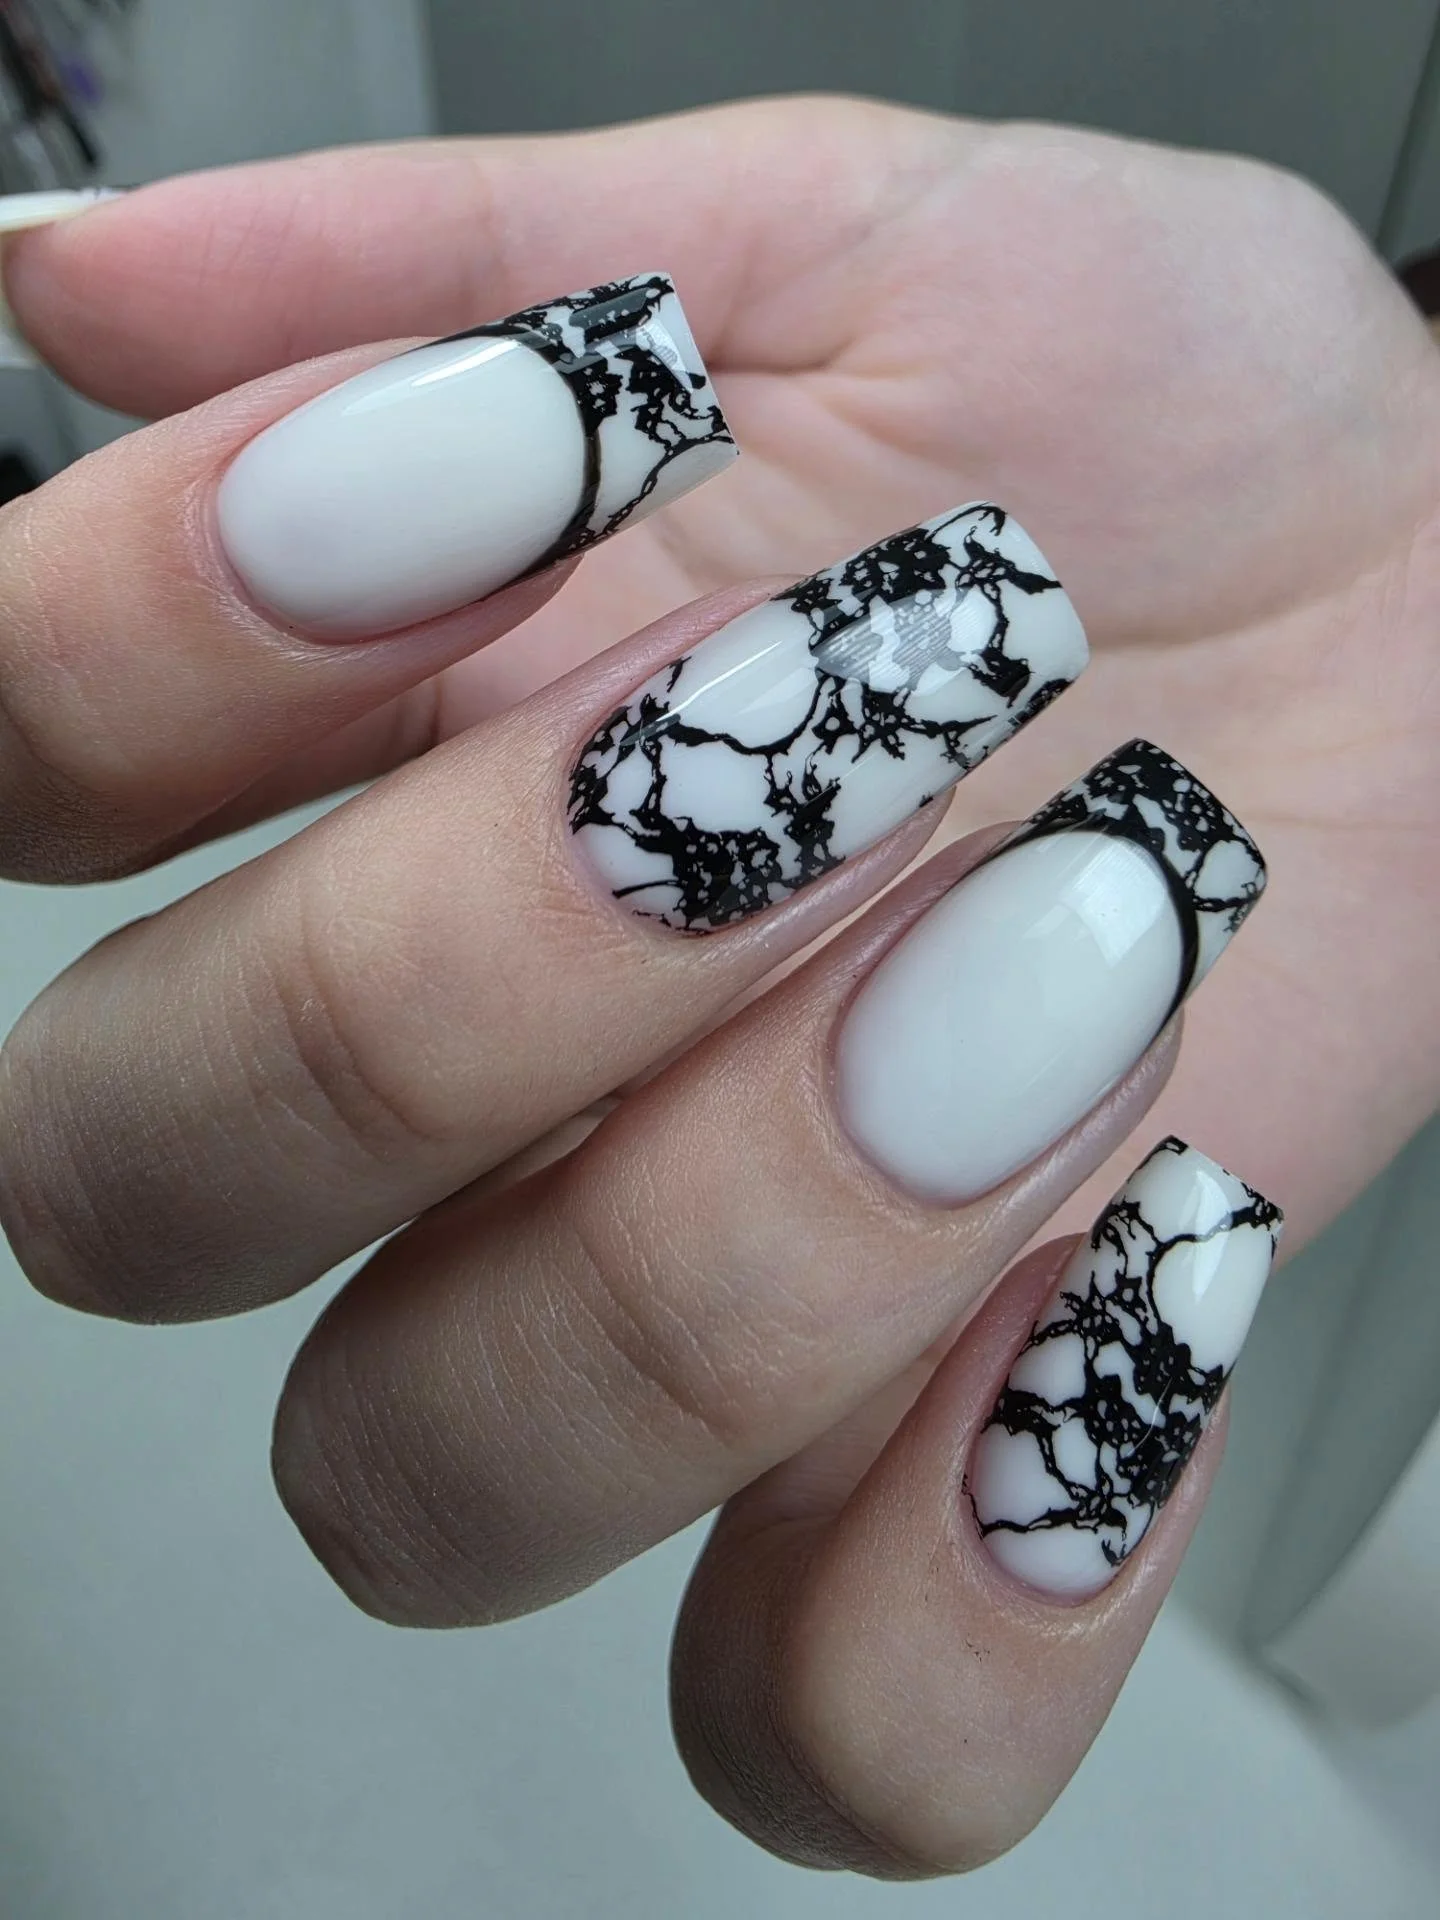
I would use an opaque soft-white gel, a highly pigmented black nail art gel, a fine liner brush, and a glossy top coat. A slightly translucent gray can also be useful for softening parts of the marble effect. I would keep the black lines varied in thickness because perfectly uniform lines would make the design look more graphic than marbled.
I would apply the white base first and cure it thoroughly. Then I would sketch thin, irregular black lines across the selected tips and nails, occasionally branching them into smaller cracks. Before curing, I could soften a few sections with a tiny amount of translucent white gel, creating more depth. The final glossy layer is what gives the manicure that smooth, almost polished-stone finish.
For me, this is the boldest interpretation of the white manicure in this collection, but it still feels surprisingly wearable. The black and white combination works with almost any wardrobe, while the marble pattern keeps the nails from looking too basic. If I wanted a manicure that people notice without using bright color, this is exactly where I would look.
The best manicure details are often the ones that feel like a natural extension of your personal style. I love how a soft nude base, a tiny crystal, a glossy finish, or a creative French tip can completely refresh a familiar look without making it feel overdone. Whether you prefer delicate details or a little more artistic drama, there is always room to experiment. So, next time you sit down for a manicure, why not try one small detail that makes the whole look feel unmistakably yours?

