
I’ve been seeing caramel balayage on every other head in my coffee shop this summer. Not the bright blonde of last year, but a warm, buttery shade that somehow looks both expensive and like you just came back from the beach. I finally tried it myself, and I get the hype.
This roundup has 25 ways to wear Caramel Balayage, from soft face-framing pieces to full-on dimensional waves. It works on straight, wavy, and curly textures, and the grow-out is surprisingly forgiving even for those of us with fine hair that shows every root line by week five. Whether you want a subtle shift or a dramatic change, there’s something here.
Rich Caramel Balayage on Mid-Back Waves
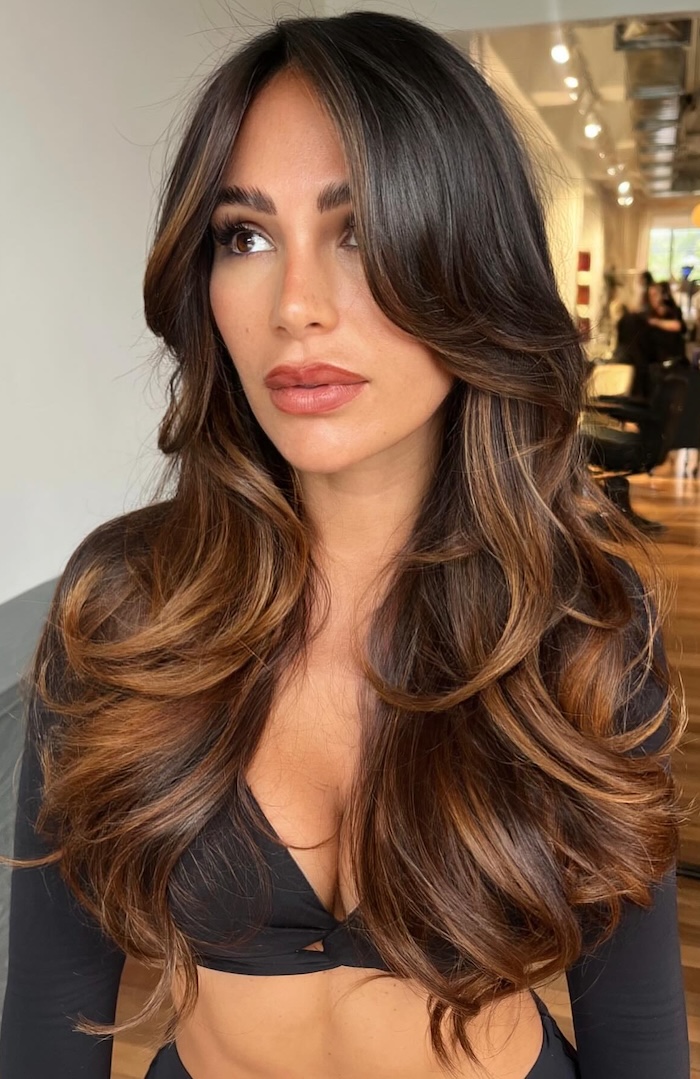
The richest caramel tones I have seen on a dark brown base. This balayage technique places warm caramel highlights through the mid-lengths and ends, leaving the roots dark. The tone reads warm and sun-kissed, not brassy. The length hits mid-back, and the loose waves show off the dimension. The texture is medium density and naturally wavy, which helps the colour blend softly. This combination flatters anyone with a warm skin tone and medium to thick hair. Fine hair might need more layering to keep the shape from falling flat. The dark base means you can go longer between touch-ups without a harsh line.
Voluminous Blowout With Caramel Blonde Balayage
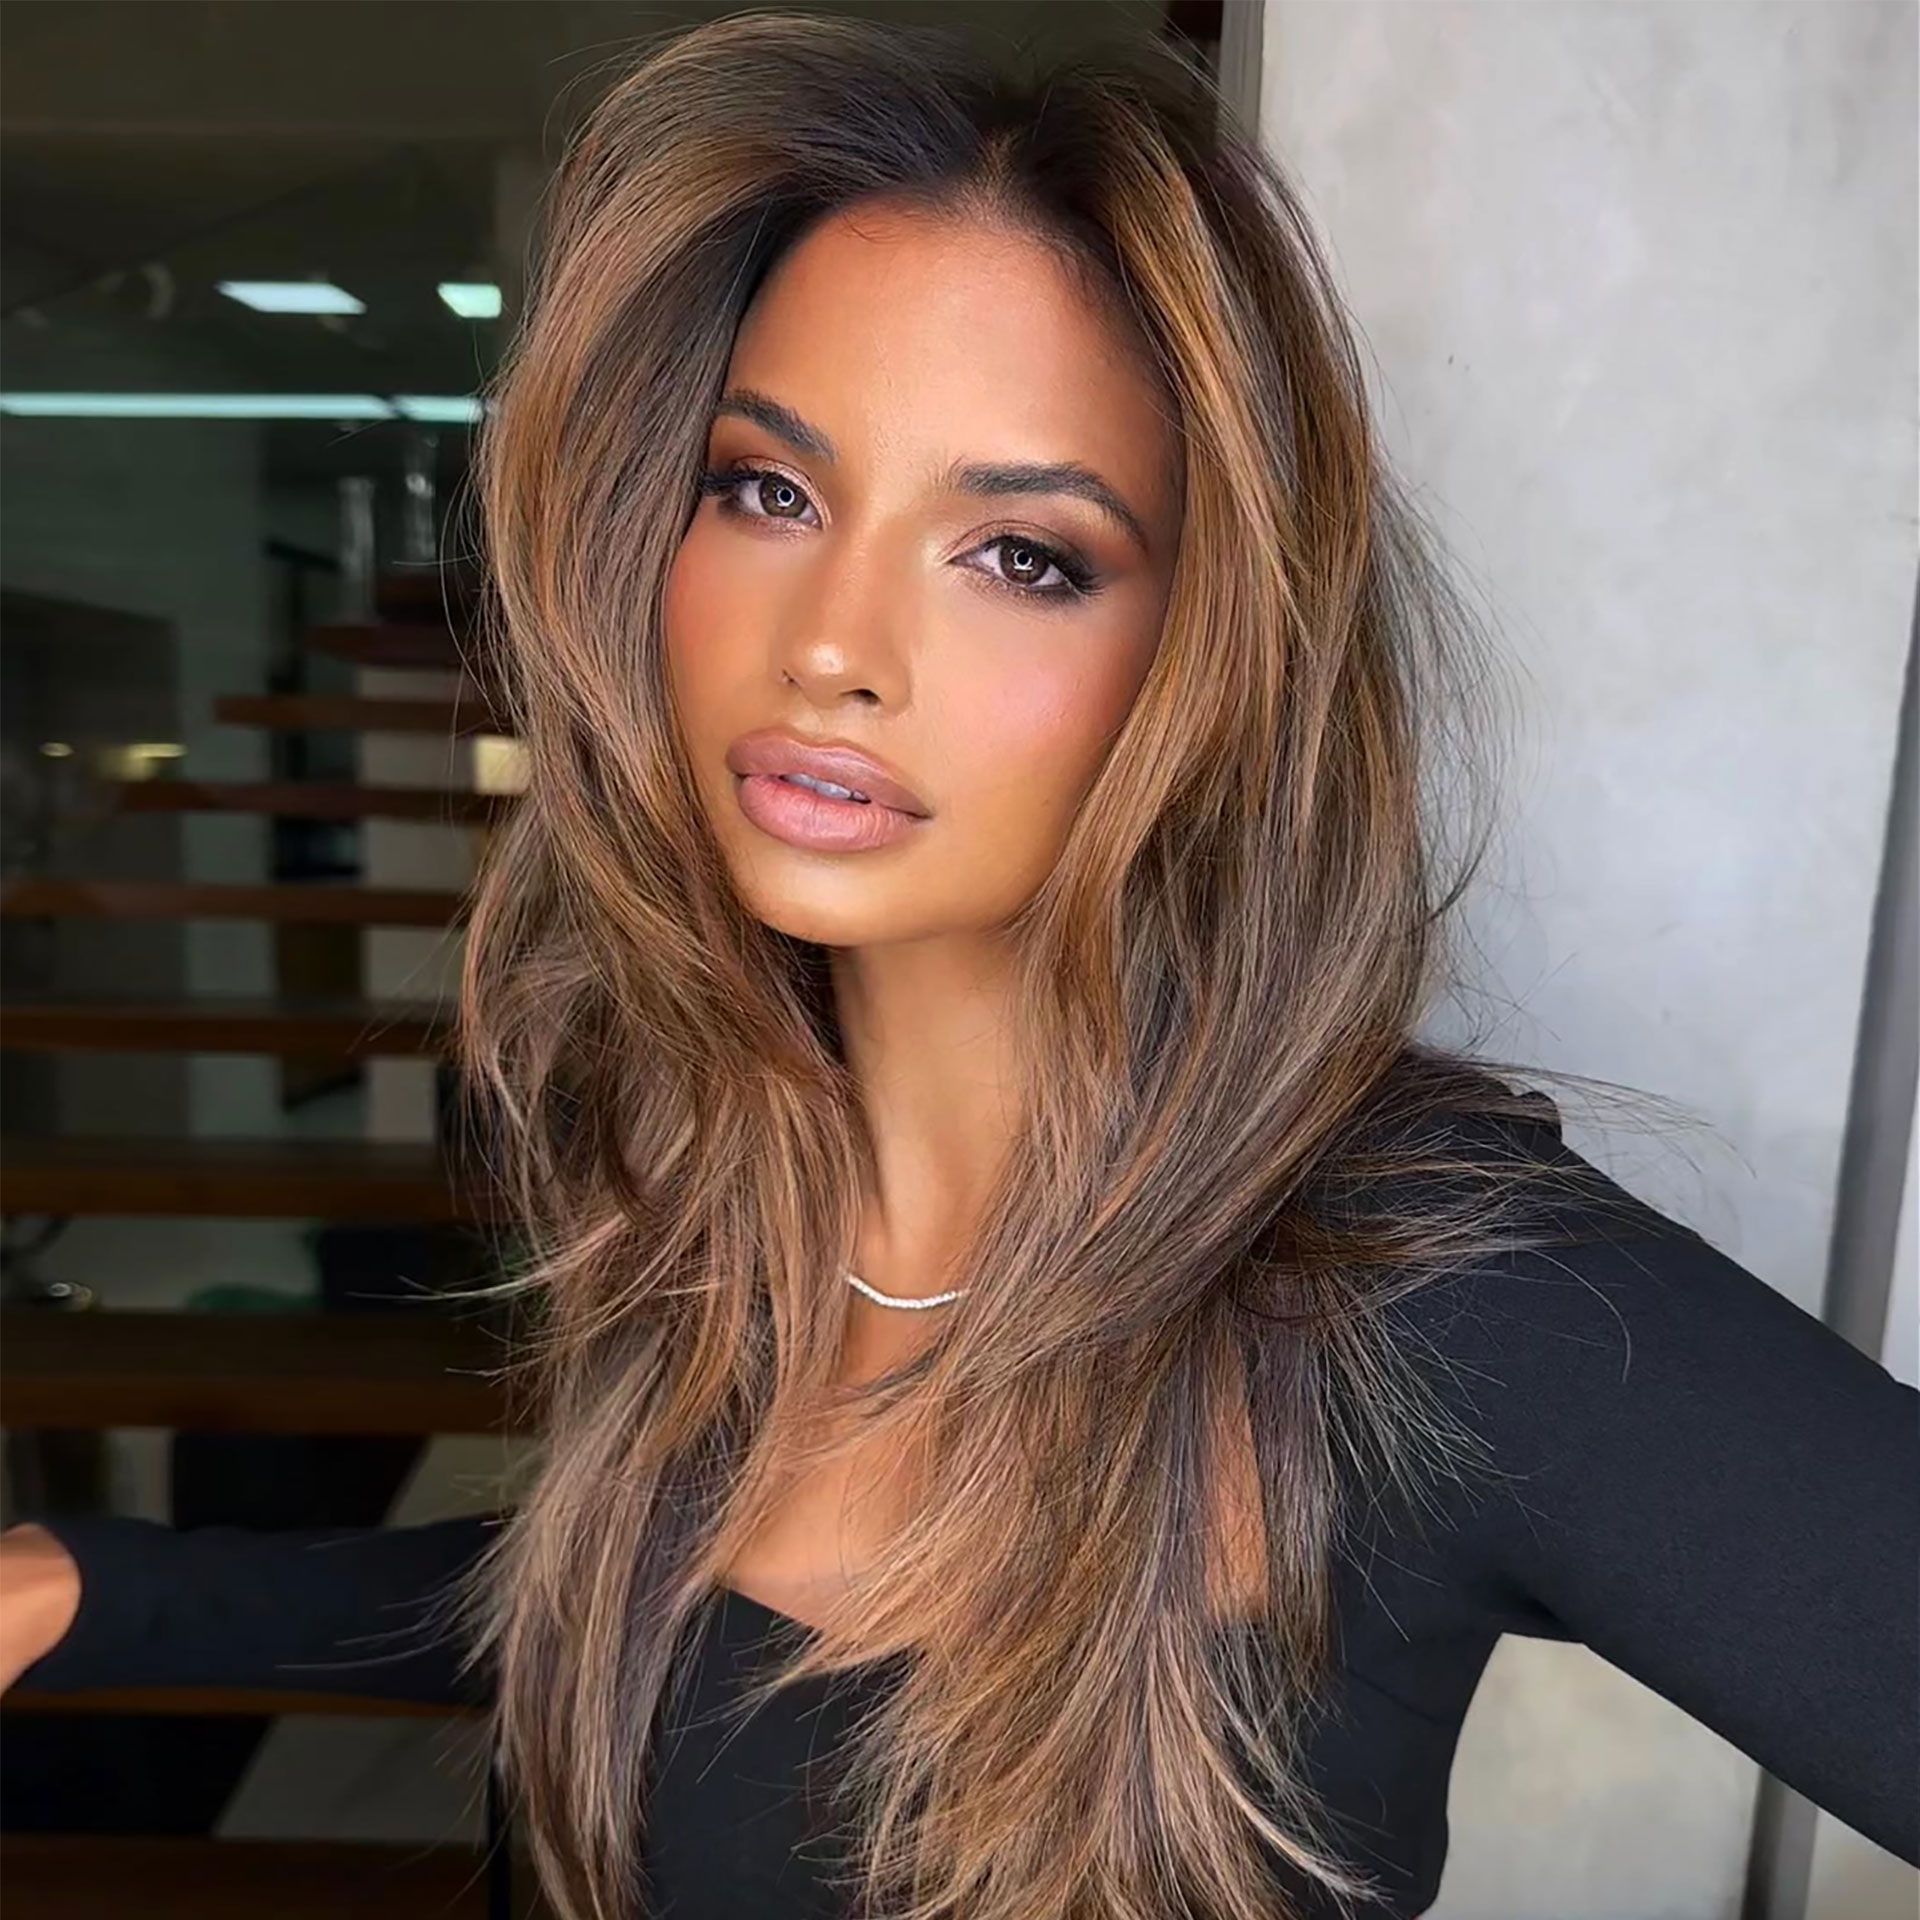
How do you get that much volume without it falling flat? The balayage technique here does the work: caramel and blonde highlights are painted onto a dark brown base, concentrating on the face-framing layers and ends. The result is a voluminous blowout that looks lifted for hours.
- Dark brown base with caramel and blonde balayage highlights
- Mid-back length with face-framing layers
- Thick, wavy texture that holds the blowout
- Blowout styling with a round brush for lift at the roots
- Ask your stylist for a soft balayage that starts below the crown to keep the root dark
The mix of warm caramel and cool blonde creates dimension that catches the light. The technique keeps the colour from looking stripey.
Dimensional Honey Caramel Balayage
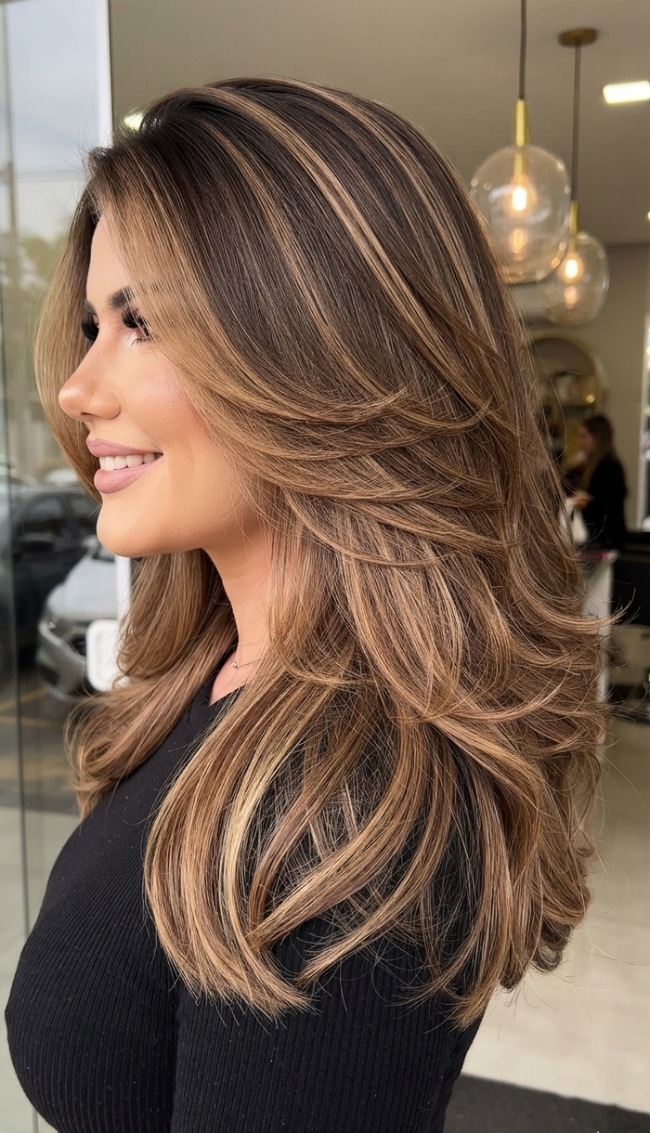
Honey caramel is warmer than standard caramel, but not as golden as blonde. This balayage uses a honey caramel tone on a brunette base, painted through the mid-lengths and ends. The face-framing pieces get a bit more concentration, which brightens the face. The length is mid-back, and the thick, wavy texture gives the colour depth. The honey tone adds warmth without going orange.
Compared to a classic caramel balayage, honey caramel reads softer and more dimensional. It suits those with neutral to warm skin tones better than a cool-toned caramel. The technique is the same: hand-painted sections for a natural blend. The result is a sun-kissed look that does not need constant toning. If you are coming from blonde, this tone eases the transition without a harsh line.
Collarbone Lob With Caramel Balayage
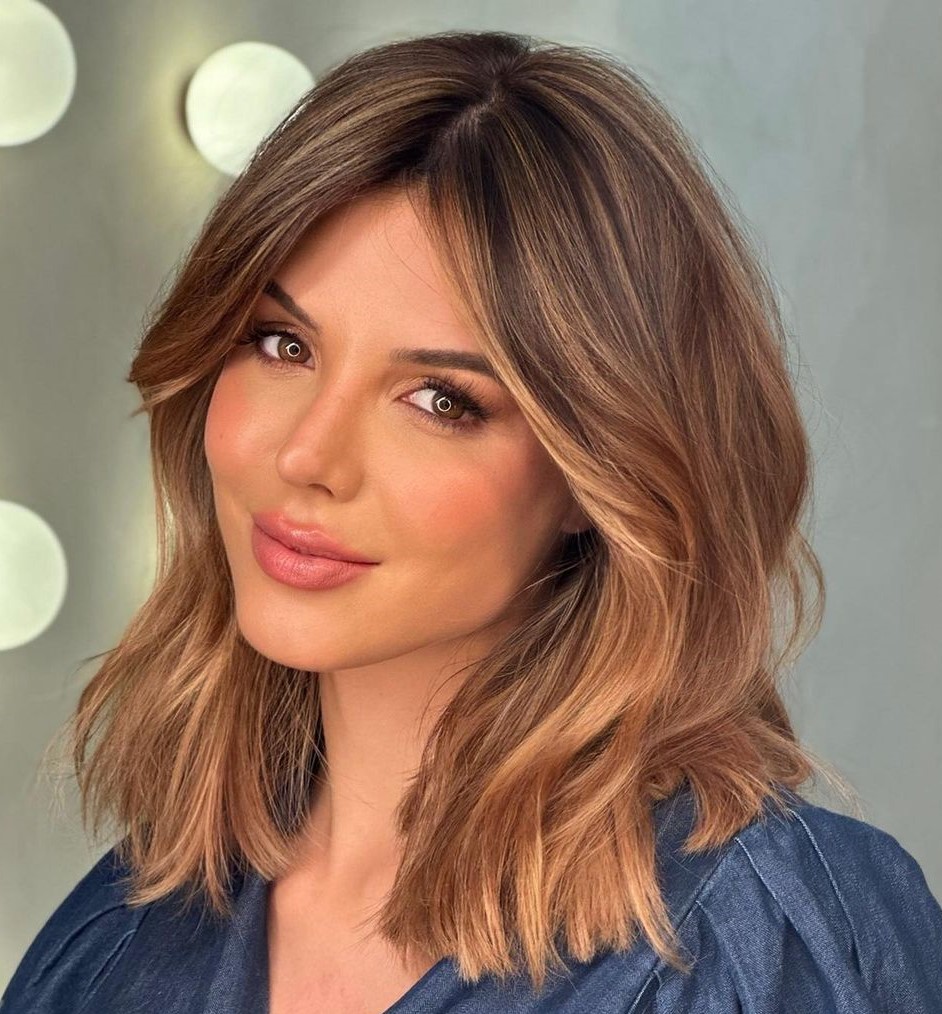
I’ll admit, I was skeptical about curtain bangs with a lob. But the collarbone lob caramel balayage works because the length hits just above the shoulder, so the bangs have room to sweep without tangling. The dark brown base keeps the roots low-maintenance, and the caramel balayage lightens the ends. Styling takes ten minutes with a round brush on the bangs. The texture is wavy and medium density, which holds the shape without falling flat by noon. Trim every eight weeks keeps the lob crisp.
Face-Framing Caramel Bangs
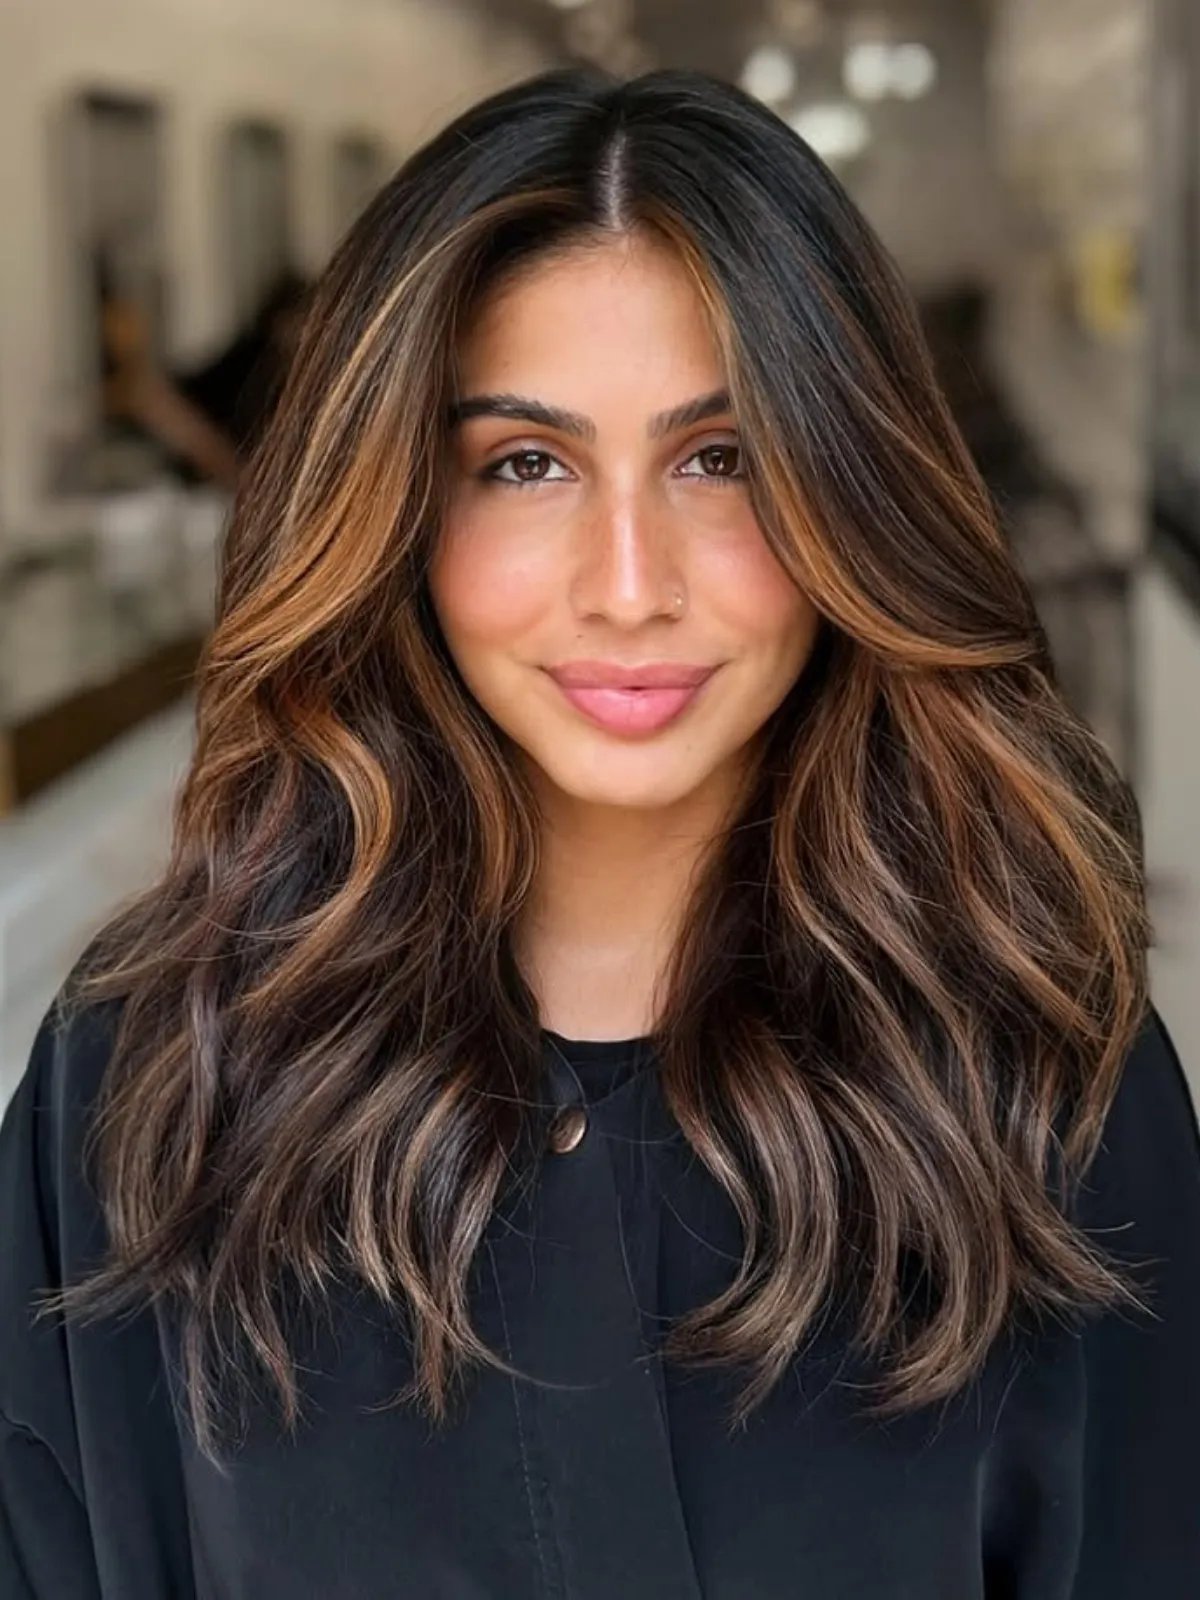
Face-framing caramel bangs? Yes, please. The dark brown base grounds the look, and the caramel balayage highlights around the front soften the whole face without committing to full lightness. On thick, wavy hair, the bangs blend into the layers naturally — no blunt line, no harsh contrast. The tone is warm but not golden, which works for anyone who wants a pop of color without going blonde. Styling takes about fifteen minutes with a curling iron on the bangs and ends. If your hair is fine or straight, the bangs might separate by noon; this one is for texture that holds.
Seamless Caramel Balayage Blend
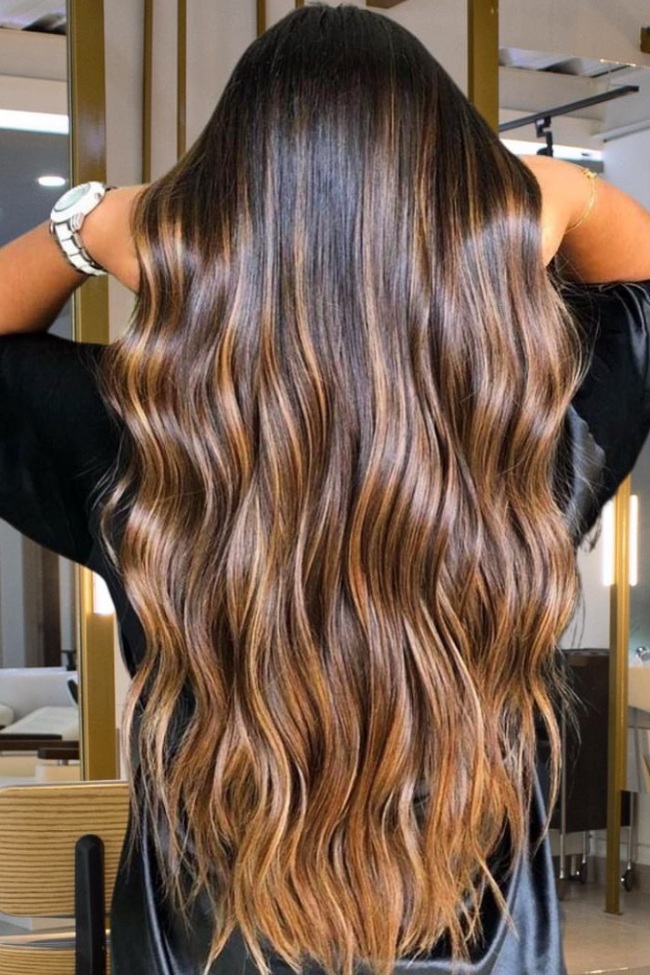
The back view tells the whole story. That dark brown base meets caramel in a way that has no hard line. The balayage technique here is about feathering the lightener through the mid-lengths and ends, not painting chunks. It’s a seamless caramel balayage because the stylist kept the transition gradual, so the warm caramel tones look like they grew in, not like they were painted on. The mid-back length gives enough canvas for the gradient to spread. Thick, wavy texture helps diffuse the colour further. This is a salon-only job. The precision of the blend requires a trained hand and a good eye for where the light naturally hits.
What makes this work is the base shade staying dark and rich. The caramel never goes too light, so it reads as depth, not damage. The waves are styled with a curling iron, about 15 minutes of work. But the real effort is in the chair: three hours minimum for this kind of seamless caramel balayage. The grow-out is forgiving because the blend starts low. You can go 10-12 weeks before a refresh.
Natural Sun-Kissed Caramel Balayage
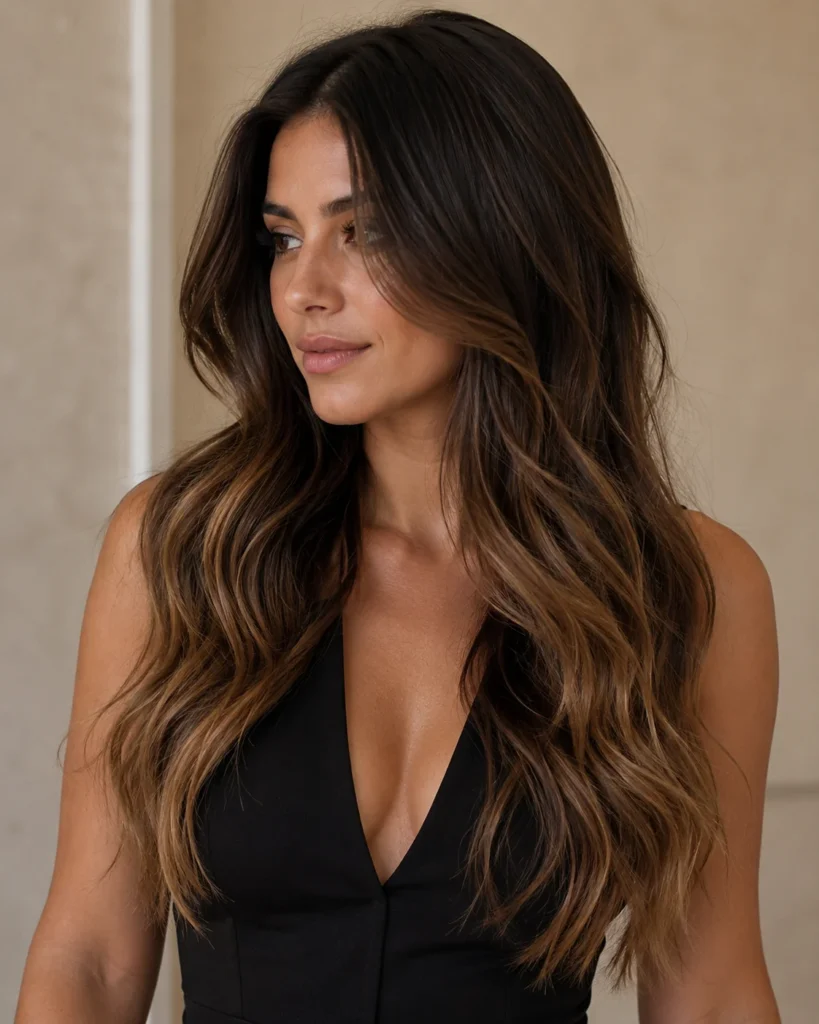
The first warm day of spring, and this is what I want on my head. The dark brown base keeps it grounded, while the warm caramel balayage catches the light like a sun-kissed effect. The technique is classic balayage, hand-painted sections that concentrate the colour on the surface and ends. The tone is a true warm caramel, not too golden, not too red. Mid-back length with thick, wavy texture gives the colour room to move. This is a natural caramel balayage that looks like you spent a month at the beach, not a day in the salon. It’s the kind of colour that transitions from summer into early fall without looking dated. The loose waves take about 15 minutes with a large barrel iron.
Voluminous Blowout With Warm Caramel
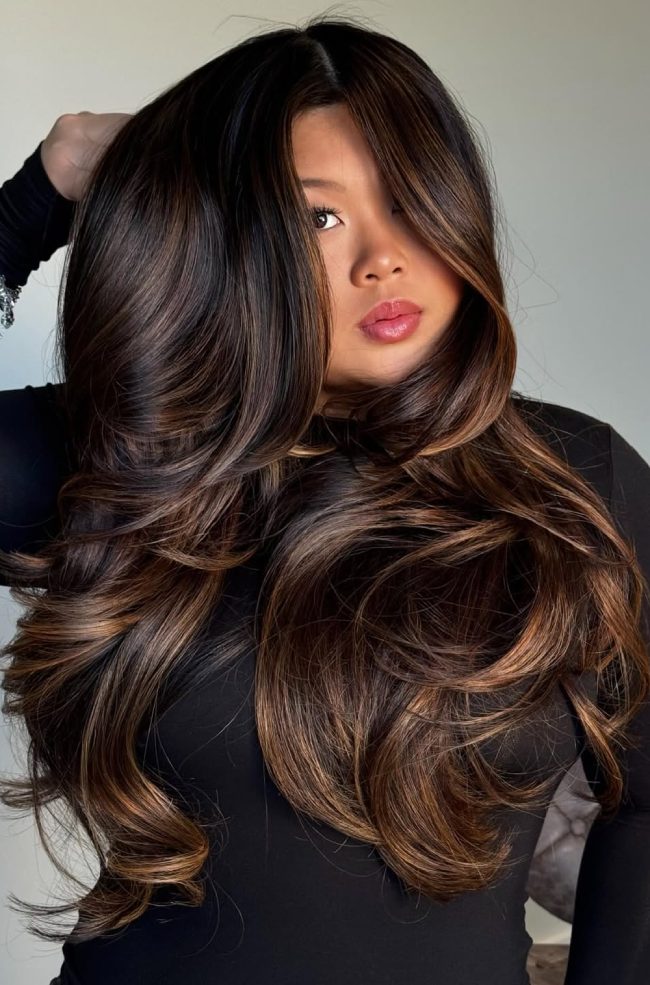
Can you get this volume at home? Not really. The voluminous caramel balayage starts in the salon. The colour is a dark brown base with hand-painted warm caramel balayage, placed to frame the face and add dimension. The blowout technique requires a round brush, a diffuser attachment, and the patience to dry each section in the right direction. The face-framing layers are cut to support the lift. The length is mid-back, so the weight pulls the volume down unless you dry it properly. Thick, wavy texture helps hold the shape. This is a salon look, through and through. The balayage itself is straightforward, but the styling is the real skill. You can try it at home, but expect a learning curve and about 25 minutes of drying time.
The key is the root lift. The stylist uses a volumizing product at the roots and dries the hair upside down. The warm caramel tones catch the light and make the volume look even bigger. If you attempt this at home, use a heat protectant and a round brush. But honestly? Book the salon for the colour and ask them to show you the blowout technique. It’s worth the extra time.
Dark Brown Base With Caramel Balayage Collarbone Waves With Caramel Balayage
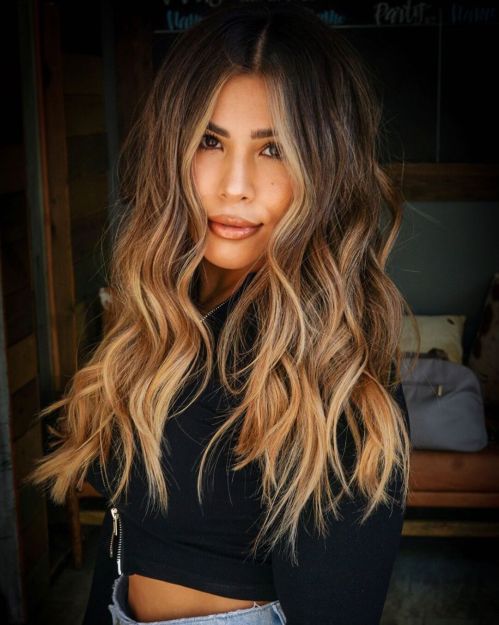
I’ll admit it: I thought collarbone length would make the balayage look chopped. It doesn’t. The dark brown base keeps the roots rich, and the caramel balayage sweeps through the mid-lengths and ends. The technique is soft balayage, placed to blend with the waves. The tone is a warm caramel that doesn’t go brassy. The collarbone length means the colour sits where it’s most visible. Medium density, wavy texture helps the colour move. Upkeep is manageable: a trim every 8 weeks keeps the shape, and the balayage grows out softly, so you can wait 10-12 weeks for a refresh. Styling takes about 10 minutes with a curling wand.
Caramel Mocha Balayage
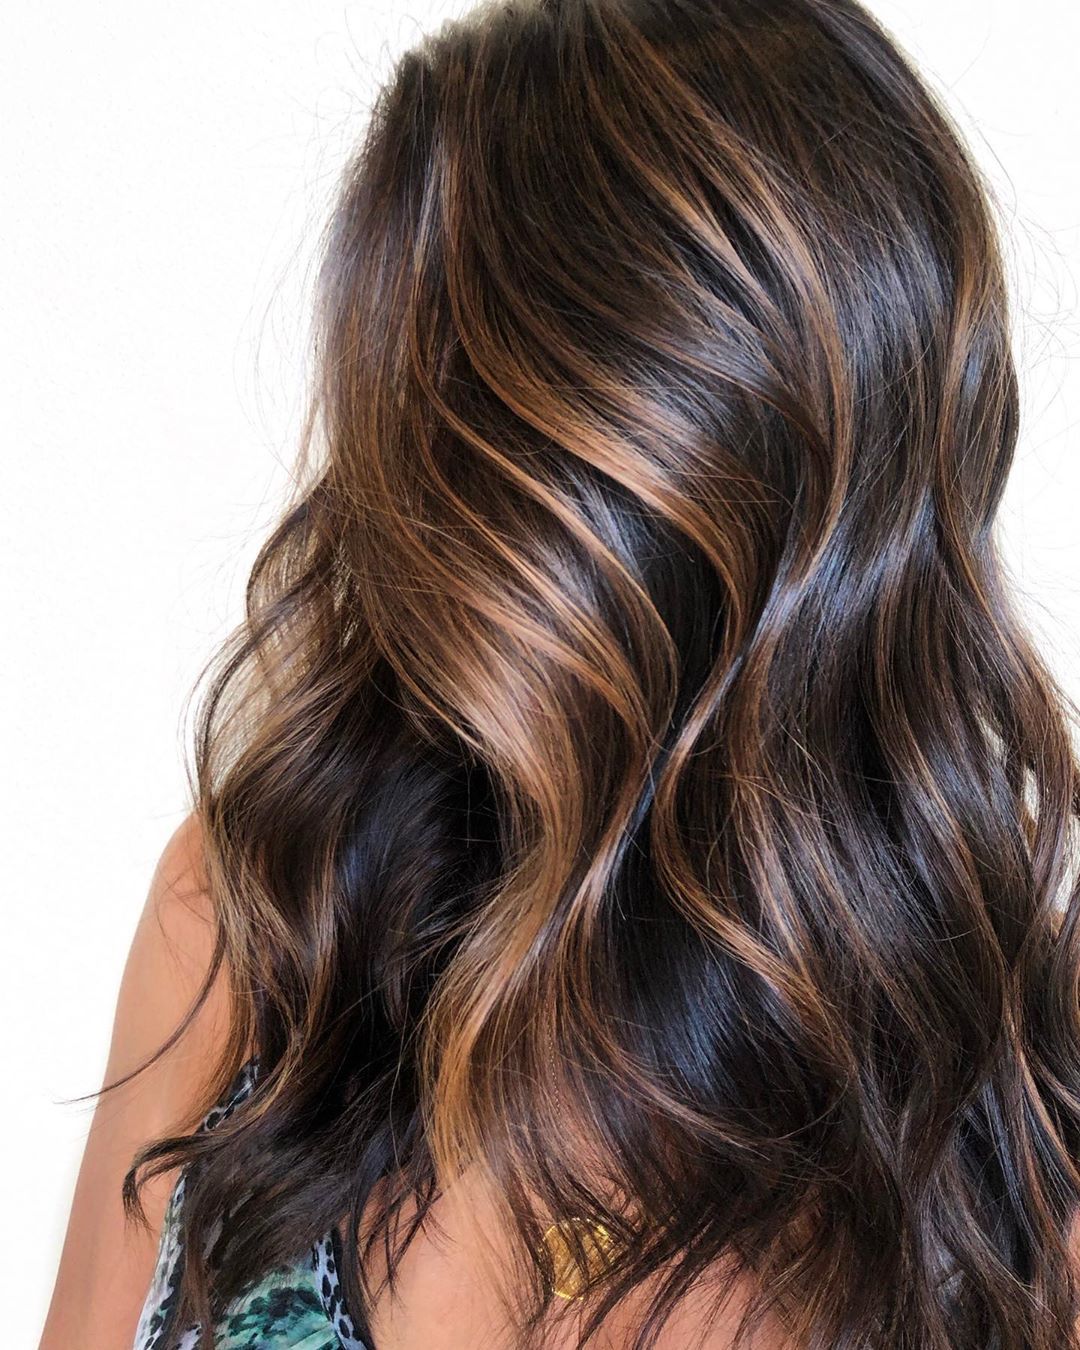
The difference between caramel and caramel mocha is the depth. The dark brown base stays nearly black, and the caramel mocha balayage adds a rich, slightly cooler warmth. The technique is balayage, but the tone is more brown than gold. This suits medium to deep skin tones with neutral or warm undertones. The mocha aspect means it won’t wash out fair skin, but it will look stunning on olive and deeper complexions. The mid-back length and thick, wavy texture show off the dimension. The colour reads as sophisticated, not flashy. If you want a caramel balayage that feels understated and elegant, this is it. It’s also forgiving for grow-out because the contrast is softer.
Caramel Balayage Transition
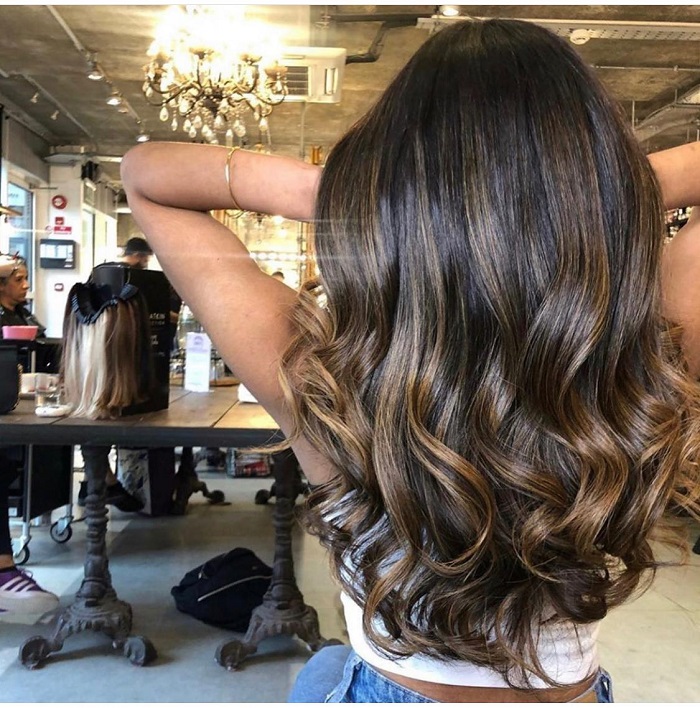
Ever watched a balayage grow out and wondered why yours looks like a stripe while this one melts into the roots? That is the caramel balayage transition at work. The dark brown base stays deep at the crown, then the caramel tones feather outward through the mid-back length, never landing in a solid line. The technique paints each section freehand, so the colour drifts softer as it travels down. Wavy, medium-density texture helps blur the shift further — every bend scatters the light differently. The result: darker roots that read intentional, not overdue. No harsh demarcation, no urgent salon call. Just a gradual fade that buys you time.
This is not a quick gloss. The stylist works in thin, vertical sections, weaving the caramel balayage transition from the mid-shaft to the ends, leaving the root untouched. The tone stays warm but not brassy, a golden caramel that softens the contrast against the base. The loose waves are styled after the colour is done, but even air-dried, the blend holds. The technique itself does the heavy lifting.
Glossy Face-Framing Honey Caramel
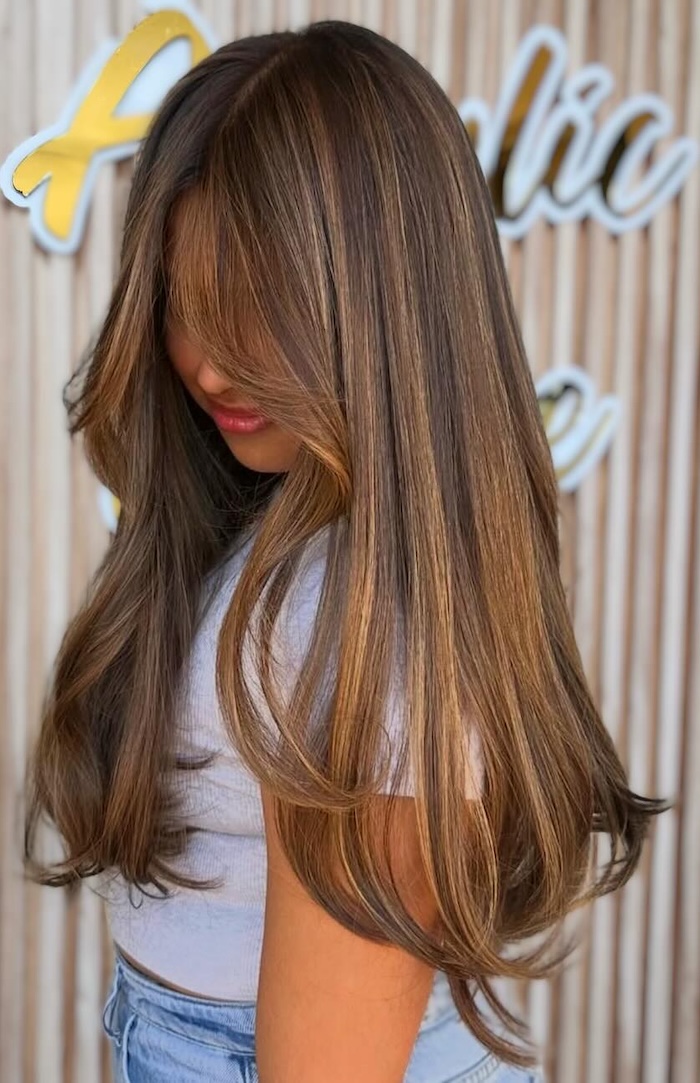
Glossy caramel balayage beats matte every time. The honey caramel tones hit the light instead of absorbing it, which is exactly what face-framing layers need. On a dark brown base, these collarbone-length pieces catch the sun and throw it back — no ash, no muted brown, just shine. The technique paints the balayage closer to the root around the face, then tapers it into the rest of the wave. Wavy, medium-density texture holds the gloss without falling flat. A matte version would sit dull by comparison; this one reads bright and dimensional from any angle.
Mid-Back Caramel Balayage Dimension
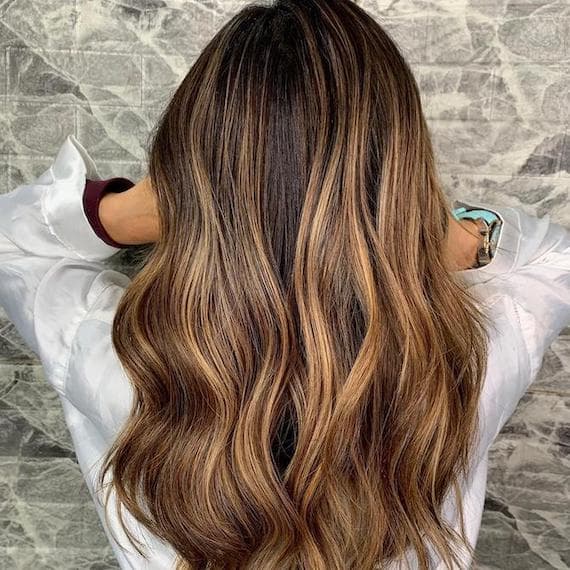
Monday morning, second-day waves, no refresh needed. That is the reality of this mid-back caramel balayage. The dark brown base at the roots stays untouched, so the grow-out is invisible for weeks. The caramel highlights run through the mid-shaft to the ends, giving the wavy, medium-density texture depth without a solid colour block. A quick shake and a spritz of water revive the loose waves — the balayage does the rest. By Friday, it still looks intentional, not faded. The upkeep is minimal: a trim every ten weeks keeps the ends healthy, and the colour holds its warmth through a few washes.
Soft Dimensional Caramel Waves
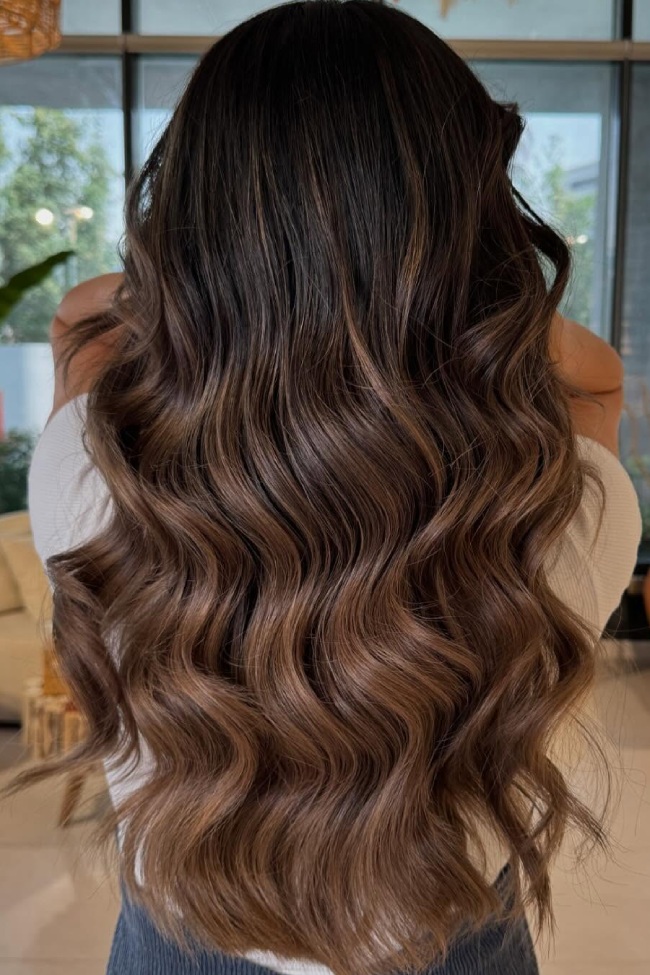
Thick hair? This soft caramel balayage was made for you. The dark brown base anchors the roots while the caramel tones weave through the mid-back length, creating depth that only dense texture can fully show. Wavy, thick hair catches each highlight differently, so the flowing waves look layered even without a heavy cut. The technique keeps the balayage soft — no harsh streaks, just a gradual lift from root to end. If your hair is fine or straight, the dimension might not read as strongly; the effect relies on volume to scatter the light. But on thick waves, it is effortless in the best way.
Wavy Blowout With Caramel Balayage
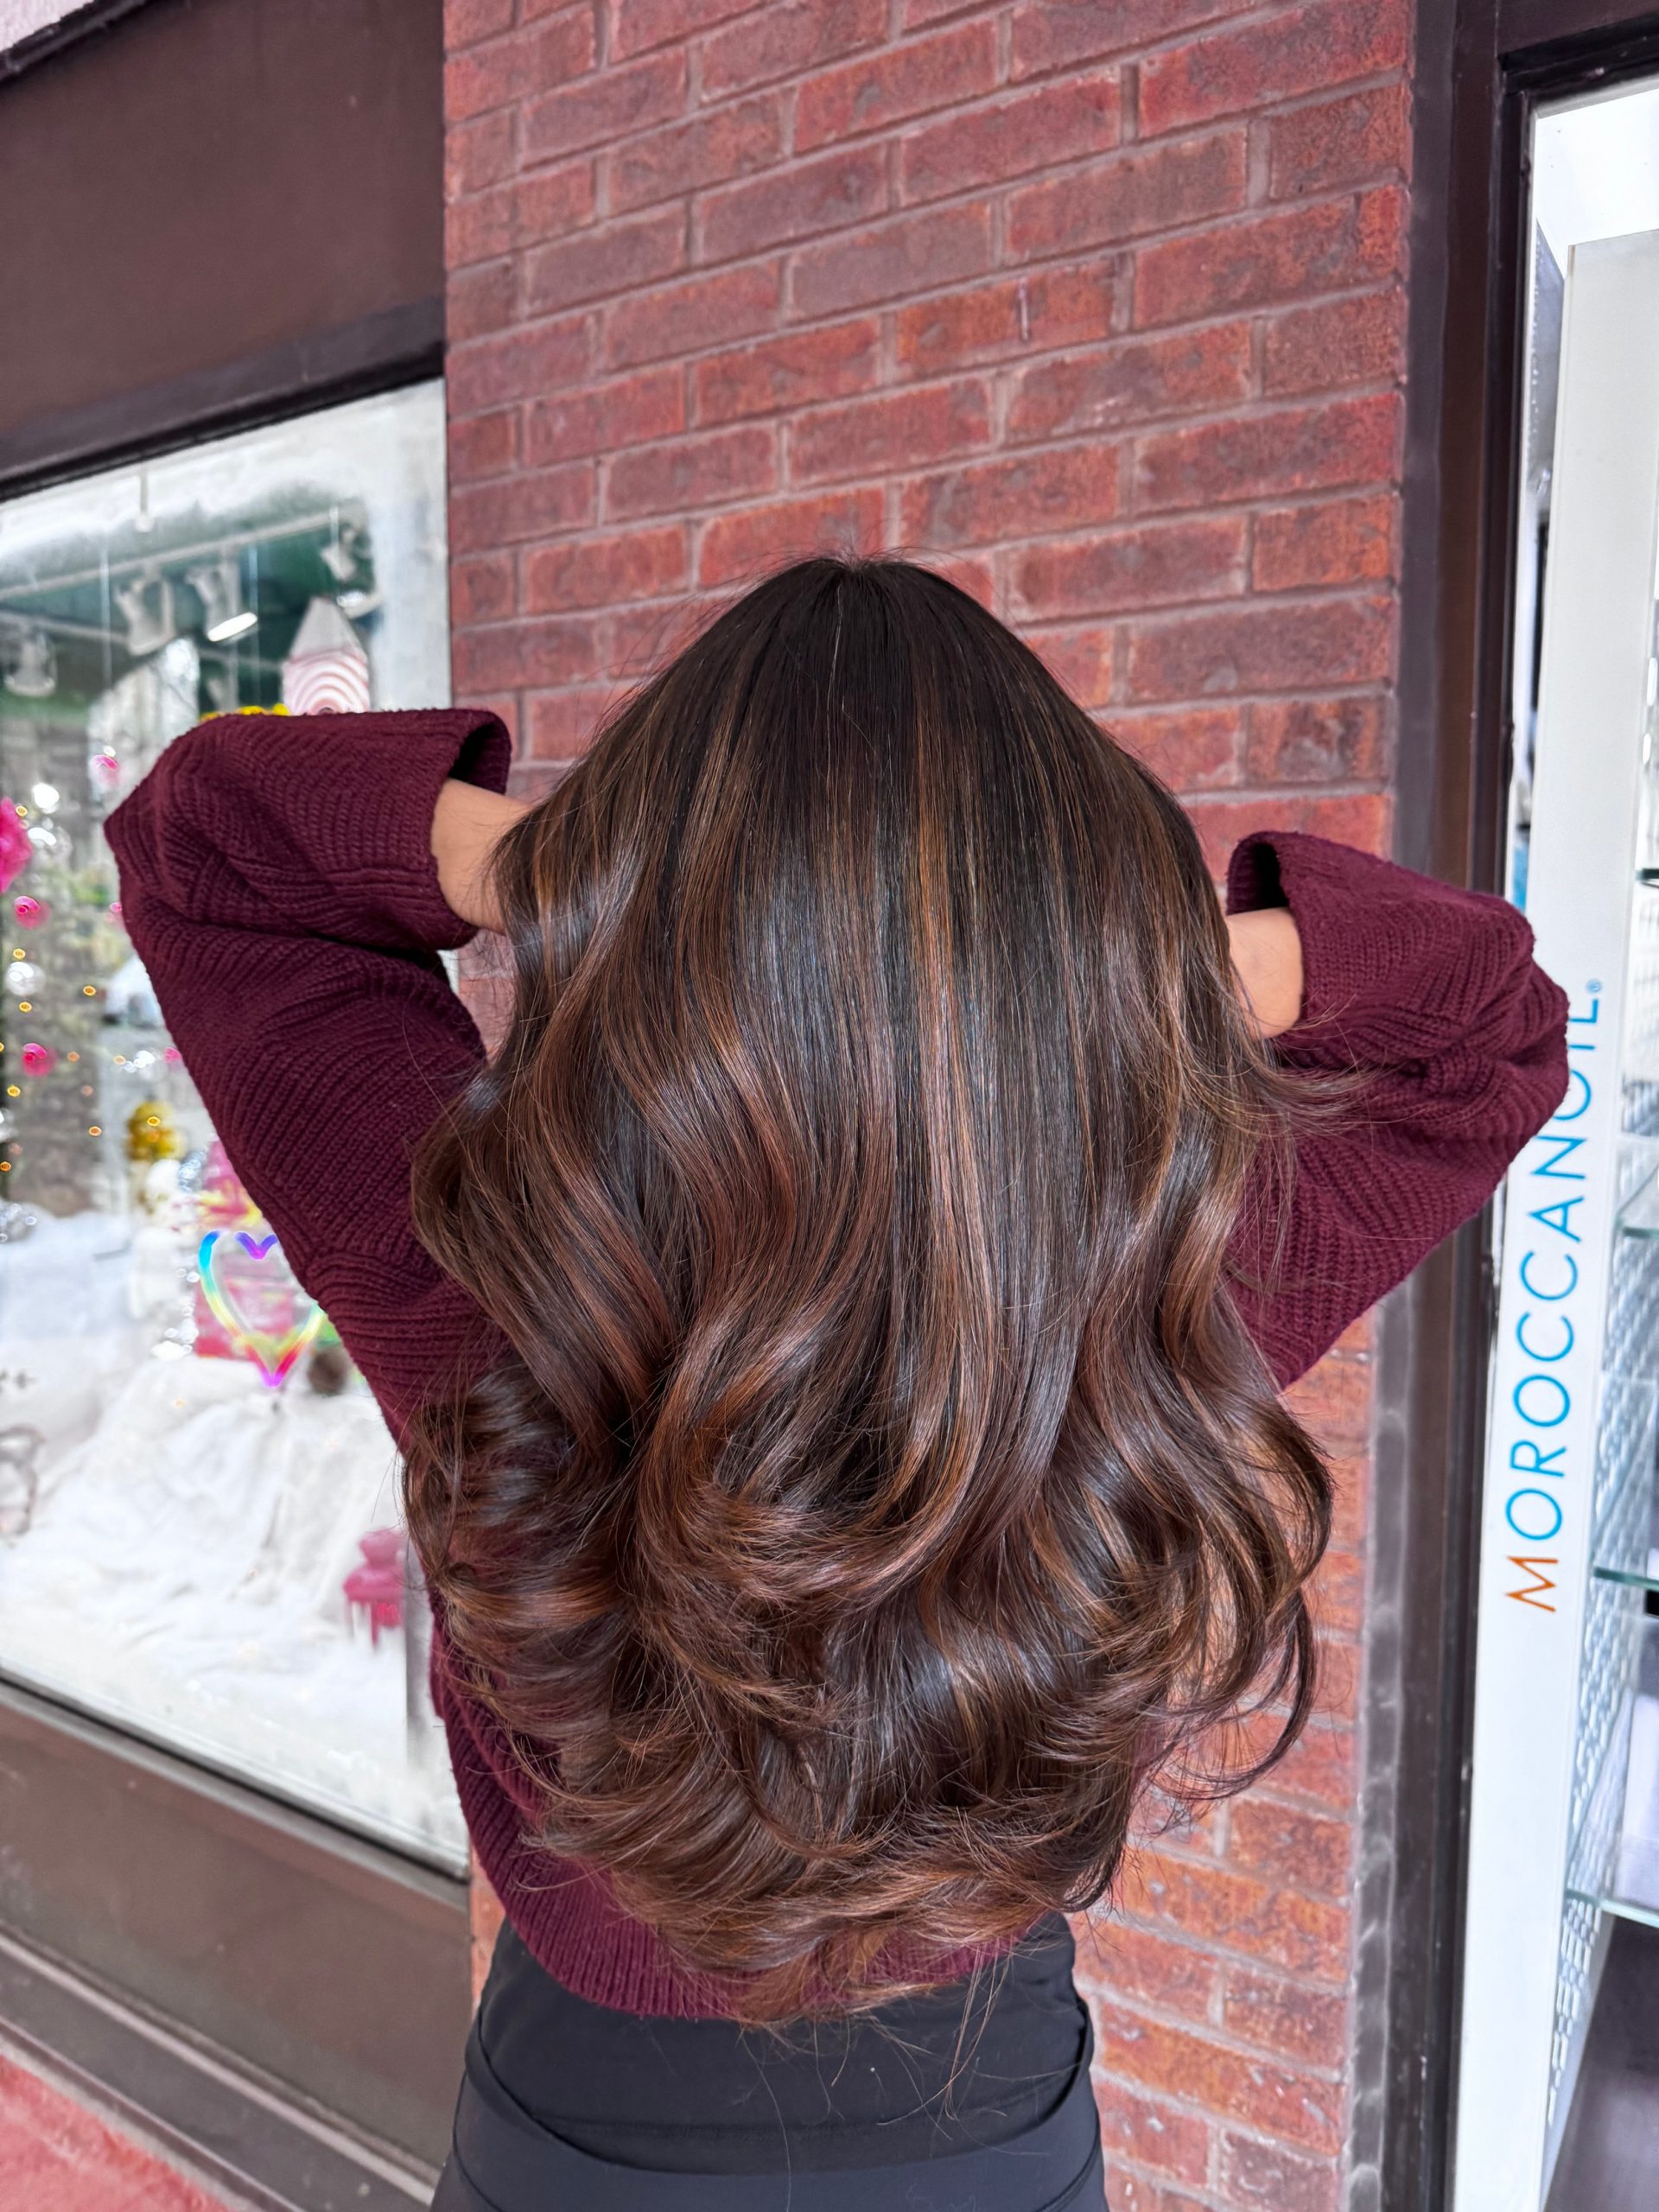
The key to this wavy blowout caramel balayage is starting with damp, sectioned hair. The dark brown base is already painted, so the warm caramel tones sit below the crown. A round brush pulls each section forward while the blow-dryer directs the root upward — that is what creates the lift at the part. Once dry, a large-barrel wand wraps the mid-shaft and ends into loose waves, alternating directions so the balayage catches light from every angle.
The technique matters here because the caramel needs movement to show its dimension. Wavy, medium-density texture holds the curl without dropping by noon. The balayage itself is painted in a soft V pattern, so the colour concentrates at the ends and leaves the root dark. That contrast is what makes the blowout read polished, not flat. No teasing, no product overload — just heat and sectioning.
Thick Wavy Caramel Balayage Depth
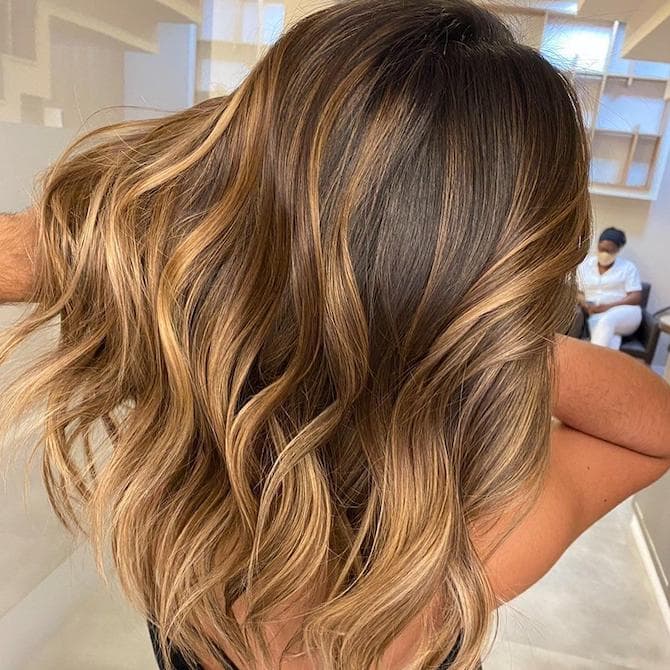
I’ll admit, I was skeptical about a thick caramel balayage on my wavy hair. The dark brown base with rich caramel balayage creates dimensional caramel tones at mid-back length. The wavy texture catches the light, but thick, wavy hair can pull warm and fade faster, leading to brassiness if you skip regular toning. The hand-painted balayage technique ensures a soft grow-out, but the caramel tones need a purple shampoo to stay cool. This look genuinely flatters those with natural wave and density who want depth without full commitment. Skip it if your hair is fine or prone to fading quickly—the upkeep might frustrate you.
Collarbone Length Caramel Glow
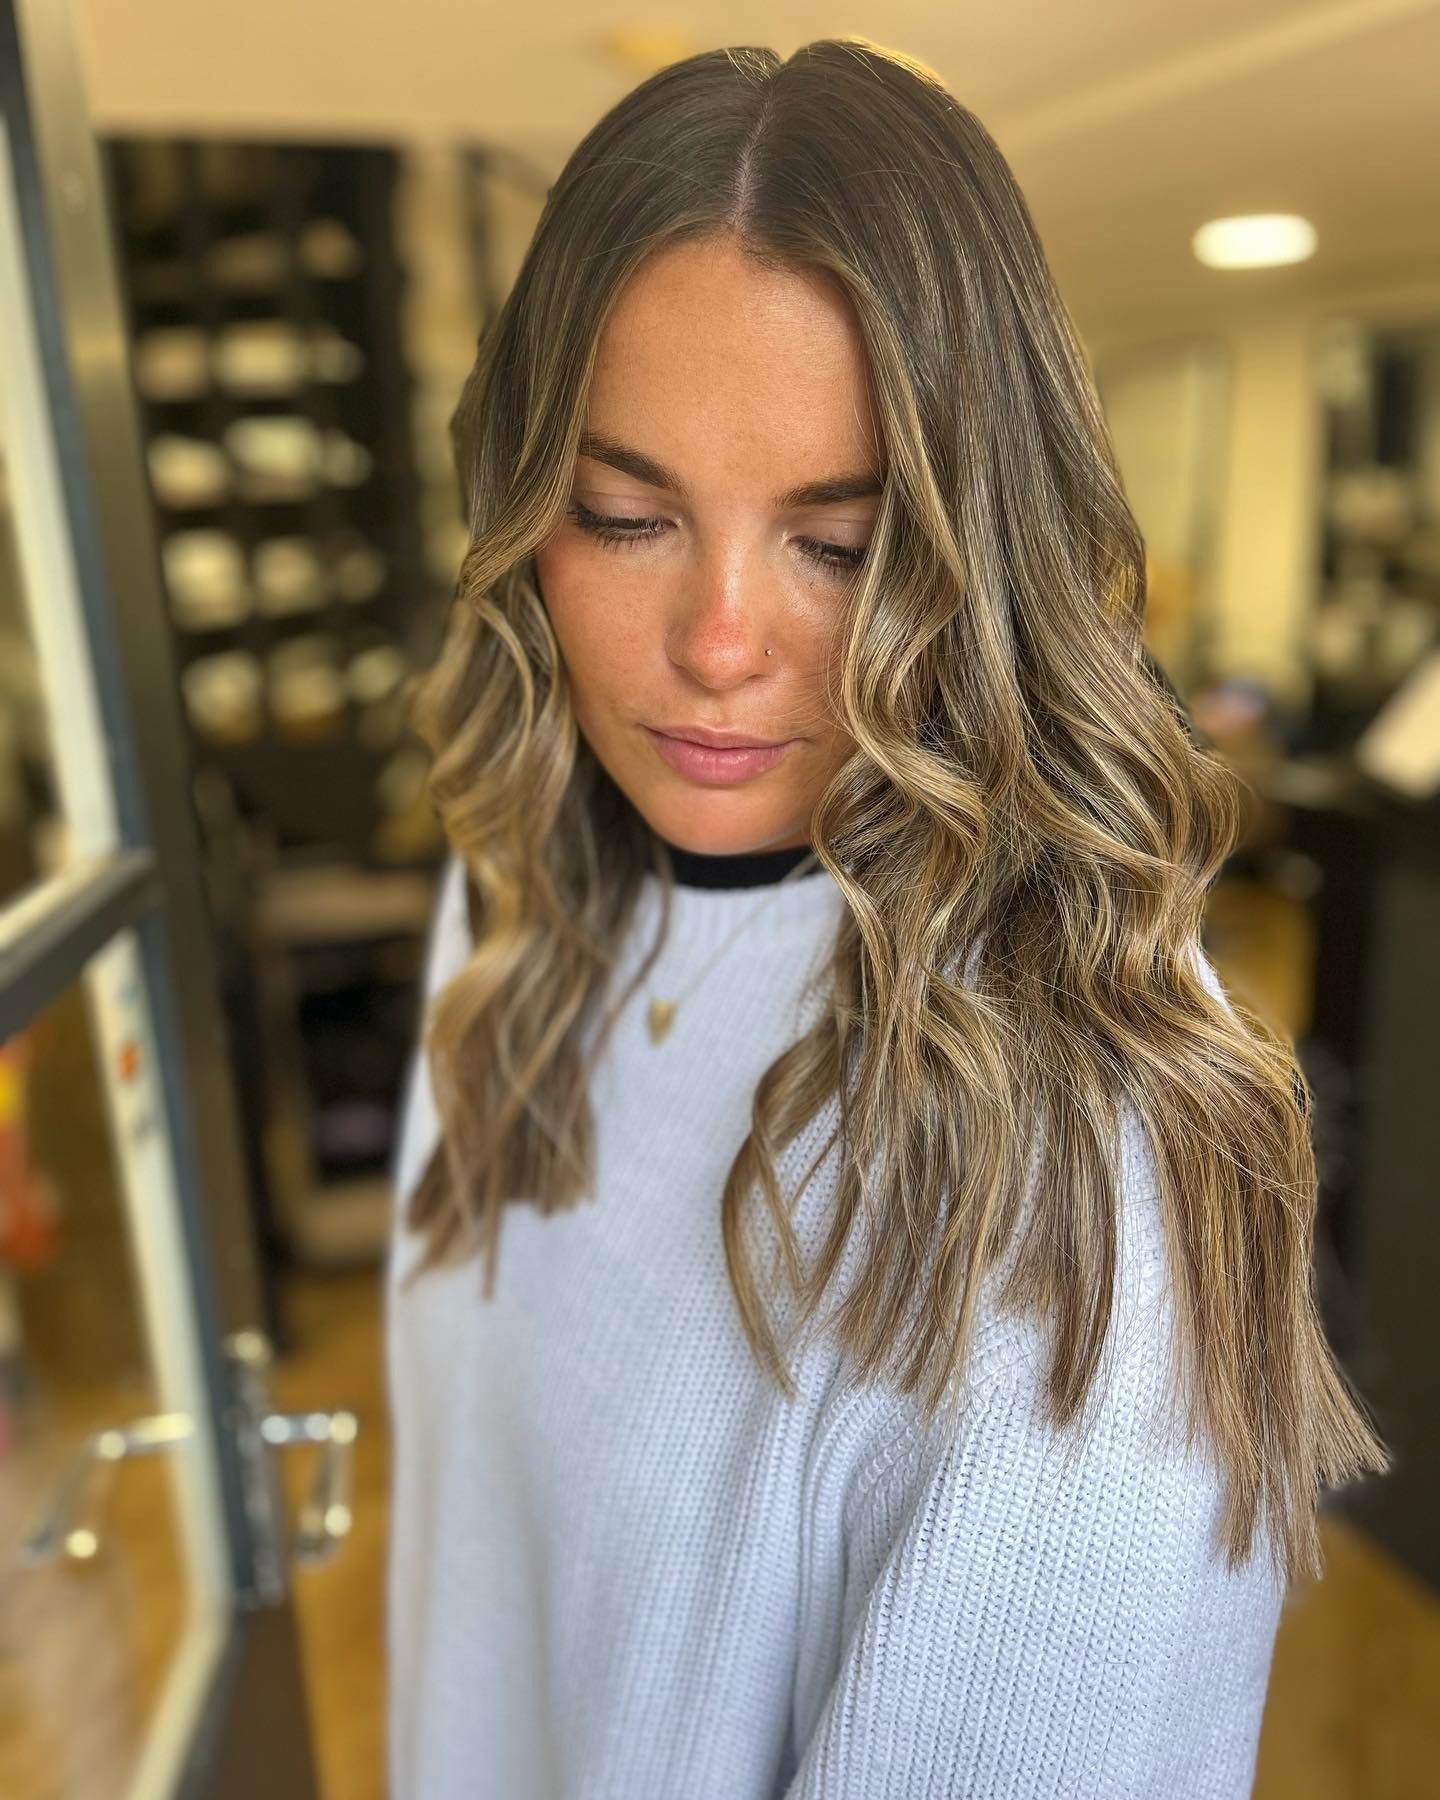
The last golden days of August call for this collarbone caramel glow. A dark brown base with caramel balayage highlights creates warm caramel tones that catch the late summer light. The collarbone length keeps it practical, and the wavy texture adds movement without styling work. This shade bridges summer and autumn smoothly, offering warmth without going full copper.
Thick Wavy Balayage Blend
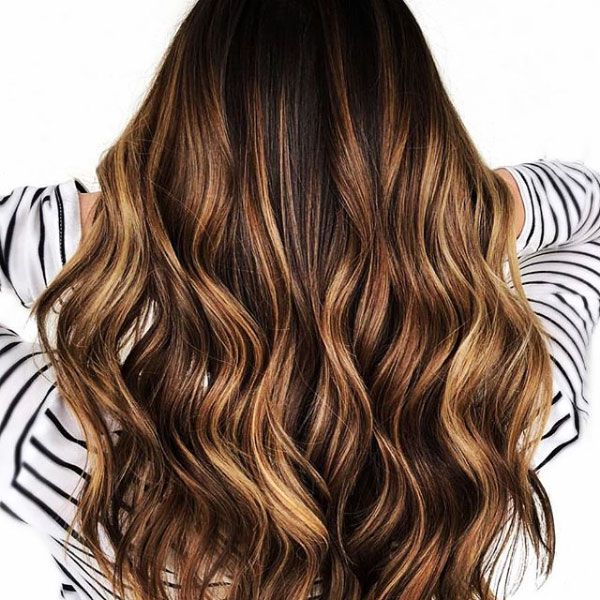
How do you get a smooth blend from dark brown to caramel without patchy results? The thick wavy balayage blend demands a salon chair. At home, you risk uneven warmth and a harsh line where the color starts. The balayage technique relies on hand-painted sections that vary in thickness, something difficult to replicate with a box dye. Thick hair means more sections, so expect a longer appointment.
The dark brown base with warm caramel tones needs a skilled hand to create dimension at mid-back length. The wavy texture helps disguise minor imperfections, but thick hair can absorb color unevenly, leading to blotchy results. A professional will paint sections by hand, ensuring the caramel tones graduate naturally from root to tip. DIY kits often lead to brassy results or a visible demarcation line. This is one color you book, not attempt. The chair time is around three hours, but you get a smooth blend that grows out softly for ten weeks.
Subtle Long Layer Caramel Highlights
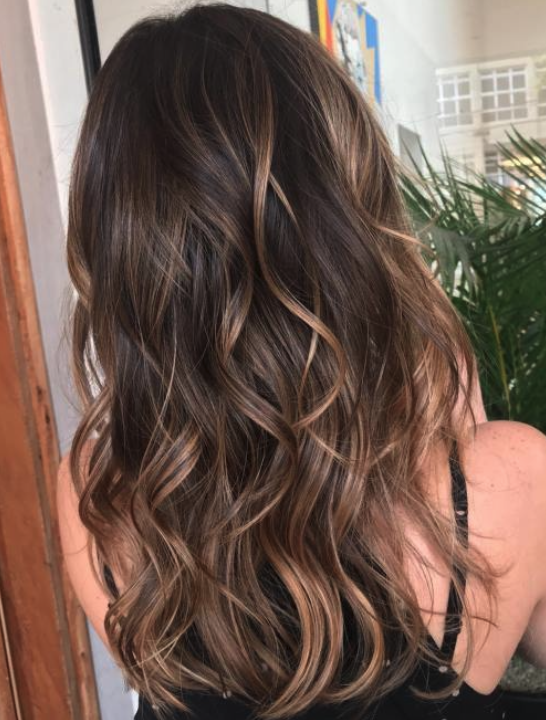
I’ll confess, I thought subtle caramel highlights would disappear into my dark brown base. But the long layers catch the caramel tones, creating warmth and dimension that lasts. The balayage technique places color strategically on the layers, so the grow-out is soft. At mid-back length, the wavy texture helps the highlights peek through. Upkeep means a trim every eight weeks to keep the layers sharp, and a toning session every ten weeks to prevent the caramel from turning brassy. The color holds its warmth through a week of washes if you use a sulfate-free shampoo. It’s low maintenance for a color look.
Mid-Back Sun-Kissed Caramel Balayage Ends
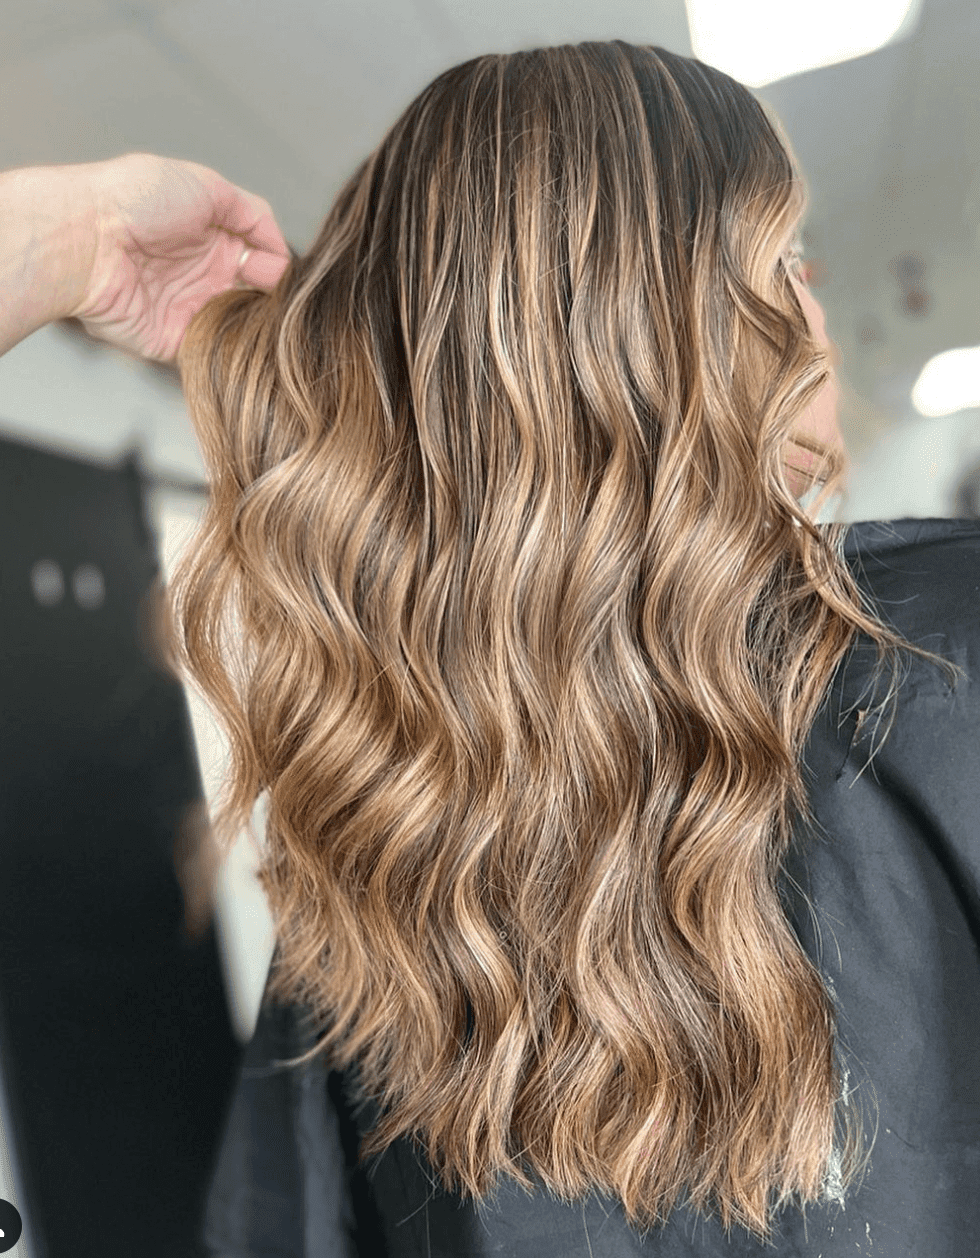
The sun-kissed effect on the ends is exactly what natural brunettes want: a lift without a full commitment. The caramel balayage ends start from a dark brown base, with the balayage technique concentrating warmth on the mid-back length.
The wavy, thick texture helps the caramel tones blend naturally into the natural color. The hand-painted balayage technique ensures the caramel is concentrated on the ends, mimicking natural sun lightening. This look suits those with naturally dark hair who want a subtle summer glow. The caramel tones are soft enough to grow out without a harsh line, making it ideal for low-maintenance color seekers. Because the color is concentrated on the ends, your roots stay dark, so you can stretch salon visits to twelve weeks. The sun-kissed effect works best on hair that already has some natural warmth, like medium brown or dark blonde bases. If your base is very dark, expect a longer appointment to lift the color gently, but the result is a warm, dimensional finish that fades gracefully.
Shoulder-Length Caramel Balayage
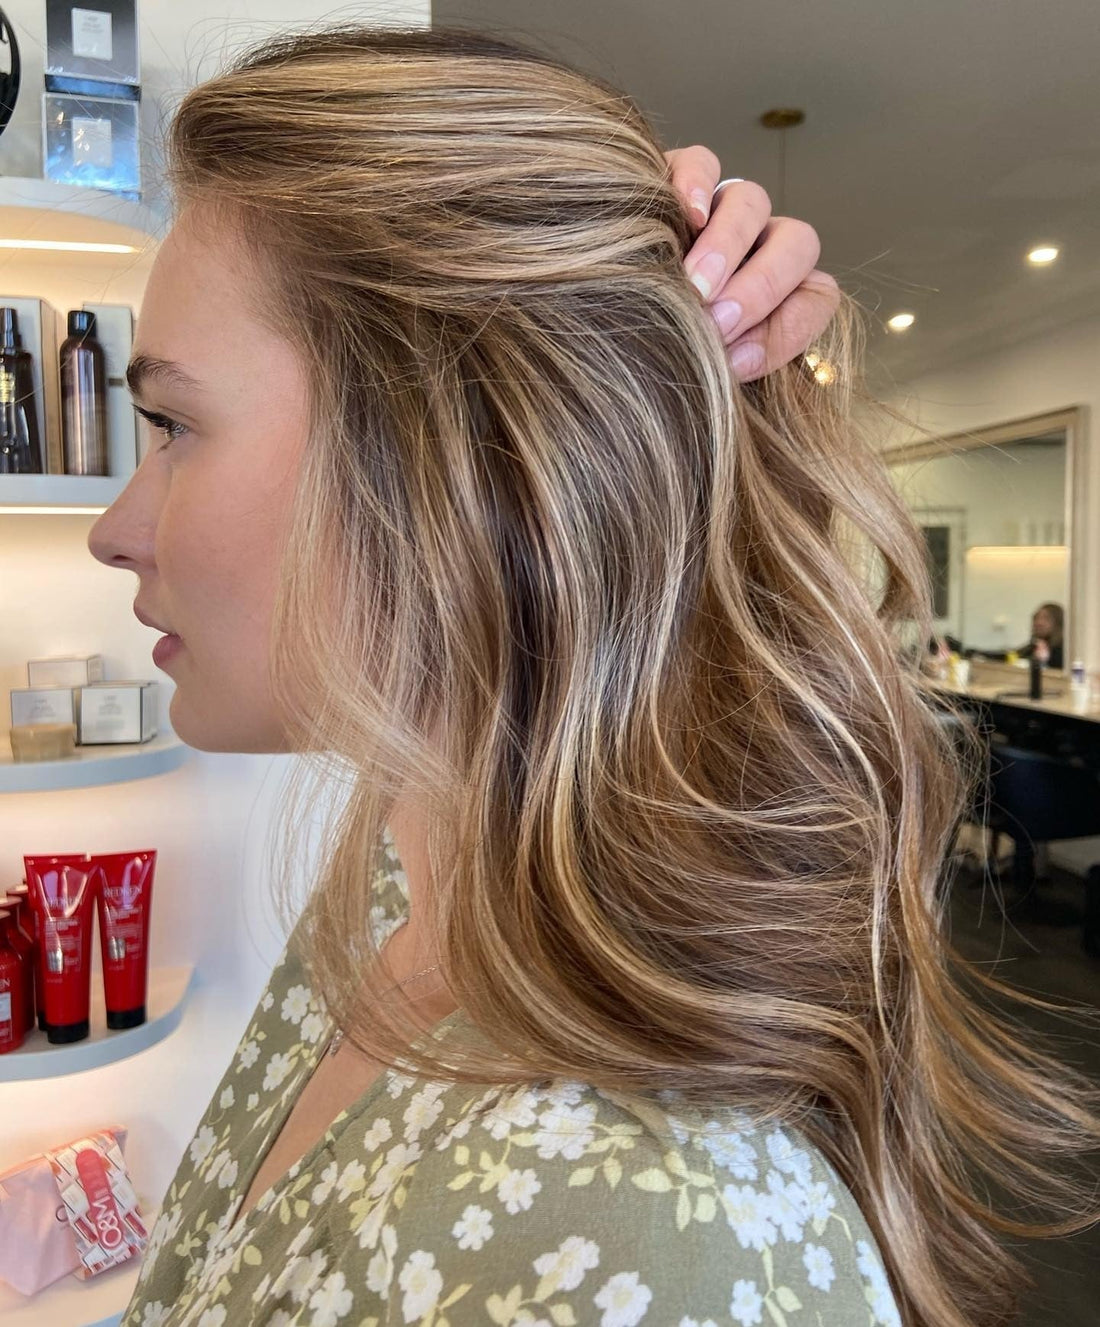
What does caramel balayage actually look like on a dark blonde base? On this shoulder-length caramel balayage, the stylist painted thin sections from midshaft down, using a gentle lift to keep the base intact. The result is a warm, honeyed tone that catches light without shouting. Long layers help the colour breathe, and the wavy texture softens the transition. The dark blonde base stays dark at the roots, so the caramel reads as a highlight, not a full colour. It is not a dramatic shift, more like your hair but richer. That is the point.
Long Face-Framing Caramel Highlights
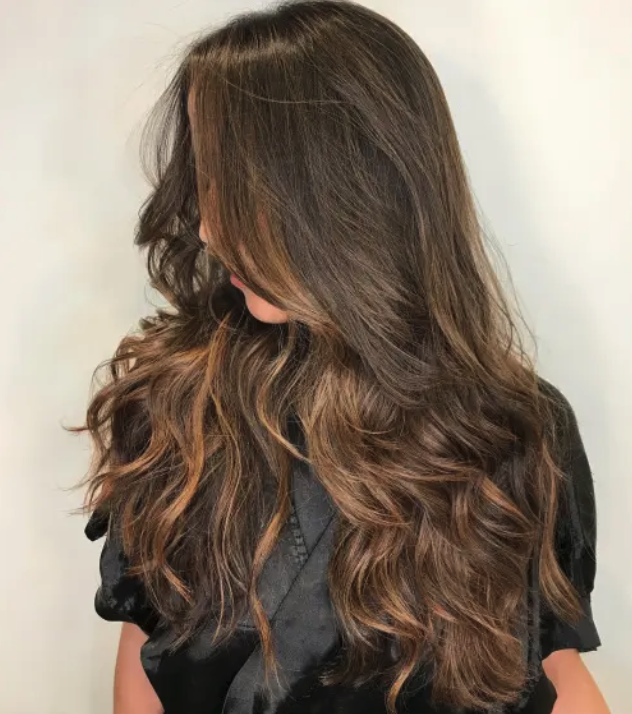
Face-framing caramel highlights beat all-over highlights for impact every time. On a dark brown base, caramel tones placed around the face draw attention upward and create a soft glow. The rest of the hair stays deeper, which means less processing and a more natural grow-out. The long length keeps the look from feeling heavy, and the thick, wavy texture carries the lighter pieces without them looking sparse.
All-over highlights spread the same colour everywhere, which can read as uniform and flatten the shape. With these, the contrast stays where it matters most. The lighter pieces read warmer against the dark base, and the loose waves help the colour catch light from different angles. It is a smarter use of the same salon time, and the grow-out is far less obvious.
Side Parted Caramel Balayage
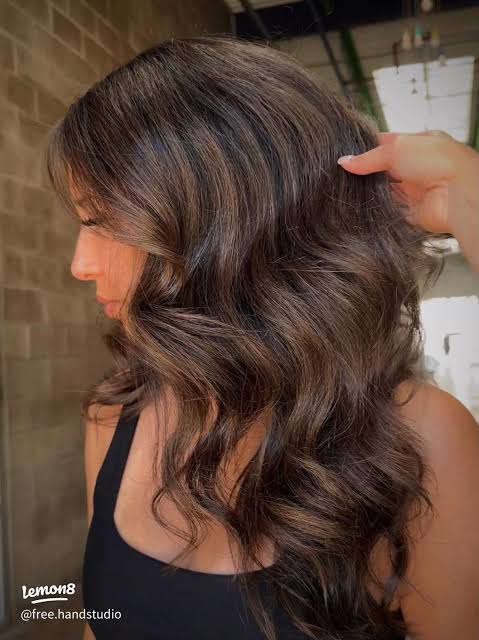
The side part changes everything about how this colour reads. With a side parted caramel balayage, the deeper base sits on the heavier side while the lighter pieces sweep across the forehead. The side-swept bangs catch the light differently depending on how you tuck them, which keeps the look dynamic. A quick blow-dry with a round brush sets the wave, and the medium density holds the shape without falling flat. The balayage grows out softly, so the part never reveals a harsh line.
Layered Mid-Back Caramel Blend
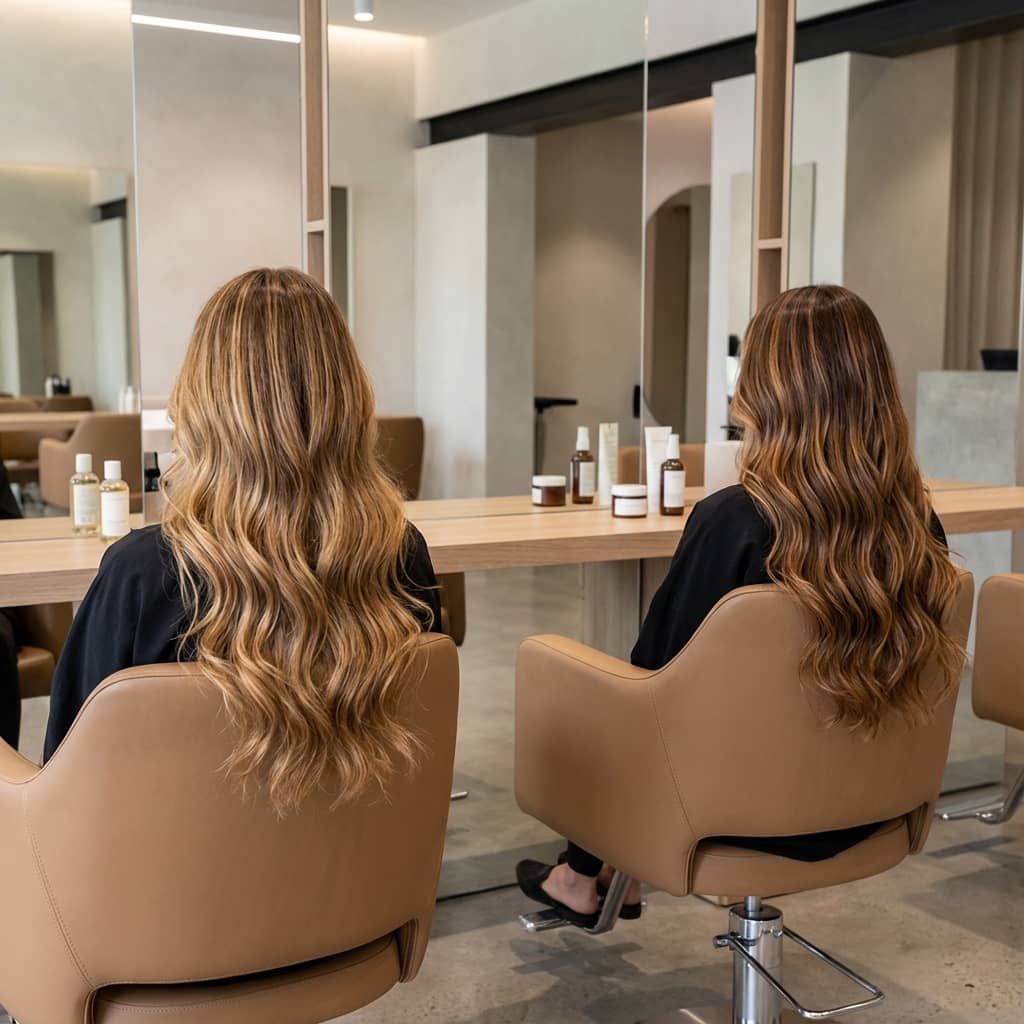
The biggest mistake with thick, wavy hair and caramel balayage is taking the colour too high. On a layered caramel balayage like this one, the colour stays concentrated on the mid-lengths and ends, which lets the dark base anchor the look. A blend of colours from deep brown to warm caramel creates dimension without the top looking flat. The thick texture needs that contrast to read as intentional. When the colour starts lower, the waves catch the light at different points, and the grow-out stays soft. Keep the lightener off the roots and let the layers do the work.
Long Layers Rich Caramel Balayage Transition
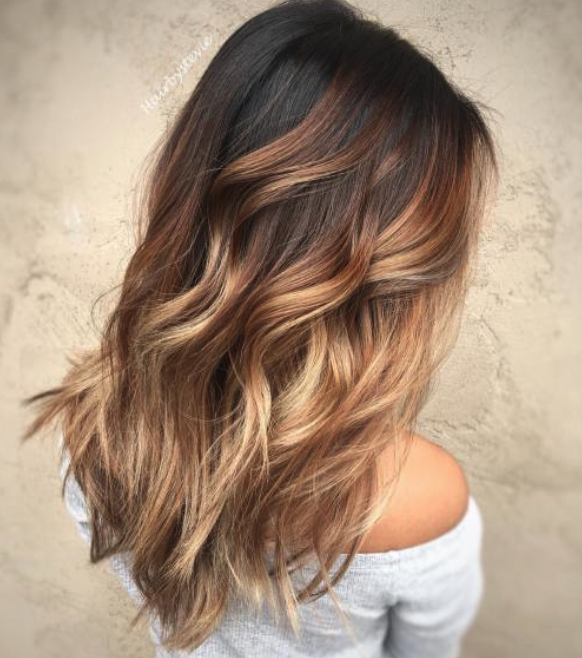
The transition from root to caramel is where most balayage goes wrong. On this one, the rich caramel transition starts subtly, with the colour deepening gradually through the mid-lengths and settling into a warm tone at the ends. The long layers help the colour spread without a harsh line, and the thick, wavy texture diffuses the light so the blend looks natural.
A hard line at the root works for some looks, but it fights the softness of caramel. A seamless blend like this one reads more like a sun fade than a salon colour. The dark base stays intact at the top, which keeps the overall look grounded. The caramel tones feel like an extension of the base, not a separate layer. That is the whole point of a transition.
Final Thoughts
After writing all of these, I’m booking the collarbone lob next. The caramel just looks better when it doesn’t have to travel far from the root. But I’ll admit, the long face-framing highlights surprised me most. They’re lower maintenance than I thought.
- Tone at week six, not week ten.
- Trim the baseline every eight weeks.
- Use a purple shampoo once a week.
Pick your favorite and book the appointment.

