
A manicure can change completely with one simple decision: the shape of the nail. From sleek square tips to graceful almond curves and dramatic stiletto points, modern nail shapes make even a familiar polish color feel fresh again. But which shape actually suits your style, your routine, and the length you love wearing? I’ve gathered a mix of polished, playful, and statement-making silhouettes that are easy to save for your next salon appointment or DIY session. Some feel effortlessly minimal, while others bring that little extra edge I always want when the season changes. So, which of these modern nail shapes will make it onto your next manicure mood board?
Mixed Nail Shapes With Artistic Statement Details
I love a manicure that refuses to look too uniform, and this combination does exactly that. The nails have elongated proportions with a mix of softly curved and straighter silhouettes, creating a playful contrast across the hand. A sheer pink-nude base keeps everything connected, while deep red sculptural detailing, black-and-silver accents, gold metallic lines, tiny cherries, and animal-inspired spots give each nail its own personality. It feels especially fun for early fall, when I want my manicure to have a little more character without covering every nail in one bold color.
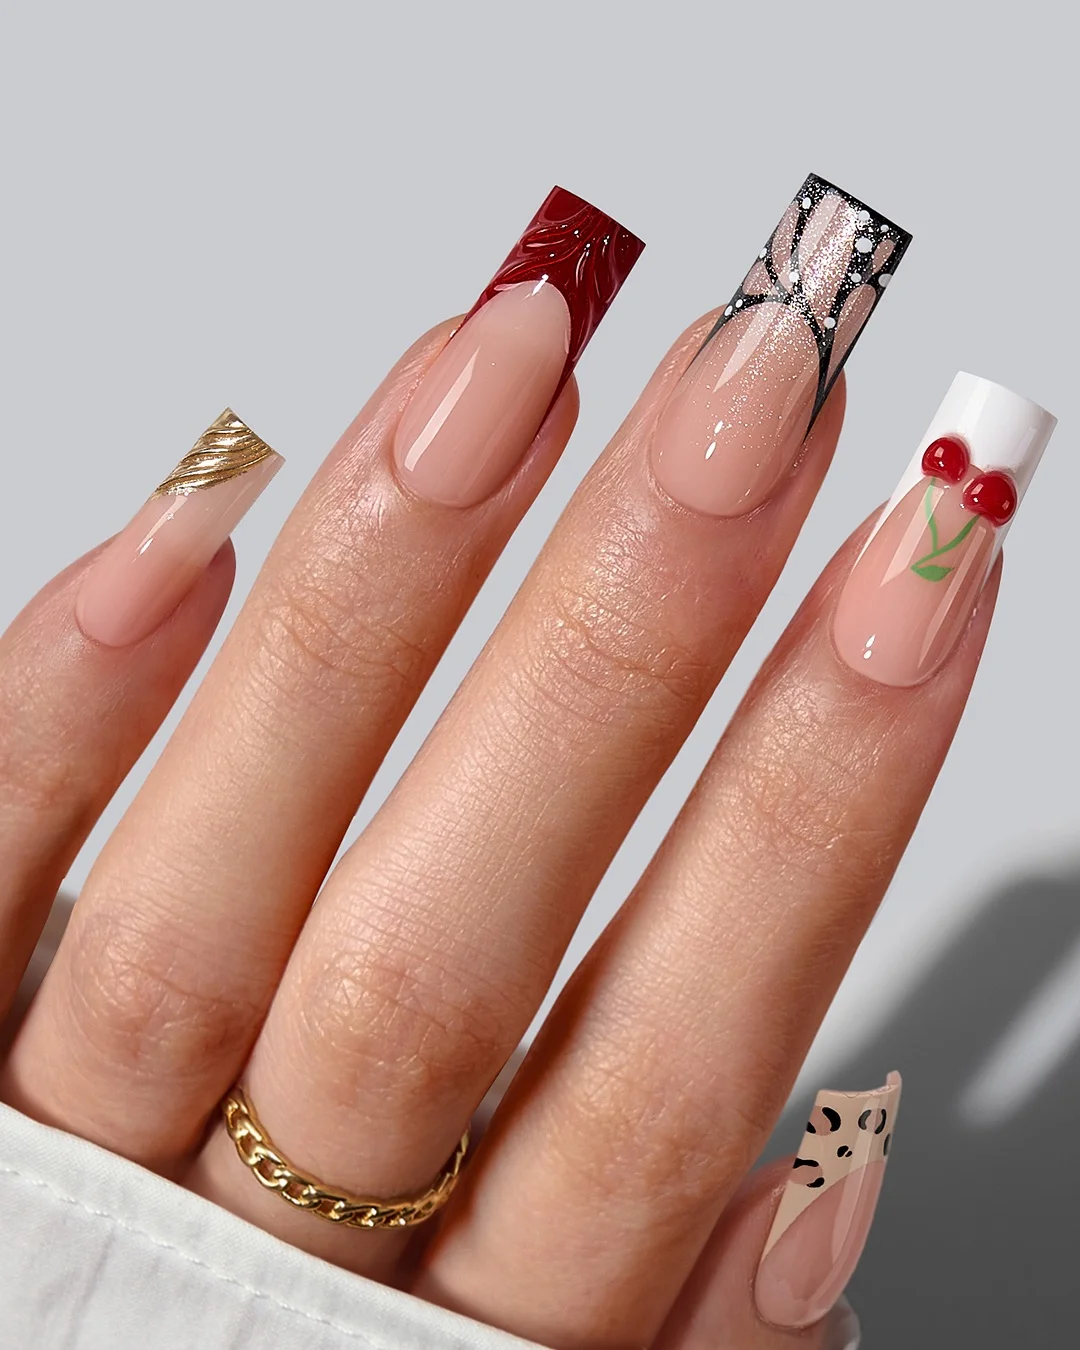
For a similar result, I would start with a sheer nude or blush gel polish such as OPI Bubble Bath or CND Shellac Romantique. I’d add a deep burgundy-red gel, black and white detailing gels, a fine gold metallic polish or transfer foil, and a tiny green and red detail for the cherry accents. A high-gloss top coat is important here because it makes the different textures look intentional and gives the manicure that freshly finished salon effect.
At home, I would shape each nail first and make sure the lengths are balanced before touching the color. I’d apply the sheer base, cure it, and then build the decorative details one nail at a time with a very fine nail-art brush. For the raised-looking accents, I’d work in thin layers rather than trying to create too much dimension at once. The trick is restraint: when every detail is tiny and precise, the manicure feels editorial instead of busy.
I would choose this approach when I’m bored with matching nails but still want the whole hand to feel coordinated. It reminds me of putting together an outfit with one statement accessory on every other detail rather than wearing the entire jewelry box at once. The different shapes make the manicure particularly interesting for anyone who enjoys experimenting with length and wants several modern nail ideas in one look.
Long Stiletto Nails With a Crisp White French Tip
Stiletto nails have a very different energy from rounded shapes, and I think that contrast is exactly why they remain so striking. The long, sharply tapered silhouette stretches the fingers visually, while the soft pink base prevents the white French tips from feeling too severe. The tips are painted in a clean, graphic white that follows the pointed shape beautifully. It is a classic combination, but the extreme silhouette gives it a much more contemporary attitude.
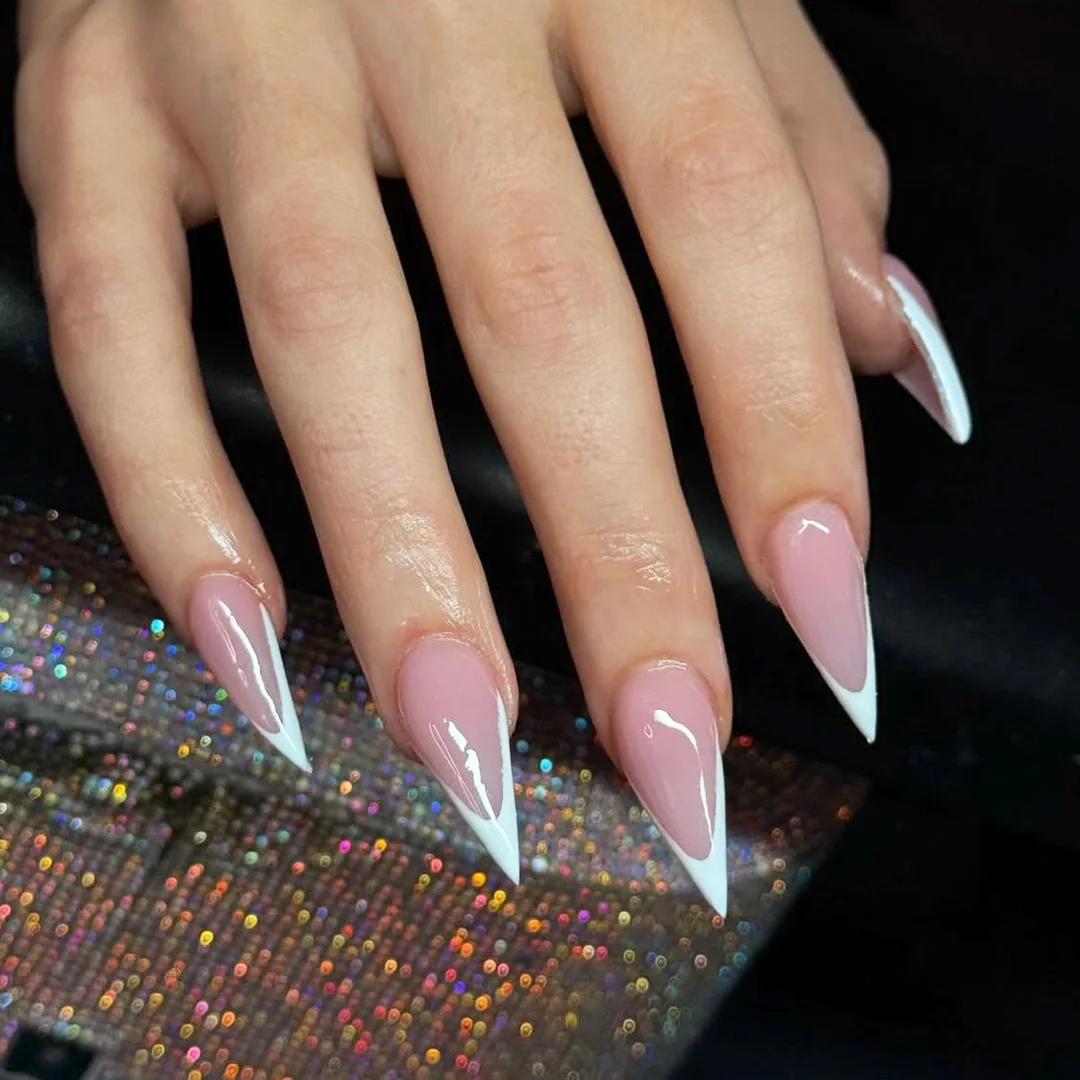
I would use a translucent pink builder gel or sheer pink gel polish for the base and a highly pigmented white gel for the tips. A thin liner brush helps create the curved French line, although French-tip guides can make the process easier for beginners. I’d finish with a glossy top coat and pay special attention to the free edge because long stiletto nails tend to show every little imperfection.
For the shape itself, I would file gradually from both sidewalls toward the center instead of trying to create the point in one aggressive pass. Once the silhouette is even, I’d apply the pink base and cure it before painting the white tips. I prefer making the French line slightly curved rather than completely straight because it follows the natural architecture of the nail more gracefully.
Personally, I see this as the shape for those days when I want my hands to do some of the styling for me. The manicure does not need glitter, charms, or complicated artwork to attract attention. The point does all the work. If I were wearing a simple black knit, a crisp button-down, or a sleek evening outfit, these nails would instantly make the whole look feel more deliberate.
Short Rounded Nails With a Clean Micro French
Short nails can look incredibly sophisticated when the shape is clean, and this rounded manicure is proof. The nails are kept compact with softly curved corners and a glossy pink base that closely follows the natural nail. Instead of a thick French tip, the white detail is narrow and neatly placed along the edge. I especially like how the shape feels practical without looking plain.
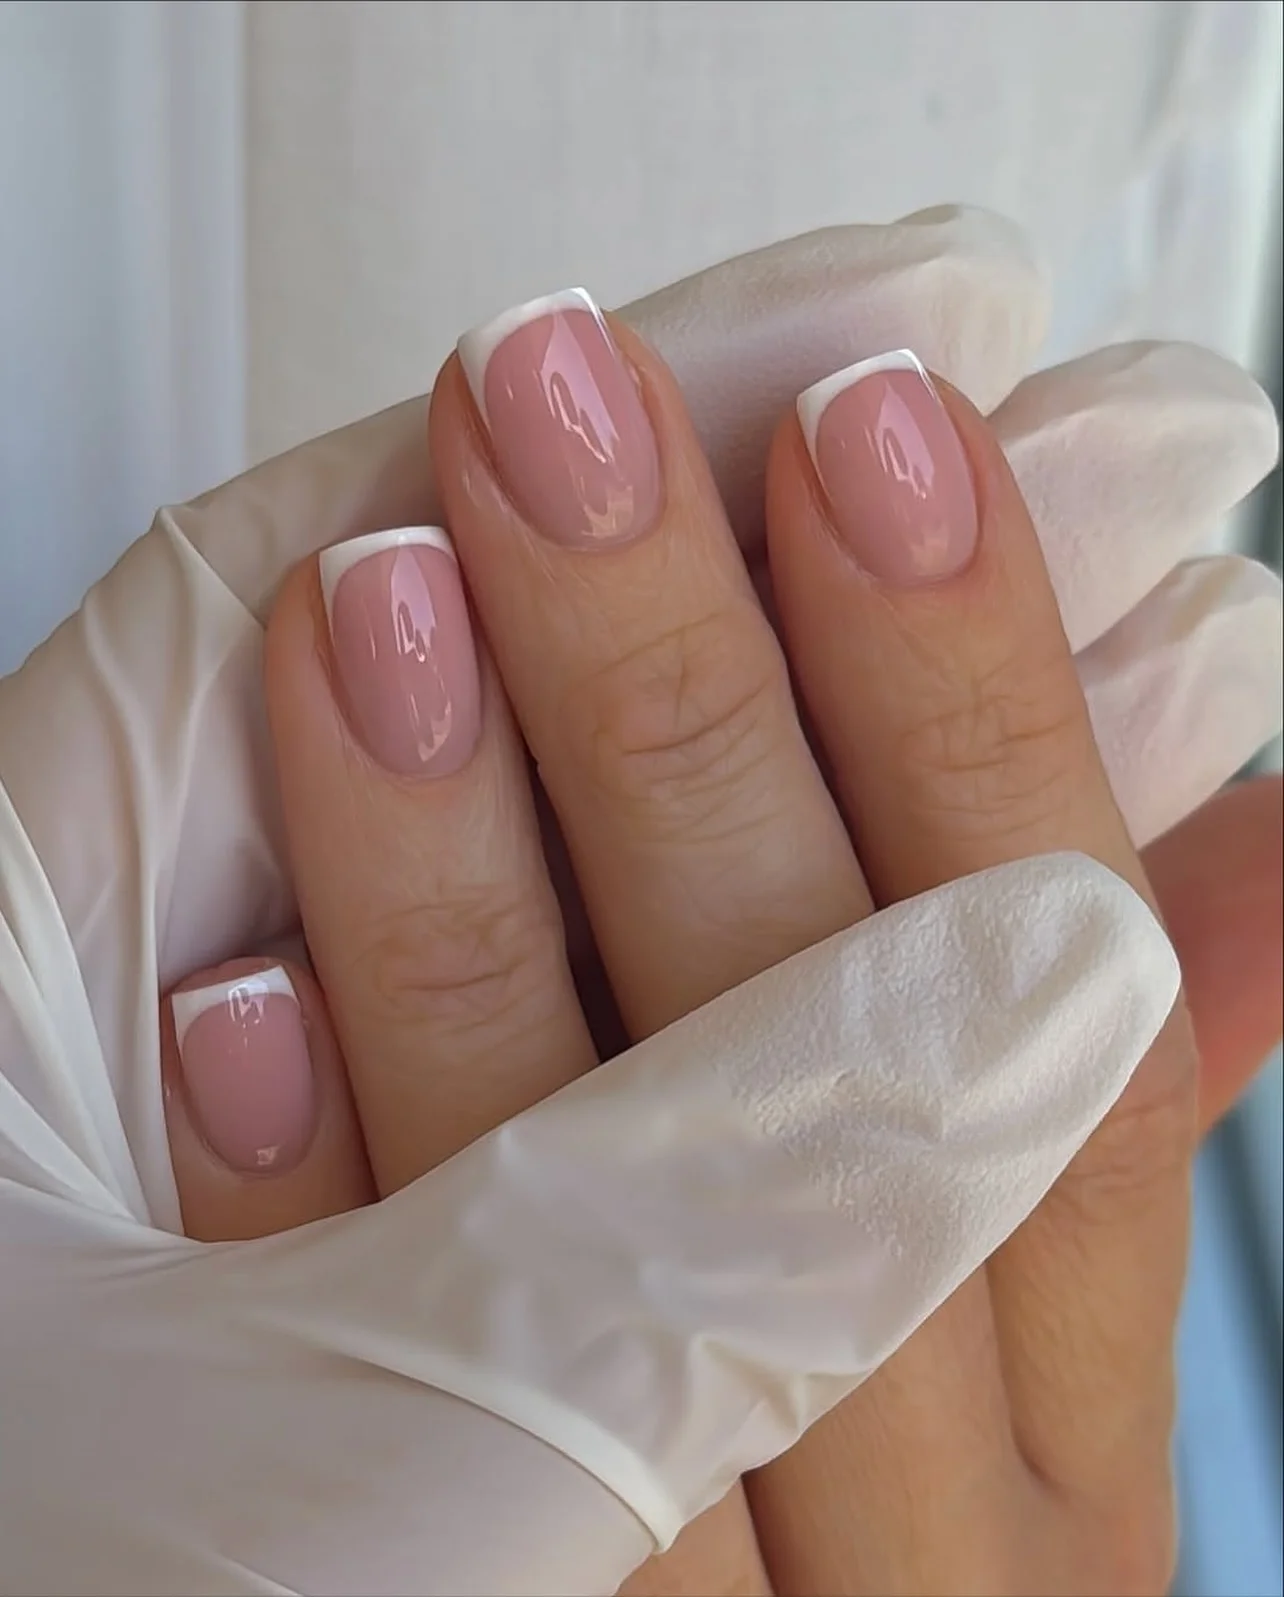
I’d reach for a milky pink or translucent blush polish, plus a creamy white gel for the delicate tips. OPI Put It in Neutral or a similar sheer pink works well for this kind of manicure, while a fine liner brush gives me better control around the curved edge. A glossy top coat completes the look and helps the short nails appear smoother and more elongated.
My favorite way to recreate this shape is to gently round the corners while keeping enough length to maintain the nail’s natural proportions. After applying the pink base, I’d use a very small brush to trace the white edge instead of loading the brush with too much product. Thin layers are the secret here. I would rather make two delicate passes than end up with a heavy French line.
This is one of the shapes I would recommend to myself whenever I need a manicure that can survive real life without losing its polish. Typing, opening packages, traveling, and everyday errands are simply easier with shorter nails. And honestly, there is something wonderfully effortless about a manicure that looks finished without demanding attention.
Soft Almond Nails With Pearly White and Gold Foil
The almond shape gives this manicure a graceful, slightly elongated appearance without becoming dramatically pointed. A translucent white and blush base creates a cloudy effect, while irregular pieces of gold foil are scattered across the surface like tiny metallic brushstrokes. I love that the decoration does not follow an identical pattern on every nail. That small imperfection makes the design feel handmade and modern.
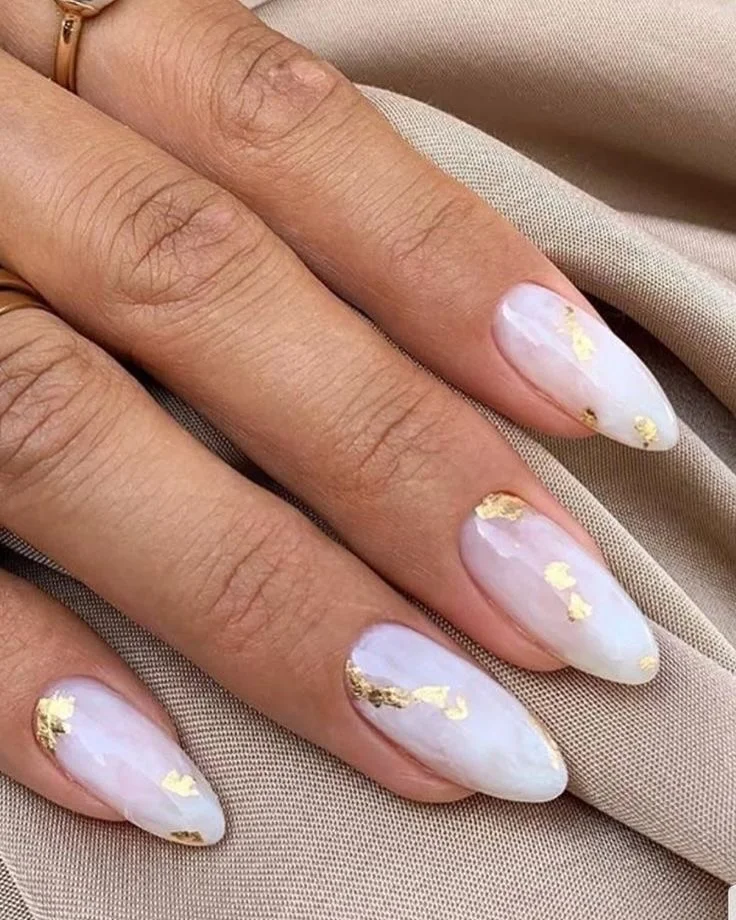
For this look, I would use a sheer milky-white gel layered over a soft pink nude base, together with small pieces of gold foil or gold transfer flakes. A semi-transparent white polish is useful for creating the hazy finish rather than a completely opaque white. I’d keep the top coat ultra-glossy so the gold catches the light without becoming too textured.
I would start by filing the sidewalls inward gradually and rounding the tip into a smooth almond point. After the base color is cured, I’d add a very thin veil of milky white and cure again. Then I’d place tiny pieces of gold foil randomly near the edges and across the center of a few nails, pressing them flat before sealing everything with top coat. The placement does not need to be perfectly symmetrical; in fact, I think it looks better when it isn’t.
I keep coming back to this shape whenever I want something feminine but not overly sweet. The gold gives the manicure enough interest for a dinner or special event, while the neutral base makes it surprisingly easy to wear with everyday clothes. It is the kind of design I could get in September and still feel completely comfortable wearing several weeks into the season.
Soft Square Nails With Tiny Pastel Hearts
There is something instantly charming about a soft square shape, especially when it is paired with a quiet pastel pink base. The straight free edge gives these nails a crisp modern structure, while the softened corners keep them from looking harsh. Tiny hearts in different pastel shades sit individually on the nails, creating a delicate scattered effect rather than a traditional heart-themed manicure.
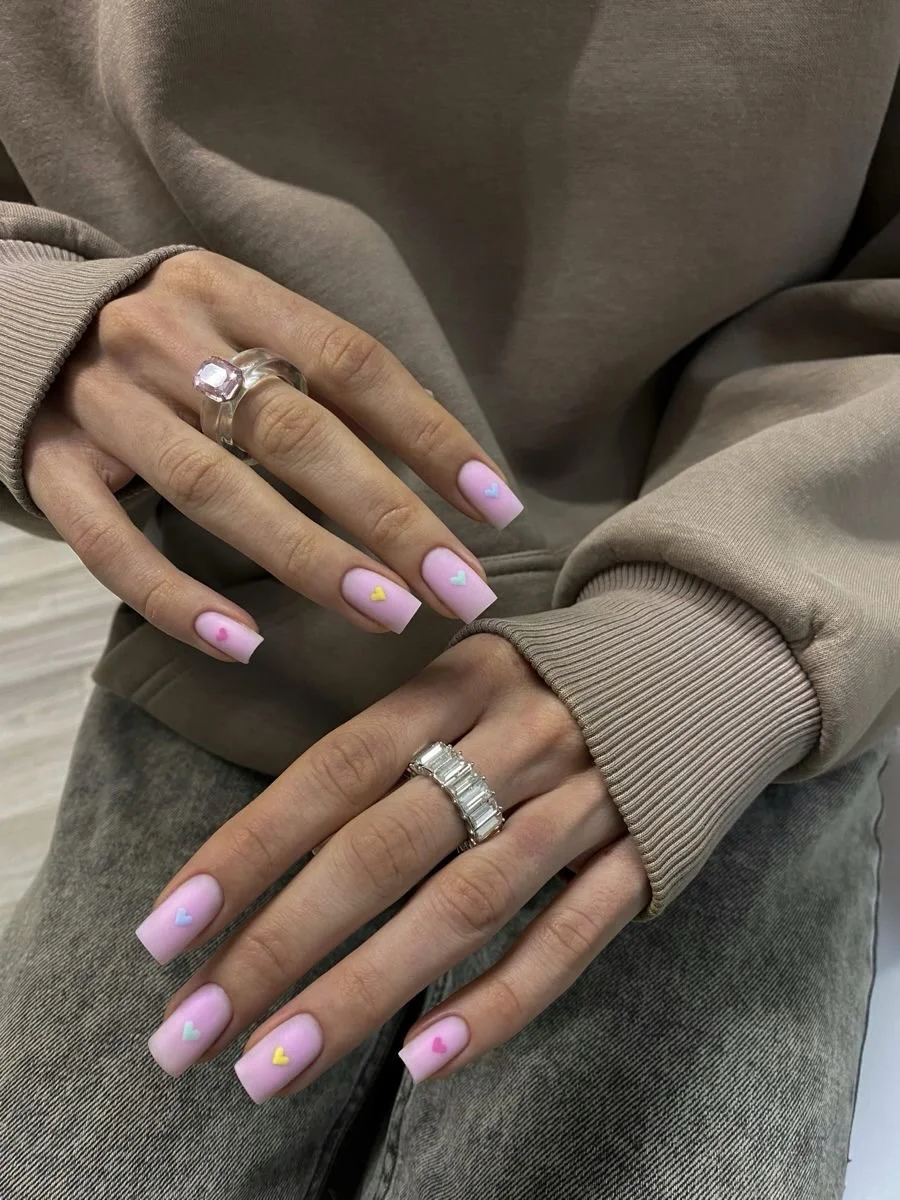
I would choose a muted pink gel polish with a creamy finish and several tiny heart decals or miniature nail-art stickers in pastel shades. If I wanted to paint them myself, I’d use a dotting tool and a very fine brush. A glossy top coat is enough to pull the entire manicure together without competing with the tiny details.
To recreate it, I’d file the nails into a soft square, checking the free edge from several angles so each nail looks balanced. I’d apply two thin coats of pink, cure them, and then place one or two tiny hearts on each nail. I prefer leaving plenty of negative space around the details because the design looks much cleaner that way. One final layer of top coat seals everything and gives the pastel color that smooth, glassy finish.
For me, this is the sweet spot between playful and grown-up. The hearts add personality, but the restrained color palette keeps the manicure from feeling childish. I could easily wear it with denim and a sweater for a casual weekend or with a tailored outfit when I want one small unexpected detail.
Short Oval Nails With a Soft Chrome Gradient
Short oval nails have been having a serious moment in my manicure rotation because they make even a very simple design look polished. Here, a translucent pink base fades into delicate silver-lilac shimmer concentrated toward the tips. One nail adds a fine metallic curve near the cuticle, giving the otherwise uniform manicure a tiny twist. The result is glossy, softly reflective, and incredibly easy to wear.
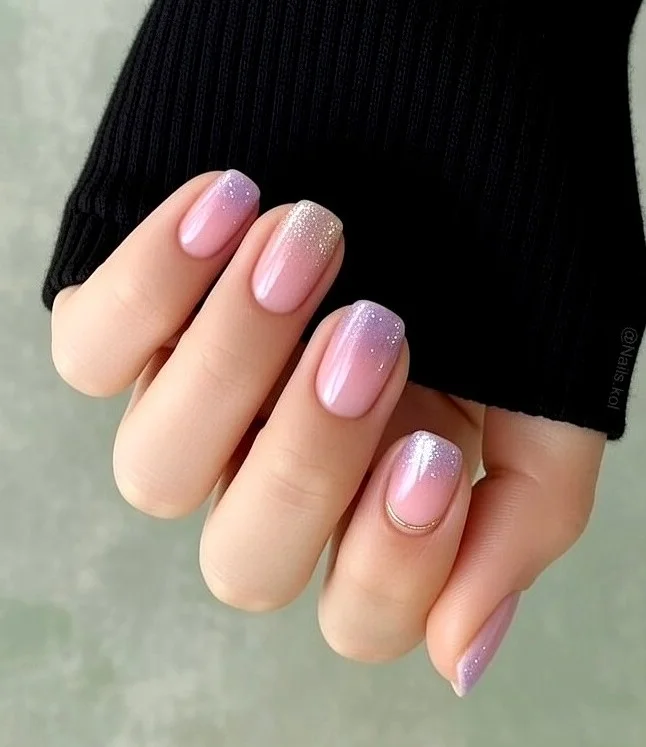
I would use a sheer pink gel as the foundation and a fine silver or lavender chrome powder for the gradient. A no-wipe top coat is useful if I want to apply chrome powder cleanly, while a thin metallic striping gel can create the curved accent. I would keep the shimmer extremely fine so the nails reflect light rather than looking covered in chunky glitter.
After shaping the nails into a smooth oval, I’d apply the pink base and cure it completely. I’d then concentrate the chrome effect around the upper third of each nail, blending it softly toward the center so there is no obvious dividing line. For the accent, I’d draw a thin curved line close to the cuticle and seal the entire design carefully. The finished surface should feel almost weightless.
This is the manicure I would choose when I want something subtle that still catches my eye every time I reach for my phone. The oval shape is practical, the pink base is forgiving as it grows out, and the shimmer changes depending on the light. It feels particularly good for the transition into cooler weather because it has that soft, slightly luminous quality without relying on a heavy seasonal color.
Fresh Green Square Nails With Delicate Texture
Soft green makes the square shape feel fresh without turning the manicure into a full-on color statement. Most of the nails are coated in a muted pistachio-green shade, while one accent nail introduces a sheer neutral base with a delicate lace-like pattern. Tiny metallic embellishments add texture to another nail, giving the manicure a thoughtful mix of flat color, translucent detail, and sparkle.
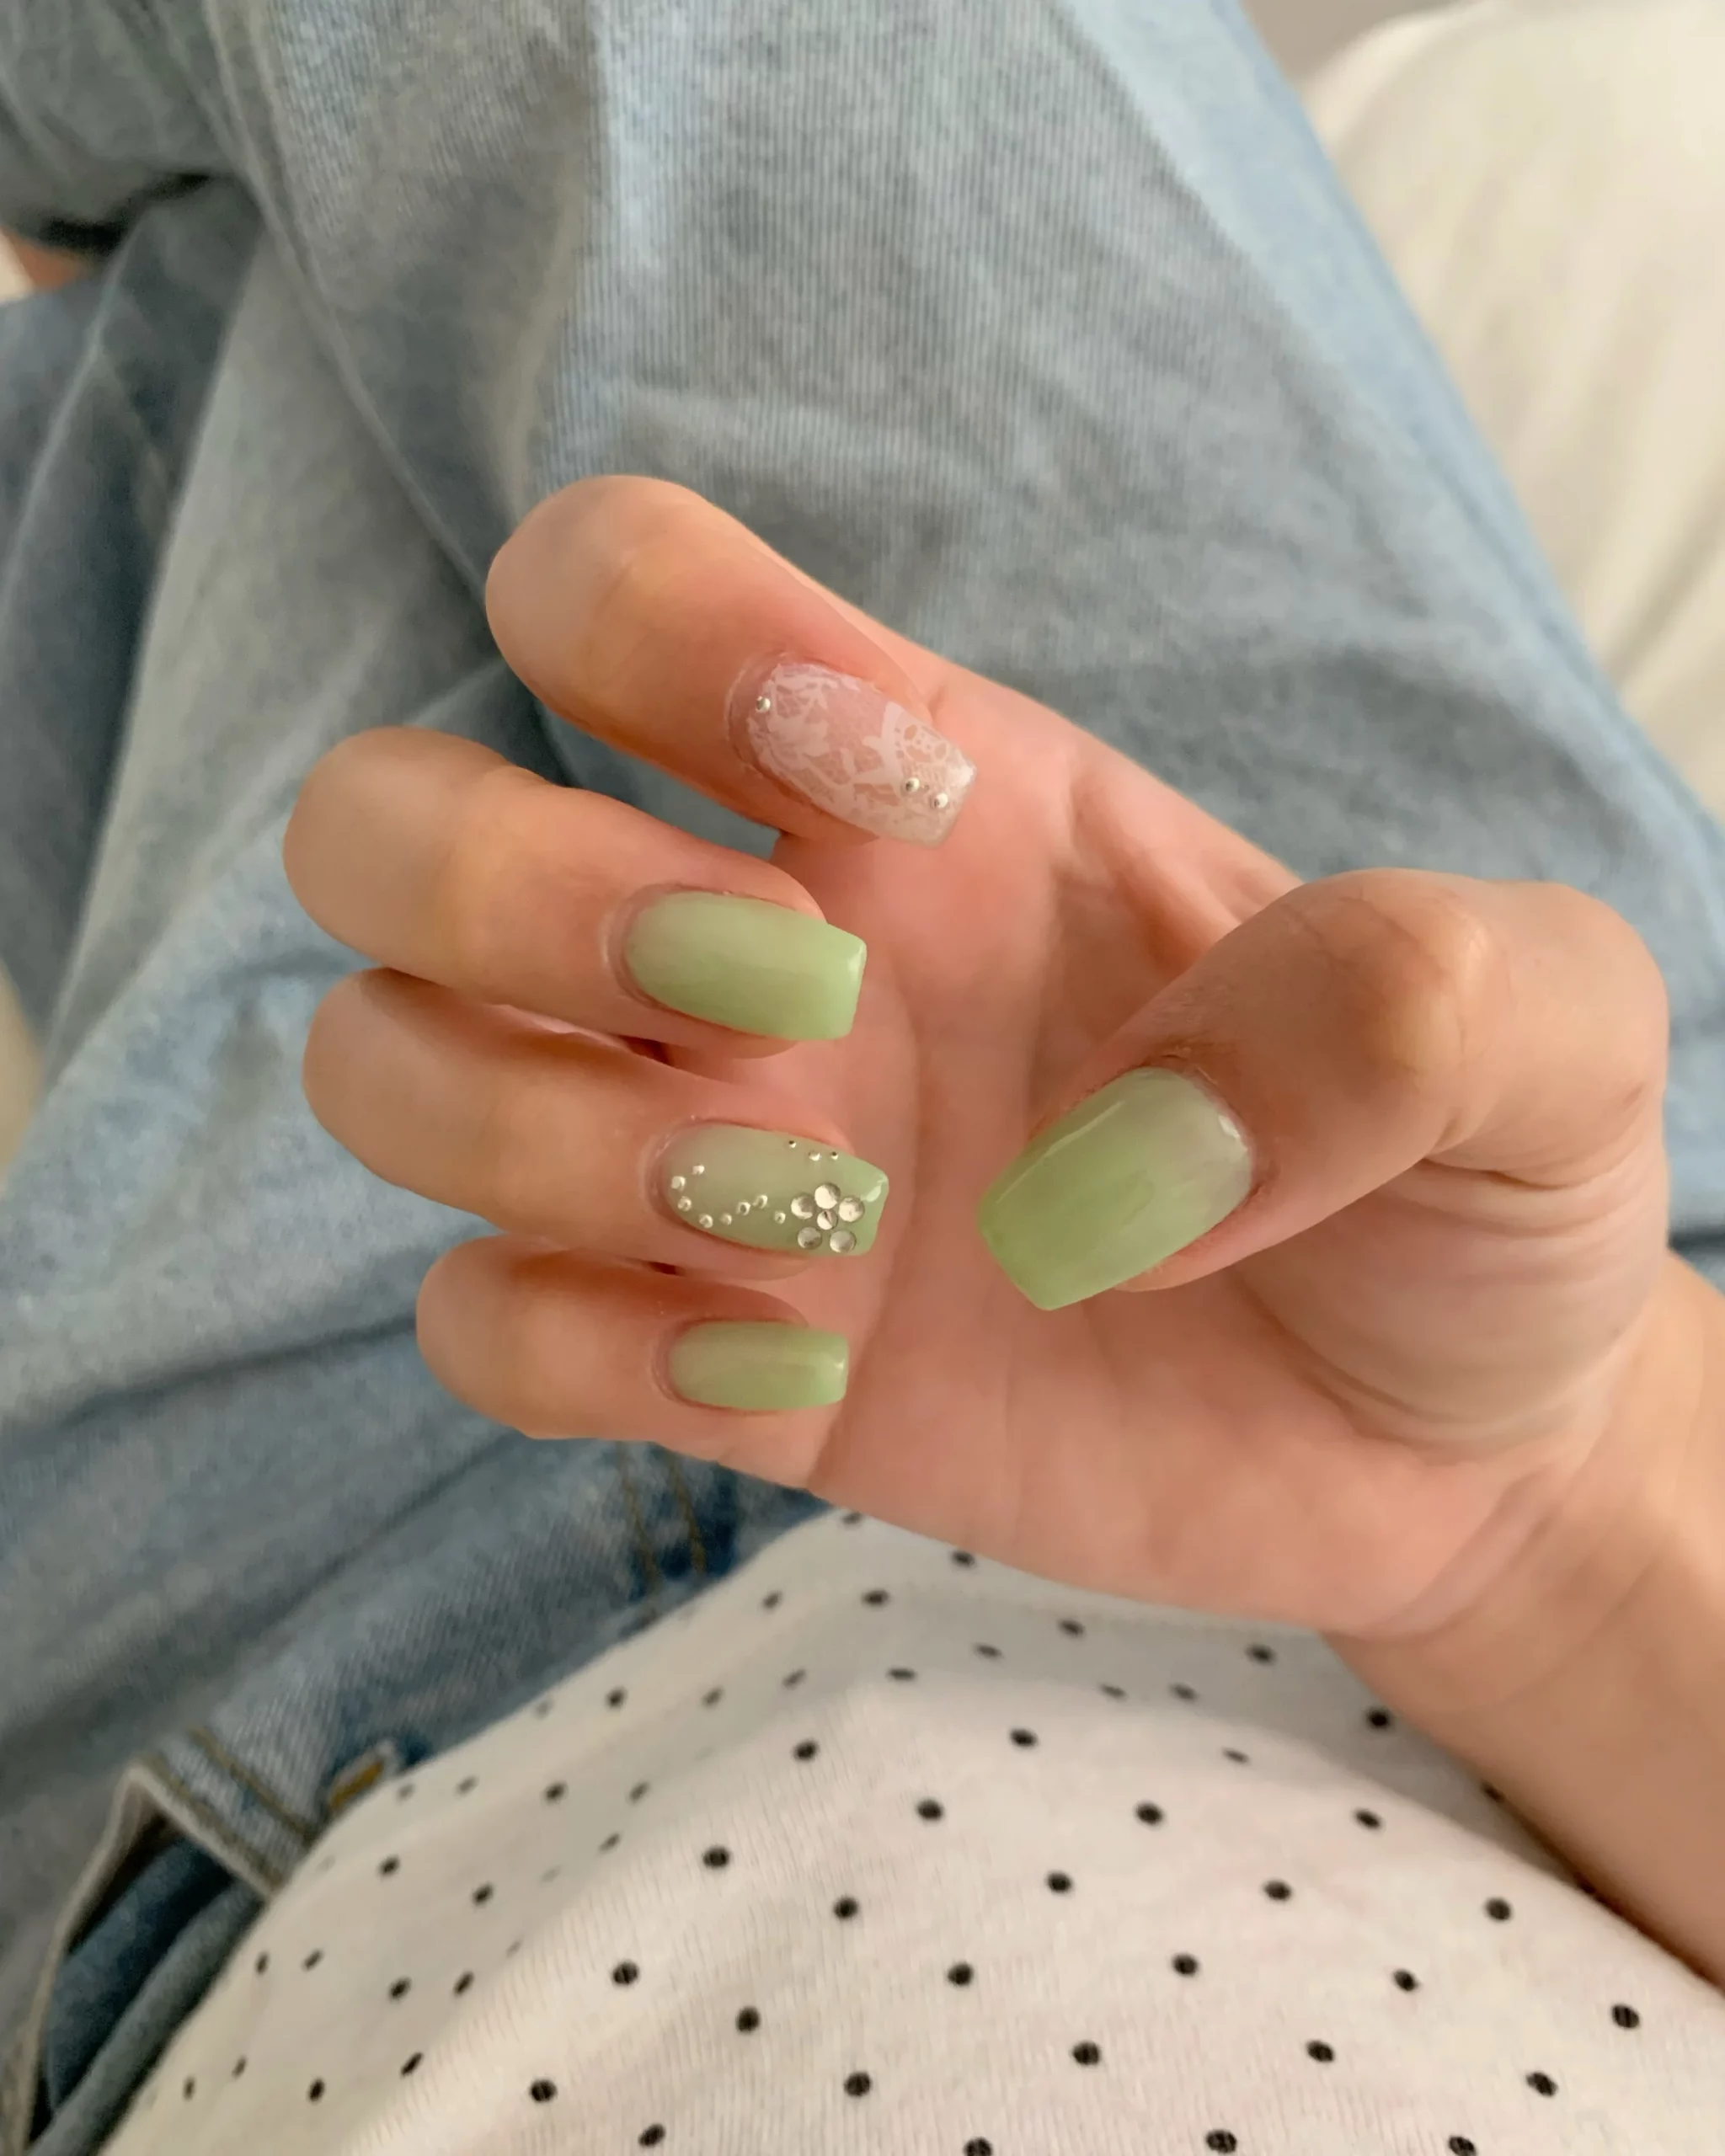
I would use a muted pistachio or sage-green gel polish, a sheer nude base, white stamping polish or lace nail-art gel, and a few miniature metallic studs or crystals. I would also keep a glossy top coat nearby because it helps the green look smooth and saturated. If I wanted the accent to be softer, I’d use a translucent white rather than a solid white.
I’d begin by creating a short-to-medium soft square with gently softened corners. After applying the green base, I’d cure each layer thoroughly before moving on to the decorative nails. For the lace detail, I’d use a fine stamping plate or a small nail-art brush, depending on how precise I wanted the pattern to be. Tiny embellishments should be placed sparingly and pressed securely into the top coat before the final seal.
I like this shape because it feels cheerful without being overly loud. The short length makes the manicure practical, while the green gives it enough personality to stand apart from another neutral manicure. It would be especially cute at the end of summer, when I still want a fresh color but I’m beginning to reach for softer clothes and deeper accessories.
Long Square Nails With a Soft White Shimmer
Long square nails create a completely different silhouette, and this version makes the most of that clean architectural edge. The nails are extended with straight sidewalls and squared-off tips, then covered in an opaque white finish that softly fades into a fine pearly shimmer toward the lower portion. The subtle sparkle keeps the white from feeling flat and gives the manicure a luminous finish.
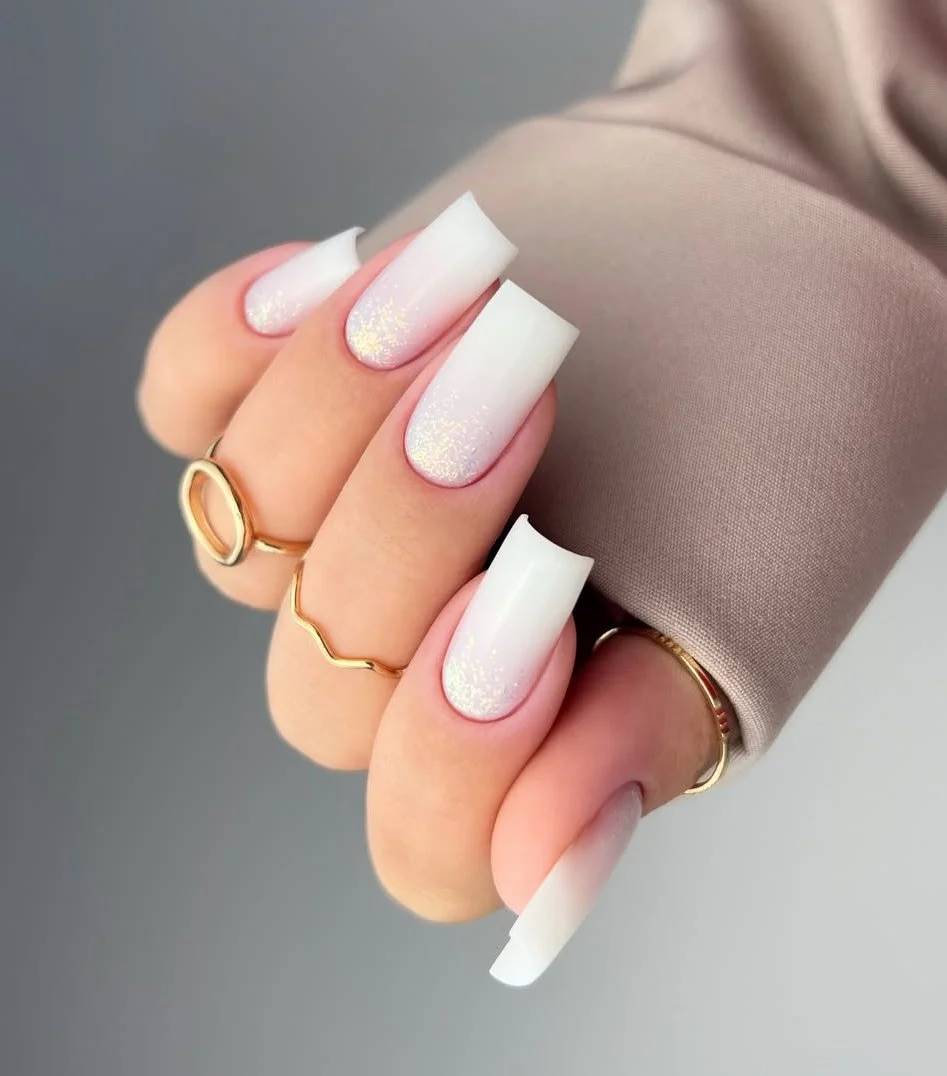
For this design, I’d use an opaque white gel polish, a sheer pink or neutral base if needed, and a very fine iridescent shimmer or pearl pigment. A structured builder gel can help create a smooth long shape before color is applied. I would finish with a high-gloss top coat because the combination of white and shimmer looks best when the surface is perfectly smooth.
I’d first make sure the extensions are even from side to side, paying particular attention to the straightness of the square tips. After the white base is applied, I’d blend a small amount of fine shimmer toward the lower portion of the nails, keeping the effect diffused rather than creating a hard line. Two thin layers of top coat can help smooth everything if the shimmer adds texture.
Deep Burgundy Edges on a Sculpted Stiletto
I love how this long, sharply tapered shape turns a simple nude manicure into something much more defined. The base is a sheer blush-nude that keeps the center of the nail soft and natural, while deep burgundy traces the outer edges and gathers into a crisp point. That contrast makes the nails look elongated without covering the entire surface in dark polish. The silhouette is unmistakably stiletto, although the proportions feel sleek rather than excessively exaggerated, which gives the manicure a very current edge.
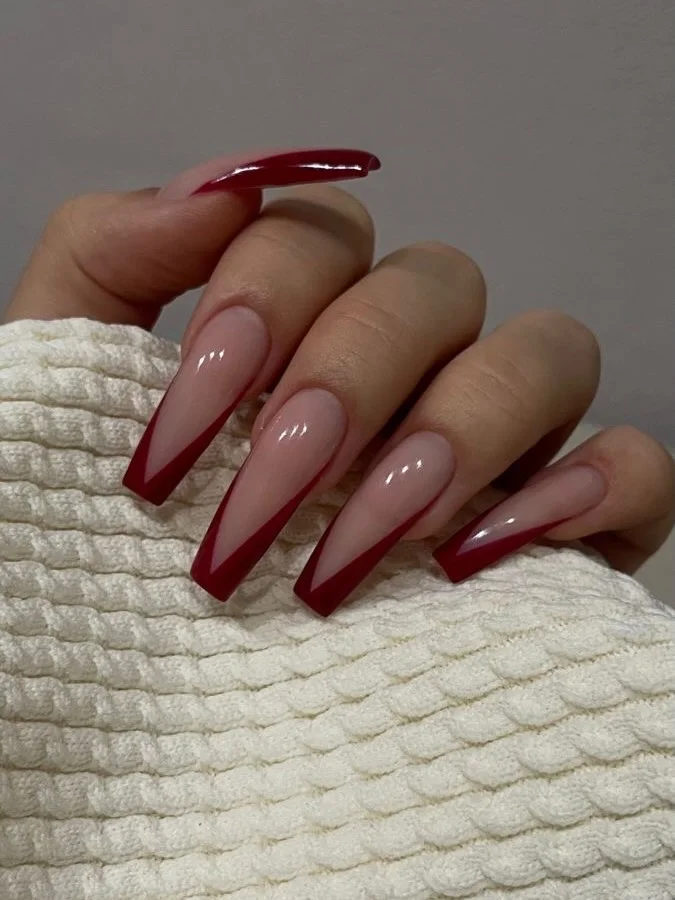
For this look, I would start with a translucent pink-nude gel polish and a rich wine or burgundy gel for the detailing. A high-gloss top coat is essential because the smooth shine makes the color transition look especially clean. I’d also keep a very fine liner brush nearby for drawing the narrow burgundy borders. The beauty of this combination is that I wouldn’t need glitter, rhinestones, or extra decoration—the shape and color contrast are already doing the work.
I would build the long stiletto shape carefully, making sure both sides taper evenly toward the tip. After applying the sheer nude base, I’d outline each side with burgundy, following the natural curve of the nail and keeping the negative space centered. The color needs a steady hand, so I’d cure one nail at a time rather than rushing through the entire hand. Finally, I’d seal everything with a glossy top coat, paying particular attention to the free edge.
This is one of those manicures I’d choose when I want my nails to feel a little mysterious without going completely dark. The burgundy instantly gives the neutral base more personality, and the elongated shape makes even simple jewelry look more intentional. If you love darker colors but don’t want them covering every inch of the nail, this is a clever middle ground.
Milky Almond Nails With a Clean, Elongated Finish
The almond shape remains one of my favorite modern silhouettes because it manages to look polished without feeling severe. Here, the nails are long and smoothly tapered, with rounded sides that flow into softly pointed tips. The milky white finish is slightly translucent, allowing a hint of the natural nail tone to show through underneath. That subtle dimension keeps the manicure from looking flat, while the glossy surface gives it that fresh, just-finished appearance I always notice first.
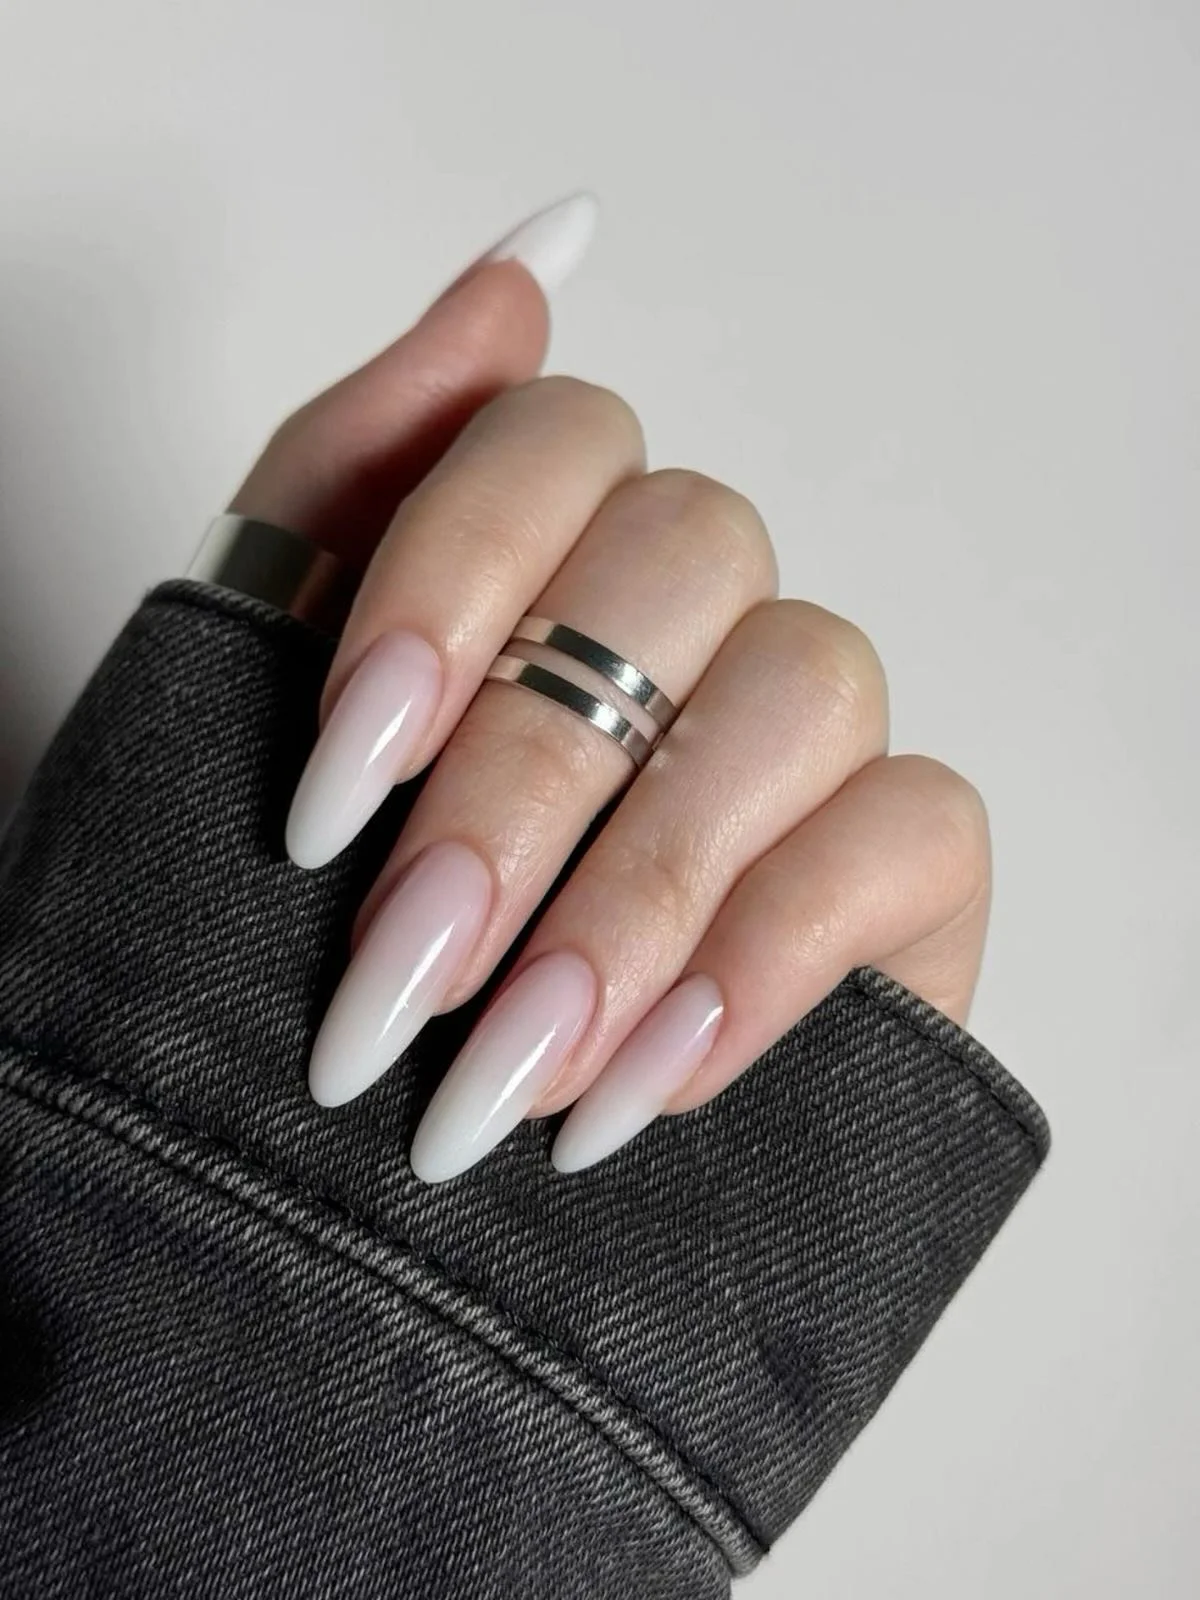
I’d reach for a milky white or semi-sheer ivory gel, ideally one that can be built up in thin layers. A neutral base coat and glossy top coat would complete the essentials. I like this type of color when the formula has enough translucency to create depth rather than becoming opaque after a single coat. The result should look creamy and luminous, not stark.
To recreate it, I’d shape the nails into a balanced almond before applying color. I’d use one thin layer of sheer nude or pink base first, then add the milky white in another controlled layer, keeping the surface smooth around the cuticle. After curing, I’d finish with a glassy top coat. The most important part for me is the shaping: an almond silhouette looks beautiful when the sides are symmetrical and the point is centered.
I could wear this shape with practically anything. A black blazer, denim, a soft knit, even a simple white T-shirt—the manicure quietly pulls everything together. It also has that wonderful quality of making the fingers appear longer without demanding attention. Sometimes that is exactly what I want from my nails.
Soft Butter-Cream Tips on a Modern Square Shape
There’s something unexpectedly pretty about combining a warm creamy center with crisp white tips. The nails have a long square silhouette with straight sides and distinct squared-off ends, while the base carries a soft buttery-yellow tone that feels delicate rather than loud. The white tips create a classic contrast, but the warmer base gives the whole manicure a fresher personality. I especially like how the shape makes the color blocks look precise and graphic.
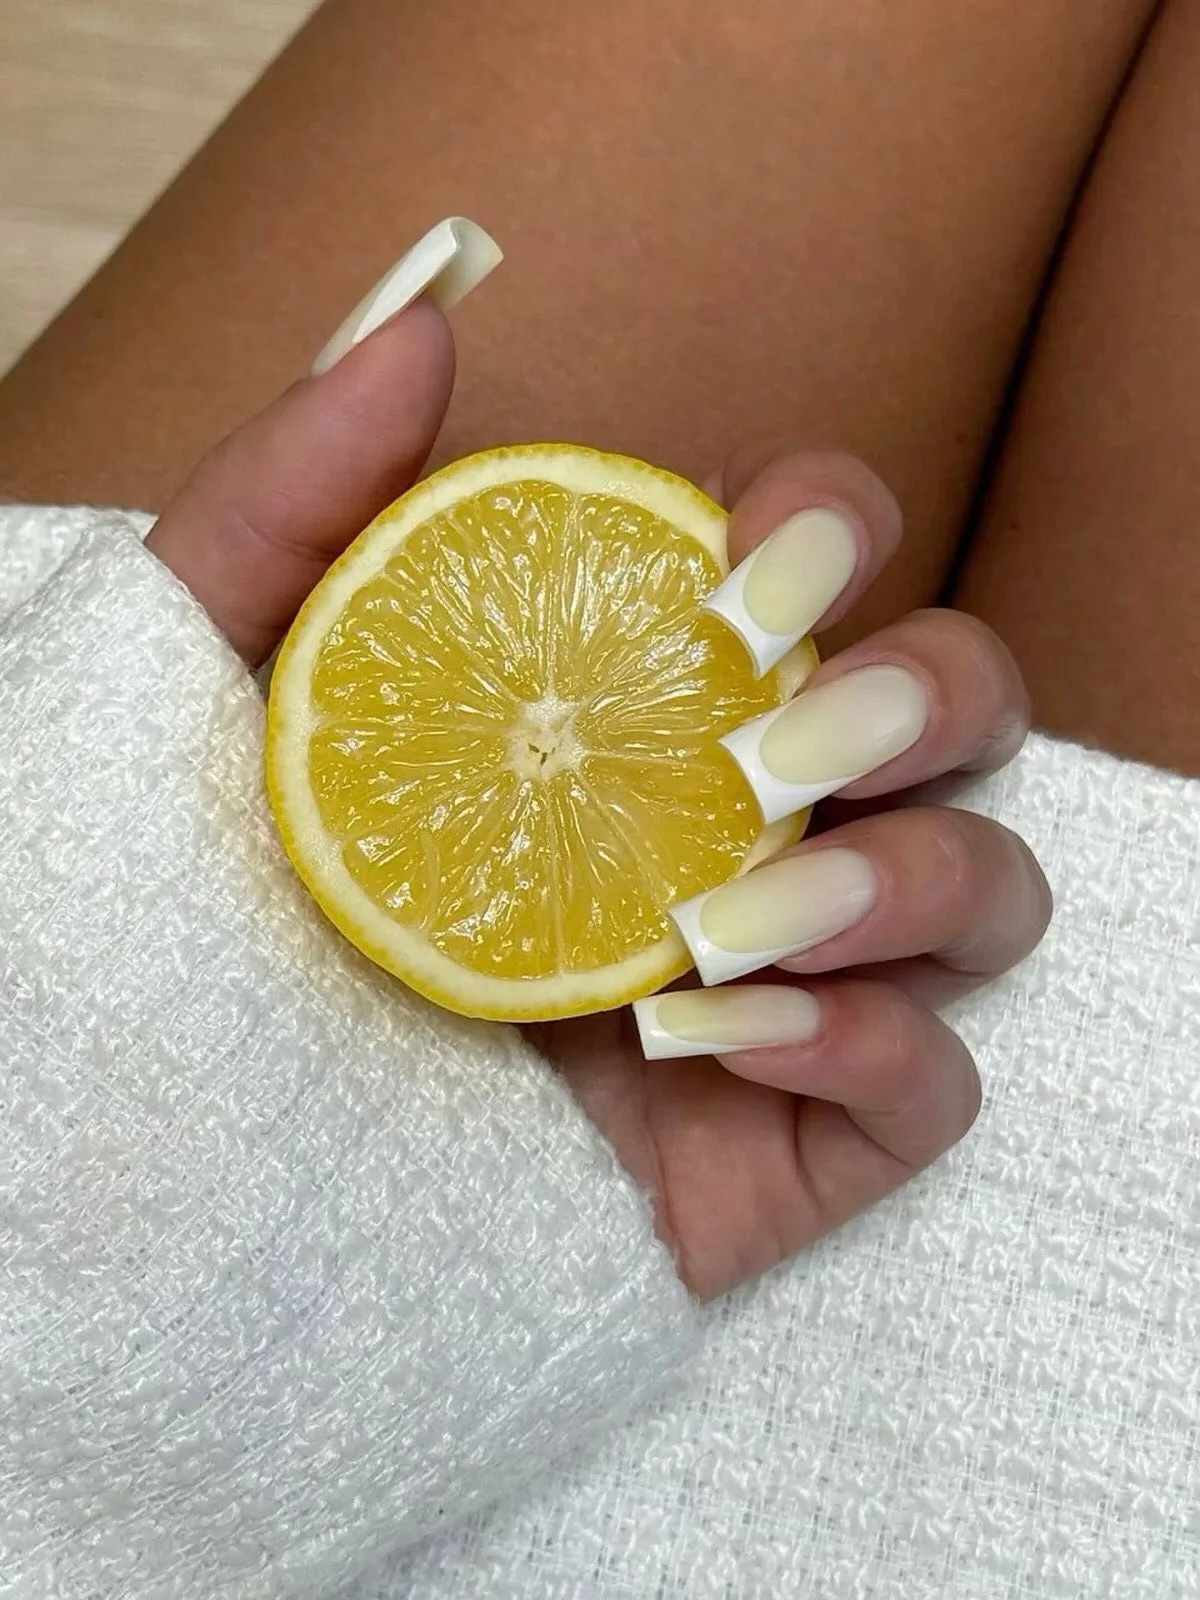
I’d use a sheer butter-yellow gel or a pale creamy yellow for the base, along with a clean white gel for the tips. A thin base coat, detail brush, and glossy top coat would be enough to create the look. For a particularly smooth result, I’d choose formulas that self-level well, because longer square nails show uneven texture more easily than shorter shapes.
I’d begin by filing the nails into a long square, keeping the sidewalls straight and the corners even. Once the base is prepared, I’d apply the creamy yellow shade in thin coats and cure between layers. The French tips can then be painted across the ends with a fine brush, making sure the line follows the square shape instead of curving too deeply. A glossy top coat brings the two colors together and gives the finish that polished salon effect.
This is the kind of manicure I’d pick for a late-summer wardrobe when I want something lighter than a traditional white French. The yellow is soft enough for everyday wear but still adds a tiny spark of personality. And honestly, the square shape makes it feel a little more fashion-forward.
Blush Almond Nails With Tiny Botanical Details
Soft pink almond nails become much more interesting when a few nails are given delicate little details. The main color here is a glossy blush pink with a smooth, elongated almond shape, while selected nails feature a translucent base decorated with tiny pink and purple floral accents. The artwork stays intentionally sparse, allowing plenty of negative space around each detail. I like that restraint because the manicure feels romantic without becoming visually crowded.
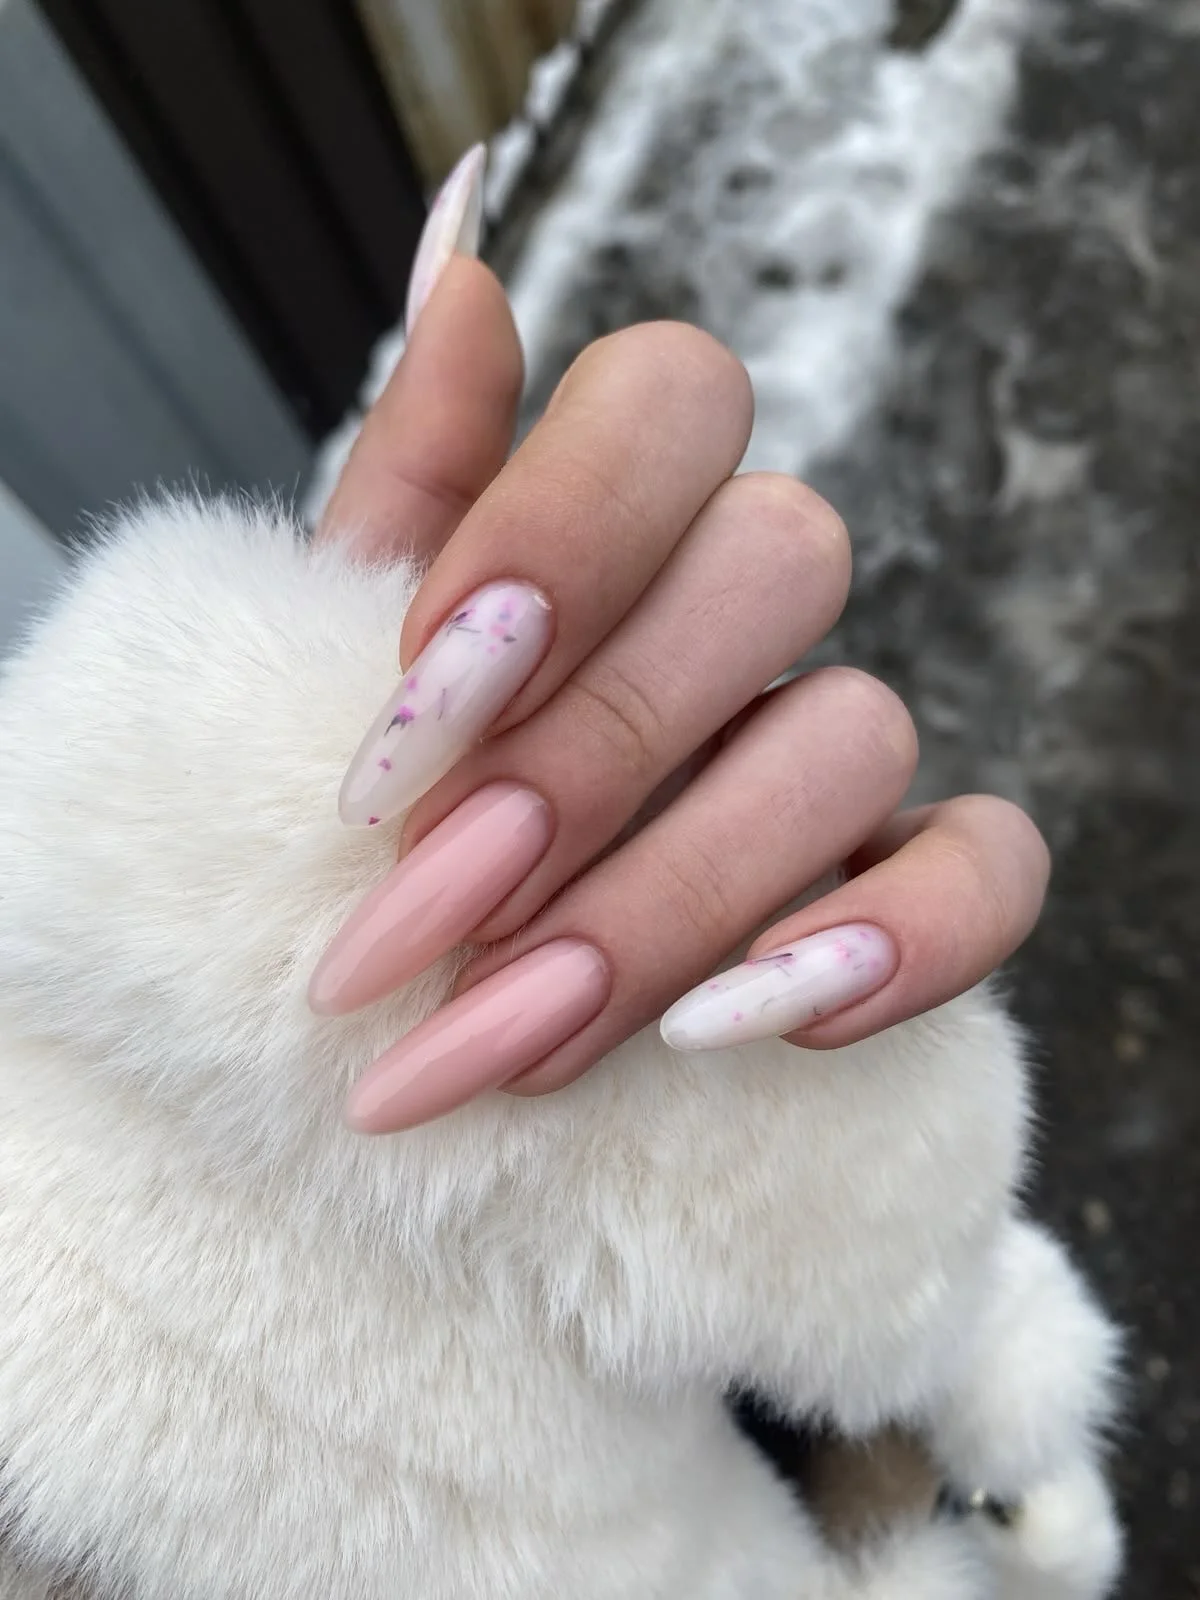
For the base, I’d choose a sheer blush-pink gel with a glossy finish. The accent nails need a translucent milky or nude base, plus tiny floral decals or hand-painted details in soft pink, lavender, and perhaps a touch of green. A very fine nail-art brush or dotting tool makes the small petals much easier to control. I’d finish with a smooth top coat to lock the details in place.
I’d shape every nail into a tapered almond first, then apply the blush shade to the solid-color nails. For the accent nails, I’d keep the base almost translucent and place tiny flowers irregularly rather than arranging them into a perfect pattern. That little bit of imperfection makes the design feel more delicate and natural. After curing the artwork, I’d add top coat carefully so the small decorations remain crisp.
I find this shape especially easy to love because the almond silhouette gives the manicure elegance while the tiny floral accents keep it personal. It would work beautifully for a daytime event, a spring-to-summer transition, or simply one of those weeks when I want my hands to feel prettier than usual. No need to wait for a special occasion.
Rosy Glitter Fade on a Soft Almond Silhouette
This manicure proves that sparkle does not have to take over the entire nail. The long almond shape is coated in a translucent rosy-pink base, while fine glitter concentrates toward the lower portion of each nail and gradually fades as it moves upward. Tiny reflective particles catch the light along the transition, creating a soft glow instead of a solid glitter block. The result feels feminine, glossy, and surprisingly sophisticated.
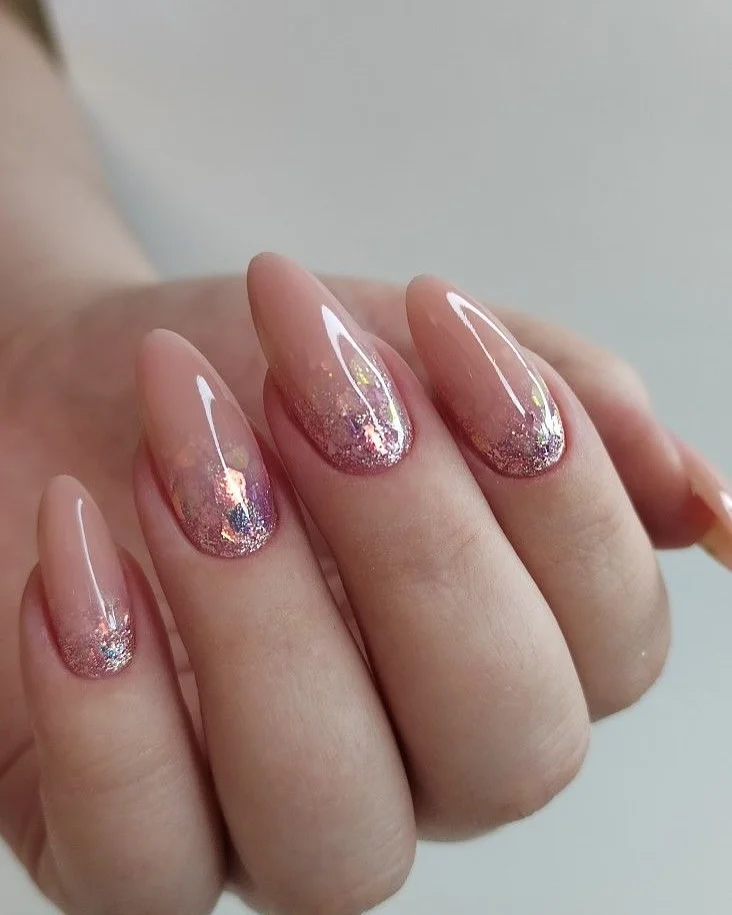
I’d use a sheer pink gel as the foundation and a fine rose-gold or multichrome glitter for the gradient. A small sponge or soft blending brush can help diffuse the glitter, while a thick enough glossy top coat will smooth everything over. I prefer fine shimmer for this style because chunky particles can interrupt the delicate almond shape.
I’d start with two thin layers of the sheer pink, then place the glitter near the lower section of the nail. Rather than creating a hard line, I’d gently feather the particles upward so the concentration becomes lighter toward the center. I’d add another small amount where needed, cure, and then finish with a glossy top coat. The trick is knowing when to stop—too much glitter can erase the subtle gradient.
I’d happily wear this for dinner, a celebration, or simply a night when I’m in the mood for a little extra shine. The almond shape keeps the glitter feminine rather than flashy, and the rosy base makes it surprisingly easy to coordinate with neutral clothing. It’s a quiet sparkle, and sometimes that’s the prettiest kind.
Short Lavender Ovals With Delicate White Florals
Short nails can absolutely have personality, and this soft oval shape is proof. The silhouette follows the fingertip closely, creating a neat, rounded finish that feels comfortable and modern. A translucent lavender-pink color gives the manicure a gentle wash of color, while selected nails feature tiny white floral motifs. One accent nail also carries a subtle shimmer, adding dimension without making the design feel busy.
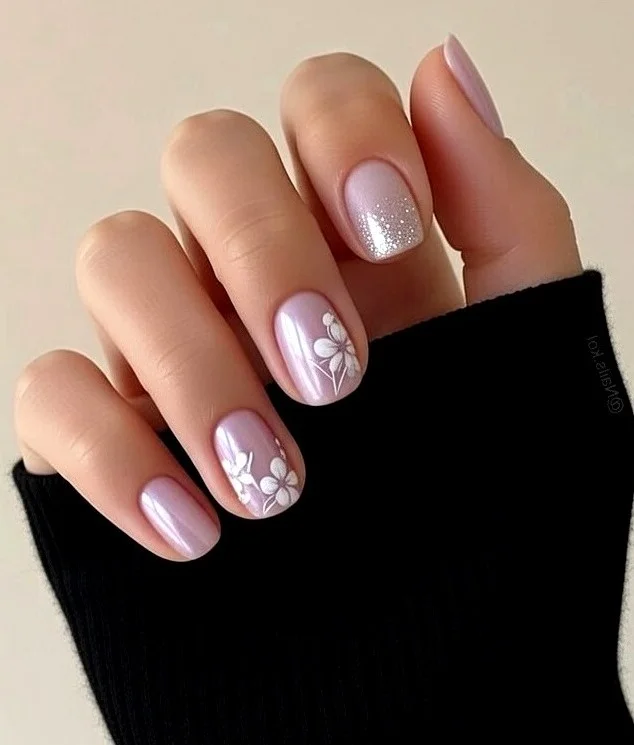
I’d use a pale lavender-pink gel polish, white nail-art gel, and a fine detail brush for the flowers. A delicate shimmer polish or sheer glitter can be reserved for one or two accent nails. Because the nails are short, I’d keep the artwork miniature and airy so the design doesn’t visually overwhelm the available space.
I’d file the nails into a soft oval, following the natural shape of the fingertips rather than creating a dramatic point. After applying the lavender base, I’d paint tiny white flowers on selected nails using small dots for petals and a fine center detail. The shimmer can be brushed lightly over one nail for contrast. A glossy top coat finishes everything while keeping the short shape looking sleek.
I especially like this option for anyone who loves nail art but does not want long extensions. The short oval shape feels practical for everyday routines, yet the lavender and floral details make it far from boring. It has that easy quality that makes me want to keep it on for weeks.
Milky White Nails With Petite Red Flower Accents
A milky white manicure gets a completely different mood when tiny red floral details are scattered across a few nails. The nails have a short-to-medium oval shape with softly rounded tips, making the clean white base look even more refined. The small red marks are delicate rather than graphic, almost like tiny petals placed across a creamy canvas. I love this approach because the decoration is noticeable only after you look a little closer.
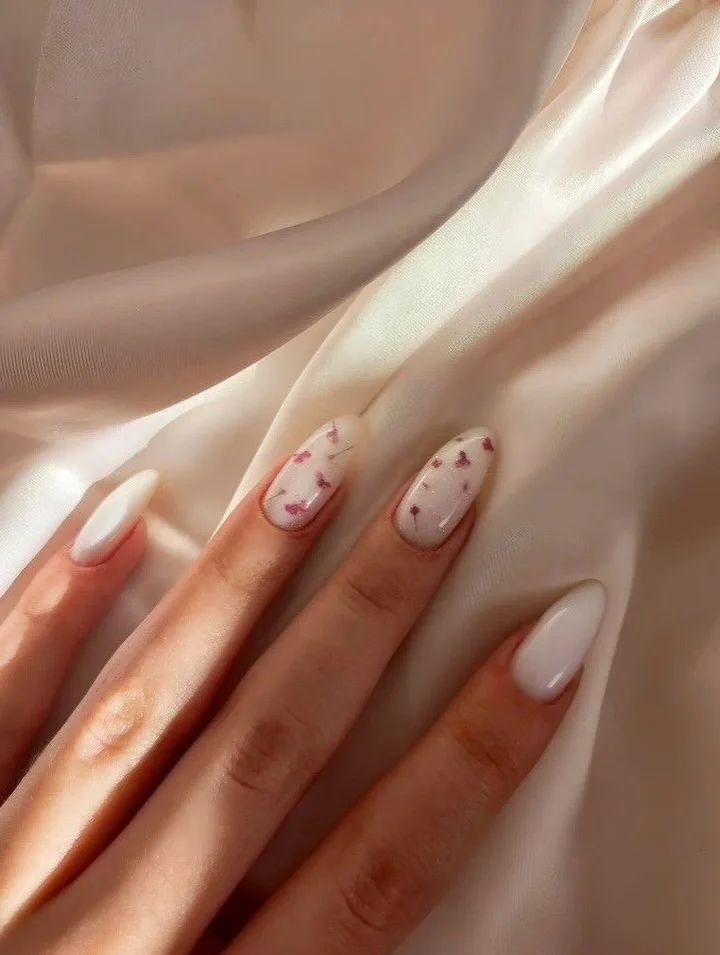
I’d choose a sheer milky white or soft ivory polish for the base and a deep cherry-red gel for the tiny accents. A fine dotting tool works particularly well for miniature petals, while a thin liner brush can add tiny stems or connecting details if desired. The glossy finish is important here because it keeps the white surface looking smooth and luminous.
After shaping the nails into a neat oval, I’d apply the milky base in thin layers. Once cured, I’d add small red floral clusters to only a few nails, varying their placement so the result feels organic. I wouldn’t try to make every flower identical; slight differences make miniature nail art look much more natural. One final layer of glossy top coat seals the design and gives the white base extra depth.
This is such an easy manicure to imagine with a white button-down, denim, or a simple knit. The red details give the neutral base a little energy without turning it into a statement manicure. If I wanted something understated but still Pinterest-worthy, I’d keep this one in my rotation.
Statement Stiletto Nails With Mixed Modern Details
When I want the nail shape itself to become part of the design, a long stiletto silhouette is hard to ignore. These nails are dramatically tapered toward pointed tips, but each nail tells a slightly different story. There is a glossy deep-red pointed tip, a sparkling nude-and-black geometric treatment, a metallic gold accent, and playful decorative details on other nails. The shared nude base keeps all those elements connected, so the manicure feels intentionally coordinated rather than random.
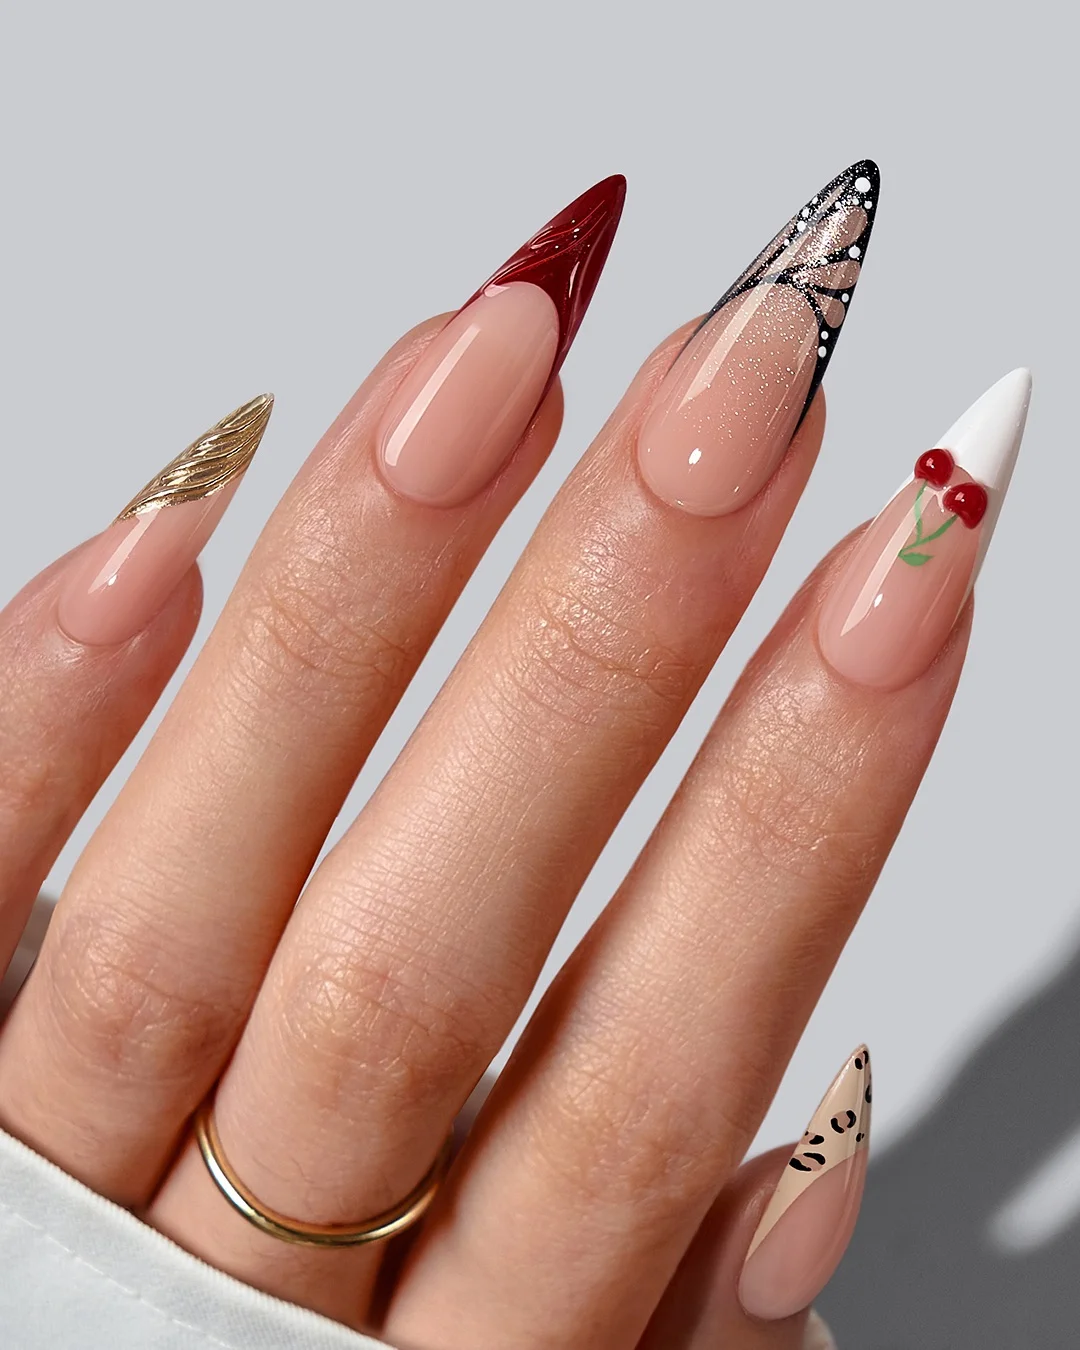
For a set like this, I’d need a sheer nude-pink gel as the foundation, plus deep red, black, white, and metallic gold detailing colors. Fine glitter, a liner brush, dotting tool, and small decorative elements can create the variety of finishes. I’d keep the palette tightly edited because multiple designs already bring plenty of visual interest.
I’d shape the nails into a consistent stiletto first, paying close attention to the central point of every tip. Then I’d establish the nude base before assigning each nail its individual artwork. One can receive a sculpted red tip, another a black-and-nude geometric pattern, another metallic gold detailing, and another a playful miniature motif. I’d cure each layer separately and finish with a glossy top coat to unify the different textures.
This is my choice when a quiet manicure simply won’t do. The long shape creates a strong silhouette, while the mixed details make the set feel almost like a tiny jewelry collection for the hands. I’d wear it with simple clothing and let the nails have their moment—because sometimes the manicure really is the accessory.
Soft Almond Nails With a Golden French Detail
I keep coming back to almond nails because the silhouette is so naturally flattering. The sides taper gently toward a rounded point, creating an elongated appearance without the sharpness of a stiletto. Here, a translucent milky-pink base meets crisp white French tips, while delicate gold edging follows the curved line near the cuticle. The combination feels refined but still has that little flash of personality.
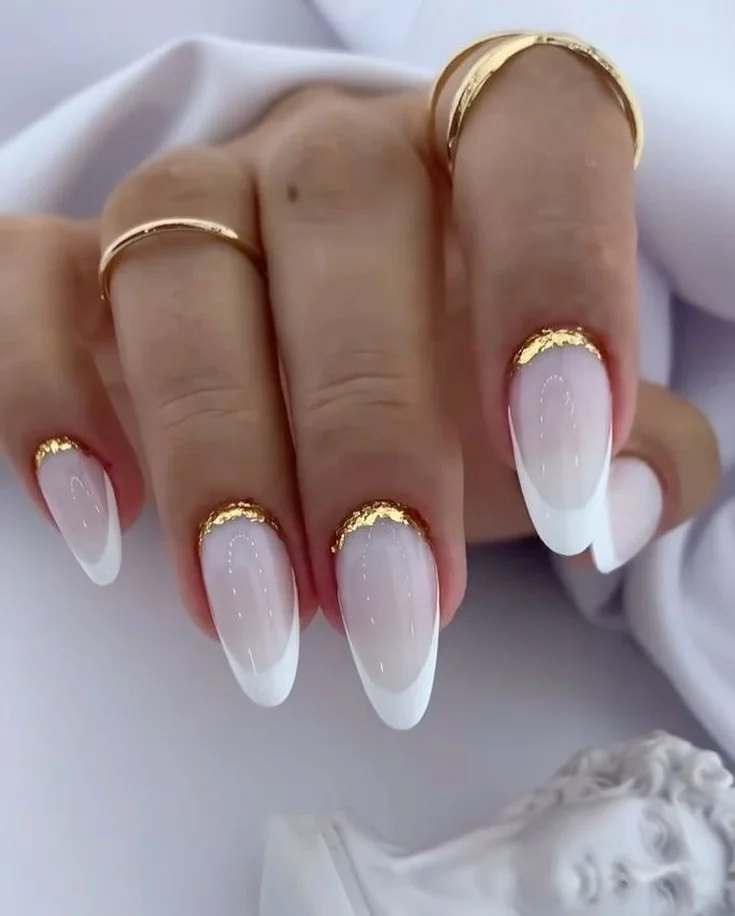
To recreate this manicure, I would start with a sheer pink or milky nude gel, followed by a soft white gel for the French tips. A thin metallic gold gel paint or transfer foil can create the fine gold detail around the base. I would also keep a high-shine top coat nearby because the glossy finish is important to the overall effect. The goal is not a heavy metallic manicure; the gold should read almost like jewelry.
I would shape the nails gradually, filing both sides toward the center while keeping the tip softly rounded rather than sharply pointed. After applying the nude base, I’d carefully paint the white tips and cure them before adding the gold accent. A detail brush makes the curved gold line much easier to control. One small trick I’ve learned is to work with very thin layers, especially around metallic details, because bulky edges can quickly take away from the elegant shape.
For me, this is one of those manicures that can move effortlessly from late summer into fall. The almond shape gives the fingers a long, graceful appearance, while the white and gold combination works beautifully with denim, knitwear, tailored pieces, or a simple black dress. If you want something polished without feeling predictable, this shape is an easy place to start.
Short Square Nails With a Minimal Graphic Accent
Short square nails have a completely different personality. Instead of creating length, this shape celebrates a neat, compact silhouette with straight sidewalls and a defined free edge. The manicure combines a sheer pink-nude base with classic white French tips, while one accent nail introduces a delicate black-and-white linear pattern. I like how the graphic detail stays concentrated rather than taking over the whole set.
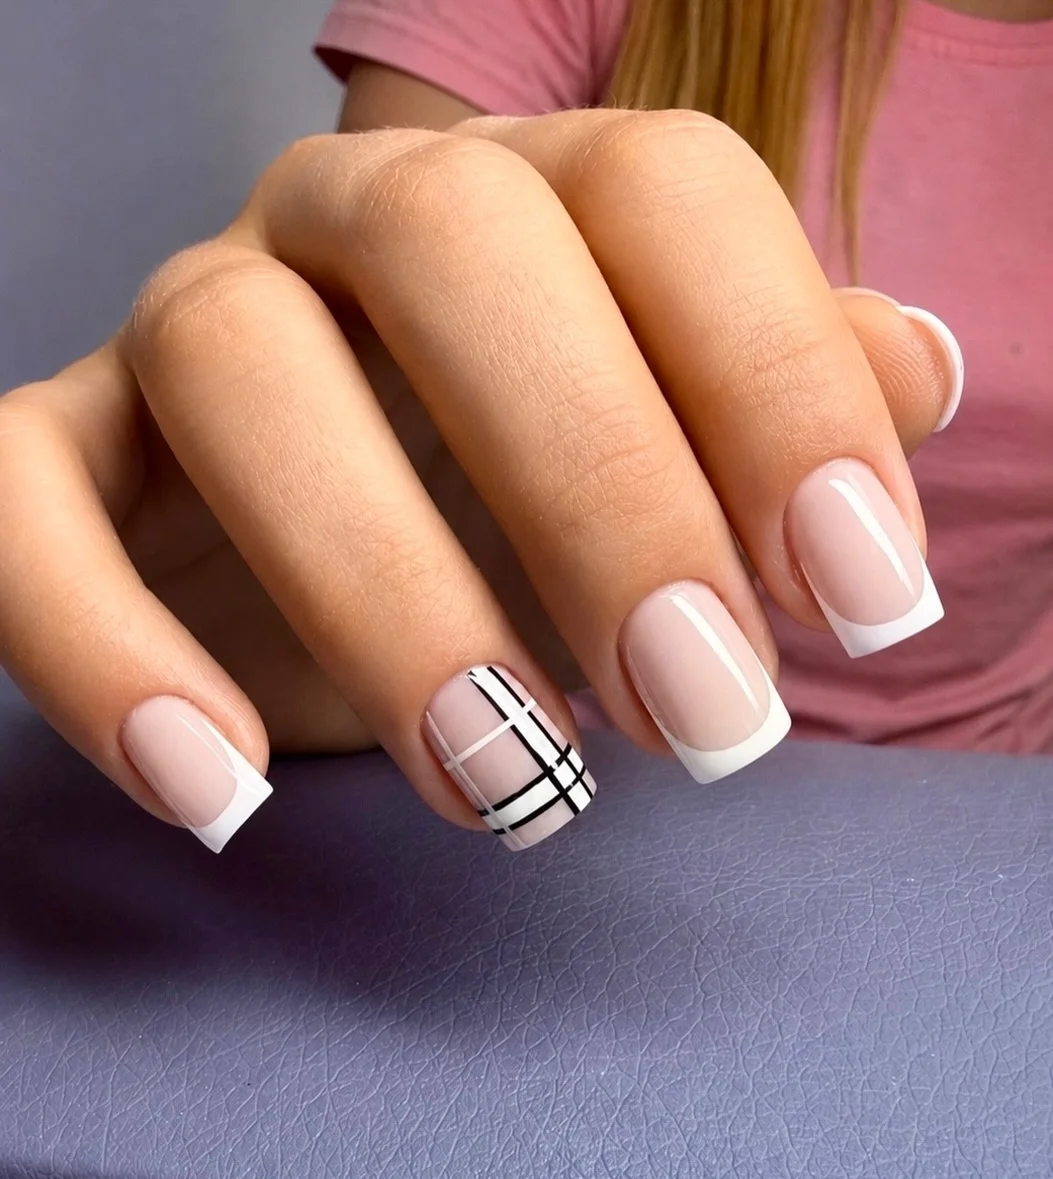
For this look, I would use a sheer blush or neutral pink base, an opaque white polish for the French tips, and black and white nail art gels for the accent. A very fine striping brush is useful for creating the intersecting lines, although thin nail-art tape can make the process easier at home. A glossy top coat brings everything together and keeps the short square shape looking crisp.
I would file the free edge straight across and make sure the corners remain softly defined rather than extremely sharp. After applying the base color, I’d create a narrow French tip on each nail and cure it. On the accent nail, I’d draw a few vertical and horizontal lines in different widths, leaving enough nude space between them to keep the design airy. This is one of those occasions where restraint really matters.
I especially like short square nails when I want something practical but still fashion-conscious. They don’t require the length associated with many elaborate designs, and the clean geometry gives even a simple manicure a deliberate finish. Add a tiny graphic accent and suddenly the whole set feels much more current. It’s proof that short nails absolutely do not have to be boring.
Rounded Short Nails With Tiny Black Hearts
A rounded short shape softens the hand and gives a manicure an almost effortless quality. The sheer pink base here keeps the nails looking natural, while tiny black hearts are scattered across the surface in an intentionally irregular arrangement. There is also a subtle touch of sparkle on a few nails, which keeps the design from feeling too flat. It’s sweet, but not overly precious.
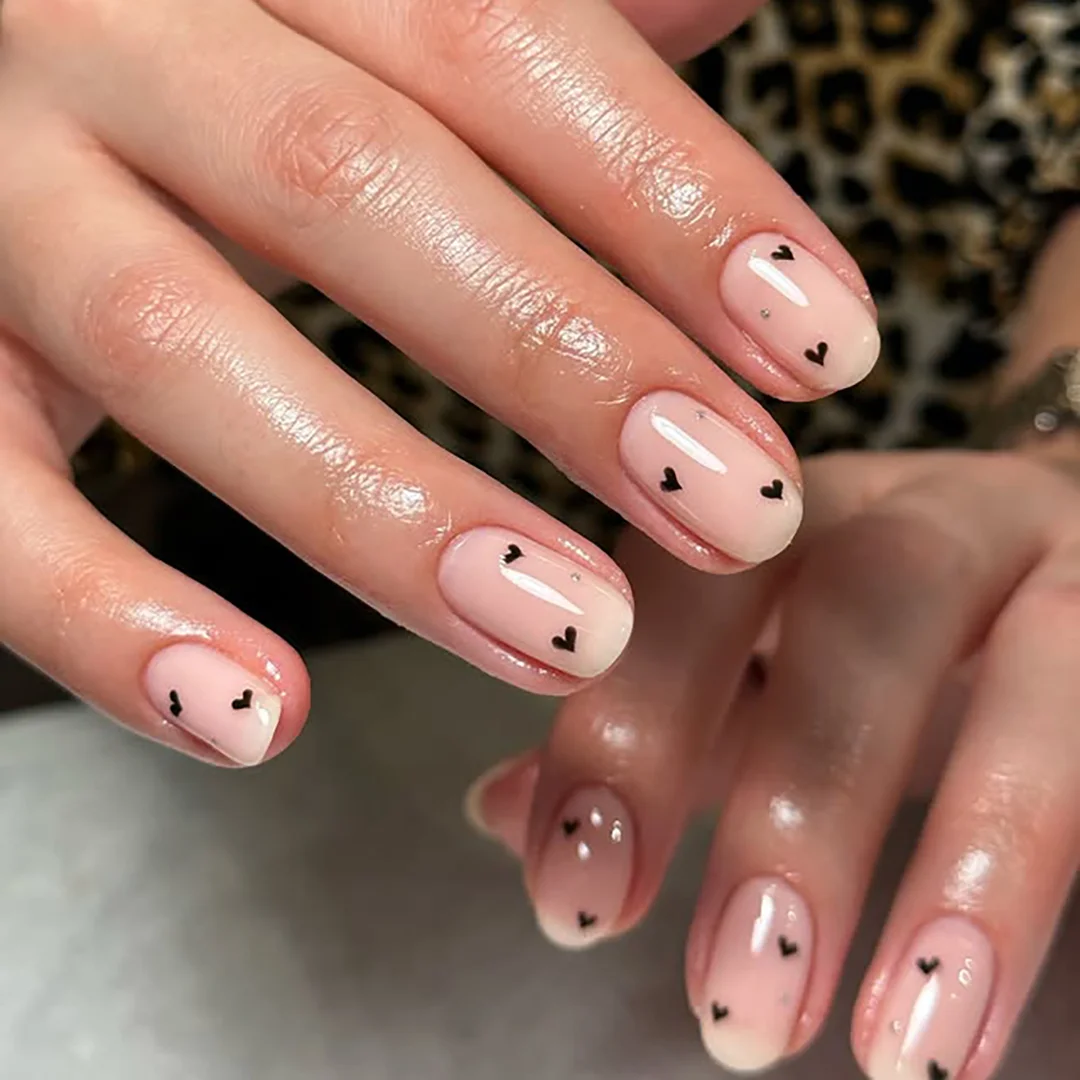
I would use a translucent pink-beige gel or builder base, a highly pigmented black nail-art gel for the hearts, and a small amount of fine silver or clear glitter if I wanted to recreate the delicate accents. The glossy finish is essential because it makes the sheer base look fresh and gives the little details more dimension. A dotting tool can also help create the two rounded lobes of each heart before connecting them.
My approach would be to keep the nails short and gently rounded, following the natural shape of the fingertip. Once the base is cured, I’d place the hearts at slightly different angles and positions instead of making every nail identical. I find that tiny differences make minimalist nail art look much more natural. After curing the details, I’d seal everything with a smooth layer of top coat.
This is the kind of manicure I would choose for everyday wear when I want a little personality without committing to a complicated design. The short rounded shape is particularly easygoing, and the neutral base makes the black accents stand out without becoming overwhelming. It would work just as well with a white T-shirt and jeans as it would with a polished evening outfit.
Long Square Nails With a Soft Pink Confetti Finish
Long square nails make a stronger statement because their straight sides and broad tips create a more architectural silhouette. The soft pink base keeps that structure feminine and delicate, while tiny flecks and translucent decorative pieces add texture across the surface. Crisp white tips complete the look, creating a fresh contrast against the pink. I love the way the squared shape gives the delicate details a little more visual space.
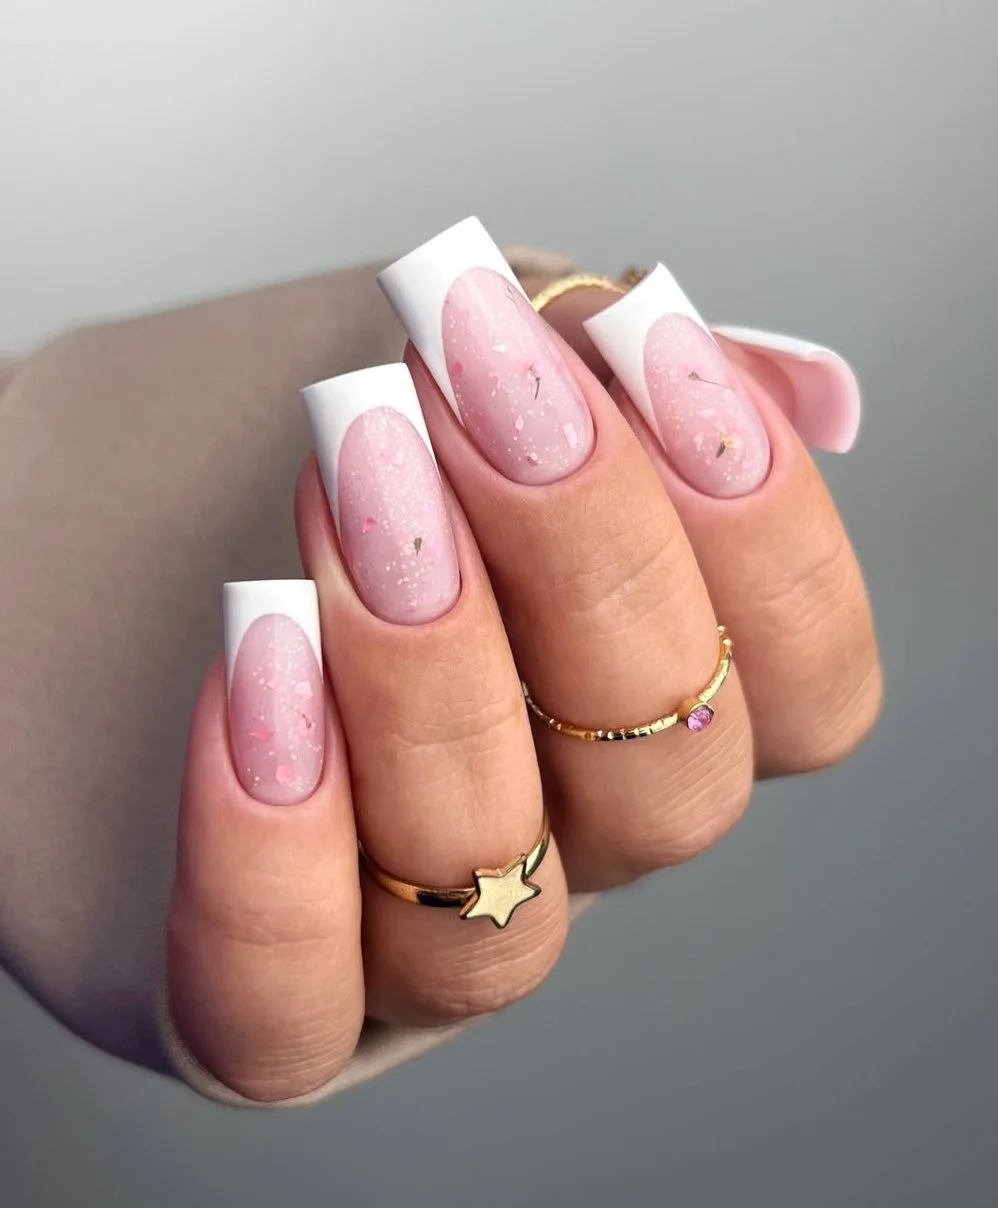
For a similar manicure, I would reach for a sheer pink builder gel or gel polish, an opaque white for the tips, and small iridescent or pale pink flakes for the scattered decoration. Fine glitter can also be pressed into the base for additional dimension. Because long square nails can visually carry more design, I would avoid adding too many different finishes at once.
I would first create the straight-sided square silhouette and make sure all the tips are even. After applying the sheer pink base, I’d place the tiny decorative flakes while the appropriate layer is still workable, then cure everything securely. The white tips can be painted afterward, followed by a thick enough top coat to smooth the surface without making the nails look bulky. Precision at the shaping stage matters just as much as the nail art here.
I see this shape as a particularly good choice when I want my manicure to become part of the outfit rather than simply an accessory. The long proportions give rings and bracelets plenty of visual company, while the pink-and-white palette keeps the overall effect light. It would be beautiful for a special event, but I could also see it working surprisingly well with a casual fall wardrobe.
Glossy Almond Nails In a Barely-There Nude
Sometimes the shape does all the talking. These elongated almond nails are coated in a warm nude-pink shade with a completely glossy finish, allowing the smooth silhouette to remain the focus. The color is close enough to a natural nail tone to feel understated, while the length and tapered sides create a noticeably elongated effect. It is minimalist manicure territory, but with enough polish to feel intentional.
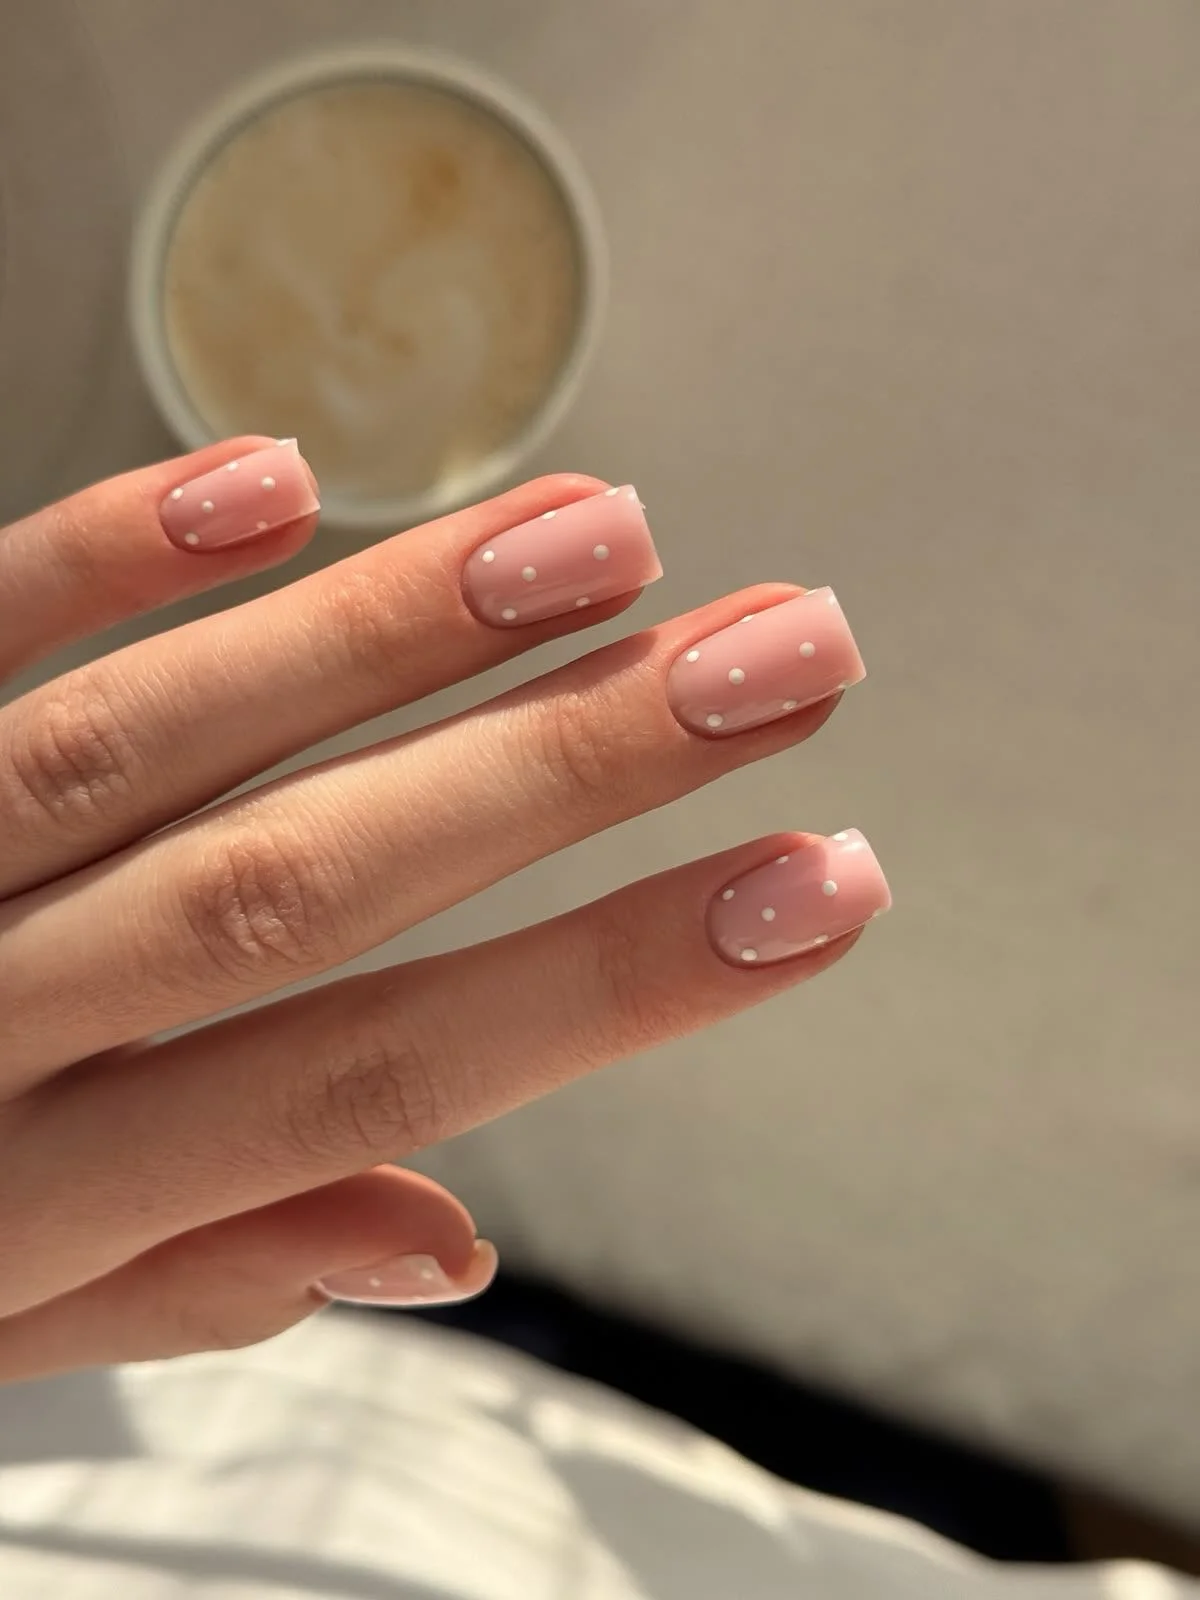
I would choose a nude gel polish with a slightly warm pink or peach undertone and a glossy top coat. For this particular look, I would skip glitter, artwork, and additional embellishment. The beauty comes from the relationship between the nude color, the clean cuticle area, and the almond shape. A builder gel can also be useful if extra structure is needed for longer natural nails.
I would gently taper the sidewalls toward the tip, checking the shape from several angles so the almond silhouette stays balanced. After smoothing the surface, I’d apply the nude shade in thin coats and cure each layer properly. The final top coat should be exceptionally smooth because every tiny imperfection becomes more visible when the manicure is this simple. Cuticle care also makes a big difference here.
Personally, this is the shape I’d recommend whenever I want my hands to look instantly polished without committing to nail art. It pairs beautifully with gold jewelry, neutral clothing, denim, and almost any seasonal color palette. And when fall arrives and wardrobes become richer and deeper, a glossy nude almond manicure provides exactly the right quiet contrast.
Structured Square Nails With Animal-Print French Tips
Square nails become much more playful when the French tip is reworked with a pattern. This set uses a soft pink translucent base with white tips decorated by black-and-pink animal-inspired markings. A few nails also feature dimensional floral accents, creating contrast between the structured square silhouette and the softer decorative elements. The result has a distinctly fashion-forward feel without covering the entire nail in artwork.
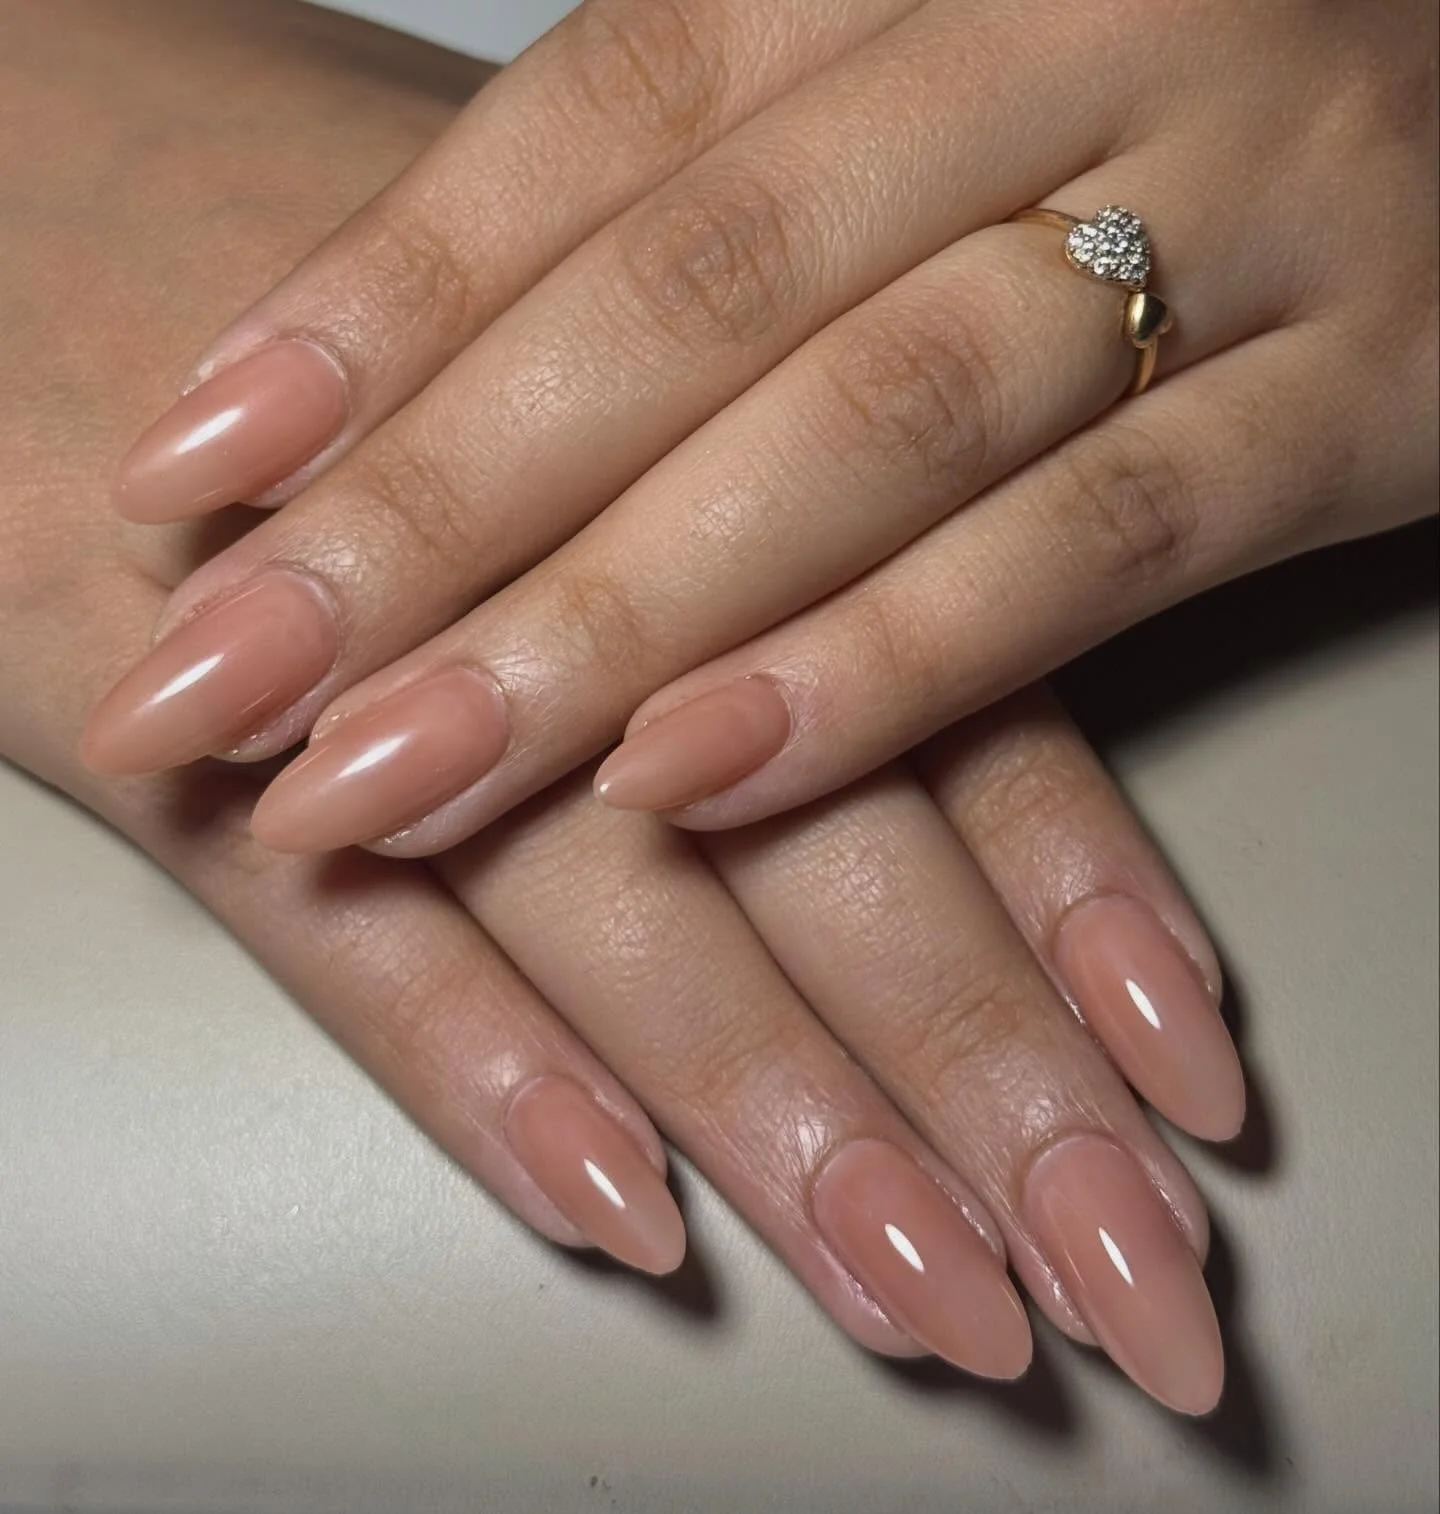
I would use a translucent pink base, white gel for the French tips, and black and pink nail-art colors for the pattern. For the raised floral details, a small 3D gel or preformed nail-art embellishment would work. A glossy top coat can be applied around dimensional elements rather than excessively over them, depending on the product being used. The important thing is to keep the base clean so the patterned tips remain the visual focus.
I would shape the nails with straight sides and a defined square edge, then create the white French sections. Once those are cured, I’d add irregular black markings and small pink accents rather than trying to make every detail perfectly symmetrical. The floral embellishments can be placed selectively on one or two nails. I think the manicure looks more sophisticated when there is some breathing room between statement elements.
This is the kind of square shape I would choose when I want my manicure to feel fun but still coordinated. The soft pink foundation makes the animal-inspired French tips much easier to wear than a full patterned nail. It could be a great choice for a weekend look, a birthday celebration, or simply a moment when a classic French manicure feels a little too safe.
Long Square Nails With Playful Pink Patterned Tips
Another take on the square silhouette brings an even more decorative approach, pairing a glossy pink-nude base with patterned tips in black, white, and soft pink. The squared ends give the design a clear frame, while delicate floral accents appear on selected nails. What makes this combination work for me is the balance between the clean negative space near the cuticle and the busier tips.
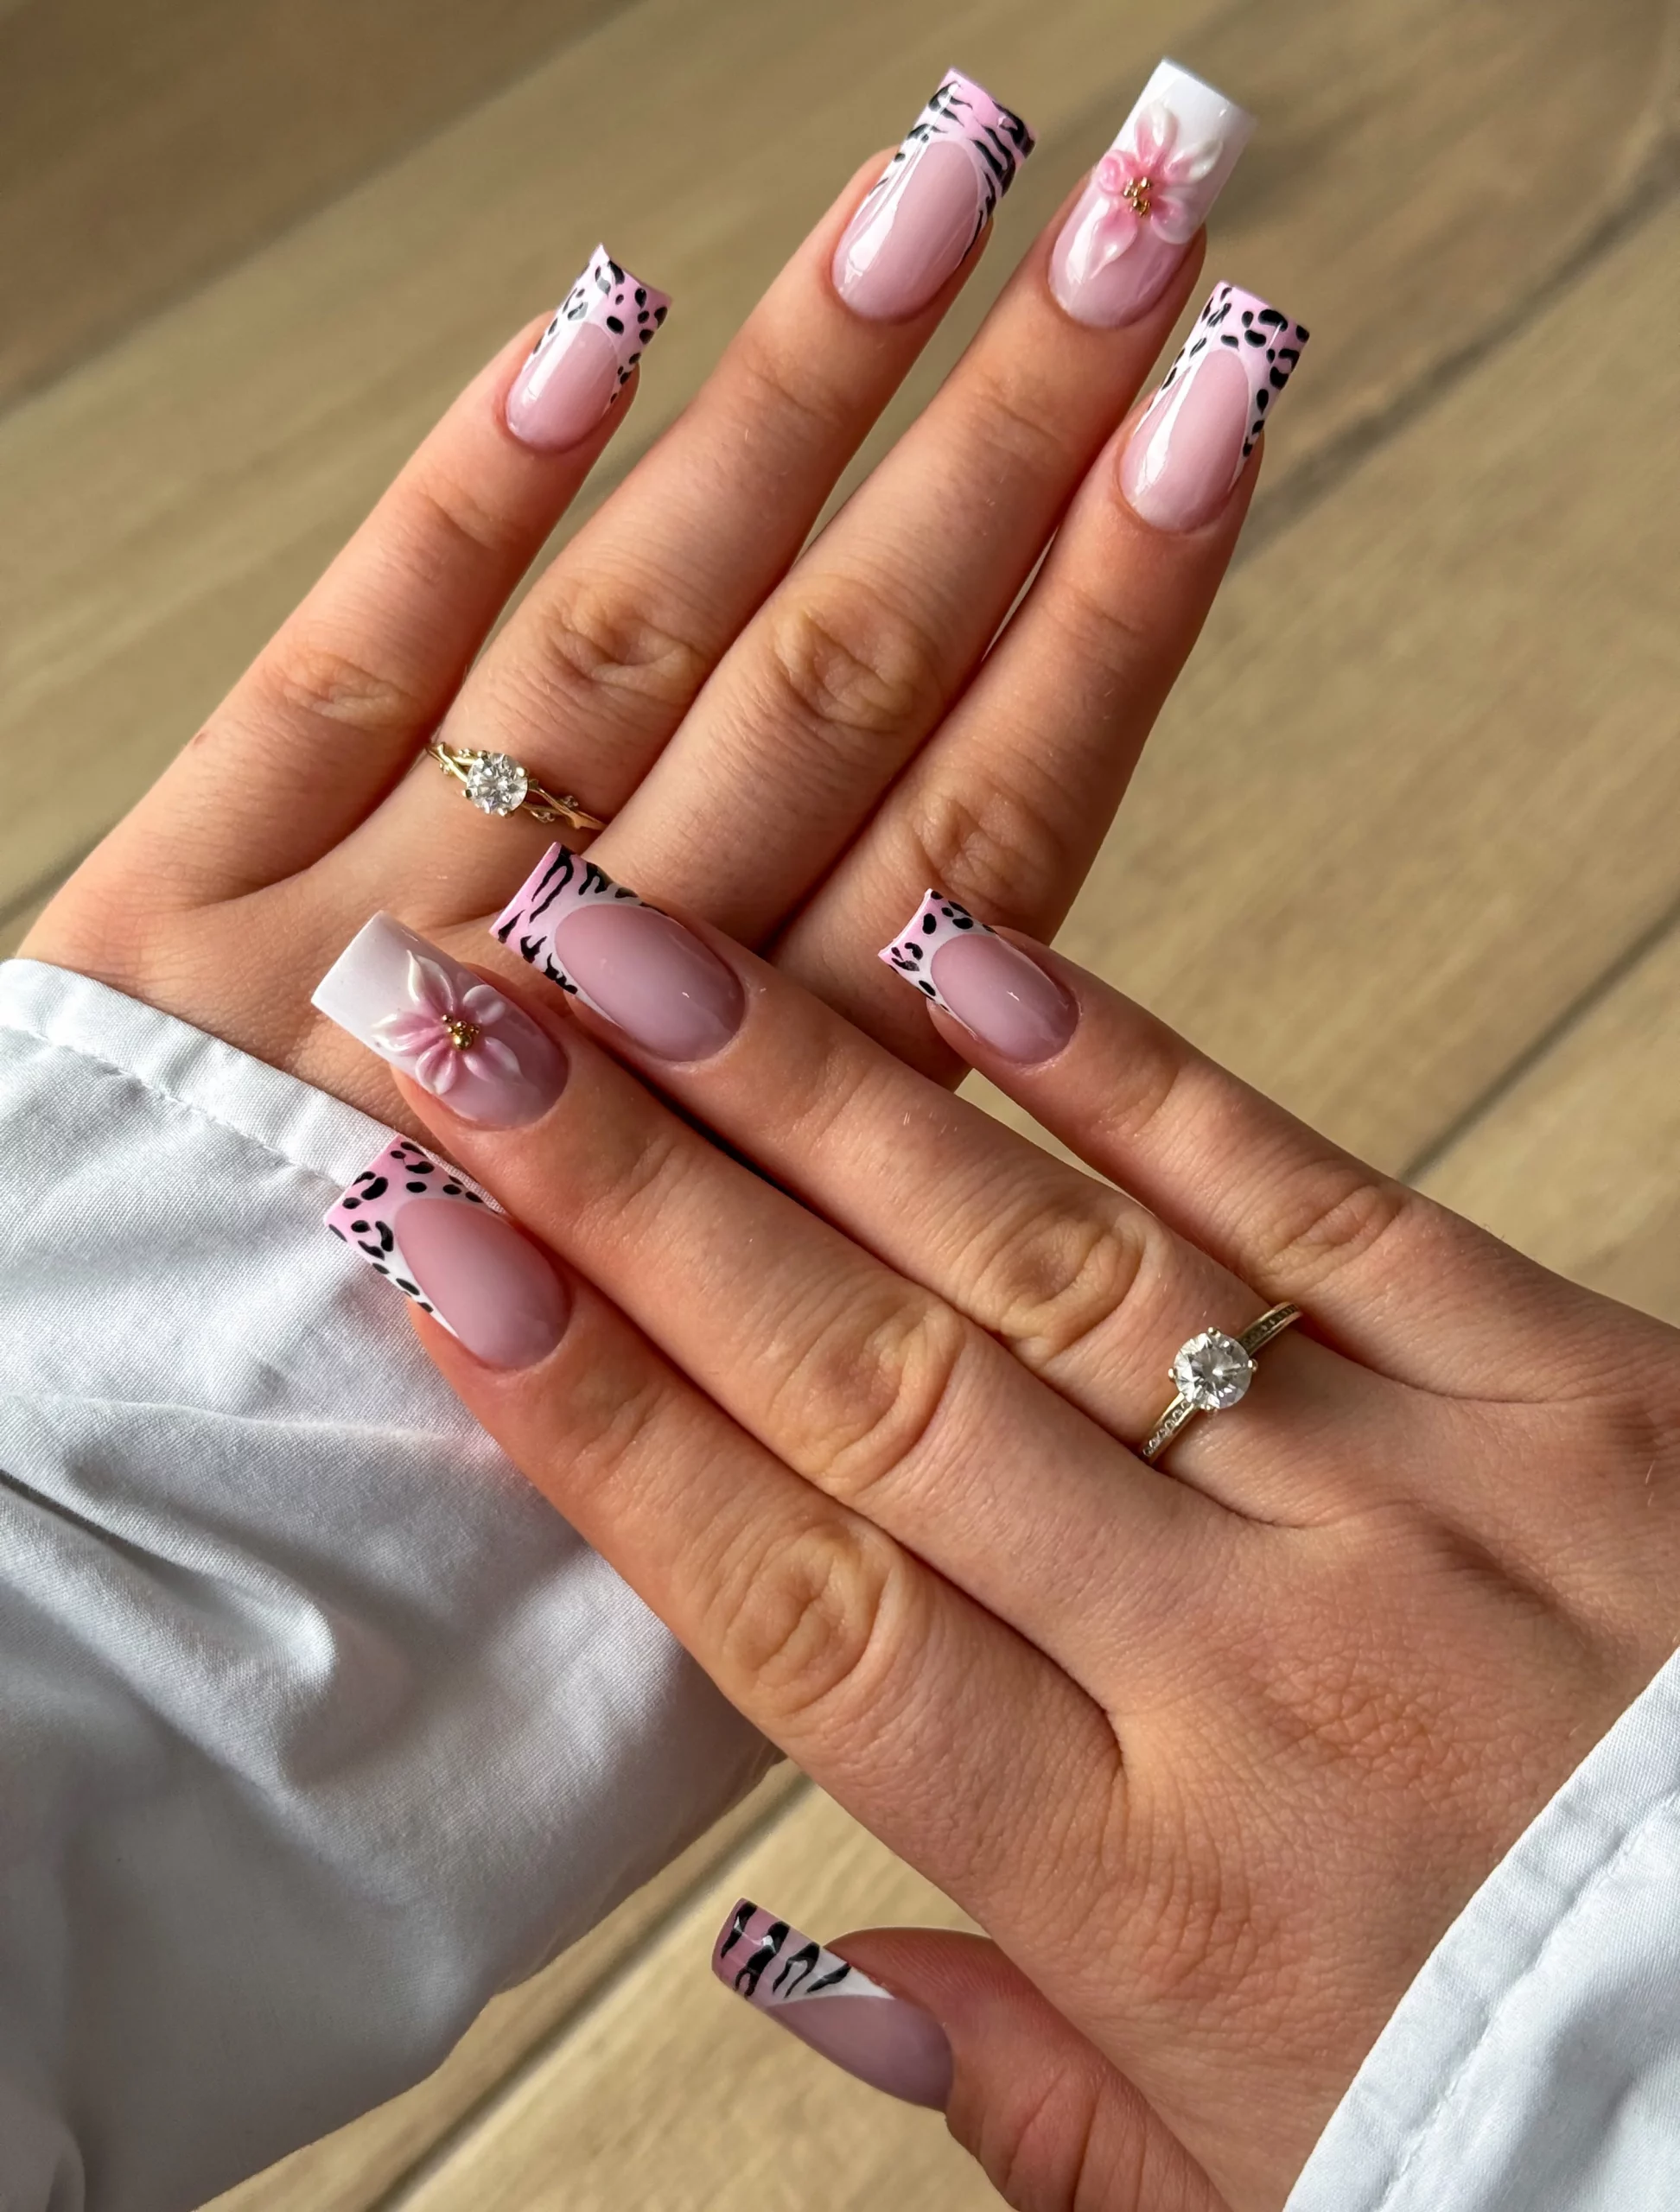
I would use a sheer pink base, white gel for the tips, and black and pink detailing gels for the animal-inspired pattern. A tiny gold bead or rhinestone can be used at the center of a raised flower, while a sculpting gel can create the petals. Because there are several decorative elements involved, I would keep the color palette tightly controlled rather than introducing another major shade.
I would begin by filing the nails into a long square shape, paying particular attention to making the tips consistent. Then I’d create the white French sections and cure them before adding the pattern. For the flowers, I’d place the embellishment only on selected nails so the manicure has a focal point. A final glossy layer helps unify the nude base and patterned details.
I find this version especially appealing when I want the shape itself to feel unmistakably modern. The square tip gives the hand a confident, graphic outline, while the pink foundation prevents the design from becoming too heavy. It is a manicure with plenty of personality, yet the repeated colors keep everything looking intentional rather than chaotic.
Almond Nails With Mixed Statement Tips
Long almond nails can handle several different ideas at once, and this set proves it beautifully. The nude-pink base creates continuity across the manicure, while individual tips shift between warm metallic gold, glossy tortoiseshell brown, white with a fine gold motif, deep red, and black. Instead of making every nail match, the design uses the almond shape as the common thread.
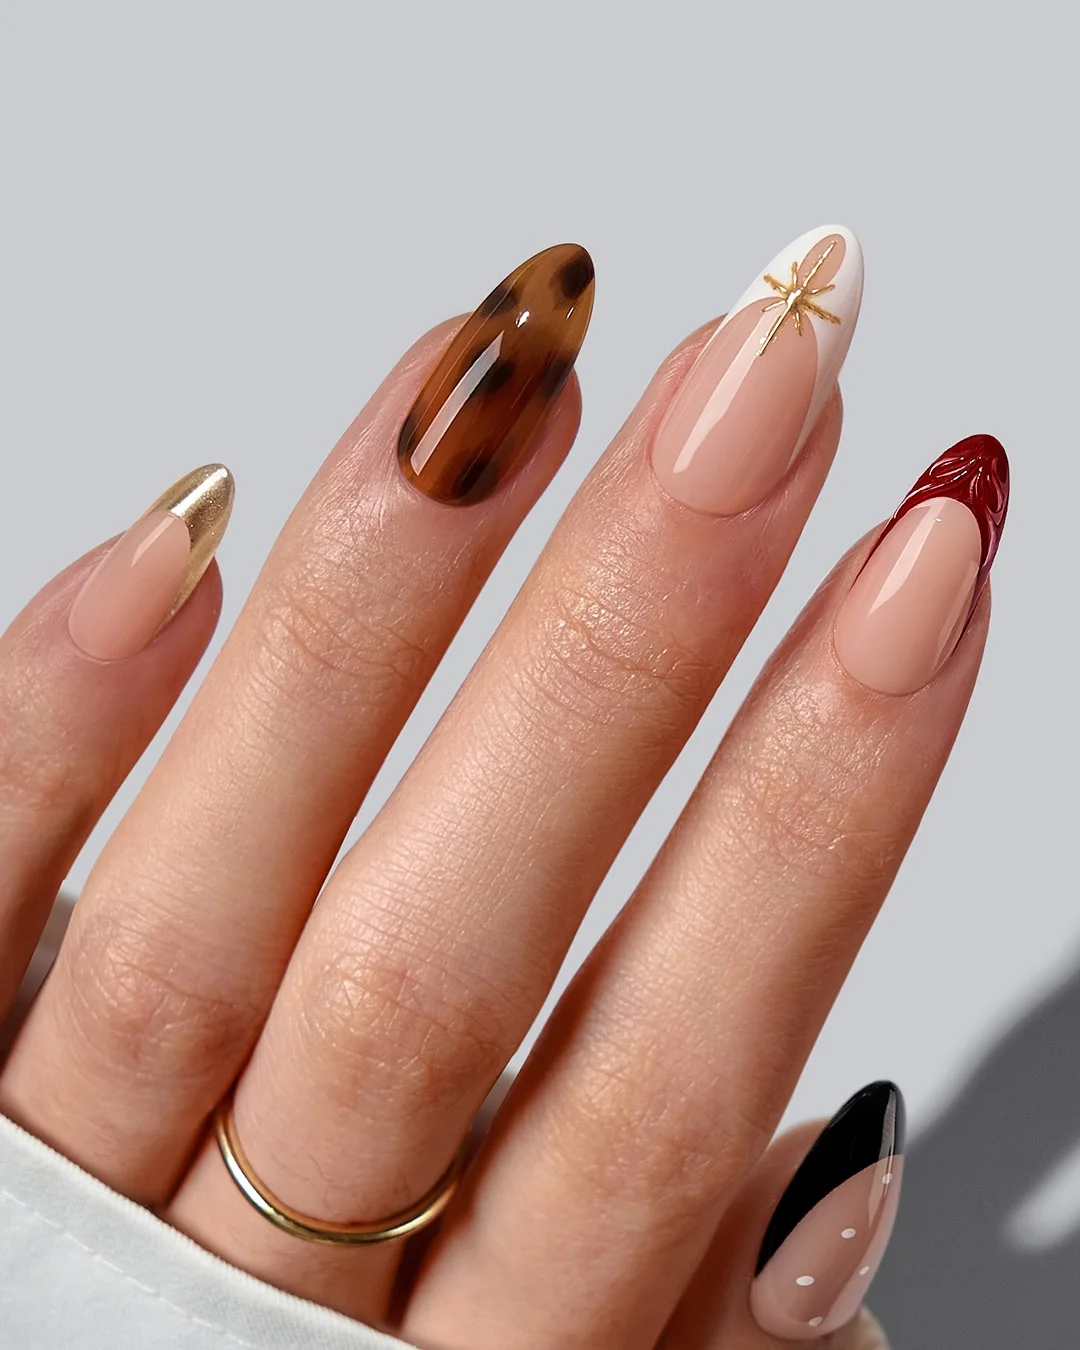
To create a similar set, I would use a sheer nude-pink base along with metallic gold gel, translucent brown or tortoiseshell-inspired polish, deep burgundy-red, black, and white. A fine gold detail brush would be useful for the delicate star-like accent, while a high-gloss top coat would enhance the richer shades. I would resist adding too many additional decorations because the variety of tip treatments already gives the manicure plenty of movement.
I would first perfect the almond shape, making sure the length and taper are consistent from nail to nail. Then I’d leave the nude base visible through the center of each nail and concentrate the stronger colors around the tips. The brown can be layered to create a translucent tortoiseshell effect, while the red and black tips can stay sleek and solid. Small gold detailing should be added last so it remains sharp and delicate.
The right nail shape can make an everyday manicure feel completely new. I love how these modern silhouettes give me plenty of room to play, whether I’m drawn to soft oval curves, crisp square tips, elegant almond nails, or bold stiletto points. The best part? There is no single shape you have to follow—choose the one that fits your style, lifestyle, and current mood. Sometimes a small change in shape is all it takes to make your next manicure feel fresh, polished, and totally you.

