
There’s something undeniably chic about a manicure that looks polished, effortless, and quietly expensive without trying too hard. But what really creates that rich-girl effect — a perfect shape, a delicate color, a glossy finish, or all three together? I’m drawn to Rich Girl Nail Ideas that feel refined enough for a special occasion but still easy enough to wear with jeans and a white tee. Think sheer pinks, creamy nudes, elegant French tips, soft almond shapes, and tiny touches of sparkle that catch the light at just the right moment. Which manicure can make your hands look instantly more put-together without feeling overdone? Let’s explore the prettiest ideas and find the polished style you’ll want to save for your next appointment.
Soft Sage Almond Nails With a Glossy Finish
I love how quietly sophisticated this almond manicure feels. The nails are elongated with softly tapered sides and rounded points, while a muted sage green covers the entire nail in a smooth, glossy finish. The color is gentle rather than loud, which gives the manicure that polished, intentional quality I associate with rich girl nail ideas. The high-shine surface also catches the light beautifully, making the muted green look fresh and dimensional without adding any extra decoration.
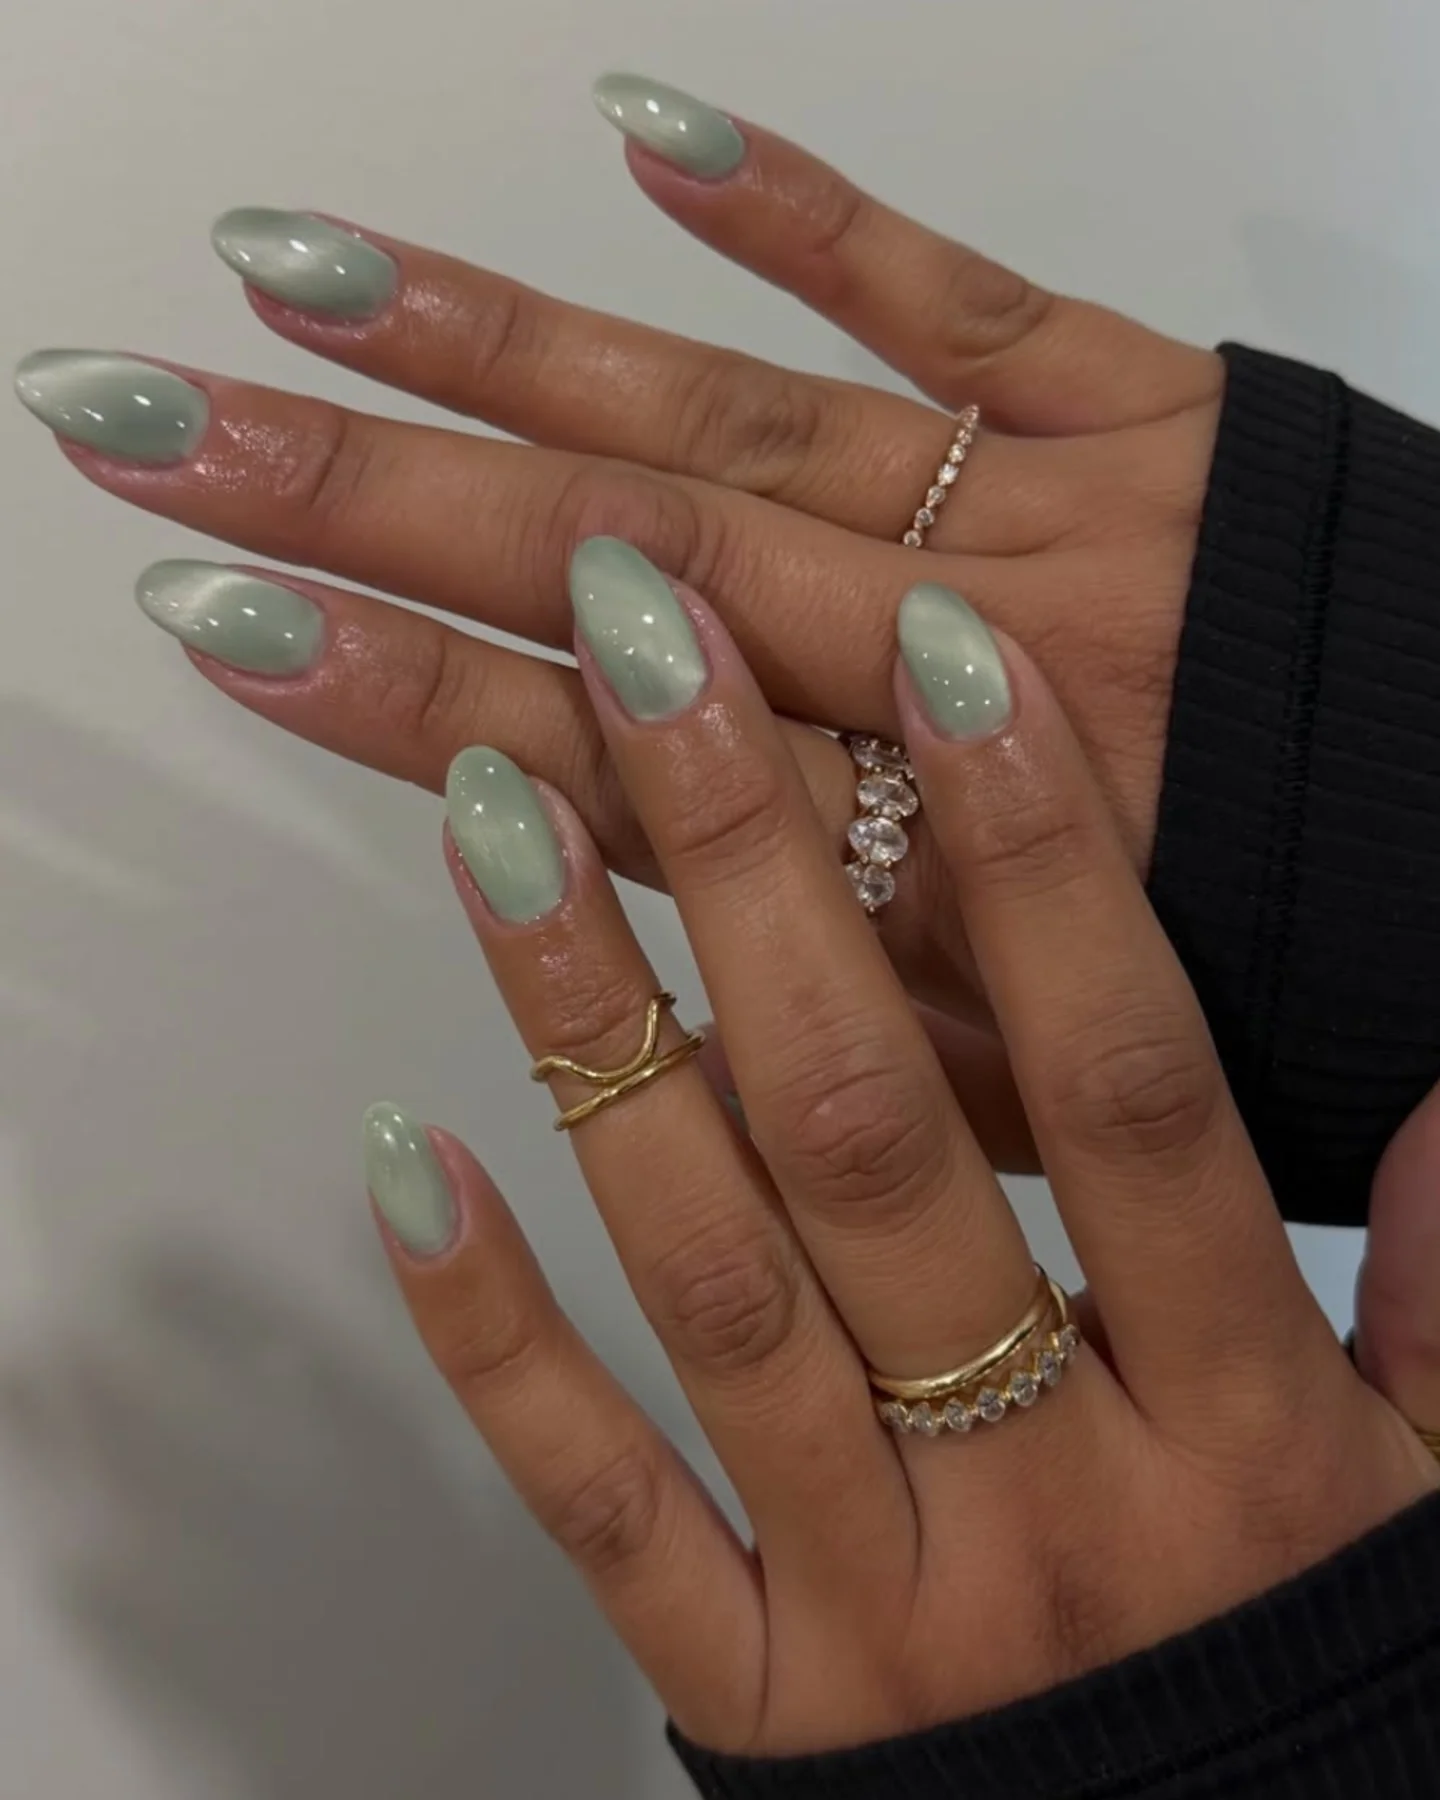
For this look, I would reach for a soft sage or gray-green gel polish, a sheer nude or pink-toned base if the natural nail needs evening out, and a high-gloss top coat. OPI, Essie Gel Couture, and The GelBottle all have shades that can be adapted to this muted palette. I would keep the color slightly desaturated rather than choosing a vivid green. That tiny distinction matters. The goal is a sophisticated green that feels wearable with black, cream, denim, chocolate brown, and all those transitional-season neutrals.
I would start by shaping the nails into a consistent almond silhouette, paying particular attention to keeping both sides balanced. After cuticle prep and a thin base coat, I would apply two very thin layers of sage polish, curing each layer if I were working with gel. A glossy top coat finishes everything beautifully. I would also clean around the cuticle before curing so the manicure looks crisp rather than bulky. The smoother the surface, the more expensive-looking the final result becomes.
This is the kind of manicure I would choose when I want something different from nude but still want to look completely pulled together. The muted green has personality, yet it never takes over the hands. I can see it working especially well during that late-summer-to-fall transition when wardrobes start moving toward cream sweaters, tailored trousers, denim, and deeper accessories. It is a small color change with a surprisingly big style payoff.
Sheer Pink Almonds With Mint Micro French Tips
This manicure takes the classic French idea and softens it into something wonderfully delicate. The base is a translucent milky pink that allows the natural-looking nail to remain visible, while slim mint-green tips follow the rounded almond shape. I especially like the proportion here: the colored tip is narrow, so the overall effect remains clean instead of becoming a traditional French manicure with a stronger contrast. It feels fresh, neat, and incredibly easy to wear.
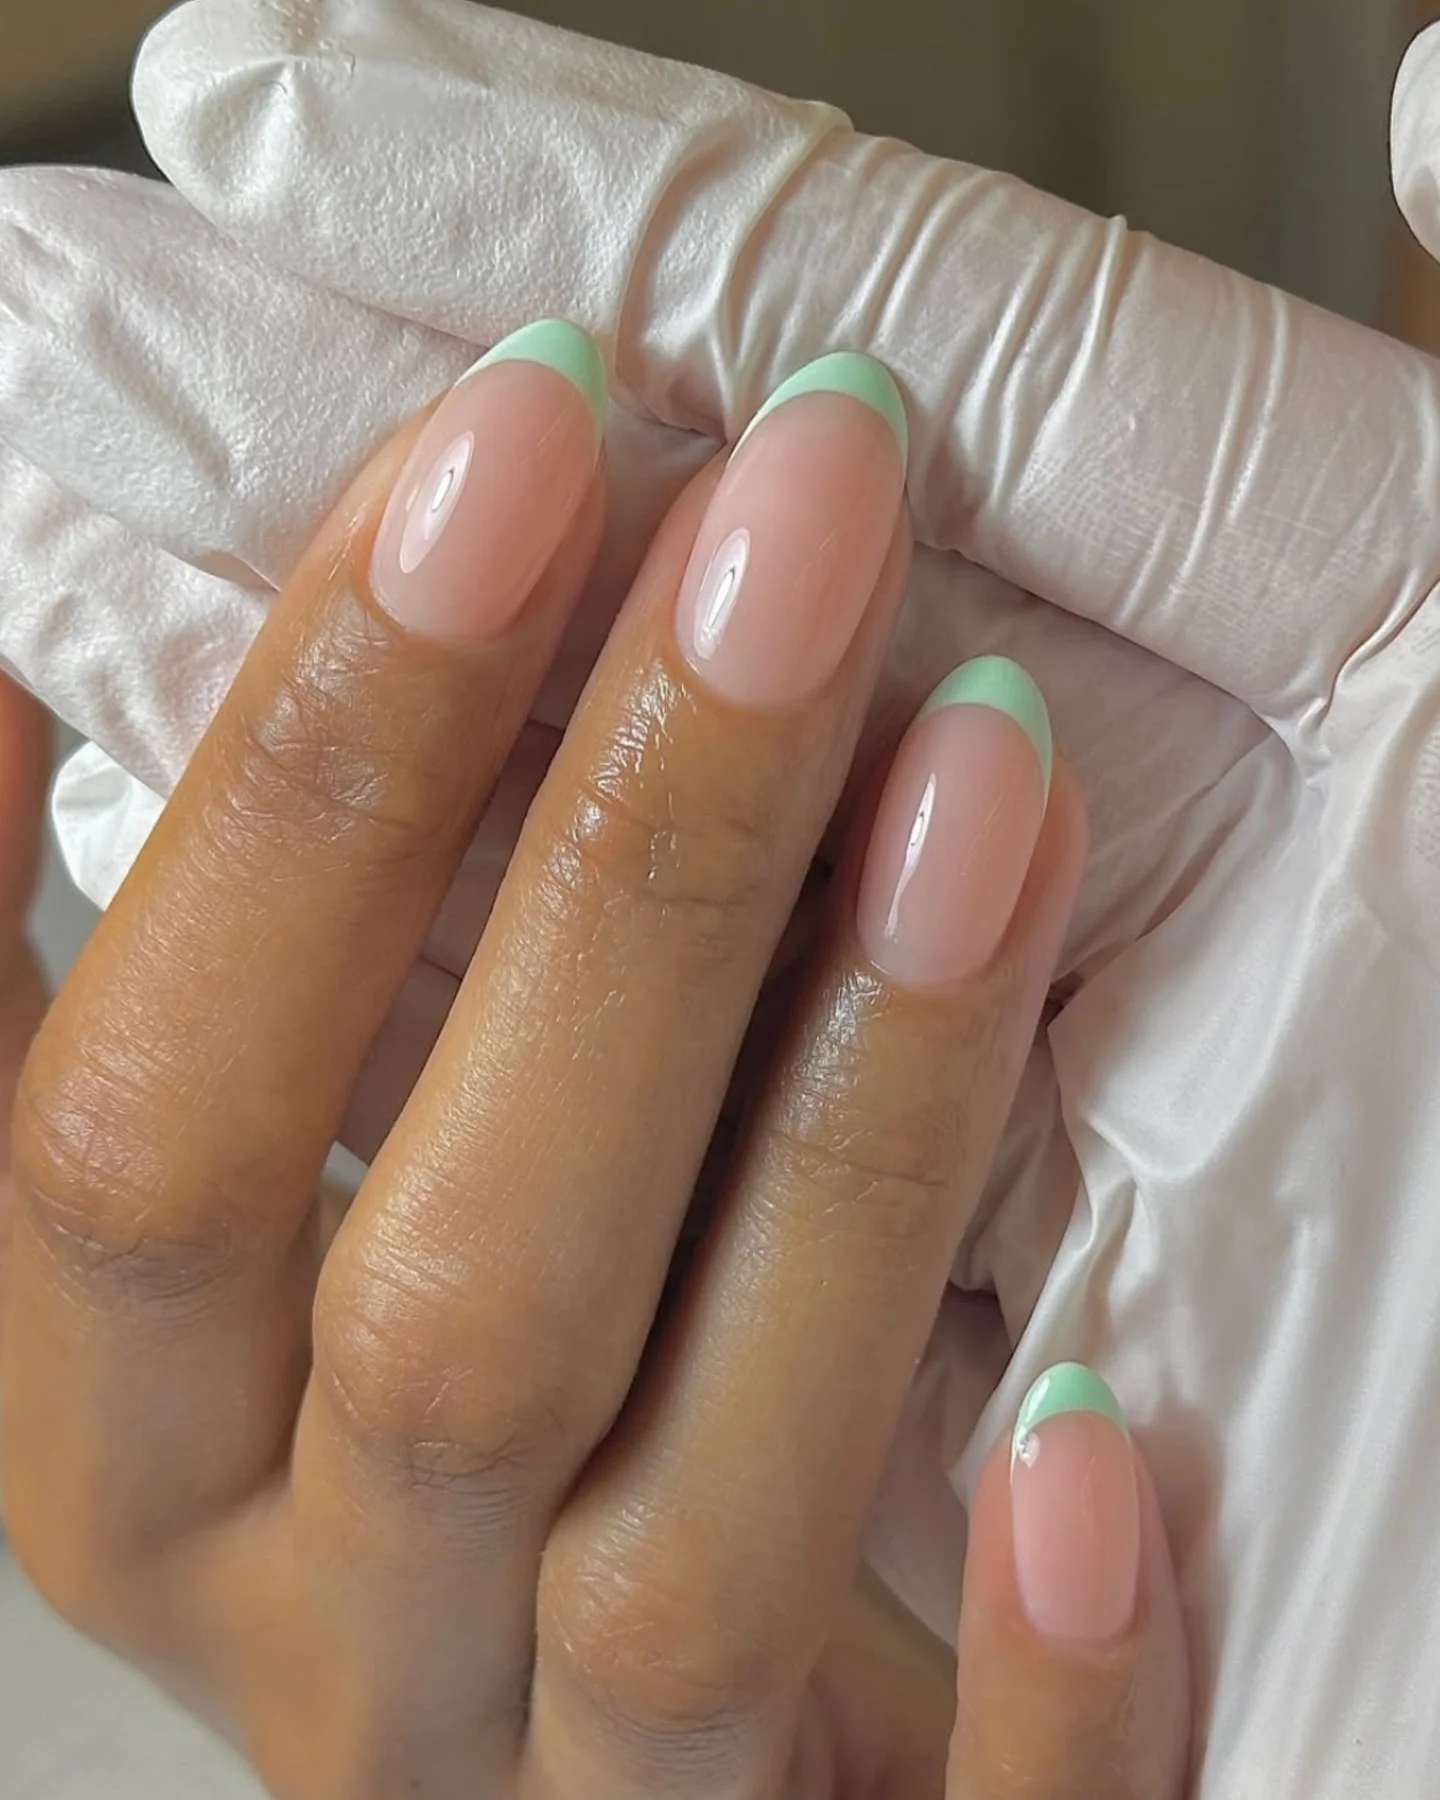
I would use a sheer blush-pink builder gel or polish, followed by a soft mint-green gel for the tips. A fine liner brush makes the curved French line much easier to control, although French-tip guides can be helpful at home. For the finish, I would choose a clear, glassy top coat. The materials do not need to be complicated. In fact, keeping the product list simple helps preserve the minimalist character of the design.
I would first create the sheer pink base and make sure it is completely smooth before touching the tips. Once the base is cured, I would use a fine brush to draw the mint line from one sidewall toward the center, then repeat from the opposite side. Working in small sections gives me much more control. I would finish with one thin layer of glossy top coat, making sure the free edge is sealed. If the line is slightly imperfect, I would rather correct it before curing than try to hide it later.
I think this is such a smart way to wear color when you usually live in neutrals. The mint detail gives the manicure a little personality, but the sheer pink keeps it sophisticated. I would happily wear this to brunch, a weekend getaway, or even with a tailored office outfit. Sometimes the smallest detail is what makes a manicure memorable.
Glossy Pink Square Nails for a Clean Classic Look
A soft pink square manicure is one of those combinations I never really get tired of. Here, the nails have a medium-long square shape with gently softened corners, giving the classic silhouette a more wearable finish. The polish is a delicate pink with a creamy, almost jelly-like appearance, and the glossy surface makes the color look incredibly smooth. There is no elaborate artwork competing for attention, which is exactly why the manicure feels so polished.
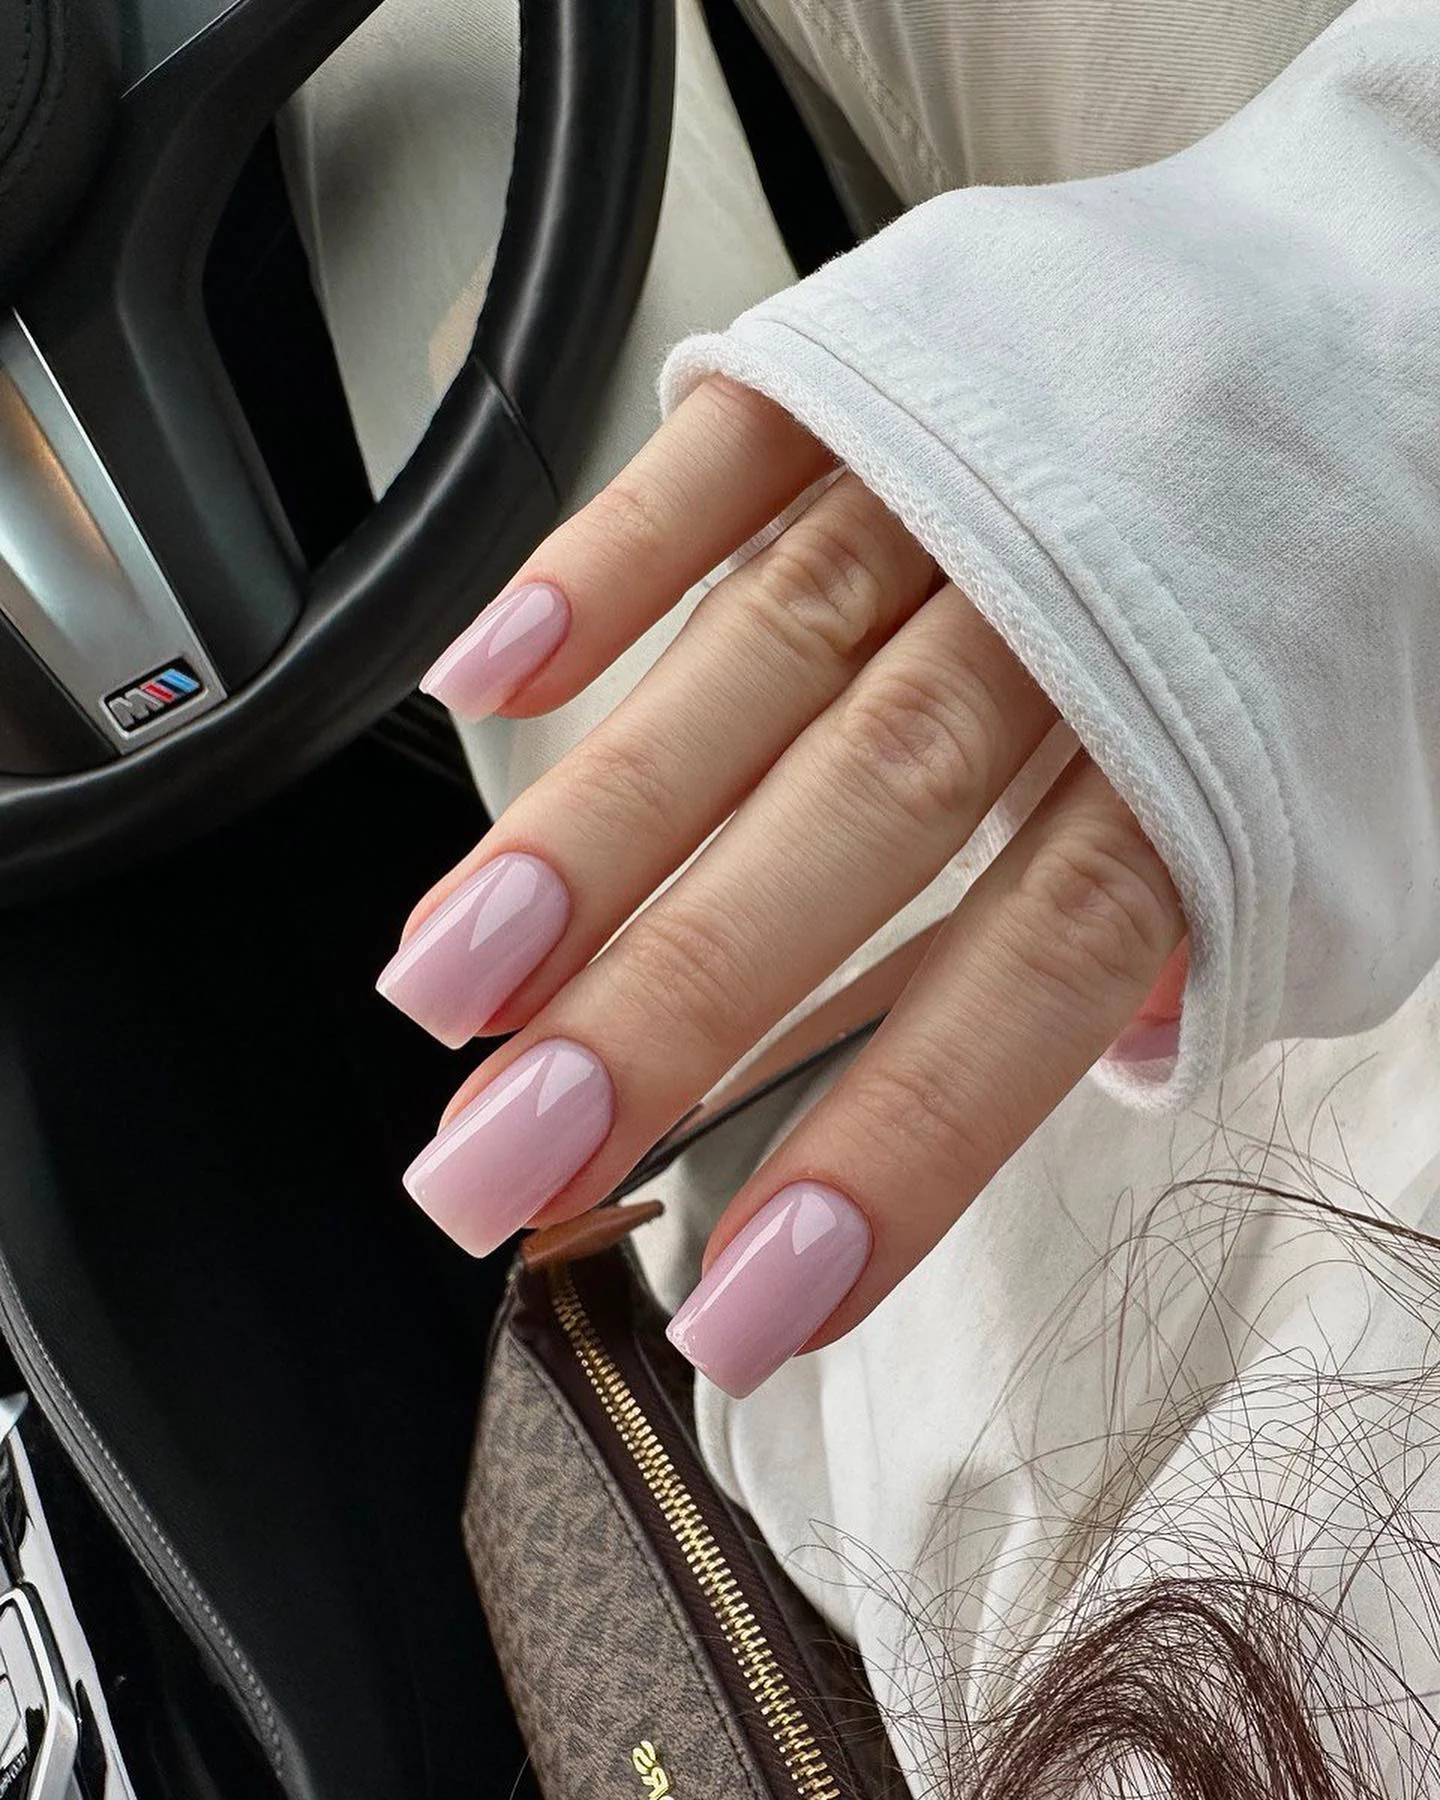
I would choose a neutral pink gel polish with a slightly translucent or creamy finish rather than an opaque bubblegum pink. Shades from OPI, Essie, or CND can work beautifully, depending on the undertone of the skin. I would also use a strengthening base coat if my nails needed additional support and a non-yellowing glossy top coat. With this kind of manicure, surface quality matters just as much as color, so I would not rush the preparation stage.
For the shape, I would file the free edge straight across and then soften the corners slightly. I find that this keeps the square silhouette crisp without creating sharp edges that catch on clothing. After applying the base, I would work with two thin coats of pink polish, allowing each layer to level before applying the next. A glossy top coat brings out the soft reflection that makes this manicure look so smooth and fresh.
I like this style when I want my hands to look instantly groomed without making a huge statement. It works with almost everything, which is a major advantage when I am not interested in changing my manicure every time my outfit changes. Add a delicate gold ring, a crisp white shirt, and a structured bag, and suddenly the whole look feels intentional. Simple? Yes. Forgettable? Not at all.
Blush Square French Nails With a Touch of Sparkle
This manicure takes a timeless French design and gives it a soft, jewelry-like finish. The nails are shaped into a neat square with slightly softened corners, while the base has a translucent blush-pink tone. Crisp white tips create the classic French contrast, and a tiny cluster of rhinestones near the cuticle adds just enough sparkle. I particularly like that the embellishment is limited to a small area rather than covering the nail. That restraint keeps the manicure elegant.
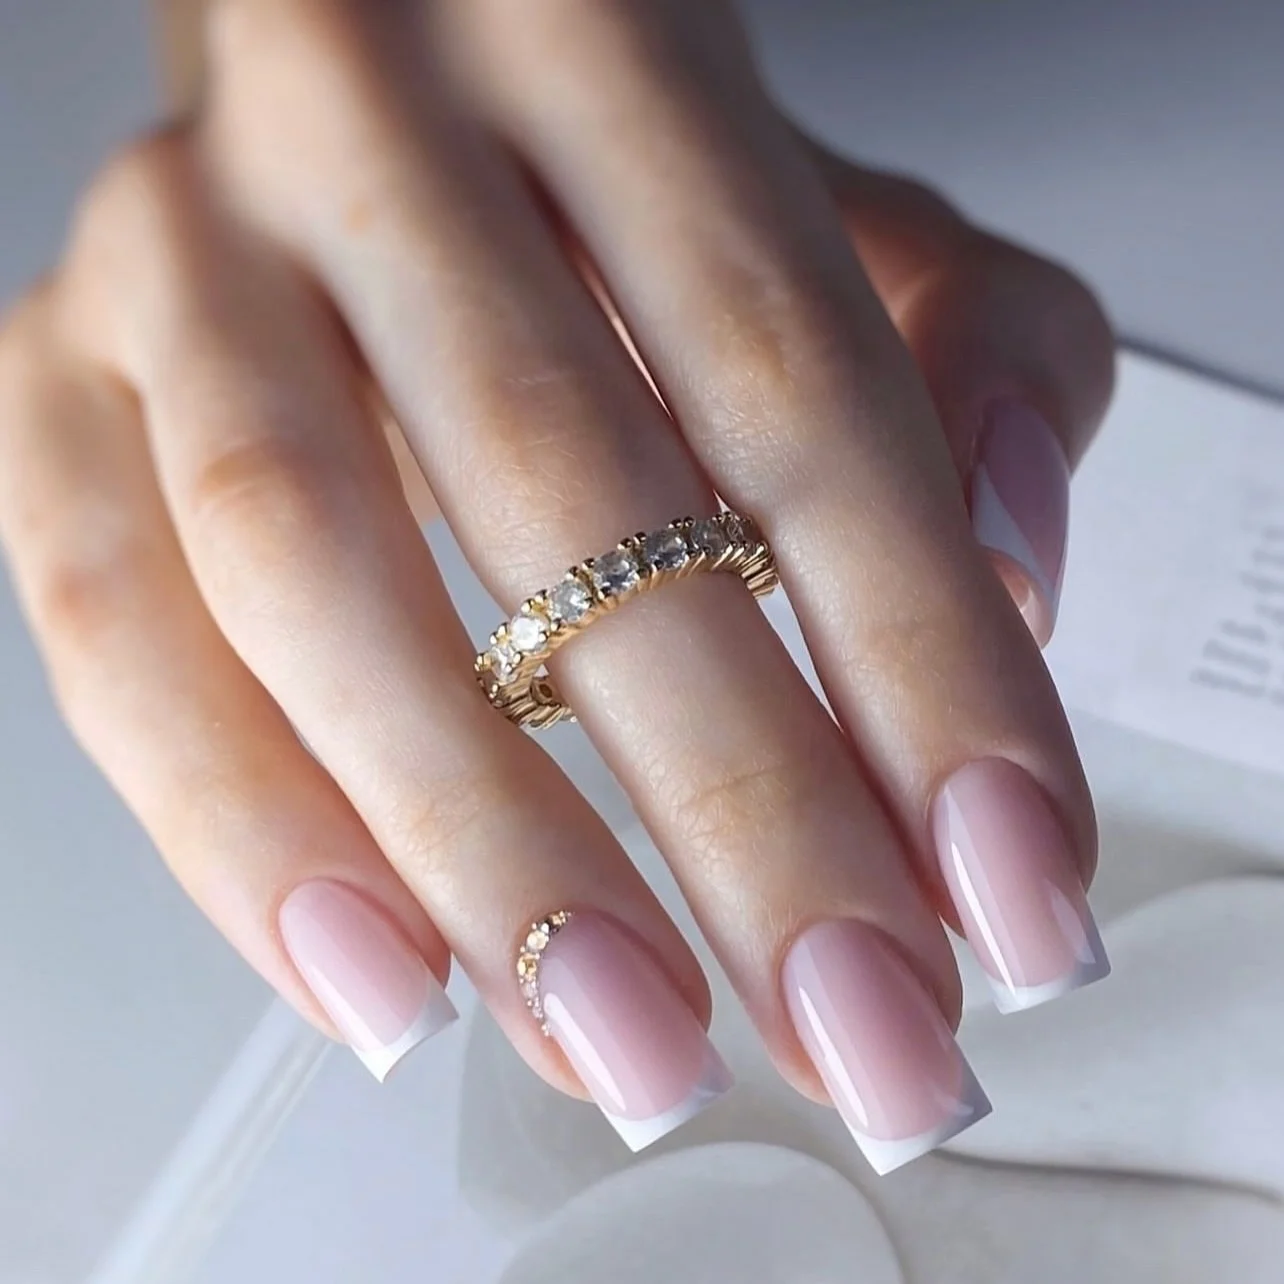
I would use a sheer pink or milky nude base, a clean white gel polish for the French tips, and a few small crystal rhinestones. A fine detail brush is useful for creating the tip, while a small amount of nail adhesive gel can secure the crystals. Swarovski-style nail crystals or professional nail-art rhinestones can provide the sparkle, but tiny glass stones from a beauty-supply store can work just as well. The key is choosing stones that are small enough to complement the manicure rather than dominate it.
I would shape the nails first and apply the sheer pink base in thin layers. Once the base is cured, I would create the white tips with a fine brush, keeping the smile line consistent from nail to nail. After curing, I would place the tiny crystals close to the cuticle on one or two nails. A final top coat can be applied around the embellishments, although I would avoid completely burying larger crystals if I want them to catch the light.
This is my idea of a manicure for someone who wants classic nails with a tiny secret. From a distance, they look like an immaculate French manicure. Then the hand moves and the little crystals flash. That contrast is what makes the design special to me. It would be beautiful for an event, but I would not save it only for special occasions.
Short Blush Nails With an Immaculate Gloss
Short nails can absolutely have that polished, refined effect, and this manicure is proof. The nails are kept relatively short with a soft rounded-square shape, while a sheer blush-nude color creates a healthy-looking wash of pink. The finish is exceptionally glossy, so the simplicity feels deliberate rather than unfinished. I also like the practical length here. These are nails I could type with, open a handbag, and go about my day without constantly thinking about them.
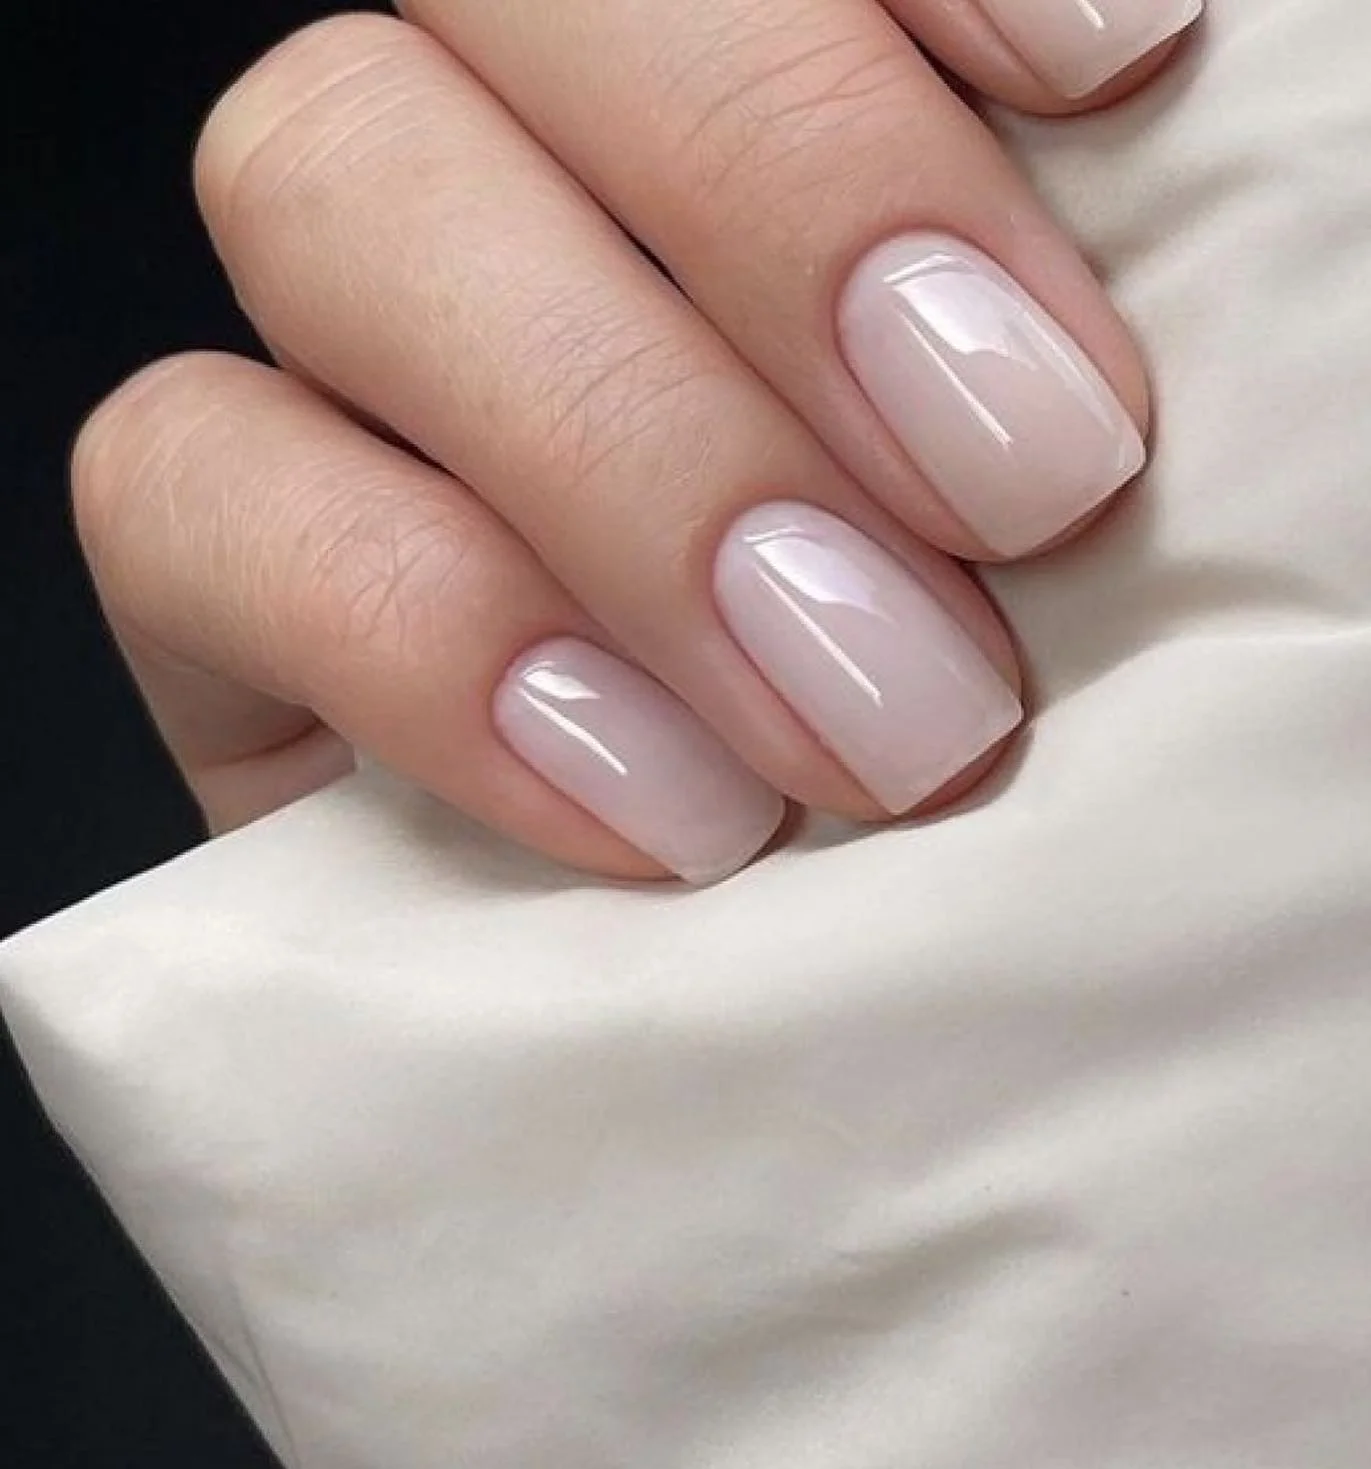
For this look, I would keep the palette very minimal: a sheer pink-beige polish, a smoothing base coat, and a high-shine top coat. Essie, OPI, and CND all offer neutral shades that can create this kind of barely-there effect. If my natural nails had visible ridges, I would use a ridge-filling base before applying color. That extra step can make a sheer manicure look dramatically smoother without requiring a heavier layer of polish.
I would gently shape the nails into a soft square, making sure the corners are not too sharp. After cuticle care, I would apply one thin layer of base and then one or two coats of sheer blush polish. I prefer building sheer color gradually because it gives me more control over the opacity. Finally, I would apply a generous but even layer of glossy top coat and let it dry completely. With minimalist nails, tiny details are surprisingly visible, so neat application is everything.
I keep coming back to short nude nails when I need something that works everywhere. They make my hands look groomed, but they never feel overly styled. This is especially appealing during busy weeks when I want my manicure to survive real life rather than just look pretty for a few days. A cashmere-colored sweater, simple jewelry, and these glossy nails? That combination practically styles itself.
Pearl French Nails With Crystal Detail
Here, the classic French manicure gets a luminous update. The nails are long and square, with a translucent pink base that softly reveals the natural nail underneath. White French tips provide the structure, while a subtle pearly shimmer across the base catches the light. One statement ring adds sparkle near the hand, but the manicure itself remains restrained, with the emphasis on glossy texture and clean proportions. It feels polished from every angle.
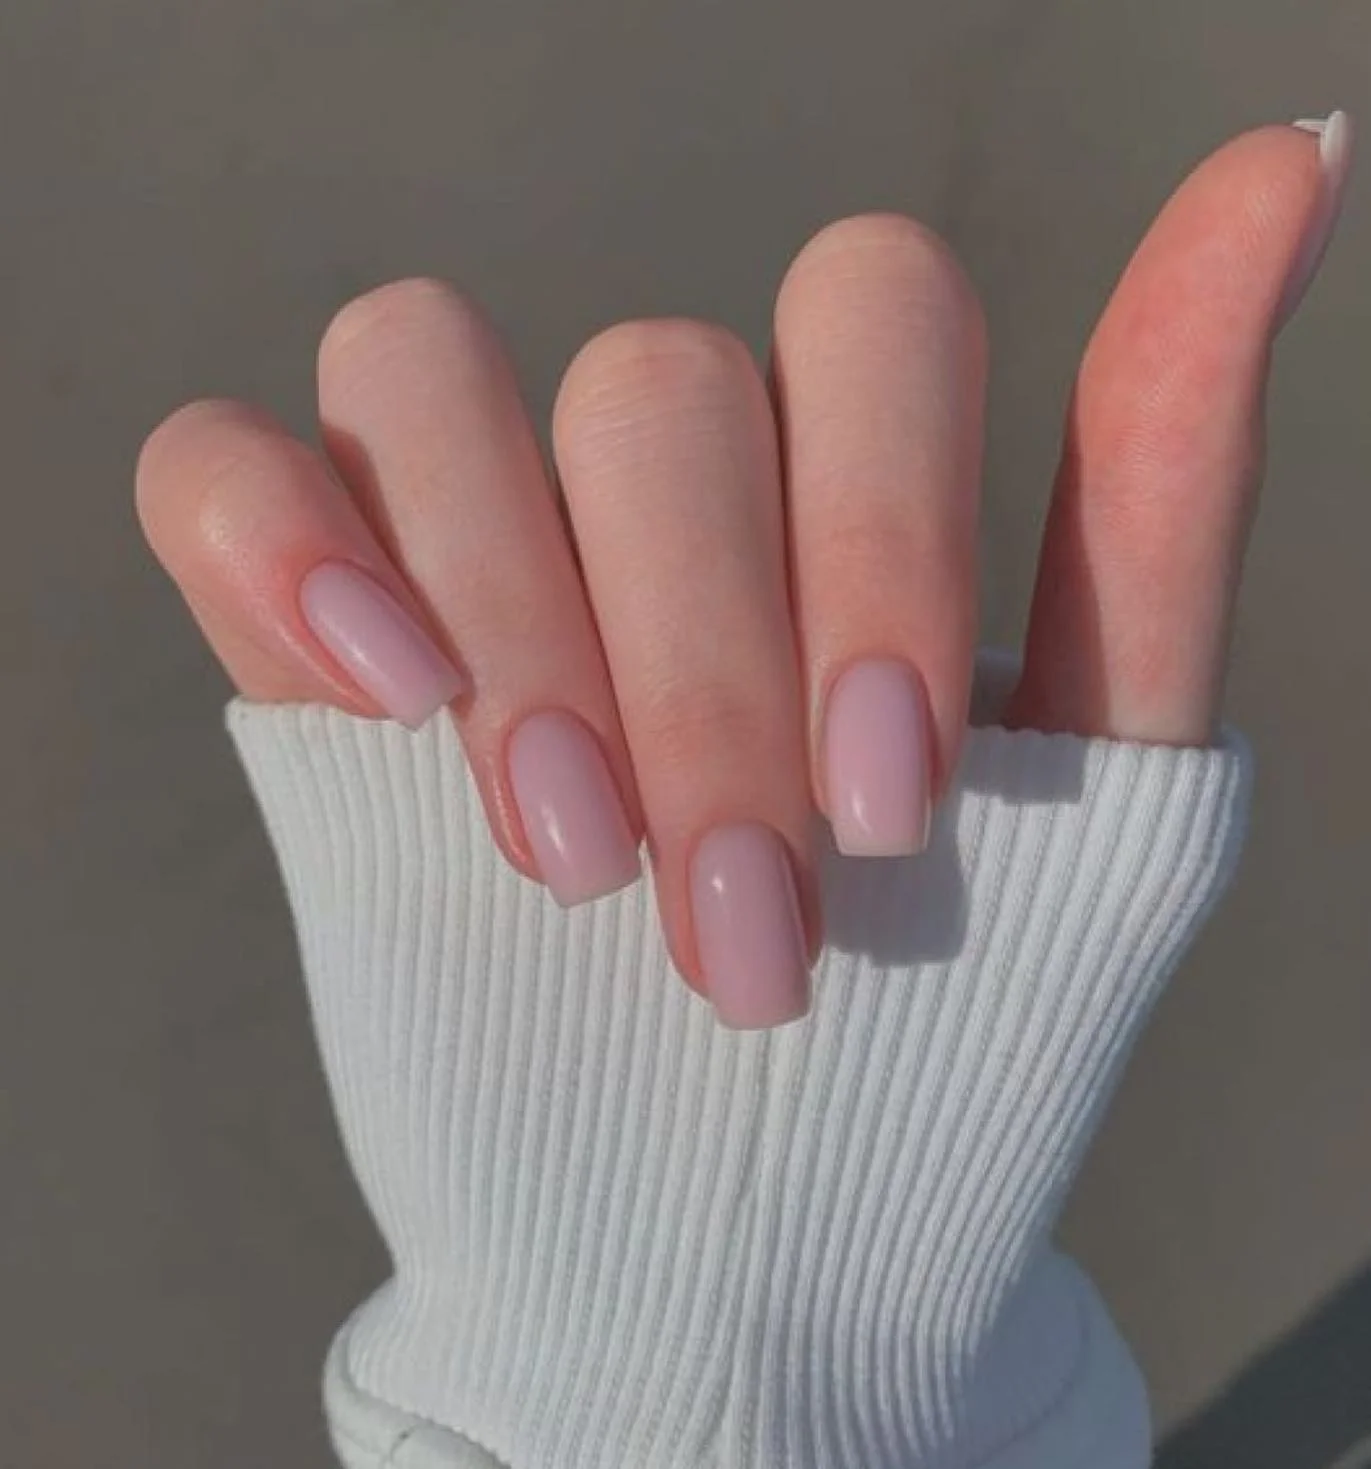
I would use a sheer pink base, a fine pearl or iridescent shimmer polish, a crisp white gel for the tips, and a glossy top coat. If I wanted the shimmer to remain subtle, I would choose a very fine pearl pigment rather than chunky glitter. A liner brush would help create the French tips, especially on a longer square nail. For an at-home version, French-tip stickers can make the process easier while keeping the shape consistent.
I would begin with the square shape and make sure every nail has a similar length. After applying the sheer pink base, I would add a very light layer of pearl shimmer, concentrating on an even application rather than building sparkle. The white tips come next. Once everything is cured and smooth, I would seal the manicure with a glossy top coat. I would keep the shimmer delicate because the magic here comes from the way it appears only when the light hits the nails.
For me, this is where rich girl nails become especially interesting. The design is recognizable, but the pearl finish gives it another layer without making it complicated. I could wear it with a wedding-guest dress, a blazer, or a simple white tee and jeans. It has that rare quality of looking dressed up without looking like I tried too hard.
Milky Blush Oval Nails for Everyday Elegance
The soft oval shape immediately gives this manicure a graceful appearance. The nails are short to medium in length, with rounded edges and a sheer blush-pink polish that looks almost like the natural nail has simply been perfected. There is no strong French tip or glitter competing with the color. Instead, the glossy finish creates a smooth, healthy-looking surface that feels understated and modern. It is one of those manicures that makes the hands look effortlessly maintained.
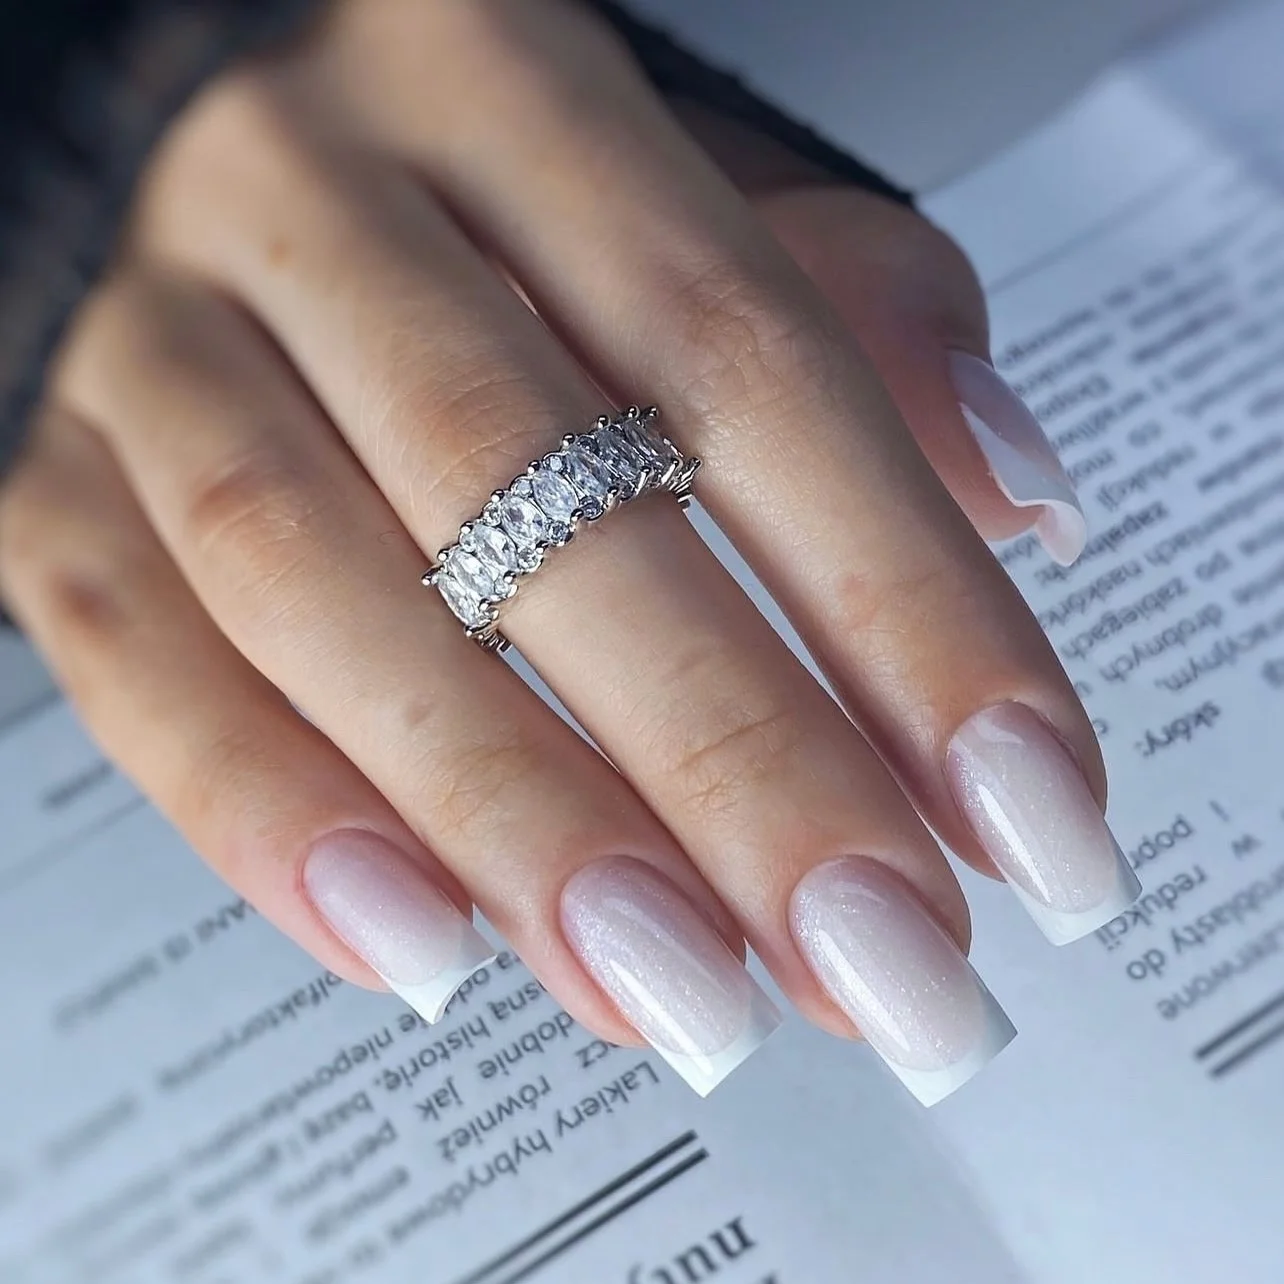
I would reach for a translucent pink polish with a neutral or slightly cool undertone, depending on the skin tone, plus a glossy top coat. A sheer formula is especially useful here because it allows the natural nail to contribute to the final color. For the base, I would choose something smoothing and flexible rather than a heavy builder product unless additional structure is actually needed. The finished manicure should feel light.
I would file the nails into a soft oval, following the natural curve of the fingertip instead of forcing an exaggerated shape. After cleaning the cuticles, I would apply a thin smoothing base and then one or two coats of sheer pink. I would inspect the surface between coats because a minimalist manicure looks best when there are no visible ridges or uneven areas. A glossy top coat completes the look and gives the blush tone that beautiful wet-shine effect.
I think this shape is particularly flattering when I want my nails to look elegant without adding length. It also feels very current because the manicure is not relying on heavy decoration to make an impression. During the transition into fall, I would pair it with soft gray, cream, espresso, or muted green clothing. It quietly pulls everything together.
Glossy Nude Almond Nails With a Barely-There Finish
A glossy nude almond manicure is practically the blueprint for understated polish. The nails are gently elongated with tapered sides and rounded tips, while the color sits somewhere between sheer beige, blush, and natural pink. The result is soft and sophisticated, with enough coverage to make the nails look finished while still allowing a little natural dimension to show through. Nothing feels excessive, and that is precisely the appeal.
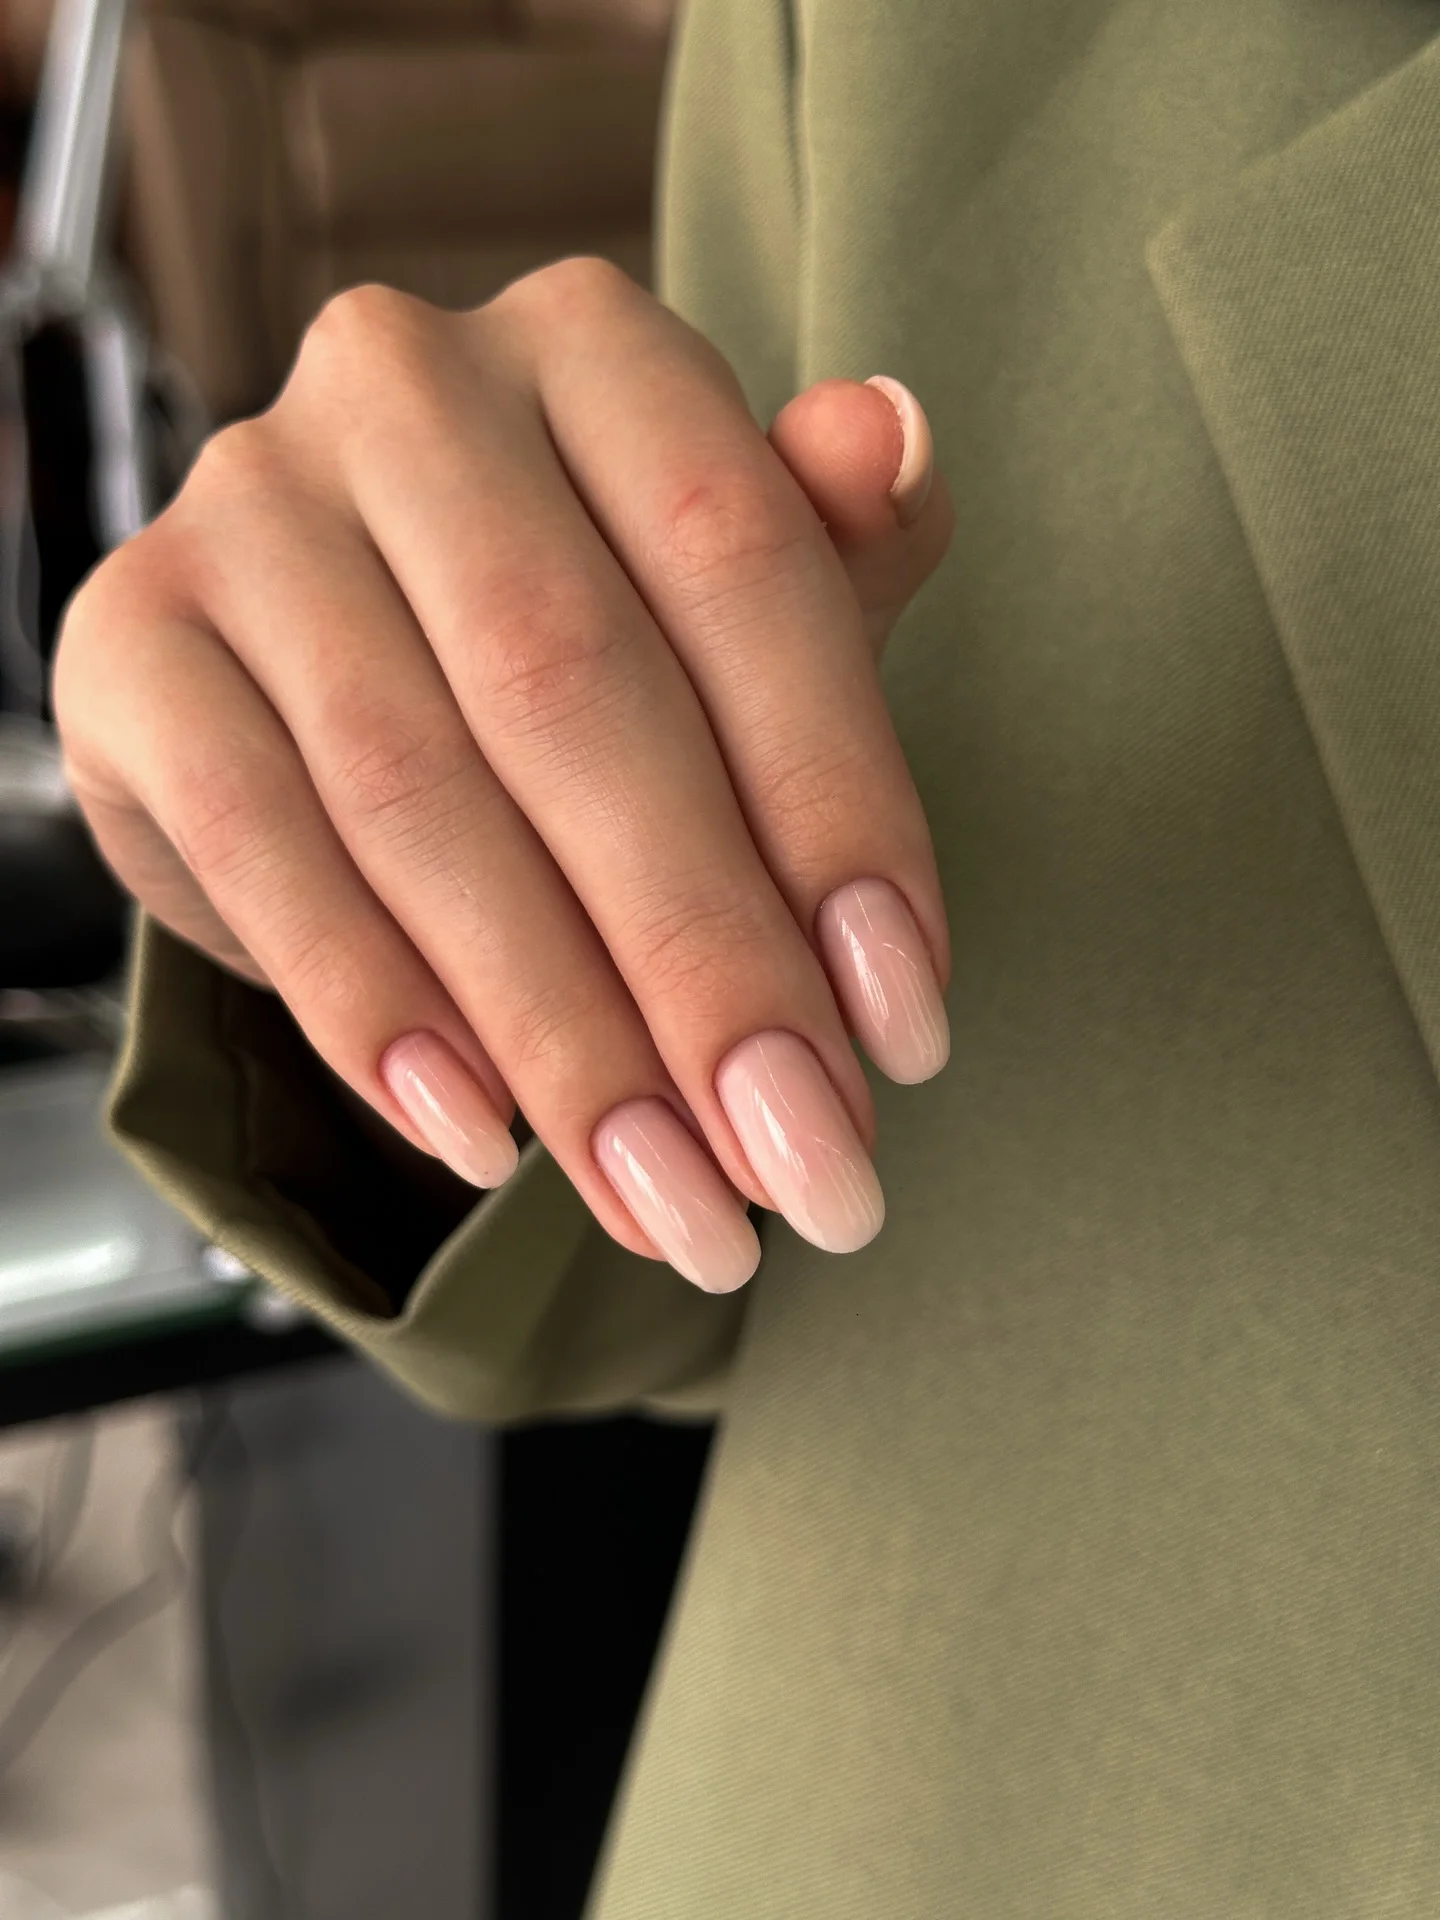
I would choose a neutral nude polish that is close to the natural tone of the nail, plus a smoothing base and glassy top coat. The exact nude matters because undertones can completely change the effect. I would test a beige-pink, neutral pink, or soft peachy nude against the skin before committing to the full manicure. Brands such as OPI, Essie, and CND have plenty of sheer neutral options, making it relatively easy to customize the look.
I would shape the nails into a balanced almond, keeping the point rounded rather than sharp. After cuticle preparation, I would apply the base coat and build the nude shade in very thin layers. If the polish becomes too opaque, I would stop rather than adding another coat. The whole idea is to create a softly perfected nail, not a heavy block of color. A glossy top coat is the final step, and I would pay extra attention to sealing the free edge.
This is probably the manicure I would choose when I want my nails to quietly work with everything else I am wearing. It looks beautiful with gold jewelry, denim, tailored pieces, soft knits, and evening clothes alike. More importantly, it does not depend on a particular trend to look good. Sometimes the most convincing rich girl nail idea is simply a beautiful shape, a flattering nude, and an immaculate shine.
Milky Almond Nails With a Barely-There Glow
This is exactly where I like to start with rich girl nails: a softly tapered almond shape paired with an almost translucent blush nude. The color melts from a warmer pink near the cuticle into a creamy, milky tip, while the glassy topcoat makes everything look exceptionally smooth. I especially love the medium-short length here. It elongates the fingers without crossing into impractical territory, and that restraint is a big part of what makes the manicure feel expensive.
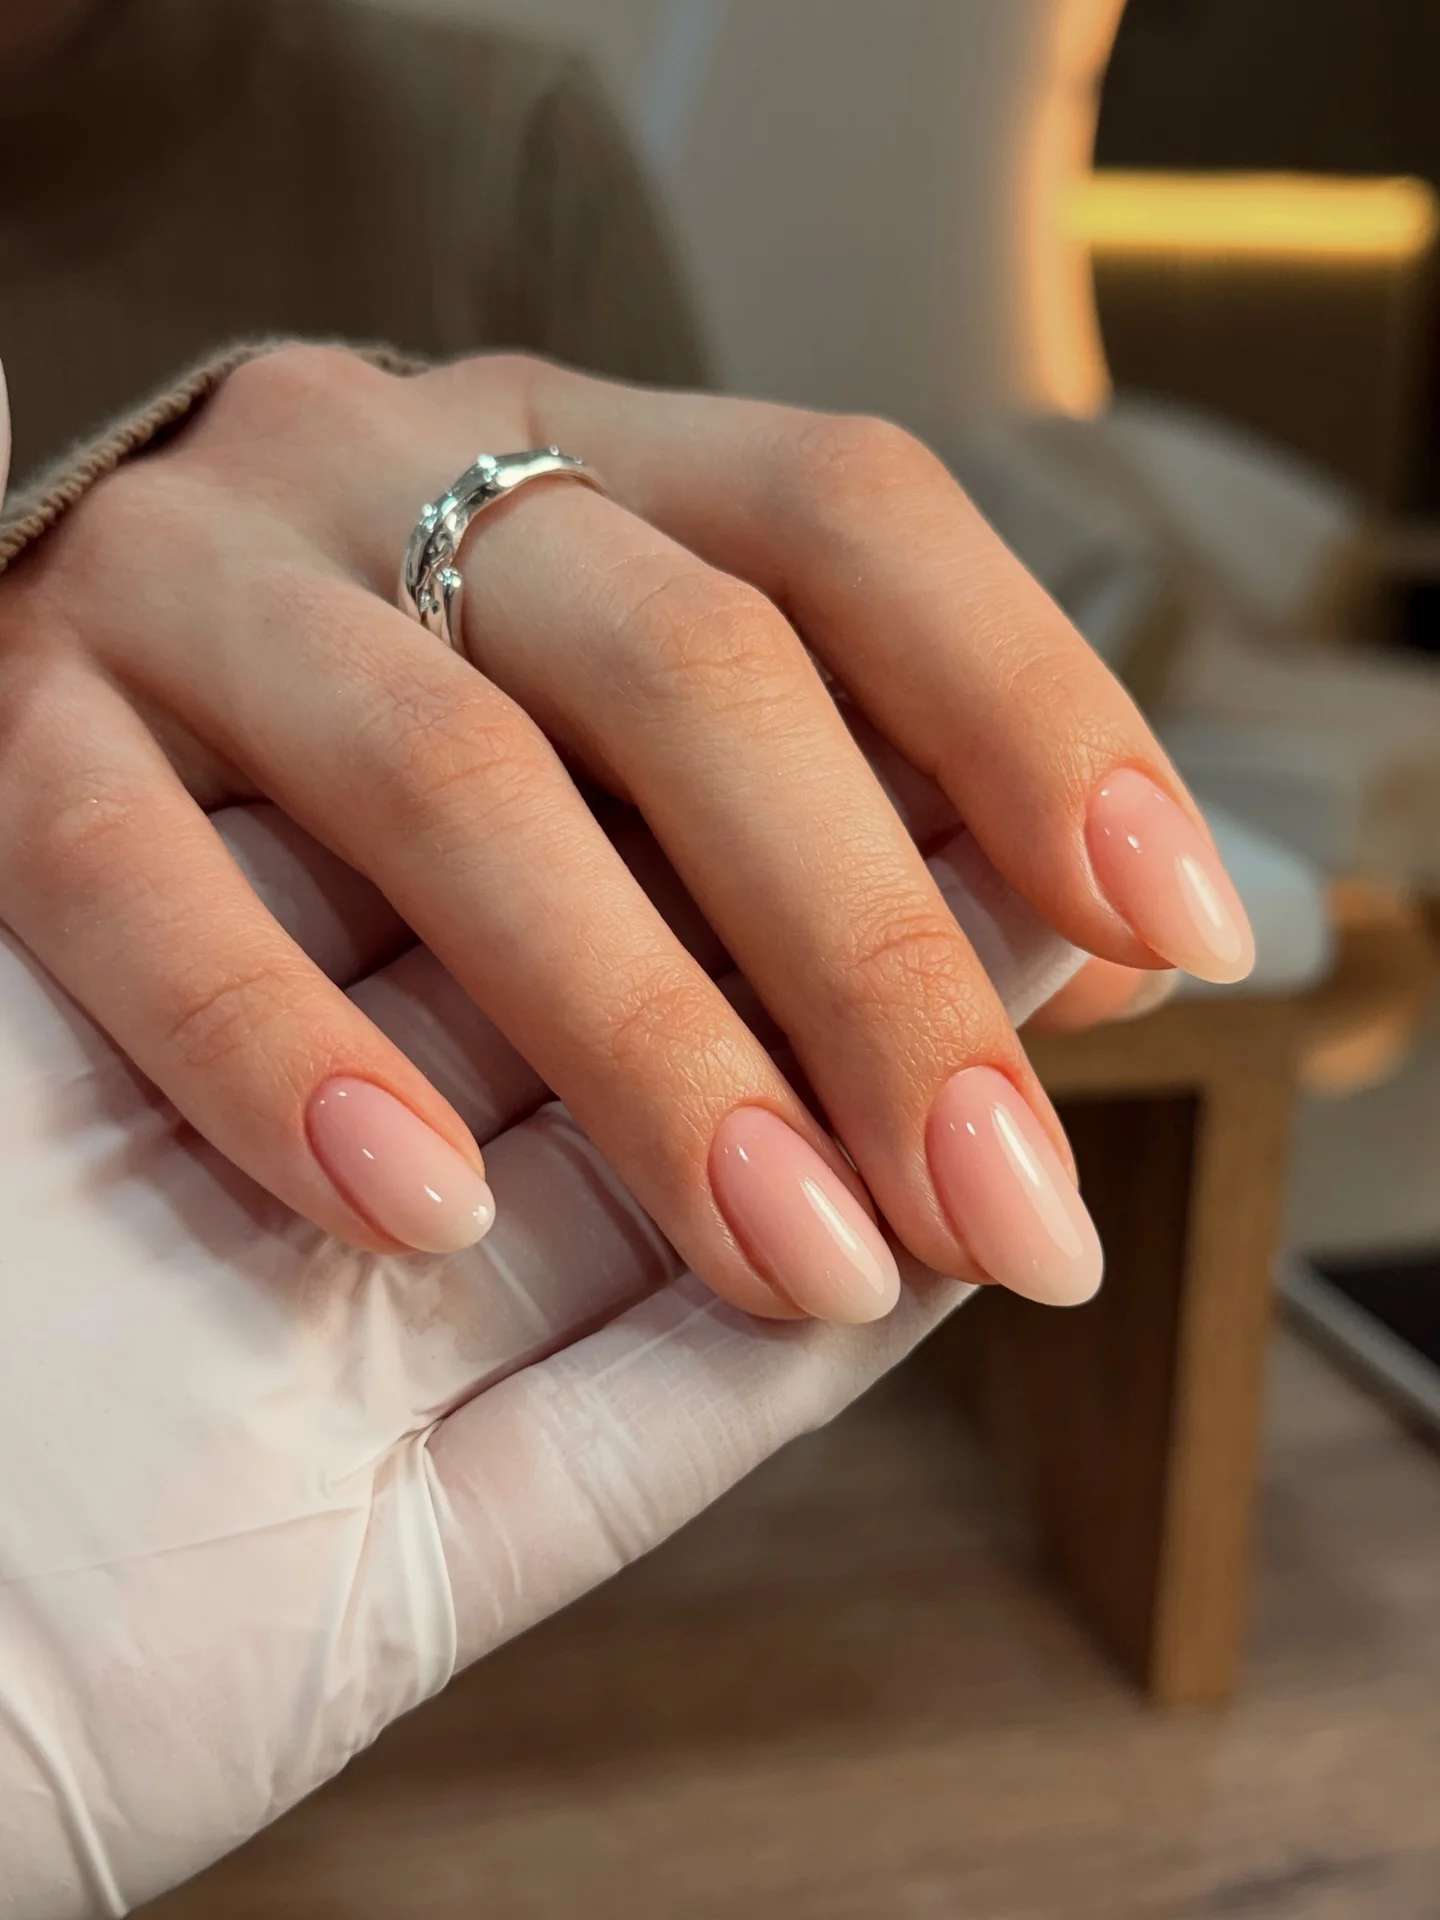
For a similar finish, I’d look for a sheer buildable shade rather than an opaque beige. OPI Bubble Bath, Essie Mademoiselle, or a comparable milky pink gel can give that softly blurred effect. One thin coat can look almost bare, while two or three create the creamy veil I’m after. A high-shine topcoat is non-negotiable because this manicure lives or dies by its immaculate surface.
At home, I’d spend more time preparing the nail than painting it. I gently shape the sides into a gradual taper, round the tip rather than sharpening it, tidy the cuticle area, and then apply very thin layers of color. If the free edge is naturally quite white, an extra sheer layer helps soften the contrast and creates that seamless milk-bath appearance.
What I like most is how little this manicure asks from an outfit. Denim, tailoring, a slip dress, an oversized knit—it works. Have you ever noticed that the simplest nude nails are often the ones that make jewelry suddenly look better? This is one of those manicures.
Glossy Lilac Square Nails That Feel Polished, Not Precious
A cool lilac manicure can absolutely belong in the rich girl category when the silhouette is this clean. The medium square nails have straight sidewalls, softened corners, and an ultra-glossy lavender-pink finish. There’s no nail art competing for attention, so the color and architecture get to be the whole story. I find that combination unexpectedly sophisticated: sweet at first glance, much sharper when you look again.
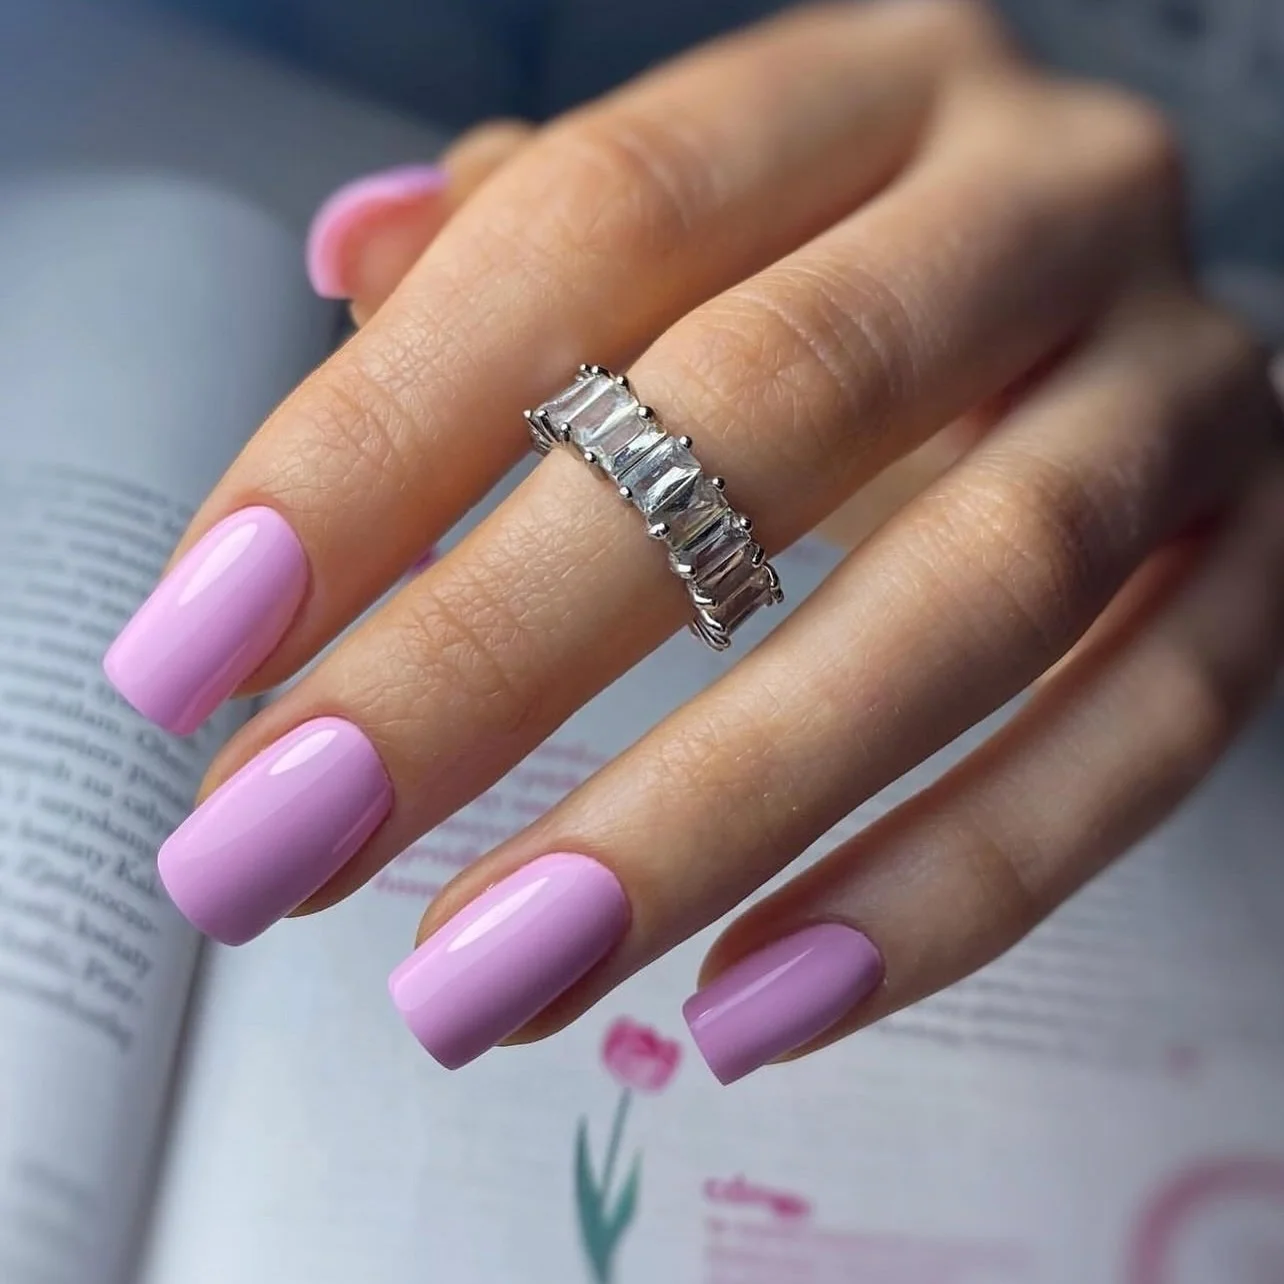
For this kind of creamy coverage, I’d choose a polish with a dense, self-leveling formula. OPI, Essie, and DND all regularly offer lilac and orchid families worth exploring. The trick is finding a pink-leaning lavender rather than something chalky or gray. Two controlled coats followed by a plumping glossy topcoat should give the smooth, almost lacquered depth that makes the shade look richer.
Square nails can be deceptively demanding. I file the free edge straight across first, then refine both sides and barely soften the corners so they don’t feel harsh. With pastel polish, I also avoid thick coats—lavender can become streaky or bulky surprisingly fast. A ridge-filling base is helpful if the natural nail surface isn’t perfectly even.
Would I wear this instead of classic nude? Absolutely, especially when I want color without committing to elaborate nail art. It has the same put-together energy as a great pastel accessory: noticeable, feminine, but never trying too hard.
Glitter-Fade French Squares With a Champagne Mood
This manicure takes the familiar white square nail and gives it a softer, celebratory finish. A blush-pink base transitions into opaque creamy white toward the tips, while fine rosy-silver glitter is concentrated near the upper half of the nude area. The square silhouette keeps the sparkle from becoming overly romantic. I like that tension—crisp structure underneath, delicate shimmer floating over it.
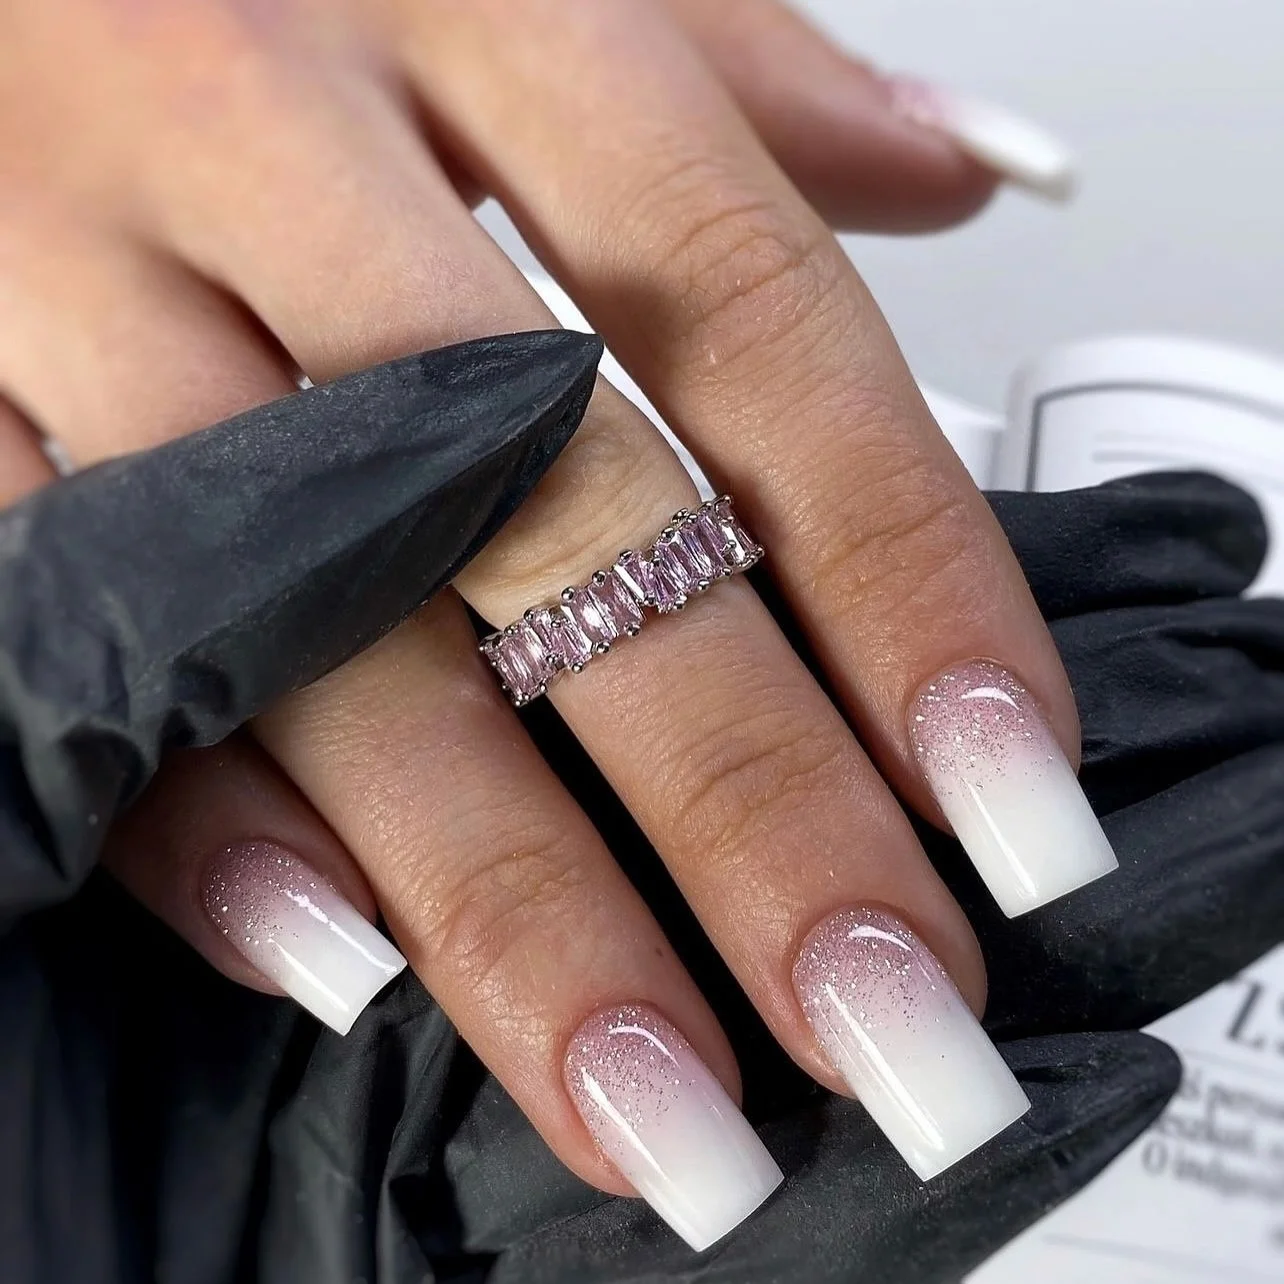
I’d recreate the palette with a sheer pink base, a soft white gel, and an extremely fine champagne or pale rose glitter. For the fade, a small makeup sponge can help diffuse the white rather than leaving a hard boundary. I’d then tap the glitter lightly over the transition, concentrating the particles toward the pink and allowing only a scattering to travel downward.
This is one of those designs where less glitter actually looks more expensive. I’d build the sparkle gradually and stop before it becomes a solid band. Afterward, a leveling layer and glossy topcoat help bury any texture so the surface feels completely smooth. That glass-like finish makes a surprising difference.
I’d save this one for moments when plain milky nails feel a little too restrained—weddings, dinners, celebrations, or simply a week when I want my manicure to catch the light. It still reads elegant from across the room, but up close there’s a tiny party happening.
Micro French Nails With Soft Squoval Edges
A whisper-thin French tip can make short nails look incredibly intentional. Here, a translucent rosy base is paired with fine white lines that follow short squoval tips, creating definition without visually shortening the nail plate. The proportions are what win me over. Instead of the heavier white bands associated with traditional French manicures, these delicate tips leave plenty of natural-looking pink visible.
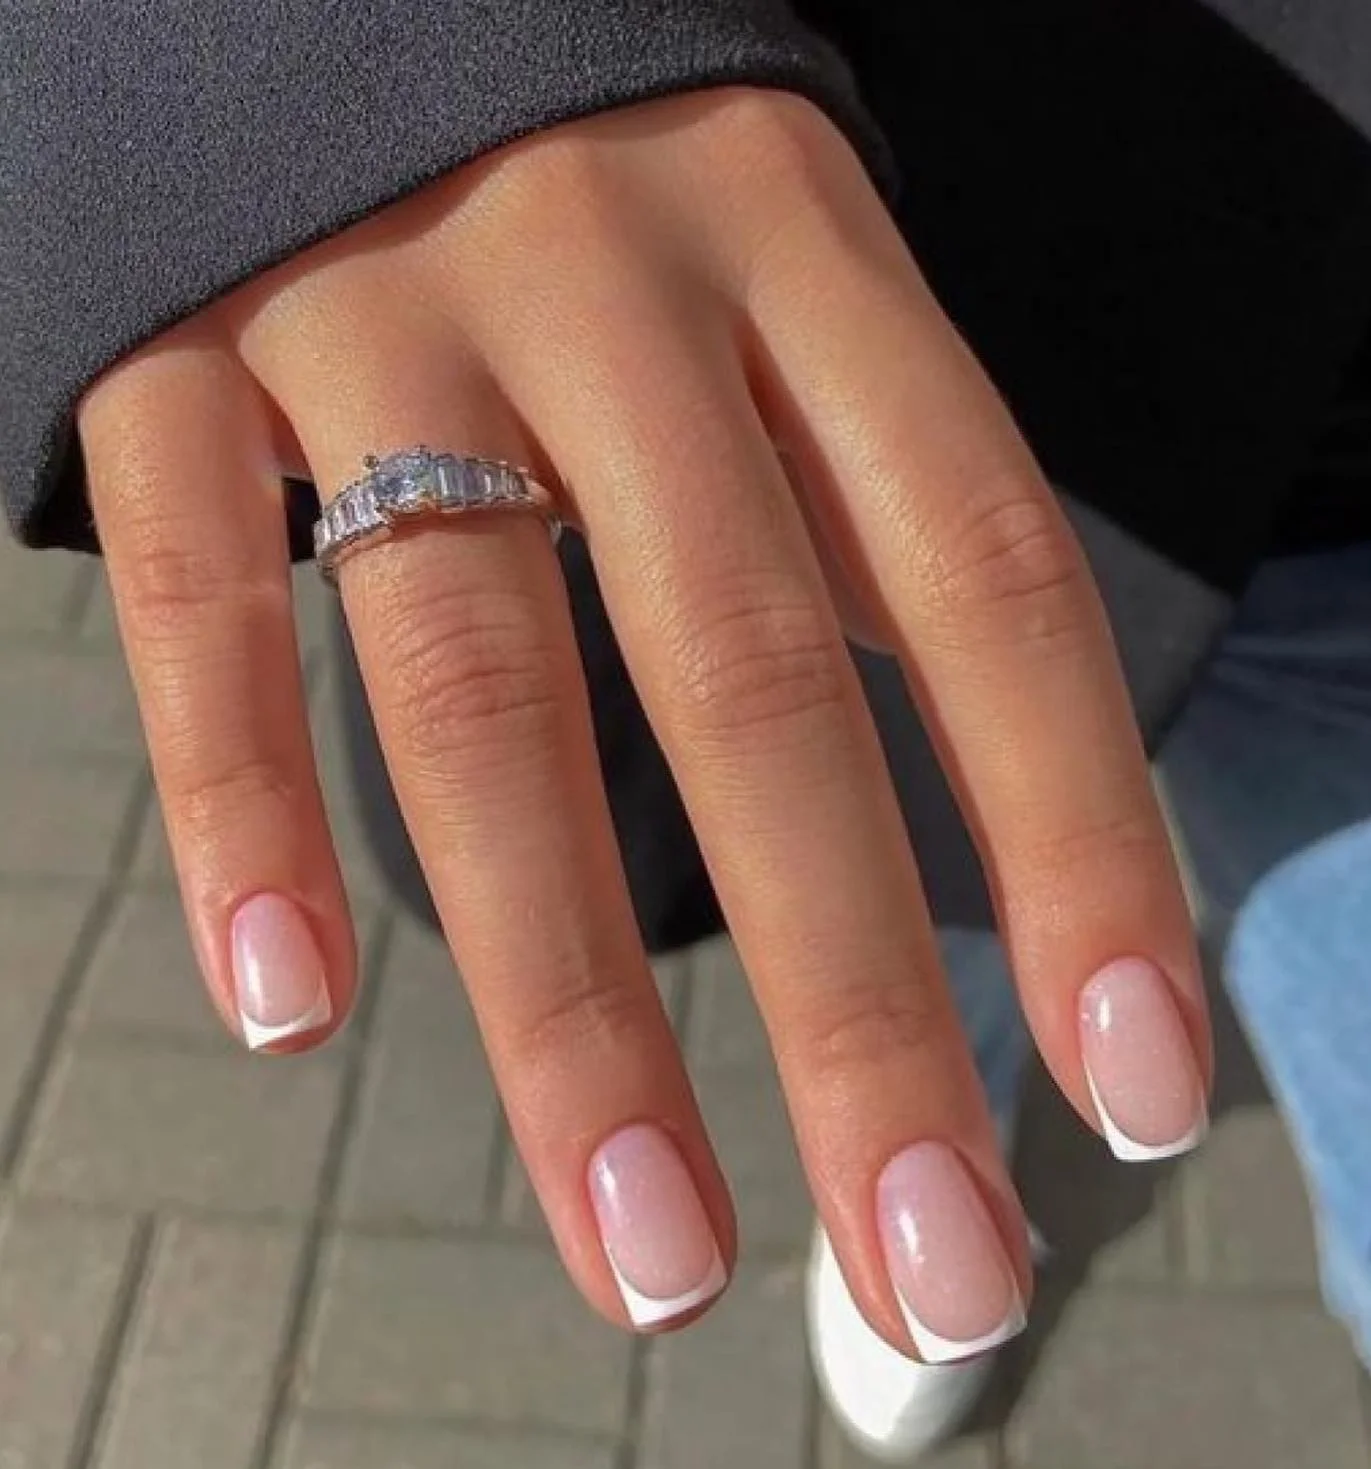
For the base, I’d reach for something like Essie Ballet Slippers or OPI Bubble Bath depending on how sheer I wanted the result. A highly pigmented white gel and an ultra-fine liner brush are much easier for creating those slim tips than using a standard polish brush. I’d keep the white line proportional to the actual free edge rather than making every nail artificially identical.
There’s also a small shaping lesson hidden in this manicure. The nails aren’t aggressively square or completely round; their straight-ish edges flow into softened corners. I find that especially wearable on short natural nails because there are fewer sharp corners to catch while still preserving that neat, structured outline.
This is probably one of the easiest rich girl nail ideas to live with day after day. Nothing feels excessive, yet the hands immediately look cared for. And really, isn’t that the appeal of this entire aesthetic? The manicure doesn’t announce itself before you enter the room—it quietly finishes everything you’re already wearing.
Creamy Nude Square Nails With a Glass Finish
There is something particularly satisfying about an immaculate nude on square nails. This version uses a creamy beige-pink shade with enough translucency to keep it from looking flat, paired with a medium-short square silhouette and gently softened corners. The uninterrupted glossy surface makes the manicure feel almost architectural. No art, no glitter, no distraction—just beautifully balanced proportions.
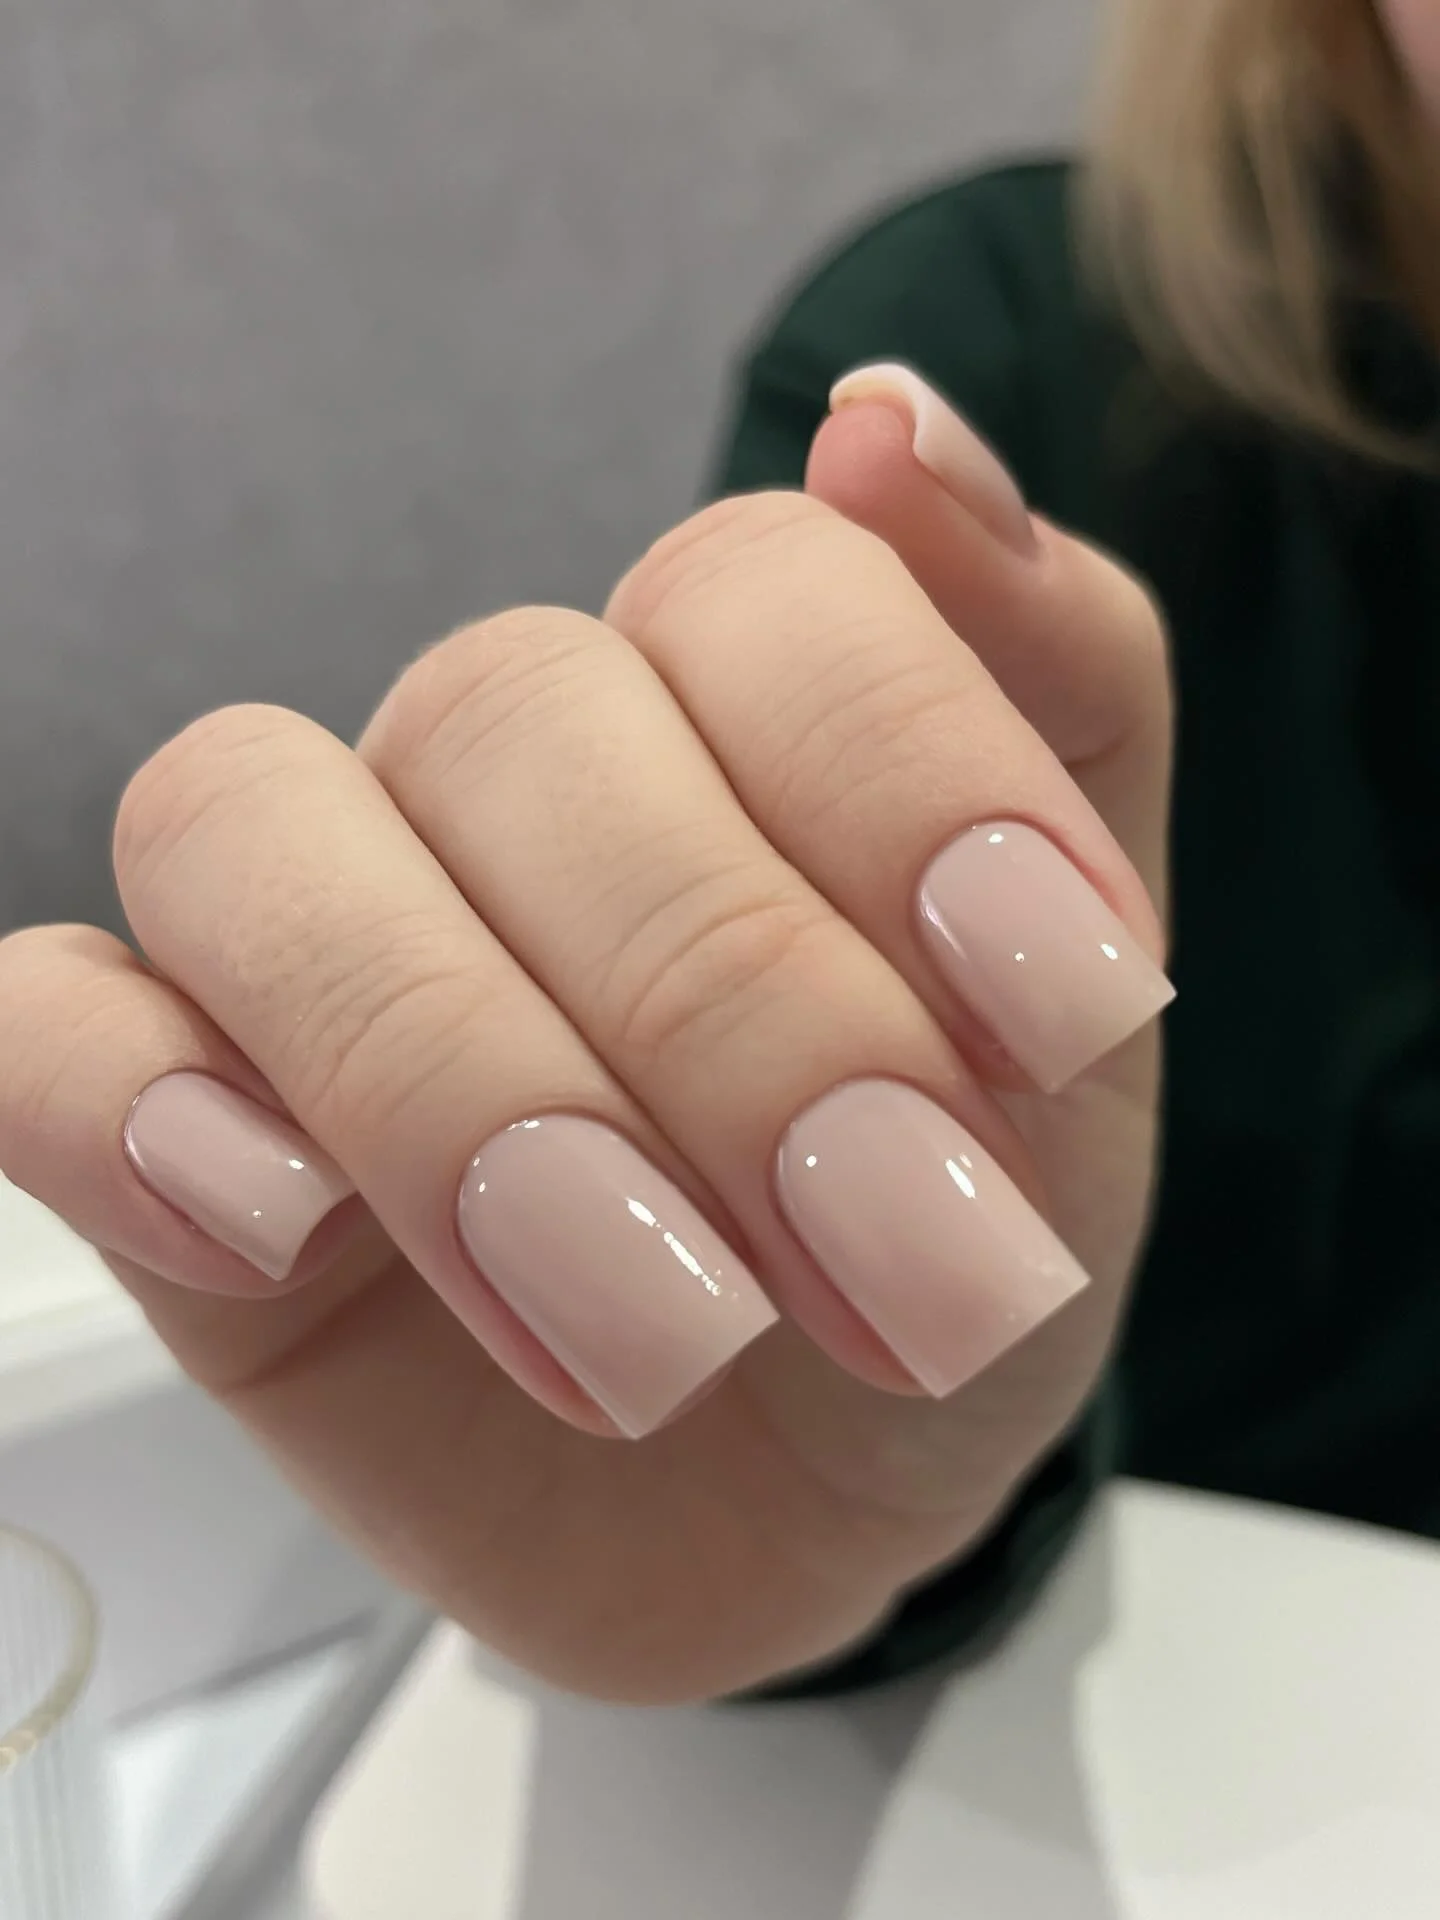
I’m picky about nude polish because undertone matters enormously. Rather than trying to find a supposedly universal nude, I prefer a shade that sits harmoniously against the skin while remaining slightly distinct from it. OPI Put It In Neutral, Essie Topless & Barefoot, and similar neutral families are useful starting points, although the exact match will vary from person to person.
If I were recreating this at home, I’d apply a smoothing base coat and then two thin coats of nude, leaving the tiniest clean margin around the cuticle. That detail keeps the application looking precise. I’d cap the free edge with each layer and finish with a substantial glossy topcoat to get that freshly polished, almost gel-like reflection.
I’ve always found this type of manicure surprisingly good at making me feel more pulled together on ordinary days. It’s the nail equivalent of finding a white shirt that fits perfectly: technically simple, but suddenly everything around it looks more considered.
Blush Square Nails With a Subtle Pearly Shift
Soft blush pink becomes much more interesting when light introduces a faint pearlescent glow. These medium square nails have a translucent rosy base and a restrained reflective finish that moves between pink and cool lavender depending on the angle. The effect is subtle enough to remain polished, yet it prevents the manicure from becoming another predictable nude.
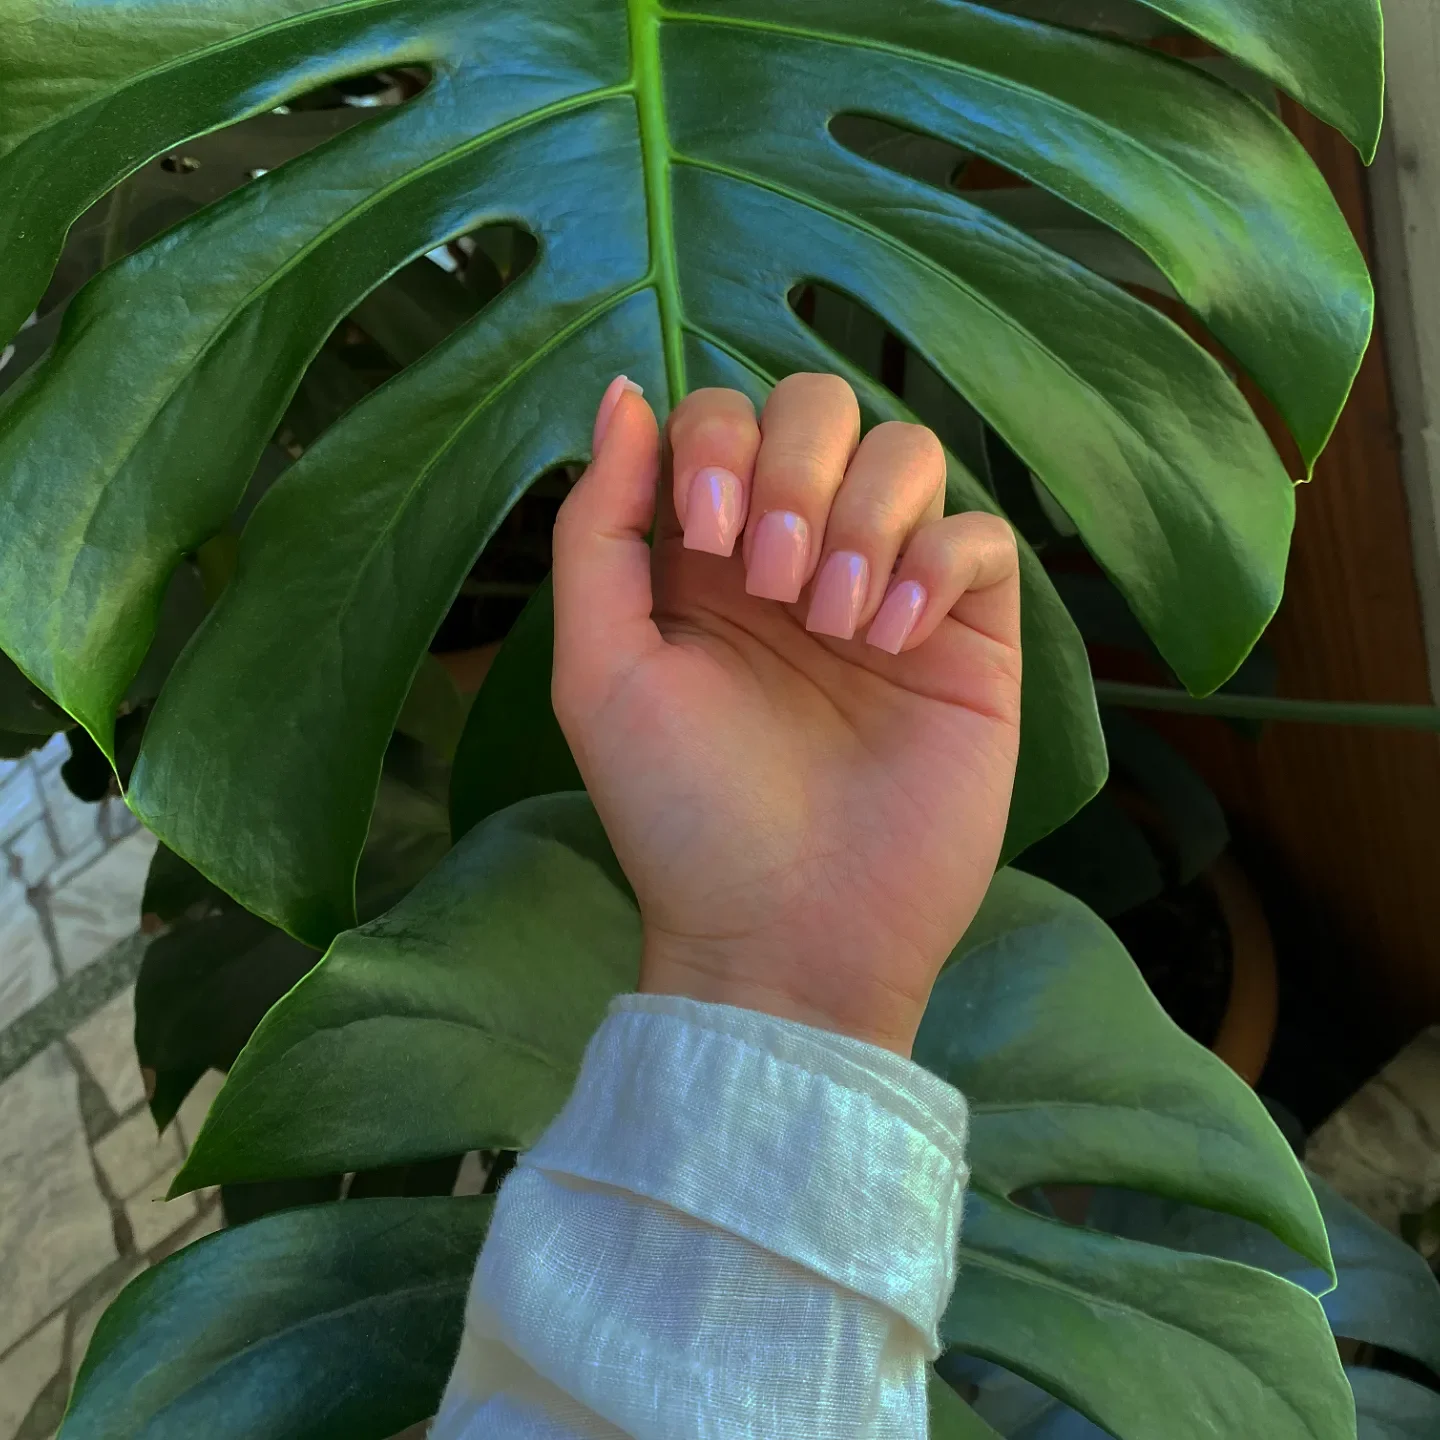
To create that finish, I’d start with a sheer blush gel and add the lightest veil of pearl or fine chrome powder before sealing everything with topcoat. The operative word is lightest. I wouldn’t want a full mirror-chrome effect here; the goal is an elusive sheen that appears when the hand moves and almost disappears when it doesn’t.
A manicure like this also proves why preparation deserves attention. Pearl finishes highlight bumps and unevenness, so I’d gently refine the surface, use a leveling base if necessary, and keep every color coat thin. With square nails, I also check the shape from several angles because even a slightly tilted free edge becomes noticeable once that glossy reflection hits it.
This is my answer for anyone who loves minimalist nails but gets bored after three days of plain beige. It behaves like a neutral, yet there’s enough going on to make you look twice. Sometimes that tiny unexpected detail is exactly what makes simplicity memorable.
Short Milky Almond Nails for Everyday Quiet Polish
Short almond nails may be one of my favorite ways to make a neutral manicure feel graceful without adding length. The silhouette is softly oval with just enough narrowing toward the tip to create an almond impression, while a translucent milky beige-pink coating lets a hint of the natural nail show through. The finish is glossy and exceptionally clean, giving the nails that fresh, almost moisturized appearance I associate with understated manicures.
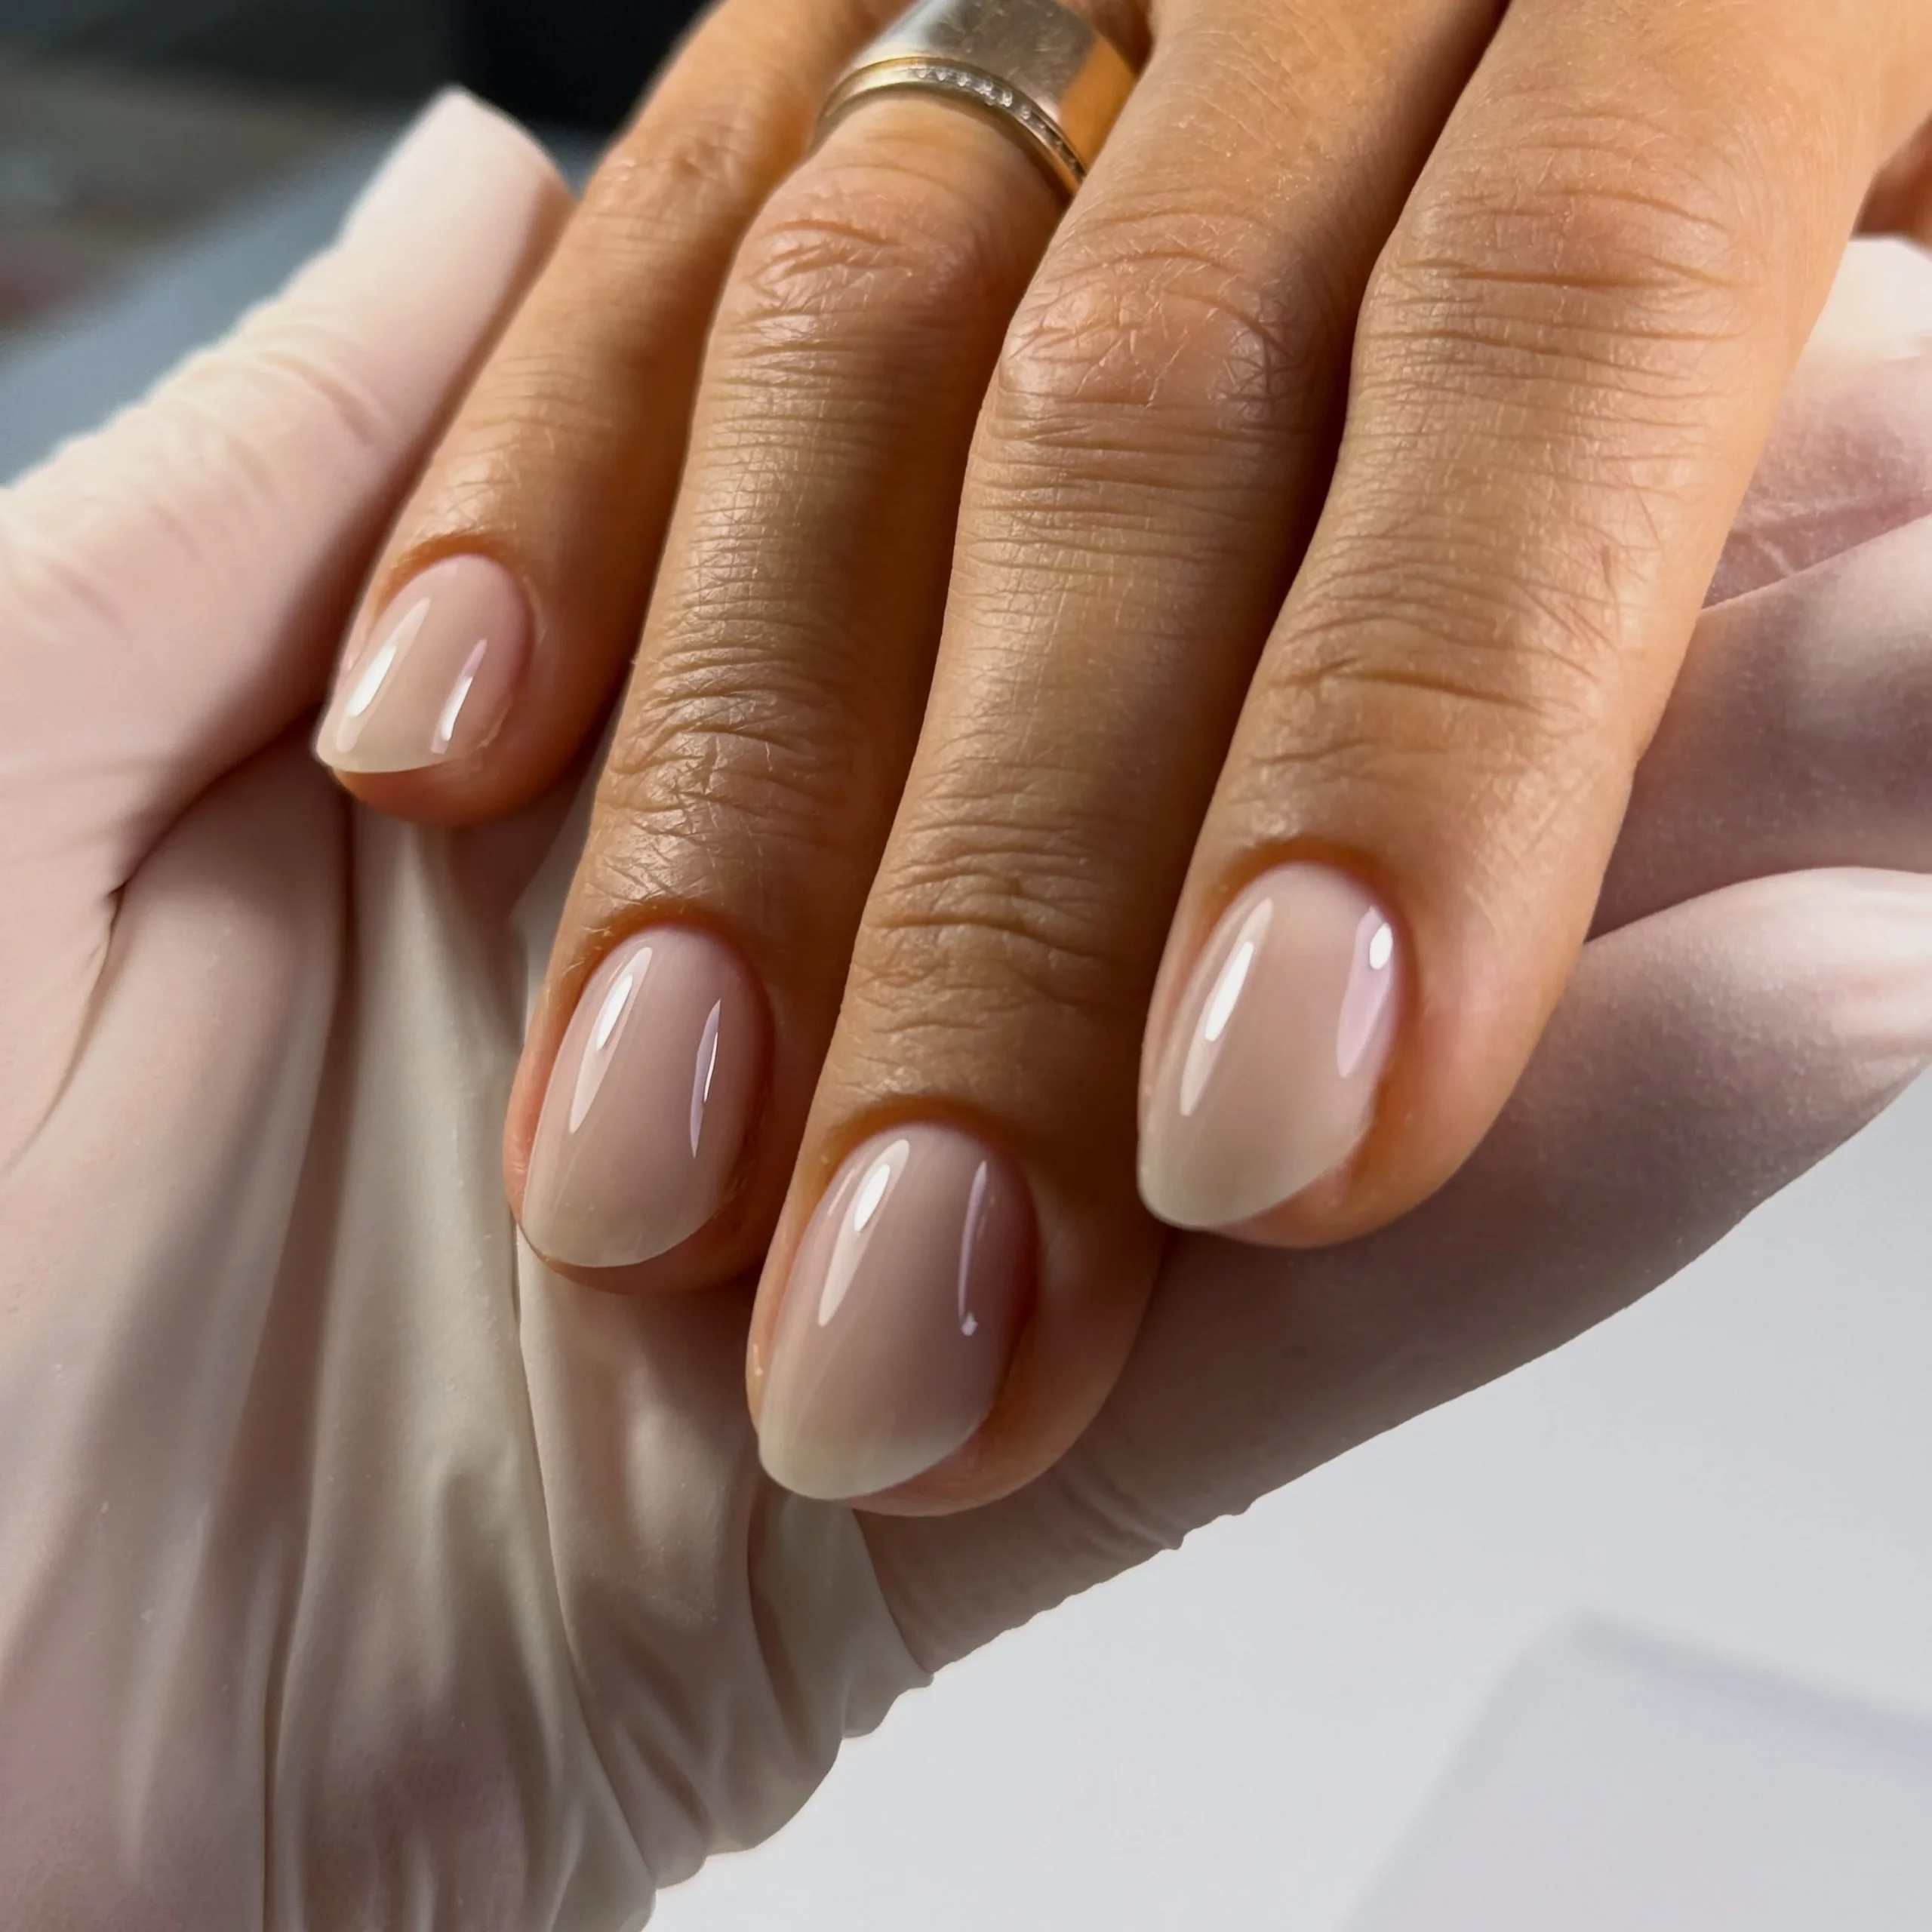
I’d choose a flexible sheer base color for this rather than a heavy opaque nude. Products in the milky pink, soft beige, and natural builder-gel families work particularly well because they can visually even the nail plate without covering it completely. Two thin coats are usually prettier than one thick one, especially when you want that slightly translucent depth.
The shape is equally important. On shorter nails, I wouldn’t force an exaggerated almond point because there simply isn’t enough length for it to look balanced. Instead, I’d round the free edge and gently taper the sides. That gives the fingers a softer, more elongated impression while keeping the manicure comfortable for typing, cooking, and everything else real life throws at it.
There are weeks when I want nail art, and then there are weeks when this is all I want. A manicure this restrained makes rings look intentional, works with practically every color in a closet, and grows out more gracefully than many stronger shades. Simple? Definitely. Forgettable? Not at all.
Rosy Nude Ovals With an Immaculate Salon Shine
The final look leans into a warmer rosy nude and a beautifully compact oval shape. The nails are short, smoothly rounded, and coated in a muted pink-beige that has enough warmth to feel alive against the skin. There’s no visible decoration, which puts all the emphasis on uniform shaping, neat cuticle work, and that glossy finish. For me, this is rich girl minimalism in its purest form.
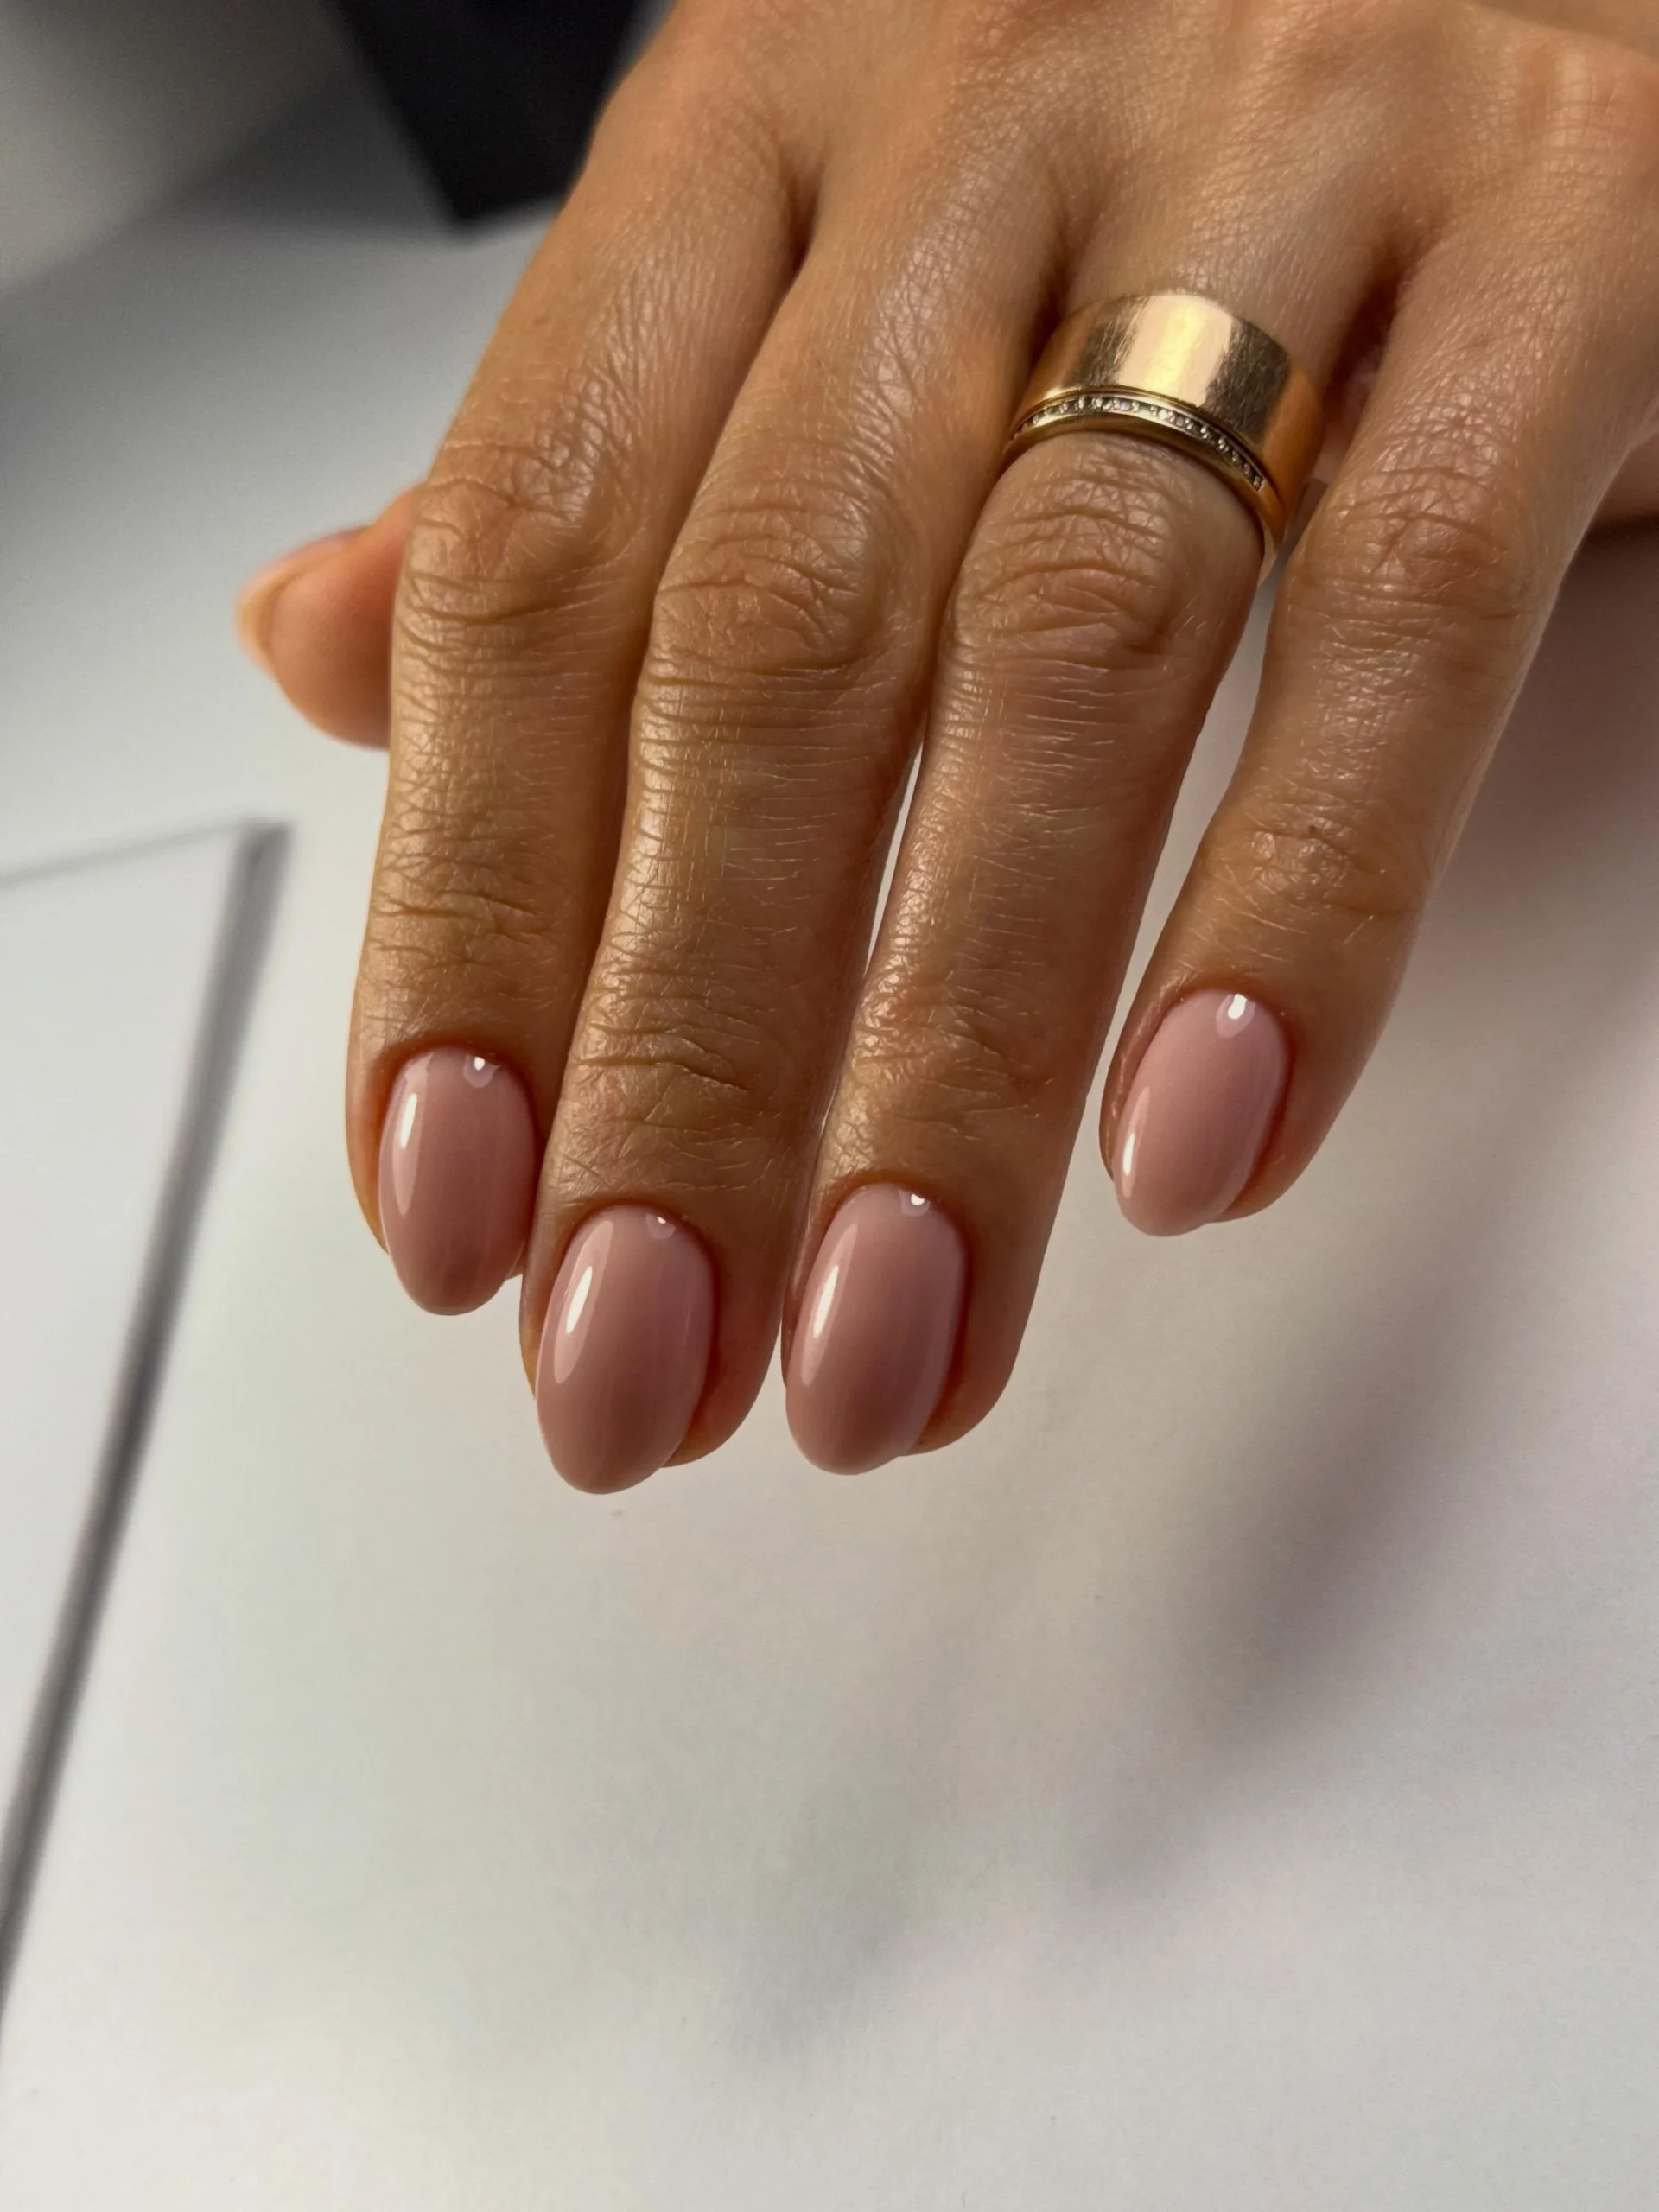
I’d look for a rosy nude with a jelly or semi-sheer quality instead of a completely opaque taupe. Essie and OPI both have extensive neutral ranges, but I’d always swatch the shade first if possible because skin undertones can completely change how a nude behaves. A color that appears dusty pink in the bottle may pull beige, mauve, or even slightly gray once applied.
At home, I’d keep the length short and file in one consistent curve, checking that the highest point of each rounded tip sits centrally. Then comes cuticle preparation, a thin base, two restrained layers of color, and topcoat. I also like to finish with cuticle oil once everything is fully set; neat surrounding skin is part of the overall effect, not an afterthought.
And that, to me, captures why rich girl nails remain so appealing. They don’t require the loudest shade or the newest piece of nail art to feel current. A flattering shape, beautifully chosen neutral, immaculate application, and serious shine can do far more. When the details are this good, restraint becomes the statement.
Soft Blush Nails With That Quietly Polished Finish
I keep coming back to this soft blush manicure whenever I want my nails to look expensive without looking overworked. The short, softly squared shape feels neat and practical, while the muted rosy-beige color melts beautifully into the skin. I especially like the balance here: the nails have enough color to look finished, but the shade stays sheer enough to preserve that clean, natural effect. The high-gloss surface is what really pulls everything together, giving the manicure that fresh, just-left-the-salon appearance.
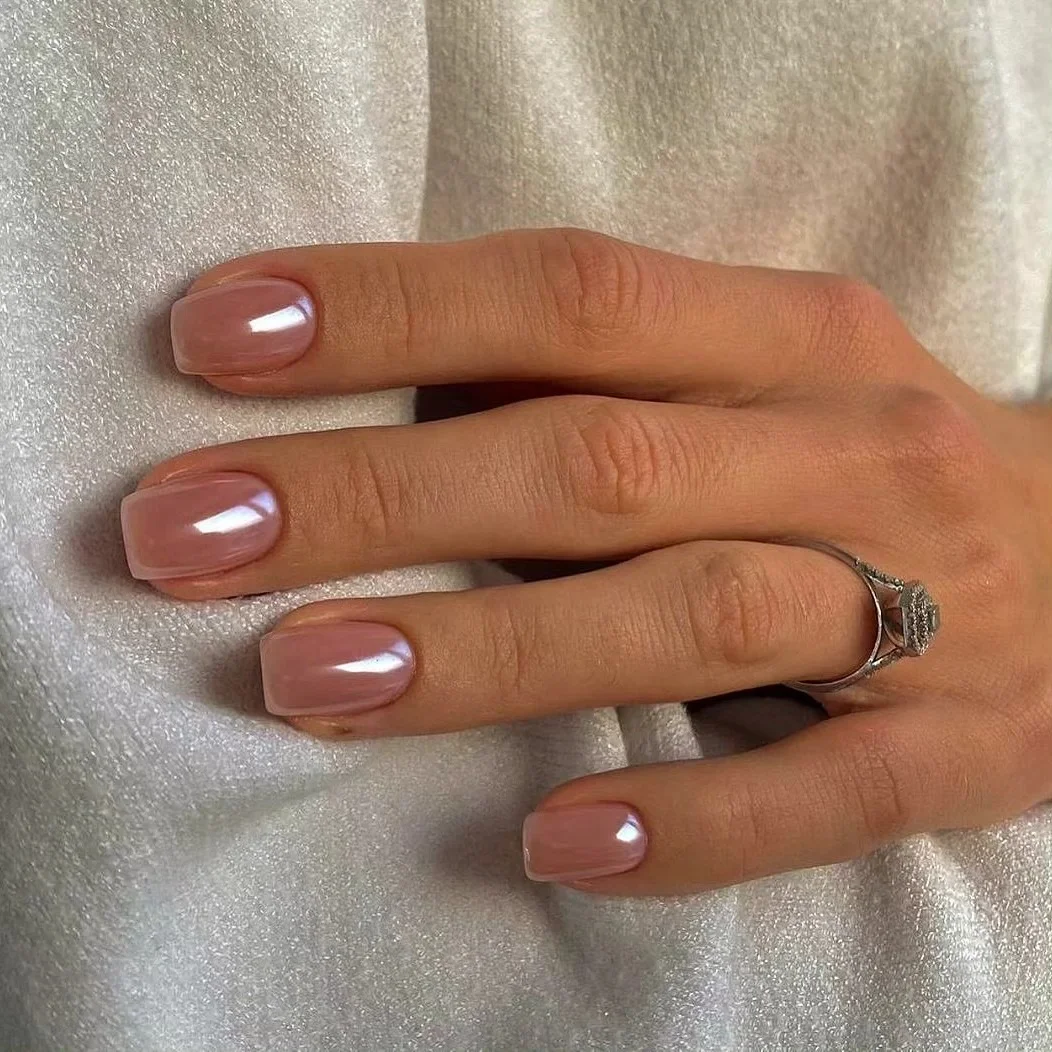
For this kind of rich girl nail idea, I would reach for a sheer pink-beige gel such as OPI Bubble Bath, CND Shellac Romantique, or a similar neutral with a slightly warm undertone. I prefer two very thin layers rather than one heavy coat because that keeps the nail looking softly translucent. A glossy top coat is essential here; I like a glass-like finish that catches the light without adding glitter or texture. The result should feel polished rather than decorated.
At home, I would start by shaping every nail into a consistent short squoval, keeping the corners softly rounded instead of sharply squared. After cuticle care and gentle buffing, I would apply a thin base coat, followed by the sheer nude-pink color in controlled layers. I let each layer level properly before adding the next one, then finish with a generous but even layer of top coat. One little detail makes a surprising difference: I always check the free edge before curing because a clean, fully covered edge helps the manicure stay fresh-looking for longer.
This is the manicure I would choose for a busy week when I still want my hands to look pulled together. I can wear it with denim and a sweater, a tailored blazer, or a simple black dress without having to think twice. It also works beautifully as a transitional look when summer starts giving way to cooler days. Sometimes the most convincing rich girl manicure is the one that barely announces itself.
Sheer Almond Nails With a Delicate Silver Edge
I love how this manicure takes a familiar neutral base and gives it one beautifully controlled detail. The long almond shape creates an elegant, elongated silhouette, while the translucent pink-beige base keeps the overall look light. At the tips, a fine silver glitter border follows the curve of each nail instead of creating a traditional solid French tip. That tiny change makes the manicure feel more modern and adds just enough sparkle for an evening without turning it into full-on party nails.
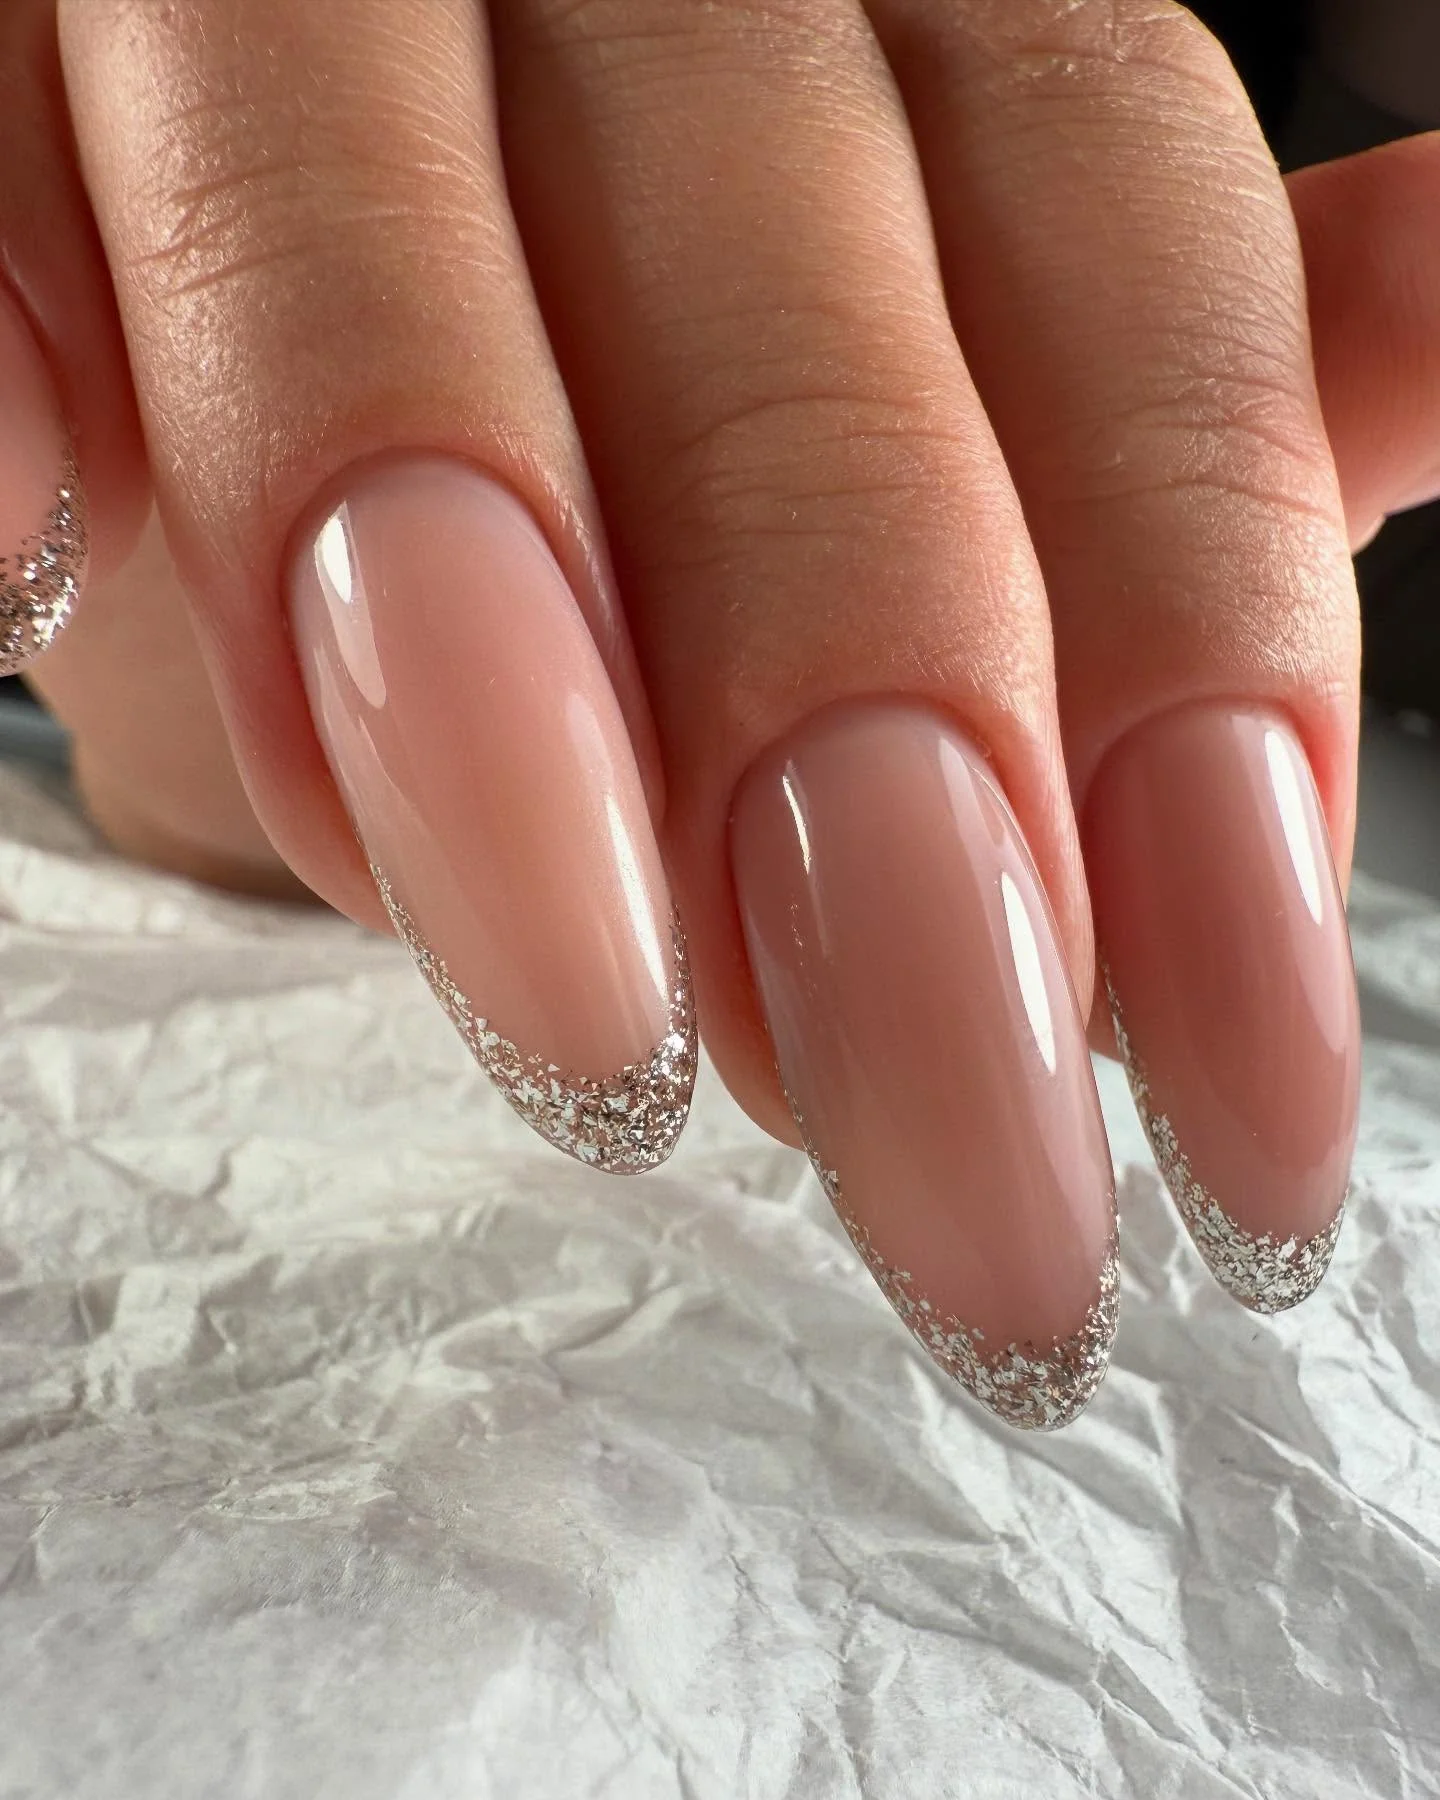
I would use a sheer milky pink gel for the base and a fine silver glitter gel or reflective silver polish for the tips. OPI Funny Bunny layered with a soft pink sheer can create a similar translucent effect, while a product such as CND Shellac Silver Chrome or a fine silver glitter liner can provide the delicate edge. I prefer micro-glitter here because chunky particles can interrupt the elegant almond shape. A crystal-clear glossy top coat completes the look and gives the silver detail extra dimension.
To recreate it, I would first file the nails into a smooth almond shape with both sides tapering evenly toward the tip. After applying the sheer base, I would use a fine liner brush to trace a narrow curved line of silver glitter along each free edge. I would keep the line intentionally thin and slightly irregular rather than trying to make it look mechanically perfect. Once the glitter is cured or set, I would seal everything with top coat, paying attention to the tips.
For me, this is where rich girl nails become especially fun: the base is restrained, but the manicure still has a little secret. I could easily wear this to a dinner, wedding, holiday gathering, or date night and still have it feel appropriate during the day. The silver catches the light when I move my hands, but the neutral foundation keeps it sophisticated. It is the kind of manicure that makes me want to wear delicate jewelry just to see everything work together.
Milky White Almonds With a Clean, Glossy Glow
A milky white manicure has a way of making the entire hand look instantly groomed. I especially like this almond version because the softly tapered shape keeps the pale color from feeling heavy. The finish is smooth and almost creamy, with enough translucency to keep the nails looking dimensional rather than flat. For anyone building a rich girl nail collection, I think this is one of those timeless combinations worth saving because it can move effortlessly from everyday errands to special occasions.
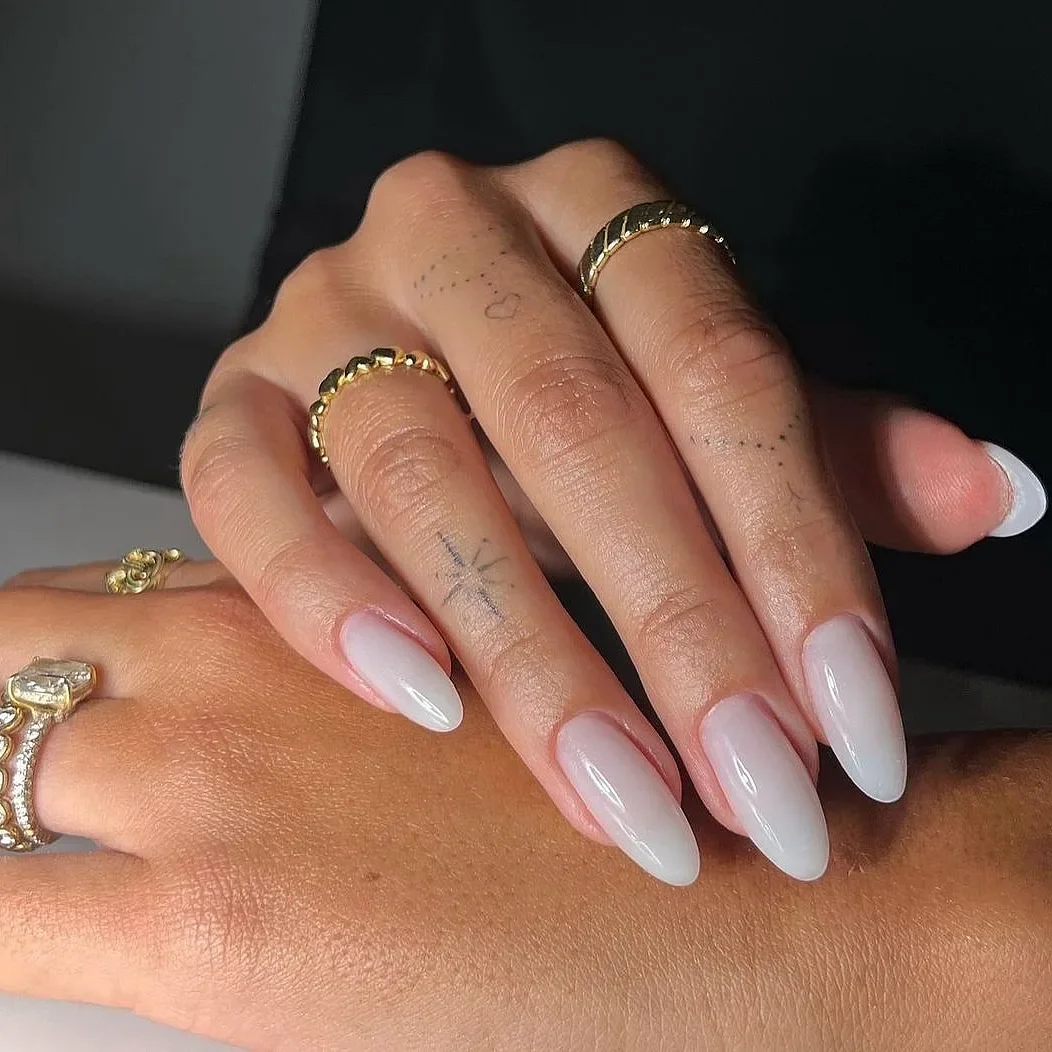
I would choose a semi-sheer milky white gel rather than an opaque white polish. Shades like OPI Funny Bunny or CND Shellac Cream Puff can be adjusted with a translucent base to create that softer effect, depending on how sheer I want the finish. I would also keep the top coat extremely glossy because the light reflection is part of the design. No glitter is necessary; the beauty comes from the color, shape, and immaculate surface.
My first step would be to refine the almond shape so the sidewalls flow naturally into a rounded point. I would then apply a thin layer of base and build the milky color gradually, checking the nails from different angles to make sure the coverage stays even. I like slightly translucent layers because they give the manicure a more expensive-looking depth. After curing, I would finish with a high-shine top coat and clean any product from around the cuticle before the final cure.
I have worn variations of this kind of manicure when I wanted something that looked sophisticated but did not require constant coordination with my wardrobe. It is surprisingly versatile. A cream sweater makes it feel soft, black clothing makes it look crisp, and gold jewelry gives it an instant evening mood. If I had to choose one neutral nail idea that always looks freshly styled, this would be very high on my list.
Nude Almond Nails With a Chic Leopard French Accent
This manicure proves that rich girl nails do not have to be completely minimal. I love the way a warm nude base keeps the overall design sophisticated while the tiny leopard details add personality around the tips. The almond shape gives the pattern a graceful frame, so the animal print reads more like a fashion accent than a loud statement. The darker brown spots are concentrated near the edges, which keeps the center of each nail clean and elongated.
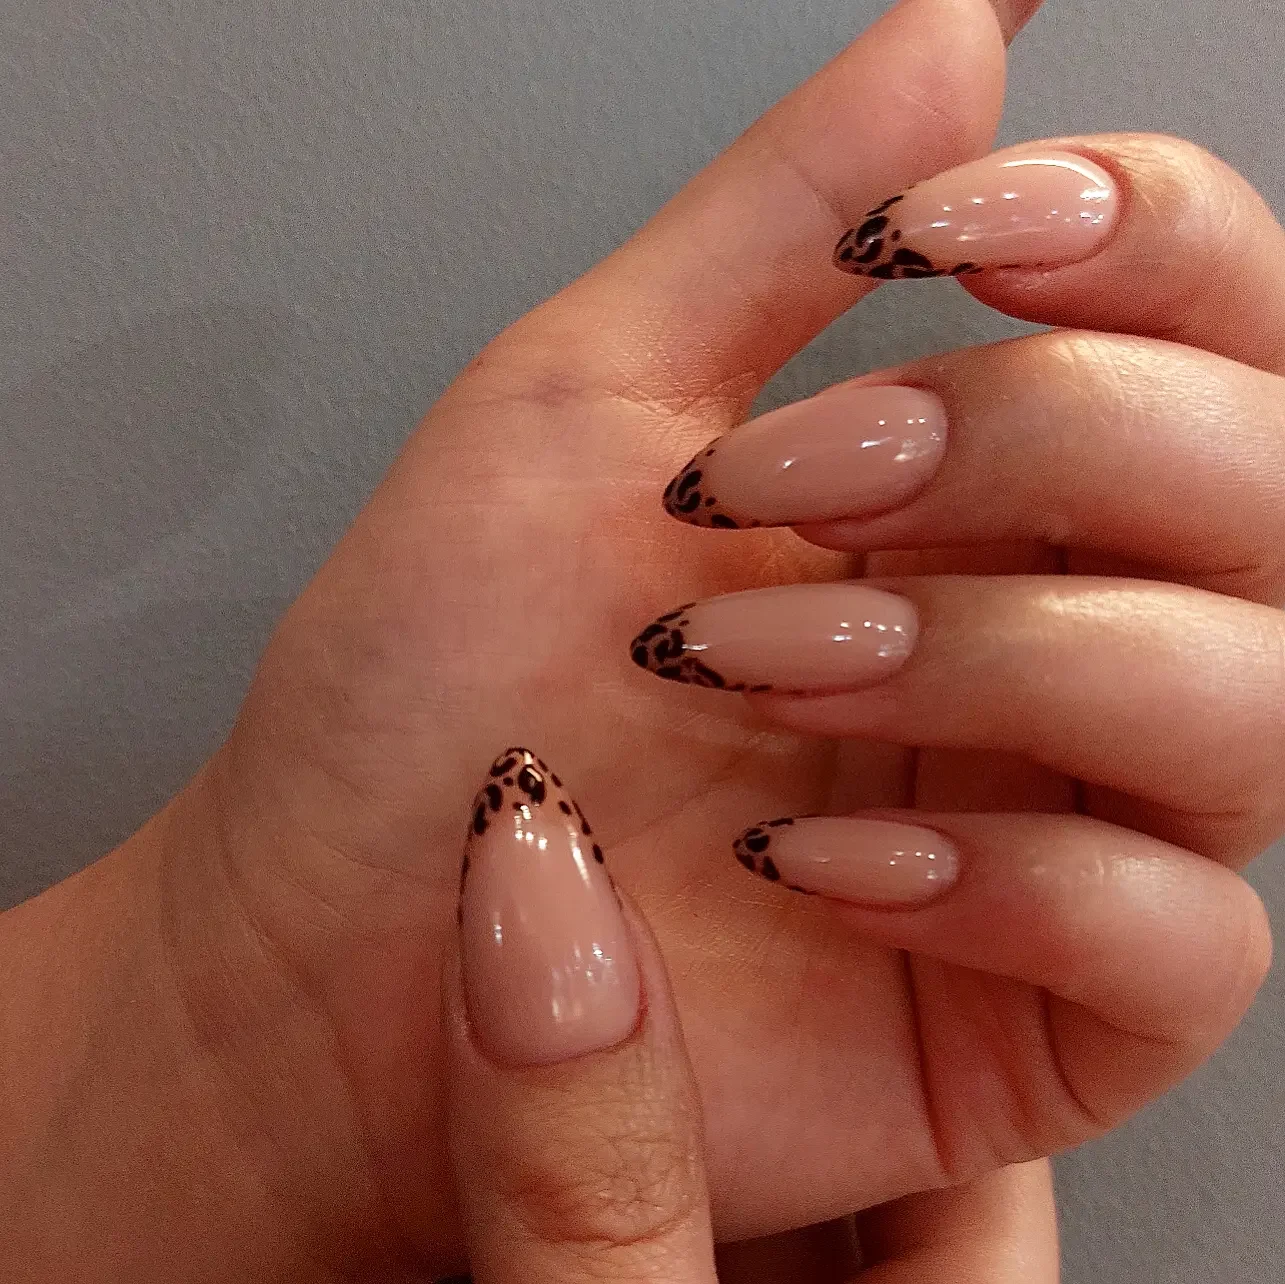
For the base, I would use a warm nude or pink-beige gel that closely complements the skin tone. Essie Gel Couture in a soft neutral can work for a similar effect, while OPI or Gelish offer plenty of nude gel options. For the leopard detail, I would keep two brown shades nearby: one medium caramel-brown and one deeper chocolate-brown. I also like having a very fine black or espresso liner available for defining selected spots, although the design looks softer when the contrast is not too harsh.
I would begin with the almond shape and apply the nude base in two thin coats. Once it is smooth and fully cured, I would use a tiny detail brush to create irregular brown spots around the tips, varying their size and placement from nail to nail. I would resist making perfectly round dots because the slightly organic shapes are what make leopard print look convincing. A glossy top coat seals the artwork and softens the contrast, turning the entire manicure into one cohesive finish.
This is probably the version I would choose when I am bored with plain neutrals but still want something wearable. I can see it working especially well in early fall with camel, chocolate, cream, or black clothing. The pattern has attitude, but the nude base keeps it from taking over the whole look. It is a clever reminder that understated does not have to mean predictable.
Glossy Blush Square Nails With a Modern Silhouette
There is something incredibly polished about a medium-length square nail covered in a translucent blush shade. I like the clean horizontal edge because it creates a sharper contrast with the softness of the pink color. The nails are long enough to feel elegant but not so long that the shape becomes impractical. That combination makes this one of my favorite interpretations of the rich girl aesthetic when I want something more structured.
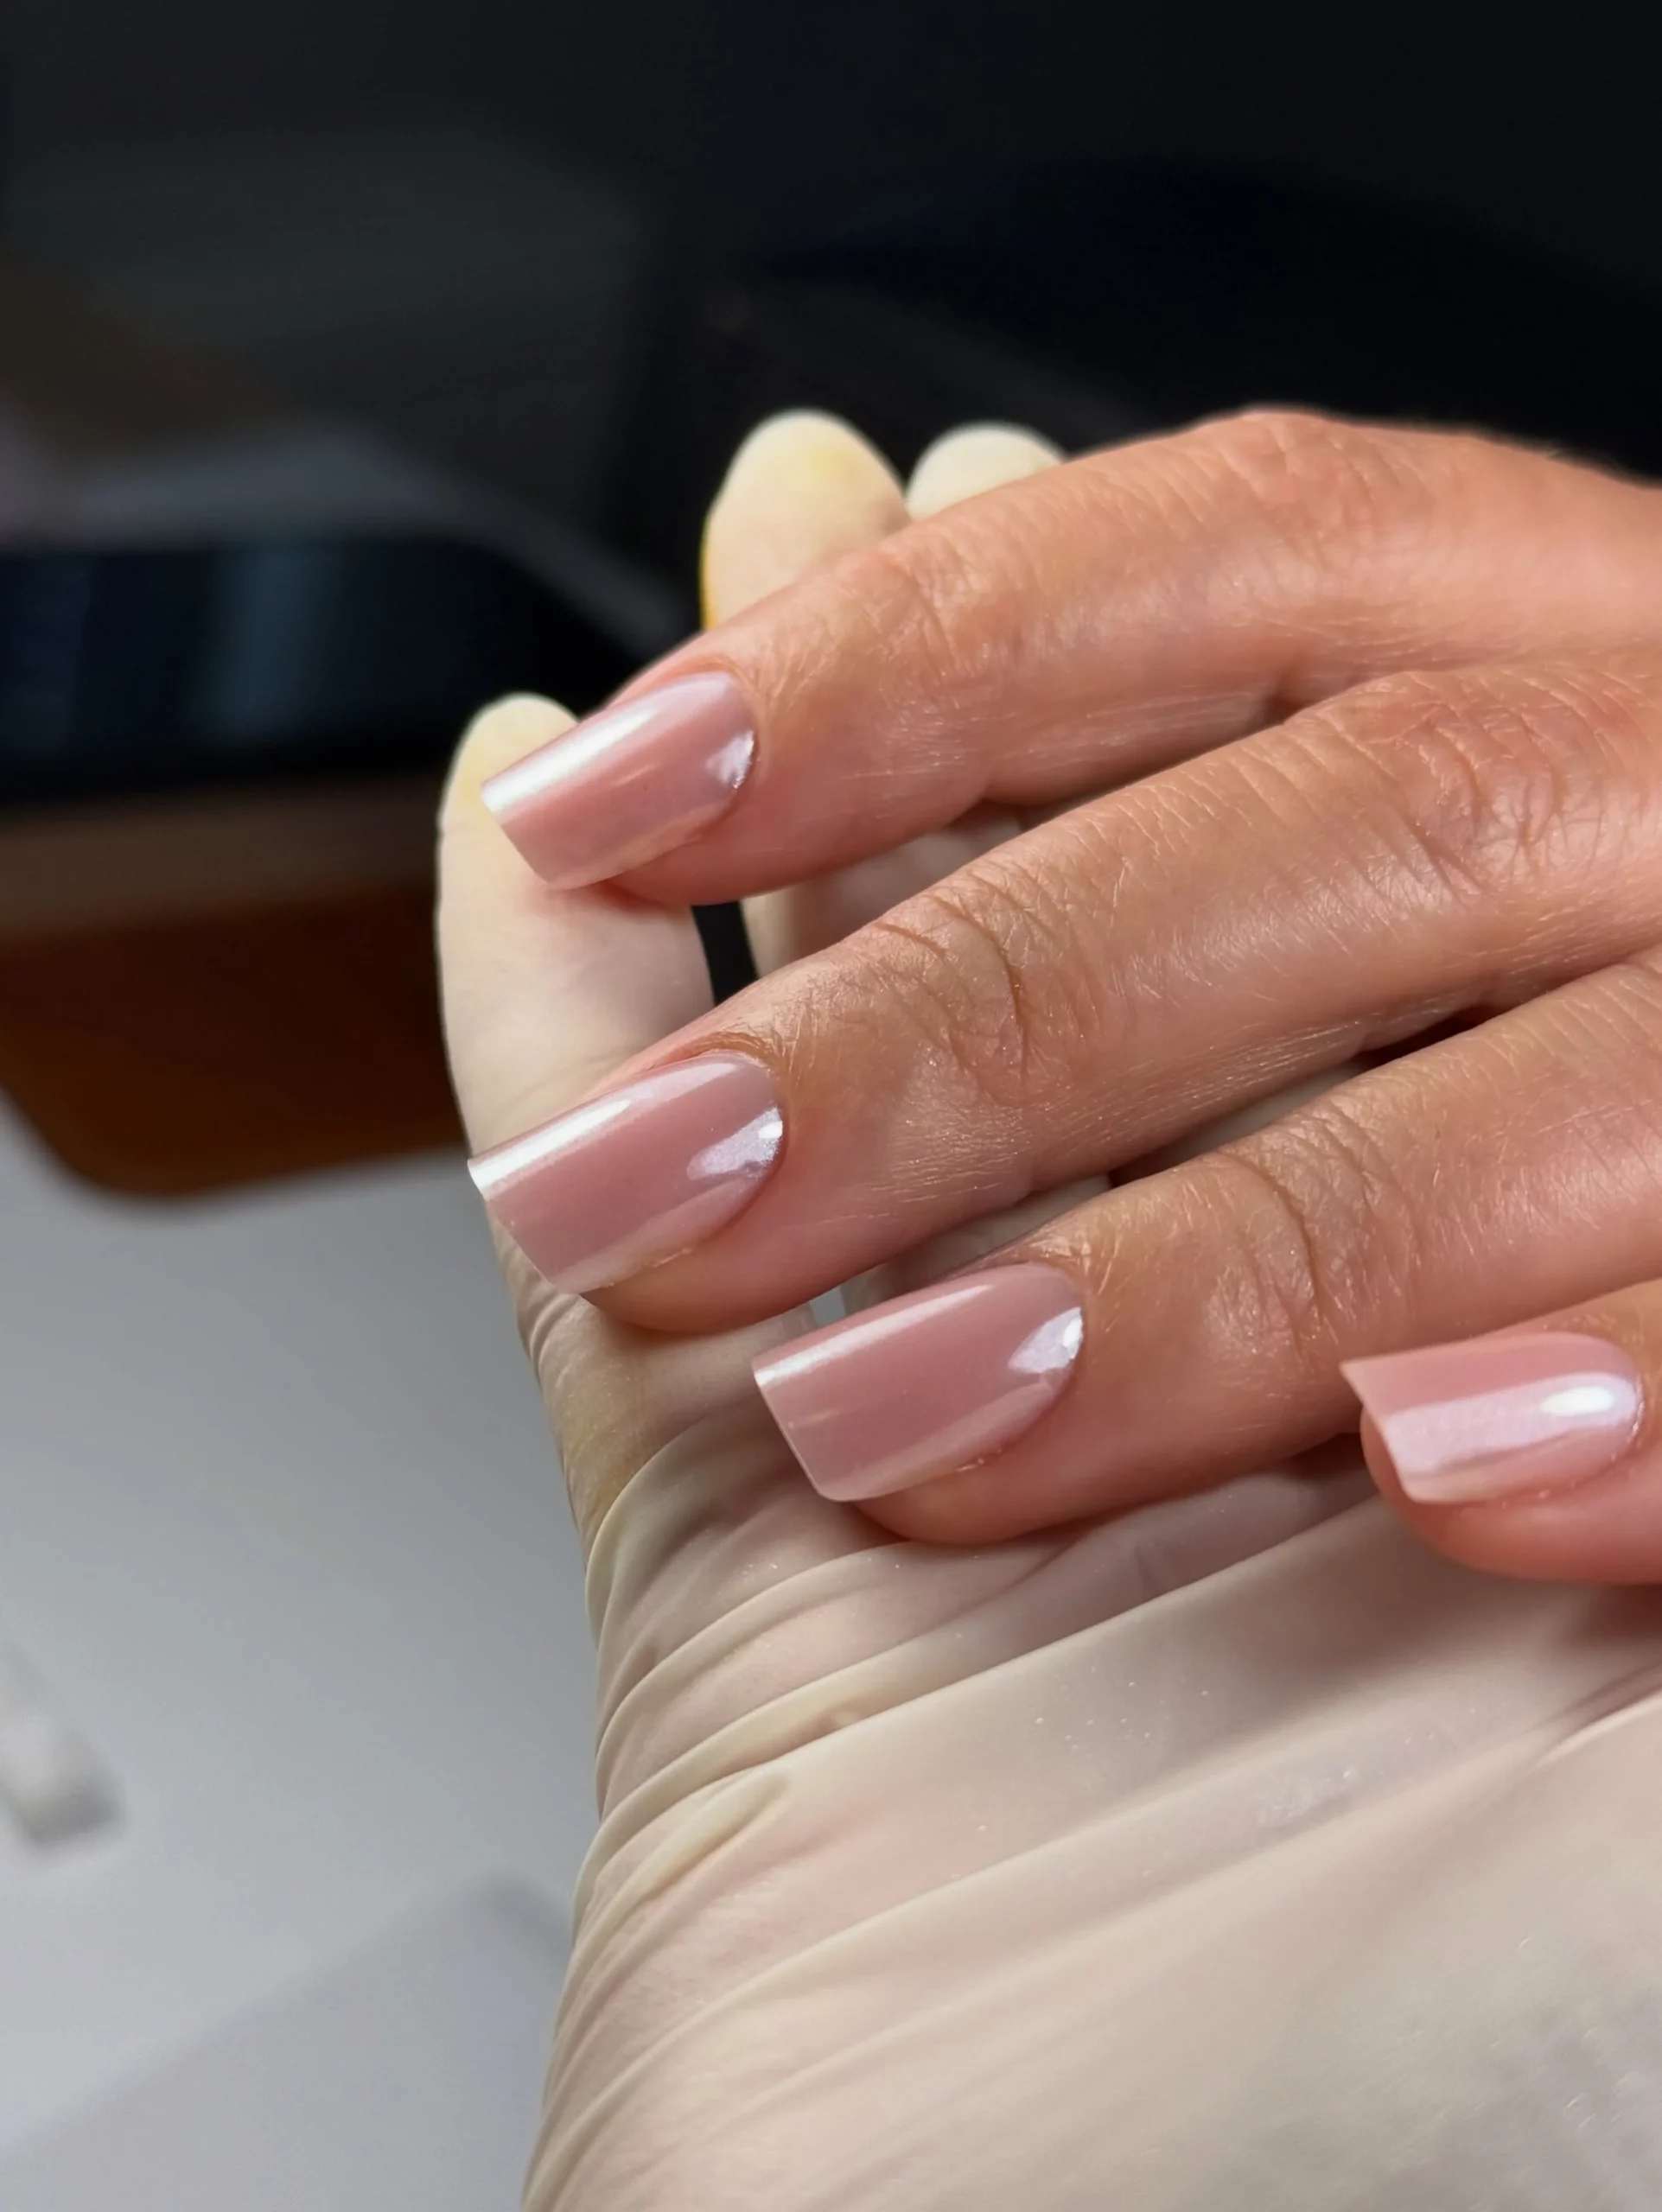
I would use a sheer dusty pink or neutral rose gel with a glossy finish. OPI Put It in Neutral is a useful starting point for this family of shades, while CND has several sheer pink options that can be layered for different levels of coverage. I would avoid anything too opaque or too cool because the beauty of this look is the subtle warmth and translucency. A flexible base and glossy top coat can help maintain the smooth, reflective appearance.
I would file the nails straight across first, then soften the very corners just enough to prevent them from looking harsh. After cuticle preparation, I would apply the base coat and build the pink color with thin layers. I always take an extra moment to inspect the sidewalls because a square shape looks best when the lines are balanced. Once the final coat is cured, I would add a glossy top coat and carefully seal the free edge.
I like this shape for anyone who wants her manicure to feel polished rather than delicate. It has a little more structure than an almond or oval nail, yet the blush color keeps it feminine and easy to wear. I could see myself choosing it for a workweek, a weekend trip, or a dinner where I want my manicure to quietly complete the outfit. Sometimes a clean shape does all the styling for you.
Short Milky Nails With a Whisper of Fine Shimmer
Short nails can absolutely have that rich girl effect, and this soft milky manicure is proof. I love the rounded-square shape because it looks tidy while giving the nails enough width to show off the delicate shimmer. The base appears pale and creamy, while tiny reflective particles create a subtle glow rather than obvious sparkle. It has that freshly moisturized, candlelit quality that looks especially pretty when the hands move.
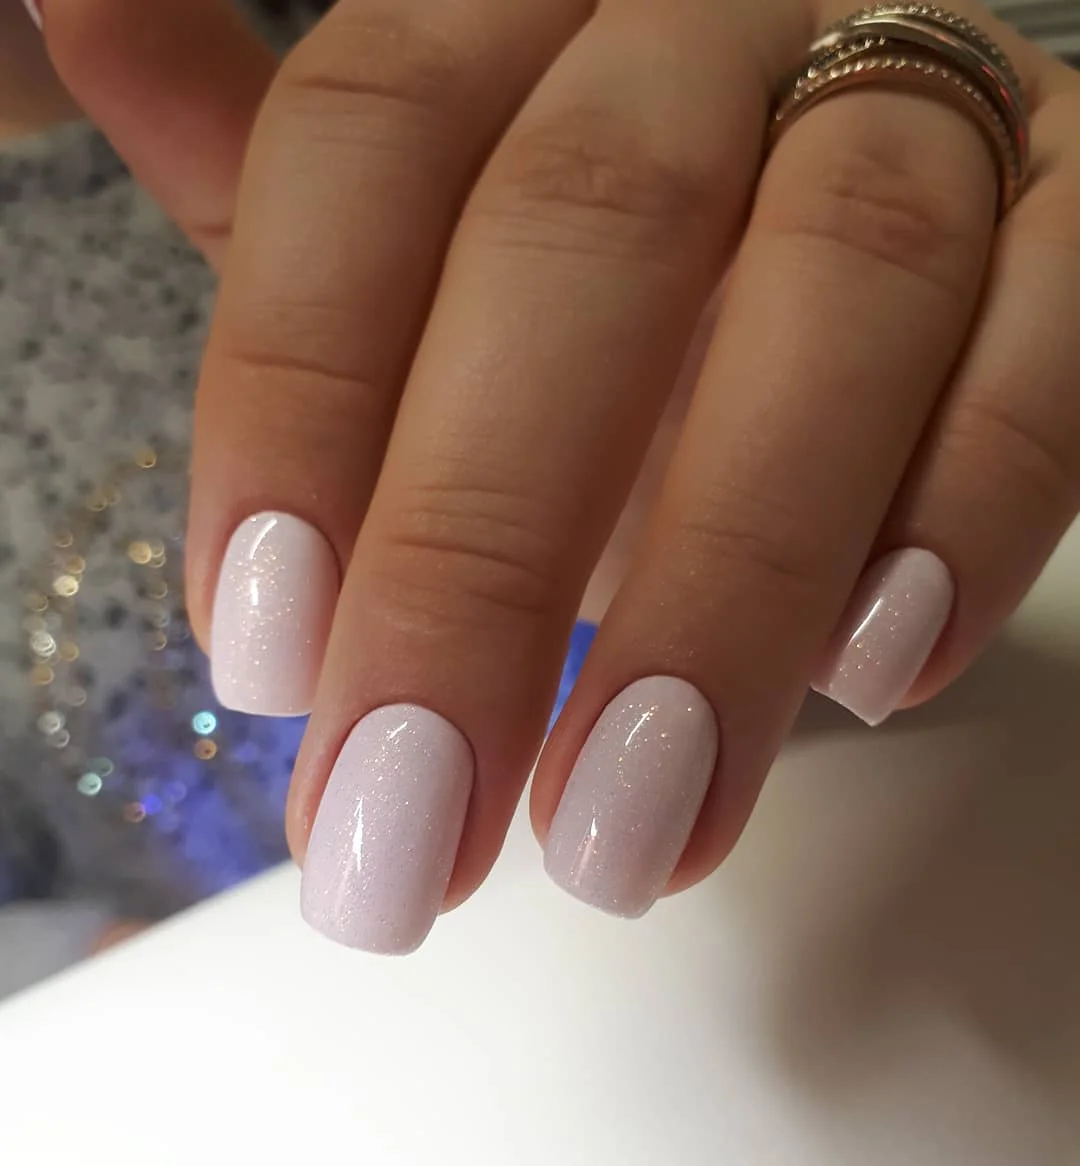
I would reach for a milky white or very pale pink polish with micro-shimmer already mixed into the formula. A sheer white gel layered over a fine pearl shimmer can create a similar finish if I want more control. I would keep the shimmer particles extremely small because the goal is luminosity, not glitter. A smooth glossy top coat is also important because it allows the fine particles to disappear into the surface while still catching the light.
At home, I would keep the nails short and softly square, making sure the corners are rounded enough for everyday wear. I would apply a sheer base, followed by one or two thin layers of the milky shimmer color. If the polish is particularly translucent, I would rather build the intensity gradually than apply one thick coat. After curing, I would add a glossy top coat and make sure the surface is perfectly smooth.
This is the kind of manicure I would recommend to myself when I want something fresh but genuinely easy to live with. Short nails make it practical, while the shimmer gives the neutral shade a little personality. I especially like it for the end of summer and the beginning of fall, when soft light makes pearly finishes look gorgeous. It is subtle enough for everyday life but never boring.
Sheer Pink Almonds With a Soft Satin Sparkle
I am always drawn to nail colors that look different depending on the light, and this delicate pink almond manicure has exactly that quality. The base is a muted nude-pink, while an ultra-fine shimmer creates a soft satin-like glow across the surface. The almond shape adds length without appearing too sharp, and the overall effect is graceful rather than overly sweet. It is a beautiful example of how one neutral shade can become much more interesting through texture.
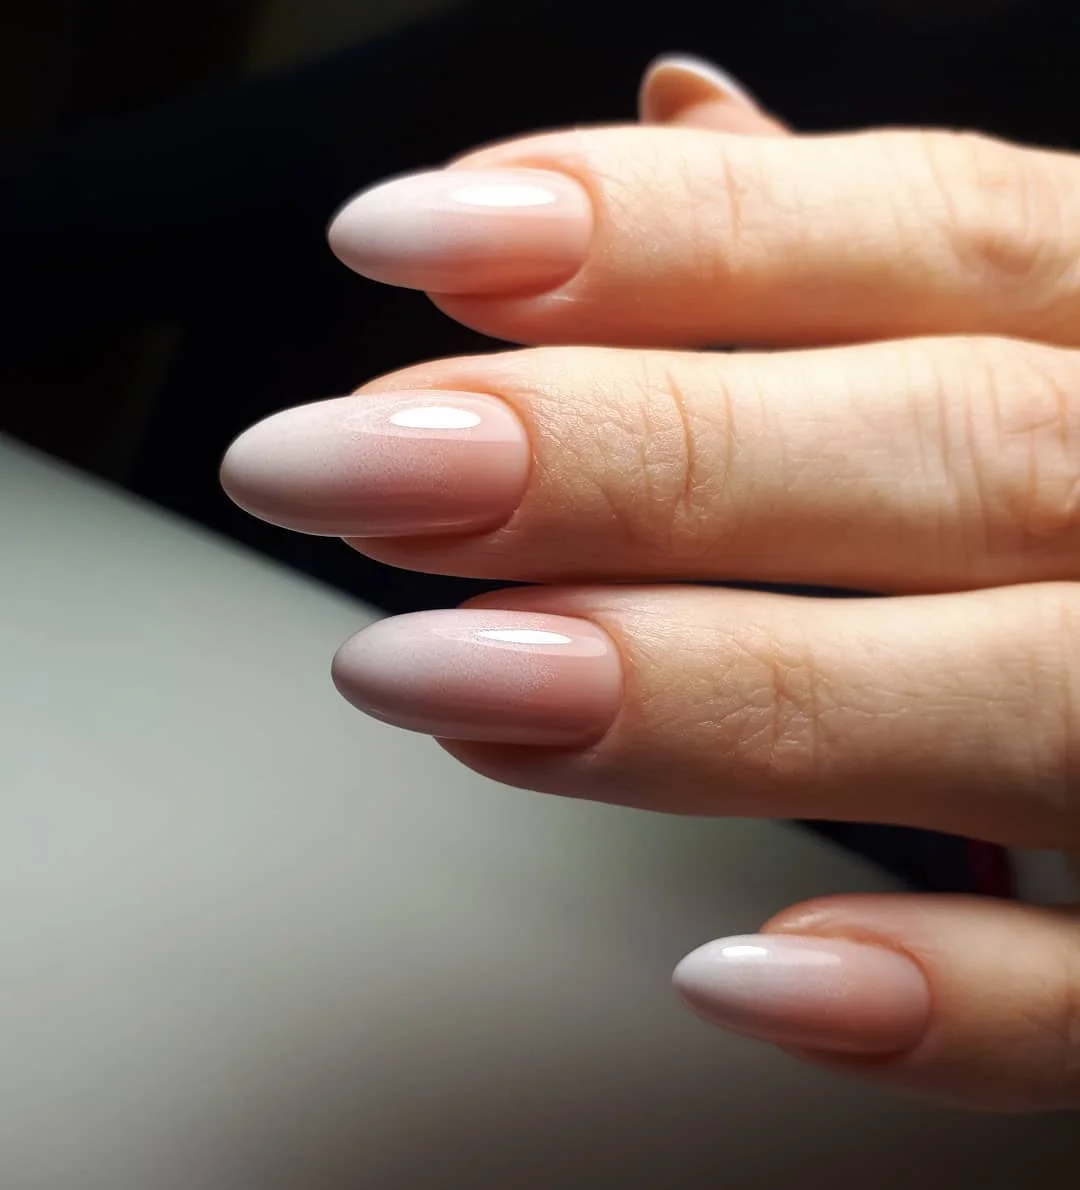
For this finish, I would use a translucent pink-beige gel with very fine pearl or champagne shimmer. OPI, Essie Gel Couture, and Gelish all have neutral families that can be layered with a fine shimmer topper to achieve a similar result. I would avoid large glitter particles because they would change the mood completely. The goal is for the shimmer to reveal itself when the light hits the nail, almost like a soft-focus filter.
I would shape the nails into a balanced almond, keeping the tip rounded rather than needle-sharp. After applying a thin base coat, I would build the sheer pink shade until the nail plate looks softly even. The shimmer can be added through a dedicated pearlescent layer or mixed into a sheer top color, depending on the products I have. I would finish with a glossy top coat and inspect the surface carefully so the reflection remains smooth from every angle.
This manicure has the kind of restraint I tend to appreciate more as the seasons change. It feels feminine without being sugary and polished without looking overly formal. I could pair it with gold jewelry, soft knits, denim, or a sleek evening outfit and never feel that the nails are competing with the clothes. If the goal is expensive-looking simplicity with a little glow, this formula is hard to beat.
Soft Champagne Almond Nails With Barely-There Sparkle
There is something quietly glamorous about a sheer almond manicure covered in the finest champagne shimmer. I love how the neutral pink-beige base remains visible underneath, giving the nails warmth and dimension instead of turning them into obvious glitter nails. The softly rounded almond shape also helps the sparkle look elongated and elegant. It is a polished finish with just enough light-catching detail to make the manicure feel special.
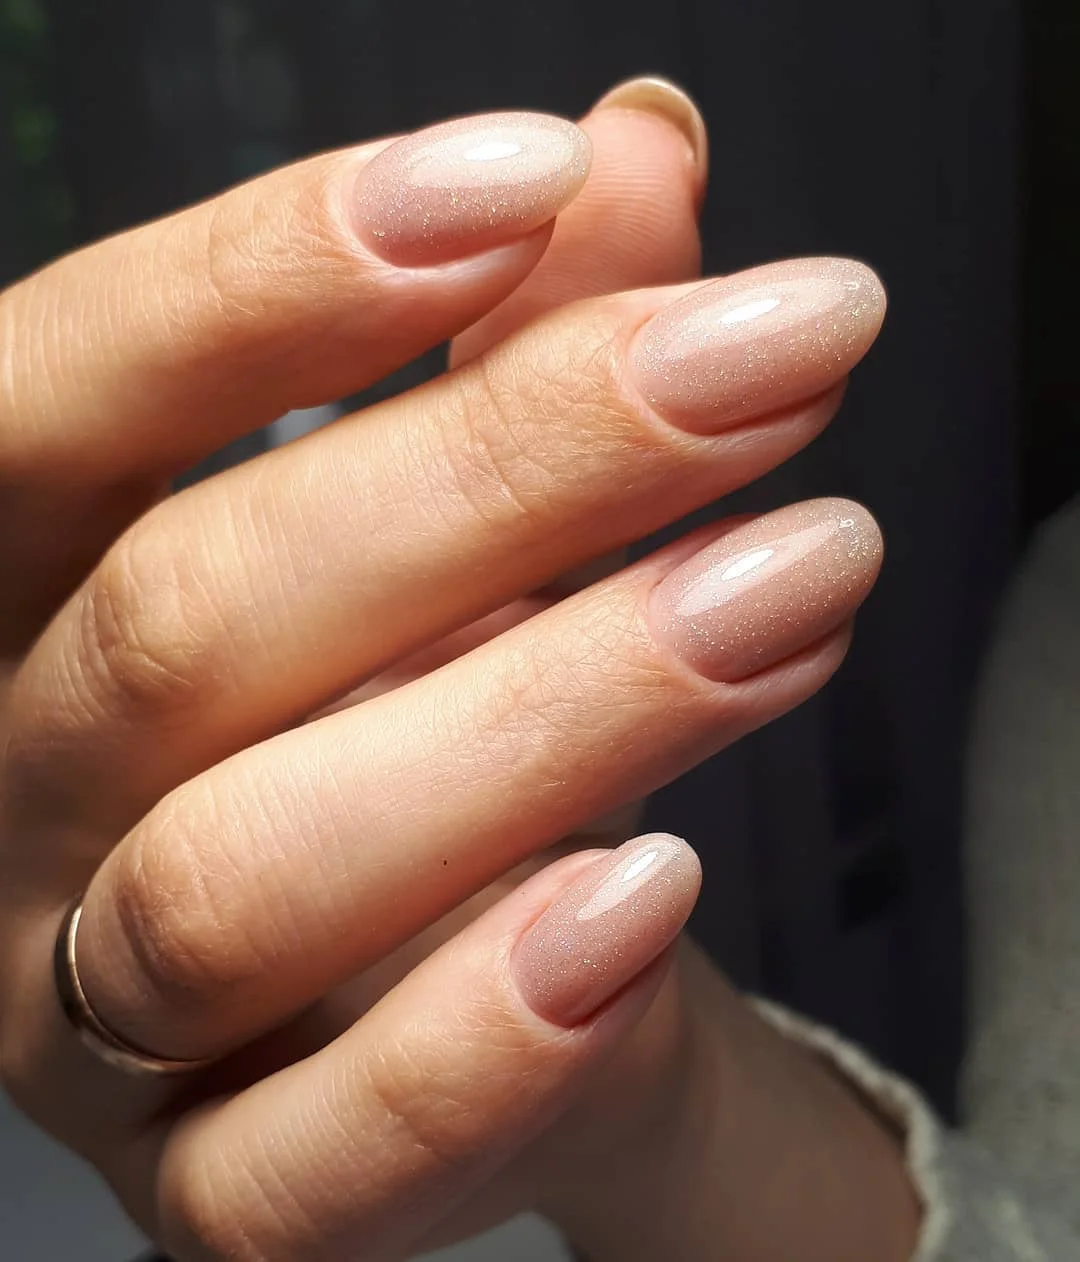
I would choose a sheer nude-pink gel with champagne micro-shimmer or layer a fine pearl pigment over a translucent neutral. A product such as OPI Chrome Effects in a delicate neutral family can be adapted for a similar luminous finish, although I would keep the pigment extremely subtle. For the base, I like shades that sit between pink and beige because they create that soft skin-like effect. The final top coat should be crystal clear and highly glossy.
I would start by shaping the nails into a smooth almond with symmetrical sidewalls and a softly rounded tip. After cuticle preparation, I would apply the sheer neutral base and build the color slowly. Once the foundation looks even, I would add the fine shimmer in a thin layer, concentrating on consistency rather than intensity. I would then seal the manicure with glossy top coat, checking that the shimmer remains evenly distributed instead of gathering at the tips or cuticle.
Rich girl nails are less about showing off and more about creating that beautifully polished feeling in the smallest details. I love how sheer pinks, creamy nudes, soft French tips, and glossy finishes can make any manicure feel instantly more refined. Whether you prefer short natural nails or a longer almond shape, there’s an idea here to make your hands look effortlessly put together. Sometimes, all it takes is the right shade, a clean shape, and a little shine to make the whole look click.

