
Unique Nail Decoration Ideas For Manicures can turn an everyday beauty routine into a chance to show a little personality. Why settle for a basic coat of polish when a few unexpected details can make your hands feel completely different? I’m especially drawn to designs that mix delicate textures, tiny crystals, metallic accents, playful art, and unusual finishes without losing that polished look. Whether you love soft nude nails or prefer something bold enough to steal the spotlight, there is a creative idea here worth saving. Which details will work for your style, your season, and the outfits already hanging in your closet? Let’s explore the prettiest ways to make your next manicure feel fresh, personal, and anything but ordinary.
Sheer Pink Shell Texture With Sculptural Tips
I love how this manicure turns a soft pink base into something much more elaborate through texture. The long almond-shaped nails begin with a translucent blush-pink foundation, while several nails feature raised, shell-like lines that sweep across the surface in delicate curved bands. The ridges create an almost seashell-inspired effect, and the combination of pearly lavender, pale pink, and subtle silver reflections makes the manicure shift beautifully as the hands move. Tiny golden glitter along the pointed edges adds one last detail without overpowering the dimensional design.
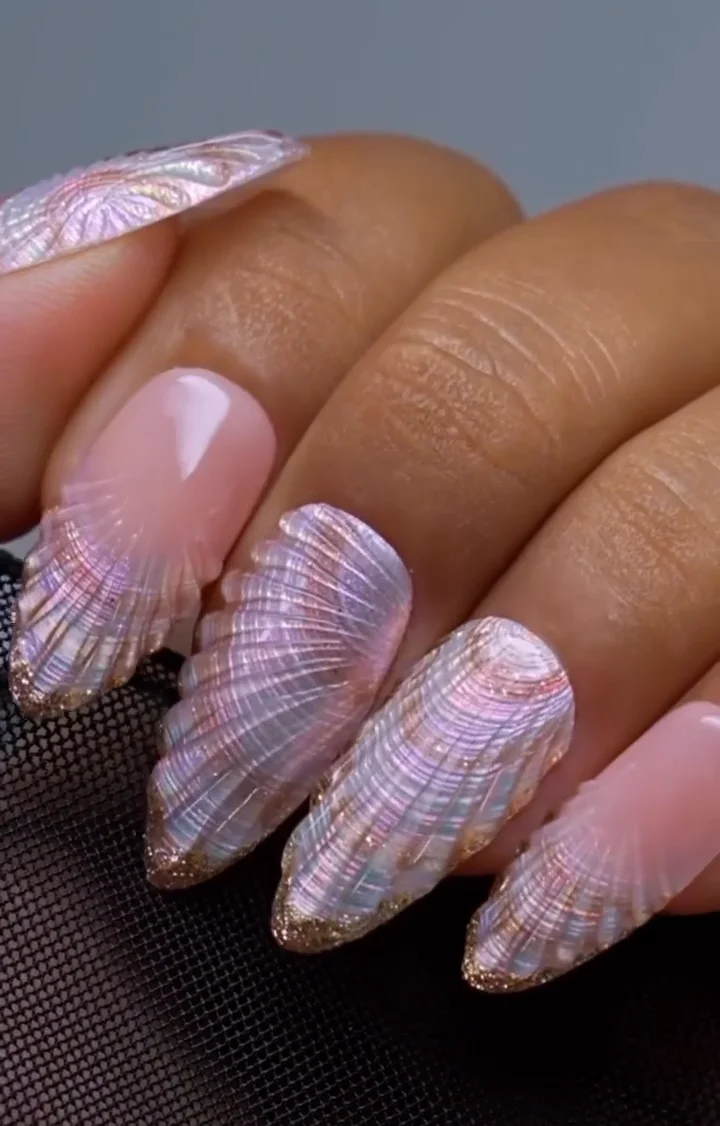
To recreate the look, I would start with a sheer pink gel such as OPI GelColor Bubble Bath or a similar translucent blush shade, then add a pearly chrome pigment or iridescent gel for the shell effect. A very thin liner gel is useful for creating the raised lines, while a fine gold glitter gel can define the tips. I would also keep a glossy no-wipe top coat nearby because this design depends heavily on that wet, glassy finish.
I would shape the nails into a long almond first, making sure the sides are symmetrical before adding any color. After curing the sheer pink base, I would build the shell pattern with extremely thin curved lines, allowing each layer to cure before adding the next so the texture stays crisp rather than becoming muddy. I would lightly press iridescent pigment over selected areas, finish the tips with fine gold shimmer, and seal everything carefully with top coat.
This is the kind of manicure I would choose when I want my nails to feel like jewelry without actually covering them in crystals. The soft base keeps it surprisingly wearable, while the sculptural surface gives it that special, almost editorial quality. It would look gorgeous with a simple white dress, denim, or even a black evening look when I want the manicure to do the talking.
Pink Chrome French Tips With Golden Botanical Details
This almond manicure takes a classic nude foundation somewhere much more playful. I see a translucent beige-pink base paired with elongated pointed tips in shimmering pink chrome. Fine gold and dark brown curved strokes sweep inward from the tips, creating an ornamental effect that almost resembles delicate vines or flames. Small multicolored rhinestones sit near the center of several designs, adding flashes of green, blue, and gold. The result feels feminine, polished, and just a little mysterious.
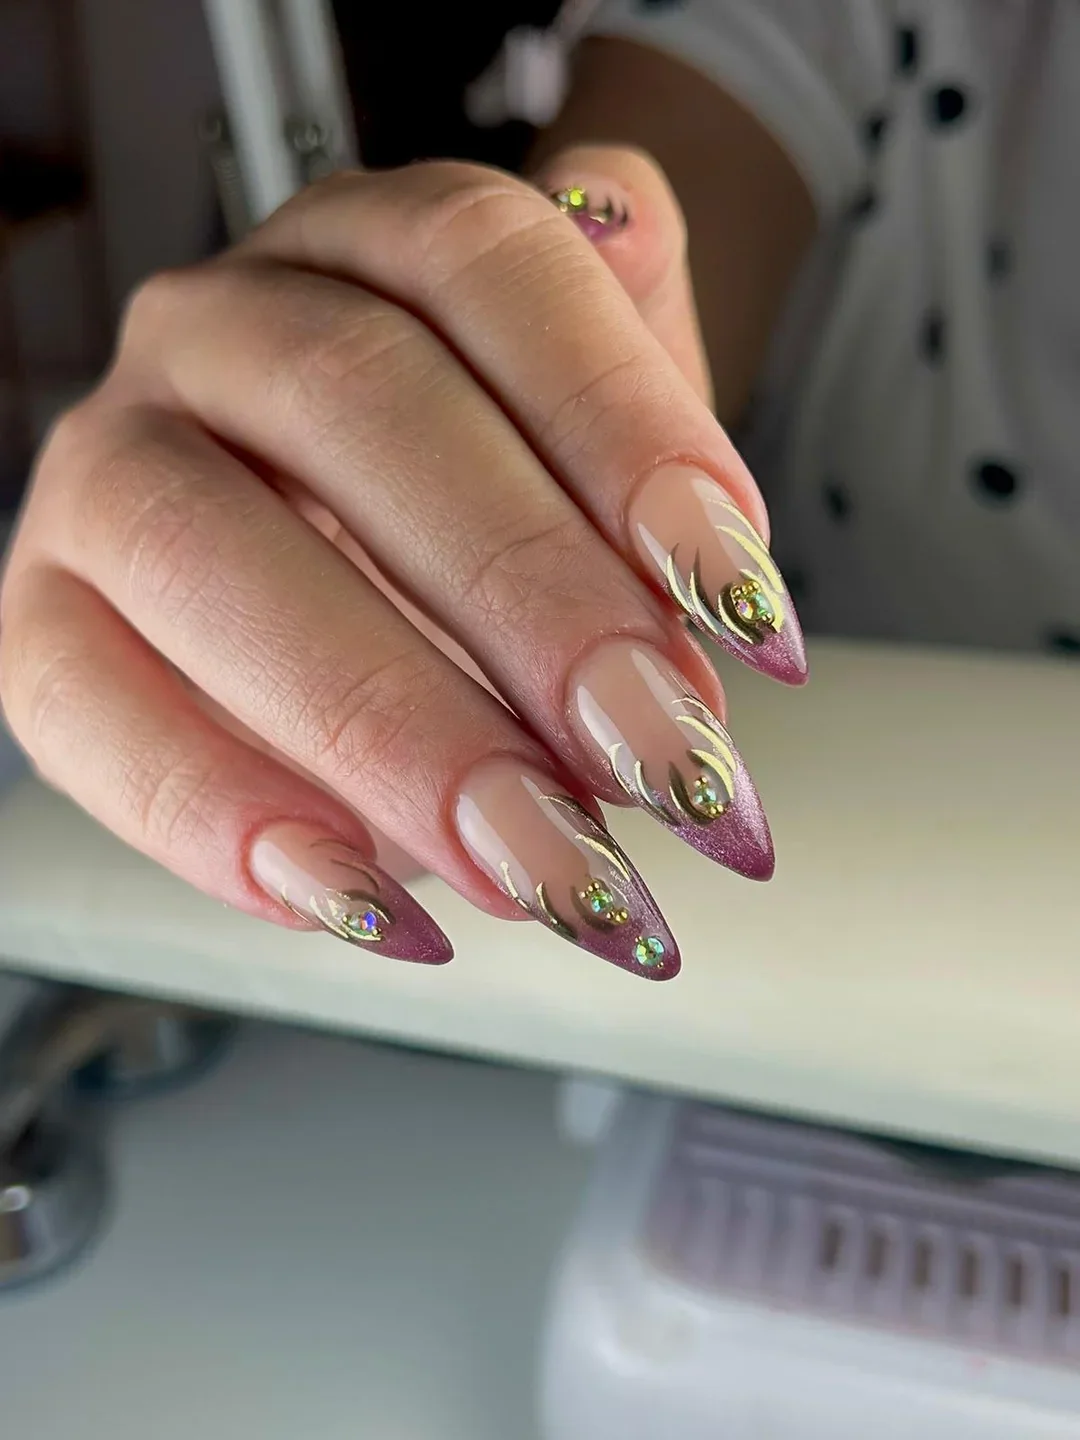
For this version, I would reach for a sheer nude-pink gel, a rose or berry chrome powder, and a highly pigmented gold liner gel. A deep brown gel paint would help define the darker outlines, while tiny rhinestones can provide the colorful sparkle. A non-wipe top coat is essential for the chrome portions, and I would use a separate glossy top coat over the finished design where appropriate.
I would keep the nude base almost transparent because that contrast is what makes the metallic tips look so striking. Once the base is cured, I would create the pointed pink French shape and cure it before applying chrome. Then I would draw the sweeping gold and brown details with a fine brush, adding each rhinestone with a small amount of gel adhesive. The final step would be carefully sealing around the embellishments without dulling their shine.
I particularly like this idea for someone who has outgrown a traditional French manicure but still wants something elegant. The pointed shape makes the fingers look longer, while the decorative details give the design personality. Would I wear it for a night out? Absolutely. But I could also see it working beautifully with a simple blazer and jeans when I want an unexpected flash of glamour.
Heraldic Nail Art With Jewel-Toned Storytelling
Here is where a manicure becomes a tiny piece of artwork. Each nail has its own design, combining deep navy, red, mustard yellow, black, white, and metallic accents with small illustrated symbols. Some nails feature shield-like motifs, while others carry antler-inspired shapes, graphic lines, and ornamental details. The almond shape keeps the set cohesive despite the variety, and the mixed palette gives it a playful, almost storybook quality.
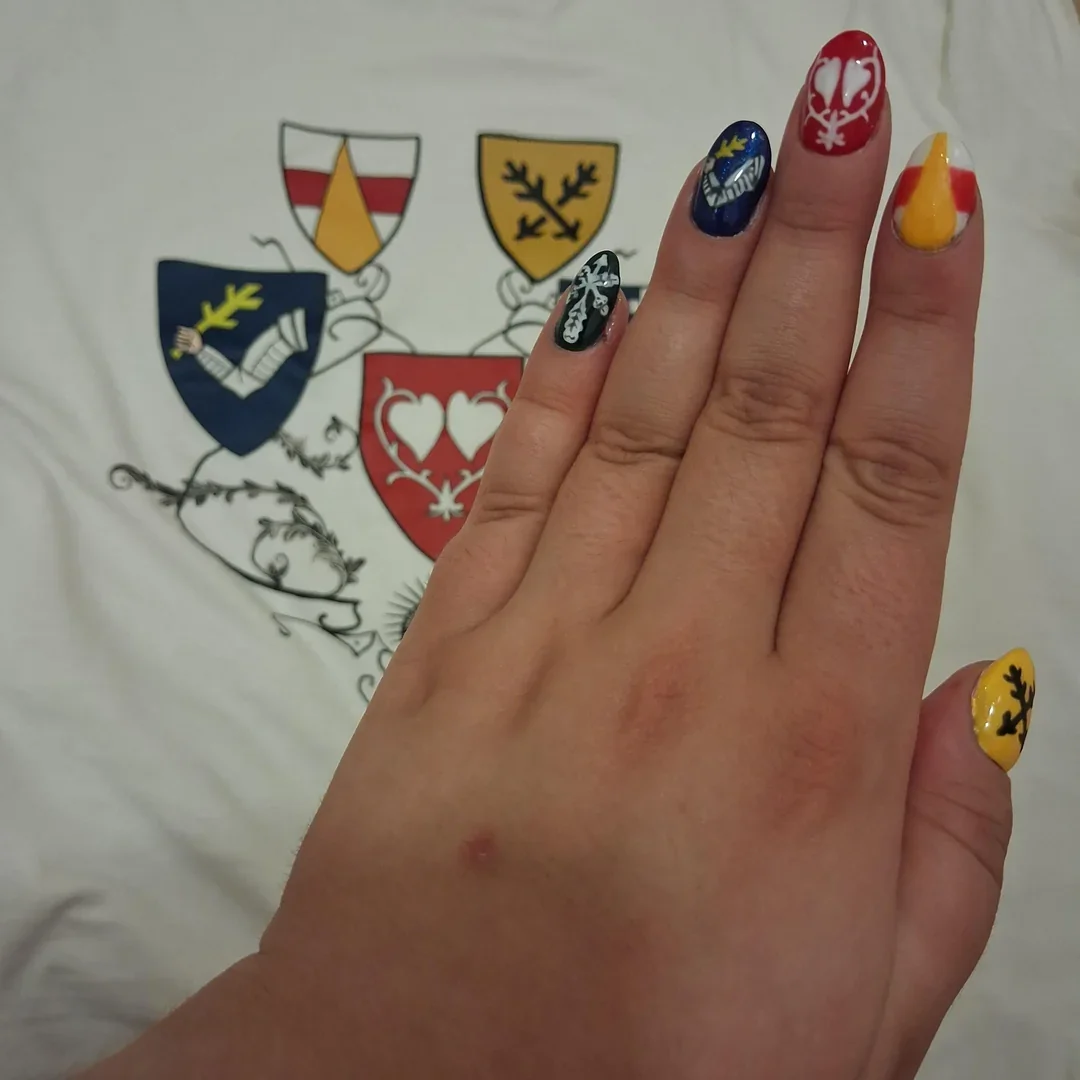
I would use a combination of highly pigmented gel colors in navy, burgundy red, mustard yellow, black, and white. A metallic gold polish or chrome pigment would be useful for tiny accents, while a detail brush would make the miniature artwork much easier to control. I would also keep a good matte or glossy top coat available depending on whether I want the illustrations to look soft and graphic or intensely polished.
The trick I would use here is to work on one nail at a time rather than trying to paint the entire set from memory. I would establish the main colored shapes first, cure them, and then add the white and black line work with a very fine brush. For the smallest details, I would use a dotting tool or ultra-fine nail-art brush and cure frequently. It takes patience, but there is no need to rush miniature artwork.
I find designs like this especially fun in late summer and early fall because they have more personality than a conventional seasonal manicure. They could even become a conversation starter at a dinner party. I would keep the rest of the outfit relatively simple and let the nails provide the visual surprise.
Chocolate French Tips With Tiny Silver Starbursts
This manicure proves that minimal nail art does not have to be boring. The foundation is a soft, translucent pink that lets the natural-looking nail bed remain visible, while deep chocolate-brown French tips create a clean almond silhouette. Fine silver lines form tiny starburst shapes across several nails, accompanied by miniature metallic dots. The design is restrained, but those little flashes of silver keep it from feeling ordinary.
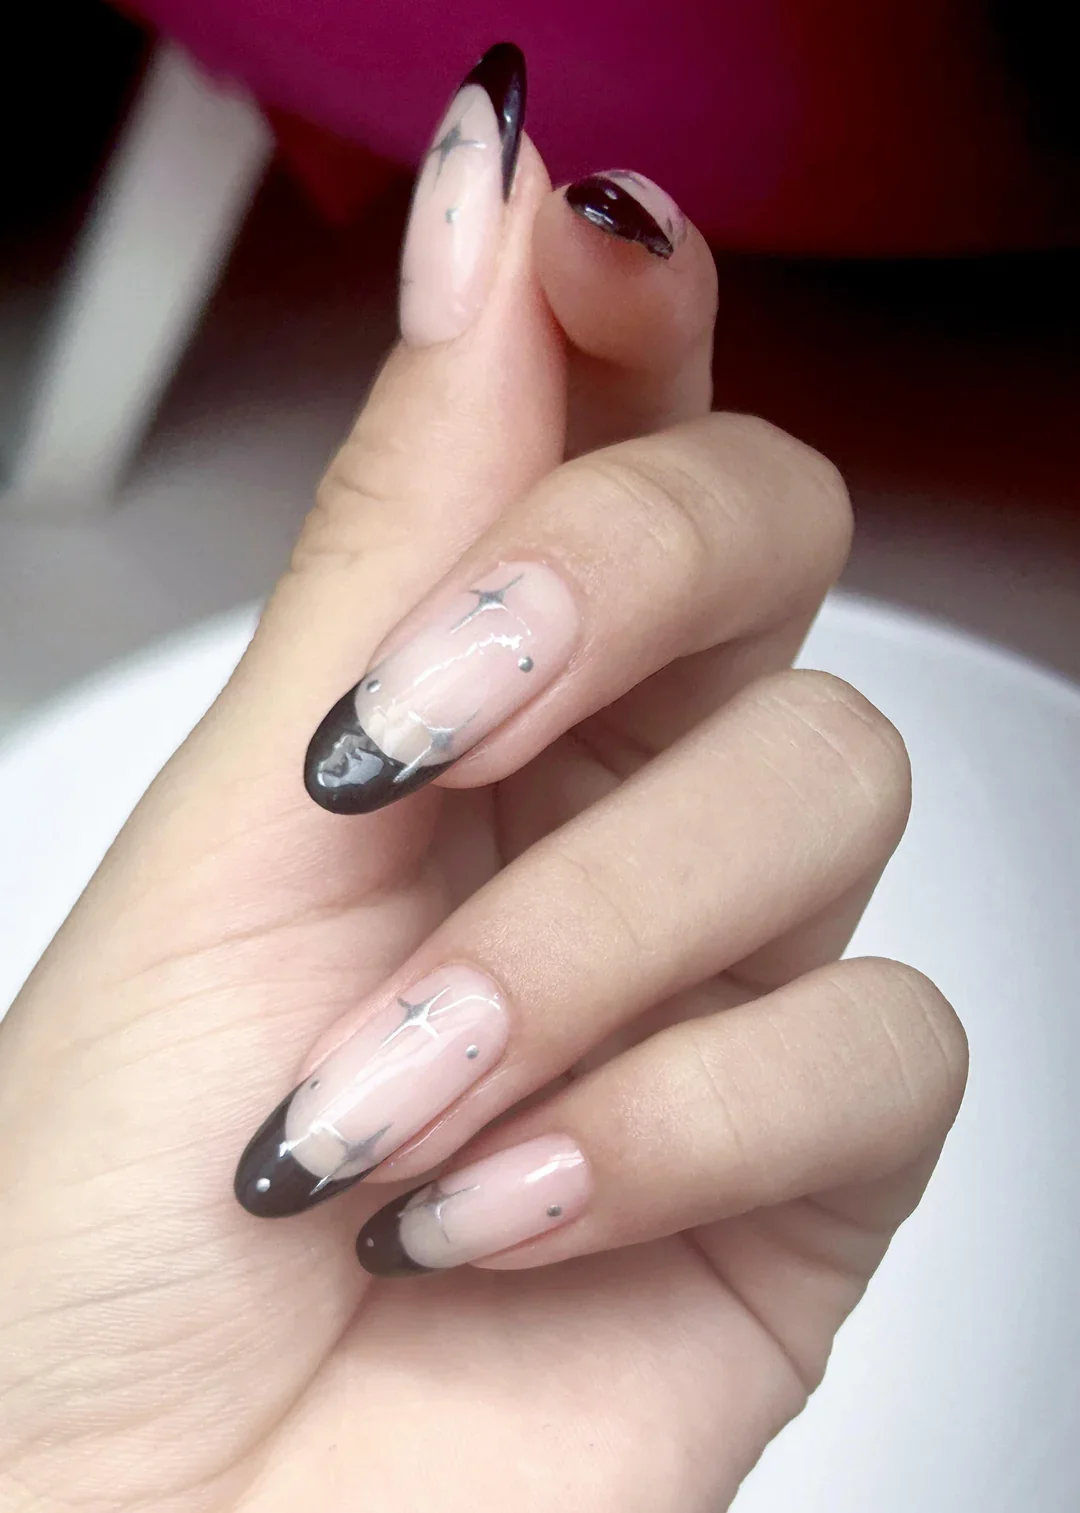
For the base, I would choose a milky nude or sheer blush gel that closely complements the natural nail. A rich espresso-brown gel is perfect for the French tips, while silver chrome gel or metallic nail-art paint can create the tiny stars and dots. I would use a fine liner brush because precision matters more here than having lots of products.
I would begin by perfecting the nude base and then map out the brown French tips using a thin brush. On almond nails, I like keeping the tip narrow and following the natural curve rather than making it too heavy. After curing, I would add tiny four-point starbursts and metallic dots, varying their placement slightly so the manicure feels organic. A smooth glossy top coat finishes everything beautifully.
This is one of my favorite directions for someone who wants something interesting but still office-friendly. The chocolate tips feel especially good as the weather starts cooling down, while the silver details keep the manicure fresh rather than overly autumnal. It is understated at first glance, then you notice the stars. That little reveal is exactly the charm.
Blush Almond Nails With Crystal Minimalism
Soft pink becomes the entire mood here. These long almond nails are coated in a translucent blush shade with an ultra-glossy finish, creating a clean, almost glass-like appearance. Instead of elaborate artwork, the decoration comes from strategically placed rhinestones and tiny metallic studs. A few clustered crystals create delicate flower-like shapes, while individual stones are scattered across other nails for an intentionally irregular finish.
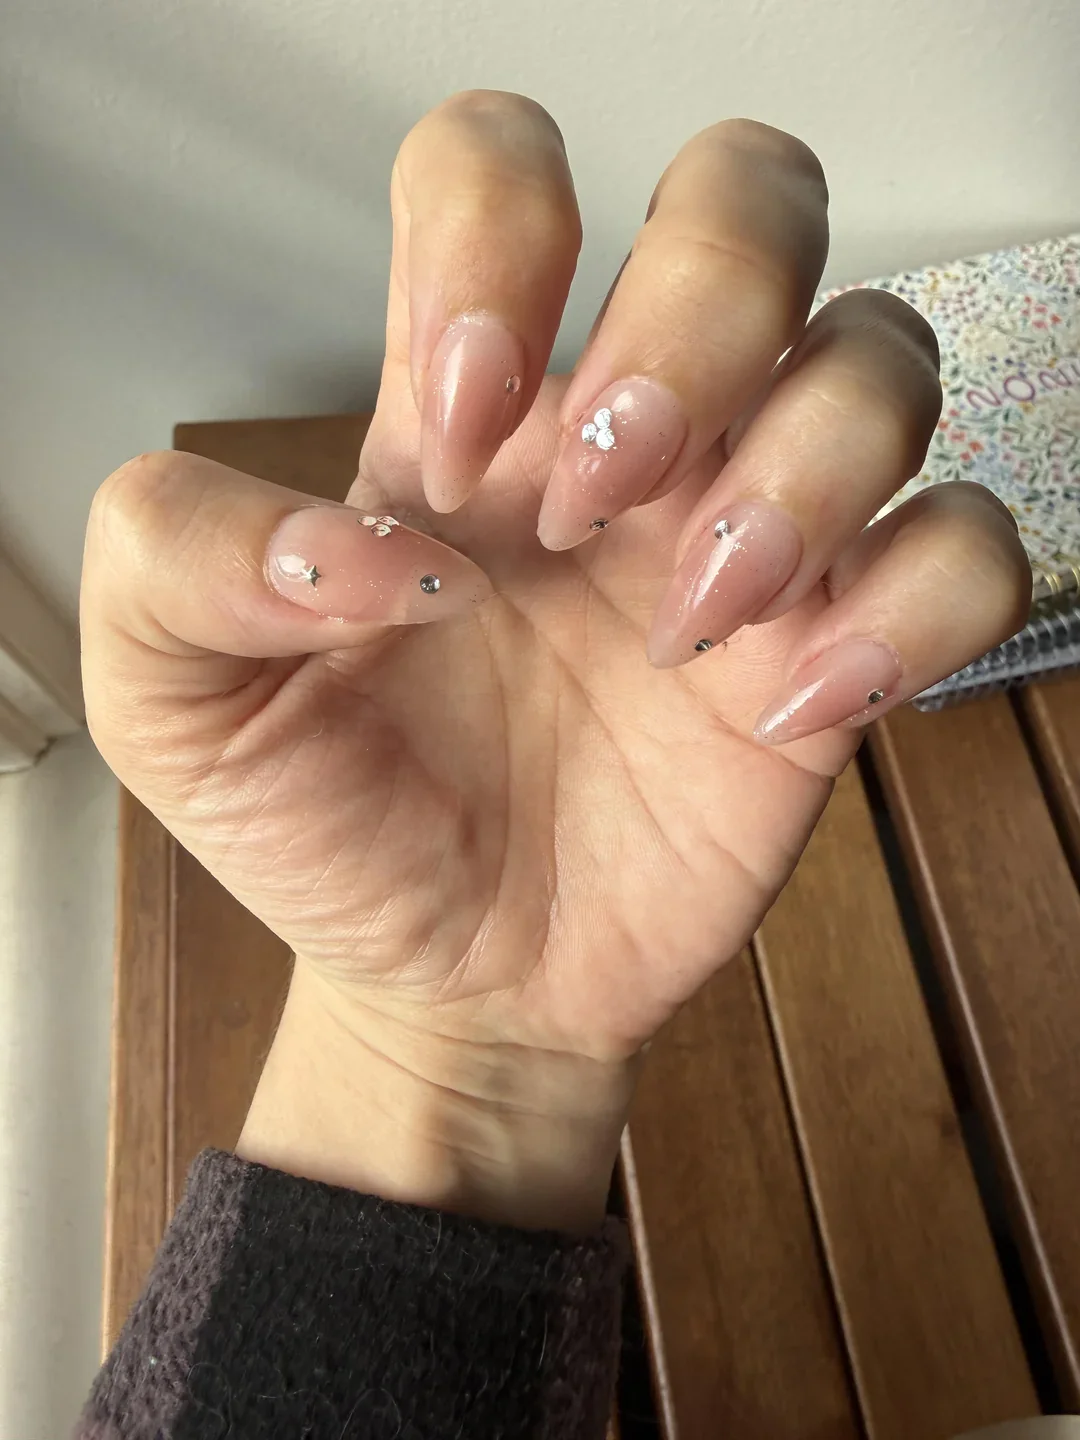
I would choose a sheer pink builder gel or gel polish with a natural nude undertone, depending on how much structure the nails need. For the embellishments, I would mix tiny clear crystals, silver micro-studs, and perhaps a few small reflective stones. A thick rhinestone gel or gem adhesive will help keep larger pieces secure, followed by a glossy top coat around—not directly over—substantial crystals.
I would first create a perfectly smooth almond shape because the simplicity of this manicure makes every detail visible. After applying the pink base and curing it, I would decide where the embellishments should sit before attaching anything. I prefer asymmetry here: one small cluster on one nail, a single stone on another, and perhaps two or three tiny pieces elsewhere. That keeps the set delicate rather than overloaded.
I would pick this manicure when I want my hands to look polished for an event without committing to heavy nail art. It feels bridal-adjacent without being exclusively bridal, and it can easily move from a summer dinner to a fall celebration. Sometimes the smartest decoration is knowing when to stop.
Mint Green Illustrated Nails With Whimsical Line Art
Mint green creates a fresh canvas for an entire little universe of black illustrations. The nails have a soft matte finish and an almond shape, while each one carries a different hand-drawn motif: mushrooms, leaves, stars, insects, small plants, and other whimsical symbols. The black line work is delicate enough to preserve the softness of the mint background, yet detailed enough to reward a closer look.
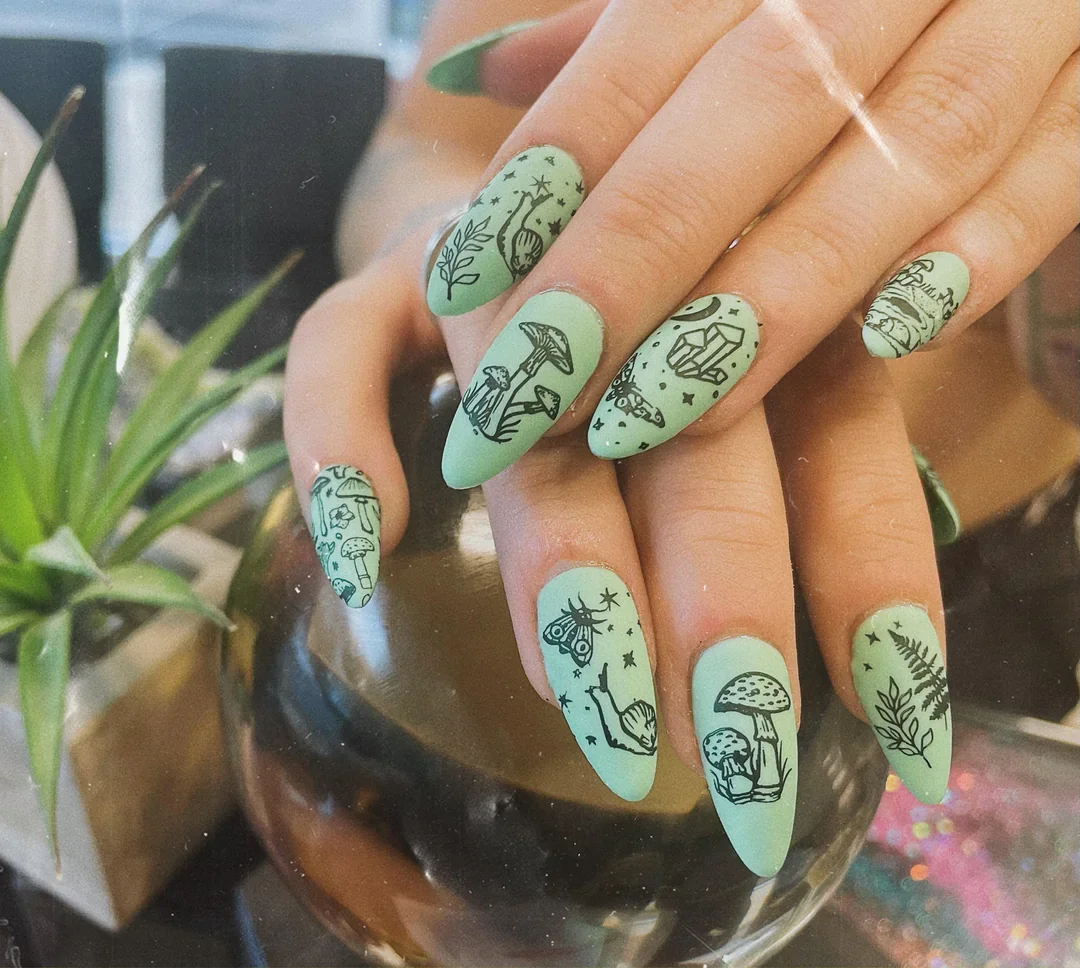
I would use a muted mint-green gel polish as the foundation and a highly pigmented black art gel for the illustrations. A matte top coat is important because it gives the mint background that velvety appearance and makes the black drawings look more like ink on paper. For anyone recreating this at home, I would also keep several detail brushes with different thicknesses rather than relying on one brush for everything.
I would apply two thin layers of mint polish, curing between each, and then create the illustrations with a very fine brush. I would not try to make every mushroom, leaf, or tiny symbol perfectly identical. Slight variations are what give hand-drawn nail art its personality. Once everything is cured, I would apply the matte top coat evenly and avoid flooding the cuticle area.
This set has a relaxed, creative energy that I really enjoy. It feels perfect for a casual weekend, a creative workspace, or those days when a plain manicure simply will not do. The muted mint also makes the design surprisingly wearable, especially with denim, cream, black, or other soft neutrals.
Nude Confetti Nails For Effortless Party Sparkle
Who says glitter has to cover the entire nail? This manicure uses a transparent nude base and concentrates multicolored confetti glitter toward the tips and upper portions of the nails. The glitter pieces vary in size, shape, and color, creating flashes of blue, red, green, gold, pink, and silver. Because the base remains sheer, the manicure feels light rather than dense, even with all that sparkle.
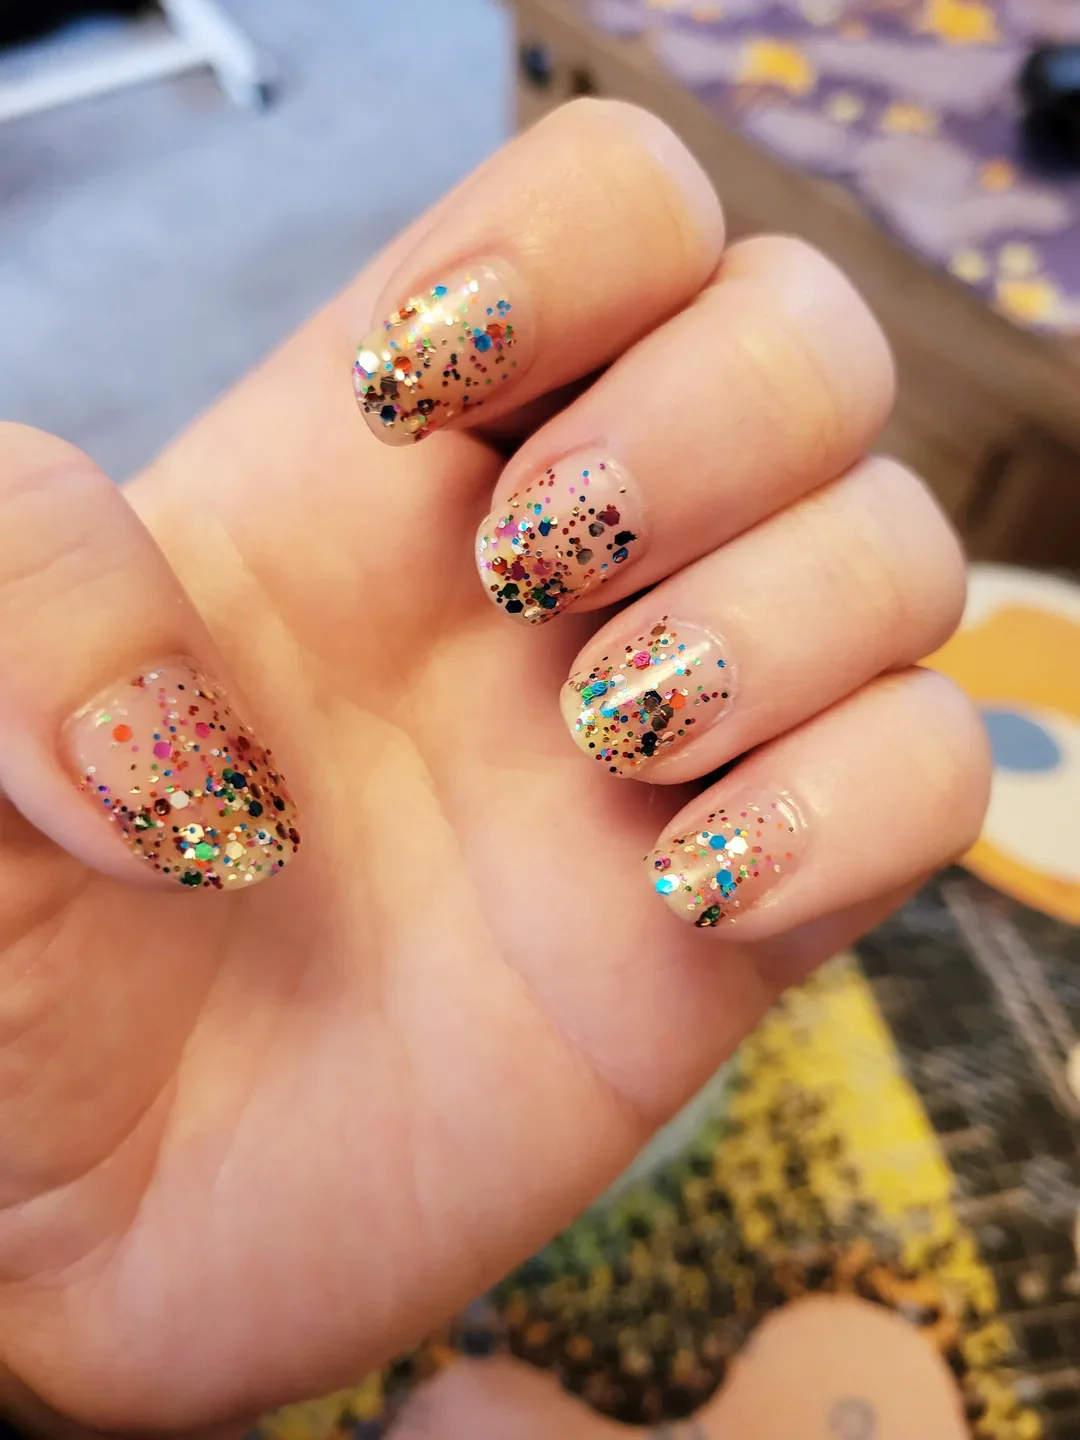
I would start with a sheer nude or clear-pink gel and use a mixed glitter containing fine particles alongside larger hexagonal and irregular pieces. A clear builder gel can help create a smooth surface if the glitter has noticeable texture, while a high-shine top coat provides the final glassy finish. I would choose glitter with multiple colors but make sure the overall mix has a similar visual intensity.
To create the gradient effect, I would apply the glitter while the base is still tacky or use a thin layer of clear gel as an adhesive surface. I would place more glitter toward the tips and gradually reduce the amount toward the middle of each nail. After curing, I would check for any sharp edges, smooth the surface if necessary, and finish with a generous layer of glossy top coat.
This is my go-to idea when I want something festive without committing to a fully decorated manicure. It works particularly well when there is a birthday, concert, vacation, or last-minute evening plan on the calendar. The best part? The irregular placement means you do not have to chase perfection. Just add sparkle and let it happen.
Icy Silver And Aqua Almonds With A Statement Bow
Cool metallic finishes completely change the mood of an almond manicure. Here, silver glitter dominates several nails, while one nail shifts into a translucent aqua-blue sparkle and another stays pale and glossy with a sculptural silver bow. The pointed almond shape ties everything together, while the contrast between icy blue, silver, and soft nude creates a distinctly wintery glow without becoming heavy.
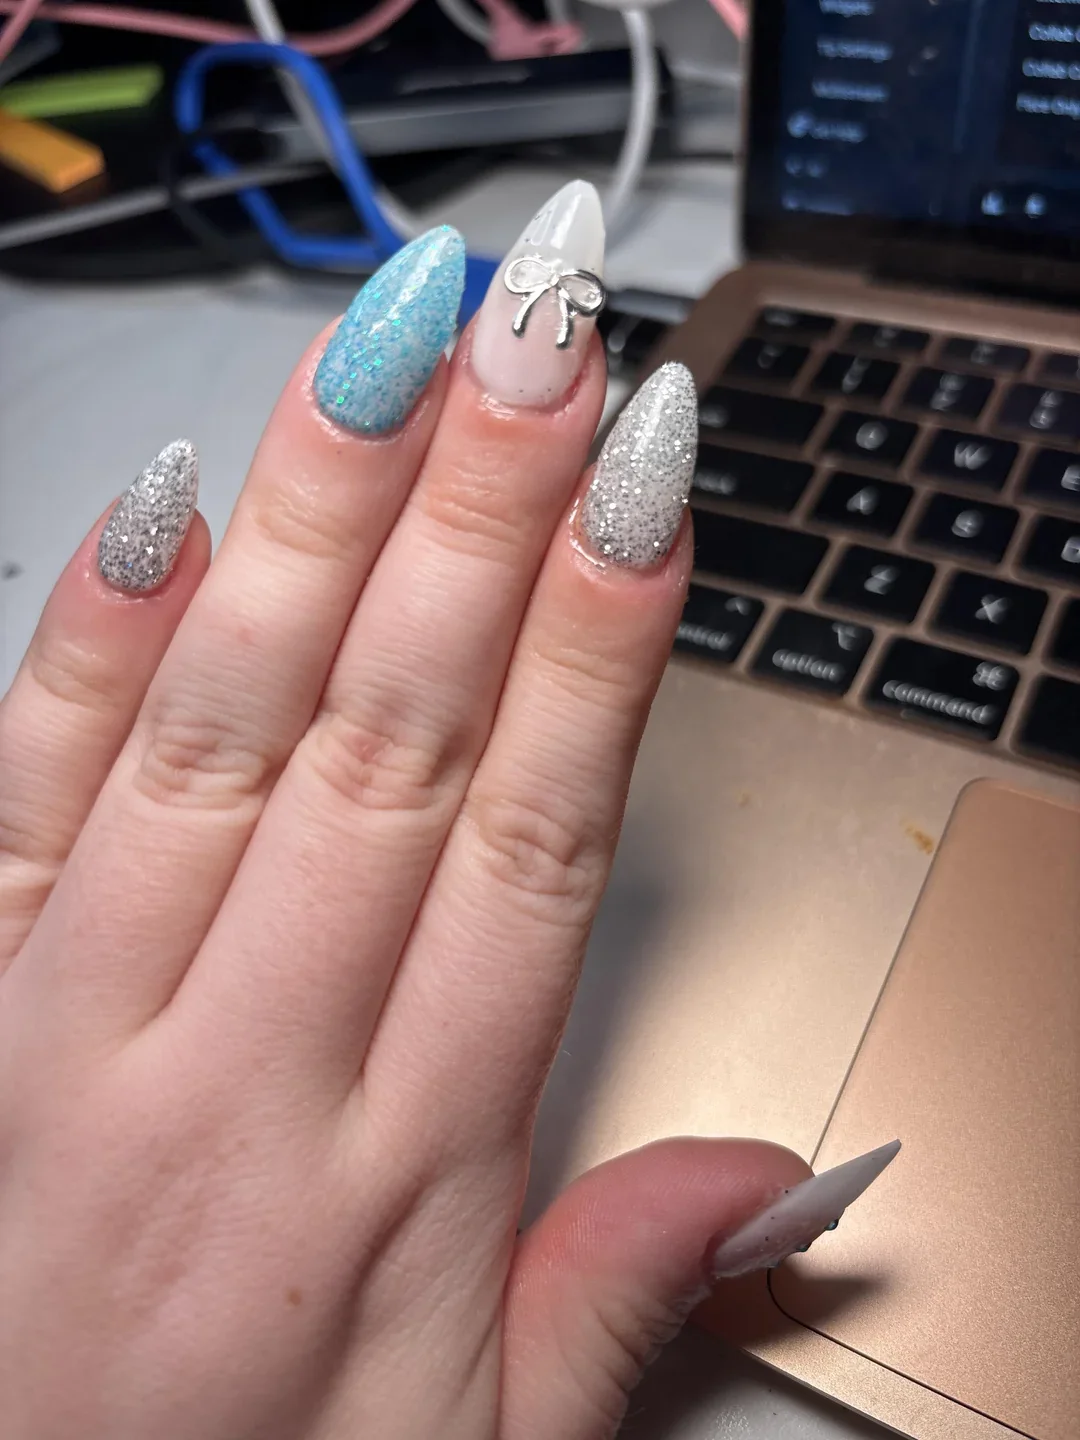
I would use a sheer nude gel, fine silver glitter gel, an aqua-blue glitter polish, and a pale white or translucent gel for the accent nail. The raised bow can be created with metallic nail-art gel or a ready-made silver embellishment, depending on how sculptural I want it to be. A strong gem adhesive is useful for securing a three-dimensional piece, followed by careful sealing around its edges.
I would shape the nails first and apply the sheer base before building the glitter colors individually. The silver nails can be fully covered, while the aqua nail works best with a translucent layer that allows the shimmer to remain dimensional. For the bow, I would position the embellishment slightly above center and secure it firmly before curing. I would finish by checking every edge so the design feels smooth and intentional.
I love this combination for anyone who wants a manicure that catches the light from across the room. It has a little party energy, a little icy elegance, and enough contrast to keep all ten nails interesting. If I were heading into a holiday season or simply wanted something dramatically different from my everyday nude manicure, this would be high on my list.
Blush Pink Tips With A Hint Of Lavender Sparkle
I keep coming back to this manicure because it makes soft pink feel far more interesting without losing its polished character. The long tapered shape is coated in a sheer blush-pink base, while a delicate lavender-pink glitter appears mainly toward the tips of several nails. The result feels airy, feminine, and slightly playful, especially with the glossy finish catching the light as the hands move.
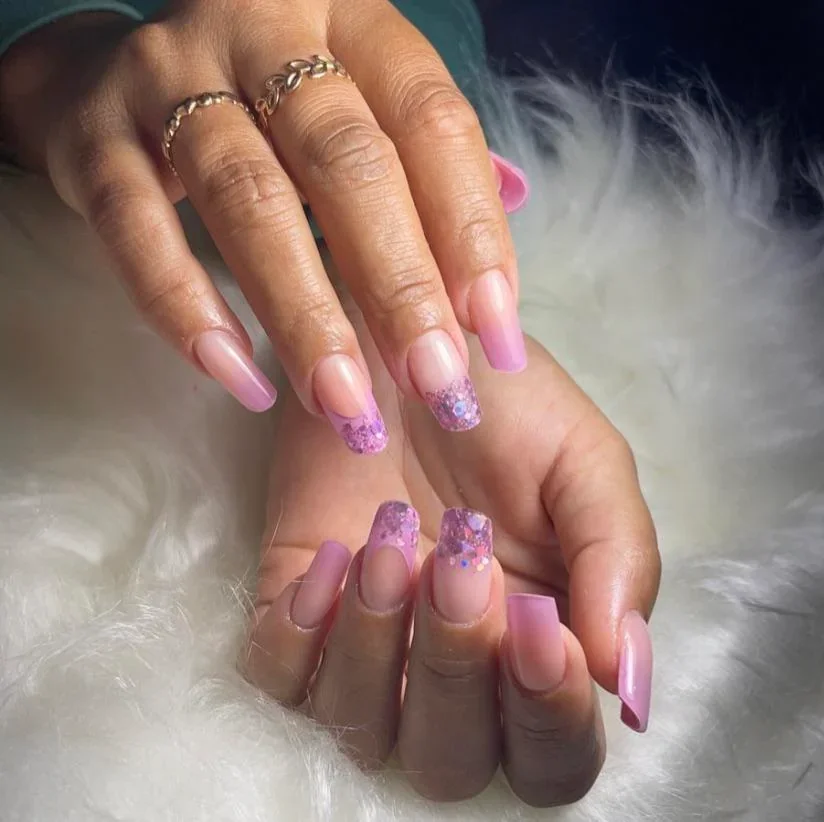
For this look, I would start with a sheer pink gel polish such as OPI Bubble Bath or a similar milky blush shade, then add a fine lavender or iridescent glitter gel for the tips. A clear builder gel can help create the elongated shape if the natural nails need reinforcement, followed by a high-shine gel top coat. I would keep the glitter delicate rather than densely packed because the transparency of the base is what makes this design so pretty.
At home, I would shape the nails into a soft tapered square or gently tapered almond, depending on the length available. After applying the blush base, I would concentrate the glitter around the free edge and softly fade it upward with a small detail brush. Two thin layers are usually easier to control than one heavy application. Once everything is cured, I would finish with a glossy top coat and carefully seal the edges.
This is exactly the kind of manicure I like when I want something noticeable but still easy to wear. The pink keeps it sweet, while the lavender sparkle gives it that little unexpected twist. For a summer evening, a vacation dinner, or even a simple white outfit, I think this one has just enough shimmer to make the whole look feel finished.
White And Gold Embellished Nail Art With Jewel Details
Here, the manicure takes a completely different direction, combining a creamy white base with intricate gold decoration and tiny green jewel accents. I love how every nail has its own composition: curved metallic lines, circular motifs, small stones, foil-like details, and delicate geometric elements work together without making the manicure look identical from nail to nail. The rounded shape keeps all those details feeling elegant rather than overly sharp.
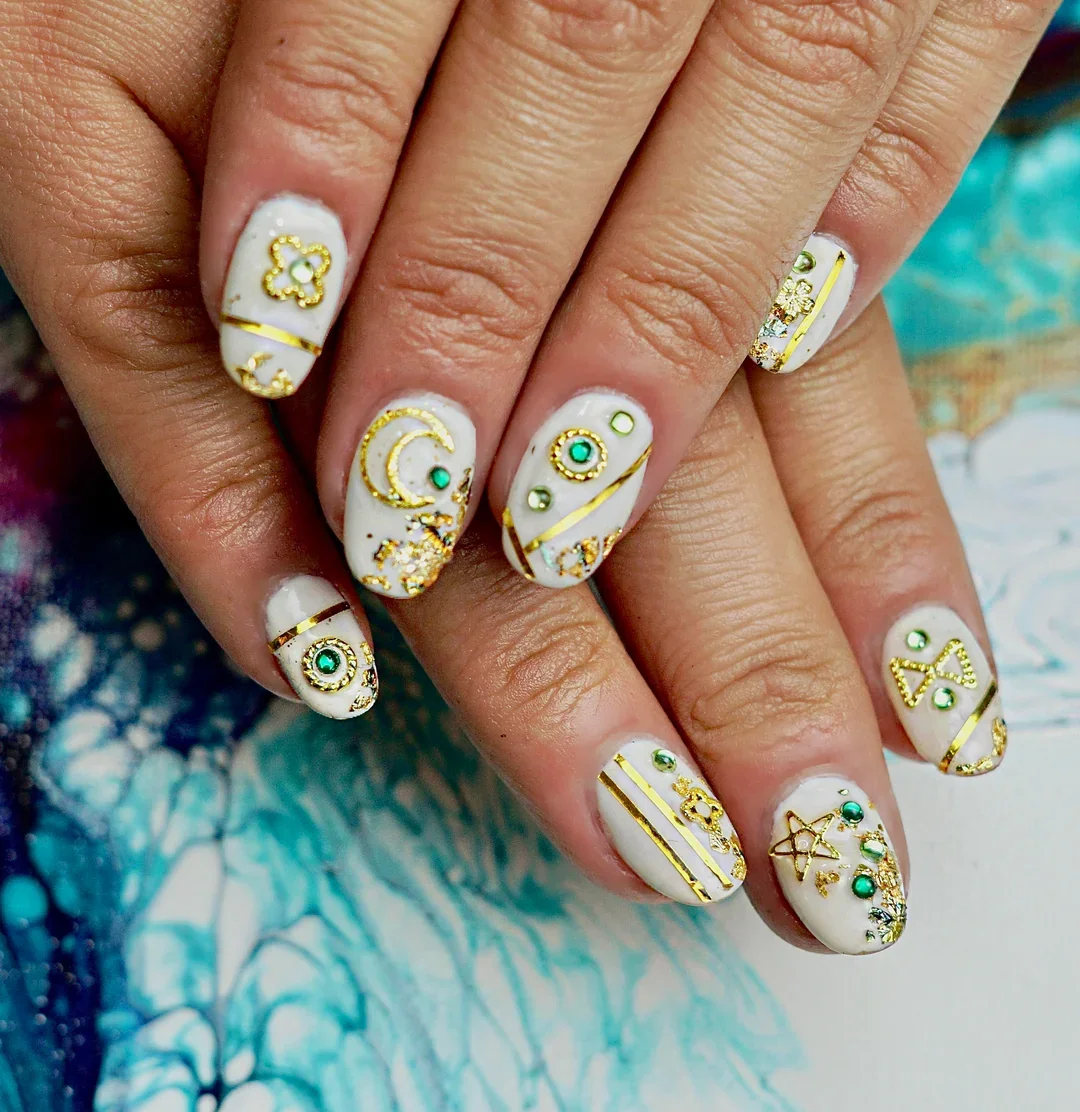
I would use an opaque white gel polish as the foundation, a fine gold striping gel or metallic nail-art paint for the lines, and small emerald-green rhinestones or flat-back crystals for the jewel accents. Gold microbeads, metallic foil flakes, and a selection of tiny nail-art charms would complete the materials. A highly pigmented white is especially useful here because it creates a clean canvas for the gold details.
I would first perfect the white base and cure it completely before adding any decoration. Then I would build the design gradually, placing the larger circular details first and using a very fine brush for the sweeping lines. Tiny crystals can be positioned with nail-art adhesive or a small amount of builder gel, followed by careful curing. I would avoid covering every millimeter with decoration; the open white areas give the intricate details room to breathe.
I see this as a manicure for the days when simple just will not do. It has a jewelry-like quality that could easily become the main accessory, particularly with gold earrings or a sleek evening outfit. I would choose it for a celebration or special event, but honestly, wearing something this detailed on an ordinary week would make an ordinary week considerably more fun.
Glossy Blush Nails With Colorful Crystal Accents
Soft pink gets a tiny party treatment here. The nails have a translucent blush base with a smooth, rounded almond shape, and each nail receives only a few miniature multicolored crystals. Because the embellishments are scattered rather than arranged into a large pattern, the manicure stays refined while little flashes of blue, yellow, pink, and iridescent light appear whenever the hands move.
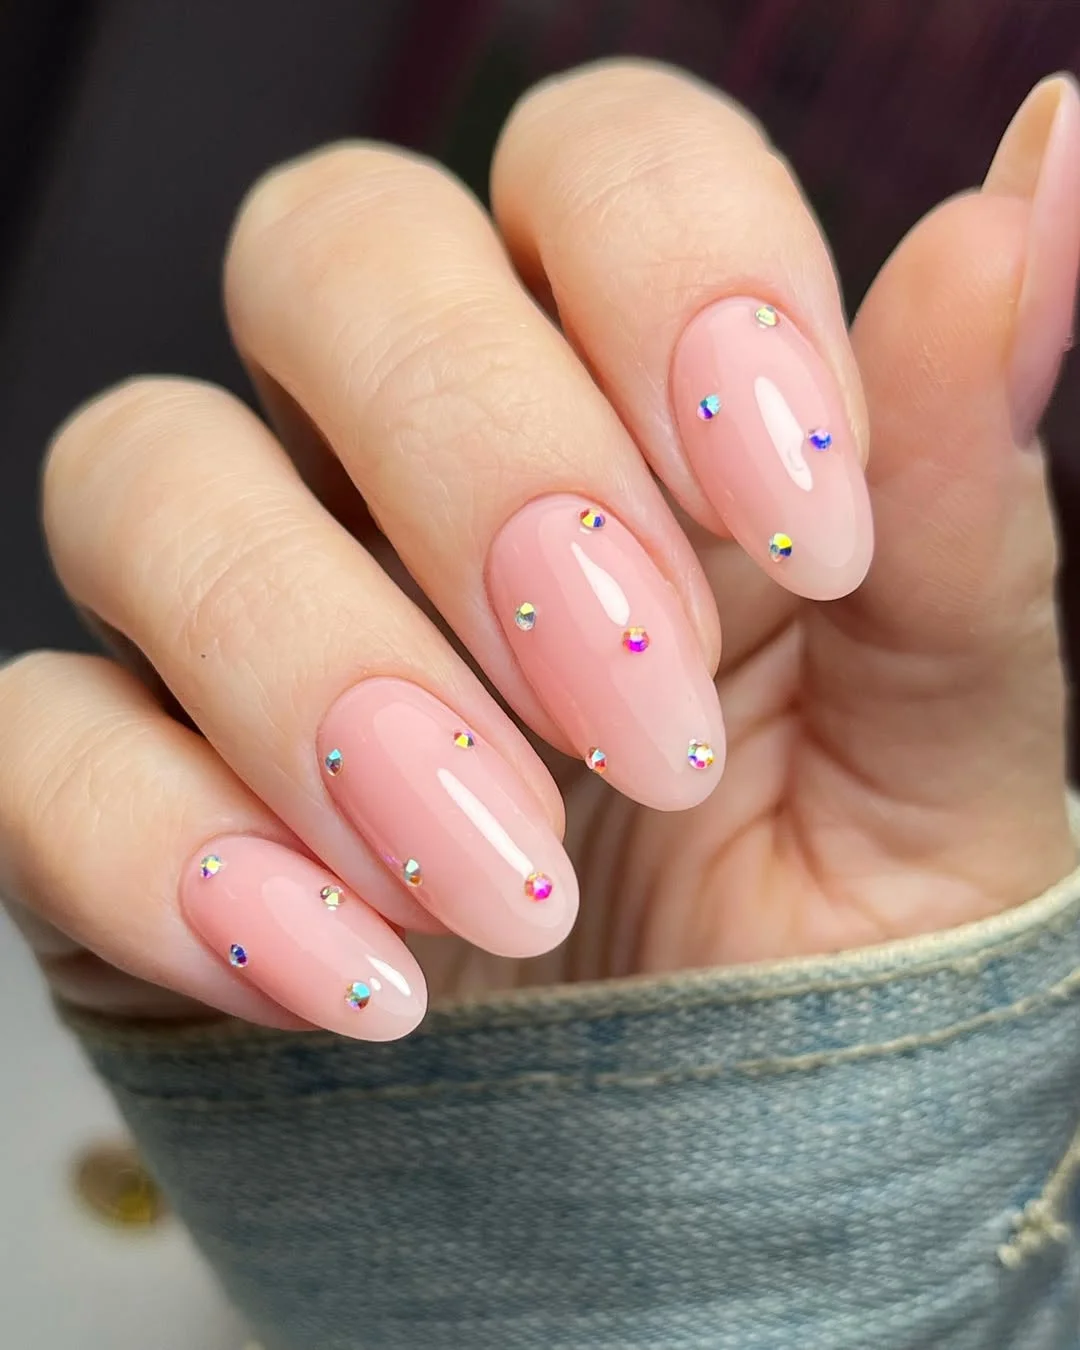
For a similar result, I would reach for a translucent pink gel polish, a glossy no-wipe top coat, and very small flat-back rhinestones in assorted colors. Iridescent crystals are particularly effective because they shift depending on the lighting. I would also keep a wax pencil or rhinestone picker nearby, along with nail glue or a small amount of clear builder gel for securing the stones.
The application is wonderfully uncomplicated. I would prepare and shape the nails, apply one or two thin coats of translucent pink, and cure each layer. Before the final top coat, I would place the crystals individually, deliberately varying their positions so the design looks spontaneous rather than mechanically repeated. I would cure the embellishments in place and apply top coat around them, being careful not to flood the surface and dull their sparkle.
I would recommend this approach whenever I want a manicure that photographs beautifully without demanding a complicated pattern. It has the clean feeling of a classic pink manicure, but the tiny crystals make it feel more current. And because the decoration is so minimal, it works surprisingly well for both everyday outfits and dressier summer plans.
Peachy Nude Confetti Nails For A Soft Summer Mood
A warm peach-nude base makes these nails feel almost like a glossy lip color translated onto the fingertips. Tiny pieces of colorful confetti are suspended across the surface, including subtle pastel and iridescent shapes that catch the light without taking over. The short-to-medium rounded shape is another reason I like this design: it feels practical, relaxed, and incredibly easy to wear.
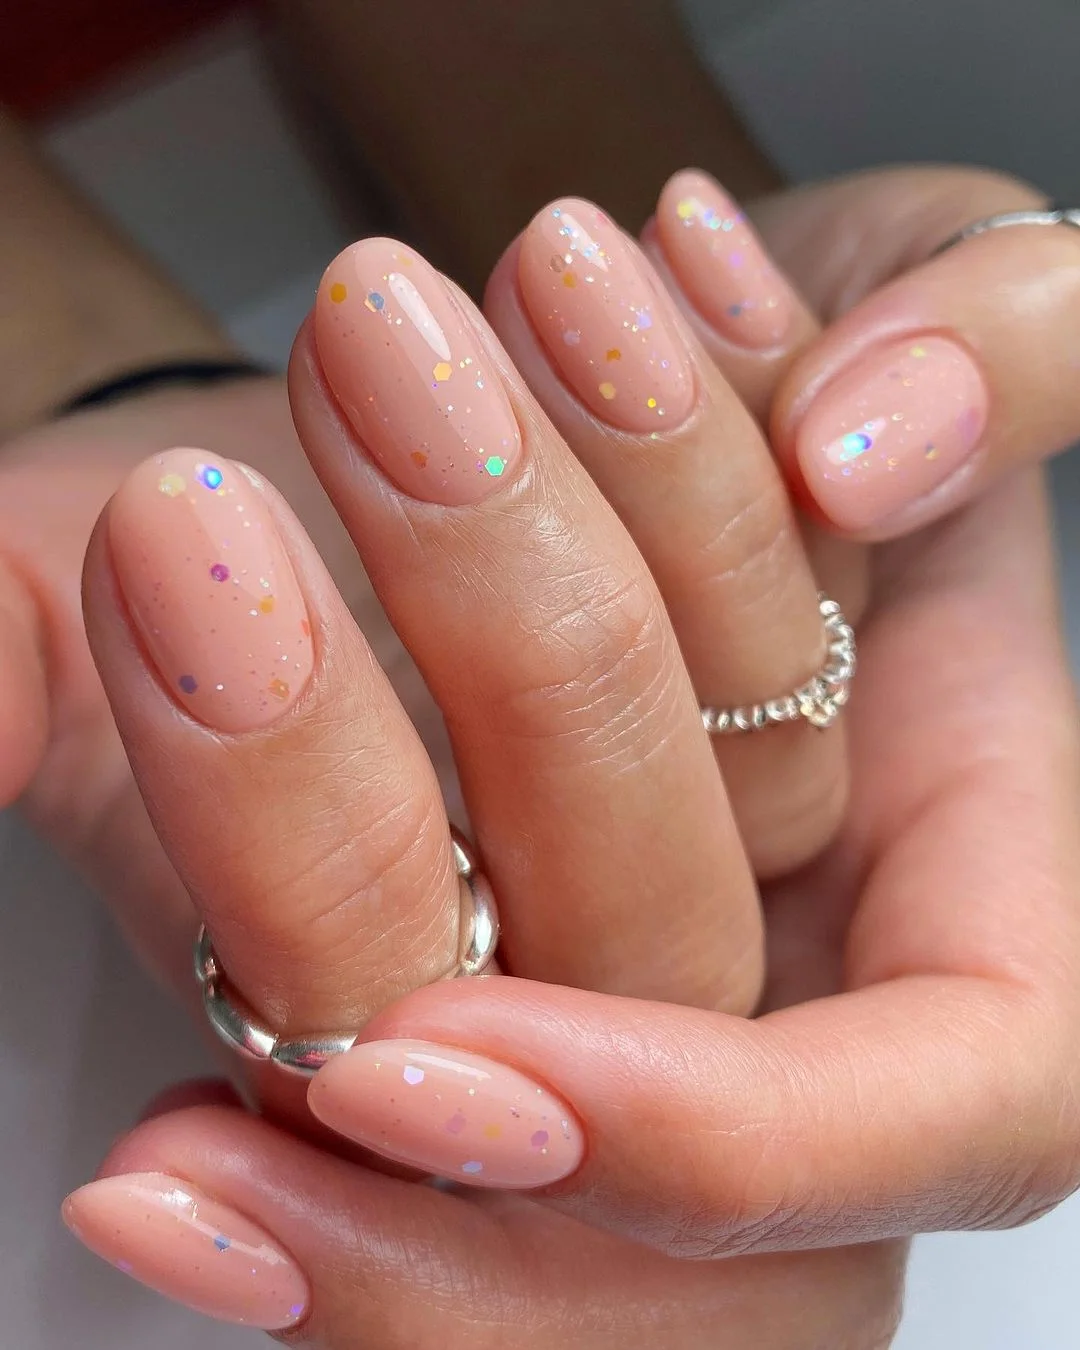
I would choose a translucent peach or pink-nude gel polish, preferably one with enough sheerness to let the natural nail character show through. For the decoration, I would use very fine holographic glitter mixed with small hexagonal confetti pieces in soft pink, gold, lavender, blue, and peach. A smooth glossy top coat is essential because it turns those tiny reflective pieces into little points of light.
After preparing the nails, I would apply the nude base in thin layers and cure it. The confetti can then be placed with a fine tool while the gel is still workable, or lightly embedded into a thin layer of clear gel. I prefer uneven spacing here because perfectly symmetrical placement would take away from the effortless effect. A generous but smooth final top coat locks everything down and gives the surface that glassy finish.
This feels like my choice for a casual summer manicure when I want color without committing to a strong polish shade. The tiny confetti pieces make it cheerful, but the peach base keeps everything sophisticated. It is also a great example of how a small amount of decoration can completely change a familiar nude manicure.
Minimal Blush Pink Nails With Fine White Lines
Sometimes the smallest detail has the biggest effect. These short rounded nails use a delicate blush-pink base with extremely fine white lines placed near the tips and tiny metallic accents that punctuate the design. The decoration is restrained enough that the manicure still reads as clean and natural, yet the thin lines give it a distinctly intentional finish.
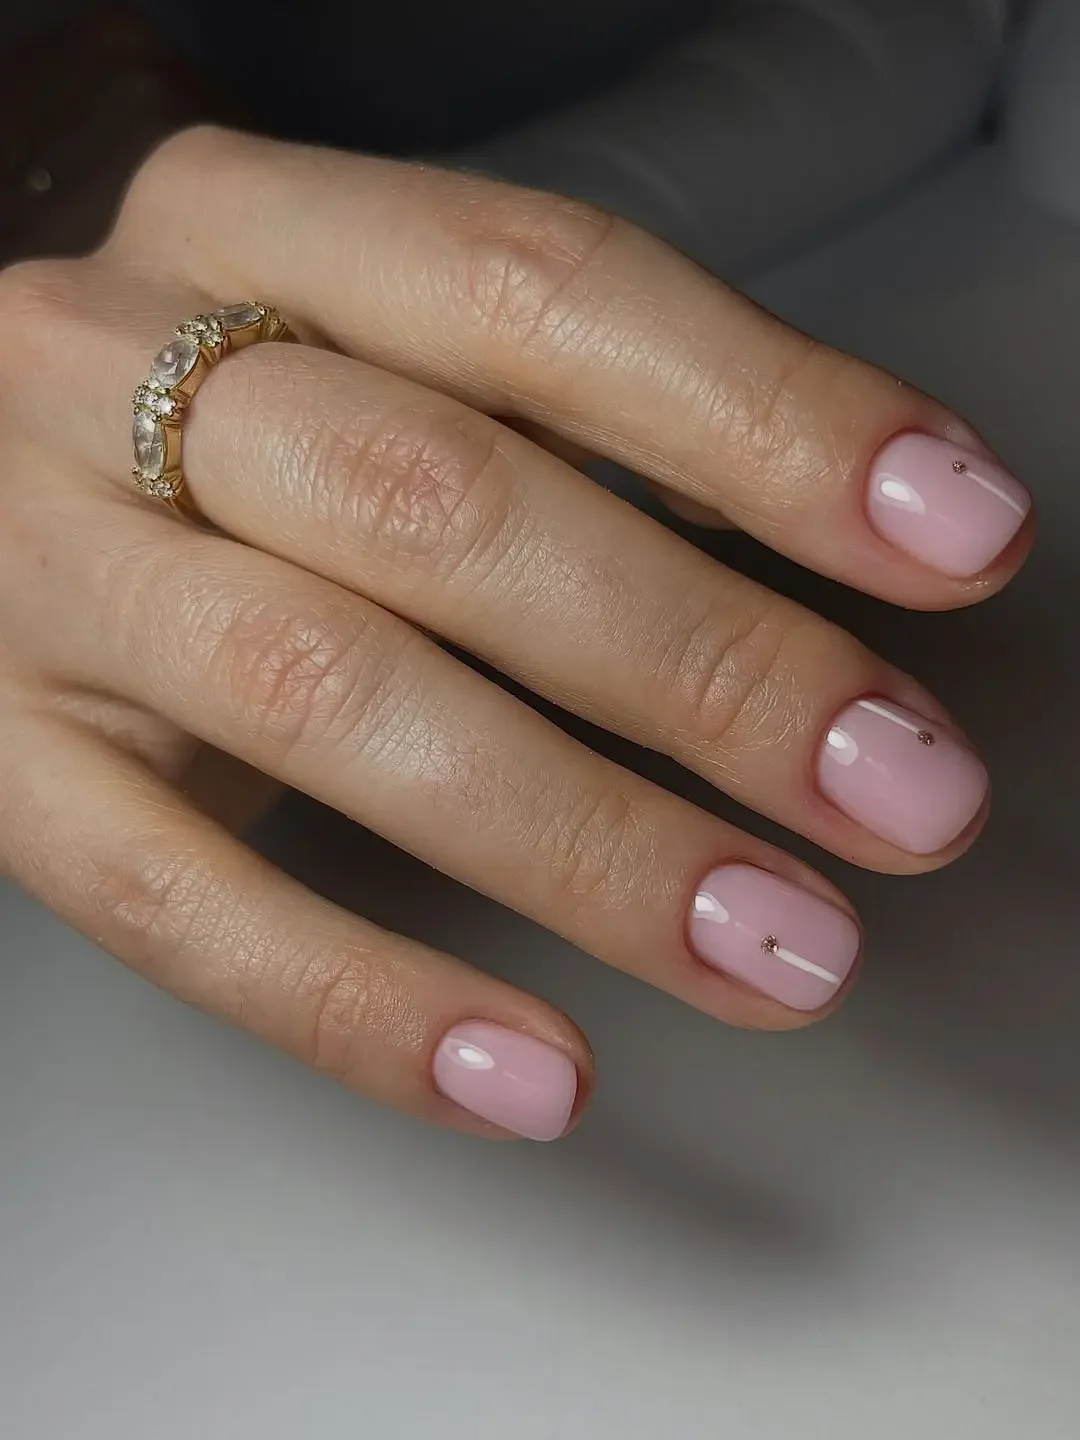
I would use a translucent or softly opaque blush-pink gel polish, a white striping gel, and a few tiny metallic gold or rose-gold studs. A liner brush with a very fine point is the key tool because these lines need to stay narrow and crisp. I would also use a glossy top coat that does not heavily level over the small embellishments.
I would begin with careful nail preparation and a neat rounded shape, then apply the blush color in thin, even coats. Once cured, I would draw the white lines with a light touch, following the natural curve of each nail rather than forcing every line to look identical. A single tiny metallic accent can then be placed beside the line before the final top coat.
This is one of those designs I would save for a busy week when I still want my nails to look thoughtfully done. It feels polished enough for work but has enough personality to avoid looking like a plain manicure. If you are nervous about nail art, this is also a lovely place to start because the decoration is subtle rather than intimidating.
Delicate Botanical Nails With Tiny Hand-Painted Details
This manicure turns the nails into tiny botanical sketches, using a soft milky pink and cream base for delicate stems, leaves, miniature blossoms, and tiny bee motifs. The artwork has an almost illustrated quality, while the varied placement keeps the set from looking repetitive. I particularly like the combination of muted pink, yellow, green, and cream because it creates a gentle seasonal palette without becoming overly sweet.
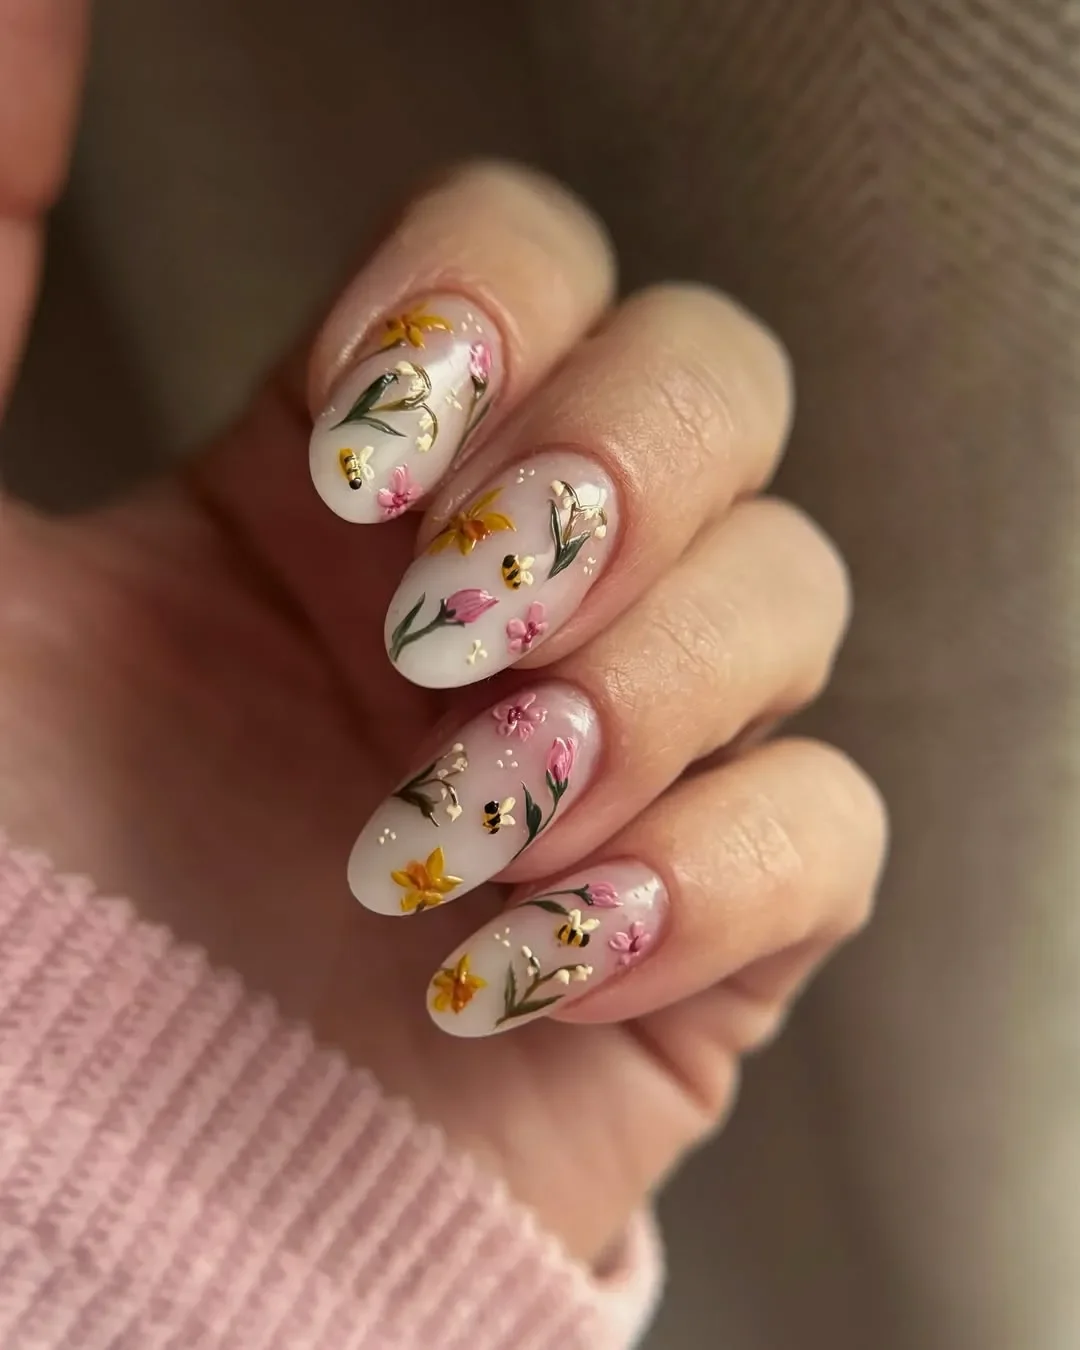
For the base, I would use a sheer milky pink gel combined with a soft ivory shade on selected nails. Fine liner brushes are essential for the stems and leaves, while micro brushes or dotting tools can create the miniature blossoms and bee details. I would choose muted yellow, dusty pink, olive green, black, and cream gel paints, plus a glossy top coat to preserve the delicate artwork.
I would work on one nail at a time and cure the base before beginning the artwork. First, I would sketch the stems and leaves with the thinnest possible lines, then add the small flowers and bees. The trick is not to make every flower identical. Tiny differences in size and placement give hand-painted nail art a much more natural character. After curing the details, I would seal the entire manicure with a thin glossy top coat.
I find this style especially charming when the weather is warm and I am reaching for lighter clothes. It has the feeling of a tiny garden without turning the manicure into a literal floral pattern. I would pair it with a simple dress, denim, or even a soft knit top and let the nails provide the unexpected detail.
Creamy Butter Nails Framed With Tiny Dots
These almond-shaped nails take a creamy buttery-yellow shade and give it a graphic outline made from tiny dots. Some dots appear darker and metallic, while others are pale and almost pearl-like, creating a delicate border around the color. The contrast is subtle, but it changes the entire manicure: instead of a basic cream polish, the nails become softly framed pieces of graphic nail art.
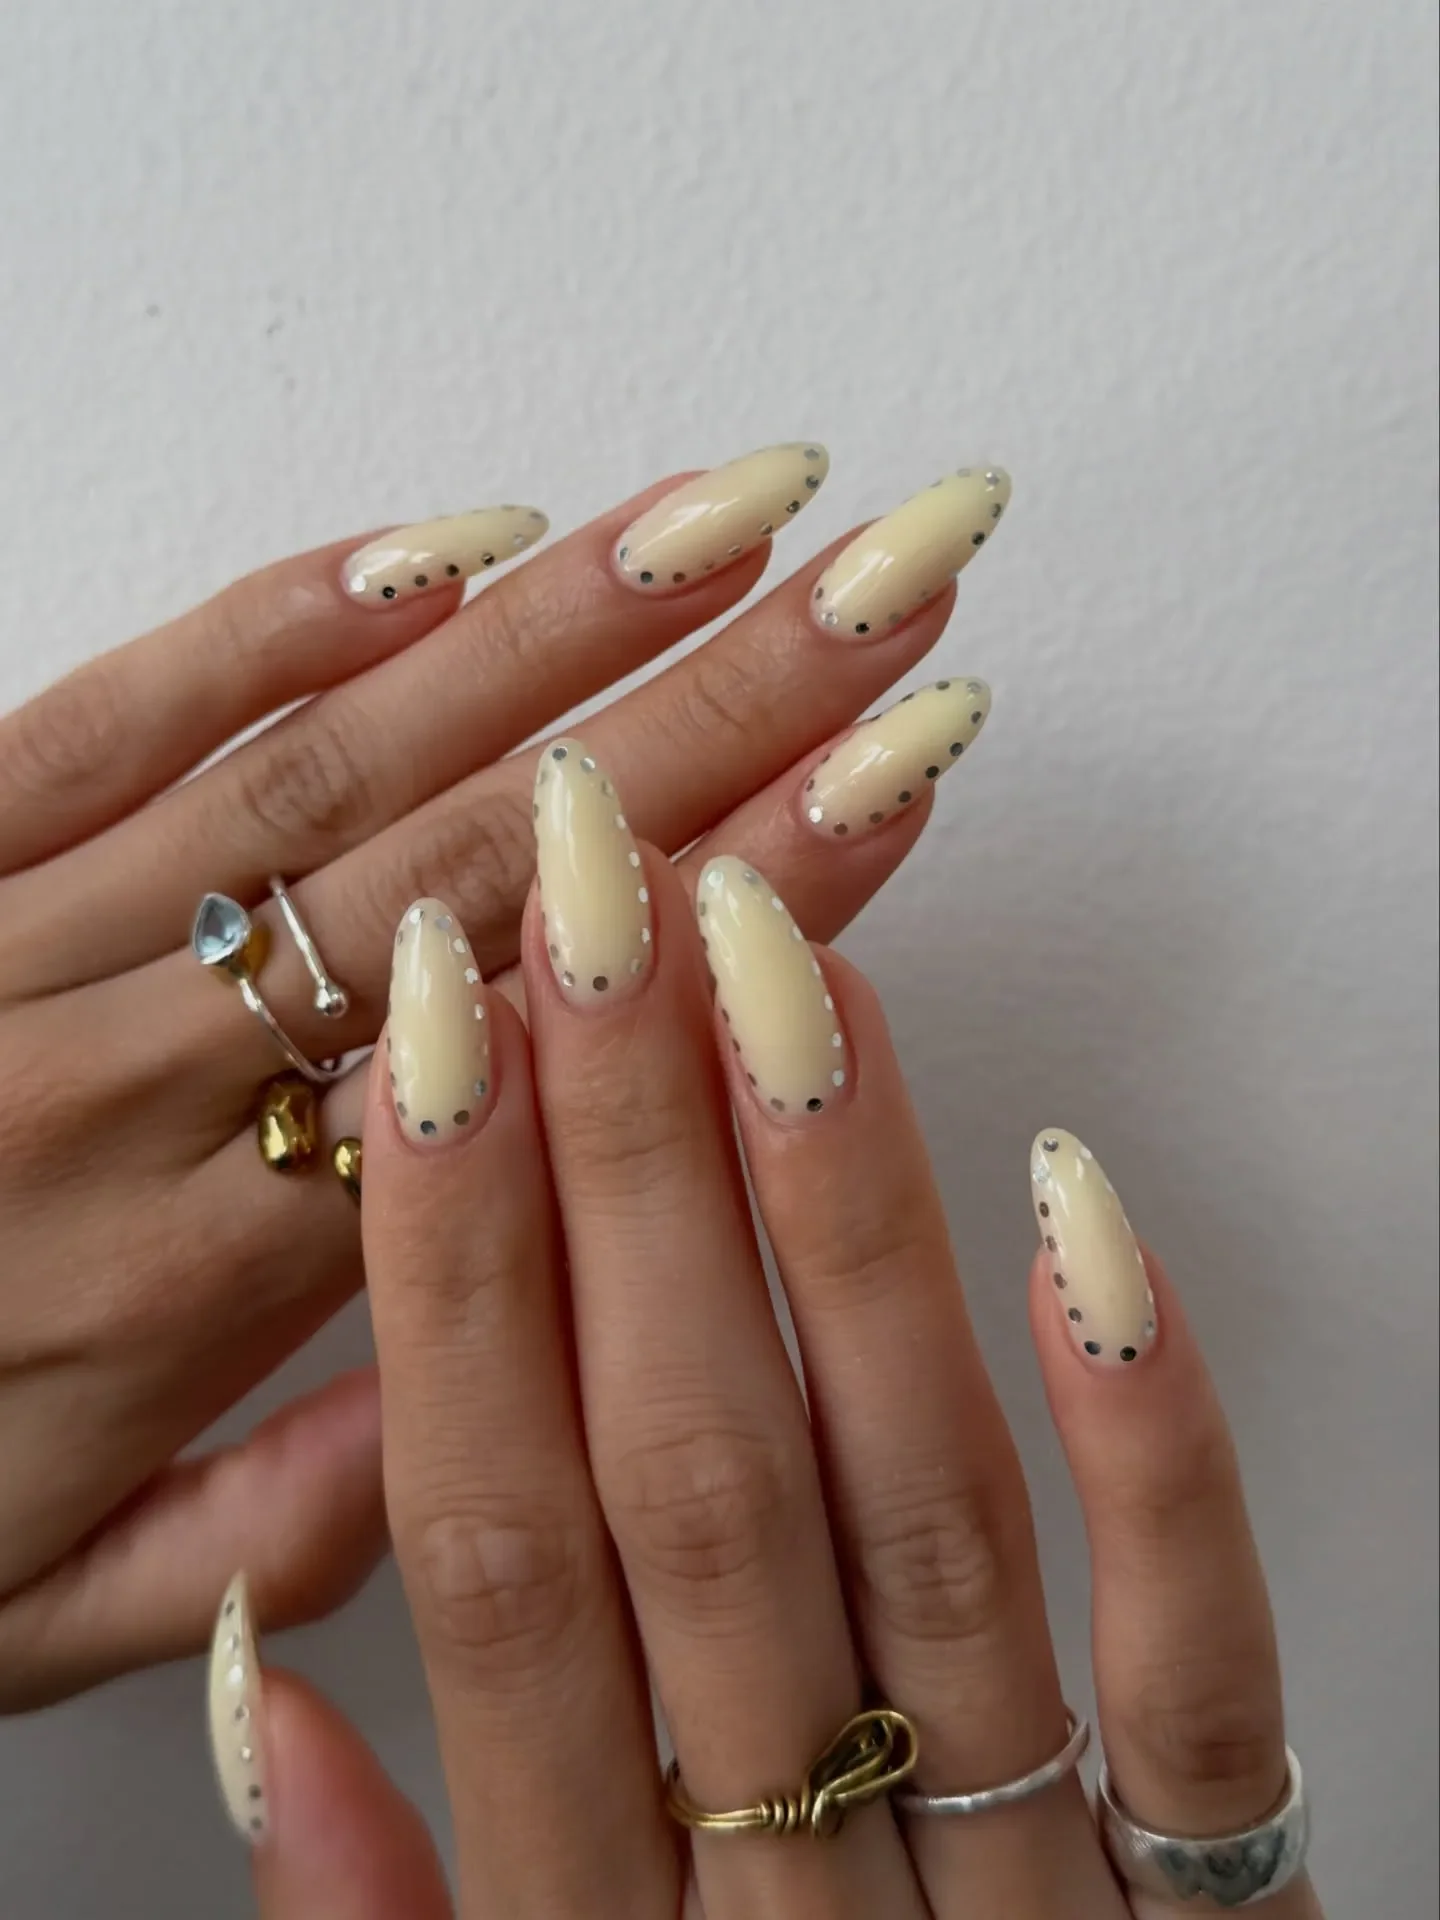
I would use a creamy pastel-yellow gel polish with a smooth, opaque finish, then select two contrasting dot colors such as soft silver and charcoal. A dotting tool with a very small tip will make it much easier to create consistent points. I would also keep a sheer nude polish available for cleaning small mistakes around the cuticle before curing.
The process is fairly approachable. After shaping the nails into a tapered almond, I would apply the creamy yellow color evenly and cure it. I would then place tiny dots around the perimeter, following the natural curve of the nail and leaving enough space between each point. Alternating the dot colors creates more dimension, while keeping their size consistent makes the finished result look intentional. The final glossy coat brings the entire manicure together.
I would choose this when I want to experiment with color but do not want elaborate drawings. The creamy yellow is cheerful without being loud, and the dotted border gives it a fashion-forward edge. It would be especially cute during summer, when lighter colors tend to feel right at home.
Blue And Lavender Butterfly Nails With A Playful Finish
Cool blue and soft lavender create the base for this playful manicure, while delicate butterfly illustrations bring the design to life. The nails alternate between blue and lavender tones, with several featuring small black-outlined butterflies in white and violet shades. The almond shape elongates the fingers, while the crisp artwork keeps the manicure youthful without making it childish.
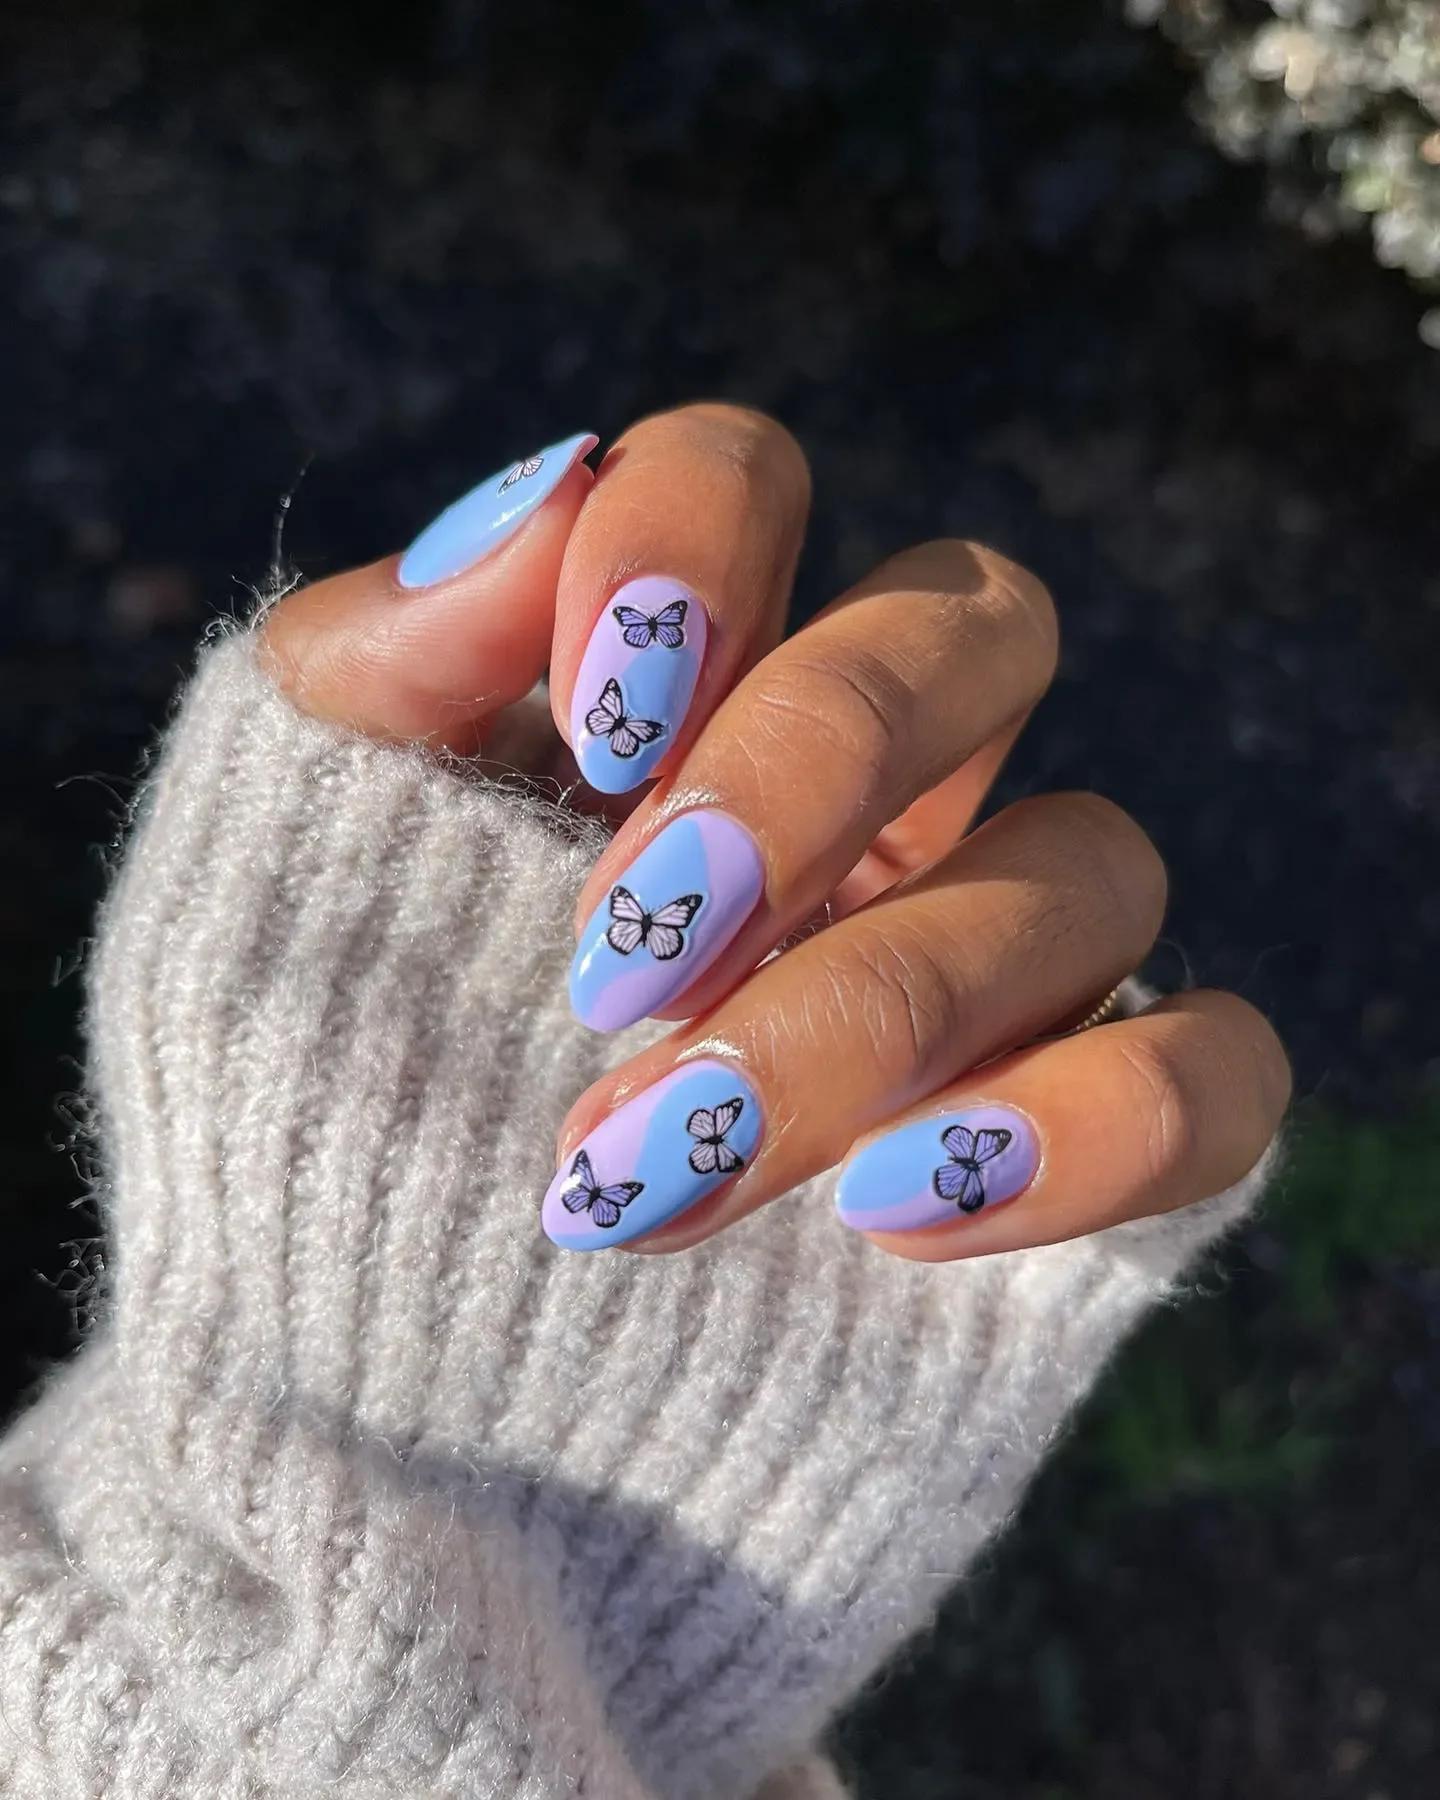
I would use pastel sky-blue and lavender gel polishes, a thin black nail-art paint for the butterfly outlines, and white and purple detail colors for the wings. A tiny liner brush is important for drawing the wing structure, although decals can be a practical shortcut if detailed hand painting is not your strength. A glossy top coat will help the pastel colors look smooth and make the artwork pop.
I would start by alternating the blue and lavender base colors across the nails, curing each layer thoroughly. Then I would add the butterfly silhouettes, keeping them small enough to leave visible negative space around the artwork. I like the idea of placing one or two butterflies on selected nails rather than filling every surface. Once the illustrations are finished and cured, a thin layer of top coat protects the design and adds shine.
Rose Gold Shimmer With Tiny Star Accents
I love how this manicure takes a muted rose-mauve shade and gives it an almost jewelry-like finish. The medium-length oval nails are completely covered in fine shimmer, creating a soft metallic glow rather than an overpowering glitter effect. A few small white star accents sit on selected nails, and that limited placement is what makes the design feel intentional. The result is feminine, polished, and just playful enough for a summer evening when I want my manicure to catch the light without taking over the whole look.
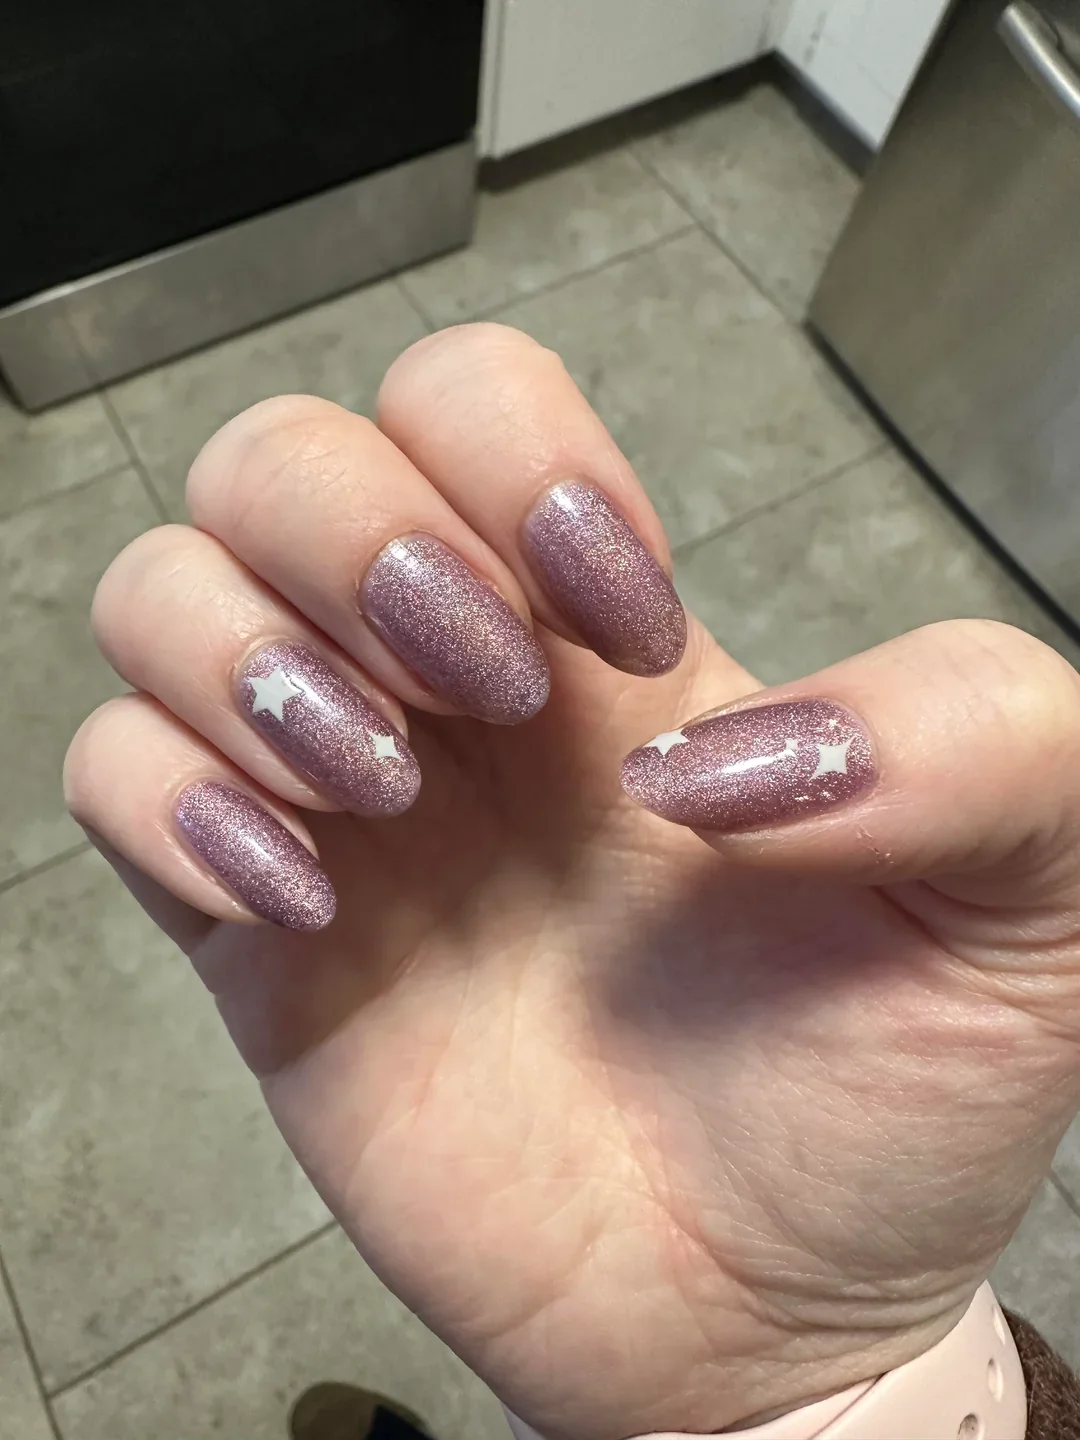
For this finish, I would start with a dusty rose or mauve gel polish containing micro-shimmer. OPI Put It in Neutral or a similar sheer pink can work as a base if I want more translucency, while a rose-gold shimmer gel such as Gelish in a rosy metallic family can create greater sparkle. I would also keep small white star decals or a fine nail-art brush nearby, plus a glossy top coat. The key is fine shimmer rather than chunky glitter because it keeps the manicure smooth and wearable.
At home, I would shape the nails into a soft oval and carefully clean the cuticle area before applying a thin base coat. After two thin layers of the mauve shimmer color, I would cure each layer according to the product instructions. Then I would add only a few small stars to the accent nails, keeping them slightly irregular so the result does not look overly mechanical. A generous glossy top coat seals everything and gives the shimmer that beautiful glassy reflection.
I would choose this design when I wanted something special but still easy to wear with everyday clothes. The rose tone works beautifully with gold jewelry, cream tops, denim, and soft summer neutrals. And honestly, those tiny stars are doing more work than a full set of elaborate decorations ever could.
Midnight Navy With Delicate Gold Florals
Deep navy instantly changes the personality of a manicure, and I especially like it when the color is kept glossy and simple on most nails. Here, the decoration comes from delicate gold floral motifs placed on selected nails, with tiny circular details extending from the flowers like miniature jewelry. The oval shape keeps the dark color elegant rather than severe. It is a beautiful example of how a saturated shade can become surprisingly sophisticated when the nail art remains precise and restrained.
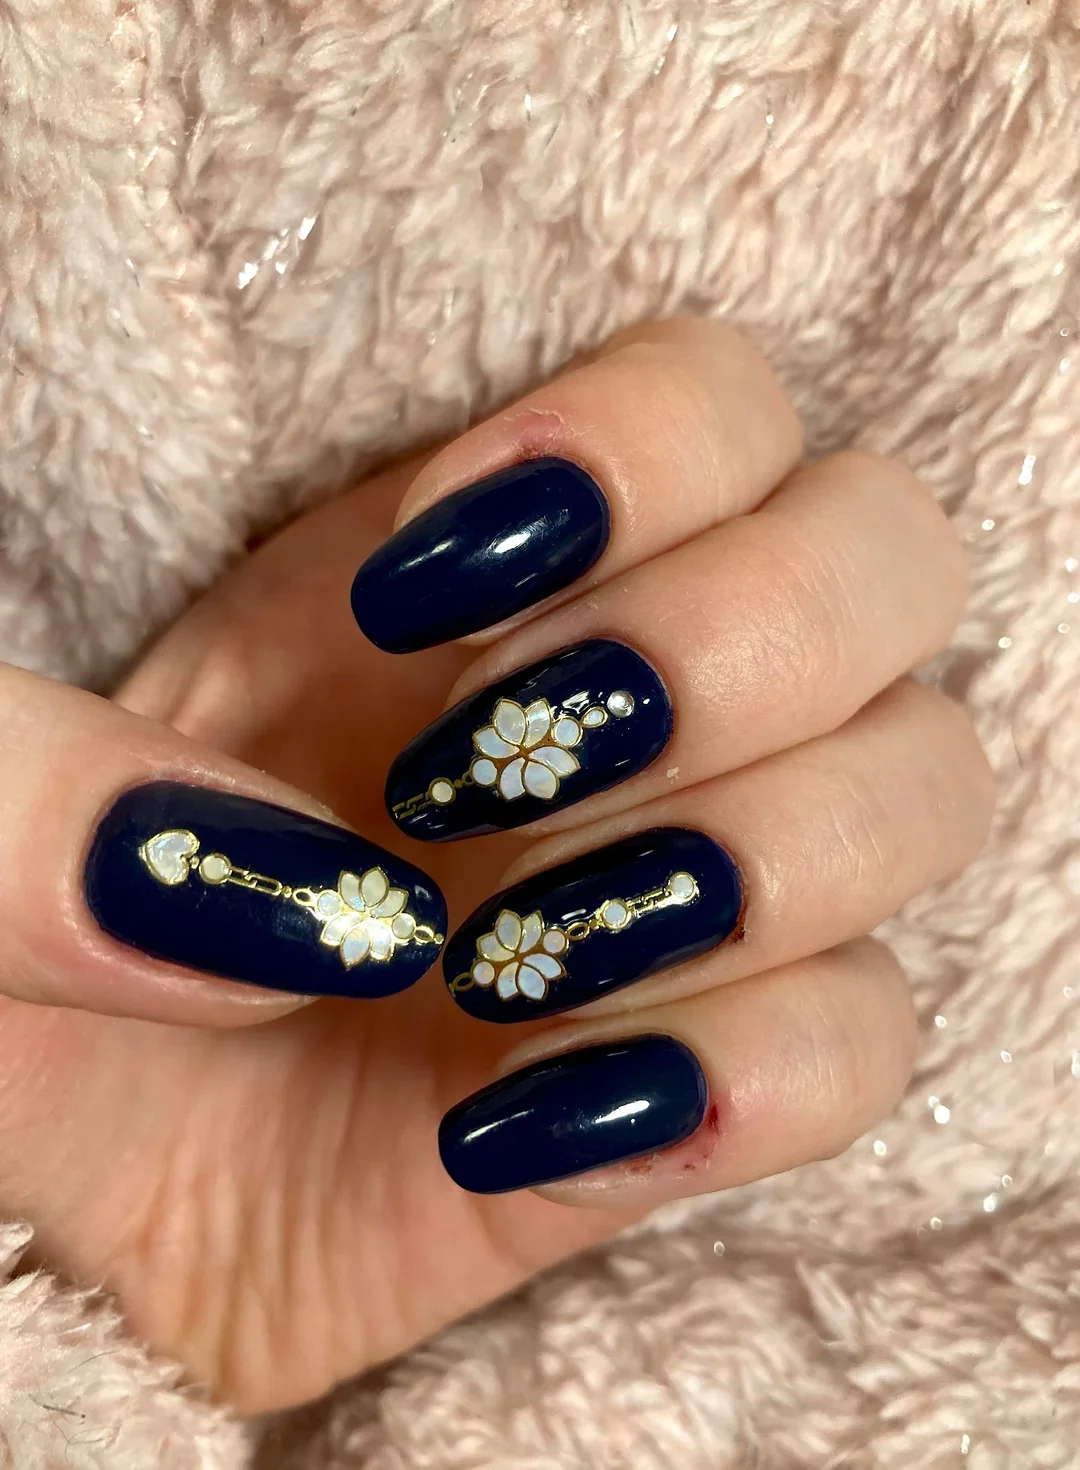
I would use a highly pigmented navy gel polish as the foundation, preferably one with a smooth cream finish rather than shimmer. For the decoration, gold metallic nail-art paint or stamping polish is ideal because it creates a crisp contrast against navy. Small gold rhinestones or metallic studs can add dimension if desired, although I would keep them tiny. A high-shine top coat is essential here because the glossy surface makes the navy look deeper and helps the gold details stand out.
I would begin with careful nail preparation, then apply two thin layers of navy, allowing each layer to cure completely. For the floral details, I would use a very fine liner brush and build the petals from simple curved strokes rather than trying to paint one complicated shape all at once. Small dots can finish the center and create the delicate chain-like effect. If freehand painting feels intimidating, floral decals or stamping plates are an easy shortcut.
I think this is one of those manicures that can quietly become the main accessory. I would wear it for a dinner date, a summer wedding guest look, or even with a crisp white shirt when I want the nails to provide the drama. Navy also gives gold a particularly rich appearance, so the combination feels much more expensive-looking than the technique actually needs to be.
Deep Teal With Fine Golden Botanical Details
A dark teal manicure already has plenty of personality, but fine gold linework gives it a completely different direction. The rounded nails are coated in a rich blue-green shade with a glossy finish, while elongated floral motifs appear near the center of several nails. I like the contrast between the solid background and the delicate outlines because it keeps the decoration airy. The tiny dots beneath some of the motifs add rhythm without making the manicure feel crowded.
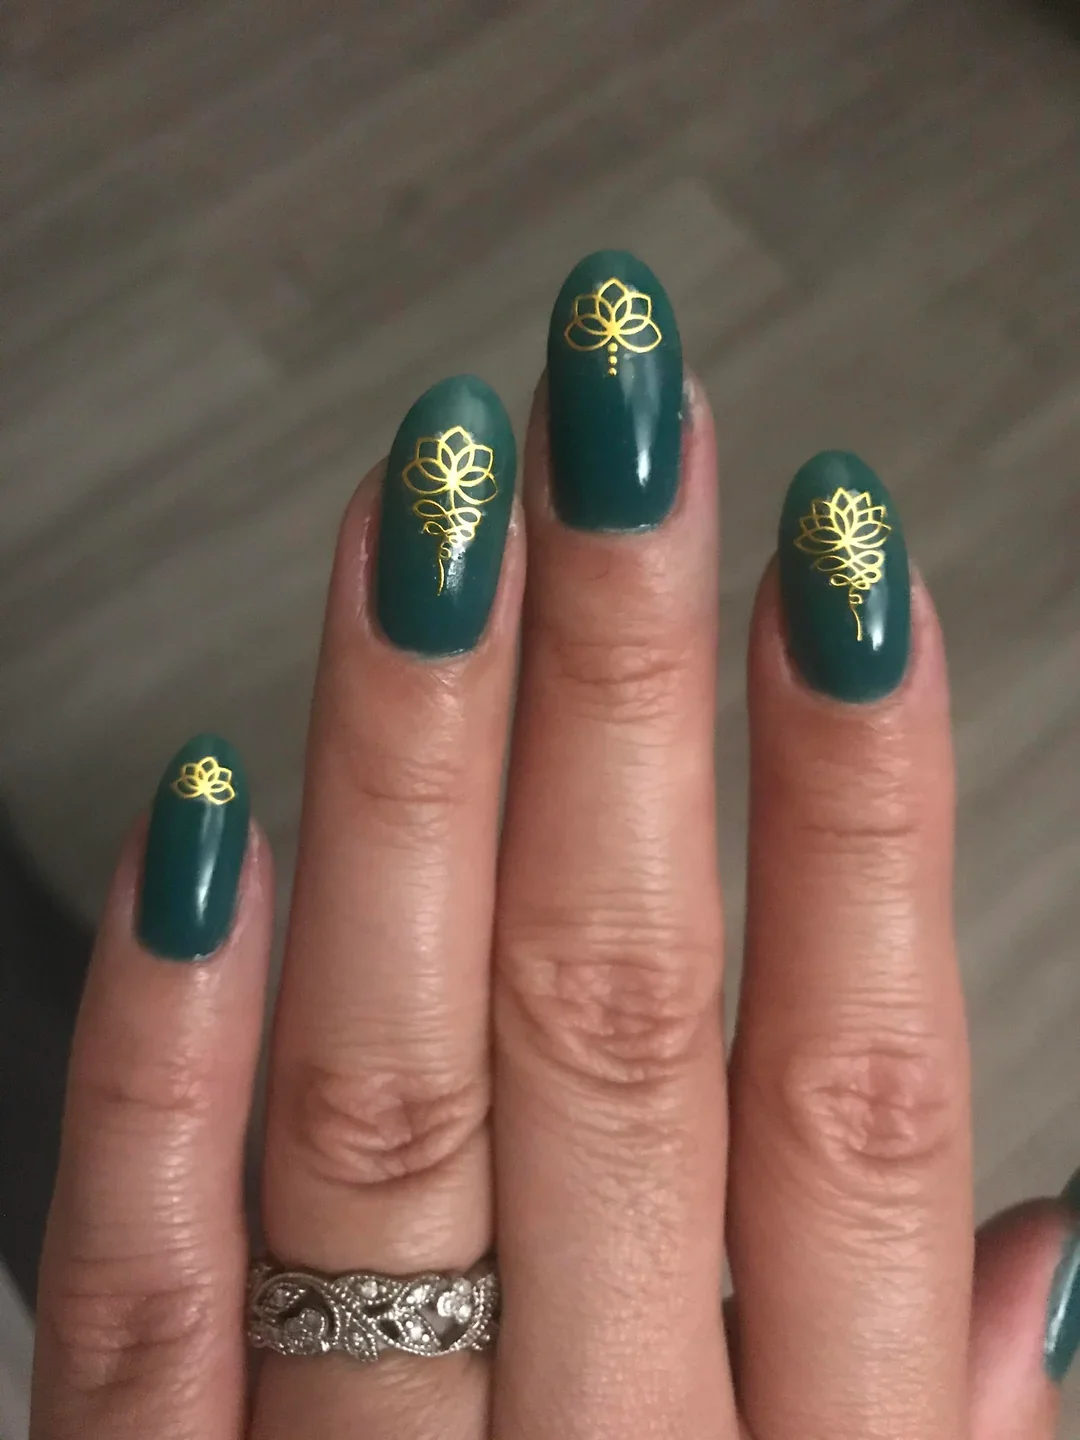
For a similar result, I would choose a deep teal or blue-green gel polish with strong pigmentation. Essie Gel Couture in a dark green-blue family could work for a non-gel version, while a professional gel color gives a more durable glossy finish. For the decoration, I would use gold stamping polish or metallic gel paint and a detail brush with a very fine tip. A glossy top coat finishes the surface and protects the fine lines.
I would first create a clean rounded shape and apply the teal polish in thin, even coats. Once the color is cured or fully dry, I would draw the floral motif using connected loops, keeping the pressure on the brush light. I find that starting with the largest petal and adding the smaller curves afterward makes intricate nail art much easier. A few tiny dots underneath can complete the composition before I seal everything with top coat.
This is the kind of design I would save for late summer evenings when I want a darker manicure but do not want to go completely black. The teal feels fresh enough for warm weather, while the gold introduces a little evening glamour. It also looks fantastic next to gold rings, which is always a bonus when the manicure is meant to be part of the whole outfit.
Sheer Pink Nails Covered With Colorful Crystals
Sometimes unique nail decoration does not need complicated painting at all. A translucent blush-pink base creates a clean foundation here, while multicolored rhinestones are scattered across the long almond-shaped nails. The stones vary in size and color, so each nail has its own little constellation. I particularly like the contrast between the delicate base and the playful jewel details because it makes the manicure feel festive without relying on a complicated pattern.
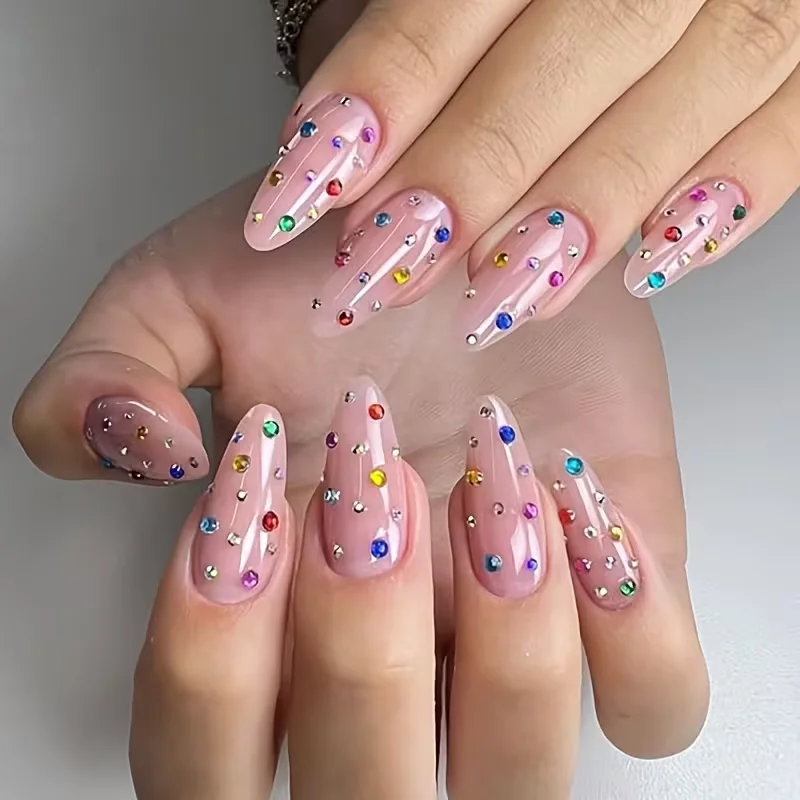
I would use a sheer pink gel polish or milky nude builder base for the foundation. OPI Bubble Bath is a classic option for creating a soft pink appearance, while a sheer builder gel can provide additional structure for longer nails. For decoration, I would choose flat-back rhinestones in several colors and sizes, along with rhinestone gel or a strong nail-art adhesive. A thick glossy top coat can be used around the stones, although I would avoid covering the entire surface of larger crystals because that can reduce their sparkle.
After preparing the nails, I would apply the sheer pink base in thin layers until the desired level of coverage is reached. I would then place a small amount of rhinestone adhesive where each crystal will sit and arrange the stones with tweezers or a wax pencil. There is no need to make both hands identical; I actually prefer a slightly different arrangement on every nail. Once everything is secure, I would carefully seal the surrounding surface.
I would wear this manicure when I wanted my hands to feel instantly more fun. It has that little flash of color that catches the eye whenever I move my fingers, especially outdoors in summer sunlight. For a more wearable version, I would simply reduce the number of crystals and keep the palette to two or three colors.
Milky White Almond Nails With Tiny Silver Stars
Soft white and translucent pink make an incredibly clean pairing, especially on almond-shaped nails. The base has a delicate milky quality rather than looking completely opaque, while tiny silver star-shaped accents are positioned close to the center of selected nails. The decoration is deliberately minimal, and that is exactly why it works. Instead of filling the surface, the metallic details act like tiny points of light against an otherwise pristine manicure.
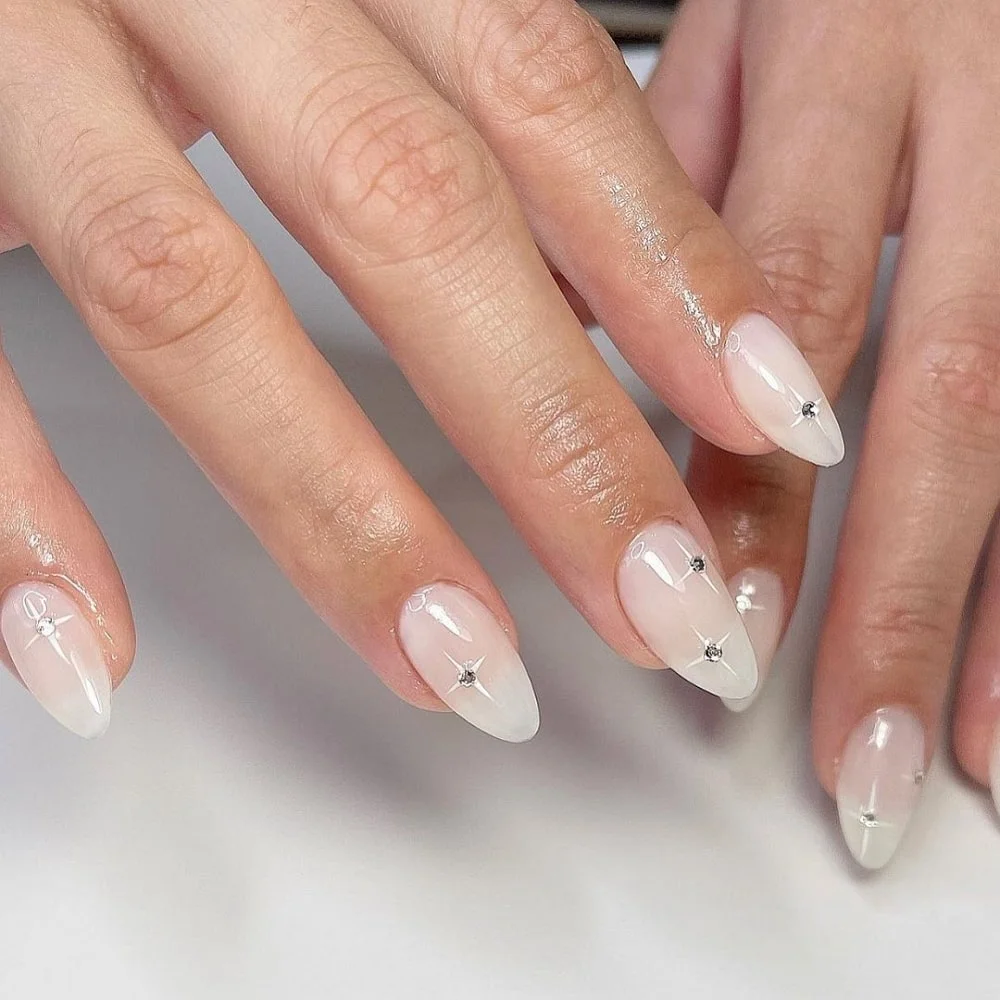
I would reach for a sheer milky white or translucent pink polish, depending on how much natural nail I want showing through. OPI Funny Bunny is a good reference for the soft white direction, while a sheer pink such as Bubble Bath can create a warmer foundation. Small silver star decals or micro charms provide the decoration, and I would finish with a clear glossy top coat. A fine silver glitter could also replace the stars for an even subtler interpretation.
I would shape the nails into a balanced almond silhouette before applying the base. Two very thin coats usually create a more elegant translucent effect than one heavy coat. Once the surface is smooth, I would place one or two stars on selected nails rather than decorating every finger. The final top coat should be applied carefully around the decorations to create an even, glass-like surface.
I think this is a particularly good choice when I want nail art that can move easily between occasions. It works for a summer brunch, vacation, a bridal event, or a simple white outfit without feeling tied to one specific aesthetic. The tiny stars give just enough personality to keep the manicure from disappearing into the background.
Soft Pink Ombre With Mini Crystal Clusters
The soft pink-to-white transition gives this manicure an elegant, almost airbrushed appearance. The long almond nails gradually fade from a translucent blush near the cuticle into creamy white tips, while tiny crystal clusters decorate a few strategic areas. I like the way the embellishments are grouped rather than scattered randomly because they create focal points without interrupting the delicate ombre. It feels polished, feminine, and very easy to imagine with summer jewelry.
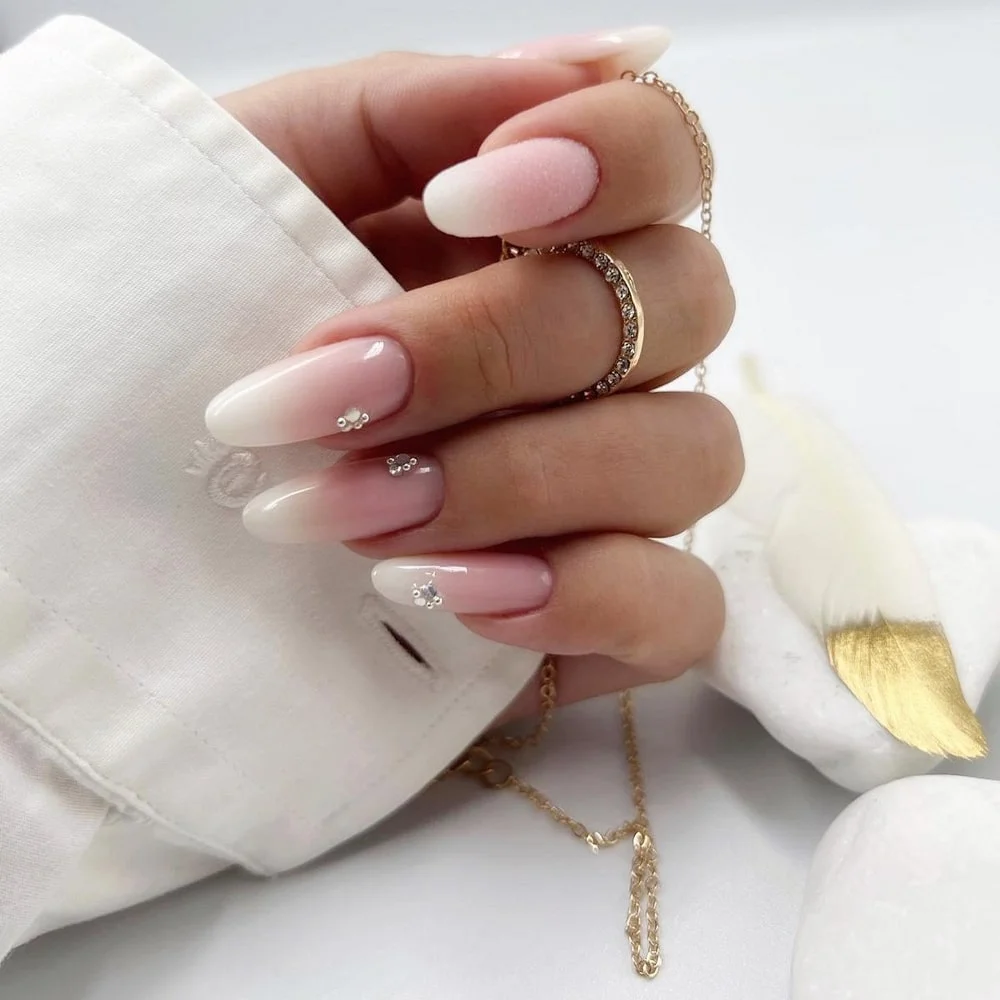
For this manicure, I would use a sheer pink base, a soft white gel polish, and a sponge or ombre brush for blending. OPI Bubble Bath paired with a soft white such as Funny Bunny is an easy color direction to recreate. For the decoration, I would choose tiny clear rhinestones or crystal studs and a suitable rhinestone adhesive. A glossy top coat is the final step because this particular design depends on a smooth, reflective surface.
I would apply the sheer pink first and create the white tip gradually, using very thin layers so the transition stays soft. I would blend the colors before curing when working with gel products designed for that technique, following the manufacturer’s instructions. After the ombre is even, I would place three or four tiny crystals together near the chosen accent areas. The trick is restraint: too many stones can hide the beautiful gradient underneath.
This is one of my favorite directions for a manicure that needs to feel feminine without looking overly decorated. The blush-and-white combination is especially pretty with gold or silver accessories, and the crystals give it enough sparkle for an event. If I were planning a summer celebration, this would definitely make my shortlist.
Nude Nails With Pearl-Like Silver Studs
There is something wonderfully graphic about combining a soft nude base with rows of tiny silver studs. The square-shaped nails balance the decoration beautifully, while the alternating nude and pale pink-white tones keep the overall manicure delicate. Small metallic dots are placed in neat patterns across selected nails, creating a subtle jewelry effect. The design feels modern because the decoration is repetitive and structured rather than scattered.
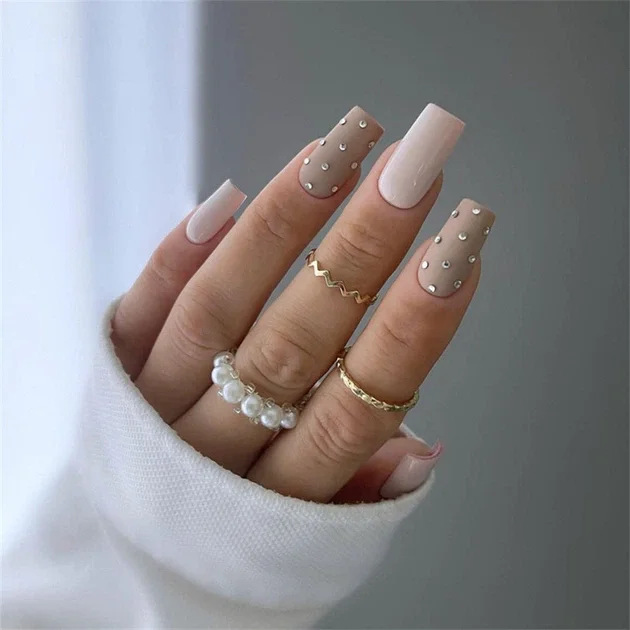
I would start with a neutral beige-pink polish that closely complements the natural skin tone. A shade such as Essie Ballet Slippers can create a soft foundation, although a slightly warmer nude may work better depending on the complexion. For the accents, I would use tiny silver half pearls or flat-back metallic studs. Nail adhesive, tweezers, and a glossy top coat are all I need to complete the look.
I would first create a clean square or soft-square shape, then apply the nude polish evenly. After the base has cured, I would map out the stud placement before attaching anything because symmetrical spacing makes a major difference with this style. I would pick up each stud with a wax pencil or tweezers and press it gently into a small amount of adhesive. Once the decorations are secure, I would finish around them with top coat.
I like this manicure because it proves that neutral nails do not have to be boring. The little silver dots create texture and movement while keeping the color palette quiet. I would choose it for everyday wear when I wanted something polished enough for work but interesting enough to make me look down at my hands and smile.
Pink And White French Tips With Metallic Framing
Classic French tips get a fresh update when the white edge is paired with a narrow metallic outline. The soft pink base keeps the nails delicate, while the white tips provide the familiar French silhouette. A thin rose-gold or silver line follows the border, giving the design a slightly more architectural appearance. Tiny crystals near the cuticle add another point of sparkle, but the overall effect remains controlled.
I would use a sheer pink base, crisp white gel polish, and a very fine metallic polish for the outline. A rose-gold shade works beautifully with warm pinks, while silver creates a cooler finish. For the crystal accents, I would choose only a few small clear stones and a tiny amount of nail adhesive. A high-gloss top coat is important because it visually connects the different layers of the design.
I would begin by applying the sheer pink base and creating the white French tips with a French brush or guide stickers. Once the tips are clean and even, I would add the metallic line just below the white edge using a fine liner brush. I would place the tiny crystals near the cuticle on only a couple of nails so they act as accents rather than competing with the French tips. After everything is secure, I would seal the manicure with top coat.
For me, this is the sweet spot between traditional and trendy. The French manicure is familiar, but the metallic framing makes it feel new again. I would especially choose this version for a summer event when I wanted my nails to look elegant in close-up photos without becoming too elaborate.
Pink Chrome French Nails With Sculptural White Tips
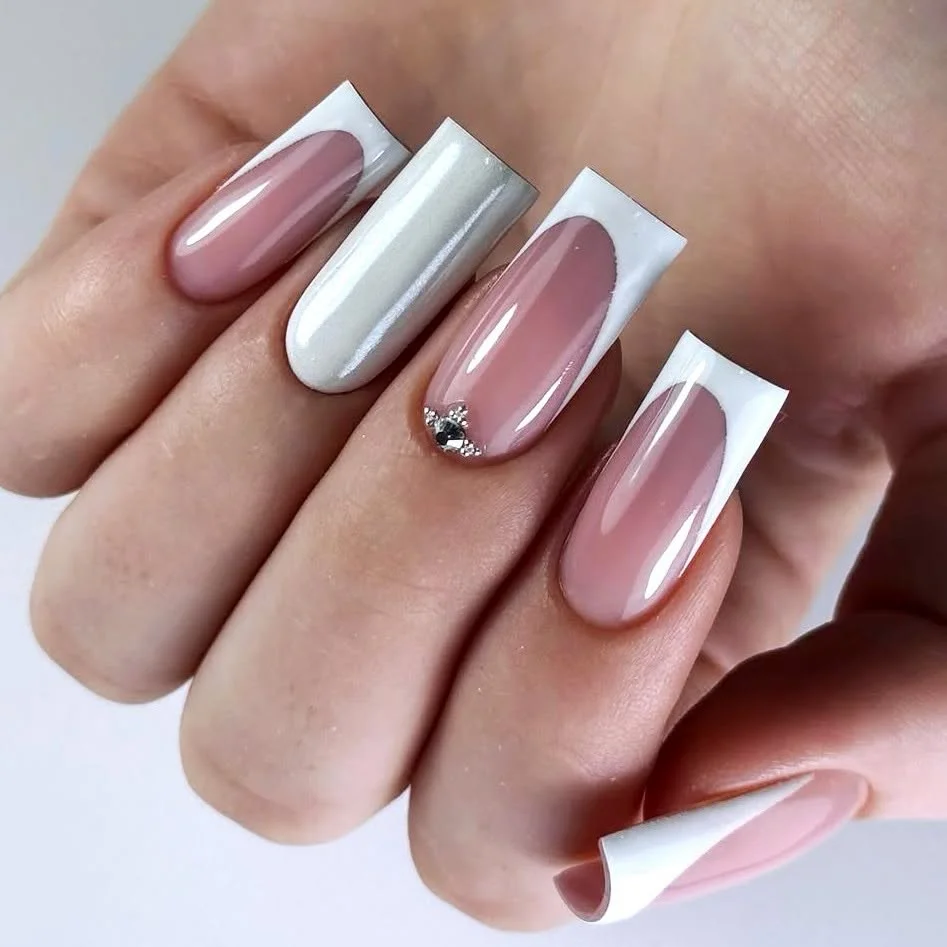
This manicure takes the French tip somewhere much more dramatic by giving the white edges an exaggerated, sculptural shape. The base is a glossy translucent pink, while the white tips curve around the sides and extend outward in a graphic silhouette. A small crystal accent near the cuticle adds a concentrated flash of sparkle. The combination feels playful, editorial, and very different from a conventional French manicure.
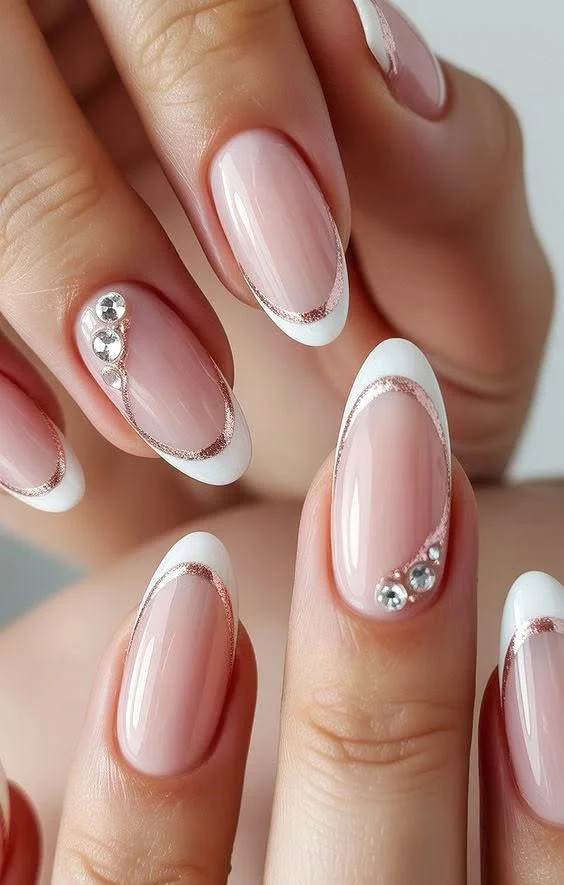
I would use a translucent pink gel polish, a highly pigmented white gel color, and a chrome or pearl top layer if I wanted extra dimension. The white needs to be opaque enough to create those sharp curved edges. For the tiny accent, a single clear rhinestone is enough. I would also keep a fine liner brush and a detail brush nearby because the curved tip requires much more control than a standard French line.
I would build the pink base first and make sure it is completely smooth. Then I would outline the unusual French shape with a fine brush before filling it in with white. I would work one nail at a time because the curves need to remain balanced from side to side. After curing, I would add the tiny crystal accent and apply a glossy top coat, carefully following the shape of the white edge.
The best Unique Nail Decoration Ideas For Manicures are the ones that feel like you. I love how a sheer base, a few crystals, sculptural lines, glitter, or tiny hand-painted details can completely change the mood of a manicure. You do not need an elaborate design on every nail to make an impression—sometimes one unexpected accent is enough. So, whether you are planning a seasonal refresh or simply craving something new, these ideas are an easy excuse to step outside your usual routine. Pick the detail that catches your eye, make it your own, and let your next manicure have a little more personality.

