
Pearl nails have a way of making even the simplest manicure feel instantly polished. With their soft glow, glossy surface, and delicate color shifts, they catch the light without ever looking too flashy. But what makes an iridescent pearl finish so irresistible, and why does it work with so many different nail shapes? From creamy milky whites to dreamy lavender, pink, and opal reflections, this trend gives classic elegance a fresh twist. I love how the finish can look subtle in one moment and almost magical in the next, depending on the light.
This season, pearl nails are especially appealing when you want something refined but still a little unexpected. Short rounded nails can make the effect feel clean and effortless, while almond and longer shapes bring out more of that luminous, jewelry-like quality. Could this be the manicure that replaces your usual neutral polish? I’m exploring the prettiest ways to wear Pearl Nails With Iridescent Glossy Elegant Finish, along with the colors, shapes, finishes, and simple styling ideas that make each version worth trying.
Lavender Pearl Almond Nails With an Iridescent Glow
This manicure takes the pearl idea somewhere dreamier with a long almond shape and a translucent lavender base. Instead of looking like a solid purple manicure, the color seems to float underneath the reflective finish, creating flashes of pink, lilac, blue, and soft gold. I love how the almond silhouette gives the delicate color a little more elegance without making it feel heavy. It has that beautiful quality where the manicure looks different every time the hand moves.
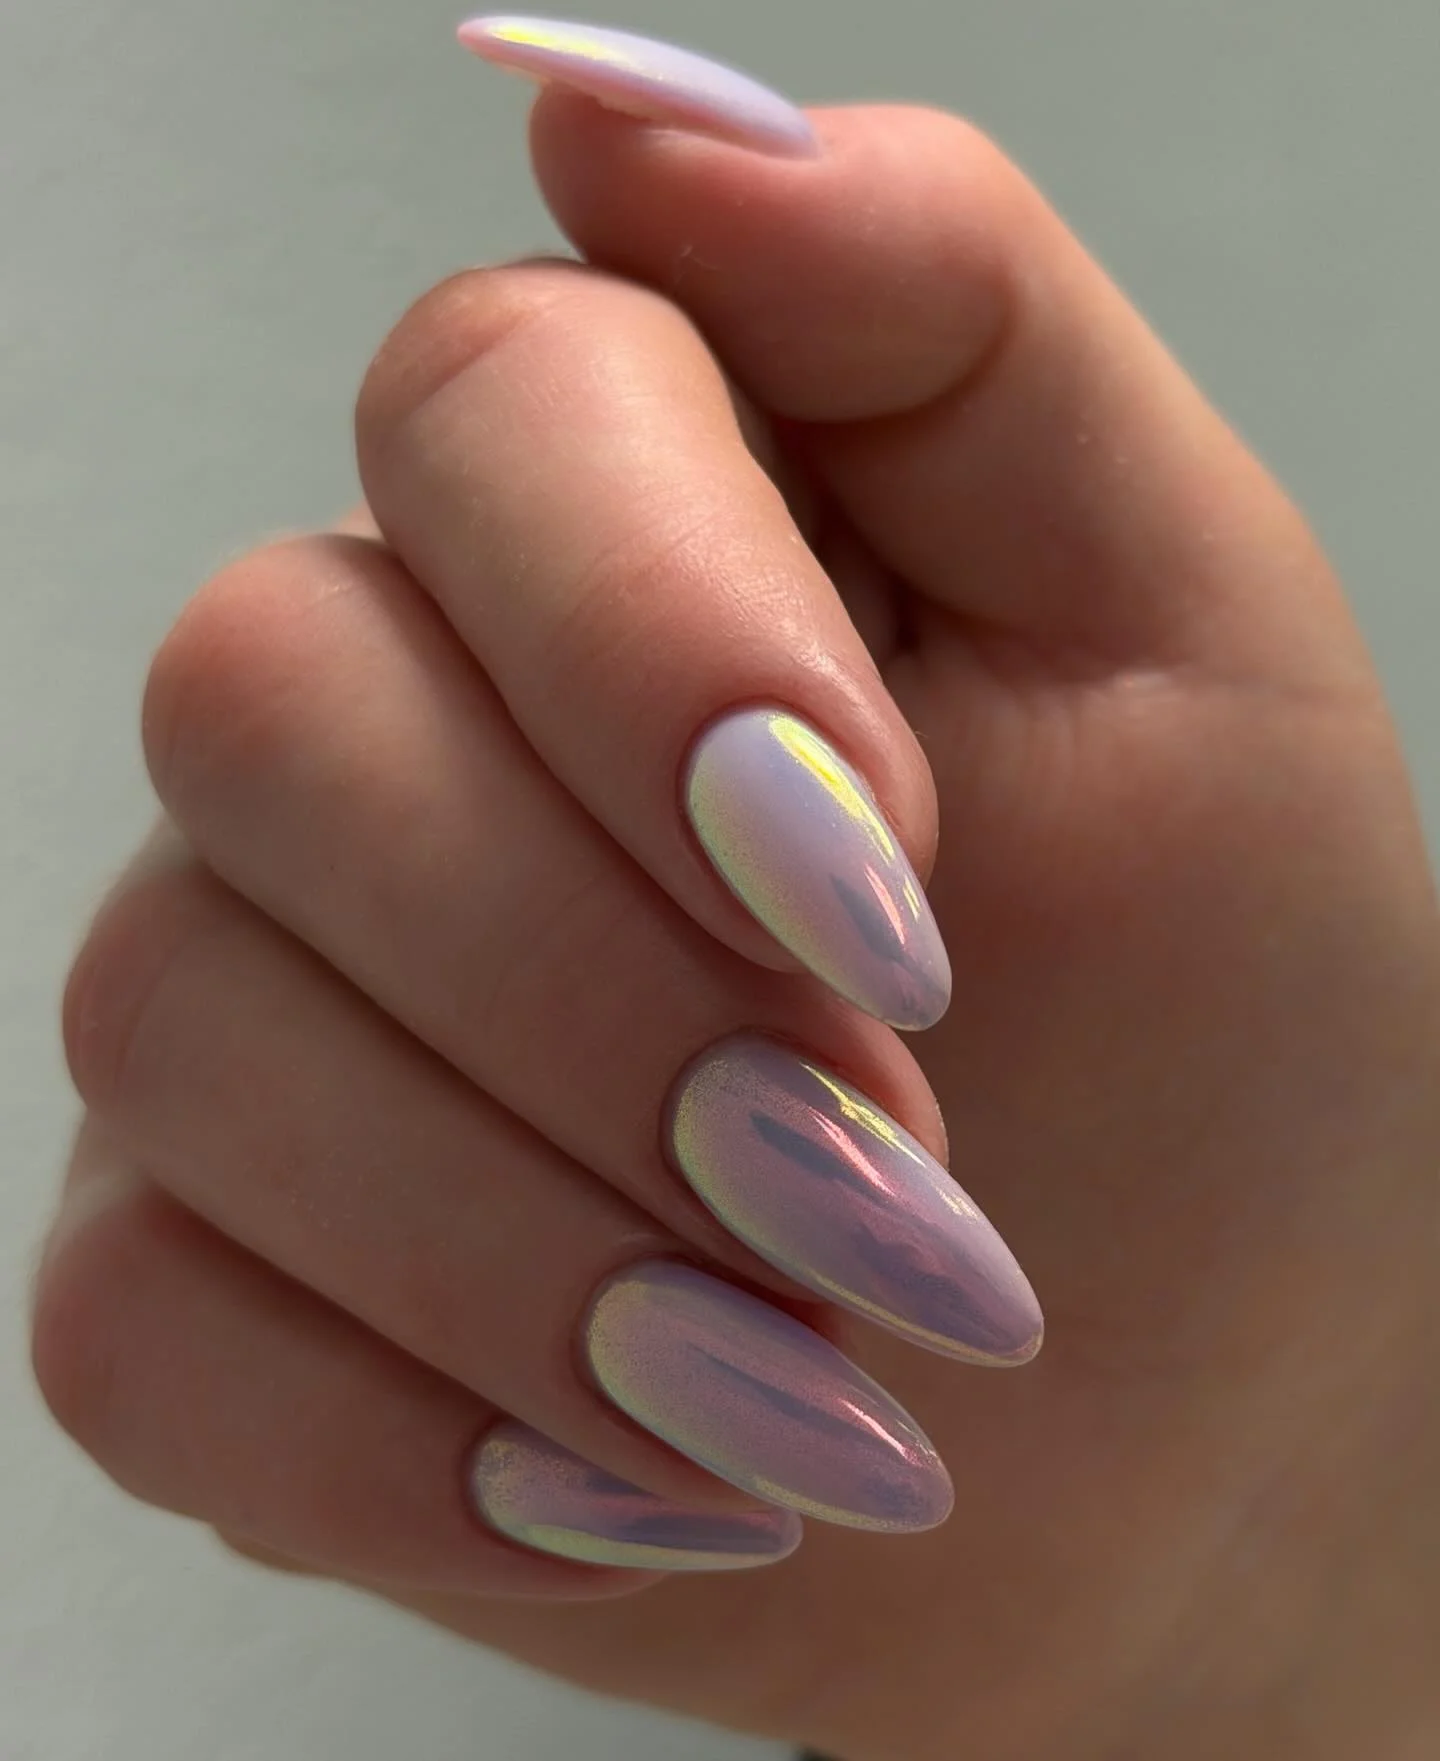
I would recreate this with a sheer lavender or very pale pink gel polish, followed by an iridescent pearl chrome powder. A neutral milky base underneath can help soften the lavender and make the shifting finish more dimensional. For the reflective layer, I would look for a chrome pigment described as pearl, opalescent, aurora, or iridescent rather than a strong metallic chrome. The difference is subtle but important: I want a translucent glow, not a mirror surface.
My first step would be creating a clean almond shape with balanced sidewalls and a softly pointed tip. After preparing the nails, I would apply a sheer lavender base in thin layers, cure it, and then carefully buff the iridescent powder over the surface. I would pay extra attention to the tips because uneven pigment can interrupt that beautiful continuous glow. A clear high-shine top coat finishes the look and makes the color shift especially noticeable under natural light.
For me, this is the kind of manicure that feels perfect when I want something feminine but not predictable. The lavender keeps it soft, while the pearly reflection gives it a little mystery. I could easily wear it for a summer dinner, a vacation, or simply one of those weeks when I need a tiny beauty upgrade every time I look down at my hands.
Pink Pearl Chrome With a Golden Light Reflection
There is something instantly cheerful about this glossy pink pearl manicure. The nails have a short-to-medium rounded shape, while the translucent pink base creates a soft candy-like glow underneath the reflective finish. The most interesting detail is the luminous golden reflection that curves across each nail, almost following the natural shape of the surface. It gives the manicure movement without adding any separate nail art.
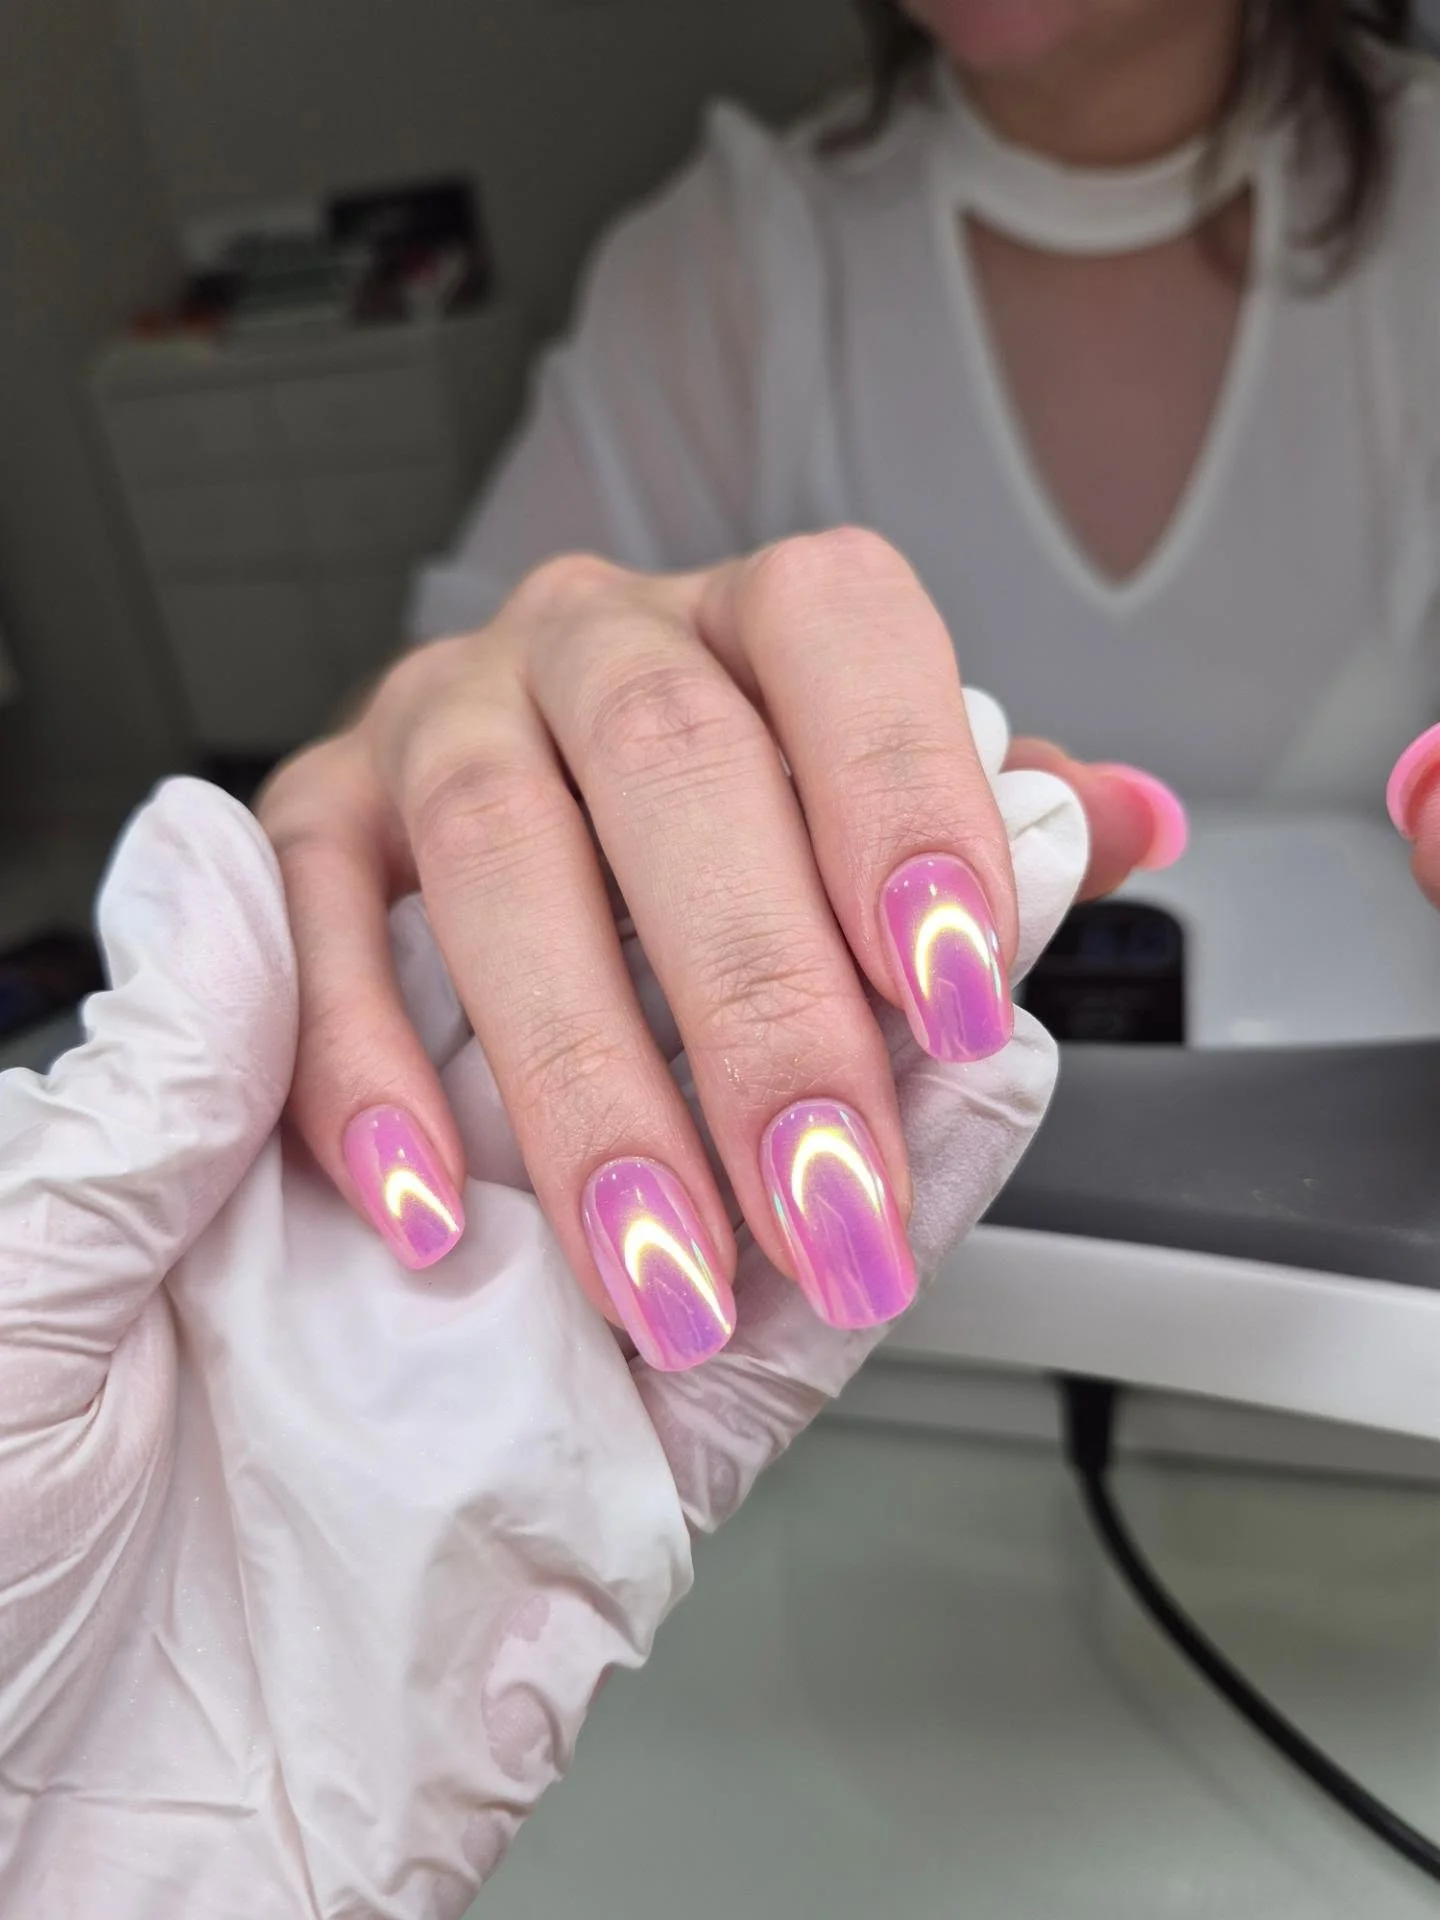
To get this effect, I would use a sheer rosy pink gel polish, a fine aurora or pearl chrome pigment, and a glassy top coat. A neutral pink base would work especially well because it keeps the manicure wearable while allowing the reflective powder to show through. I would avoid an opaque bubblegum polish here; the beauty comes from the transparent layering and the way the light travels through it.
I would shape the nails into a softly rounded square or short oval before applying the base. Once the pink color is even and cured, I would apply the iridescent powder very lightly and build it gradually rather than covering the surface with too much pigment. That is the little trick I would use for this particular finish: the more delicate the chrome layer, the prettier the dimensional glow tends to look.
This one feels especially easy to wear. I can see it working with a simple summer dress just as easily as with jeans and a white tee, and it has enough shine to make even a basic outfit feel more finished. If classic pink polish feels a little too ordinary lately, this is the version I would reach for.
Sheer Opal Nails With Abstract Pink Reflections
I love when pearl nails are allowed to look slightly unpredictable, and this design does exactly that. The base is translucent and opalescent, with soft pink flashes appearing across the oval nails like fragments of reflected light. Rather than placing a specific pattern on each nail, the reflective color seems to move organically across the surface. That makes the manicure feel delicate from a distance but much more interesting up close.
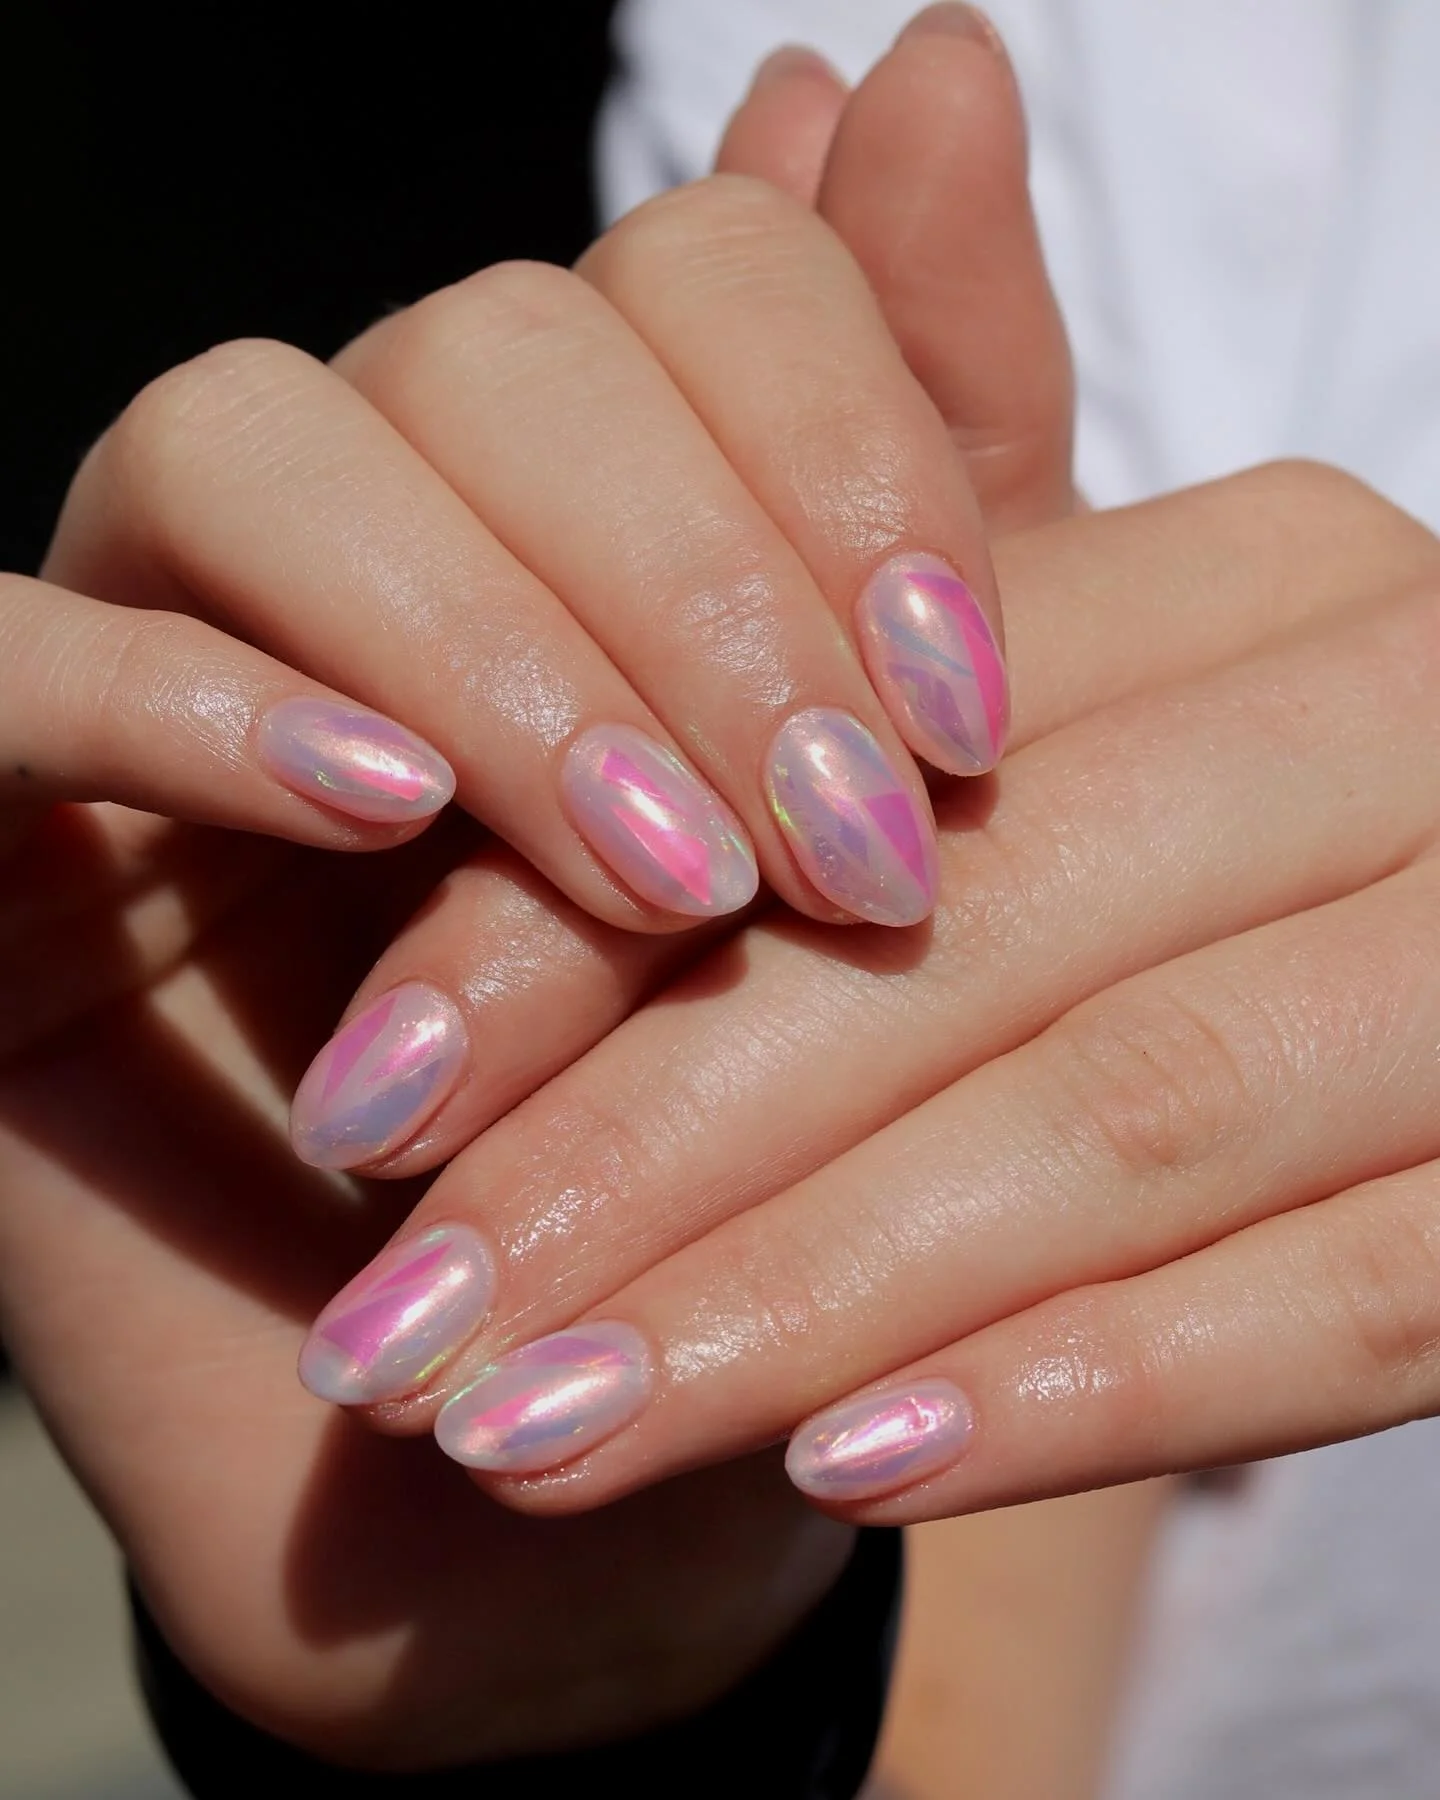
For the base, I would choose a sheer milky or translucent nude gel and layer a fine opal chrome over it. Soft pink or rose-toned reflective pigments can create the rosy flashes, while a clear glossy top coat keeps the surface smooth. If I wanted a slightly stronger effect, I could add a very subtle lavender or blue shift underneath the pearl powder, but I would keep the colors transparent so the nails do not lose their airy quality.
At home, I would first create a neat oval shape and make sure the surface is completely smooth. After applying the sheer base, I would cure it and gently rub the opal pigment across the entire nail, using a very small amount at first. If I wanted more pink dimension, I would add tiny amounts of a rose-reflective pigment rather than painting opaque pink shapes. The final top coat should be applied evenly because a smooth surface is what makes the shifting reflection look so polished.
This is one of those manicures I would choose when I want something subtle but still worth staring at. The irregular reflections give it personality without turning it into busy nail art. It also feels wonderfully versatile for late summer, when I still want that fresh, luminous quality but am starting to crave softer, slightly cooler colors.
Pastel Opal Nails With a Soft Blue-Pink Shift
These rounded almond nails have a beautiful translucent pastel effect that moves between pale blue, pink, and lavender. The finish is glossy enough to create bright vertical highlights, but the underlying color remains soft and misty. I particularly like the contrast between the delicate pastel base and the almost glass-like surface because it keeps the manicure from looking flat. It is romantic without becoming sugary.
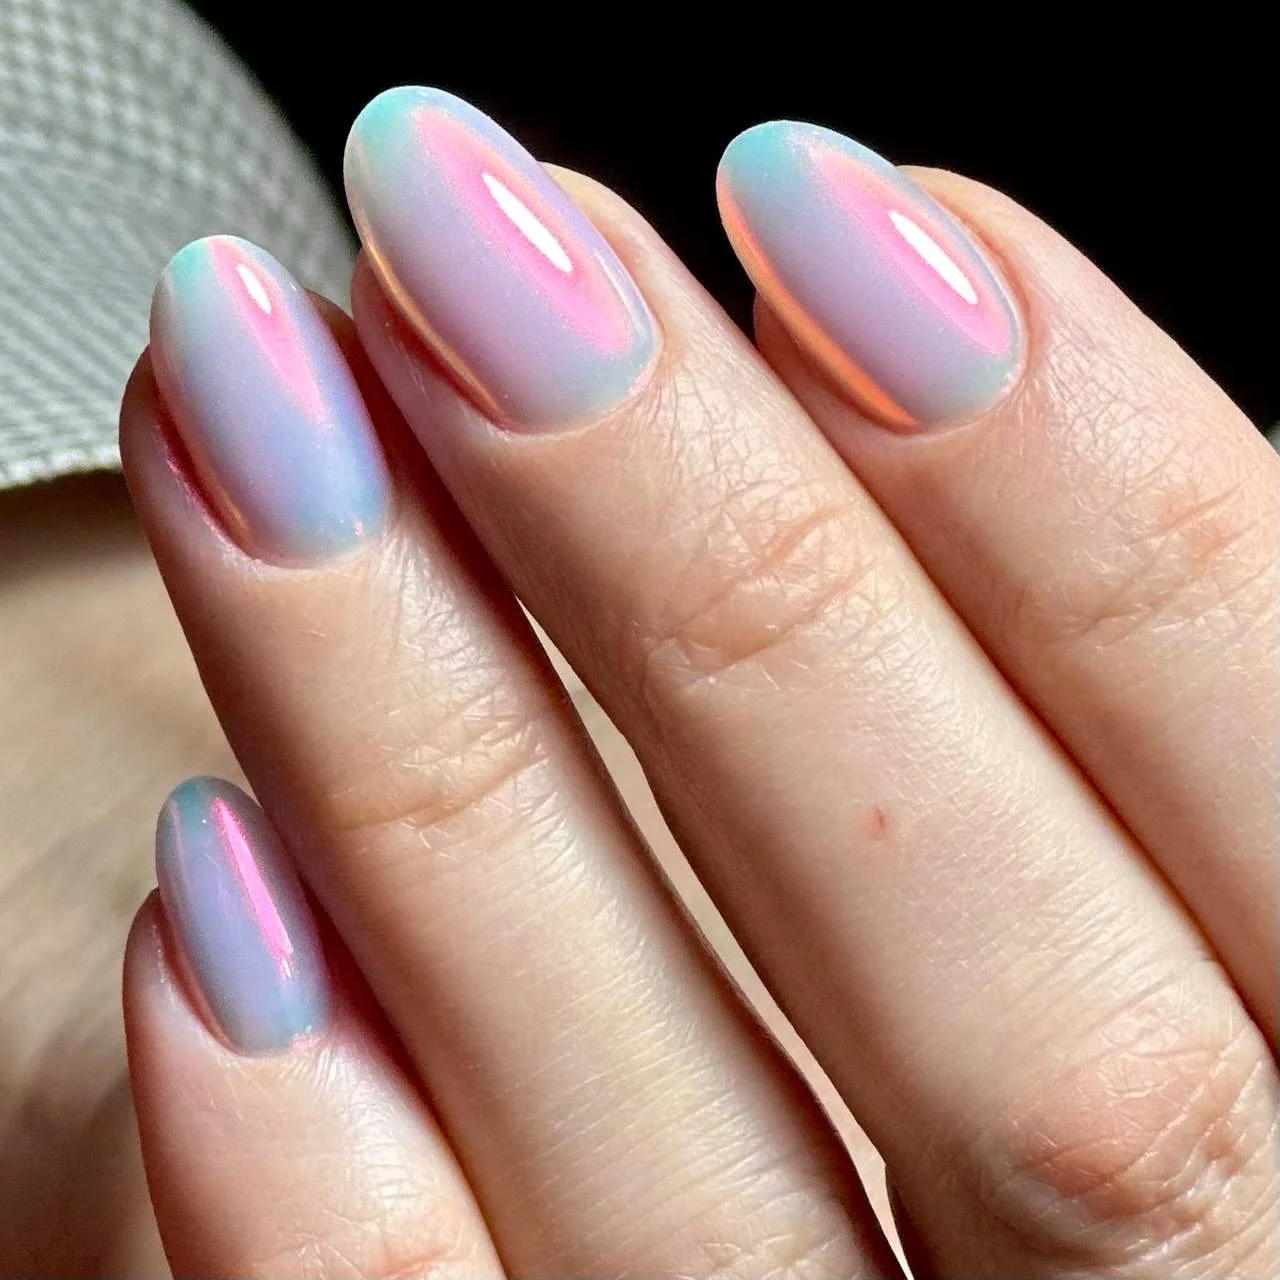
I would use a sheer pastel blue or lavender gel as the foundation, depending on how cool I wanted the final result to feel. A pearl or aurora pigment with pink and blue reflections would create the shifting finish, while a high-gloss gel top coat would give the nails their smooth reflective surface. For a softer version, I would use a sheer nude base first and let the chrome pigment provide most of the color.
The application can be surprisingly simple once the shape is right. I would file the nails into a rounded almond silhouette, apply a thin base layer, and then build the pastel color gradually. After curing, I would buff a fine iridescent pigment over the nails and seal everything carefully with top coat. I would keep the edges neat because reflective finishes can make tiny imperfections more noticeable than a regular cream polish would.
I think this is such a pretty choice when I want pastel nails without committing to a different opaque shade on every finger. The colors melt into one another, so the manicure feels cohesive even though the reflection keeps changing. And honestly, that little flash of pink when the hand catches the light is the whole point.
Lavender Pearl Nails With a Polished Metallic Veil
A deeper lavender base changes the personality of pearl chrome completely. Here, the nails have a medium square shape with gently softened corners, and the purple tone remains visible beneath a luminous reflective layer. Gold, pink, and blue highlights move through the lavender, creating an almost metallic veil while keeping the color soft. It feels more defined than a milky pearl manicure but still has that elegant translucent quality.
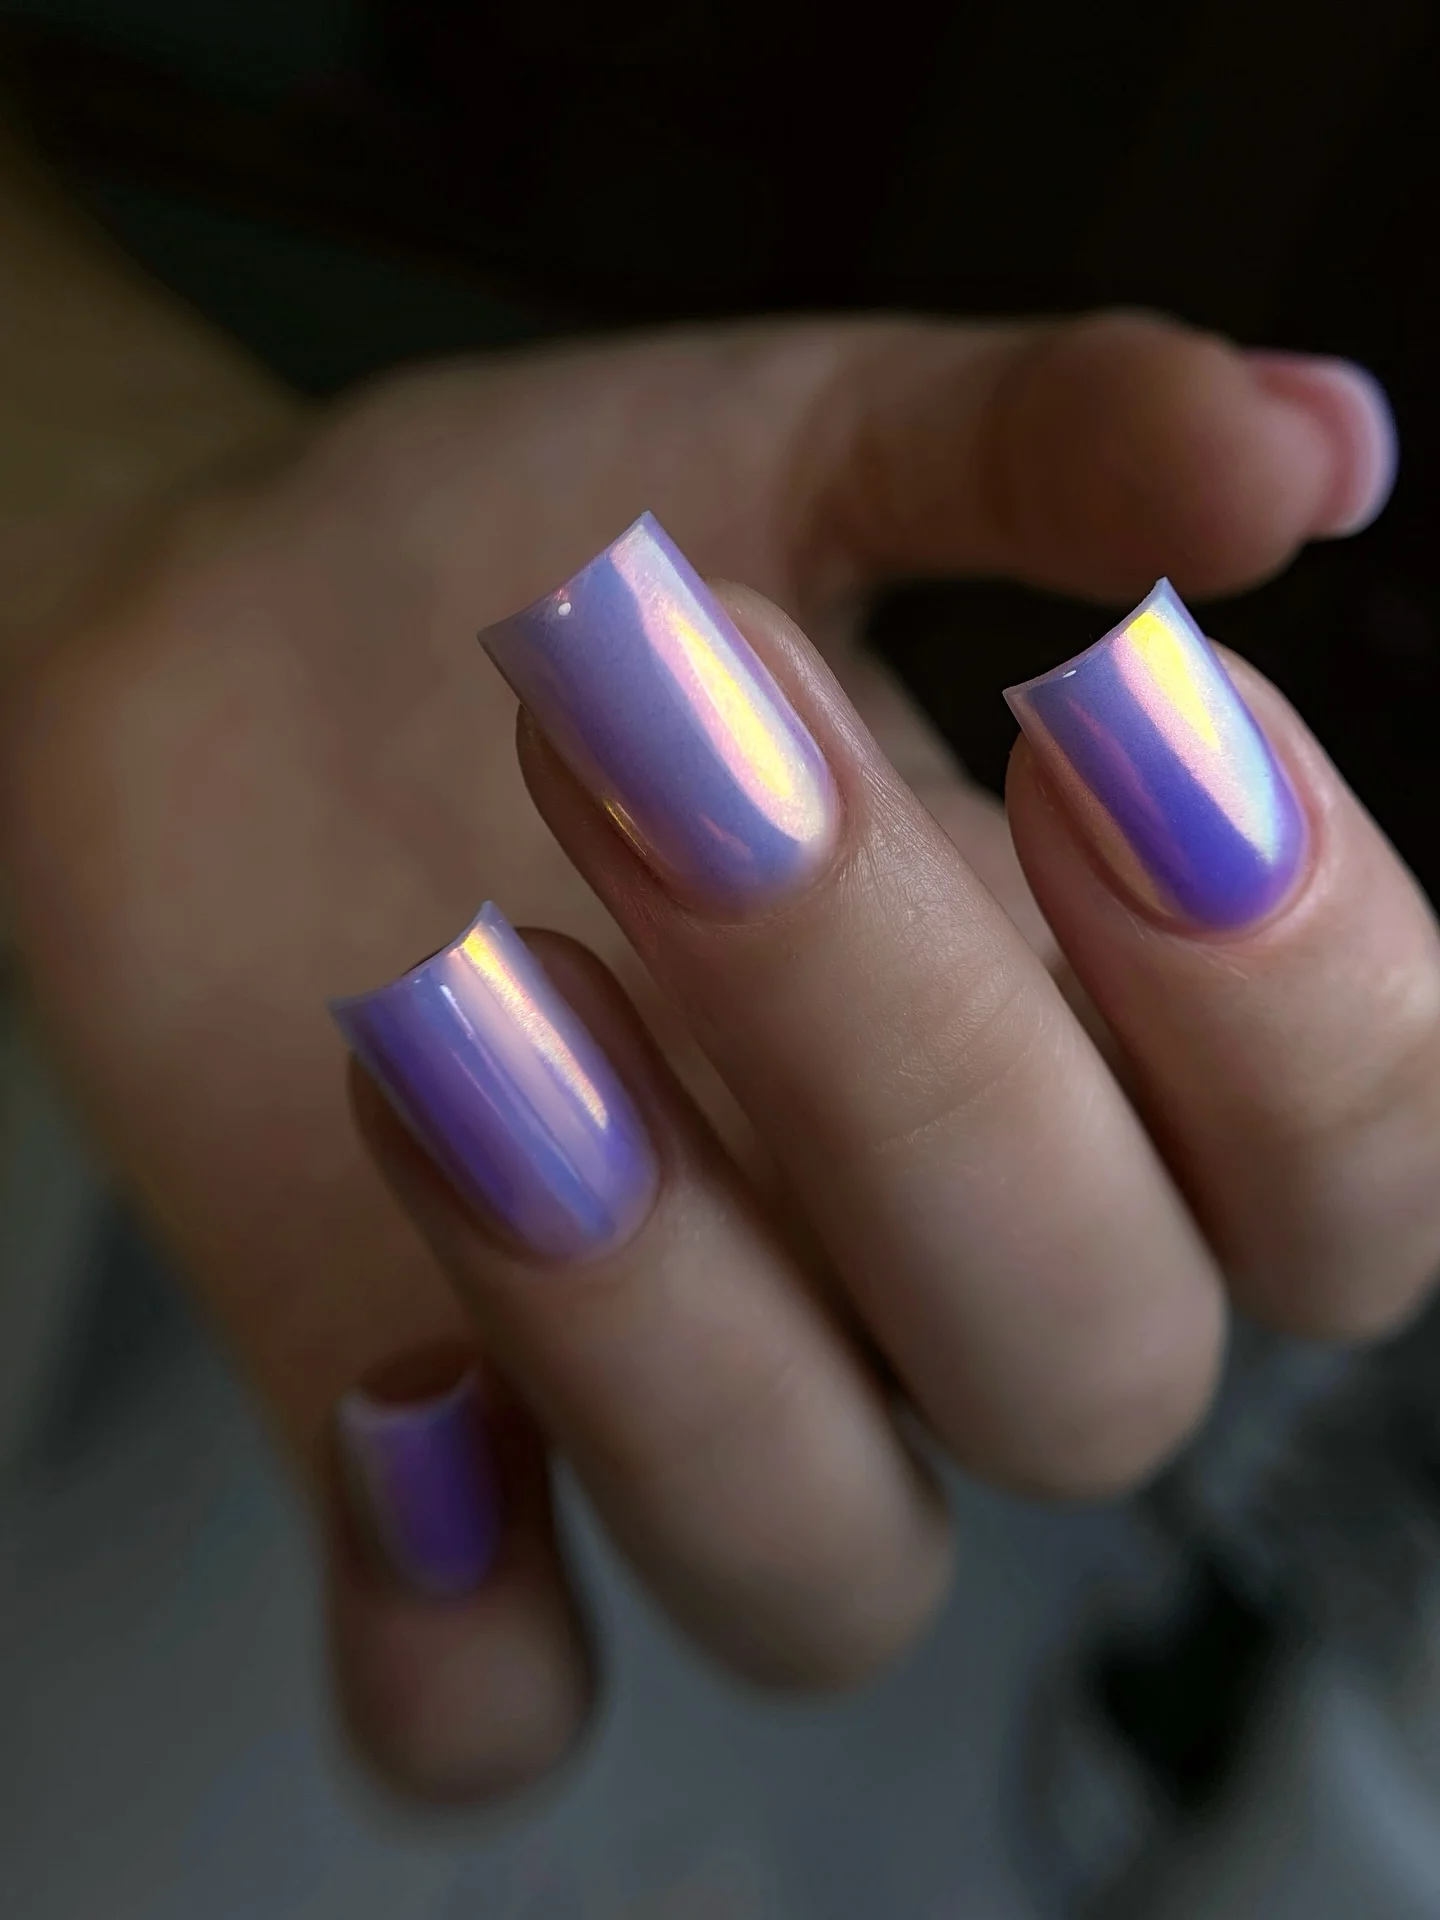
I would start with a soft lavender gel polish that is neither too blue nor too violet. Over that, I would use a pearl chrome pigment with an aurora shift, ideally one that reflects warm gold alongside cooler pink and blue tones. A glossy non-wipe top coat would be my final layer. If the lavender is already quite pigmented, I would use only a small amount of chrome so the base color remains the star.
For the shape, I would file the free edge straight and soften the corners rather than creating a sharply squared tip. I would apply the lavender in thin coats, curing between layers, and then rub the chrome pigment gently over the surface. I would check the nails from different angles before sealing them because reflective finishes can reveal uneven application that is easy to miss under direct light.
This version feels a little more fashion-forward to me. It would be beautiful with silver jewelry, a black outfit, or even a simple gray sweater when the weather starts cooling down. The lavender gives me color, while the pearl finish keeps everything sophisticated. That balance is what makes it so wearable.
Long Iridescent Almond Nails With a Multicolor Pearl Glow
For the final look in this set, the pearl effect becomes more ethereal and elongated. The long almond nails carry a translucent base that shifts through soft pink, blue, green, and creamy white, creating a delicate rainbow-like reflection without looking overly colorful. Each nail has its own subtle variation, but the overall manicure stays beautifully coordinated. The pointed almond shape also gives the sheer finish a graceful, almost floating quality.
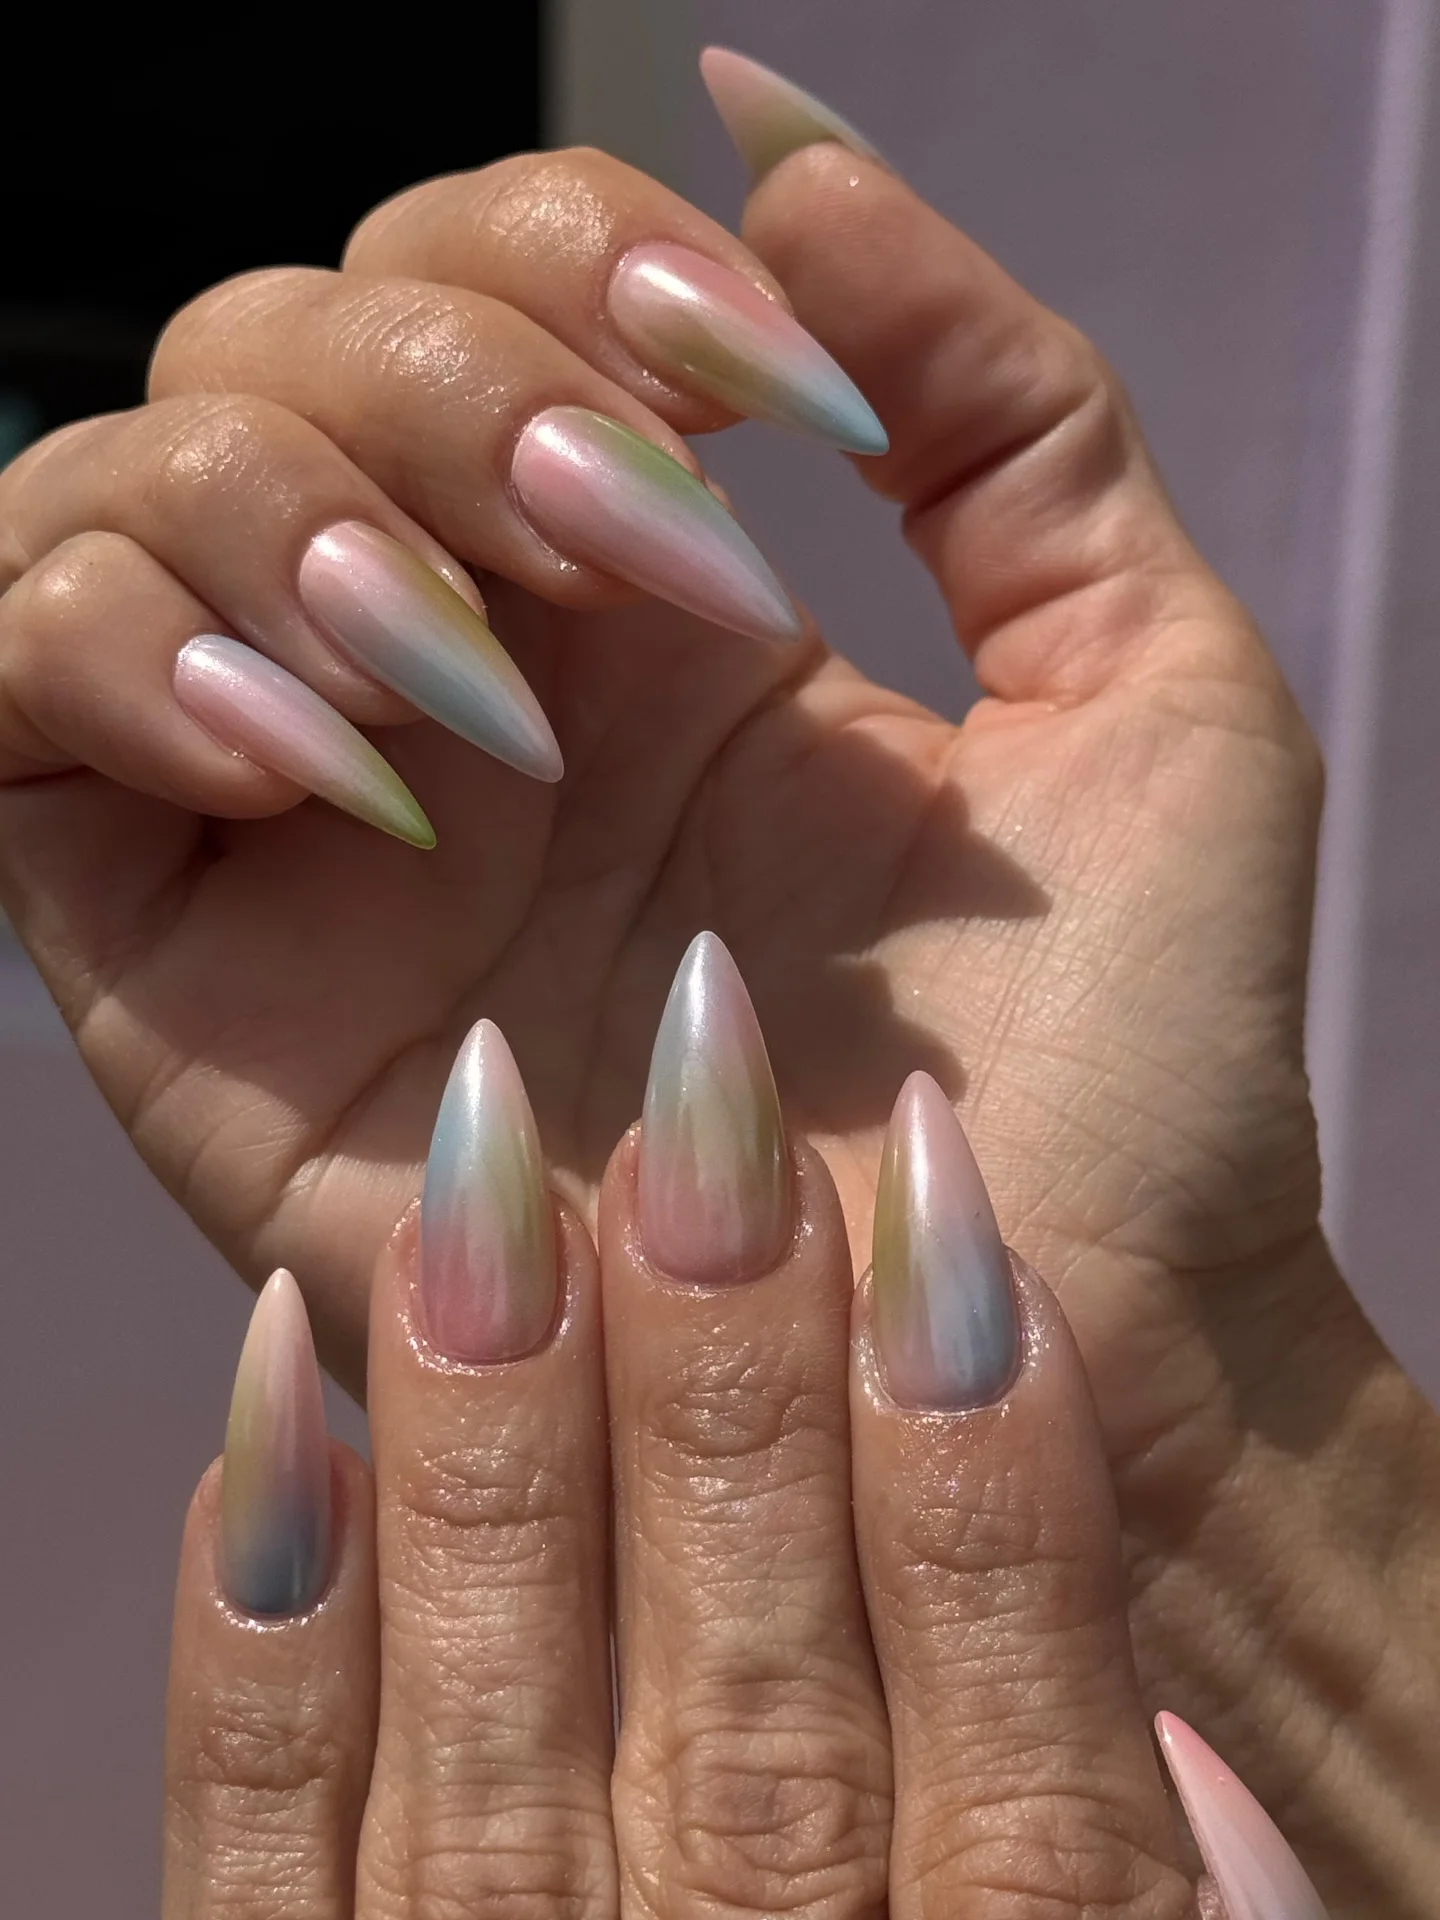
I would use a sheer pink-nude base as the starting point, followed by an opalescent pearl pigment capable of reflecting several pastel tones. A translucent white gel can also be layered underneath if I want the colors to appear slightly more luminous. I would finish with a thick, high-shine top coat that levels beautifully and leaves the surface looking smooth rather than textured.
I would shape the nails carefully into long almonds, making sure the tips are symmetrical before applying any color. After the base and sheer color are cured, I would apply the iridescent powder sparingly and build the effect until the pink, blue, and green reflections become visible. I would keep the pigment concentrated enough to catch the light but avoid making the surface look metallic. The last glossy layer is essential because it gives the entire manicure that wet, polished appearance.
I would save this version for when I want my manicure to be the accessory. It has enough color and shine to stand out, yet the translucent finish keeps it surprisingly elegant. There is something almost magical about pearl nails like these: they do not simply sit on the fingertips as one color, they seem to change with every movement.
Soft Pearl Glow With a Neon Iridescent Twist
I love how this manicure takes the classic pearl effect somewhere much more playful. The short, softly rounded nails have a translucent pink-lilac base with a glossy pearlescent veil, while sweeping flashes of neon green create an unexpected shift across the surface. The green appears almost liquid as the light moves, and tiny reflective accents add another layer without making the manicure feel overloaded. It is a clever balance between delicate and futuristic, especially for anyone who wants pearl nails with a little personality.
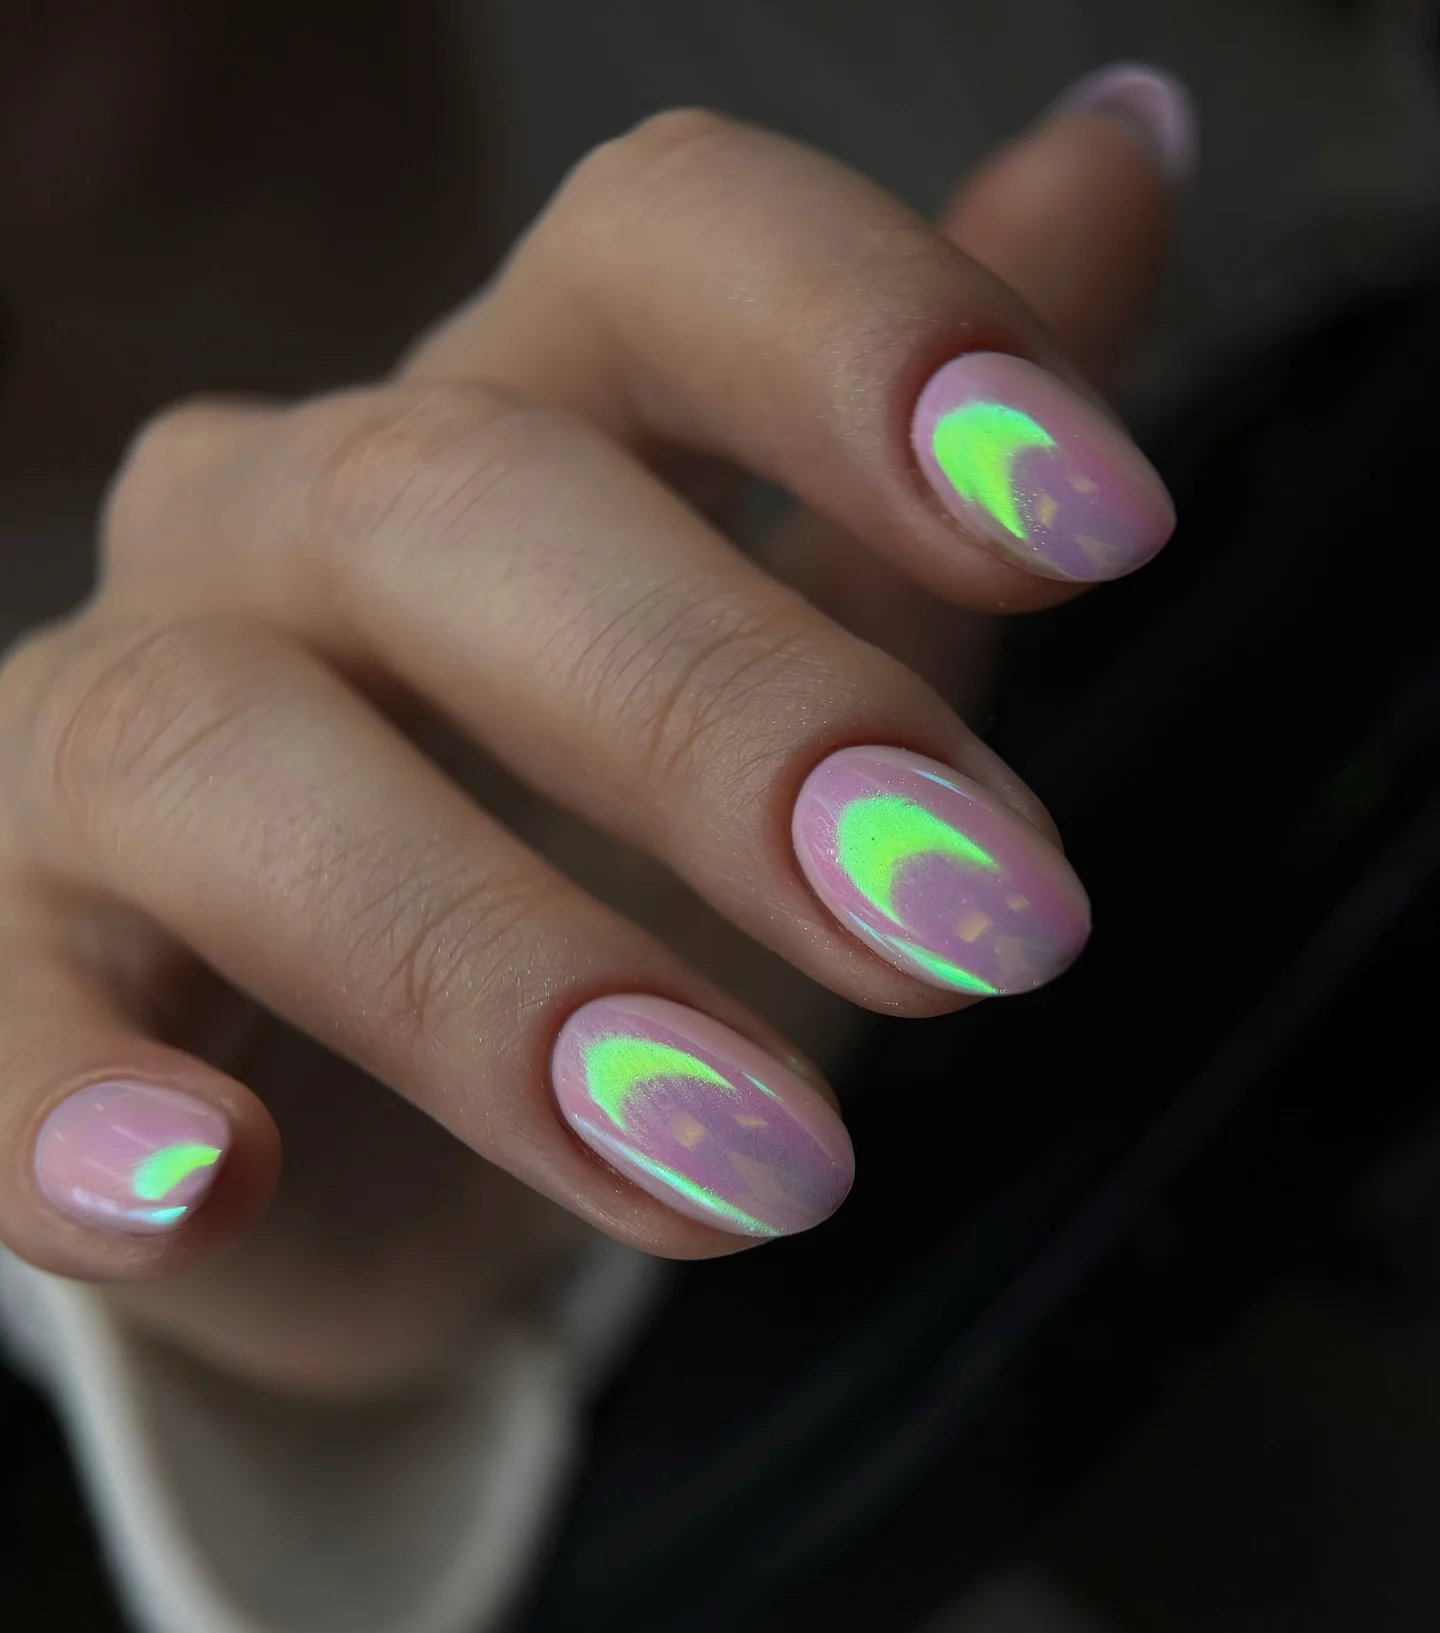
To recreate this finish, I would start with a sheer milky pink or pale lavender gel base and add a fine iridescent chrome powder that reflects green, lilac, and soft silver. A small amount of neon green gel can create the curved accents, while tiny pieces of iridescent foil or reflective flakes give the surface those scattered flashes. I would finish everything with a high-shine no-wipe top coat because the smooth surface is what makes the shifting colors look so polished.
At home, I would shape the nails into a short rounded oval and keep the base fairly sheer rather than covering the natural-looking tone completely. After curing the base, I would apply the pearl chrome lightly, concentrating on an even veil instead of heavy coverage. Then I would add the green curved details with a fine liner brush, cure them carefully, and seal the whole manicure with glossy top coat. The trick is restraint: the green should look like a flash of reflected light rather than a solid block of color.
This is the kind of manicure I notice every time I move my hands. I like that it can look almost innocent under soft indoor lighting and suddenly turn electric in direct sunlight. For late summer, it has that fun evening quality I want from my nails without giving up the elegance of a pearl finish.
Dreamy Lavender Pearl With a Glassy Sheen
When I want pearl nails to feel soft and romantic, this lavender version is exactly where I would look. The almond-shaped nails are coated in a delicate translucent lavender-pink base, and the iridescent layer shifts toward icy blue, pearly white, and subtle pink as the light changes. The color is diffused rather than sharply metallic, which keeps the manicure airy and sophisticated. There is something almost weightless about this finish.
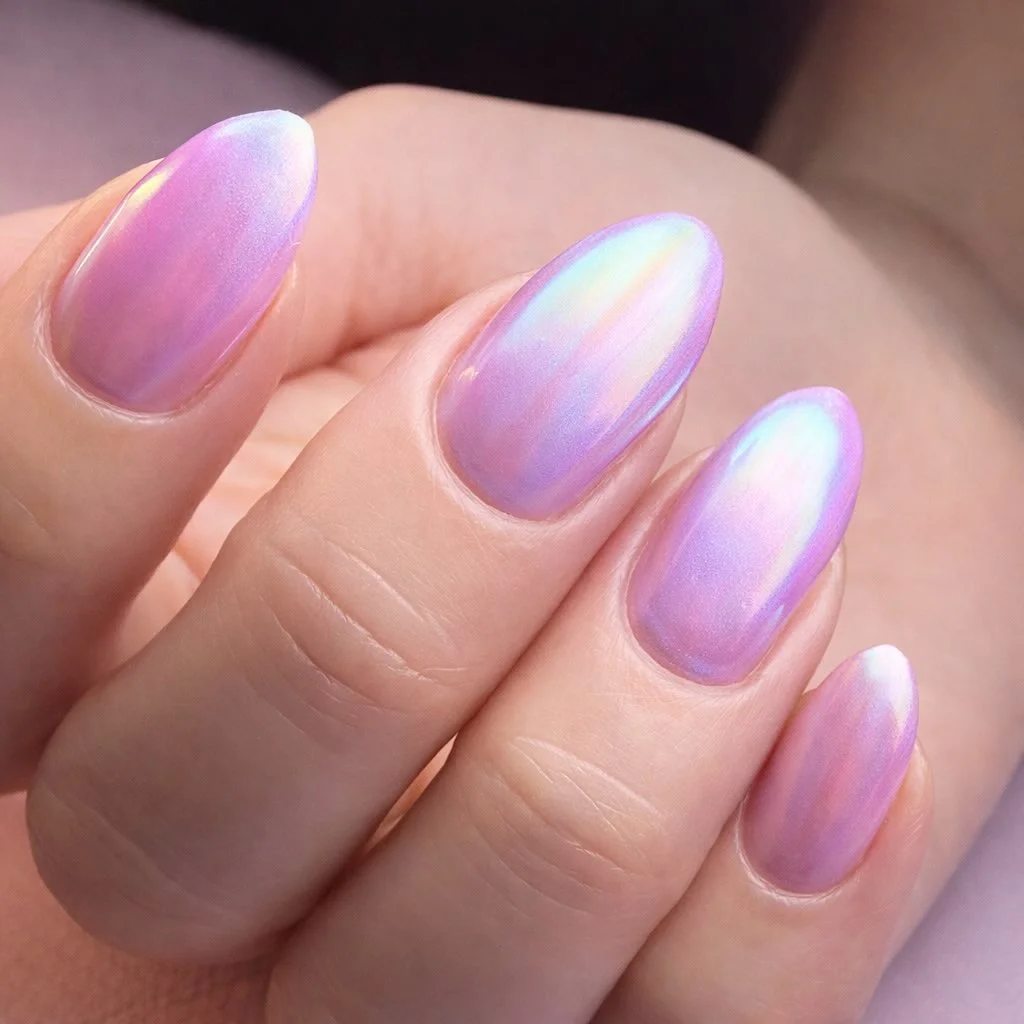
I would use a sheer lavender gel polish, a pale pink jelly shade, and a very fine pearl chrome pigment to achieve this effect. The chrome should be delicate enough to let the underlying color remain visible. A glossy top coat is essential here because the entire appeal comes from the smooth, reflective surface rather than obvious glitter.
For my own version, I would begin with a carefully prepared almond shape and apply one or two thin layers of translucent lavender. Once cured, I would rub a small amount of pearl powder over the surface until the nails develop that soft dimensional glow. I would avoid adding glitter or heavy decoration because it could interrupt the subtle color transition. One final glossy layer brings everything together.
I especially like this look when I want my manicure to feel polished but not overly planned. It works beautifully with pale denim, soft knits, simple jewelry, and those in-between-season outfits that do not need much accessorizing. If you usually choose nude nails, lavender pearl is an easy little detour.
Ocean Blue Pearl With a Golden Light Shift
Here the pearl effect becomes much more expressive. I see a deep translucent blue base with a fine metallic sheen that moves between blue, teal, and warm yellow as the light hits the curved surface of the nails. The short rounded shape keeps the stronger color controlled, while the elongated reflective streaks make the manicure feel almost three-dimensional. It has a distinctly aquatic mood without relying on literal seashell or wave motifs.
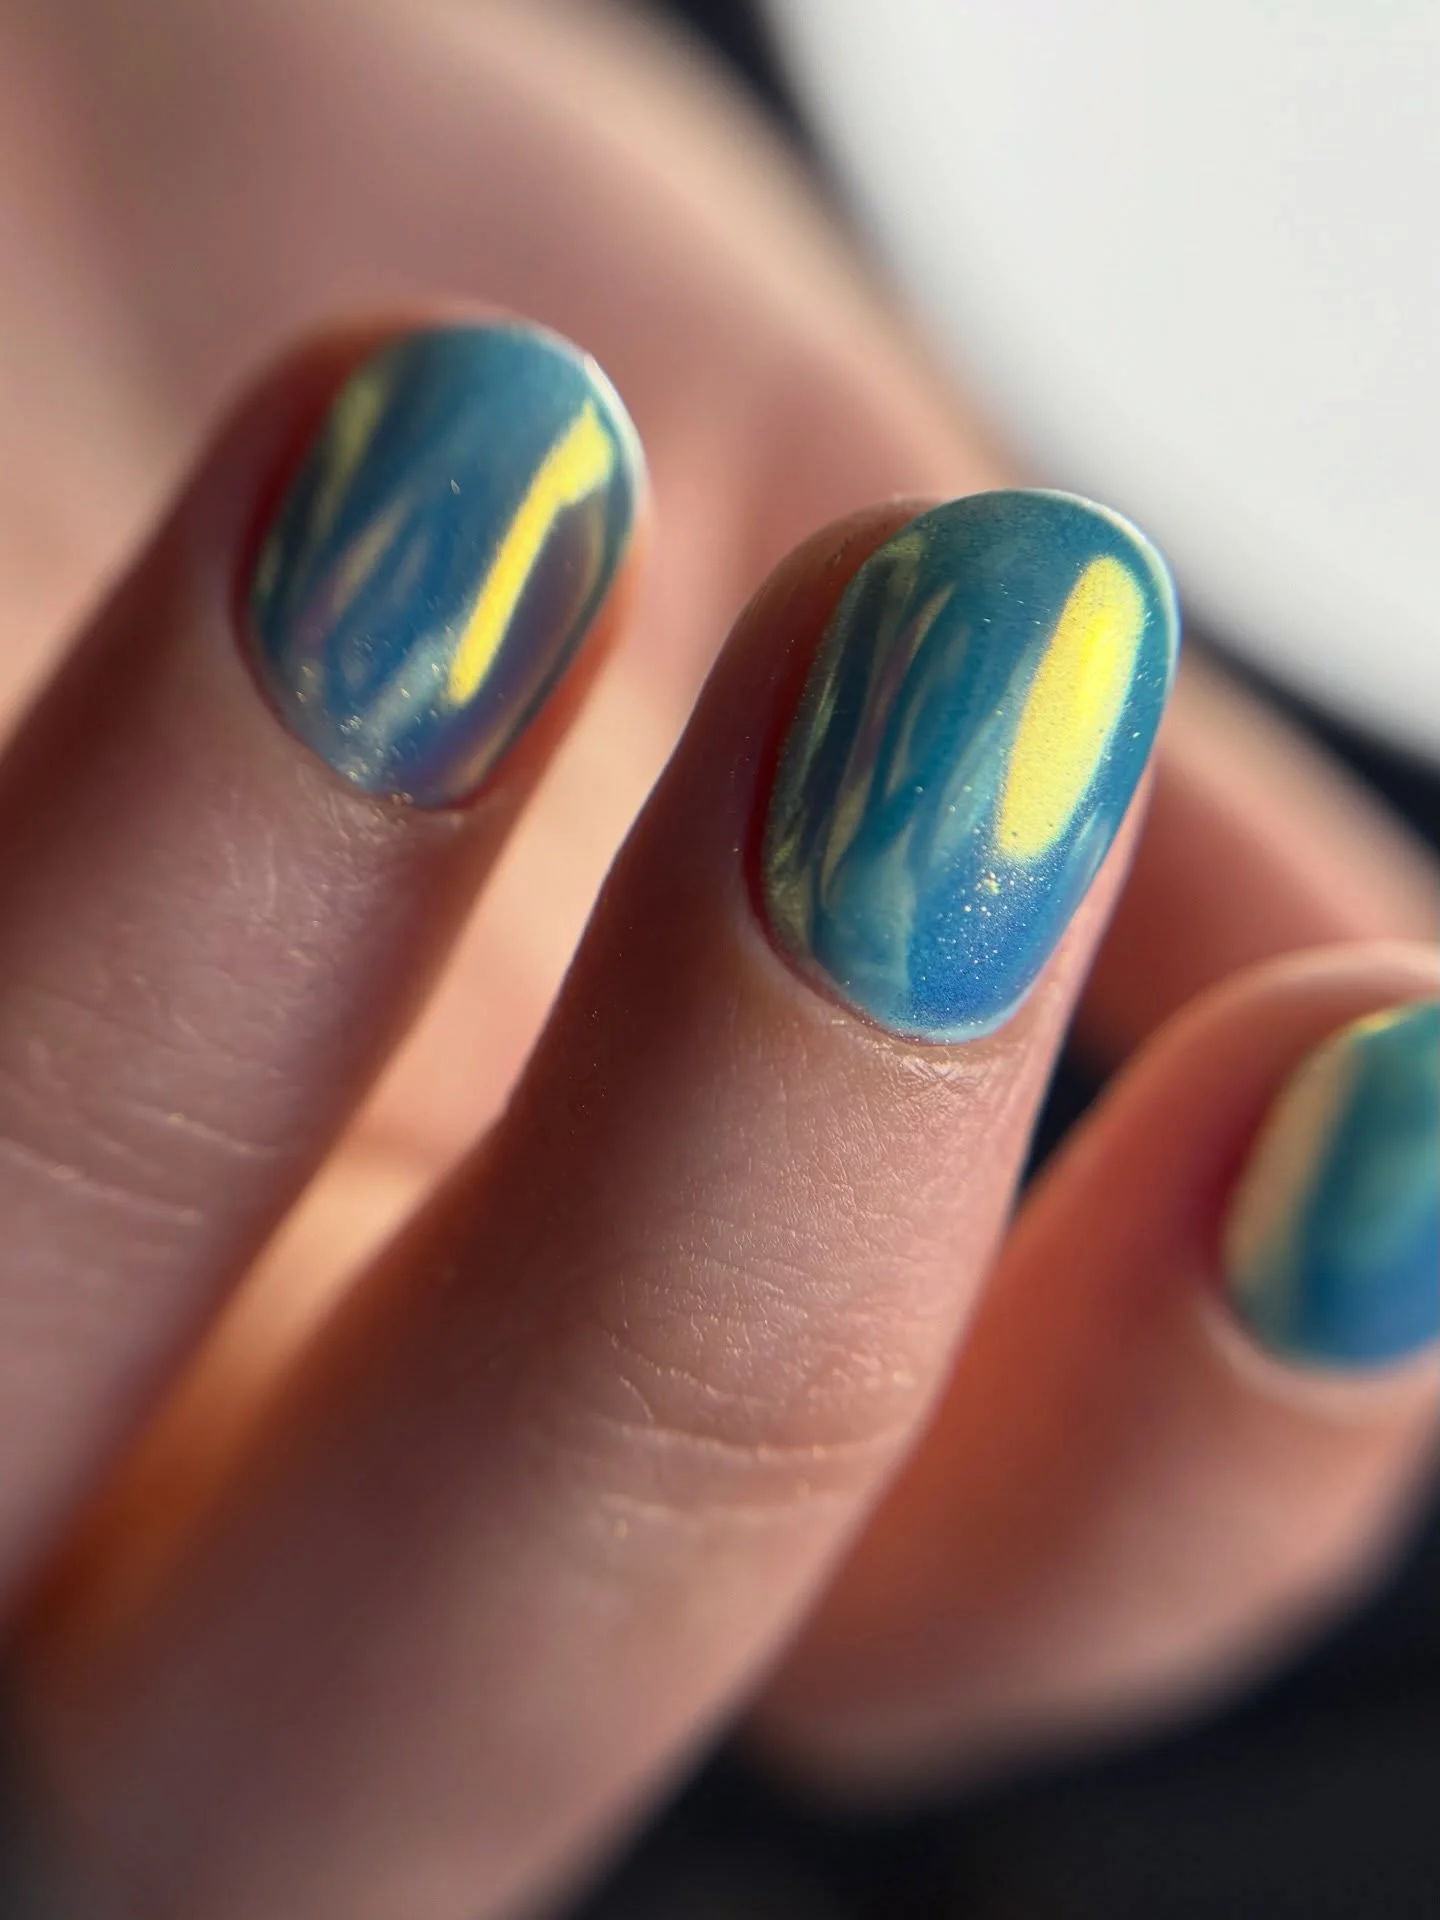
For this version, I would reach for a rich blue gel polish, a blue-green magnetic or pearlescent pigment, and a chrome powder with a warm gold shift. The combination matters because a simple blue polish would not create the same dimensional effect. I would keep the top coat extremely glossy so every reflective area remains crisp and smooth.
I would apply the blue base in thin, even layers and cure between coats. Once the color is opaque enough, I would add the shifting pigment and gently manipulate it across the nail so the reflective areas remain slightly irregular. I like that approach because perfectly identical streaks can make a reflective manicure look too mechanical. After curing, I would finish with a smooth layer of top coat.
For me, this is one of those pearl manicures that feels especially good when summer is winding down. The blue has enough depth for evening plans, but the reflective gold keeps it connected to warm-weather light. I would wear it with a simple white shirt or denim and let the nails do all the talking.
Pink Pearl Chrome With a Playful Golden Flash
Pink and gold can sometimes feel predictable, but this manicure gives the pairing a fresher attitude. The nails have a glossy pink-lilac foundation with strong yellow-gold reflections running through the surface. The elongated oval shape gives those flashes plenty of room to move, while the translucent pink keeps the overall effect feminine and light. Every angle seems to reveal a slightly different version of the color.
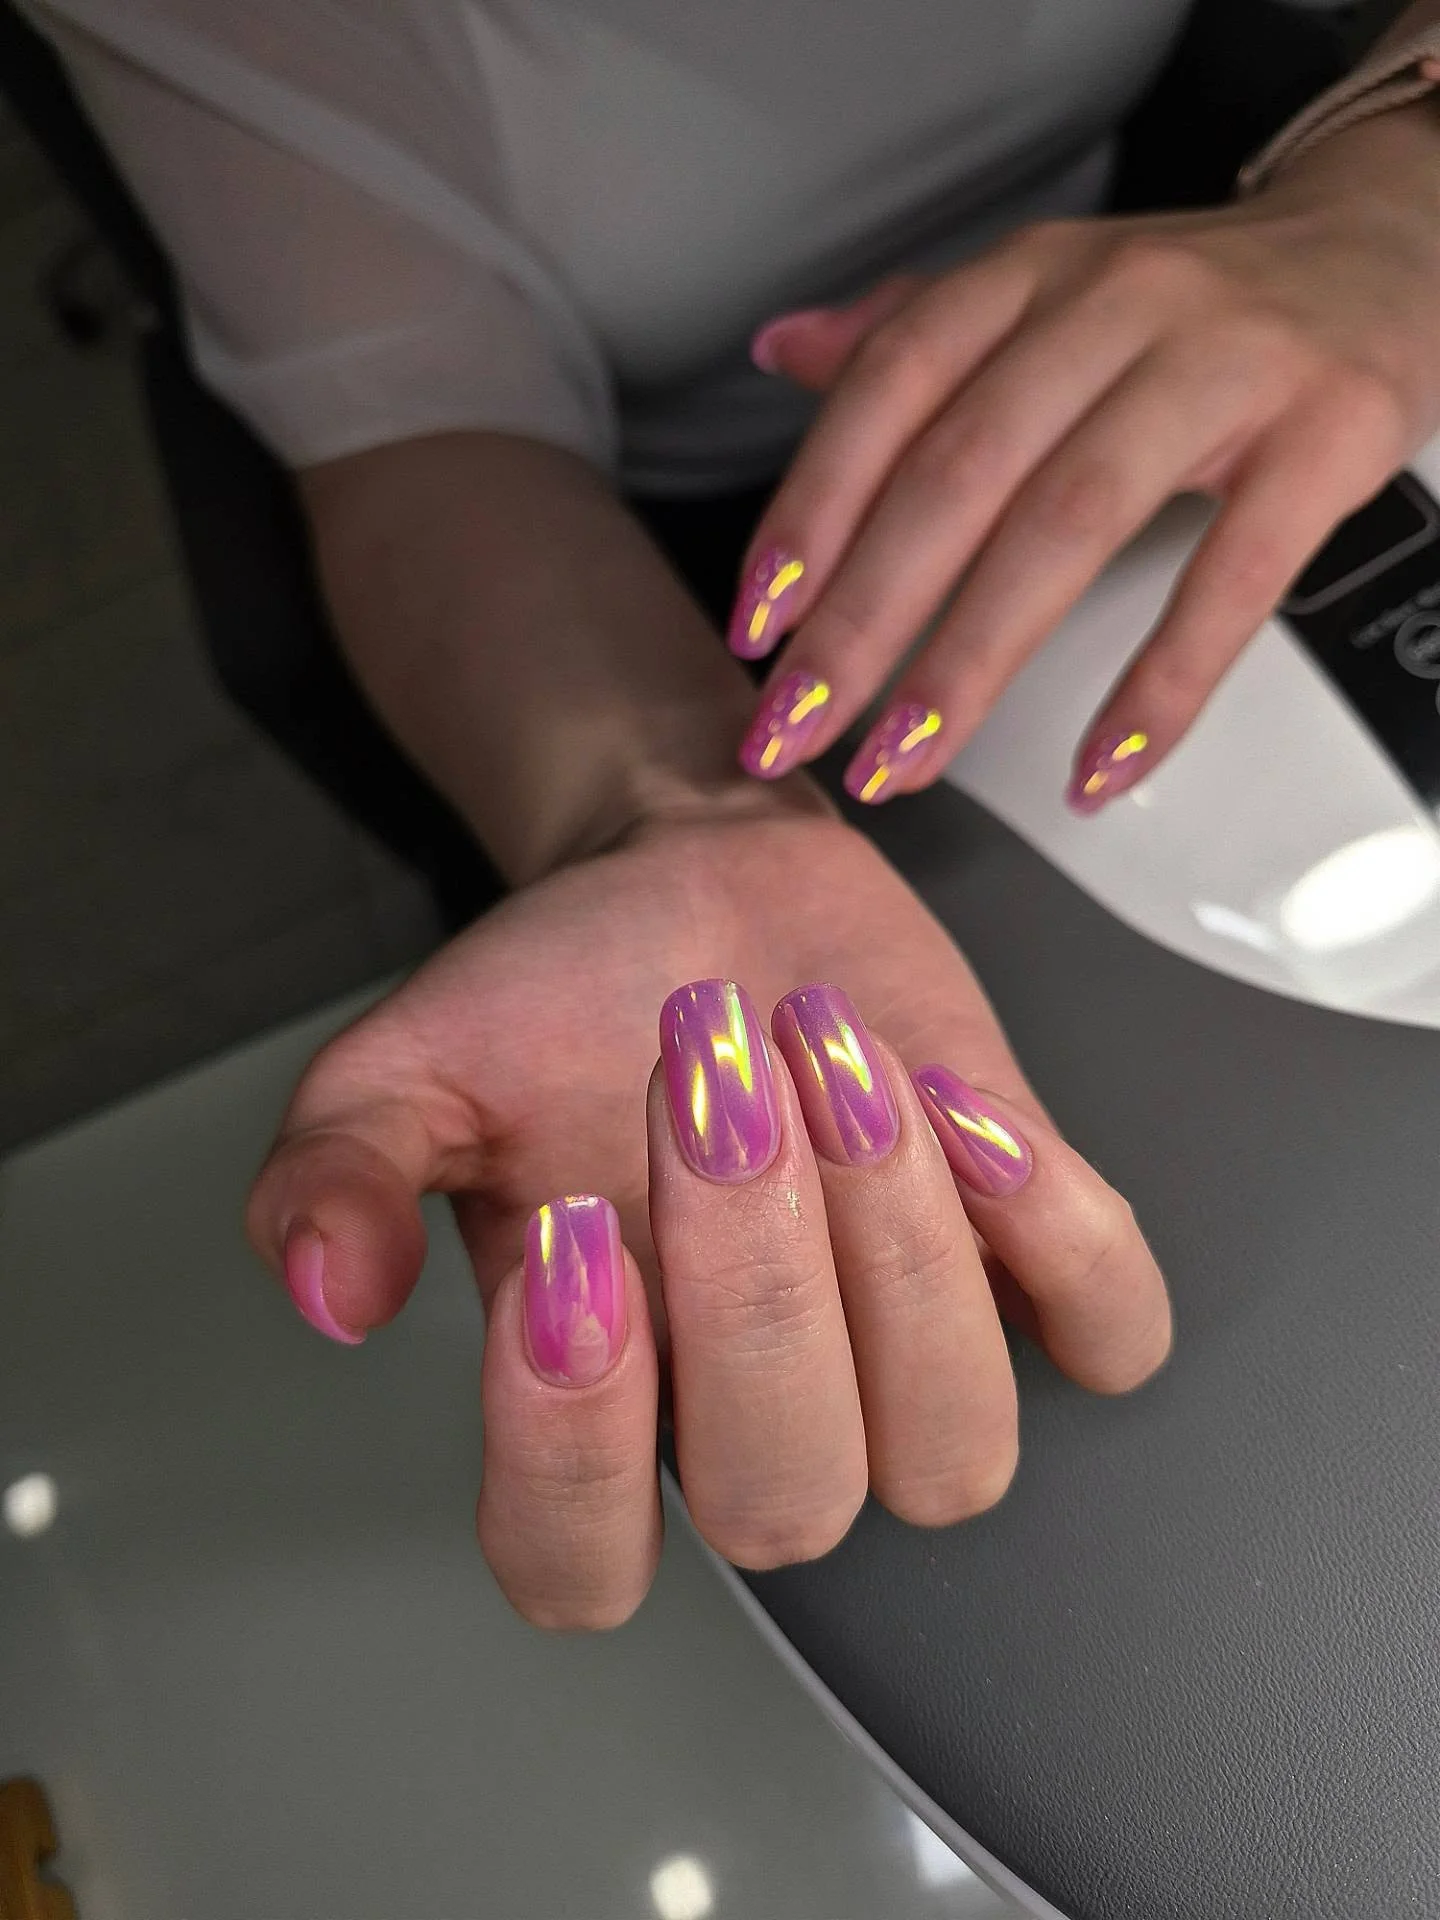
I would build this look with a sheer pink or berry-tinted base, a pink-violet chrome pigment, and a gold-shifting iridescent powder. A high-gloss top coat is the final piece because the reflective finish needs a completely smooth surface. I would keep the materials minimal rather than layering several decorative elements on top of one another.
At home, I would first create a clean oval shape and apply a translucent pink base. After curing, I would work the iridescent pigment into the surface with a soft applicator, paying attention to the center and upper curve of each nail. If I wanted more pronounced gold movement, I would add a very fine layer of golden chrome selectively rather than covering everything. The result should remain translucent, glossy, and fluid.
I love this type of manicure for a night out because it photographs beautifully without needing rhinestones or elaborate nail art. It also has that satisfying quality where the nails look pink from one angle and almost golden from another. Why settle for one color when the light can give you several?
Sheer Blush Pearl With Multicolor Reflections
This manicure is a quieter take on the iridescent trend, and honestly, I find that incredibly wearable. The nails are short and softly rounded, covered with a sheer blush-pink base that allows the natural nail tone to remain part of the design. Subtle reflections of yellow, pink, lavender, and green appear along the curved surface, creating a delicate pearl effect rather than a strong chrome statement. It feels clean, feminine, and beautifully understated.
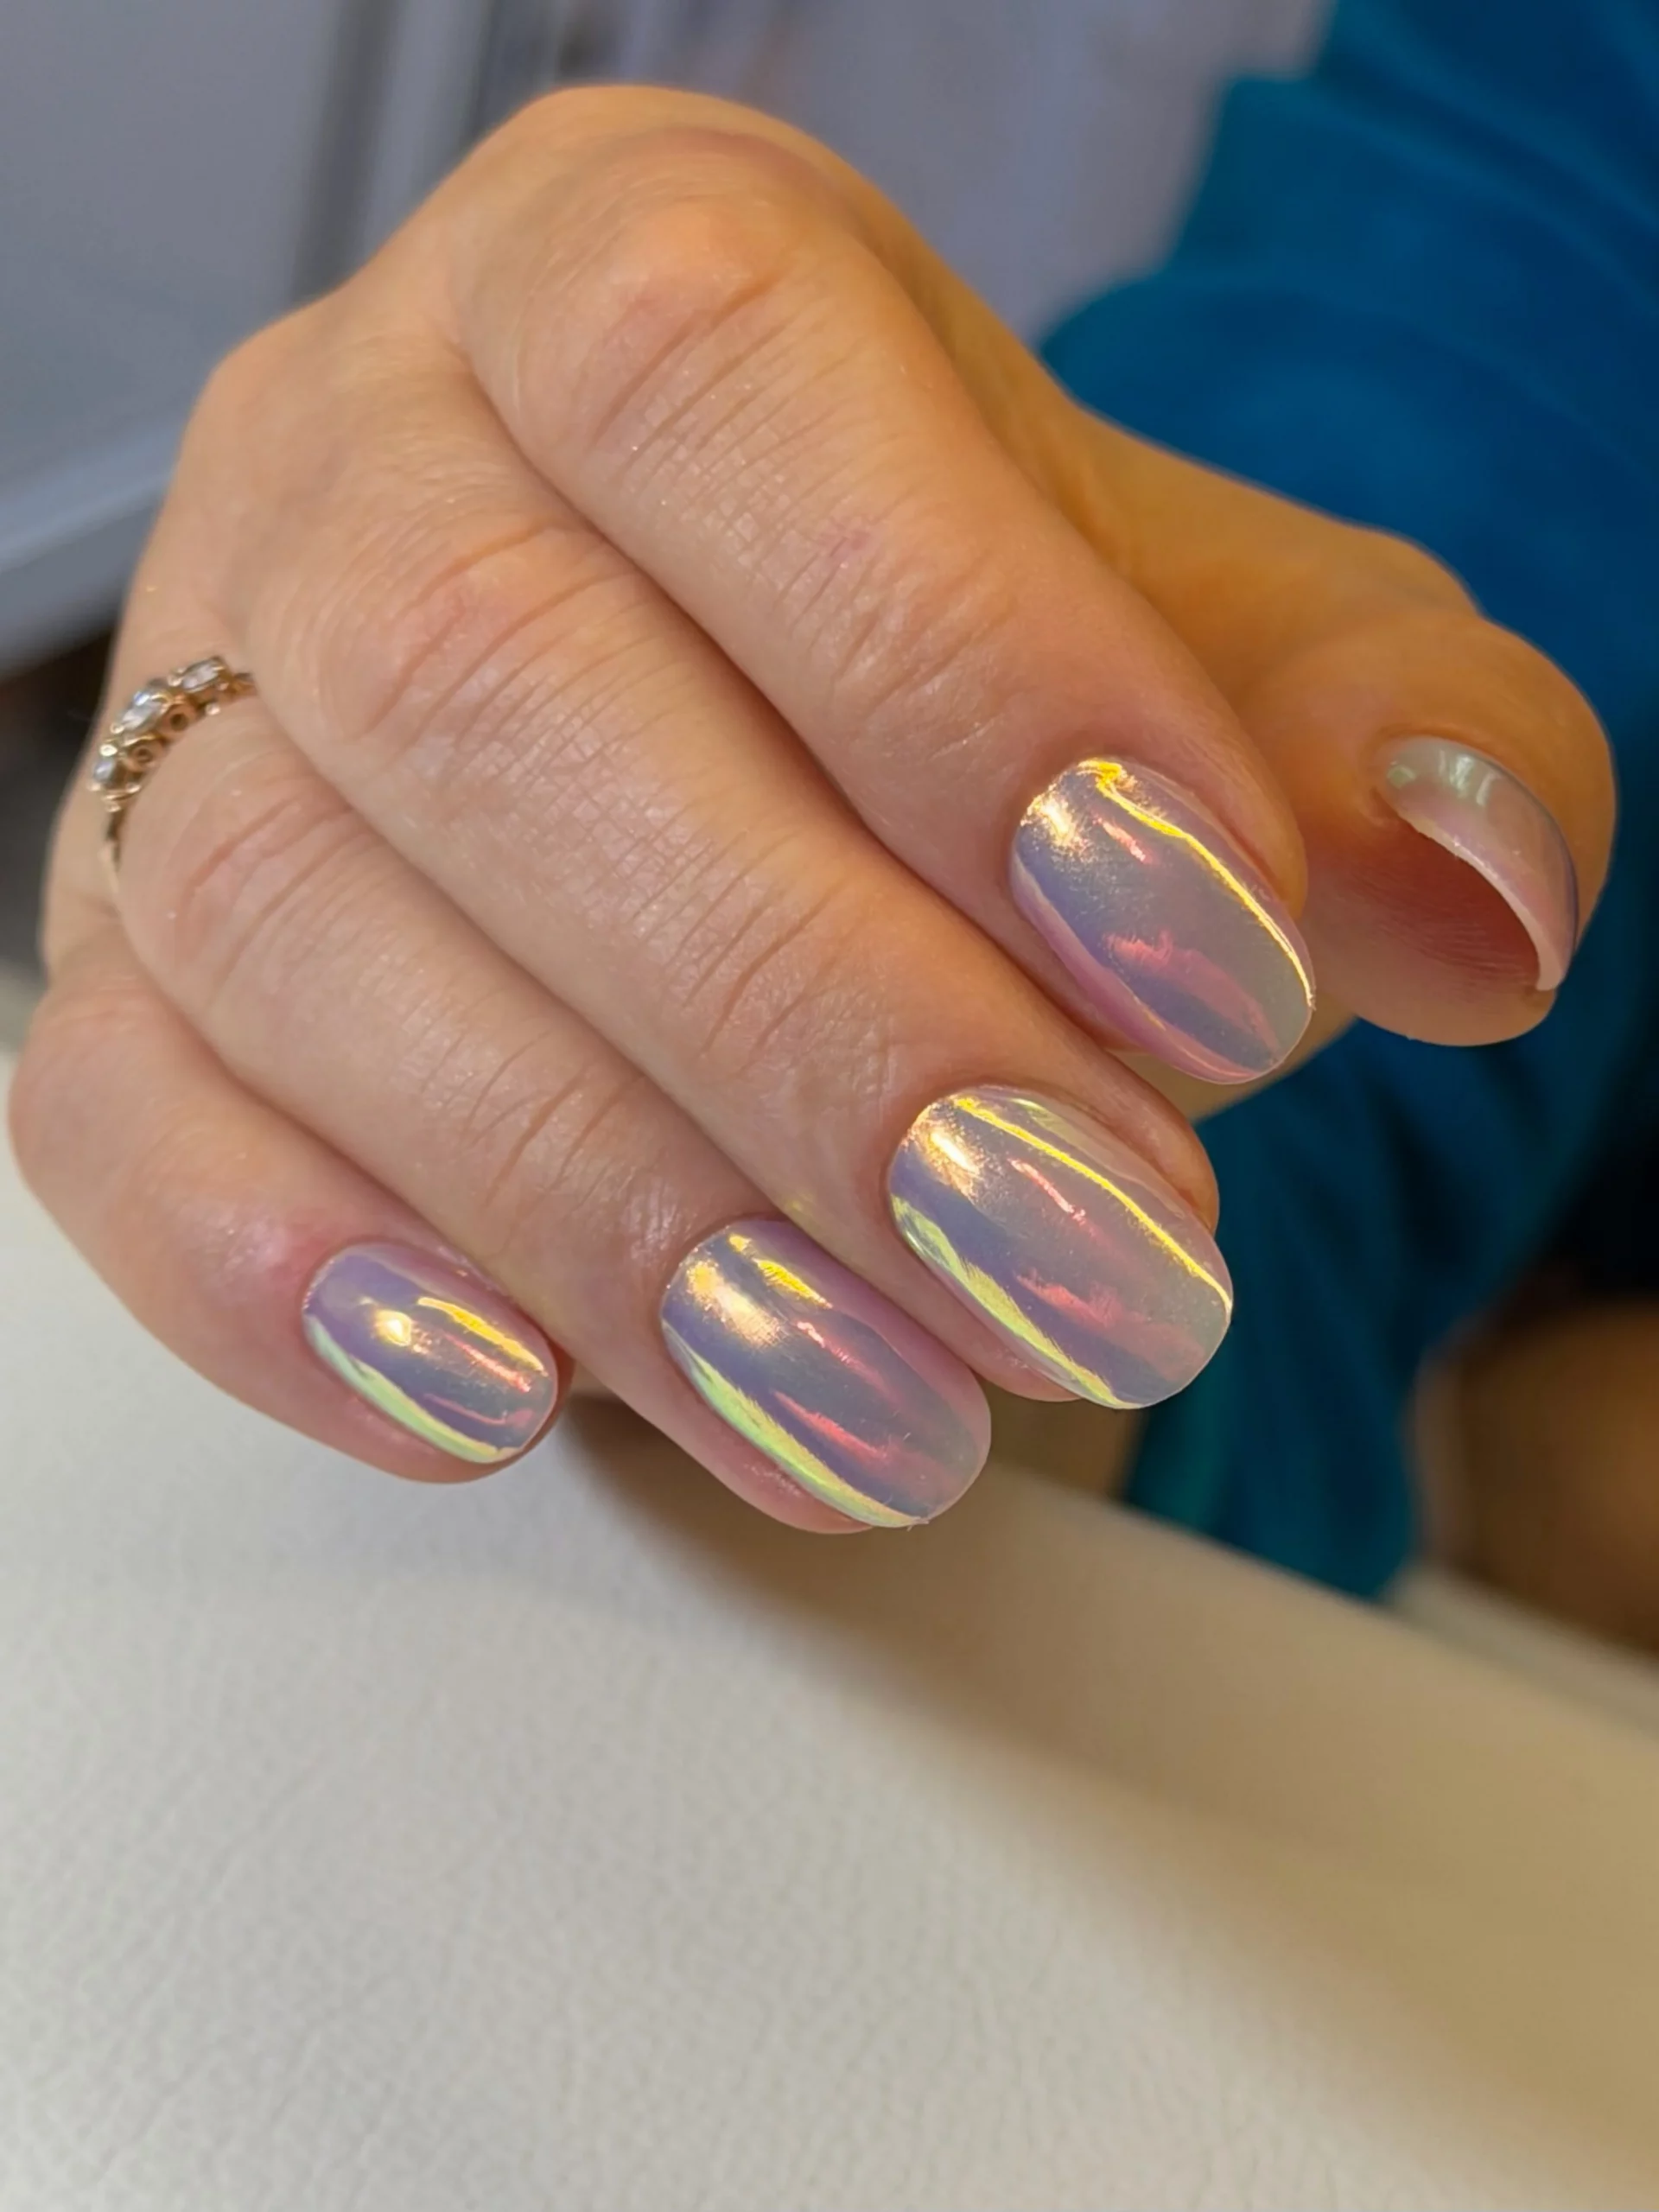
I would use a translucent blush gel polish, followed by a very fine multichrome or pearl pigment. The pigment should have a soft color shift instead of chunky shimmer, since the goal is a smooth glazed appearance. A clear glossy top coat would preserve the delicate transparency and make the reflections look more pronounced.
I would keep the application simple. After preparing and shaping the nails, I would apply a thin blush base and cure it fully before adding the pearl pigment. I would buff the pigment gently until the color shift looks even, then seal it with top coat. Short nails are especially easy to wear with this technique because the translucent finish keeps the manicure looking neat as it grows out.
This is probably the version I would choose for everyday wear. It works with almost everything in my closet and still gives me that little moment of color whenever my hands catch the light. Sometimes the most interesting manicure is the one that does not announce itself immediately.
Cool Silver Pearl With Pink and Gold Reflections
Cool pearl tones become surprisingly sophisticated when they are paired with warm reflections. These short, rounded nails have a soft gray-lilac base that shifts into silvery white, pale pink, and flashes of yellow-gold. The finish is glossy rather than glittery, so the manicure looks sleek and smooth from a distance and much more dimensional up close. The contrast between the cool foundation and warm reflections is what makes it memorable.
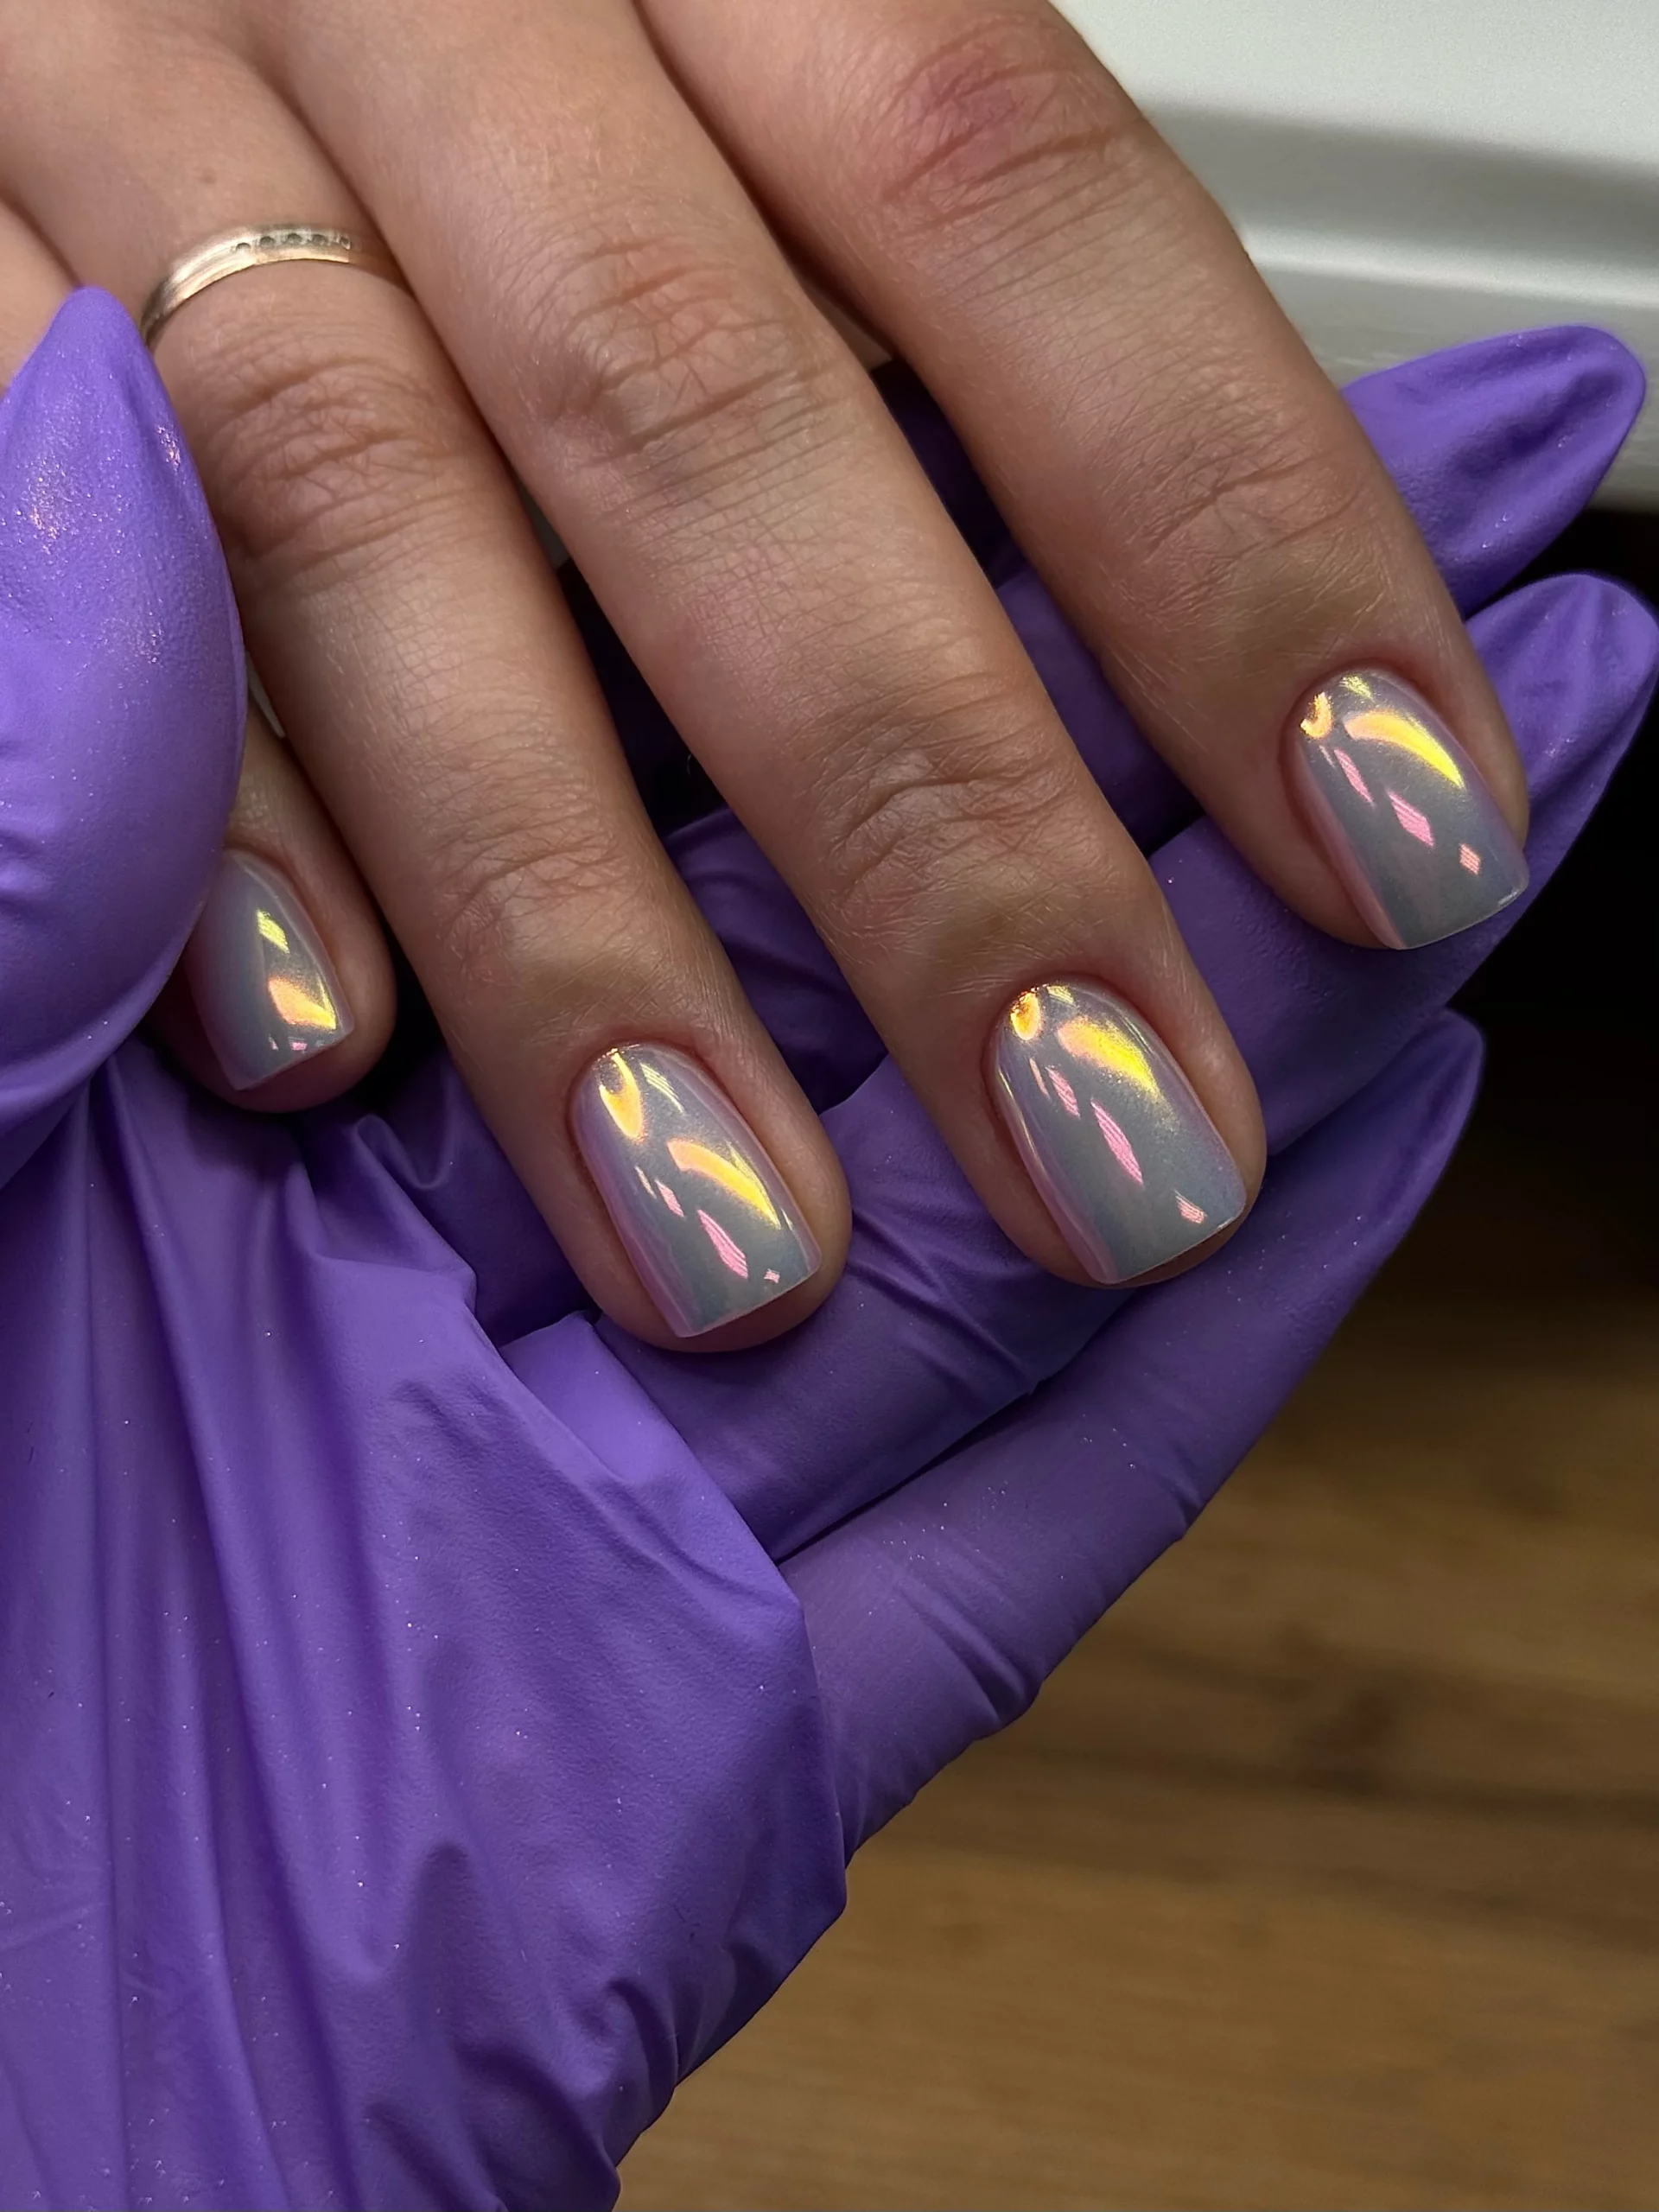
For this design, I would choose a sheer gray-lilac gel, a silver pearl chrome, and a multichrome pigment that reflects pink and gold. I would avoid a dense metallic silver because it could make the manicure look more like traditional chrome. The goal is a translucent pearl surface with changing color underneath the shine.
I would apply the gray-lilac base thinly and cure it before rubbing in the pearl pigment. If the first layer looks too subtle, I would build the effect gradually rather than applying a thick coat all at once. A final no-wipe glossy top coat would smooth everything out and intensify the reflective finish. I always prefer building chrome effects in thin layers because it gives me more control over the final depth.
This is such an easy manicure to dress up. I can see it working with silver jewelry, black evening pieces, or even a simple gray sweater when the weather starts cooling down. It has enough shine to feel special but enough restraint to remain elegant.
Pink-Lilac Pearl With a Soft Neon Edge
The final look brings the pearl trend back to a softer, almost ethereal place. The nails are long and almond-shaped, with a translucent pink-lilac base that reflects bright violet, soft green, and hints of yellow around the edges. The color appears especially luminous along the sidewalls and tips, creating the impression of light traveling across the nails. It is delicate at first glance, but the shifting finish gives it plenty of personality.
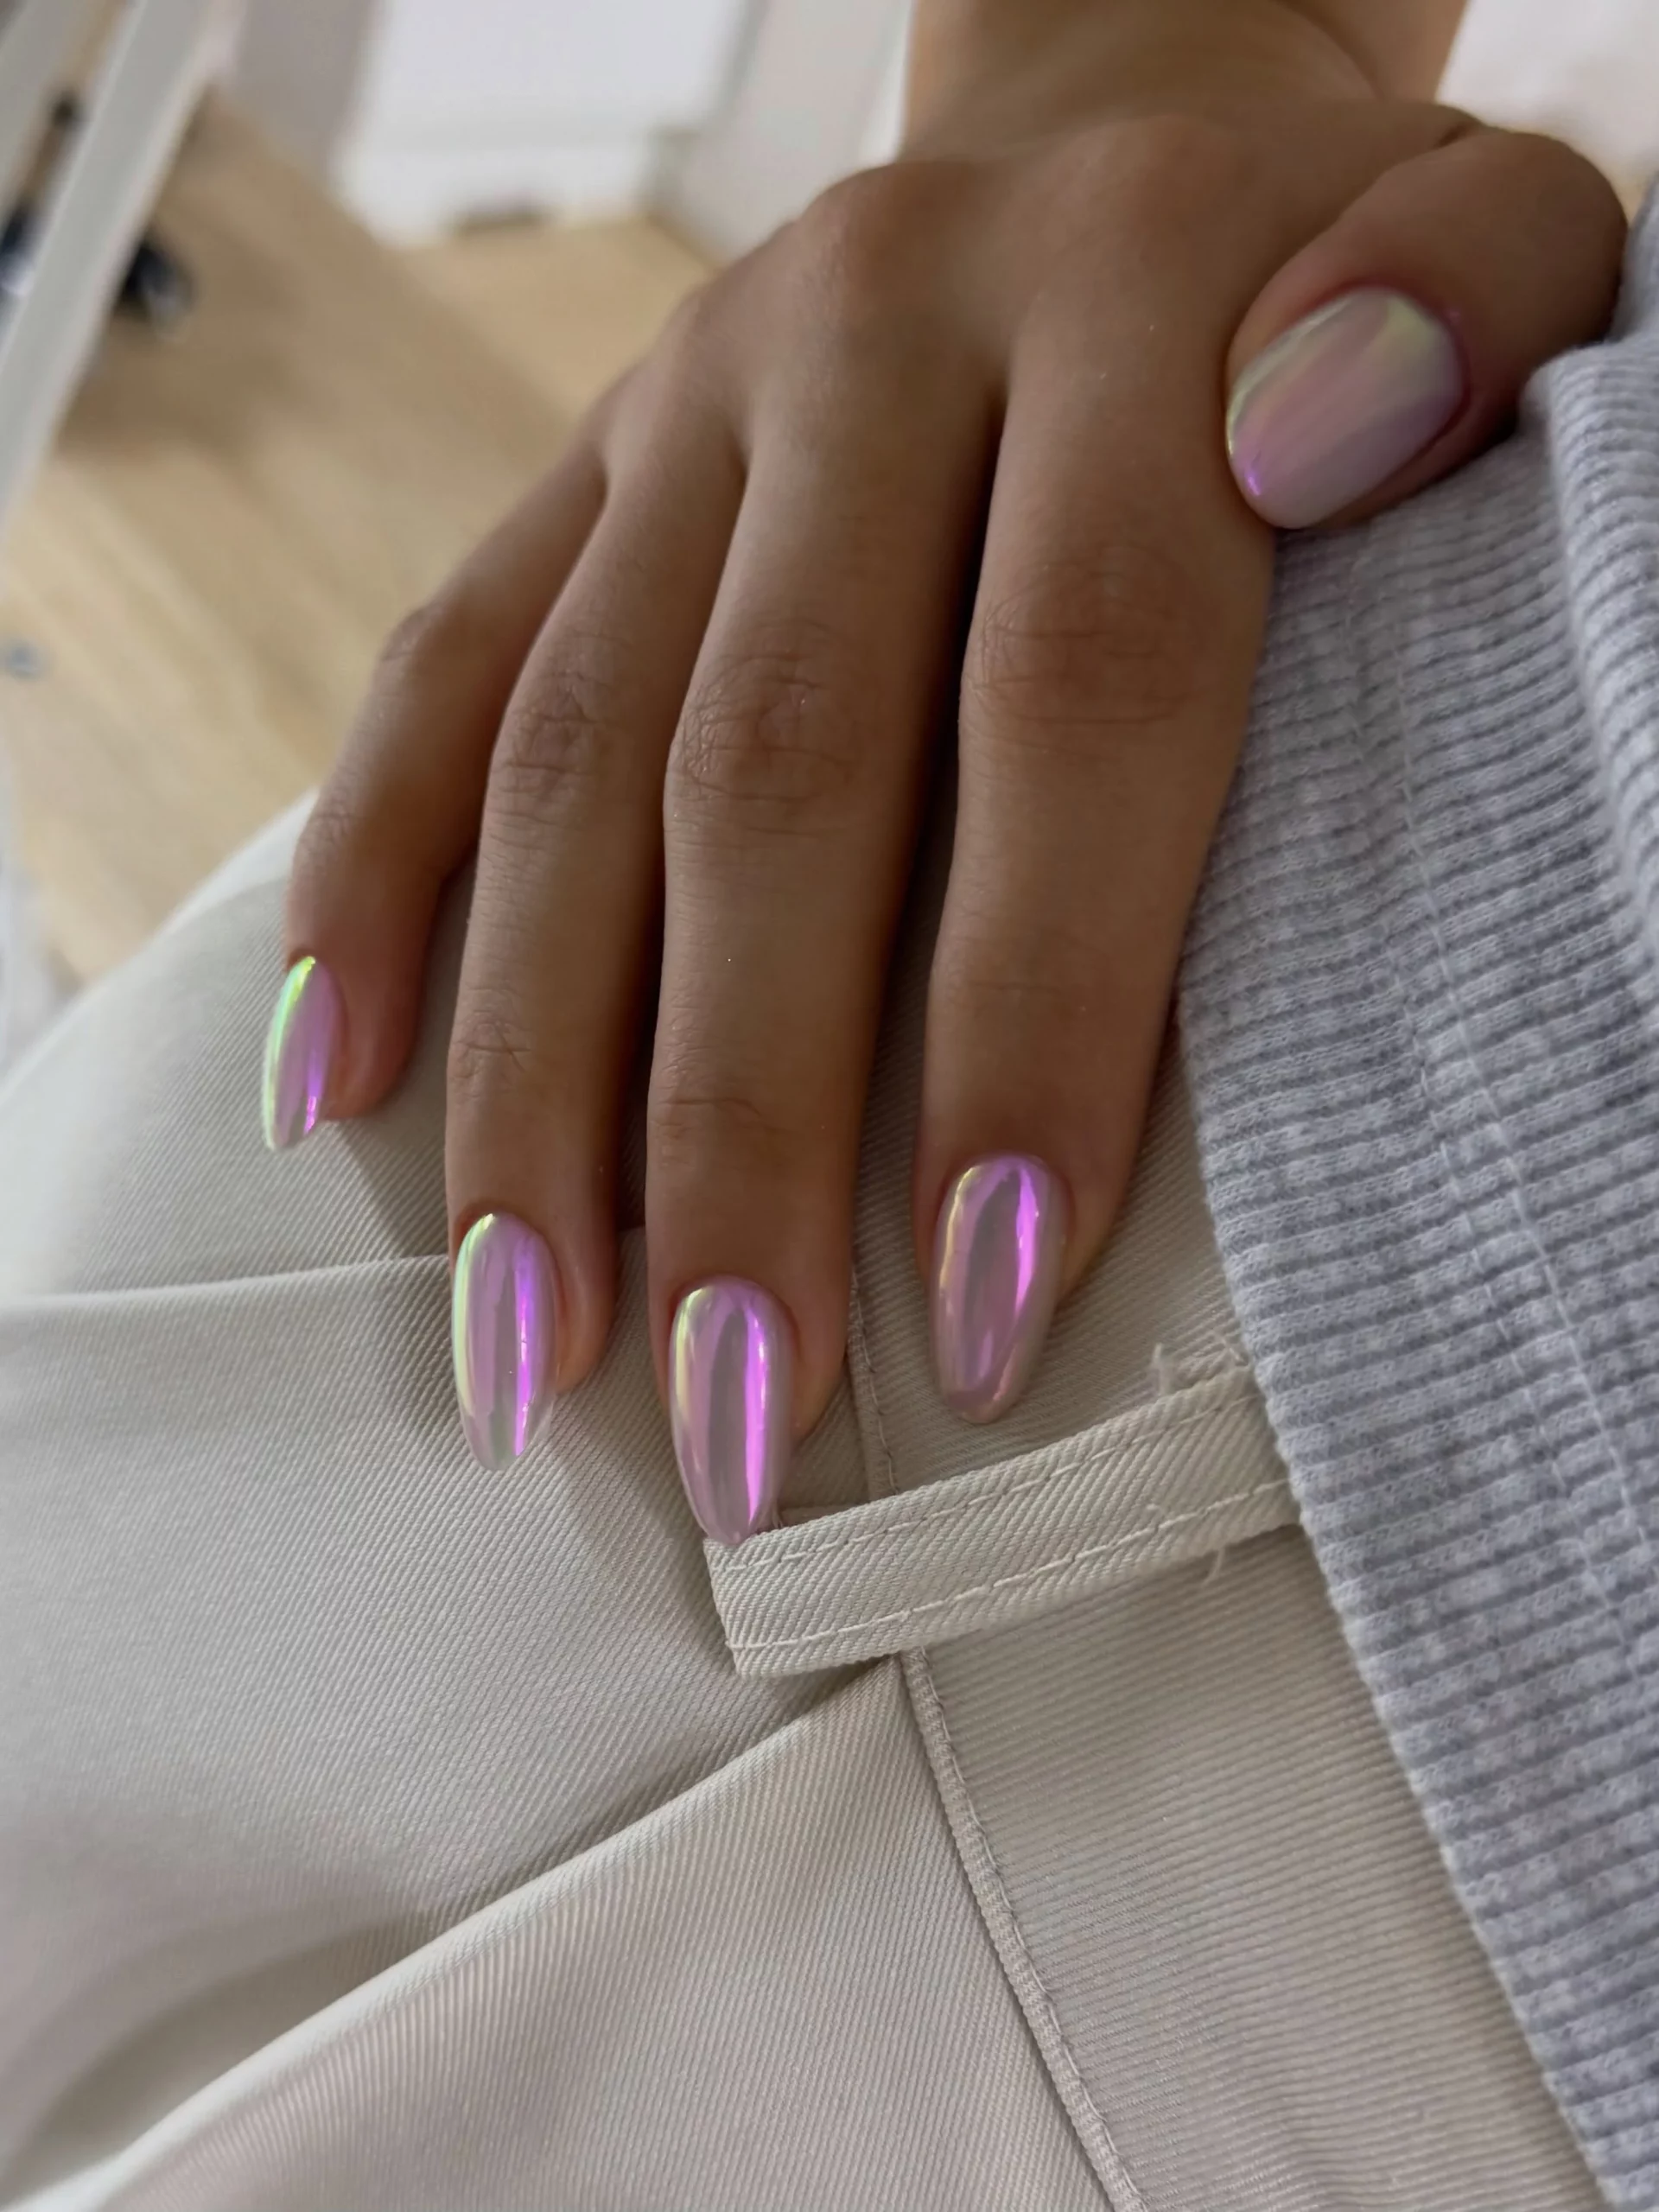
I would recreate this with a sheer pink-lilac gel base, a fine iridescent chrome pigment, and a subtle multichrome powder that can flash green and violet. I would keep the base relatively transparent so the reflective pigment has room to create depth. A thick, glassy top coat would be essential for maintaining that wet-look finish.
I would shape the nails into a balanced almond silhouette before applying the color. After the base is cured, I would add the iridescent pigment with light pressure, focusing on an even glow rather than trying to create a perfectly uniform color. I would then seal the manicure carefully, making sure the free edge is covered so the glossy finish stays intact. The longer almond shape gives the shifting colors extra space to show themselves.
I would save this version for the days when I want my manicure to feel a little magical without becoming complicated. The pink keeps it elegant, while the green and violet reflections make it playful when the light changes. And that is exactly what I like about pearl nails: they can look refined and understated one second, then completely different the next.
Pearl Glow With a Soft Blue Iridescent Sheen
I love the way a pearl manicure can look almost weightless while still catching the light from every angle. Here, a translucent milky-blue base gives the nails that smooth pearl effect, while delicate pink, peach, and golden reflections glide across the surface like tiny flashes of opal. The medium-length square shape keeps the finish polished and modern rather than overly ornate. It is the kind of manicure I would choose when I want something elegant but still a little unexpected.
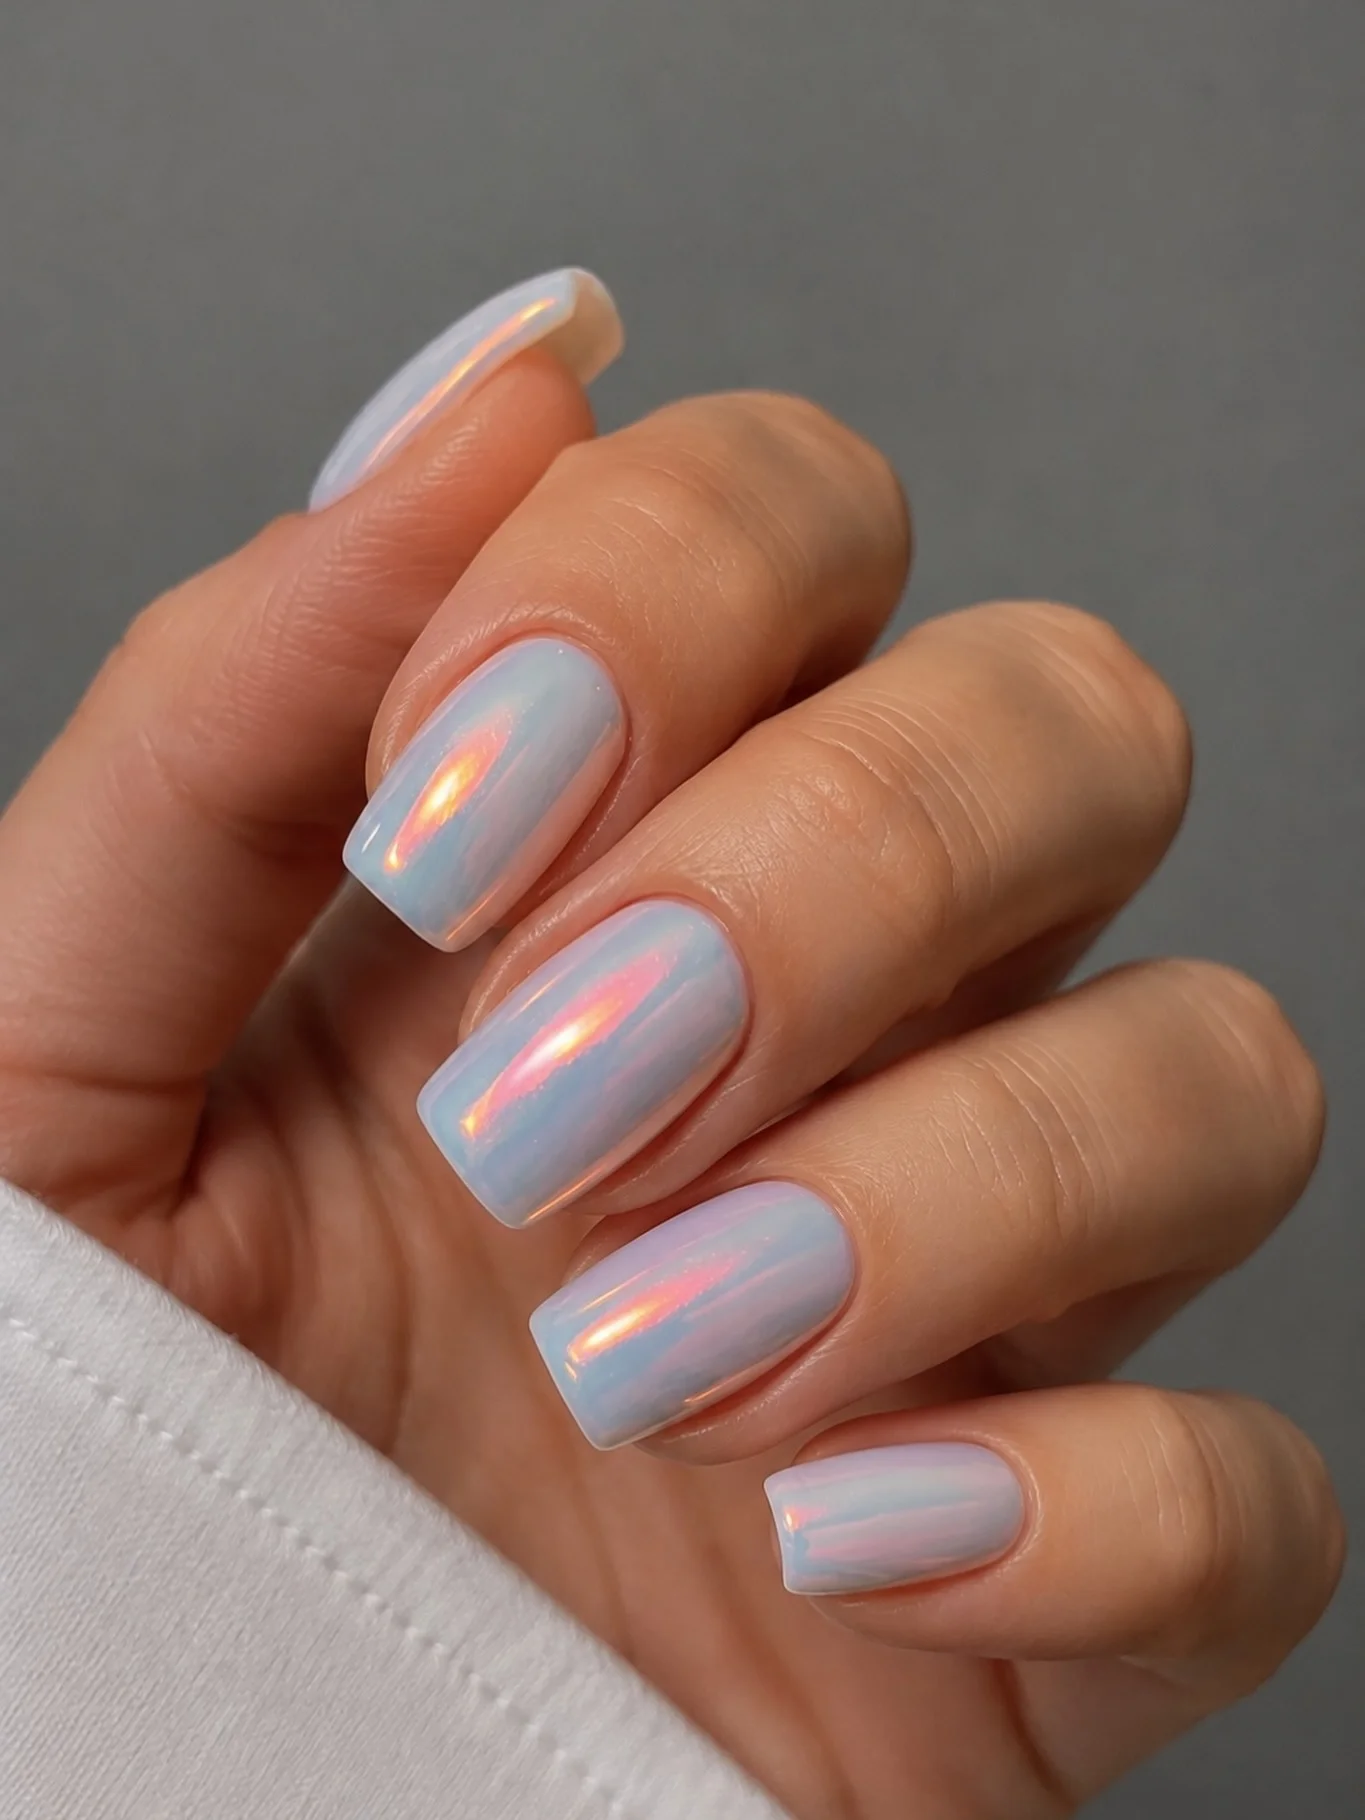
To recreate this finish, I would start with a sheer milky or icy-blue gel base and add a very fine iridescent chrome powder with pink, gold, and lavender reflections. A glossy no-wipe top coat is essential because the entire appeal comes from that glass-like surface. I would keep the color underneath translucent instead of opaque, allowing the shifting pigment to remain visible.
At home, I would shape the nails evenly, smooth the surface, and apply a thin layer of milky gel before curing. After adding the pearl pigment, I would gently buff it over the entire nail rather than concentrating it in one area. A thin layer of top coat seals everything in and brings out that liquid shine. I always prefer several thin layers to one heavy coat because the finish stays cleaner and more refined.
This is one of those designs I could wear with almost anything. The cool base feels especially fresh toward the end of summer, while the warm flashes keep it from looking too icy. Have you ever noticed how a subtle shift in color can make a simple manicure feel much more expensive? That is exactly the trick happening here.
Pink Pearl With a Delicate Golden Flash
Soft pink and pearly shine are a combination I keep coming back to because they make the hands look instantly polished without demanding attention. The rounded almond shape gives this manicure a graceful silhouette, while the translucent pink base lets tiny yellow-green and golden reflections appear across the surface. I especially like the way the iridescence stays concentrated within the glossy finish instead of becoming a chunky glitter effect.
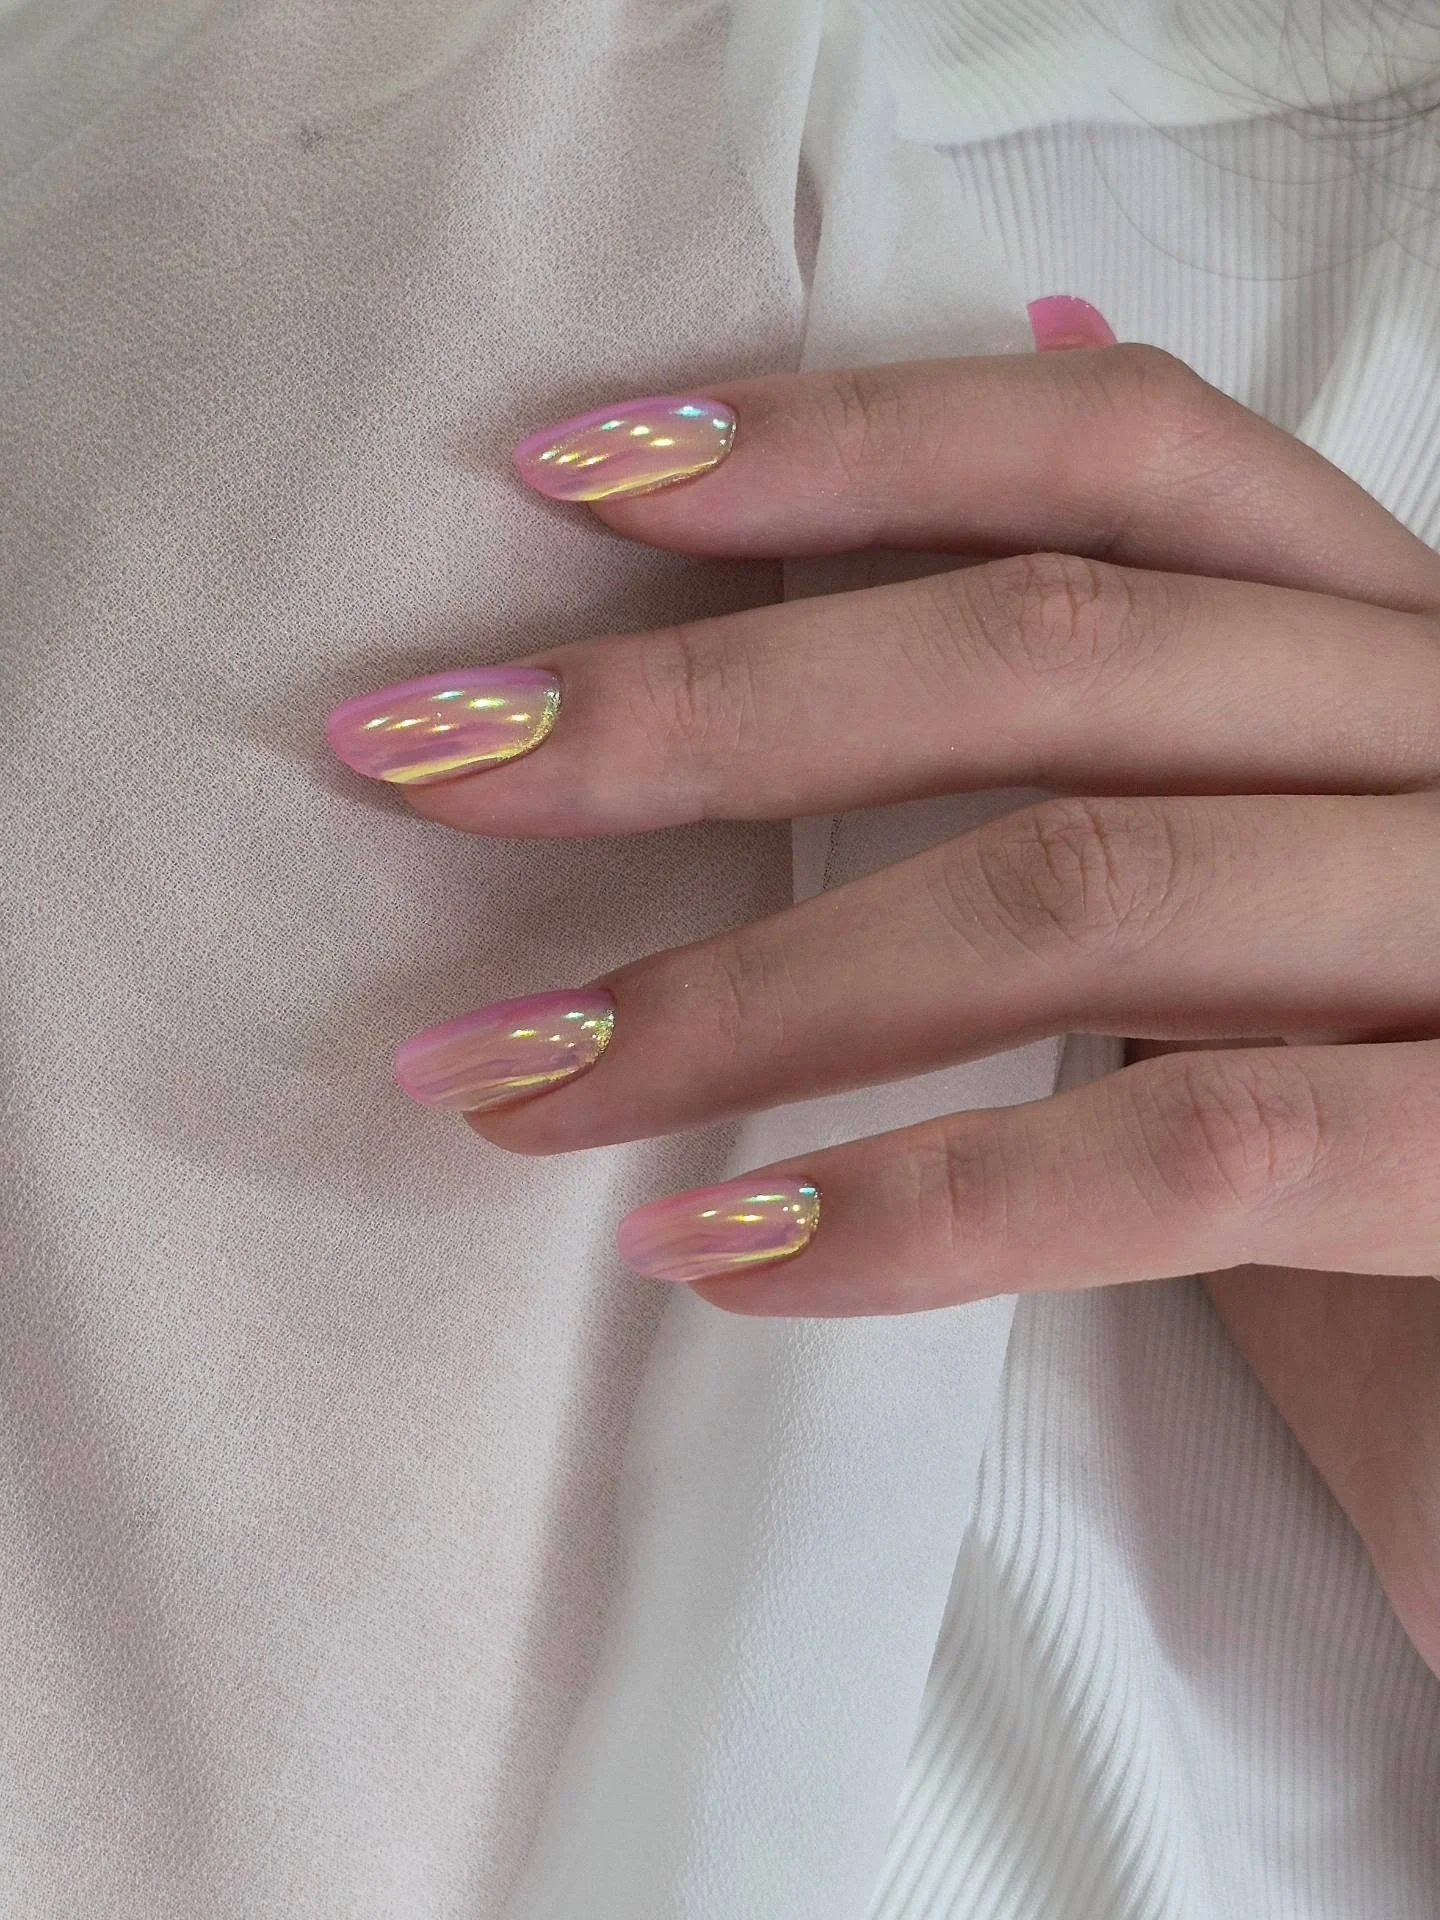
For this version, I would use a sheer blush-pink gel, a translucent pearl chrome pigment, and a high-shine top coat. The color should remain soft enough that the reflective powder can do most of the visual work. A fine sponge applicator or silicone chrome tool makes it easier to distribute the pigment evenly.
I would prepare the nails carefully, apply the pink base in thin coats, cure it, and then rub the iridescent pigment gently across the surface. I would pay particular attention to the free edge because that is where the reflective effect can become especially pretty. Once the chrome looks smooth, I would finish with a glossy top coat and cure it thoroughly.
I think this variation has a particularly effortless quality. It feels feminine without being sugary, and the almond shape adds just enough length to make the fingers look elegant. I can easily see myself wearing it with a white summer dress, a soft knit when temperatures drop, or simply jeans and a clean shirt. Sometimes the most versatile manicure is the one that quietly changes depending on the light.
Lavender Pearl With Liquid Rainbow Reflections
Lavender gives the pearl effect a completely different personality. Instead of looking purely milky, this manicure has a soft purple base that catches vivid green, yellow, and pink flashes as the light moves across the nails. The short square shape makes the finish feel wearable, while the glossy surface adds enough dimension to keep the color from looking flat.
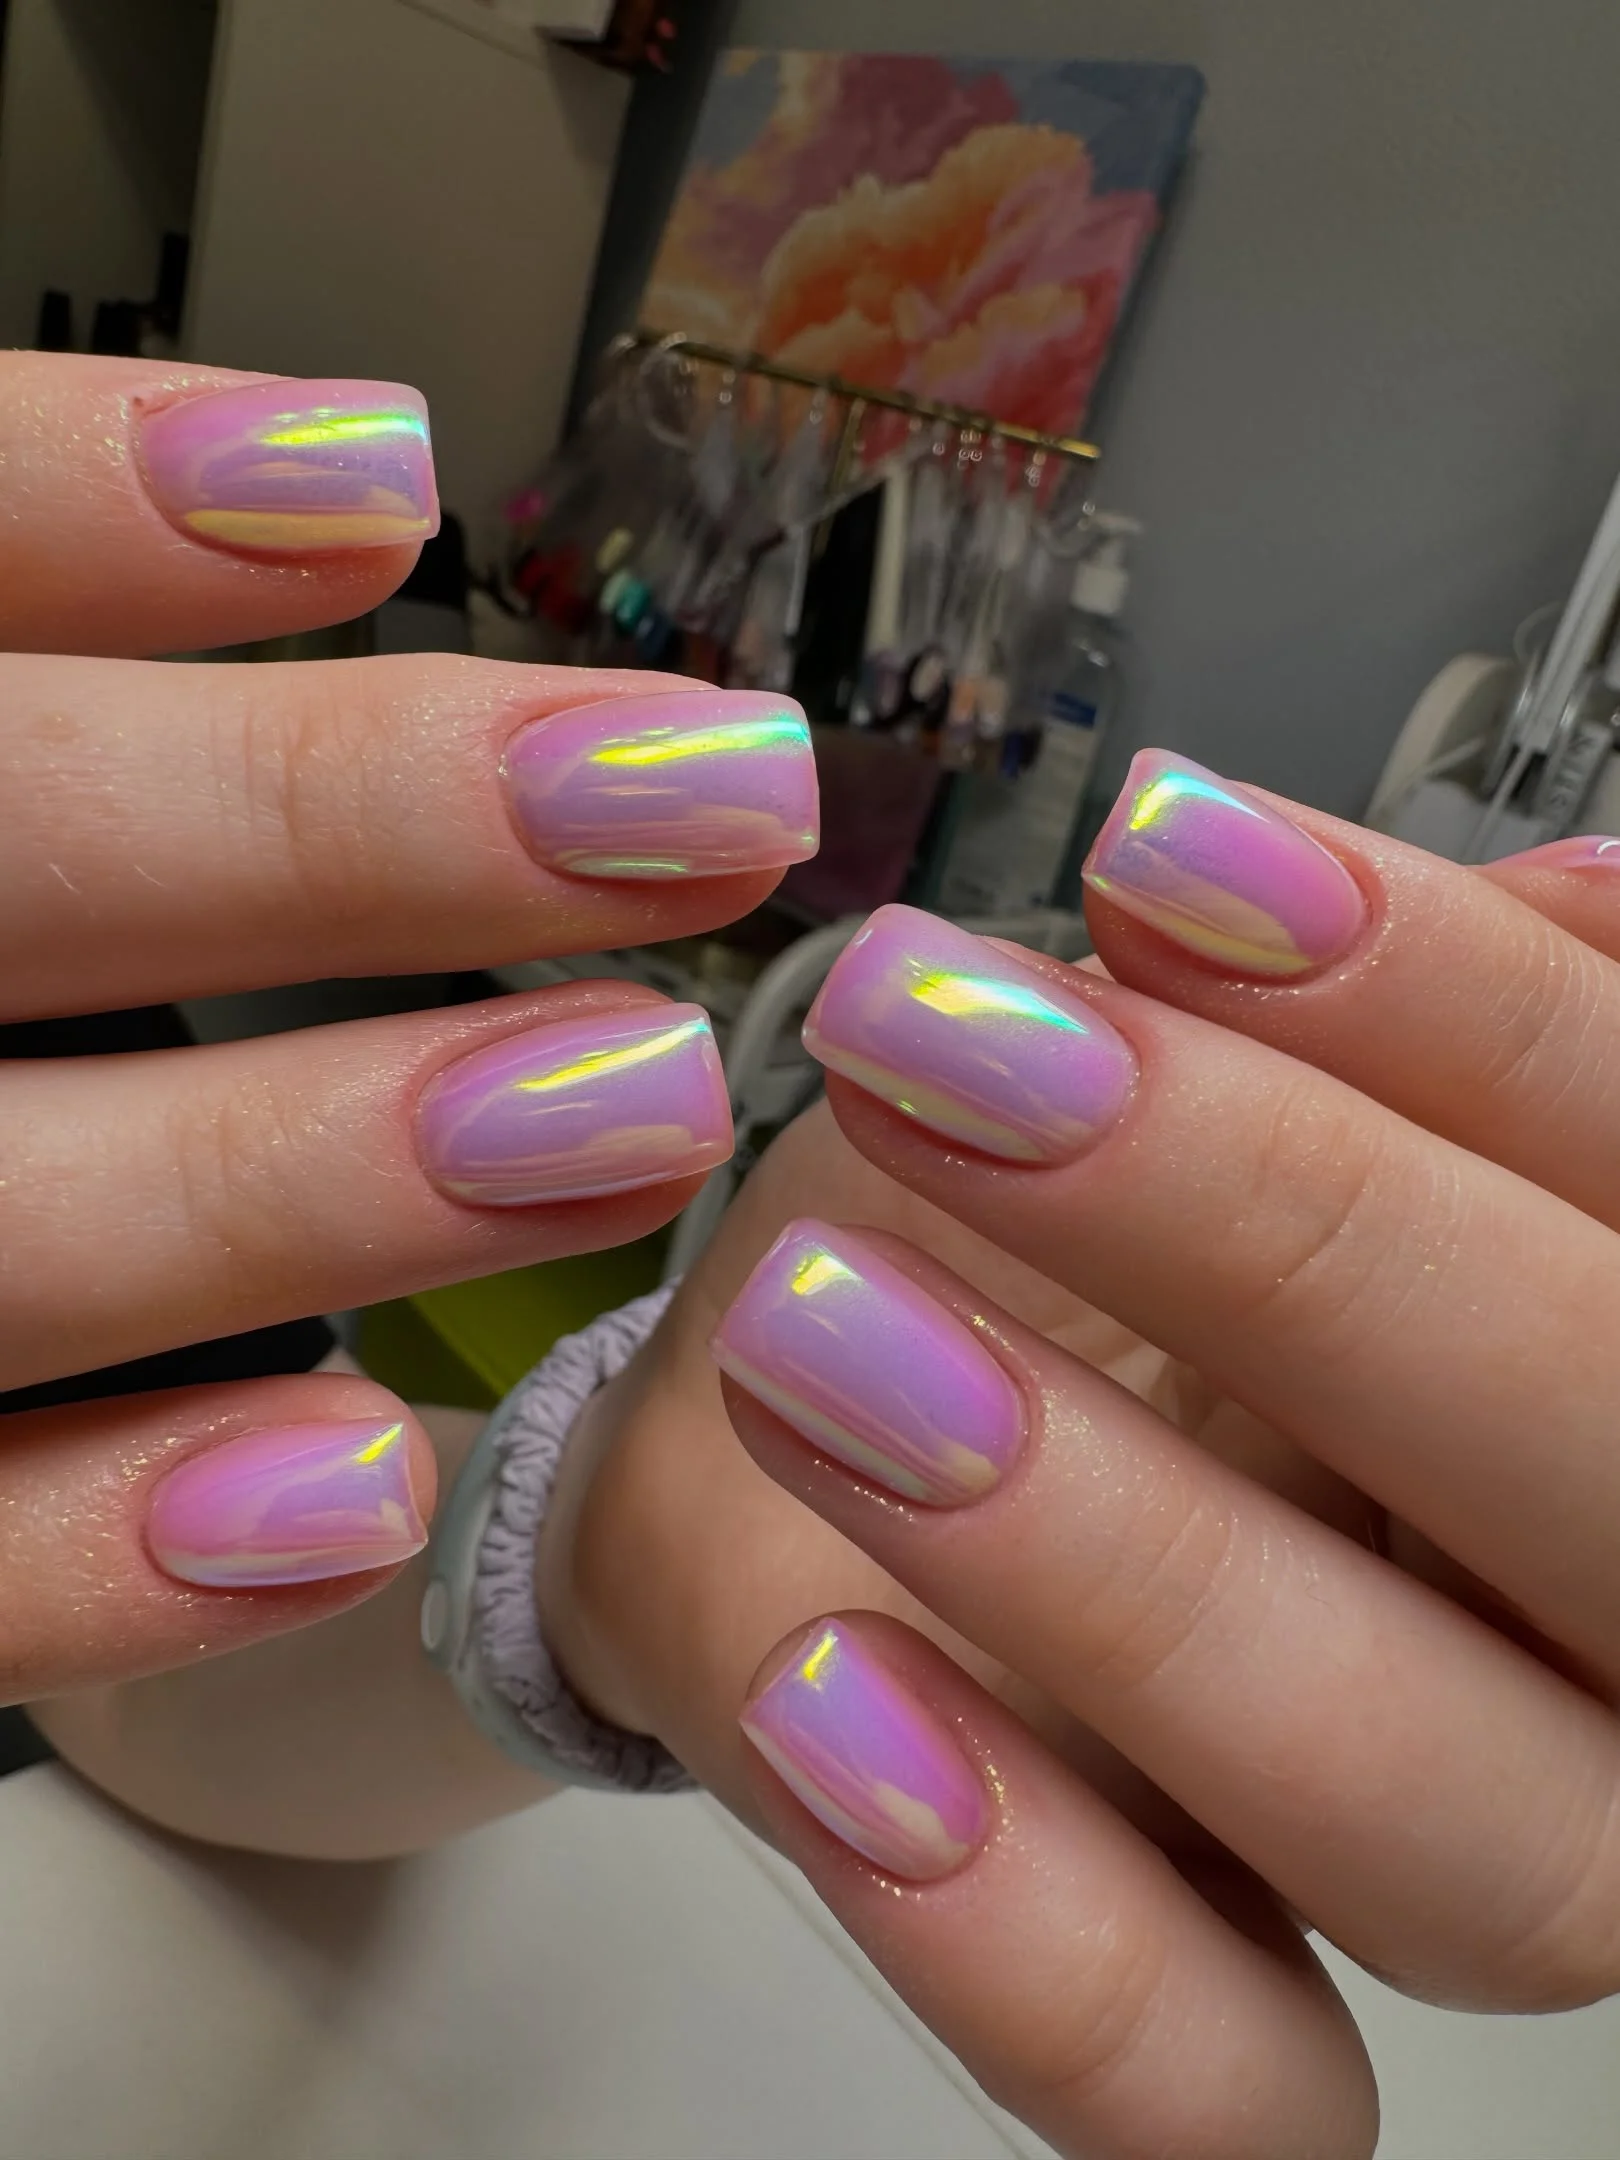
I would reach for a translucent lavender gel polish, a multichrome or aurora chrome powder, and a clear high-gloss top coat for this look. The most important detail is choosing a pigment with a fine texture rather than visible glitter particles. I want the reflection to look almost embedded inside the polish.
After preparing and shaping the nails, I would apply the lavender base and cure it completely. Then I would use a small applicator to press the chrome pigment over the surface with light, even movements. I would avoid rubbing too aggressively because that can make the finish uneven. One smooth layer of glossy top coat brings everything together and creates that beautiful liquid appearance.
I find this version especially fun when I want something more playful without stepping into complicated nail art. The lavender keeps it soft, but those flashes of green and yellow give it a little attitude. It is a great reminder that pearl nails do not have to mean white or pink alone. Why settle for one reflection when you can have several?
Sheer Opal Almond Nails With a Dreamy Finish
There is something almost ethereal about a translucent opal manicure, especially when the nails are shaped into a long almond. The base looks milky and nearly transparent, while soft pink and warm golden reflections appear underneath the glossy surface. I would describe this finish as delicate rather than glittery because the color seems to move through the nail instead of sitting on top.
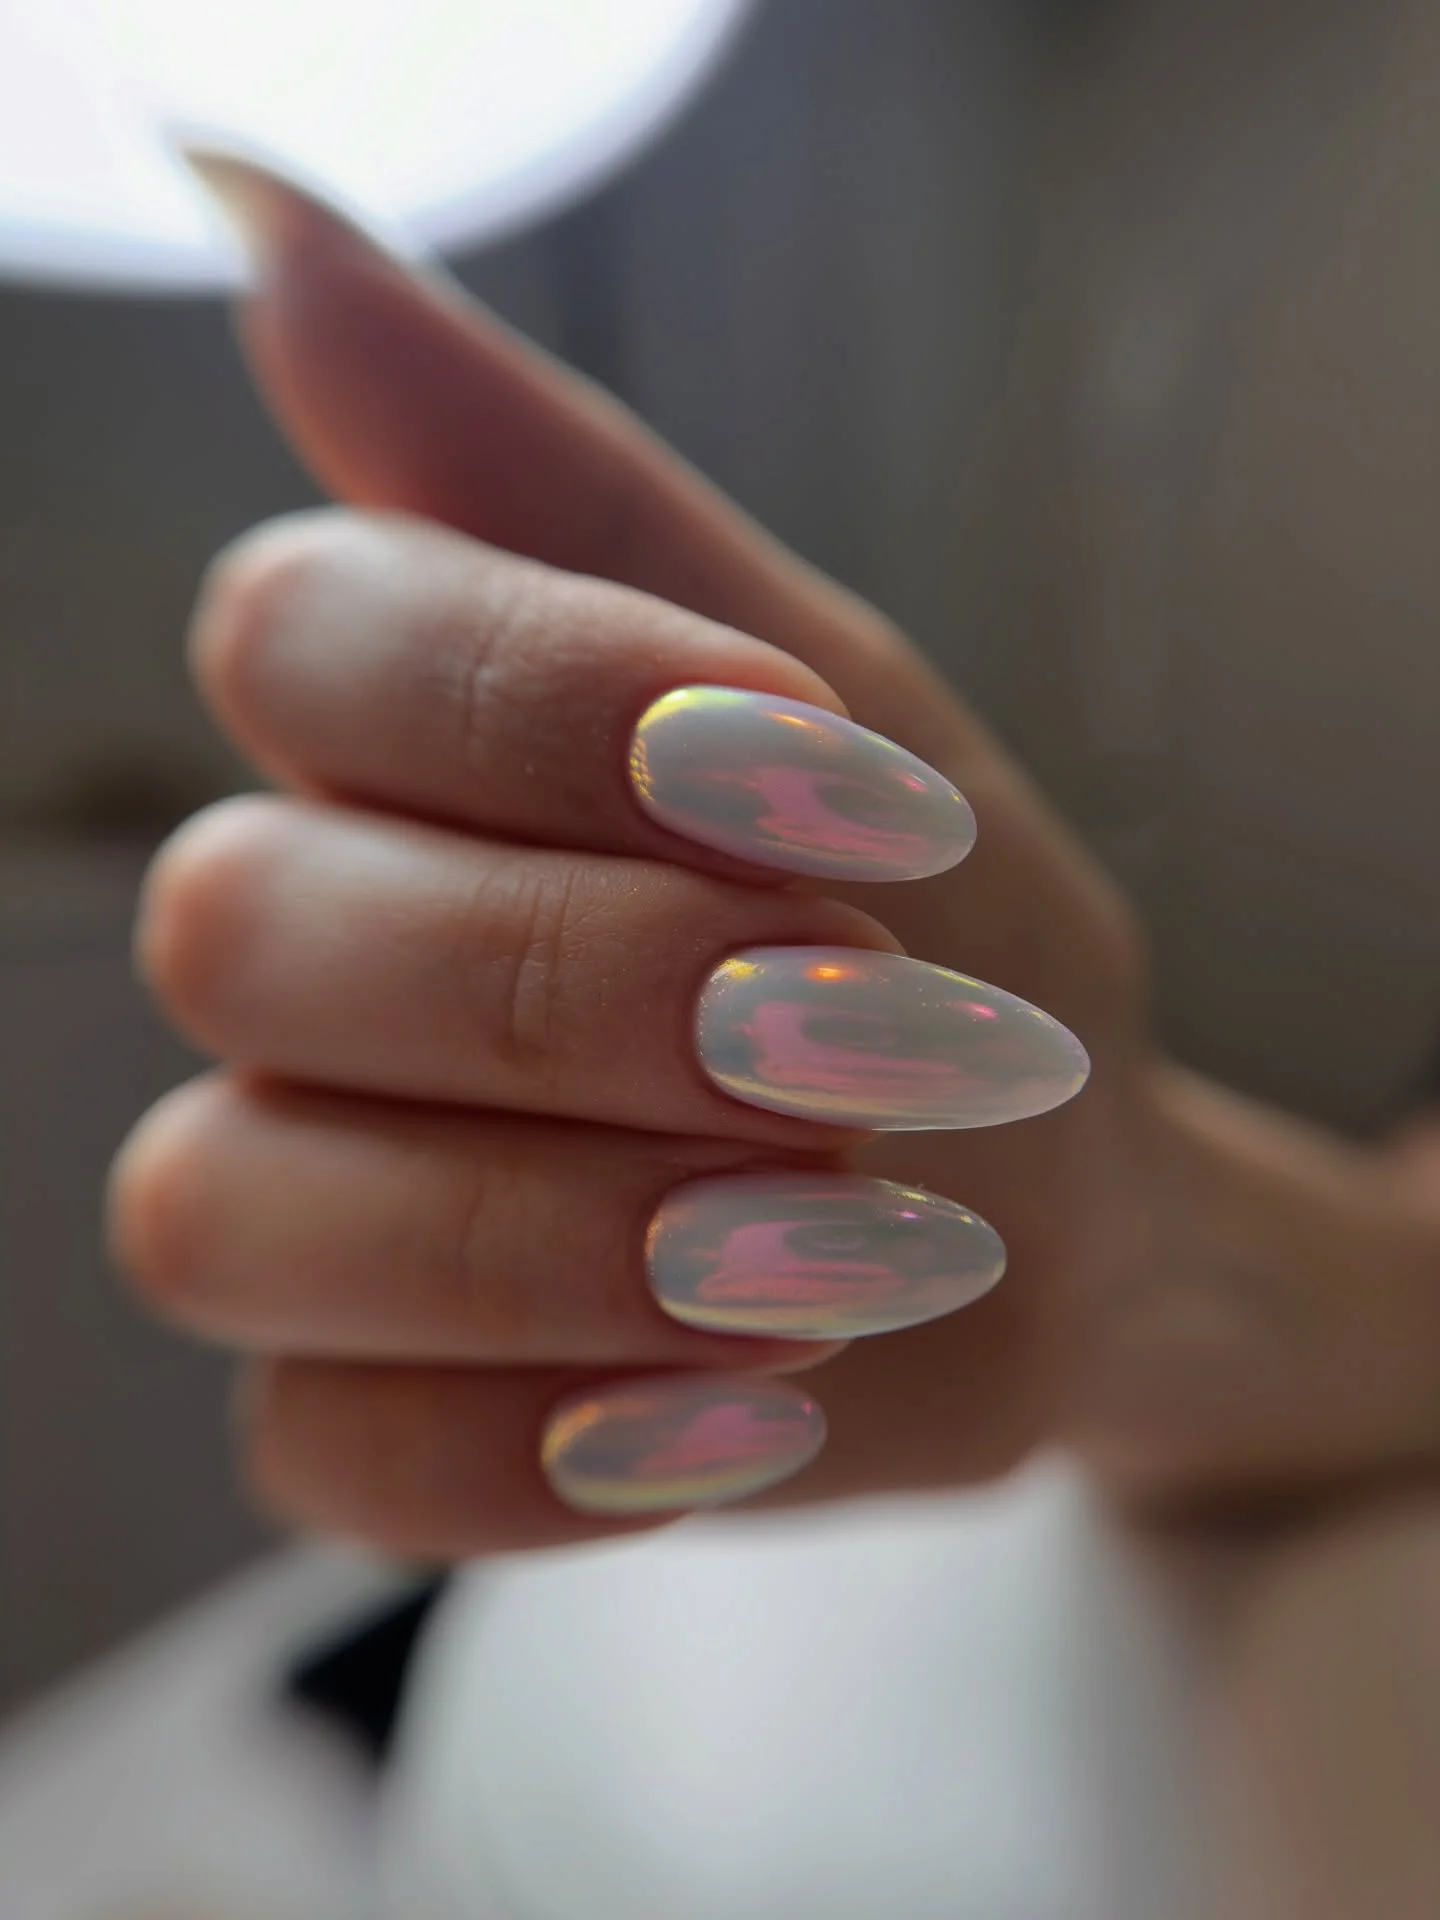
For the base, I would choose a sheer milky gel with a hint of pink or white, followed by a subtle aurora chrome pigment. A builder gel can be useful if extra structure is needed for longer nails, while a no-wipe glossy top coat creates the smooth surface this design depends on. I would keep the product layers thin so the translucent quality remains visible.
My approach would be simple: shape the nails into an even almond, refine the sidewalls, and apply the sheer base. Once cured, I would gently work the opalescent pigment across each nail until the pink and golden flashes appear. The final top coat should be applied carefully around the cuticle area so the manicure looks seamless as it grows out.
This is the kind of manicure I would save for a special weekend and then immediately realize I want to wear it every day. The almond shape feels elegant, but the translucent color keeps it modern and light. It also has that beautiful late-summer quality where everything looks softer in the evening light. A little glow goes a long way here.
Classic Short Pearls With Pink and Gold Chrome
Short nails can absolutely carry an iridescent finish, and this manicure proves it beautifully. The compact square shape gives the design a neat, practical foundation, while the lavender-pink base is transformed by ribbons of peach, yellow, and soft gold. Because the nails are shorter, the reflective finish becomes the main event without making the manicure feel excessive.
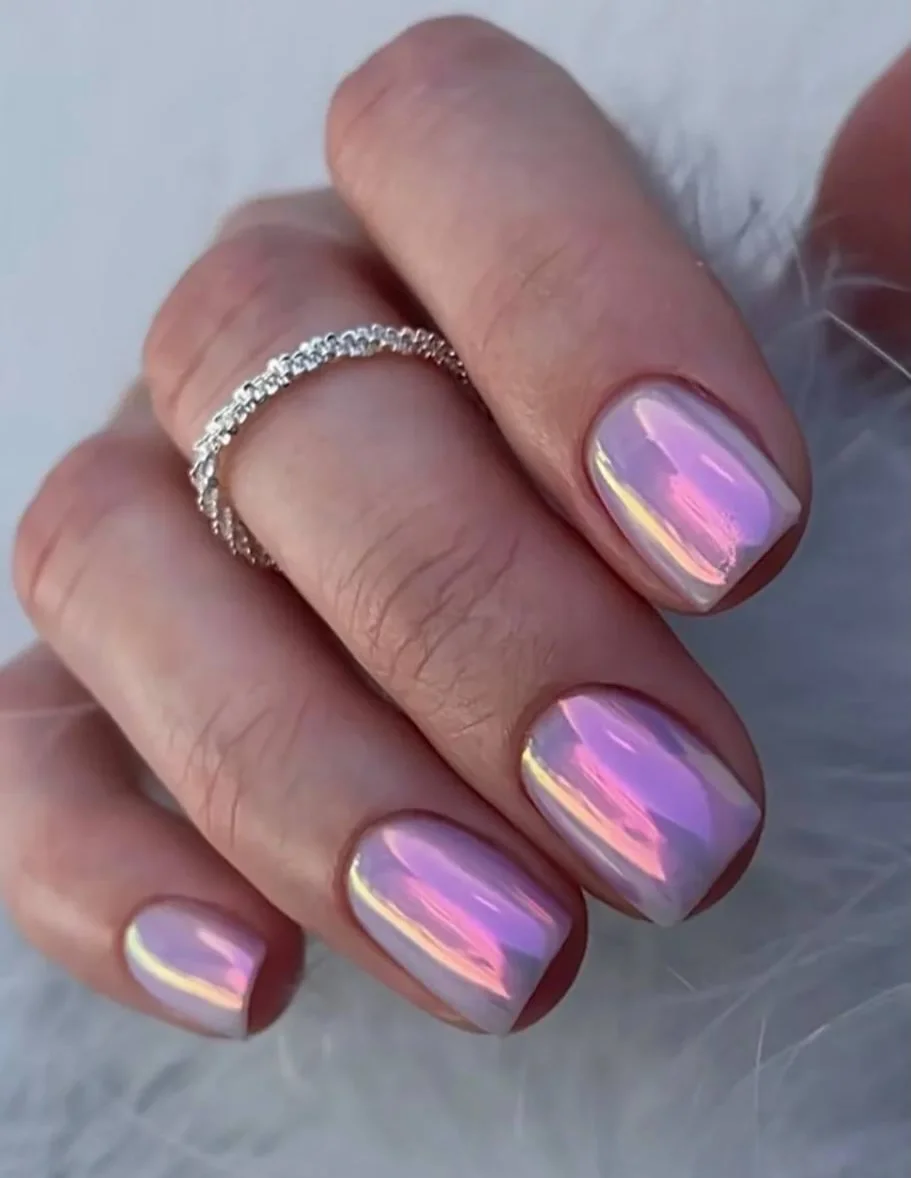
I would use a sheer lavender-pink polish as the foundation, followed by a fine pearl chrome with warm multicolor reflections. For a particularly smooth result, I would also keep a soft buffing applicator nearby and finish with a thick but controlled glossy top coat. The goal is not sparkle; it is that polished, reflective surface that looks almost wet.
I would begin by filing every nail into the same short square shape and lightly smoothing the surface. After applying the base color, I would cure it and gently buff the chrome pigment over each nail. I like working one nail at a time when using reflective powders because it gives me more control over the intensity. Then I would seal the pigment with top coat, paying attention to the free edge.
I think this is one of the easiest versions to adapt to everyday life. Short nails are practical, but the pearl finish prevents them from feeling basic. I could type, cook, travel, and still have that little flash of color whenever my hands move. Honestly, that tiny moment of shine is sometimes all I need.
Long Pearl Chrome With a Soft Pink Base
This manicure takes the pearl trend in a slightly more glamorous direction with longer square nails and a sheer pink foundation. The surface reflects pale yellow, green, pink, and champagne tones, creating a layered chrome effect that changes as the hands move. I like that the color remains delicate even though the nails themselves make a stronger statement.
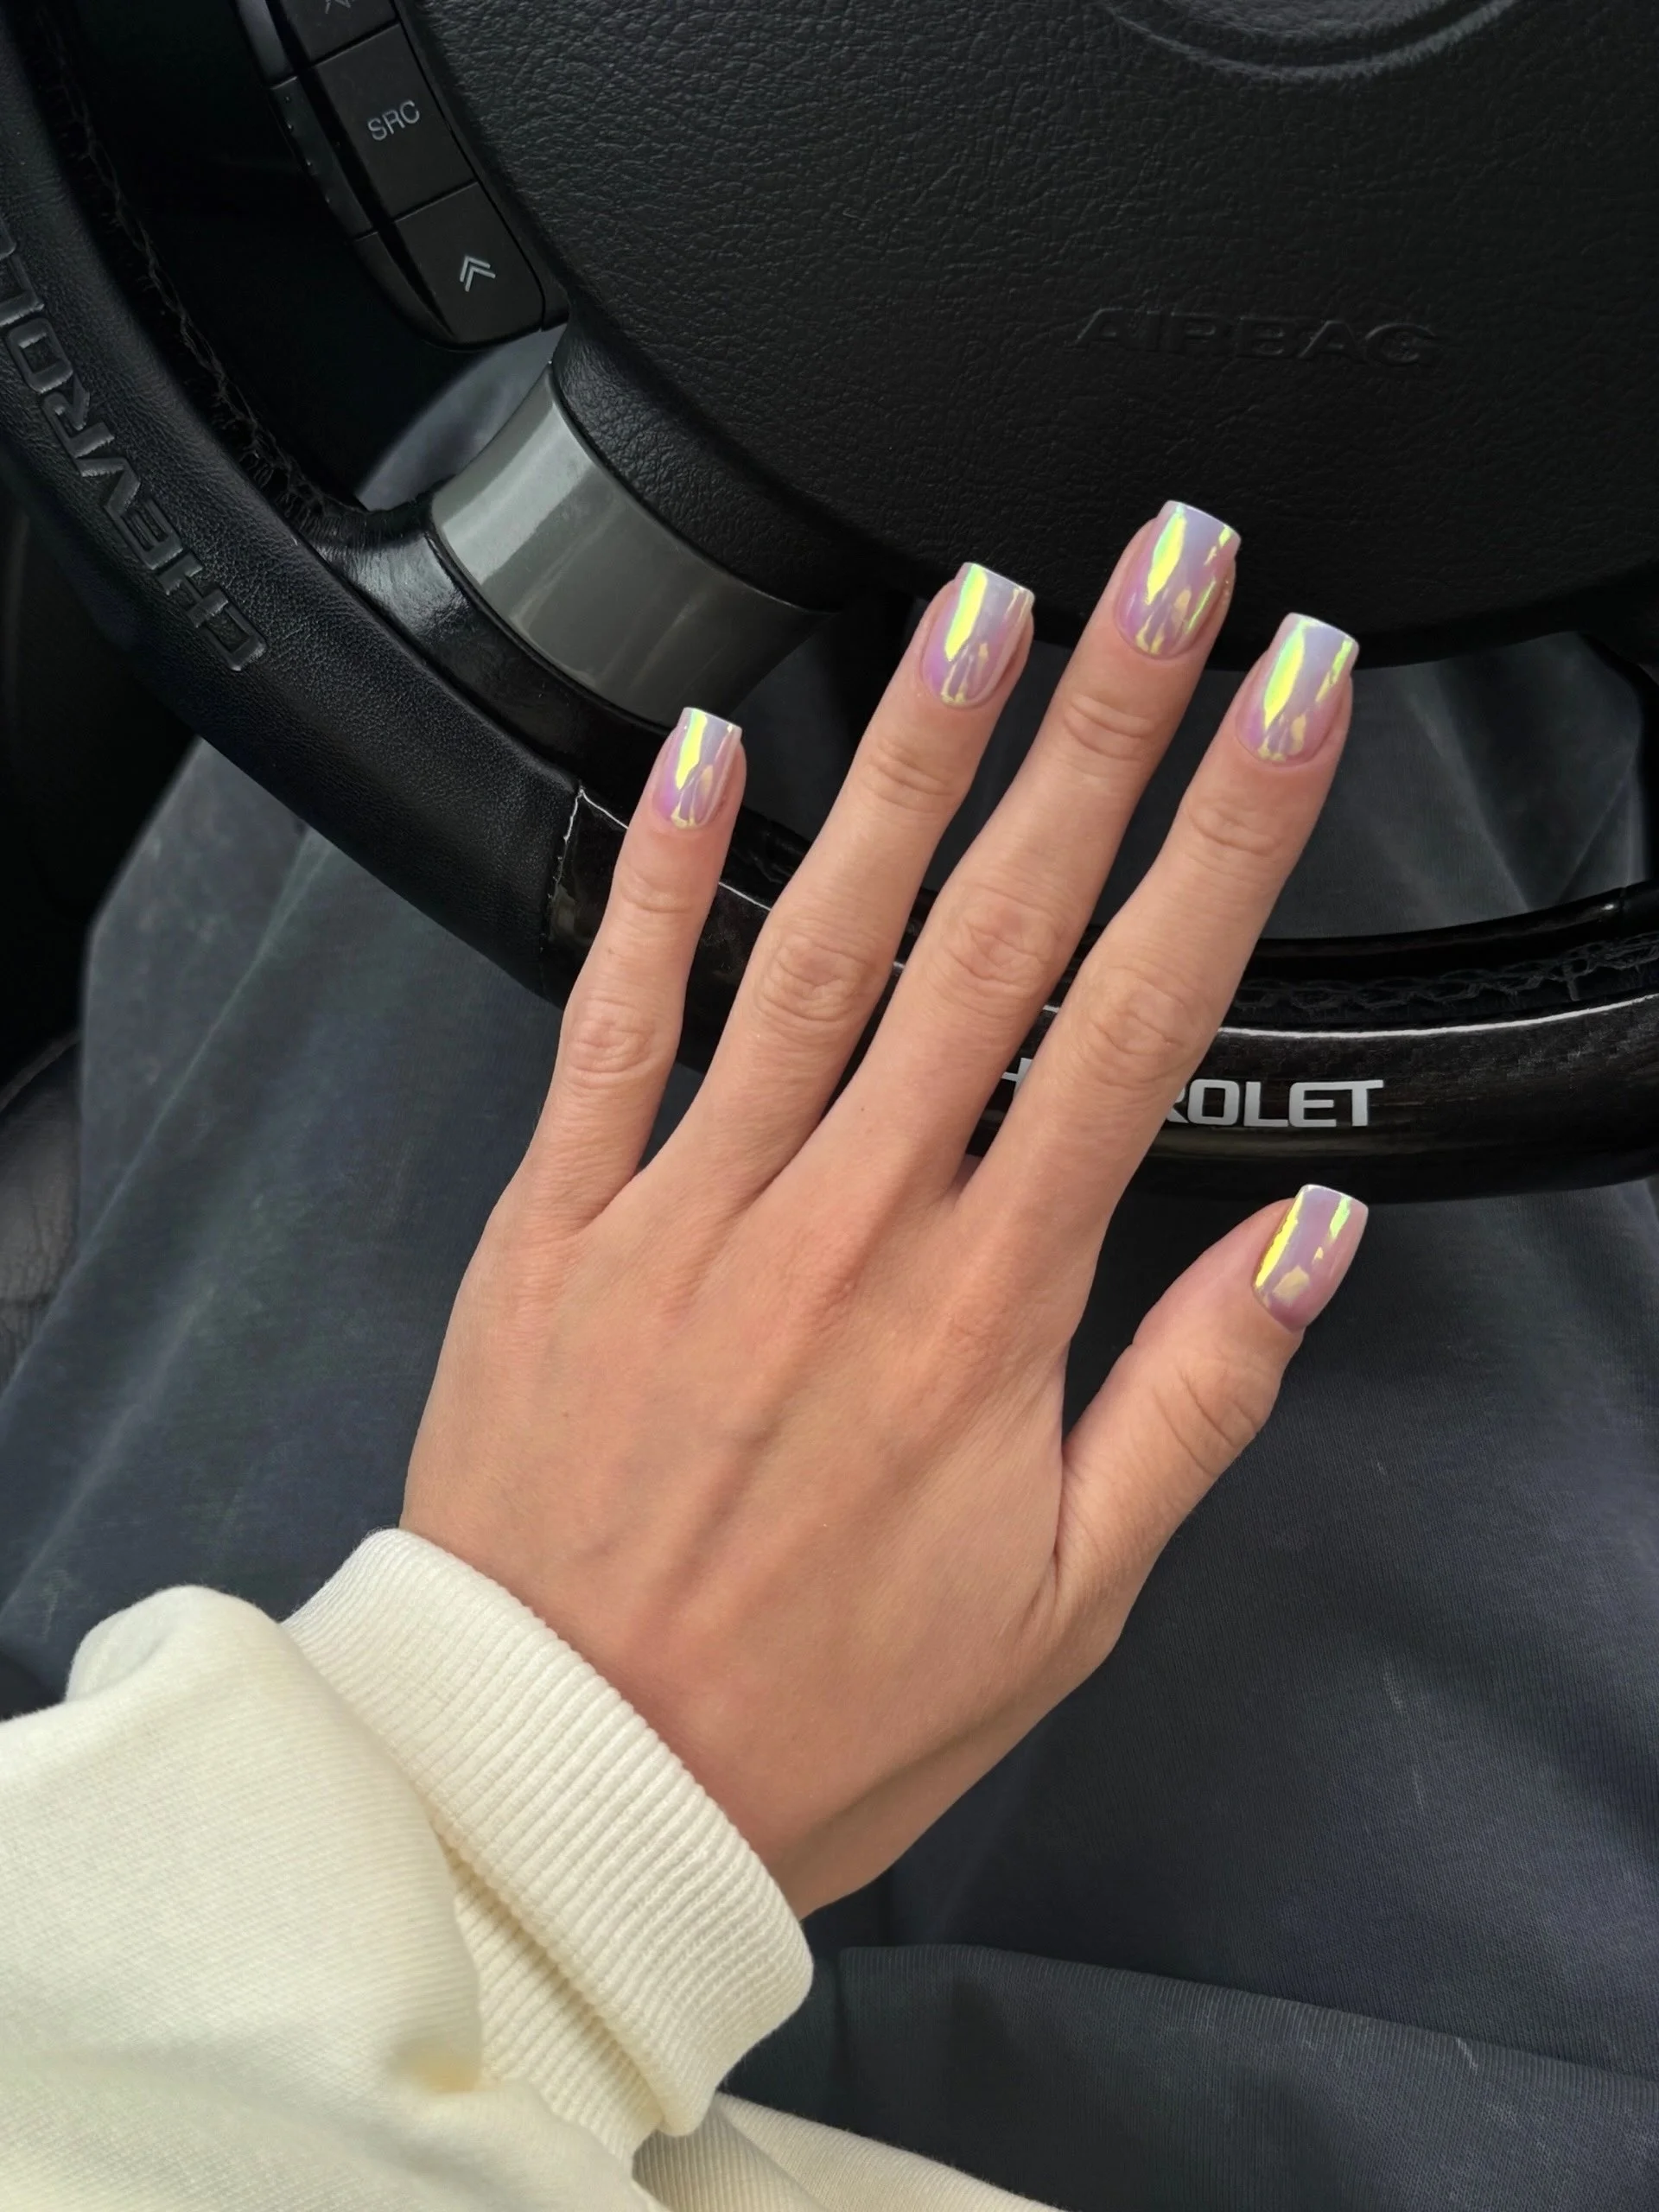
To achieve it, I would choose a translucent pink gel, a pearl or aurora chrome pigment, and a high-gloss top coat. The chrome should have a fine, almost powdery appearance so it melts into the base rather than creating obvious metallic patches. If the natural nails need additional strength at this length, I would use an appropriate structured gel before adding the color.
The application starts with careful shaping because long square nails look best when the lines are balanced. I would apply the pink base, cure it, and then buff the pearl pigment evenly across each nail. I would check the manicure under different lighting before sealing it because the reflections can look surprisingly different from one angle to another. One final glossy layer gives the surface that smooth, glassy finish.
For me, this is the version that feels most like a statement manicure without using traditional nail art. It would look beautiful with evening clothes, but I also like the contrast of wearing it with something very simple. A plain white top and these reflective nails? That is more than enough. Sometimes the manicure can be the accessory.
Warm Pearl Almonds With a Sunset Chrome Effect
The final variation brings a warmer mood to the pearl finish, with a muted rosy base and elongated almond nails that catch striking peach, orange, and golden reflections. The color shift is especially beautiful because it does not erase the softness of the base. Instead, the warm chrome appears like a narrow beam of sunset light moving across each nail.
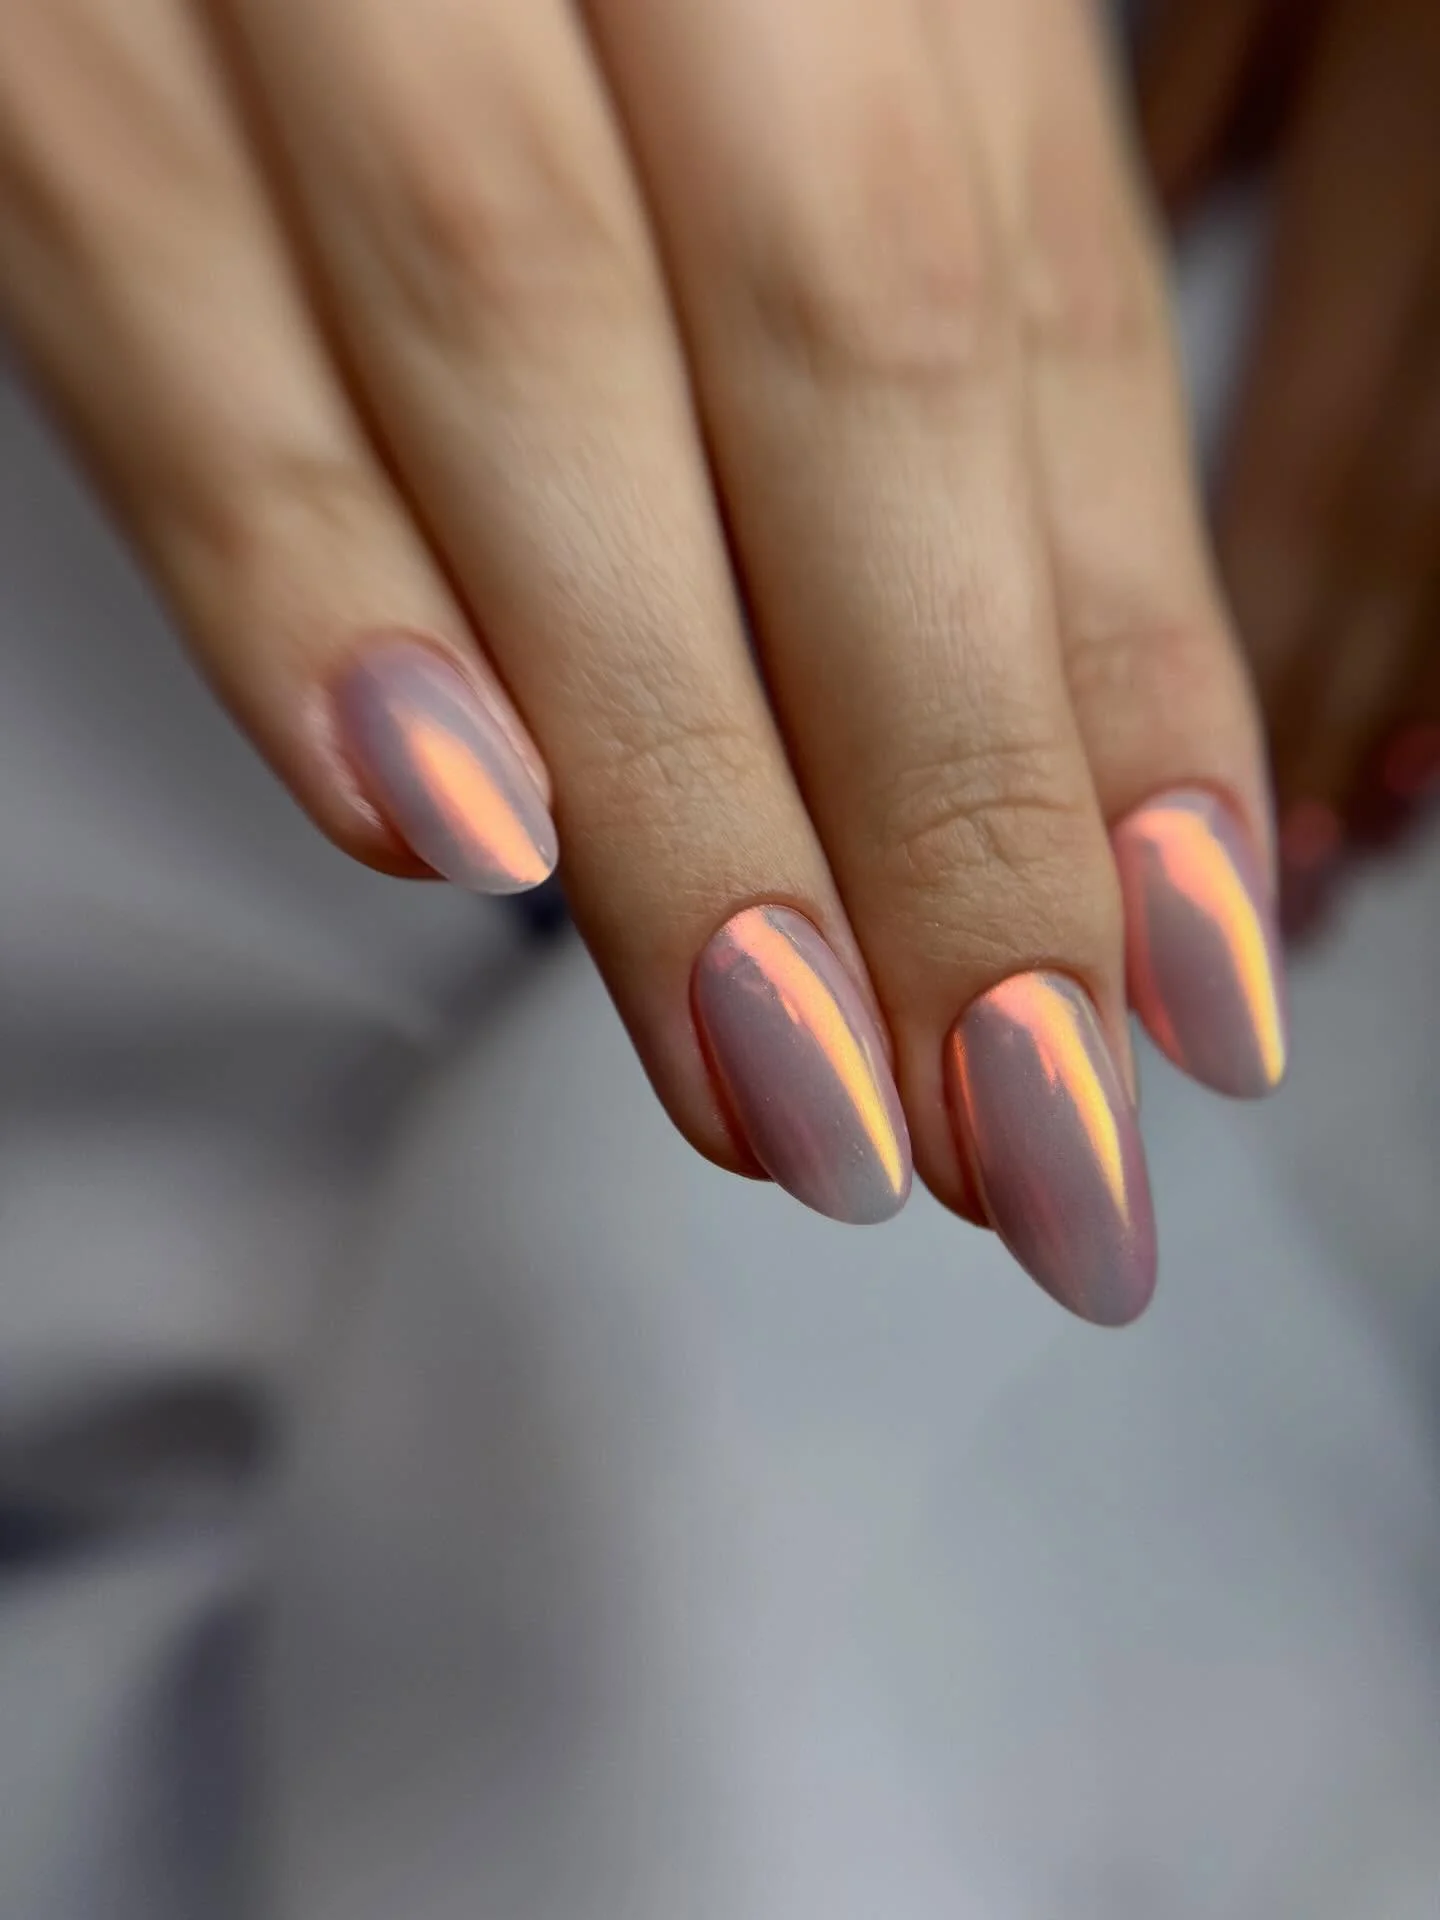
I would use a sheer dusty-rose gel as the foundation and pair it with a warm aurora pigment containing peach, champagne, and subtle yellow reflections. A smooth glossy top coat is the finishing step I would not skip. If I wanted the color to remain especially delicate, I would apply the base in one or two thin layers rather than building it into an opaque pink.
I would shape the nails into a softly tapered almond, refine the edges, and apply the rose base. Once cured, I would rub the warm chrome pigment over the nails until the reflective streak becomes visible. I would keep the pressure light and build the effect gradually because it is much easier to add more pigment than to remove it. After sealing everything with top coat, I would check the free edges and make sure the shine remains completely smooth.
I love this warmer interpretation for the transition between summer and fall. It still has that airy pearl quality, but the peachy reflections make it feel a little richer as the evenings become cooler. Would I wear it on vacation? Absolutely. Would I keep it for an early fall dinner? Also yes. That versatility is exactly why pearl nails keep finding their way back onto my manicure list.
Coral Pearl Nails With a Fiery Chrome Glow
I love how this manicure takes a vivid coral-pink base and gives it a surprisingly delicate pearl effect. The nails are long and almond-shaped, with a smooth silhouette that makes the bright color feel elongated and refined rather than heavy. The finish has a glossy, almost glass-like surface, while narrow yellow-gold reflections travel through the center of each nail and create that beautiful iridescent flash. It is a particularly fun interpretation of pearl nails because the effect is energetic while the finish remains sleek.
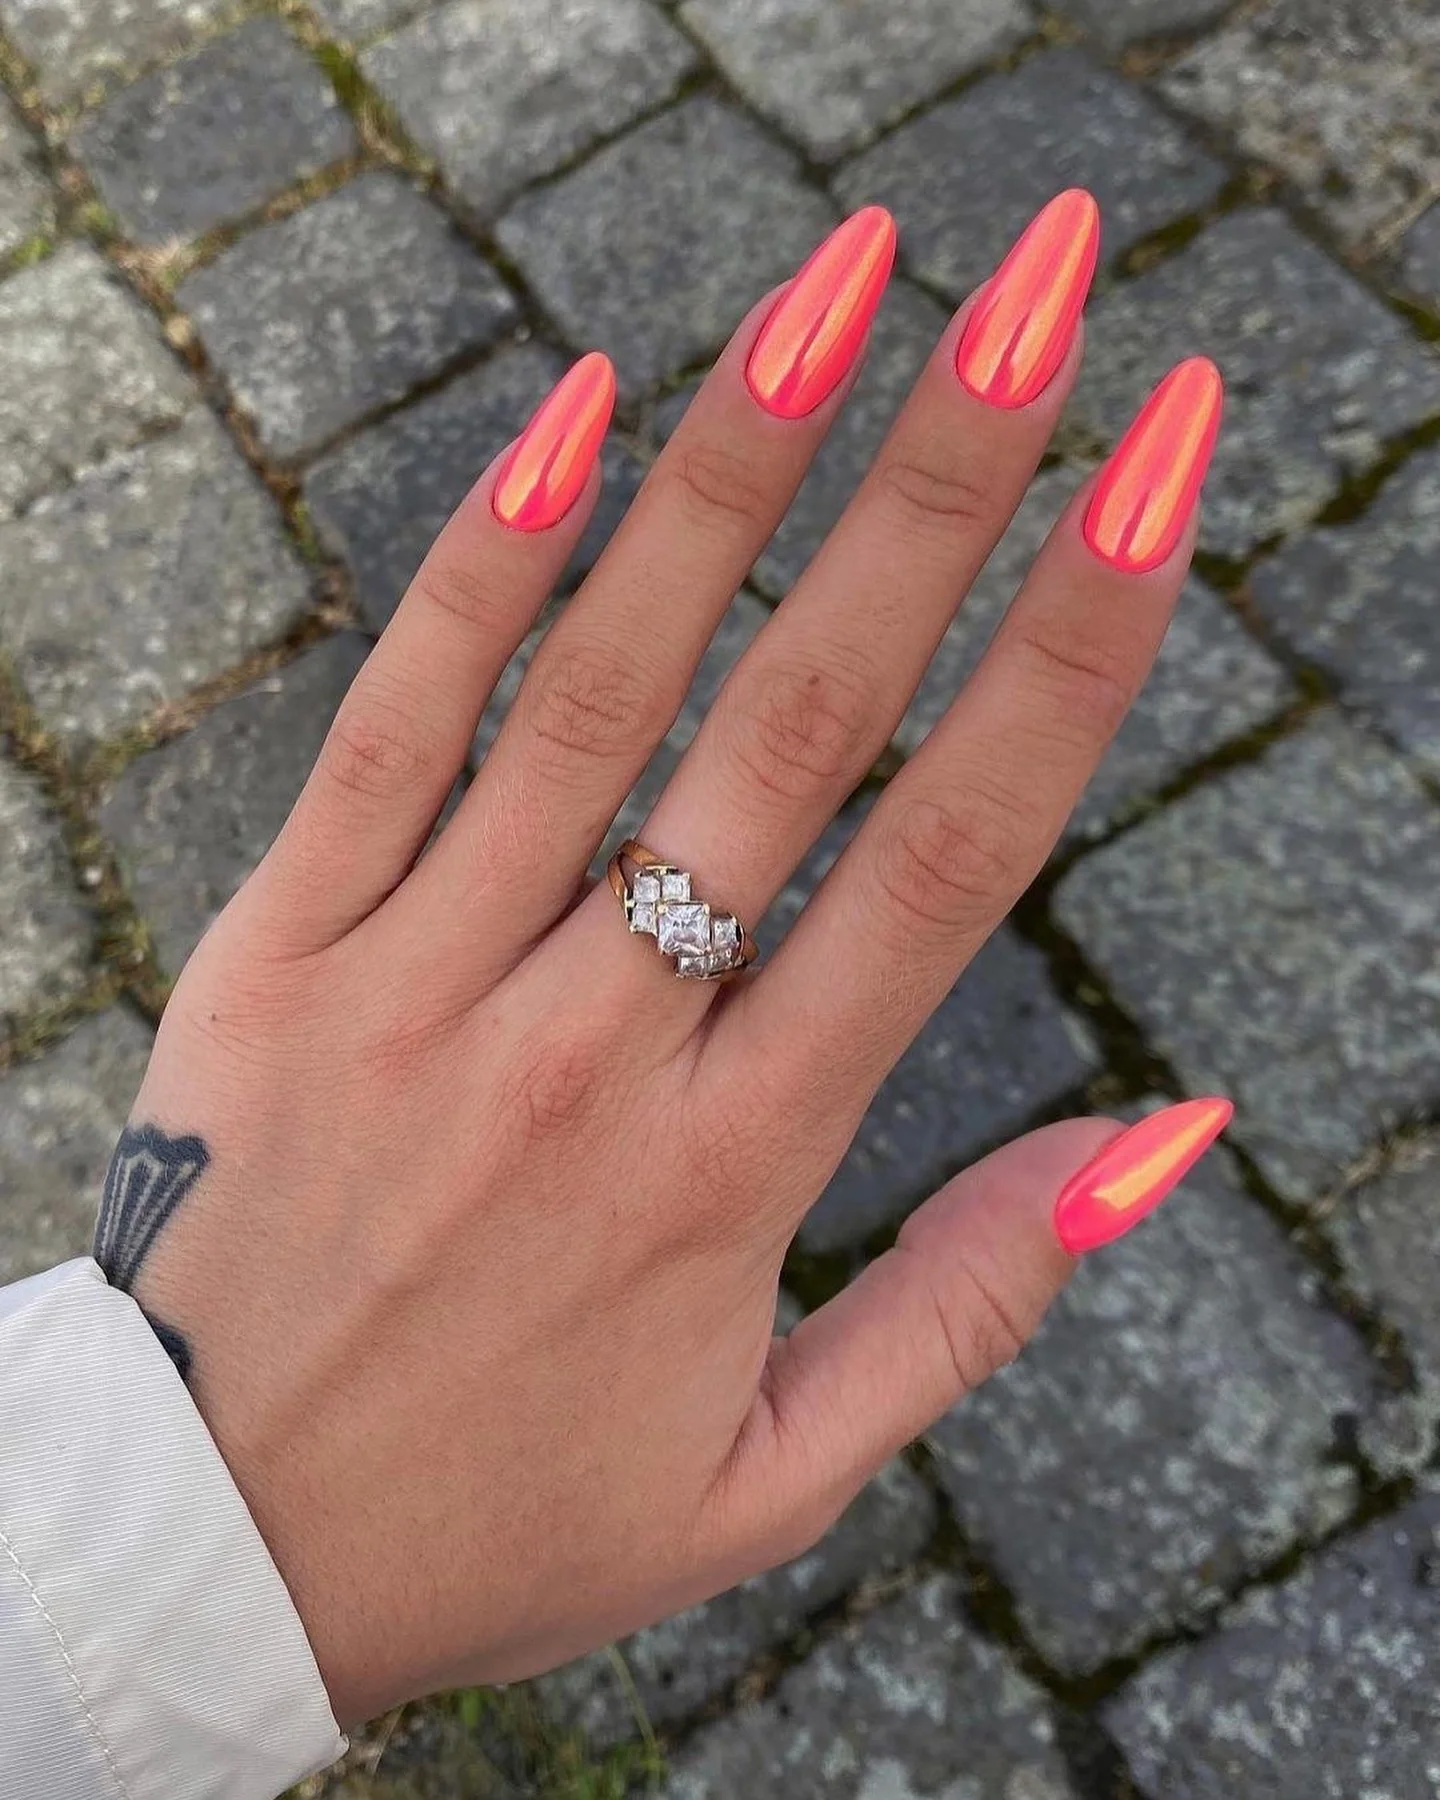
For a similar result, I would start with a saturated coral or pink gel polish and add a very fine yellow-gold or multichrome chrome powder. I would reach for a non-wipe gel top coat, a soft applicator for the chrome, and a high-shine finishing gel. I would not overload the surface with glitter because the beauty here comes from the clean color underneath and the controlled reflective streak.
I would shape the nails into a soft almond before applying the base color in thin, even layers. After curing, I would apply the non-wipe top coat, cure it according to the product instructions, and gently buff the iridescent pigment over the surface. I would concentrate slightly more pigment through the center so the light catches it as the hand moves, then seal everything with another glossy top coat.
This is the kind of manicure I would choose when I want my nails to do a little talking without relying on rhinestones or complicated nail art. The coral makes it especially appealing for the last warm days of summer, while the pearl reflection gives it enough polish to transition beautifully into early fall. One glance at the nails in sunlight and the whole color seems to wake up.
Pink Opal Nails With a Neon Iridescent Shift
I keep coming back to this soft pink version because the base looks almost translucent while the iridescent detail creates a vivid flash of yellow, aqua, and green. The rounded shape keeps the manicure wearable, and the glossy surface gives the nails that smooth, freshly finished appearance I associate with modern pearl manicures. Instead of covering the pink completely, the reflective pigment seems to float over it, which makes the color feel dimensional.
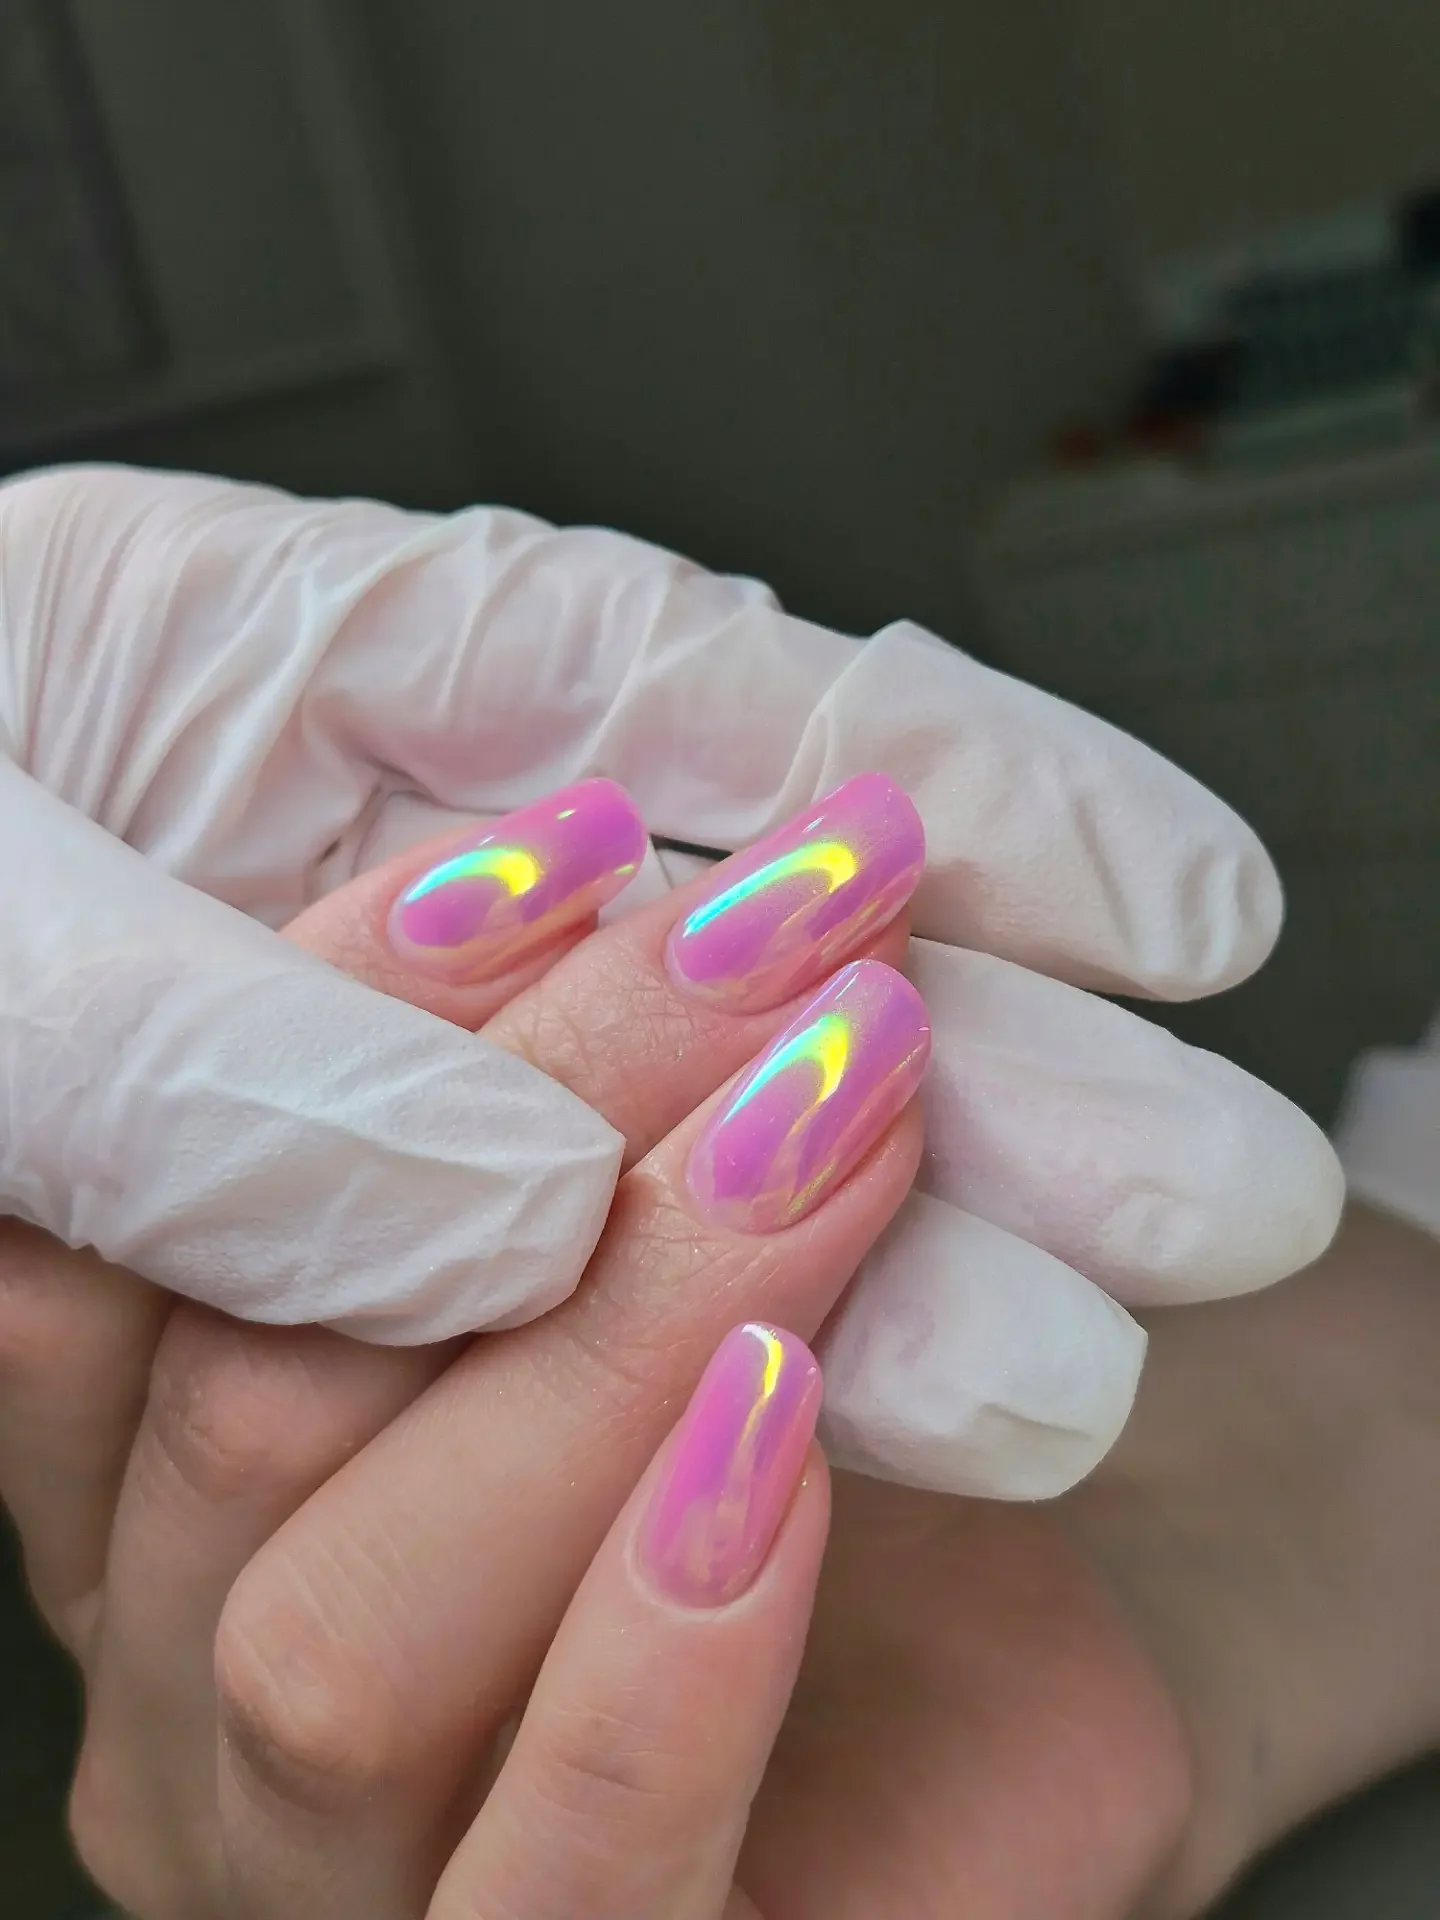
For this look, I would use a sheer pink gel base, a translucent milky pink if more coverage is needed, and a multichrome pigment with green, aqua, yellow, and soft blue shifts. A glossy non-wipe top coat is essential because a pearlescent manicure depends heavily on the smoothness of the surface. I would also keep a small silicone applicator or eyeshadow-style sponge nearby for controlled pigment application.
I would begin with short, softly rounded nails and build the sheer pink in one or two thin coats. Once the color is cured, I would apply the chrome powder lightly rather than rubbing it aggressively into the nail. I like the idea of leaving subtle variations from nail to nail because that keeps the finish looking more organic. A final layer of glossy top coat brings everything together and gives the surface that wet-looking shine.
I think this version works beautifully when I want something feminine but not overly sweet. The pink keeps it approachable, while the unexpected green and yellow flashes make the manicure feel current. Would I wear it with a simple white outfit or denim? Absolutely—the shifting finish becomes the accessory.
Smoky Pearl Nails With Pink and Gold Reflections
I love the moodier direction of this manicure. The translucent gray base has a soft smoky quality, but instead of looking flat, it catches delicate flashes of pink, champagne, and warm gold. The short-to-medium oval shape makes the design feel understated, while tiny reflective particles add movement whenever the nails catch the light. It is a great reminder that pearl nails do not have to be pale or traditionally luminous.
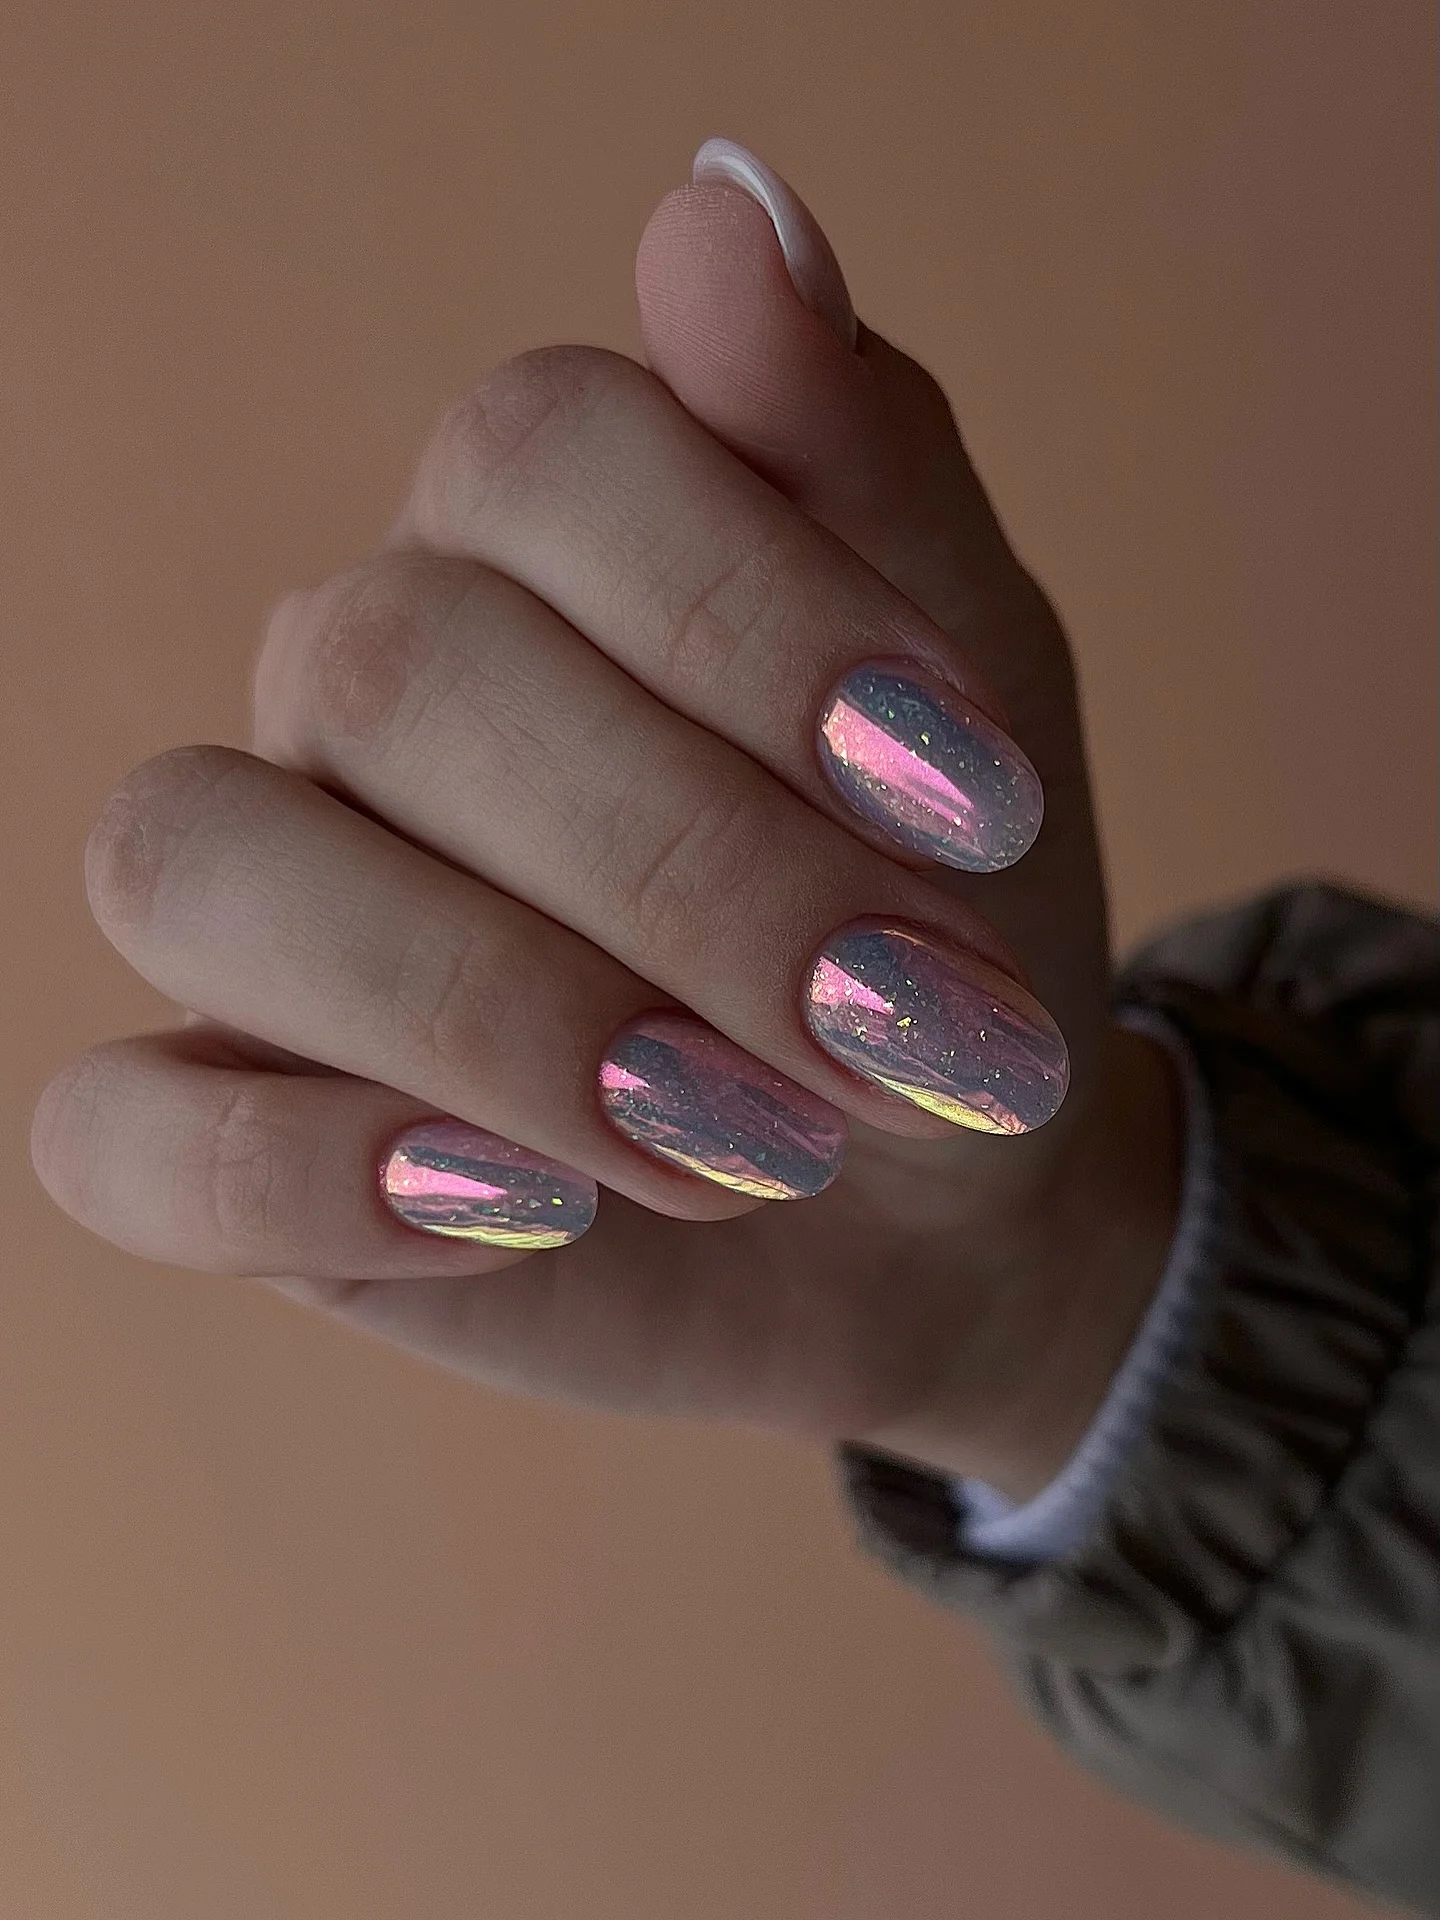
I would recreate this effect with a sheer smoky gray or taupe gel, a fine pink-gold aurora pigment, and a very glossy top coat. A translucent base works especially well because it allows the chrome to remain visible without creating a solid metallic block of color. I would keep the glitter extremely fine and choose a pigment with several color shifts rather than obvious chunky particles.
I would first refine the oval shape and smooth the nail surface carefully because imperfections can become much more noticeable under reflective finishes. After applying the smoky base, I would cure it and add a thin layer of non-wipe top coat. I would then work the iridescent pigment into selected areas, especially toward the center and free edge, before sealing the manicure with a final glossy layer.
This is probably the version I would pick when I want pearl nails to feel a little more sophisticated and less traditionally pretty. The smoky foundation gives the manicure depth, while the pink and gold flashes soften it. I can easily see this working for an evening dinner, a September event, or simply one of those weeks when I want my everyday manicure to feel slightly special.
Blush Pink Nails With a Lime Pearl Flash
I find this combination especially fresh because the delicate pink base and electric yellow-green reflection create such a striking contrast. The nails are elongated with a soft almond shape, and the translucent finish allows the natural-looking pink foundation to remain visible beneath the chrome. The iridescent stripe appears strongest toward the center of each nail, giving the surface a curved, dimensional appearance rather than a flat metallic finish.
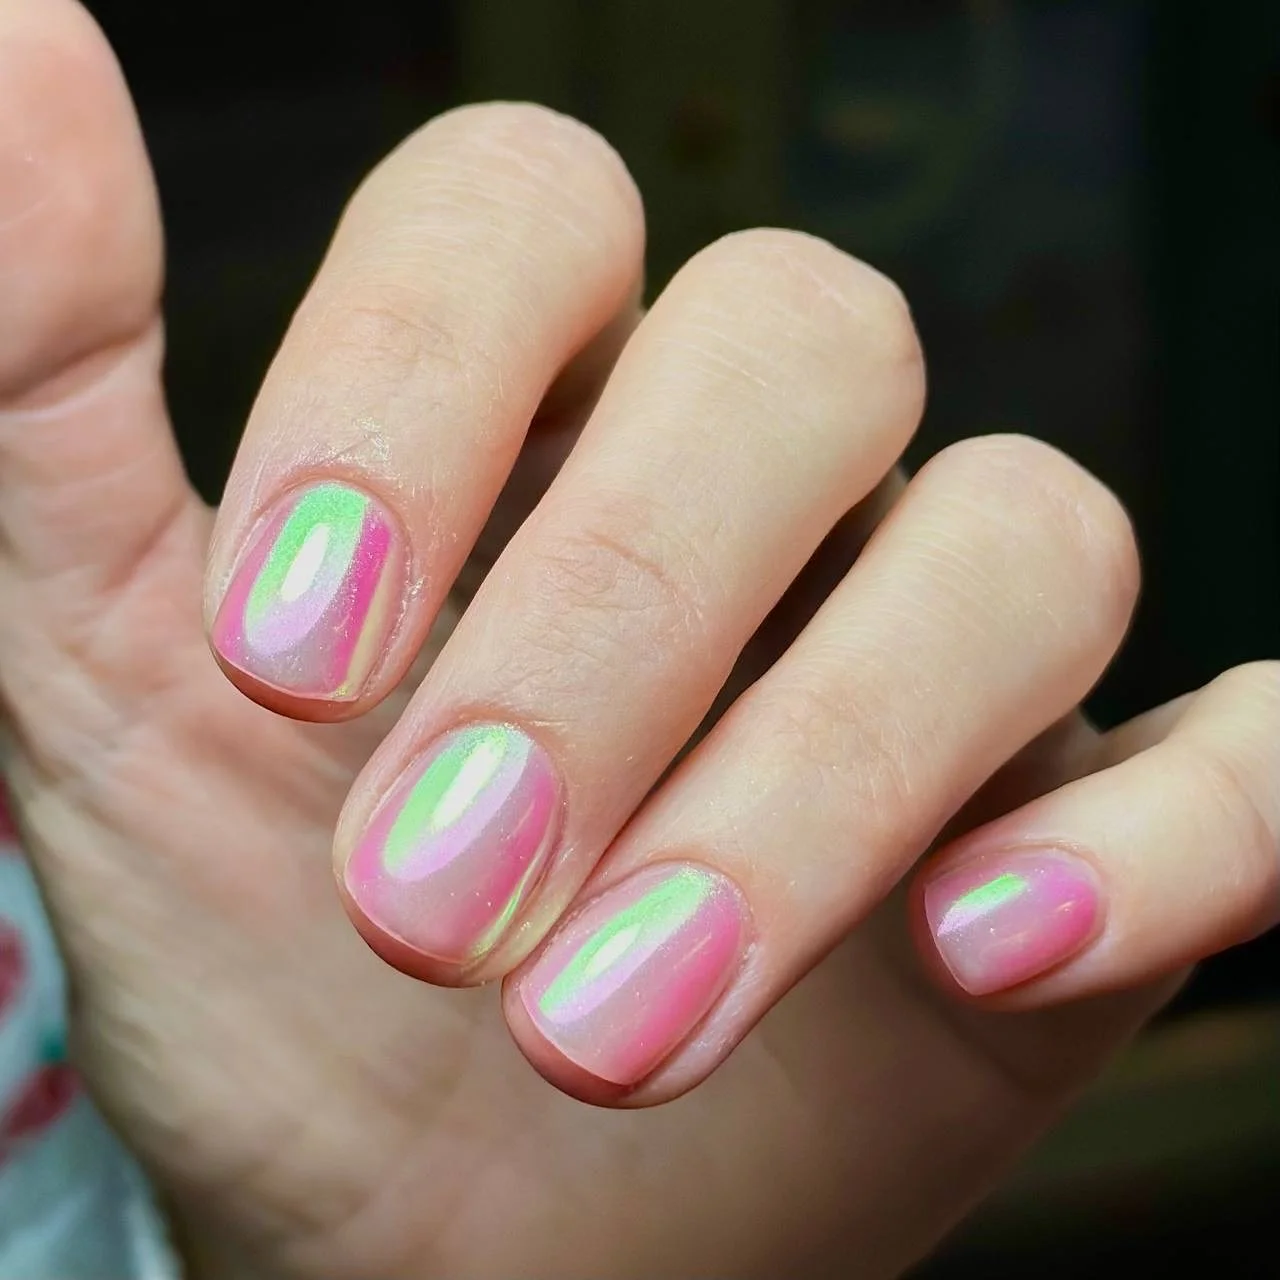
To create it, I would choose a sheer blush-pink gel polish, a fine lime-green or yellow-green chrome pigment, and a glossy non-wipe top coat. I would also keep the base relatively translucent because too much opaque pink would reduce the airy quality of the pearl effect. The goal, for me, is to let the reflective pigment look as though it is sitting inside the shine rather than simply on top of the color.
I would start by shaping the nails into a balanced almond and applying a sheer pink base. After curing, I would add the glossy layer needed for the chrome application and gently work the yellow-green pigment over the surface. I would pay attention to the direction of the reflective flash, keeping it elongated along the nail so the shape looks even longer. Once everything is sealed, I would finish with cuticle oil for that polished salon-style appearance.
I like this idea for someone who wants a classic pink manicure with a twist that only reveals itself when the light changes. It feels especially pretty in natural daylight, when the green reflection becomes much more noticeable. Honestly, that little surprise is what makes the manicure memorable.
Cool Opal Nails With an Icy Pearl Finish
I would describe this manicure as the cooler side of the pearl trend. The nails have a soft oval shape and a translucent blue-white base that shifts into pale pink, lavender, and hints of warm yellow depending on the angle. The finish is smooth and luminous rather than glittery, which gives the manicure an almost opalescent quality. I especially like how the reflective effect remains delicate even though the color changes are clearly visible.
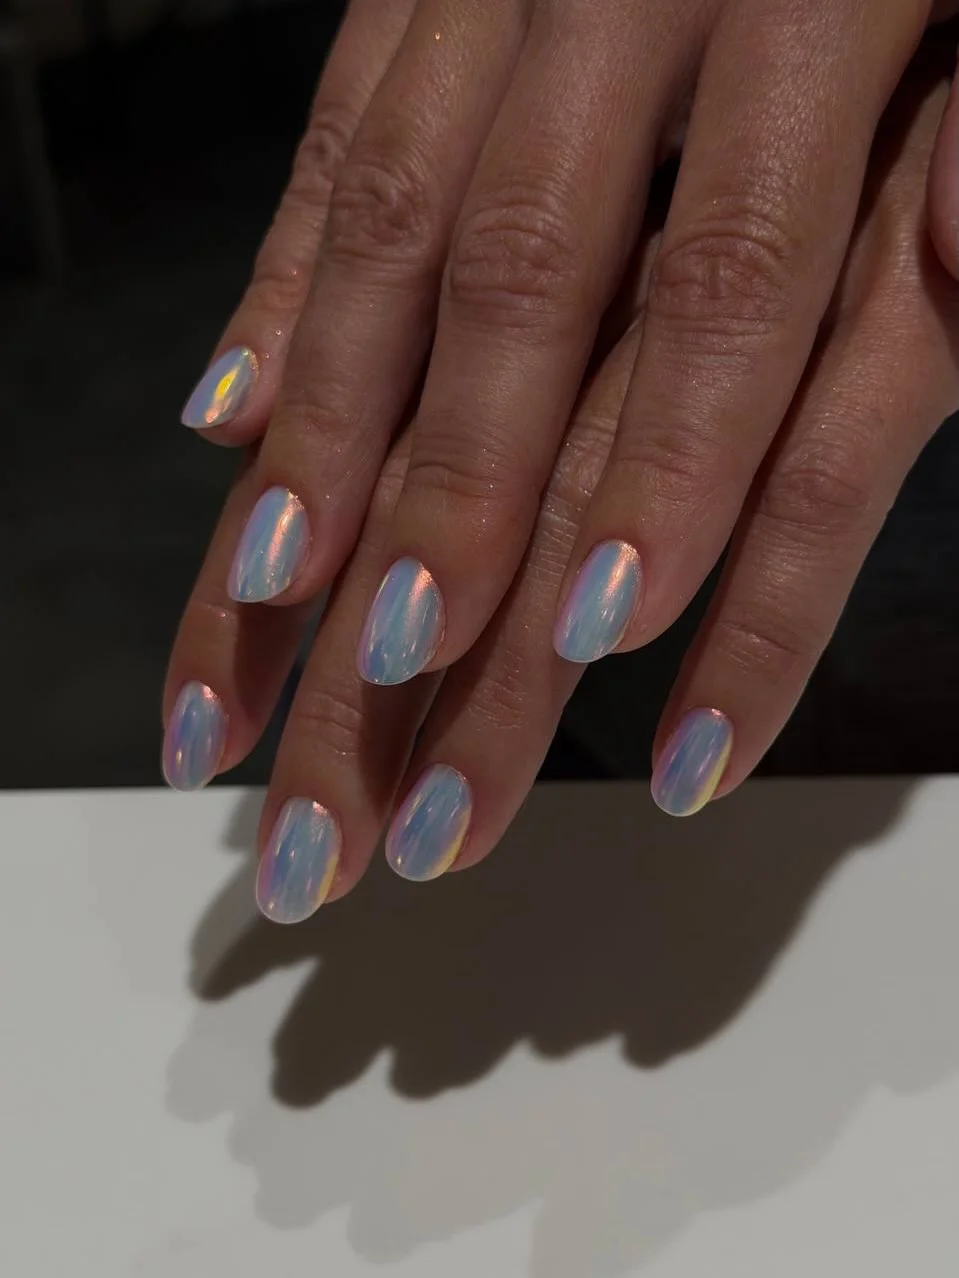
For this version, I would use a sheer milky blue or translucent white base with a cool-toned aurora chrome pigment. A pearl or opal powder that shifts between icy blue, pink, lavender, and champagne would create a similar effect. I would finish with a thick, glassy top coat that smooths the surface and protects the delicate reflective finish.
I would keep the nail shape soft and symmetrical, then apply the translucent base in very thin layers. After curing, I would add the chrome pigment sparingly, building it gradually until the color shift becomes visible. I would avoid pressing too much pigment into one area because the prettiest part of an opal manicure is the movement between colors. One final glossy layer gives the nails that smooth pearl-like depth.
This is the manicure I would choose when I want something quiet from a distance but fascinating up close. The cool blue base feels fresh, while the pink and gold reflections prevent it from looking too icy. It would be beautiful with soft knits and neutral September outfits when I want my manicure to provide just a small flash of color.
Lavender Pearl Nails With a Golden-Green Shift
I love the slightly futuristic feeling of this lavender manicure. The nails are elongated and softly rounded, with a translucent pink-lilac foundation that allows the reflective pigment to glow through rather than sit heavily on top. The strongest detail is the narrow yellow-green flash running vertically across each nail, creating an almost liquid-metal effect against the cooler pink base. It is playful, polished, and surprisingly wearable at the same time.
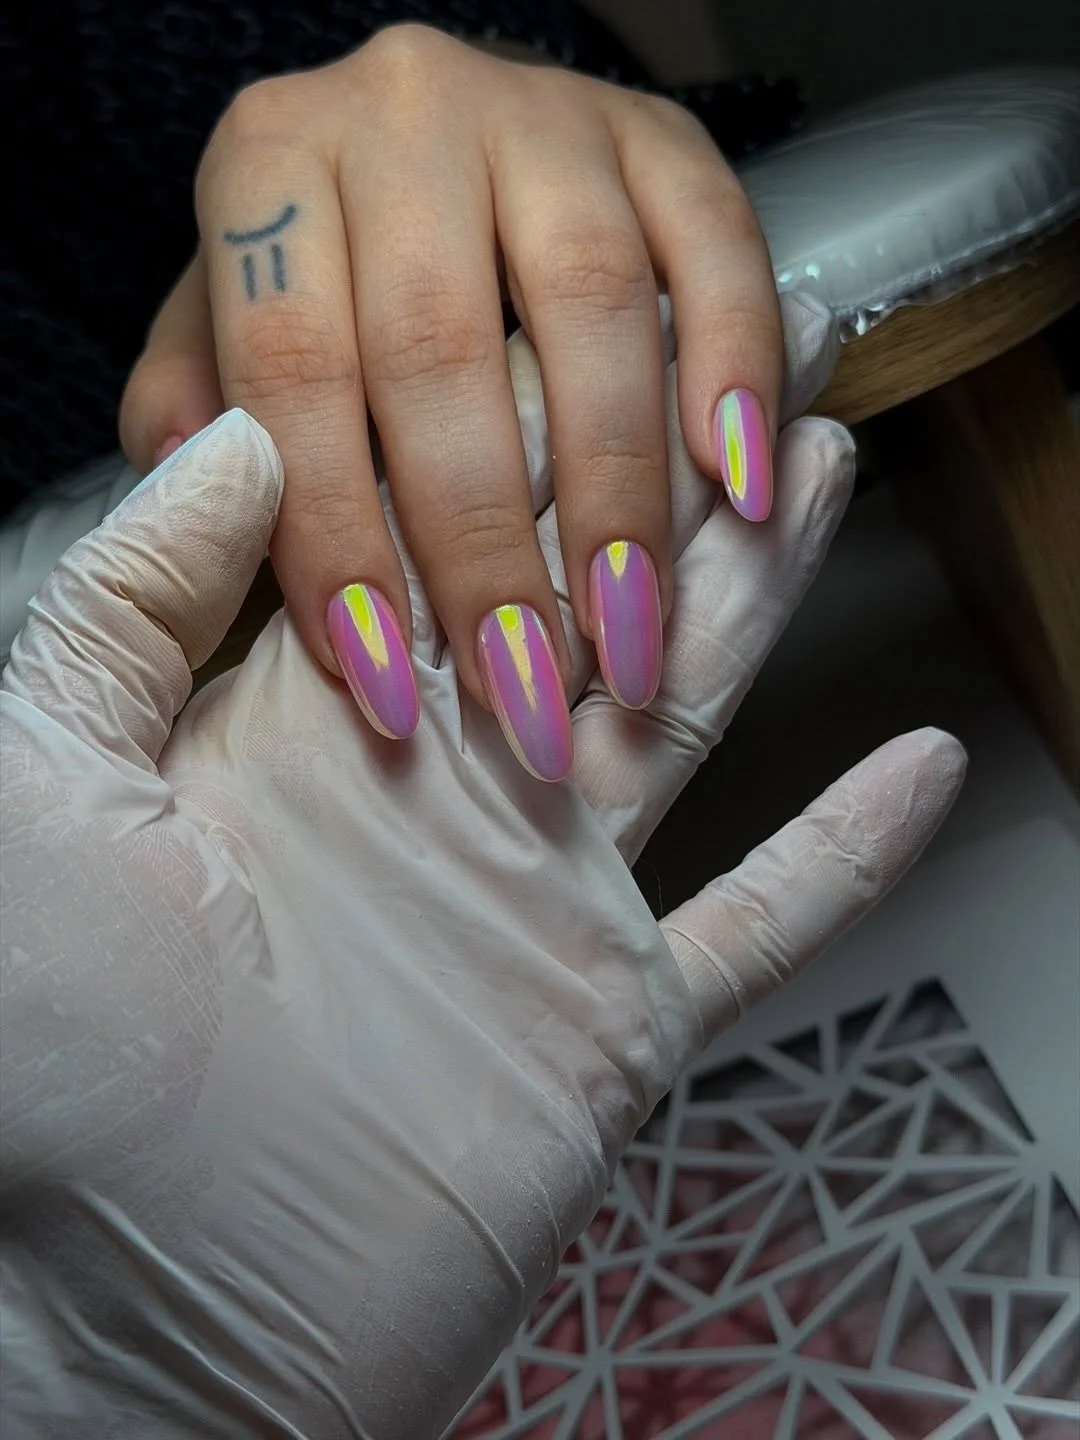
I would use a sheer lavender-pink gel, a yellow-green aurora chrome pigment, and a high-shine non-wipe top coat for this design. If I wanted a softer result, I would choose a pearl pigment with a subtle green shift rather than an intensely metallic chrome. I would also keep the layers thin because the transparency is part of what gives this manicure its elegant depth.
I would shape the nails into a long oval or soft almond, depending on the natural nail length, and smooth the surface before applying the sheer pink-lilac base. Once cured, I would add the chrome finish gradually, focusing the pigment along the center of the nail to emphasize the elongated shape. I would finish with a glossy top coat and cure it fully according to the manufacturer’s instructions.
For me, this is where pearl nails become genuinely exciting. The lavender-pink foundation keeps the manicure delicate, but that golden-green flash adds just enough unexpected color to make me look twice. I could wear this style for a night out, a special occasion, or simply when a standard pink manicure feels a little too safe.
Pearl nails are having a beautiful moment, and I can see why. Their soft, luminous finish gives even the simplest manicure a polished, elegant feel, while an iridescent gloss adds those subtle flashes of pink, lavender, blue, or gold that make the nails look different as the light moves. What makes this trend so appealing is its versatility: a short milky manicure can feel effortlessly clean, while longer almond nails can turn the same pearl effect into something more eye-catching. But how do you choose the right pearl shade, nail shape, and level of shine?
I love this look for exactly that reason—it never feels completely predictable. The finish can be delicate and understated for everyday wear or layered over pastel shades when I want a little more personality. From creamy white pearls to dreamy opal and lavender reflections, there are plenty of ways to make this elegant manicure your own. So, which version would I actually wear this season? Let’s explore the prettiest Pearl Nails With Iridescent Glossy Elegant Finish and the small details that make each one worth saving for your next manicure.

