
As the leaves begin to turn and cozy layers return to my wardrobe, I always find myself craving richer, deeper nail colors. Chocolate brown feels especially perfect for fall 2026, offering the warmth of espresso and cocoa with a polished, sophisticated finish. From glossy dark chocolate tips to soft, creamy mocha shades, this color works beautifully across both minimalist and more detailed manicures. I love how effortlessly brown nails can complement everything from chunky knits to tailored coats without feeling predictable. Whether you prefer short, natural nails or a longer almond shape, there is a chocolate-inspired look to suit your personal style. Here are the chocolate brown fall nail designs I’ll be saving for the season ahead.
Glossy Caramel Brown for an Effortless Fall Manicure
I always come back to a glossy caramel-brown manicure when I want my nails to feel polished without looking overly styled. The short, softly rounded shape keeps this shade modern and practical, while the warm brown has that delicious toasted-caramel quality that immediately feels right for September and October. I love how evenly the color covers every nail here, with no decoration competing for attention. The high-shine finish adds enough dimension to keep the manicure looking fresh, almost like a sheer layer of caramel has been poured over the nails.
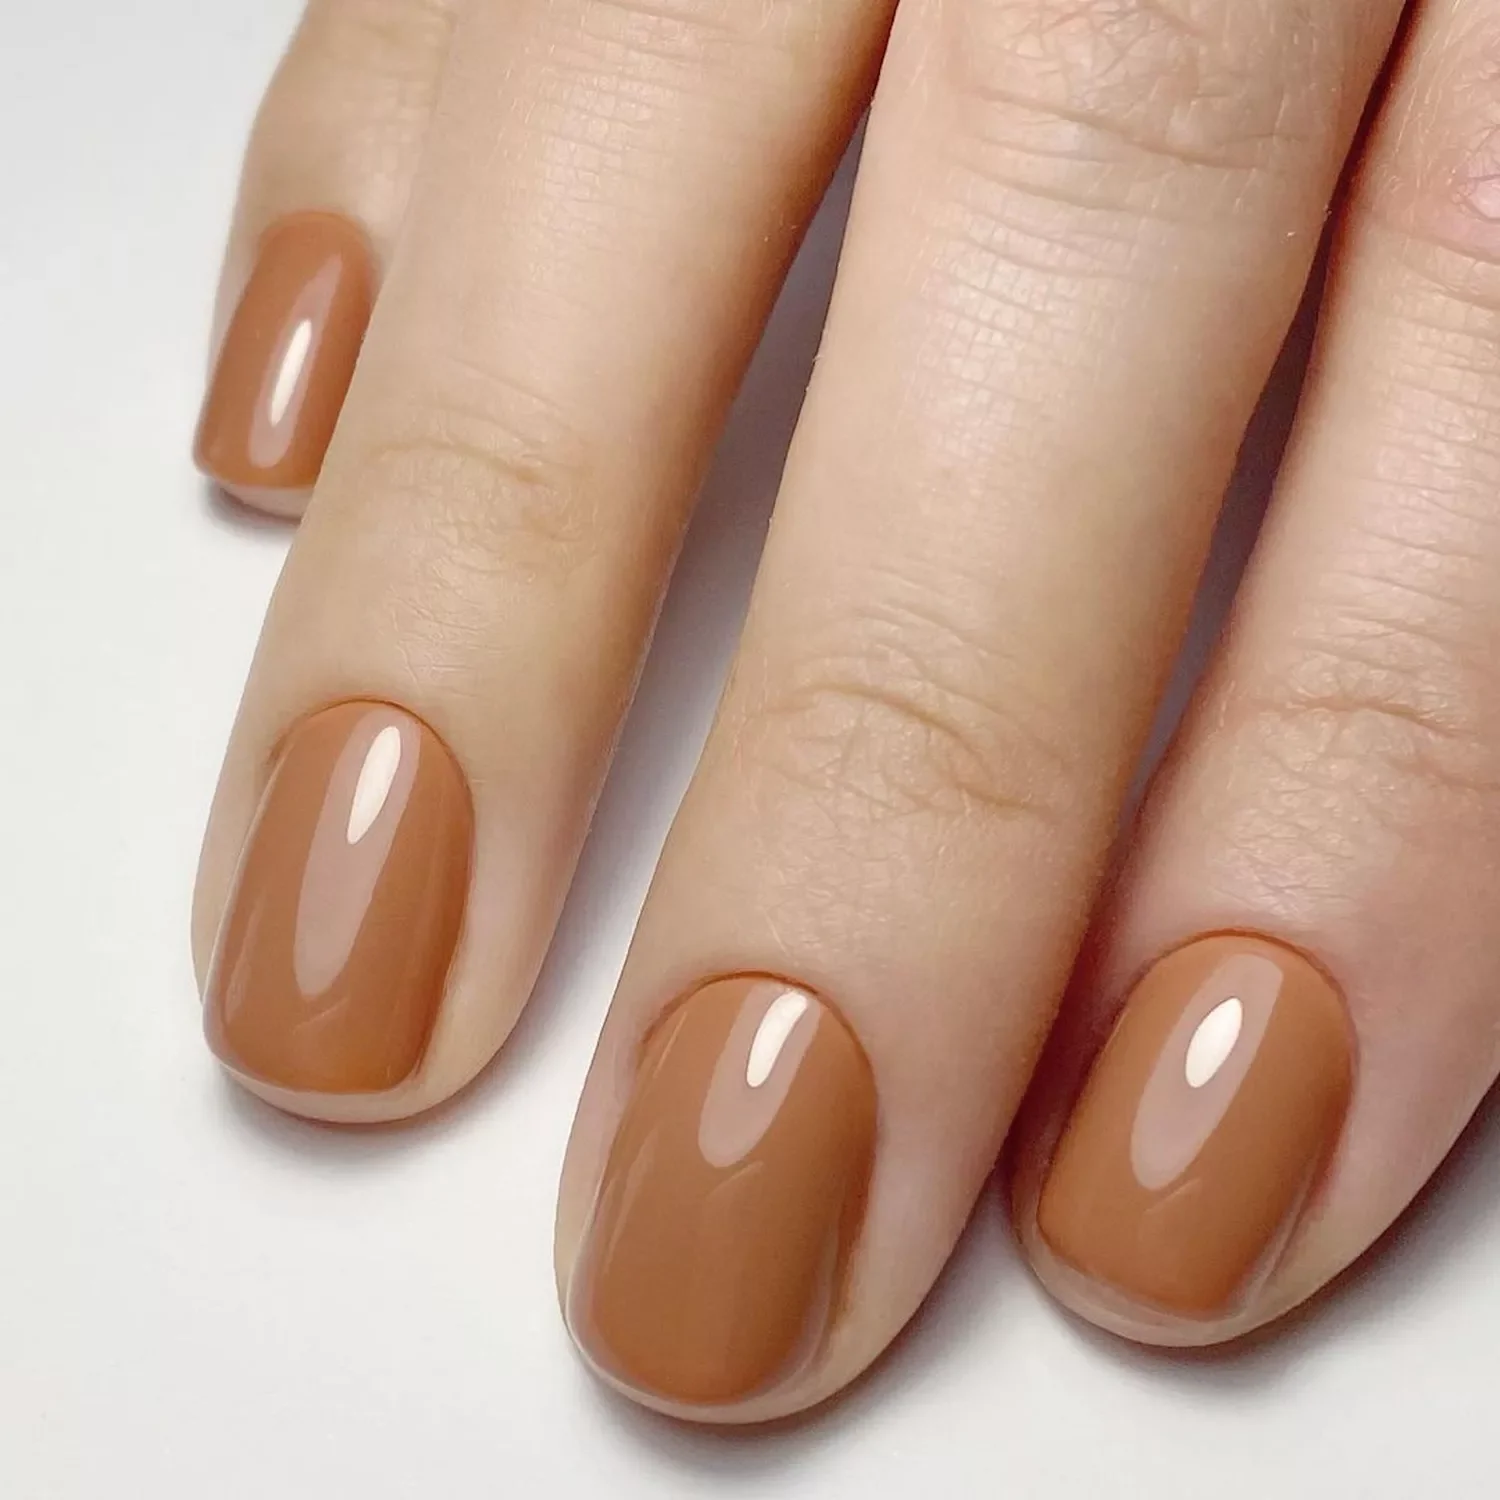
For a similar result, I would look for a medium caramel, toffee, or warm chestnut gel polish rather than a very dark chocolate. OPI, Essie, and CND all offer brown families that can be layered or adjusted to reach this kind of warmth. I would also keep a glossy top coat nearby because the shine is doing a lot of the visual work. A nourishing cuticle oil is useful too, especially as cooler weather starts making hands feel drier.
At home, I would shape the nails first and gently smooth the free edge before applying a thin base coat. Two very thin layers of caramel-brown polish usually create a cleaner finish than one thick layer, particularly around the cuticle. After allowing each layer to settle, I would seal everything with a high-shine top coat and give the edges a little extra attention. That tiny detail can make a simple manicure look surprisingly salon-like.
This is the kind of manicure I would choose for a busy fall week when I want everything to coordinate without thinking about it. It works with denim, camel sweaters, cream coats, black basics, and even a little leopard accessory. Sometimes the most memorable manicure is the one that quietly makes the whole outfit look more pulled together.
Mocha Brown With Delicate Abstract White Lines
This mocha-brown manicure takes a completely different route, using a muted, earthy brown base with tiny white abstract drawings. The nails are short and softly rounded, which makes the decorative details feel intentional rather than overwhelming. I particularly like the irregular white lines and tiny dots because they give the manicure a hand-drawn quality. It feels artistic, but not precious. The soft matte finish also changes the mood of the brown, making it look velvety and understated rather than glossy and sweet.
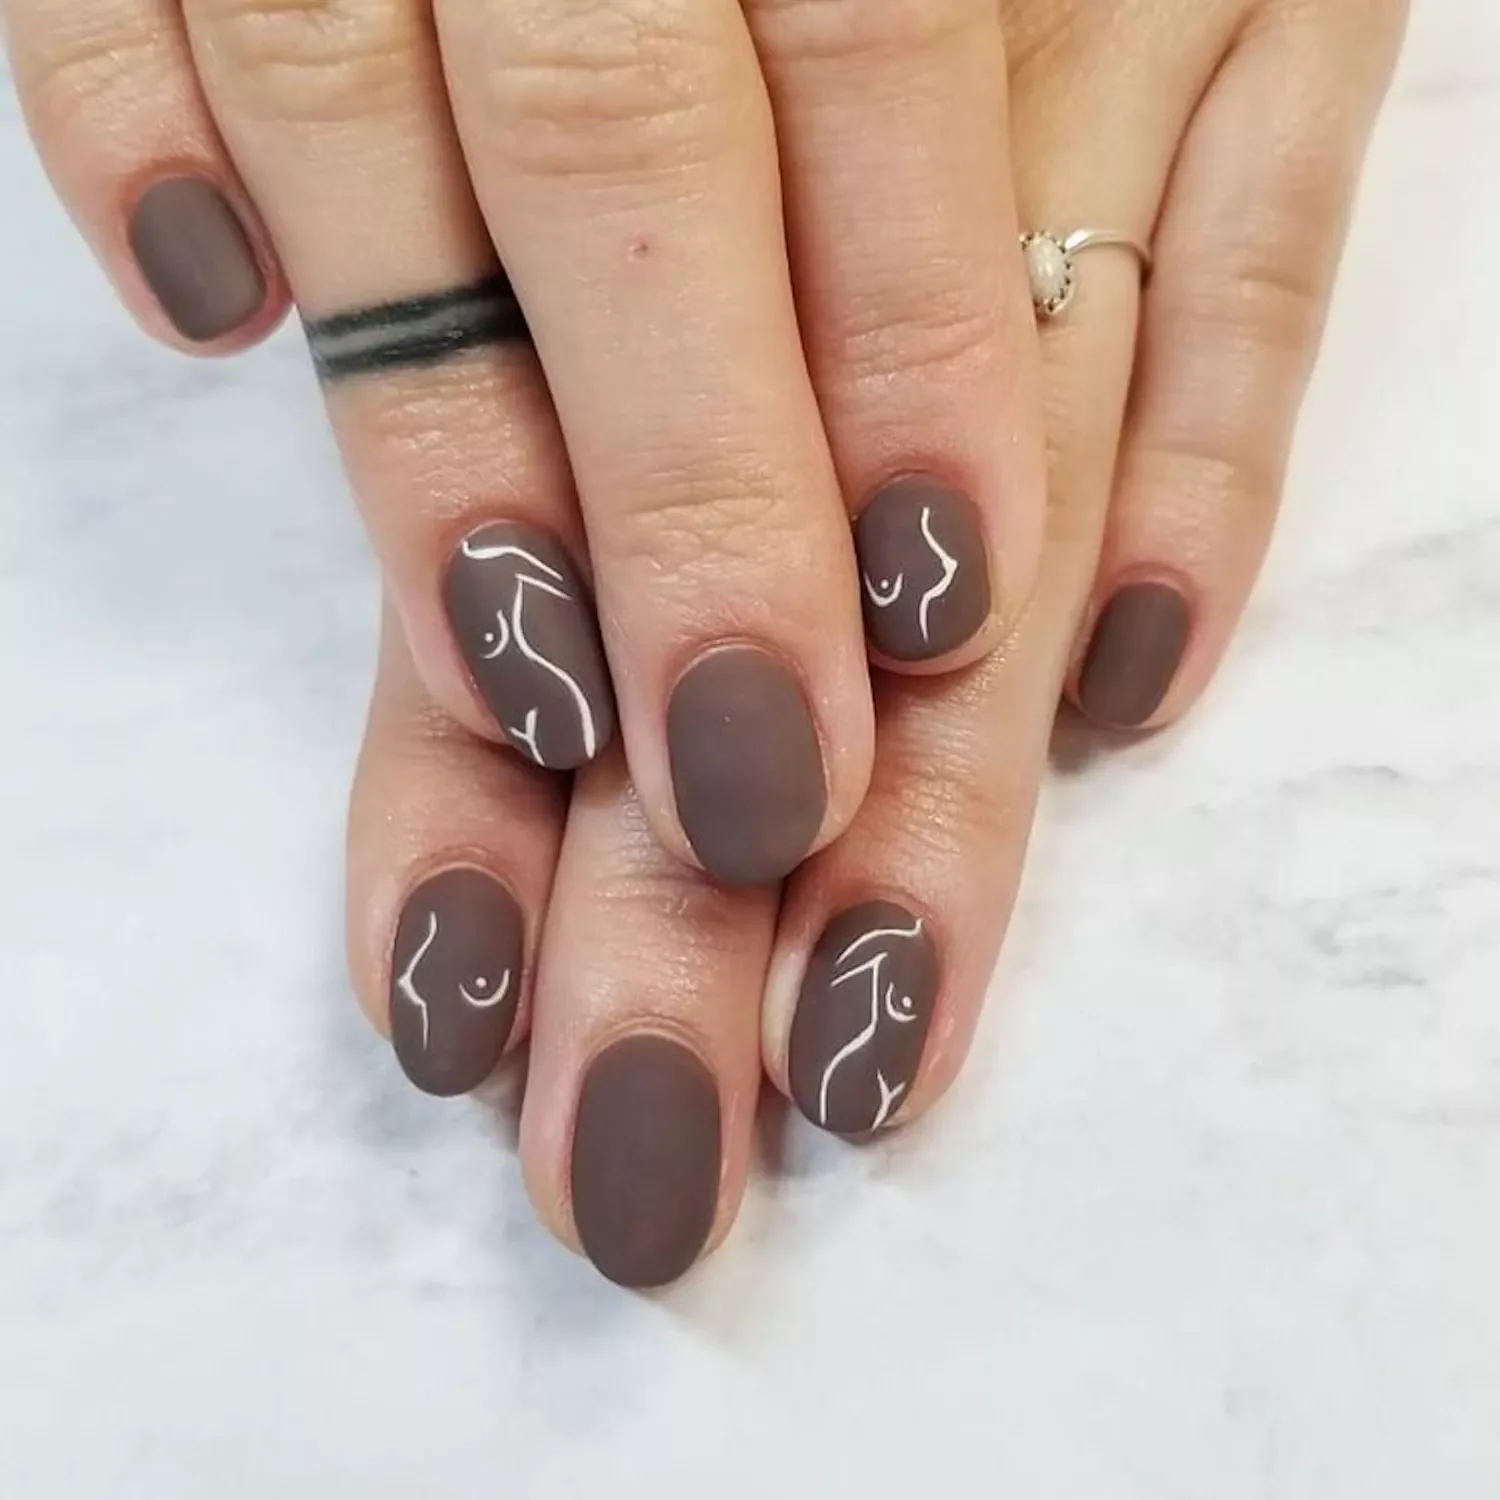
For this design, I would choose a muted cocoa or mushroom-brown polish with a matte top coat, plus a highly pigmented white nail-art polish and a fine detail brush. A dotting tool would make the tiny circular accents easier to control. If I were recreating the manicure myself, I would avoid an overly warm brown and choose something with a slightly smoky undertone so the white details remain crisp.
I would begin with the brown base and let it dry completely before adding the abstract lines. With a fine brush, I would create loose curves rather than trying to make every nail identical. That is the secret here: the designs should look related, not copied. I would add the tiny dots last, then finish with a matte top coat once everything had dried sufficiently. For anyone nervous about nail art, this is actually a forgiving place to start because perfection is not the point.
I think this manicure would be especially pretty in late fall, when chunky knits, dark denim, and soft neutral layers start appearing again. It has that quiet coffee-shop energy I love when the weather turns cool. And if you usually consider nail art too playful for everyday wear, would these little abstract marks change your mind?
Chocolate Brown and Leopard Print for a Playful Fall Accent
Leopard print and brown belong together almost too naturally, so I am not surprised this combination keeps returning every fall. Here, long almond-shaped nails alternate between glossy chocolate-brown polish and a creamy accent design filled with irregular brown and black leopard spots. The placement of the print along the length of the accent nails keeps the manicure visually elongated. The overall effect is feminine, playful, and unmistakably autumnal without covering every nail in pattern.
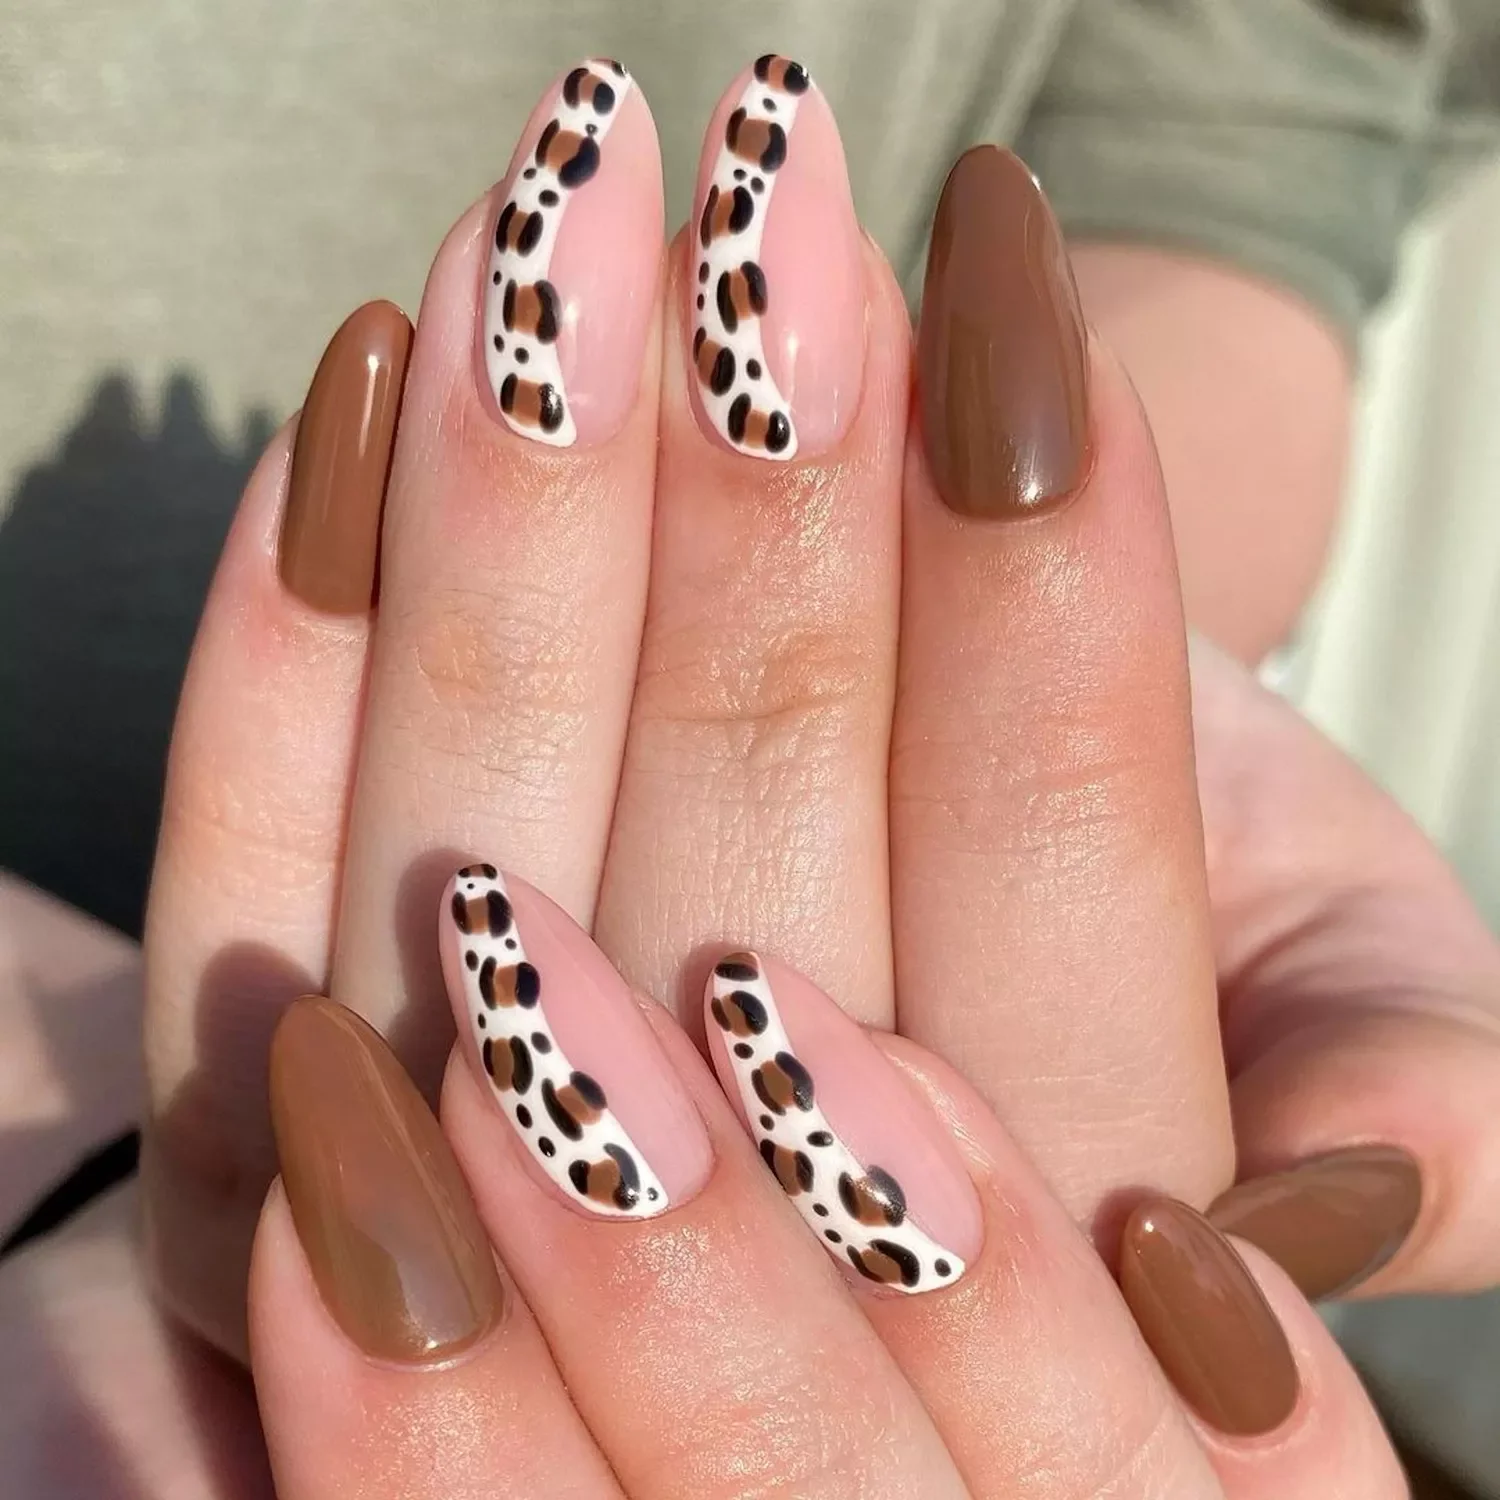
I would use a rich chocolate or coffee-brown gel polish for the solid nails, a soft creamy nude for the patterned areas, and two contrasting shades for the leopard markings. A darker brown and black work beautifully, although I personally prefer a slightly warmer brown in the spots because it blends more naturally with the rest of the manicure. A glossy top coat brings everything together and gives the leopard details that polished finish.
To create the look, I would first build the almond shape carefully because the silhouette matters almost as much as the design. After applying the nude base to the accent nails, I would place irregular brown spots with a small dotting tool or brush. Then I would surround parts of each spot with broken black curves, leaving some areas open. There is no need to make the pattern symmetrical; in fact, a little irregularity makes it look more convincing.
I would wear this manicure with a chocolate cardigan, denim, or even a simple black dress when I wanted my hands to become the accessory. It is one of those designs that can make a very basic outfit suddenly feel styled. Fall does not always have to be quiet and neutral. Sometimes it needs a little wild side.
Sheer Chocolate Brown With Tiny Heart Accents
I love the softness of this manicure because the brown base is translucent enough to let the natural nail show through. The short-to-medium rounded shape keeps it practical, while tiny heart-shaped accents in brown and golden tones create a delicate little surprise. Instead of traditional nail art covering the entire nail, the decorations feel scattered and almost spontaneous. The glossy finish makes the sheer brown look especially juicy.
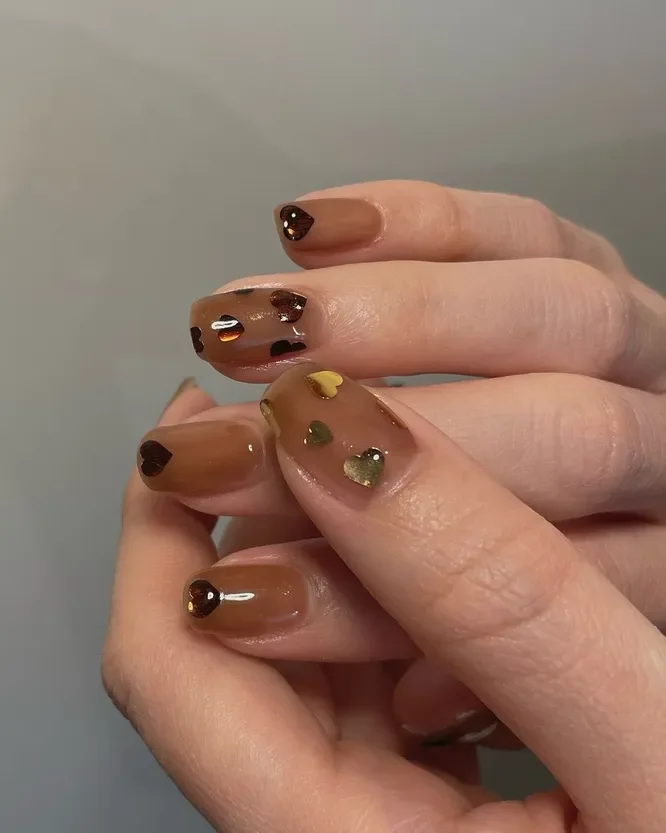
For this version, I would choose a transparent caramel-brown or jelly chocolate polish, depending on how much natural nail you want showing. Tiny heart decals can make the design easier at home, although I would use a dotting tool and fine brush if I wanted a hand-painted finish. A glossy gel top coat is essential because the transparent brown looks best when it has a smooth, glassy surface.
I would apply one or two thin coats of the sheer brown first, keeping the layers very even. Once the base is cured or completely dry, I would position the tiny hearts in slightly different places rather than lining them up. A small amount of nail art adhesive can help secure raised decorations before the final top coat. I would keep the embellishments minimal because the charm of this manicure is its restraint.
This design reminds me why I like brown so much for fall: it can be cozy without becoming heavy. The tiny hearts add personality, but the overall look still feels grown-up. I could easily see myself wearing this with a soft knit sweater and delicate gold jewelry on a crisp October afternoon.
Minimalist Mocha Nails With a Barely-There Finish
There is something incredibly chic about a manicure that almost looks like an extension of the hand. These short, rounded nails use different depths of mocha and chocolate brown to create a tonal effect rather than relying on nail art. Some nails appear slightly lighter and milkier, while others carry a deeper cocoa tone. The glossy surface keeps everything sleek, and the result feels beautifully understated.
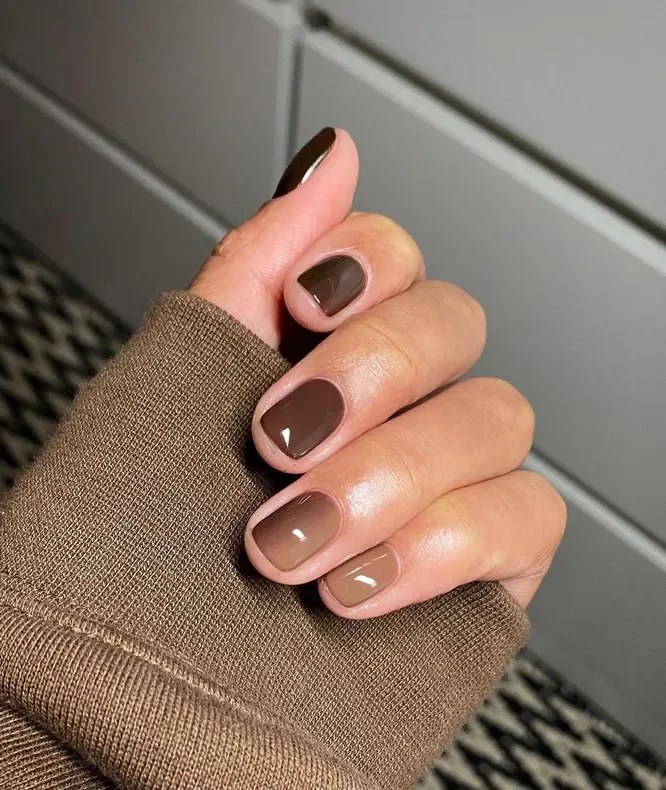
I would recreate this with a small collection of closely related brown shades: creamy taupe, milk chocolate, cocoa, and a slightly deeper mocha. The colors do not need to be dramatically different. In fact, subtle variation is what makes the manicure feel sophisticated. I would finish with the same glossy top coat across every nail so the palette remains visually connected.
My approach would be simple. I would prepare the nails, apply the base coat, and then assign each brown shade to a different nail while keeping the darkest colors balanced across the hand. Two thin coats should be enough for most opaque polishes. If the shades have slightly different finishes, I would use one consistent top coat over everything to create a uniform shine.
This is probably the easiest idea in the group to adapt to everyday life, and I mean that as a compliment. I like a manicure that can survive meetings, errands, coffee dates, and a last-minute dinner without suddenly feeling out of place. If you prefer quiet beauty over obvious nail art, this tonal mocha palette is a very easy yes for fall.
Deep Chocolate Almond Nails With Fine Metallic Edges
Now we are moving into a richer, more dramatic interpretation of chocolate brown. The long almond nails are coated in a deep brown base, with glossy darker tips and fine metallic-gold detailing tracing portions of the nail. The combination of brown, nude space, and gold creates a sculpted appearance that makes the almond shape look even longer. I particularly like the way the metallic detail follows the natural curves instead of appearing as a straight stripe.
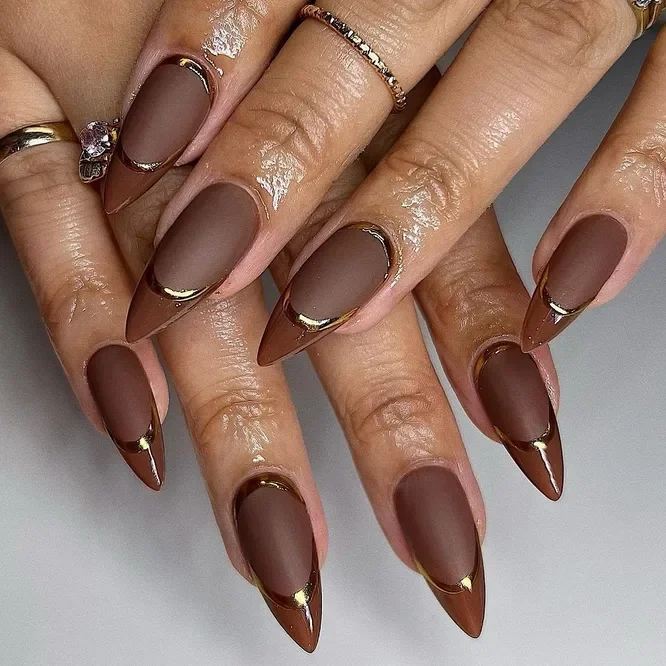
For this design, I would use a deep espresso-brown gel polish, a slightly lighter nude or cocoa shade, and metallic gold gel paint or thin gold striping tape. A fine liner brush is useful for creating precise curves. I would also keep a high-gloss top coat on hand because the contrast between the deep brown and reflective gold is one of the manicure’s strongest features.
I would start by creating a clean almond shape and applying the nude-brown foundation. After curing the base, I would carefully add the darker chocolate sections, following the shape of the tip. The gold line should be extremely thin; too much metallic product can quickly make the design feel busy. Once the details are secure, I would finish with a glossy top coat, taking care not to drag the fine gold lines.
For me, this is the manicure for the evening side of fall. It would look gorgeous with a satin slip dress, tailored black clothing, or a simple brown coat and gold jewelry. It has a little more attitude than a classic chocolate manicure, but it still feels refined rather than flashy.
Soft Brown Chrome for a Modern Fall Glow
Brown becomes almost futuristic when it is paired with a soft chrome finish. These almond-shaped nails start with a translucent nude-brown base and fade into a darker smoky chocolate tone toward the tips. A reflective sheen runs across the surface, giving the manicure a subtle metallic glow rather than an obvious mirror effect. I love that the design still feels delicate despite the longer shape.
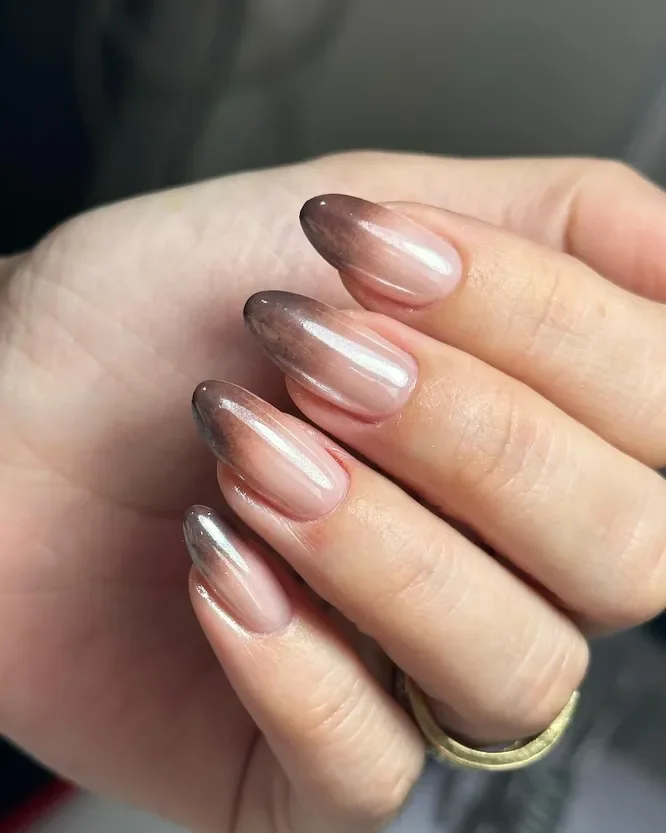
I would reach for a sheer nude-brown gel, a deep cocoa shade for the gradient, and a fine chrome powder in a soft silver, champagne, or neutral metallic tone. The exact chrome color can shift the mood considerably. For fall, I prefer something muted and pearly rather than extremely bright because it keeps the brown at the center of attention.
To recreate the gradient, I would apply the sheer brown base and build the darker color gradually toward the tips with a sponge or airbrush technique. After curing, I would apply the chrome product according to the system being used, then seal it carefully. The surface needs to be exceptionally smooth before chrome is applied; otherwise, every tiny imperfection can become more noticeable.
I see this as the bridge between minimalist and statement nails. It has enough shine to catch the light when I move my hands, but the colors remain grounded in the autumn palette. If classic brown feels too familiar for you this year, a soft chrome finish is one of the easiest ways to make it feel completely new.
Molten Bronze Nails With a High-Shine Metallic Finish
Metallic bronze gives chocolate brown a warmer, almost liquid quality. The medium-length nails have a softly squared shape and are covered in a rich coppery-bronze chrome that reflects light beautifully. There is no additional decoration, and honestly, none is needed. The finish itself becomes the design, making the manicure look sleek, expensive, and wonderfully suited to the golden light of fall.
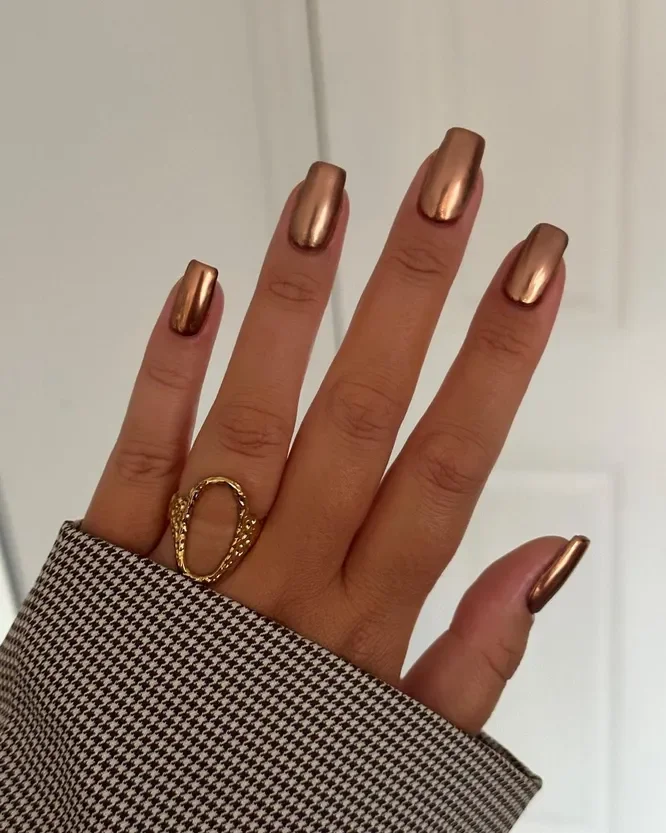
For this manicure, I would use a bronze or copper metallic gel system with a smooth chrome finish. A darker brown base underneath can give the metallic shade additional depth, especially if the bronze is naturally sheer. I would also use a high-quality no-wipe top coat compatible with the chrome system because the final surface needs to remain perfectly smooth.
I would prepare and shape the nails first, then apply the brown or bronze base. After curing, I would work the metallic pigment over the surface evenly, paying close attention to the sidewalls and free edge. Once the chrome looks seamless, I would seal it carefully with top coat. I would avoid excessive layers because metallic finishes tend to look best when the nail remains visually streamlined.
This is my choice when I want fall nails to feel glamorous without relying on rhinestones or complicated artwork. Bronze looks beautiful with chocolate, camel, cream, denim, and black, so it is surprisingly versatile. I can already see it catching the light while holding a warm drink on a chilly afternoon.
Chocolate Swirl Nail Art With a Deep Burgundy Accent
This manicure takes chocolate brown into a richer, more graphic direction. The long almond nails combine deep burgundy, chocolate, cream, and translucent sections in flowing abstract curves. Instead of placing a single motif on top of the base, the colors seem to move across each nail like ribbons. The contrast is sophisticated, and the darker burgundy gives the brown palette a slightly moodier edge that feels perfect for November.
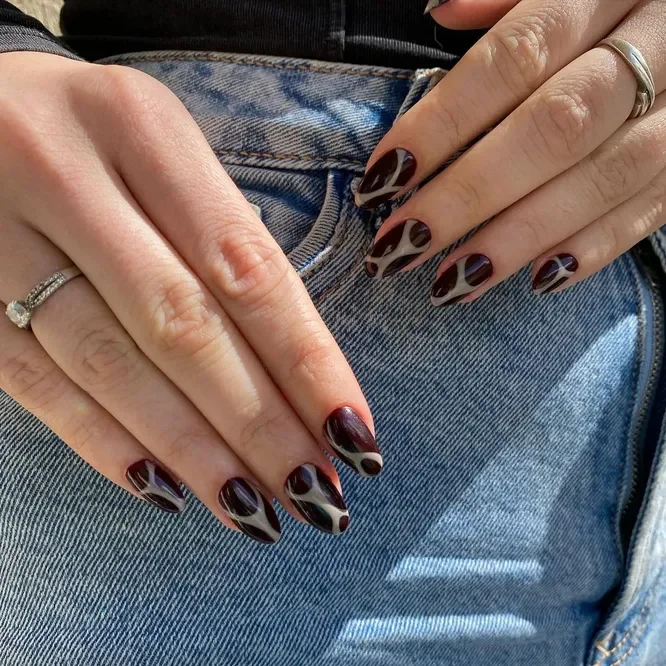
I would build this palette around espresso brown, deep wine, creamy beige, and a sheer nude. A fine liner brush is essential for the curved sections, while a detail brush helps fill the larger color areas cleanly. I would keep the finish glossy because the reflections help distinguish the overlapping shapes and make the colors appear richer.
I would begin with the sheer nude foundation and then sketch the larger curved sections with the darkest shades. I would let each color cure before adding the next so the lines remain crisp. The cream accents can be used sparingly to create contrast, especially near the center of the nail. Once all the shapes are balanced, I would add a glossy top coat to make the entire design look fluid.
I particularly like this idea for someone who wants artistic nails but does not want a traditional floral or geometric pattern. It feels spontaneous, almost like brushstrokes from a tiny abstract painting. Paired with denim and a dark sweater, it would have that effortless fall-editorial quality I am always looking for.
Chocolate Brown French Tips With Leopard Detail
A soft nude base and chocolate leopard tips make this final design feel surprisingly light for such a rich color story. The almond nails are kept mostly natural-looking through the center, while the tips carry small leopard spots in brown, black, and cream. The result is a playful variation on the French manicure that still leaves plenty of negative space visible. I love how the pattern follows the curved tip rather than taking over the entire nail.
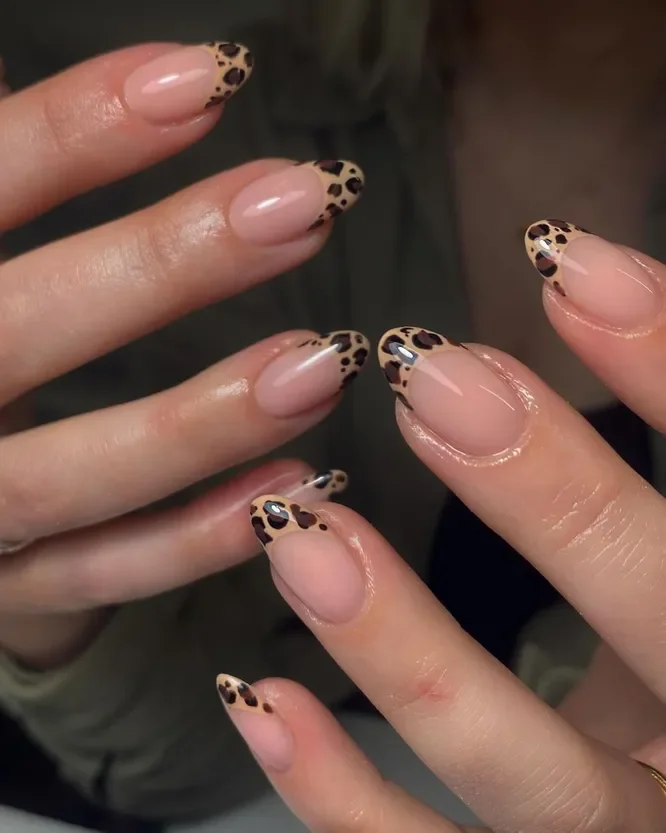
I would use a sheer pink or neutral nude for the base, a warm chocolate brown for the leopard spots, a creamy beige for contrast, and a deep brown or black for the irregular outlines. A fine brush and dotting tool are enough to create the pattern without needing a complicated kit. The final glossy coat is what gives the design that clean, polished finish.
I would first apply the sheer nude base and allow it to settle completely. Then I would create the curved French-tip outline and fill it with small irregular patches. The leopard spots should vary in size and shape, with little gaps between them. I would add the darker outlines selectively rather than circling every spot completely, which keeps the design looking softer and more natural.
I think this is one of the most wearable ways to experiment with leopard nail art in fall 2026. The chocolate palette keeps it connected to the season, while the nude center makes the manicure feel less demanding. If you have been tempted by animal-print nails but worried they might be too much, this version could be the sweet spot. It gives the classic brown manicure just enough personality to make people look twice.
Chocolate Brown French Waves for a Soft Fall Statement
I love how this manicure softens the drama of a long almond shape with a delicate, almost lace-like design. The base is a sheer blush pink, while the tips are traced with thin chocolate-brown and muted taupe waves. Rather than forming a traditional French line, the curves move organically across the tips, creating a fluid effect that makes the nails look longer and more elegant. The brown detailing is especially beautiful for fall because it brings warmth without covering the entire nail.
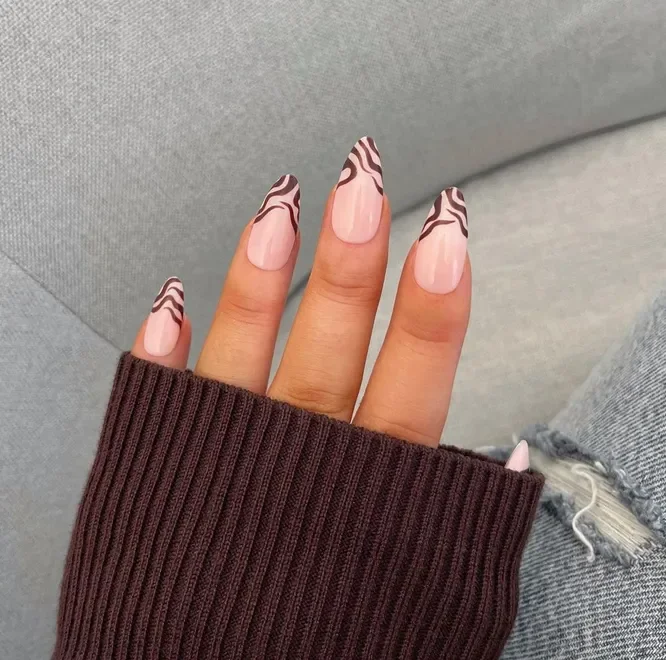
For this design, I would use a sheer pink or milky nude base, a deep cocoa-brown polish, and a slightly lighter taupe-brown for the fine waves. A very thin liner brush will make the curved lines much easier to control. I would also choose a glossy top coat because the combination of translucent nude and reflective brown looks best when the surface stays glass-smooth.
I would begin with the almond shape and apply one or two thin coats of sheer pink. Once the base is dry or cured, I would use the liner brush to draw several narrow, uneven waves across the tip. I would keep the lines close together in some areas and more separated in others so the design does not look mechanically repeated. A final layer of glossy top coat seals the fine artwork and gives the manicure that fresh salon finish.
This is the sort of manicure I would choose when I want something seasonal but not obviously themed. It would look beautiful peeking out from the sleeves of a brown ribbed sweater, exactly the kind of little detail that makes a fall outfit feel finished.
Deep Burgundy Chocolate With Leopard Accent Nails
Deep burgundy-brown polish gives this manicure a wonderfully rich foundation, while two accent nails introduce a creamy leopard pattern. The nails have a rounded oval shape, making the dark color feel elegant rather than severe. I particularly like the balance here: most of the nails remain glossy and solid, while the animal print is concentrated on just two nails. The result feels playful without losing its polished character.
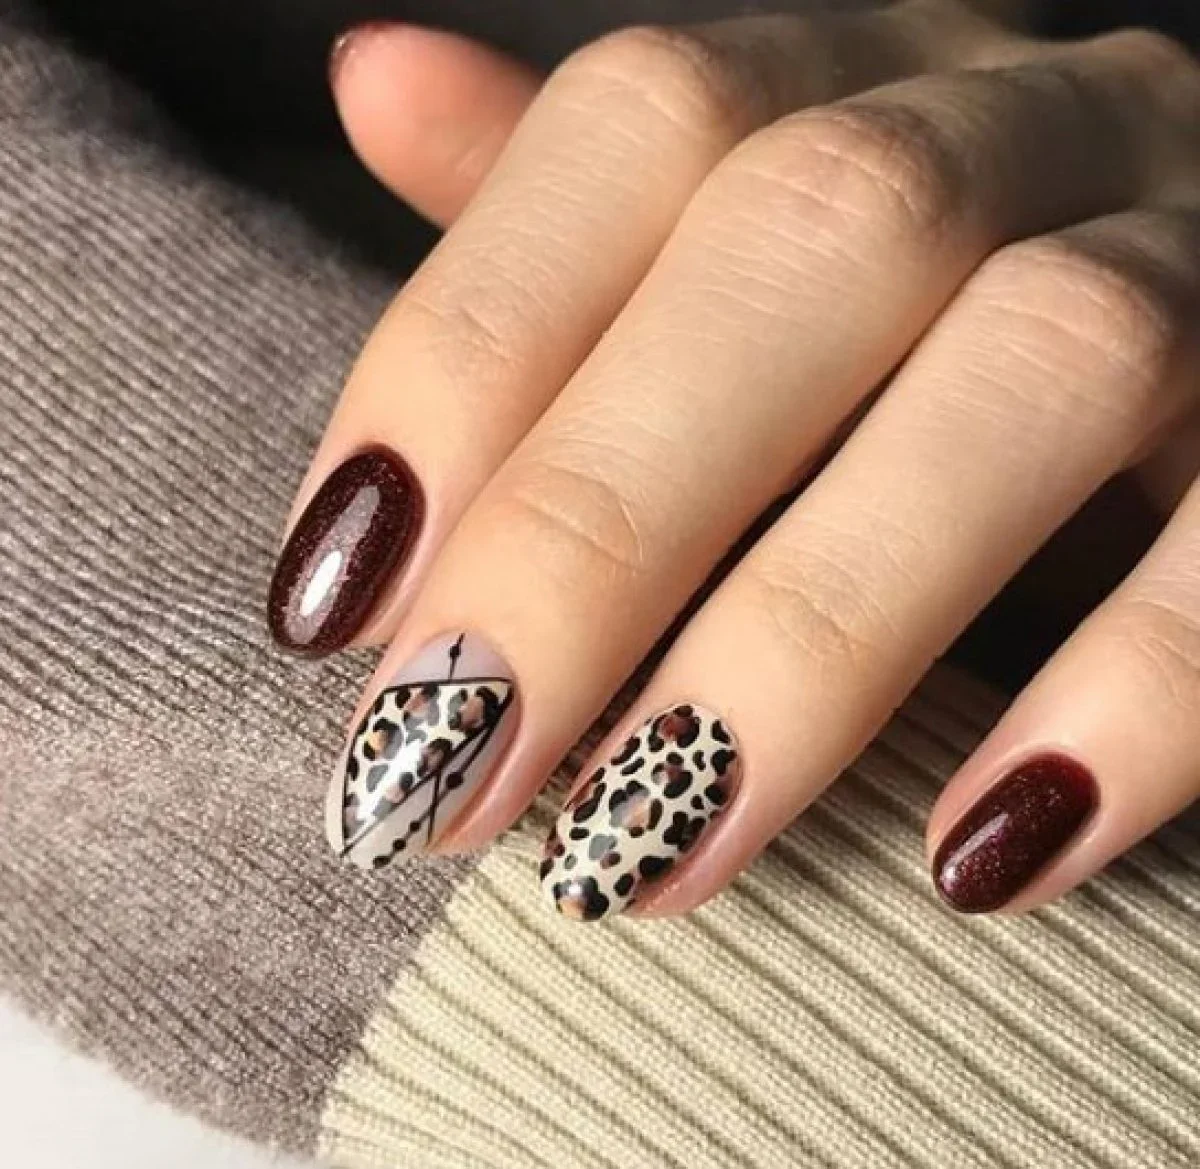
I would use a dark chocolate-burgundy polish for the solid nails and a warm ivory or beige base for the leopard accents. For the spots, I would combine medium brown with a deeper chocolate shade and a touch of black. A glossy top coat is important for both finishes so the manicure feels cohesive. If I were shopping for colors, I would look for names such as espresso, dark cherry, cocoa, or roasted brown rather than choosing a flat black-brown.
To create the accent nails, I would apply the light base first and let it dry completely. Then I would add irregular brown spots with a dotting tool, varying their size and spacing. Small broken dark outlines around the spots create the characteristic leopard effect without requiring perfect circles. I would keep the solid burgundy-brown nails completely clean and glossy so they visually frame the patterned accents.
I think this combination is especially good for someone who loves animal print but does not want it on every nail. The burgundy undertone makes the manicure feel deeper and more autumnal than a traditional tan leopard design. Add a dark denim jacket and gold jewelry, and suddenly the whole look has a little more personality.
Chocolate Almond Nails With a Single Brown Flower
A tiny brown flower becomes the unexpected detail in this otherwise sophisticated chocolate manicure. The long almond nails alternate between glossy deep brown and sheer nude, with the flower placed on a light accent nail. The petals are painted in several chocolate tones and gathered around a tiny metallic center. I love the contrast between the solid brown nails and the delicate negative space because it keeps the design feeling airy.
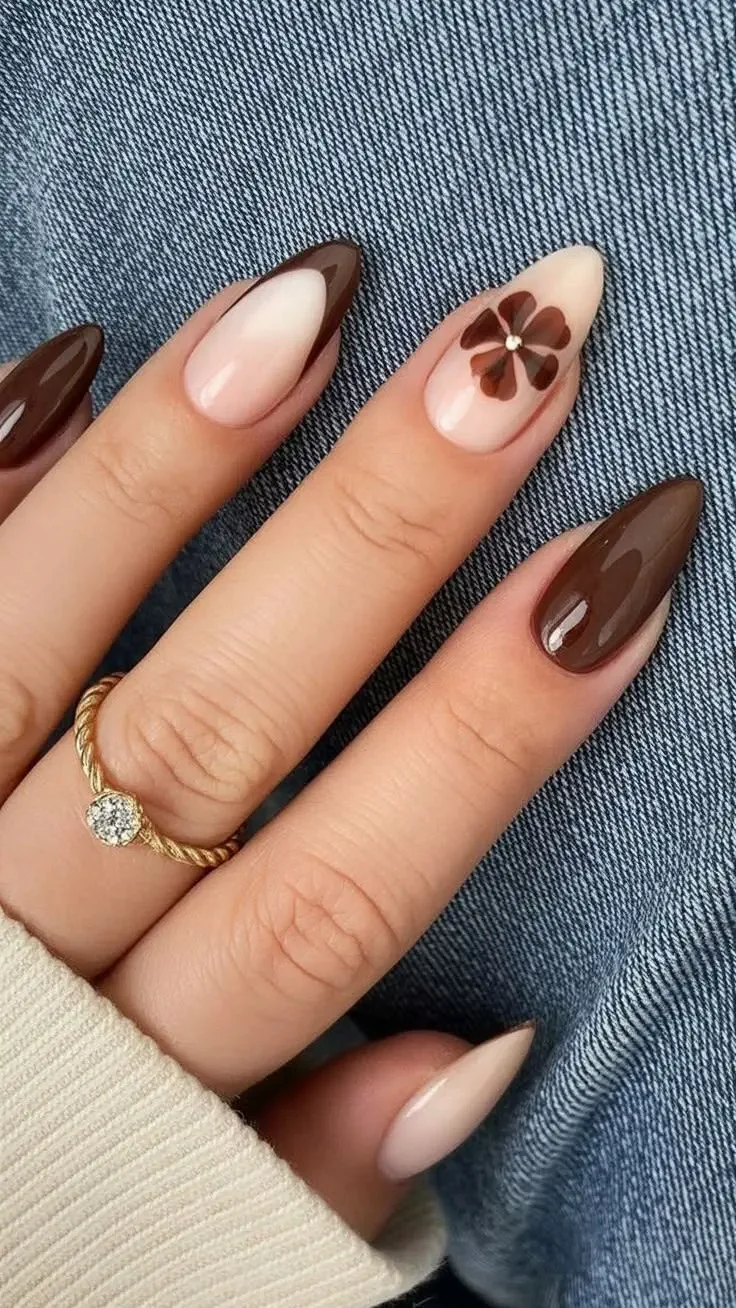
I would choose a rich chocolate-brown polish for the solid nails and a sheer pink-beige for the accent nail. For the flower, two or three shades of brown are enough, while a tiny gold or metallic dot can define the center. A dotting tool is particularly useful here because it creates rounded petals quickly and evenly. I would finish everything with a high-shine top coat.
At home, I would paint the solid nails first and then create the sheer accent nail. For the flower, I would place five small brown dots around the center, slightly dragging each one outward with a detail brush to create a petal shape. A smaller dot in the center gives the design definition. I would resist adding extra flowers or leaves because the single motif is what makes this manicure feel refined.
This design has a sweet little vintage-shop mood without becoming overly delicate. I would wear it with a cream sweater, straight-leg jeans, and a simple gold ring. It feels like fall nail art for someone who wants to whisper rather than shout.
Chocolate Brown Nails With Powder Blue Polka Dots
Chocolate brown and powder blue are an unexpectedly lovely pairing. The long almond nails are coated in glossy brown, then decorated with evenly spaced pale-blue dots. The contrast is striking because the cool blue breaks up the richness of the chocolate without making the manicure feel summery. The rounded dots also give the design a playful retro quality while the deep brown keeps it grounded in the fall palette.
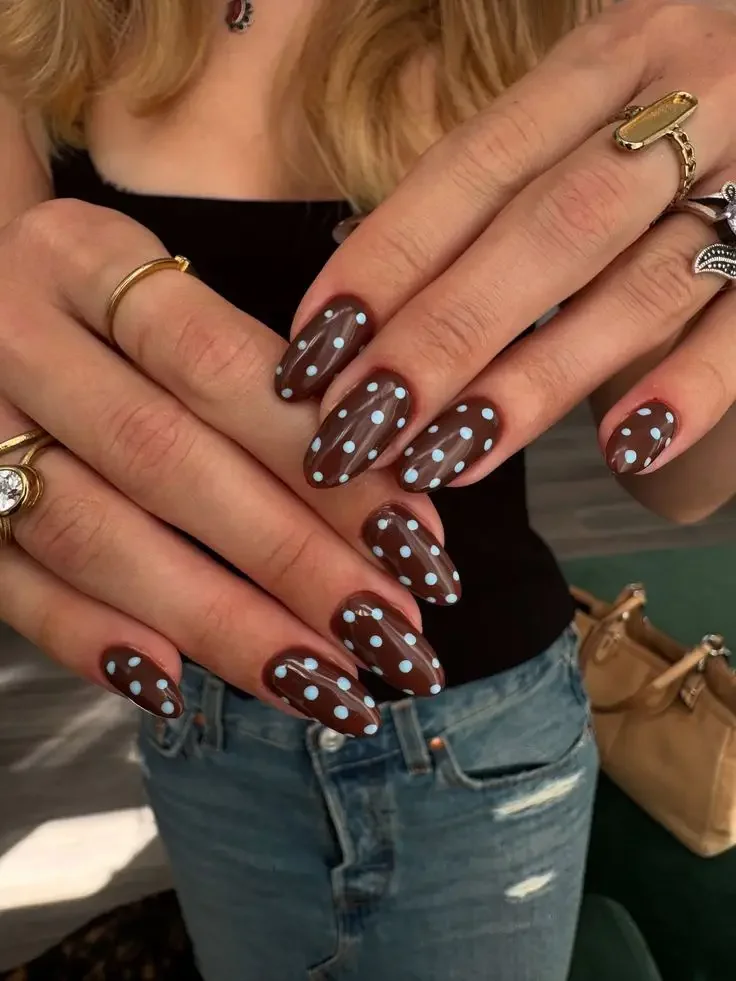
I would use a dark cocoa or espresso polish for the base and a soft powder-blue shade for the dots. A medium-sized dotting tool will make the pattern much easier to control, although the dots can also be created carefully with the rounded end of a small nail-art tool. I would keep the top coat glossy so the blue dots remain crisp against the reflective brown.
I would apply two thin coats of chocolate polish before placing the dots. Starting near the center of each nail, I would create evenly spaced dots and work outward, trying to maintain similar proportions rather than obsessing over exact measurements. If one dot looks slightly imperfect, I would simply embrace it; the charm of this design comes from its playful character. A final glossy layer brings everything together.
I especially like this idea for the transition from early to mid-fall, when the wardrobe can still include denim and lighter layers but the beauty palette is getting deeper. It is proof that brown nails do not have to be serious. A little powder blue can change the entire mood.
Glossy Espresso Almond Nails With a Sculpted Finish
Sometimes the color is enough. These long almond nails are finished in a deep, glossy espresso brown that appears almost black in the shadows but reveals a warm chocolate undertone in the light. The elongated shape adds drama, while the completely solid finish keeps the manicure remarkably clean. There are no accents competing with the color, so every bit of attention goes to the richness and shine of the brown.
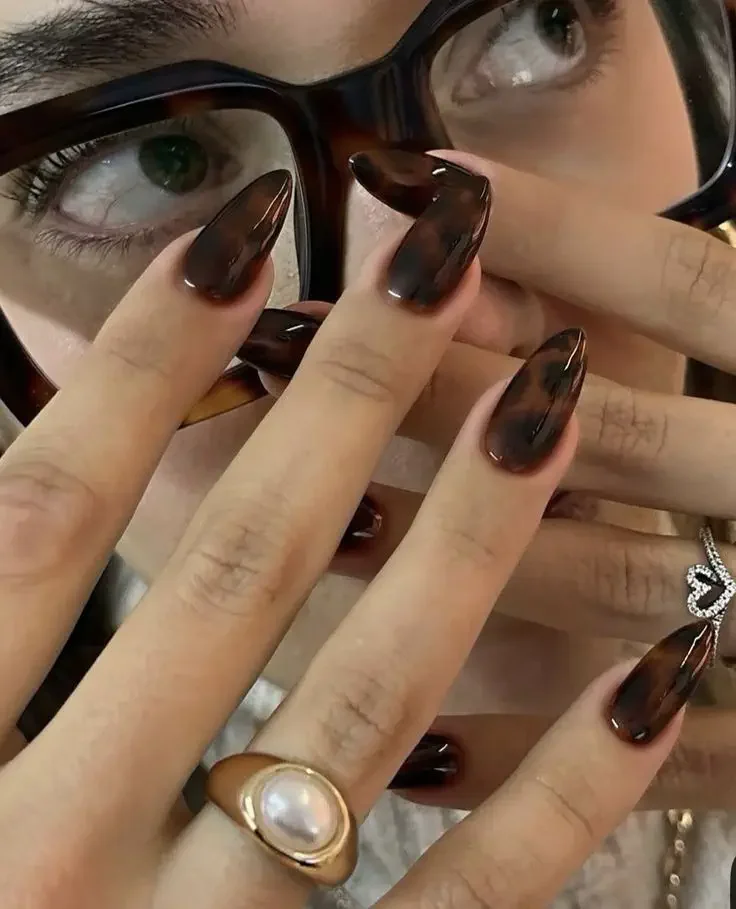
For this look, I would keep the product list very simple: a deep espresso-brown gel polish, a smoothing base coat, and an exceptionally glossy top coat. If the natural nails need additional strength for this length, I would consider a suitable builder-gel overlay or professional extension service rather than trying to force the natural nail to carry a shape it cannot comfortably support.
I would focus heavily on preparation because dark polish makes uneven edges much easier to notice. After shaping the almond silhouette, I would apply the base coat and then two thin coats of espresso brown, allowing each layer to cure properly if I were using gel. I would carefully clean any product from the skin before finishing with the top coat. The cleaner the cuticle area, the more expensive this minimalist manicure looks.
I find dark brown particularly flattering when fall clothing starts becoming richer and more layered. It works with burgundy, charcoal, cream, denim, and of course more brown. If you are tempted by black nails but want something slightly softer, espresso is the answer I would try first.
Long Chocolate Nails With a Sheer Center Detail
This manicure plays with transparency in a very subtle way. The long almond nails feature deep chocolate sections that appear to frame a translucent nude center on several nails. The contrast creates the illusion of dimension without adding rhinestones, glitter, or elaborate artwork. The glossy finish makes the brown appear almost liquid, while the exposed-looking sections keep the overall effect lighter.
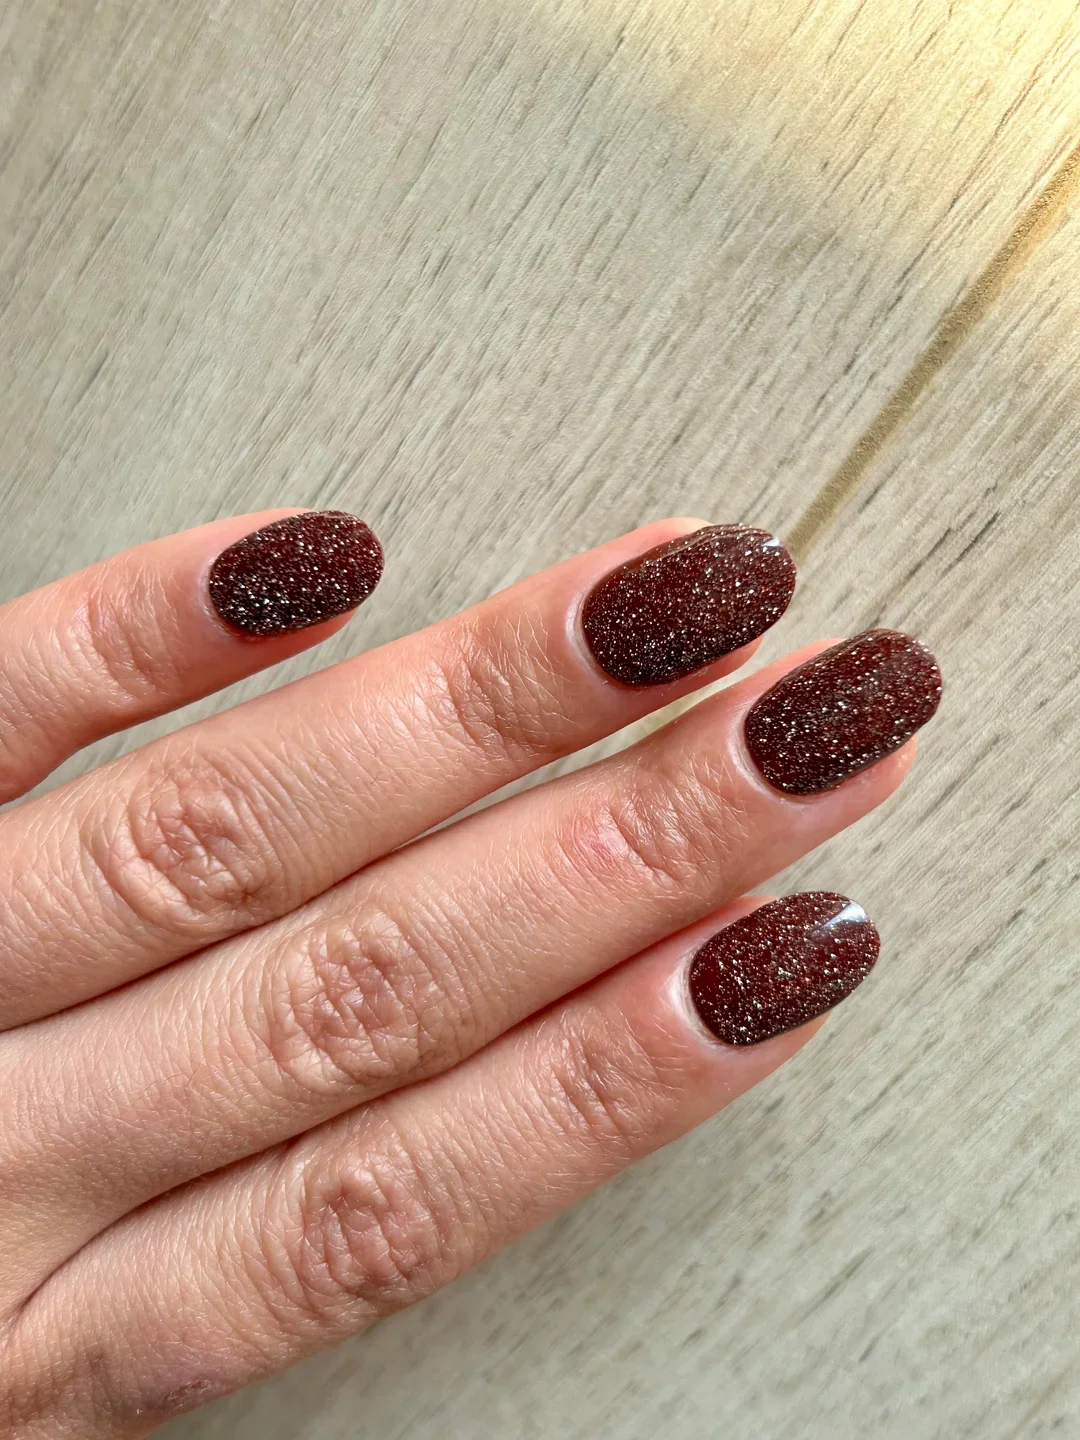
I would use a deep chocolate gel polish alongside a sheer nude or natural-pink shade. Because the design depends on clean borders, a fine liner brush would be helpful for outlining the chocolate areas. I would also use a high-gloss top coat to enhance the contrast between the transparent and opaque portions.
I would start by creating the almond shape and applying the sheer nude base. Once cured, I would carefully map out the chocolate sections with a liner brush, following the natural curve of the nail. I would build the darker color gradually rather than applying a thick layer immediately. After curing and checking the symmetry, I would seal the design with top coat.
This feels like a more fashion-forward interpretation of the chocolate nail trend. I would save it for a weekend when I wanted my manicure to feel intentional, perhaps with a structured brown jacket or a sleek evening outfit. It is simple from a distance but much more interesting once you notice the details.
Short Chocolate Brown Nails With a Subtle Matte Mood
Shorter nails can make dark brown feel incredibly chic, and this manicure proves it. The nails are kept compact with a softly rounded shape and covered in a muted chocolate shade. The finish has a subdued quality that makes the color appear velvety rather than intensely reflective. There is something wonderfully practical about the look, especially for anyone who wants a polished fall manicure without committing to length.
I would choose a medium-dark cocoa polish and a matte top coat for this version. If the natural nails have ridges, I would use a smoothing base coat underneath because matte finishes can sometimes emphasize uneven texture. A nourishing cuticle oil is also worth keeping nearby, particularly during the cooler months when dry skin can distract from an otherwise immaculate manicure.
I would shape the nails evenly, smooth the edges, and apply a thin base coat. Two light coats of chocolate brown should provide enough coverage without creating bulk. After the color has cured or dried, I would apply the matte top coat evenly and avoid touching the nails until the finish has fully set. I would also make sure the cuticles are moisturized before finishing the manicure.
I like this version for everyday wear because it does not ask for much attention. It would be perfect with a chunky sweater, jeans, or a tailored coat. There is a quiet confidence to short brown nails that I find particularly appealing once the weather starts cooling down.
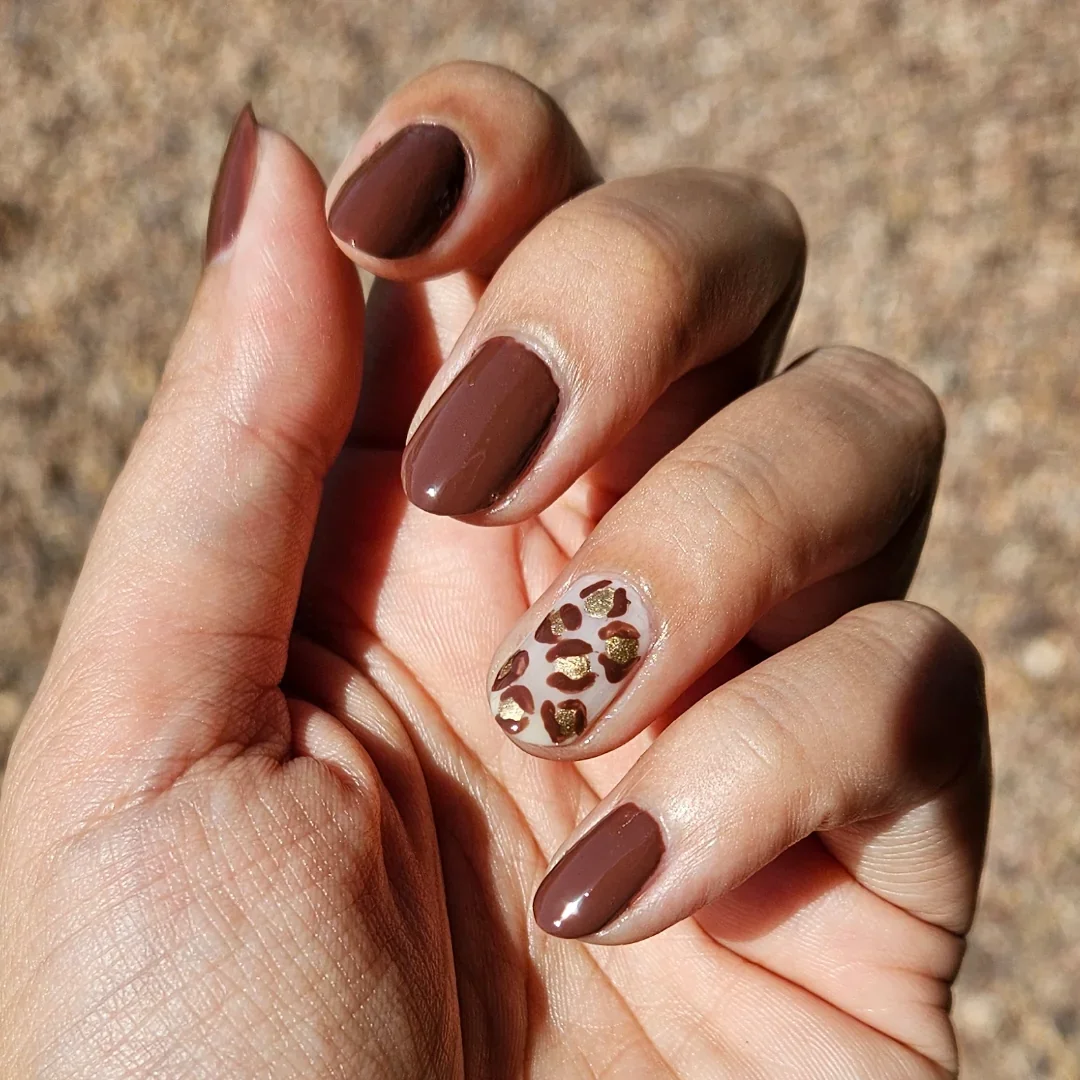
Chocolate Brown With a Gold-Spotted Accent
A single accent nail transforms this otherwise classic chocolate manicure into something much more festive. Most of the nails are painted a glossy medium-brown shade, while one nail features a transparent or pale base decorated with irregular chocolate-brown and metallic-gold spots. The shapes resemble tiny abstract confetti pieces, giving the design a subtle jewelry-like quality without becoming overly ornate.
I would use a medium chocolate polish for the solid nails, a sheer beige or nude for the accent, and two metallic gold products with slightly different finishes if I wanted extra depth. A dotting tool and fine detail brush would make the irregular shapes easier to place. I would use a glossy top coat across the entire manicure to make the gold accents sparkle against the warm brown.
I would paint the solid nails first and then create the accent nail separately. After applying the light base, I would place brown and gold shapes at random intervals, keeping some negative space between them. I would avoid making the design too symmetrical because the scattered placement is what gives it a modern feel. One final layer of top coat should smooth everything beautifully.
This is the kind of manicure I would happily carry from October into the holiday season. The gold gives chocolate brown a little evening energy, but the design remains restrained enough for daytime. It would look particularly lovely beside warm gold rings or a simple watch.
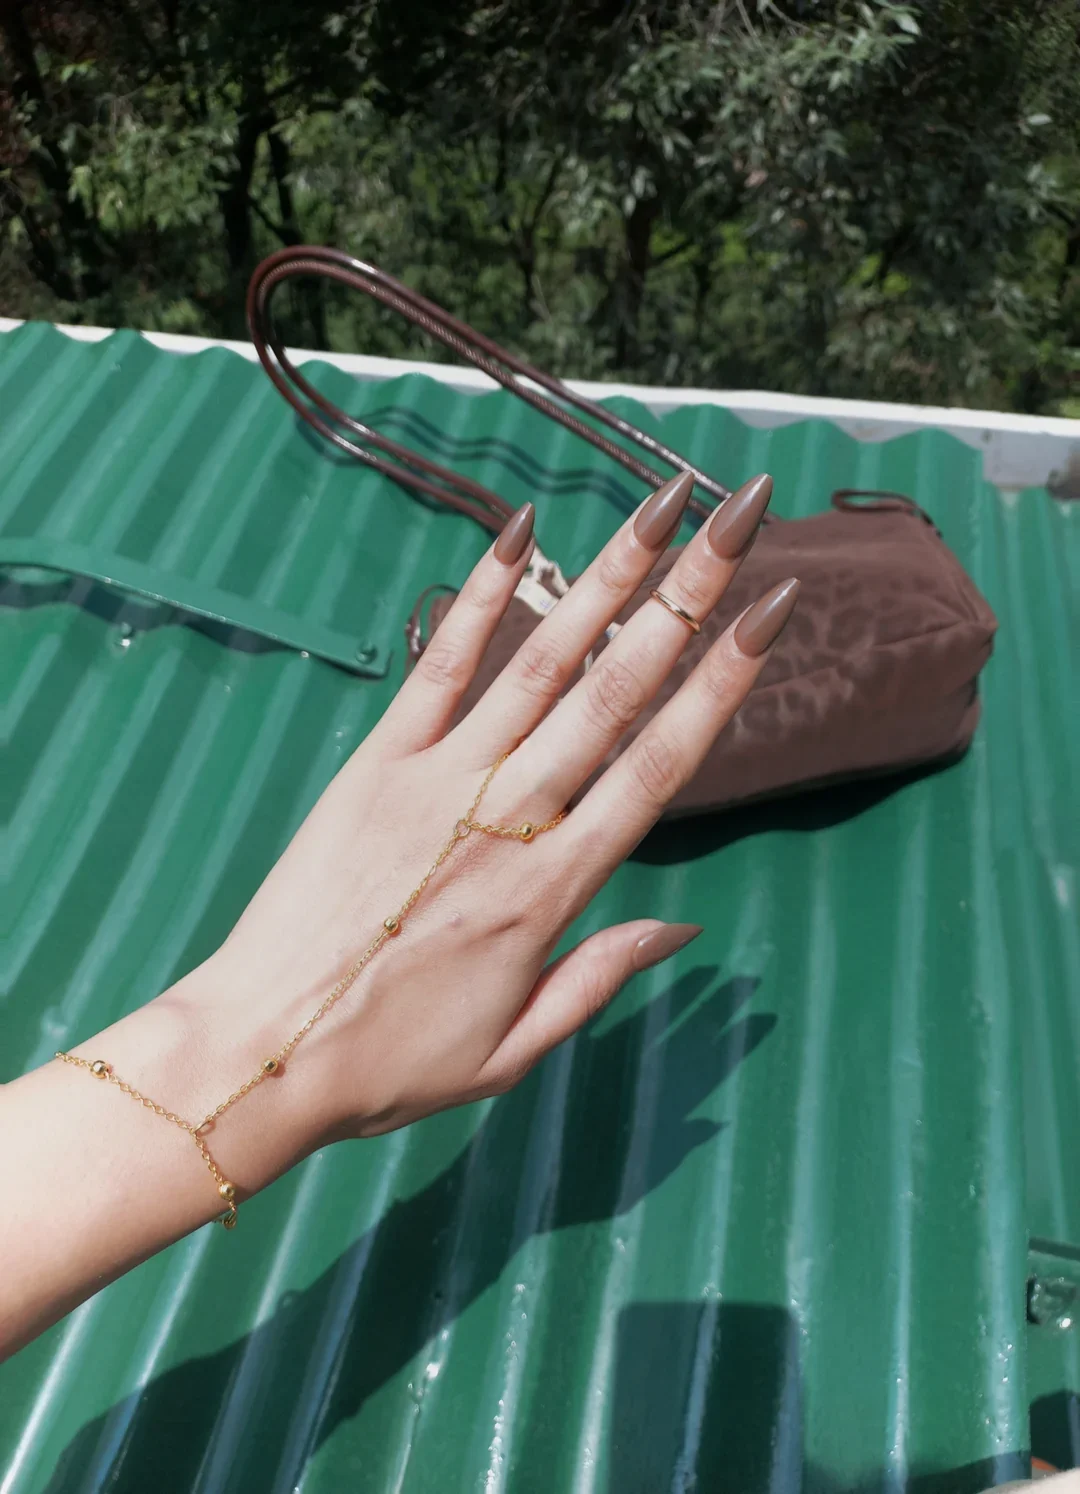
Warm Cocoa Stiletto Nails for a Sleek Fall Look
The stiletto shape makes this warm cocoa manicure feel instantly more dramatic. The long, sharply tapered nails are covered in a smooth brown shade with a slightly lighter, creamy quality than deep espresso. The finish is glossy and completely solid, allowing the unusual silhouette to remain the main feature. The result is sleek, elongated, and wonderfully coordinated with the brown accessories surrounding the manicure.
I would choose a warm cocoa gel polish with a balanced undertone, avoiding anything too orange or too gray. For this length and shape, I would prioritize a strong base system and careful structural preparation. A glossy top coat is essential because the smooth reflective surface gives the brown its richness and keeps the long nails looking polished rather than heavy.
I would shape these carefully rather than filing aggressively into a sharp point. The sidewalls need to remain balanced so the nail does not look uneven from one side to the other. After applying the base and two thin layers of cocoa polish, I would seal the free edge and finish with a glossy top coat. Anyone who is not accustomed to very long nails may find an almond or tapered almond easier to live with, so I would adjust the length to suit daily routines.
Personally, I think this is a gorgeous choice for someone who treats nails as part of the overall outfit. The cocoa shade works beautifully with gold jewelry, brown leather accessories, and neutral clothing. It has that effortless fall feeling where every detail seems to belong together without looking overly coordinated.
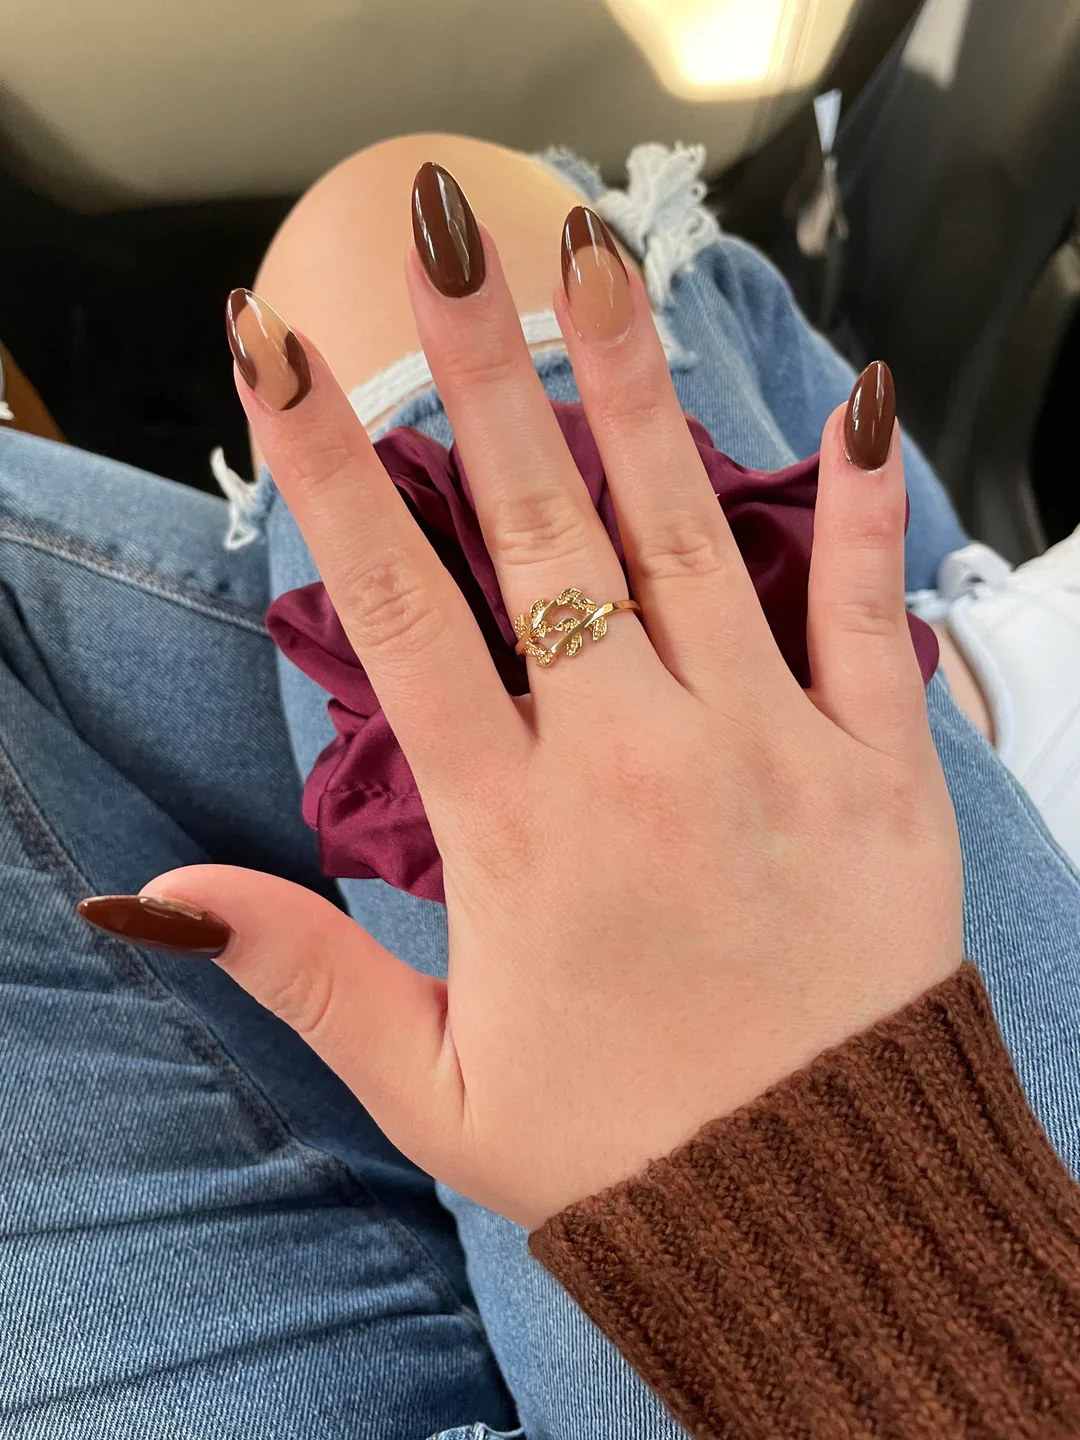
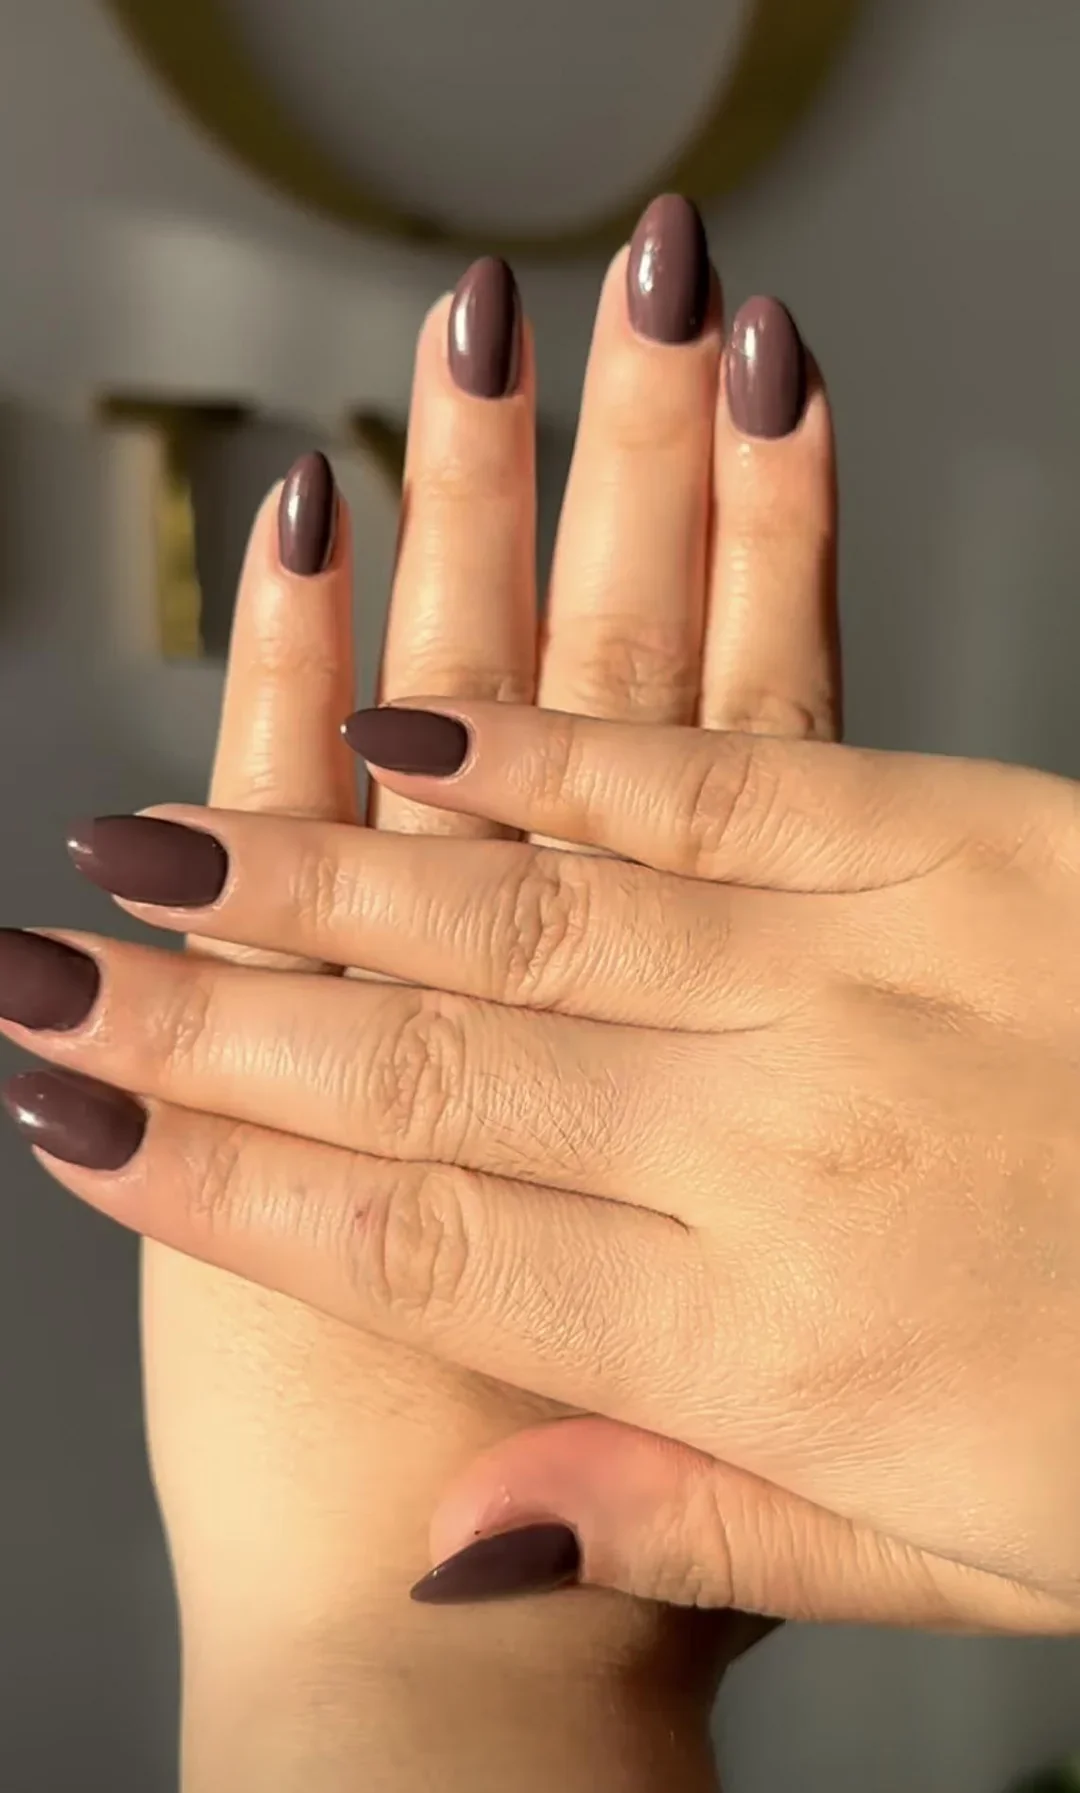
Chocolate Brown Nails With a Soft Taupe Contrast
This final manicure brings the chocolate trend back to a beautifully wearable place. The nails combine deep brown with a softer taupe-brown tone, creating a subtle tonal contrast rather than a complicated design. The shapes range from rounded to softly almond, and the glossy finish gives every shade a smooth, polished appearance. The result feels cozy, modern, and remarkably easy to wear.
I would build the palette around two or three closely related colors: dark chocolate, medium mocha, and soft taupe. Keeping the undertones compatible is important because the manicure should look intentionally coordinated rather than mismatched. I would use the same glossy top coat on every nail so the different colors share one consistent finish.
To recreate it, I would first decide where I want the darkest and lightest shades placed. I like alternating tones rather than placing all the dark colors together, as this creates a more balanced effect across the hands. After applying the base coat, I would use two thin layers of each polish and carefully seal everything with a glossy top coat.
This is probably the manicure I would recommend to someone who says, “I love brown, but I don’t want my nails to look too dark.” The taupe softens the palette while the chocolate keeps it distinctly autumnal. Add a cream sweater, relaxed denim, and a warm coffee in hand, and suddenly the season feels exactly right.
Glossy Chocolate Almond Nails With a Warm Fall Finish
I love how effortlessly this long almond manicure captures the mood of early fall. The nails are shaped into a slender almond with softly pointed tips, while the color sits somewhere between milk chocolate and rich cocoa. The high gloss gives the brown an almost syrupy quality, making every nail look smooth and dimensional. It is simple at first glance, but the length and shine give it enough presence to feel distinctly styled rather than basic.
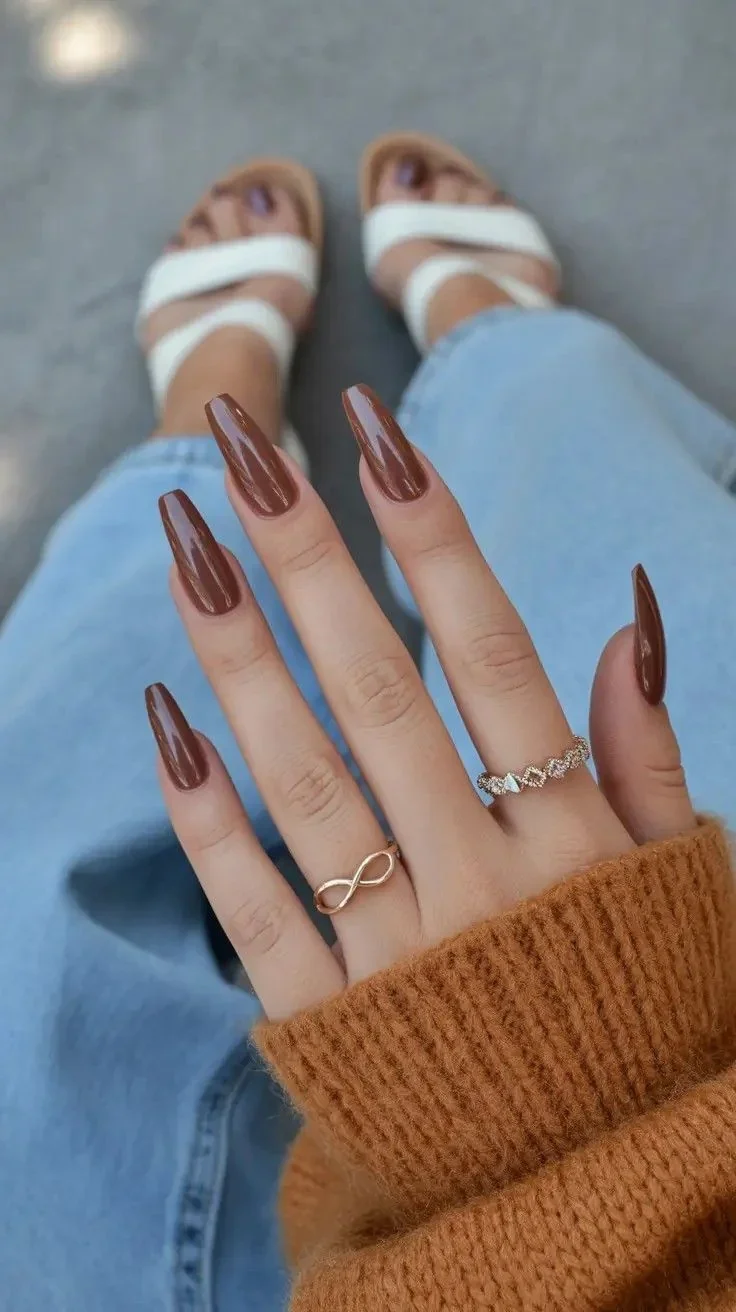
For a similar finish, I would start with an almond-shaped extension or carefully shaped natural nails, depending on the length I want. A chocolate-brown gel polish from OPI, Gelish, or CND would work beautifully, followed by a high-shine top coat. I would also keep the base smooth and the cuticles neat because a dark polish makes every little detail more noticeable. The warm brown works especially well against camel, cream, denim, and cognac shades.
At home, I would prep the nails, gently shape the free edge, apply a thin base coat, and build the brown color with two controlled coats. I like to let each layer settle before adding the next because dark shades can become uneven when applied too thickly. The final step is a glossy top coat, followed by cuticle oil once everything has cured. That little bit of oil makes the whole manicure look instantly fresher.
This is the kind of manicure I would choose when I want my nails to do the styling without competing with my clothes. I can easily see it with an oversized camel sweater, light-wash jeans, and gold jewelry. Sometimes the most memorable fall manicure is the one that looks almost effortless.
Espresso Brown With a Delicate Swirl Accent
This manicure takes chocolate brown in a moodier direction. Most of the nails are covered in deep espresso and dark chocolate shades, while one accent nail introduces a translucent taupe-brown base with flowing, almost marble-like lines. Tiny sparkling details trace parts of the design, giving the manicure a subtle evening glow. The rounded almond shape keeps everything elegant, even though the colors are quite intense.
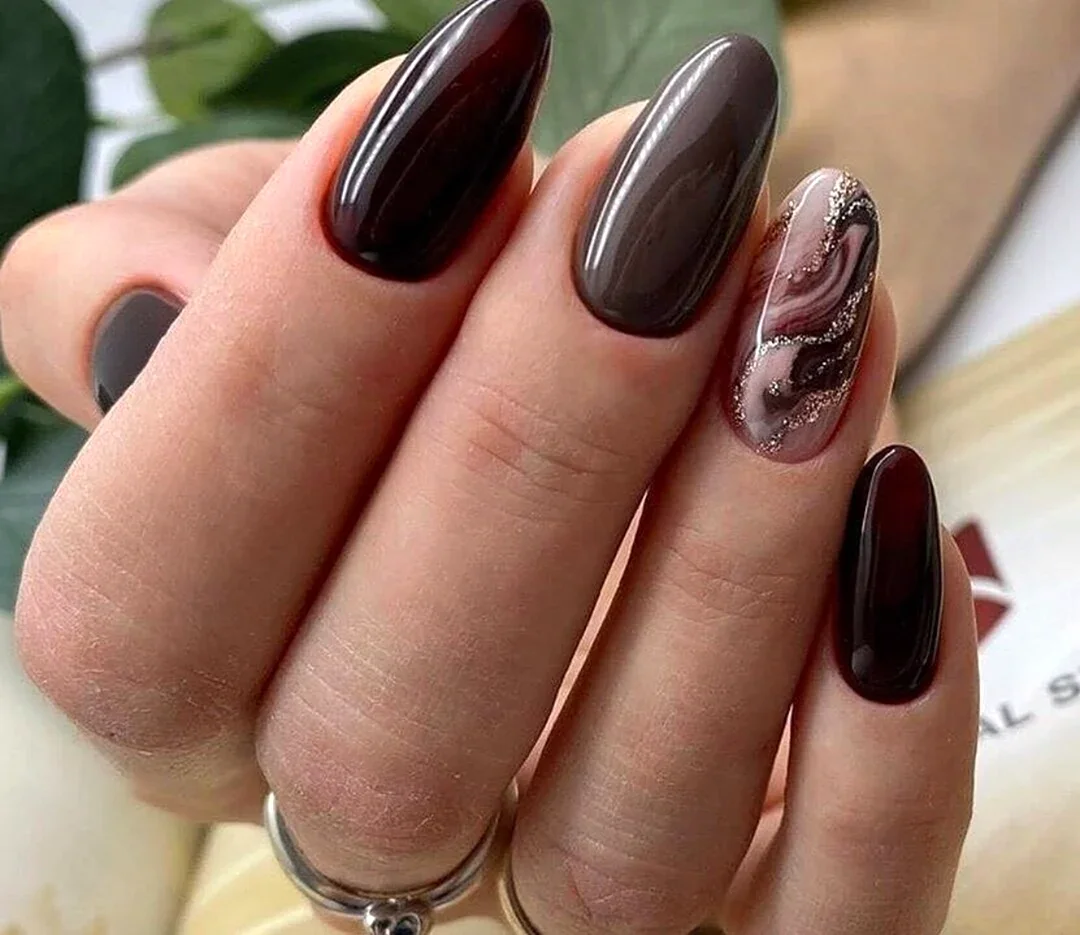
I would recreate the palette with a very dark espresso gel, a softer mocha or taupe shade for the accent nail, and a fine detailing brush for the curved lines. A bronze-brown shimmer or fine metallic gel can provide the tiny reflective accents without turning the manicure overly glittery. Brands such as OPI, Essie Gel Couture, and Gelish have plenty of brown and neutral options that can be mixed to achieve this kind of tonal effect.
For the accent nail, I would first create the sheer brown base and cure it before adding the decorative lines. I prefer making the swirls slightly irregular rather than trying to make them perfectly symmetrical because that gives the design a more fluid, handmade character. A very fine brush helps control the curves, and a final glossy top coat brings the entire manicure together.
I especially like this idea for late fall, when the mood shifts toward candlelit dinners, darker clothing, and richer textures. It feels sophisticated without being overly formal. If I wanted a brown manicure with just enough personality to make someone look twice, this would be high on my list.
Chocolate Brown Nails With Sculptural Metallic Texture
There is something unexpectedly glamorous about combining glossy brown with a textured metallic accent. The manicure uses deep chocolate tones on several nails, while other nails feature a dense, dimensional bronze-brown texture that almost resembles tiny beads. The shape is tapered and elegant, and the contrast between the smooth reflective polish and the textured surface creates most of the visual interest.
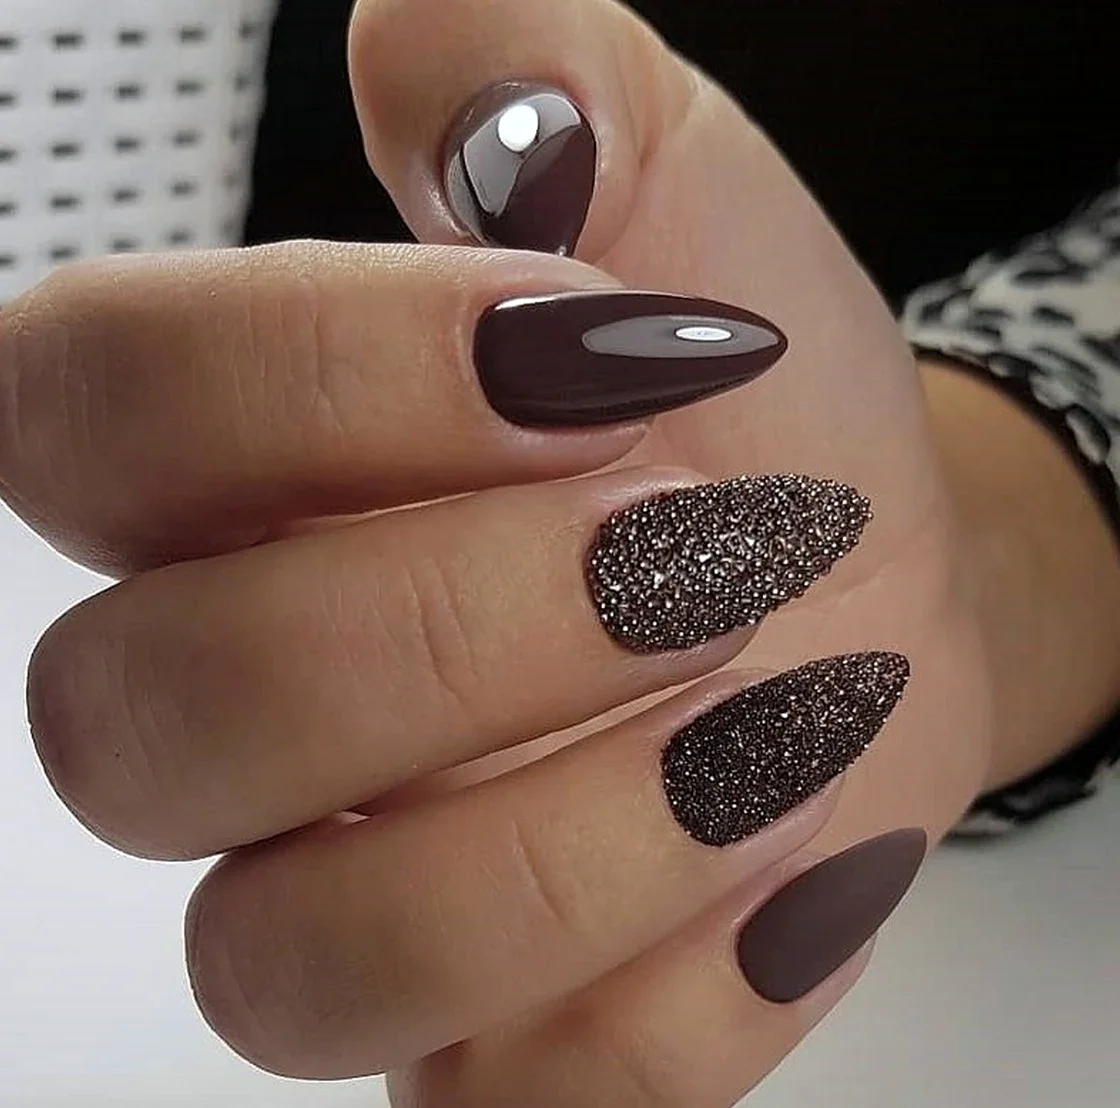
For materials, I would use a deep chocolate gel polish, a muted brown or taupe base, and fine metallic microbeads or textured nail powder for the statement nails. A magnetic brown polish could also add another layer of depth if I wanted a softer interpretation. I would keep the rest of the palette restrained because the texture already provides plenty of decoration.
I would begin with the solid brown nails and cure them completely before moving to the textured accents. For those nails, I would apply the base color, add the appropriate adhesive or uncured gel layer, and carefully place the tiny decorative particles while the surface is still workable. The edges should remain clean, and I would seal only where appropriate so the texture does not disappear beneath a thick layer of top coat.
This design feels made for someone who enjoys a little drama but still wants to stay within a sophisticated fall palette. I would wear it with black, chocolate, or charcoal clothing and keep the jewelry relatively simple. It is proof that brown does not have to be quiet.
Short Chocolate Brown Nails for an Easy Everyday Manicure
Short nails can look incredibly polished in chocolate brown, and I think this is one of the easiest versions to wear every day. The nails have a softly rounded shape and a deep glossy brown finish that looks rich without feeling heavy. There is no complicated decoration here, which allows the color itself to become the focal point. The result is neat, feminine, and very easy to adapt to different wardrobes.
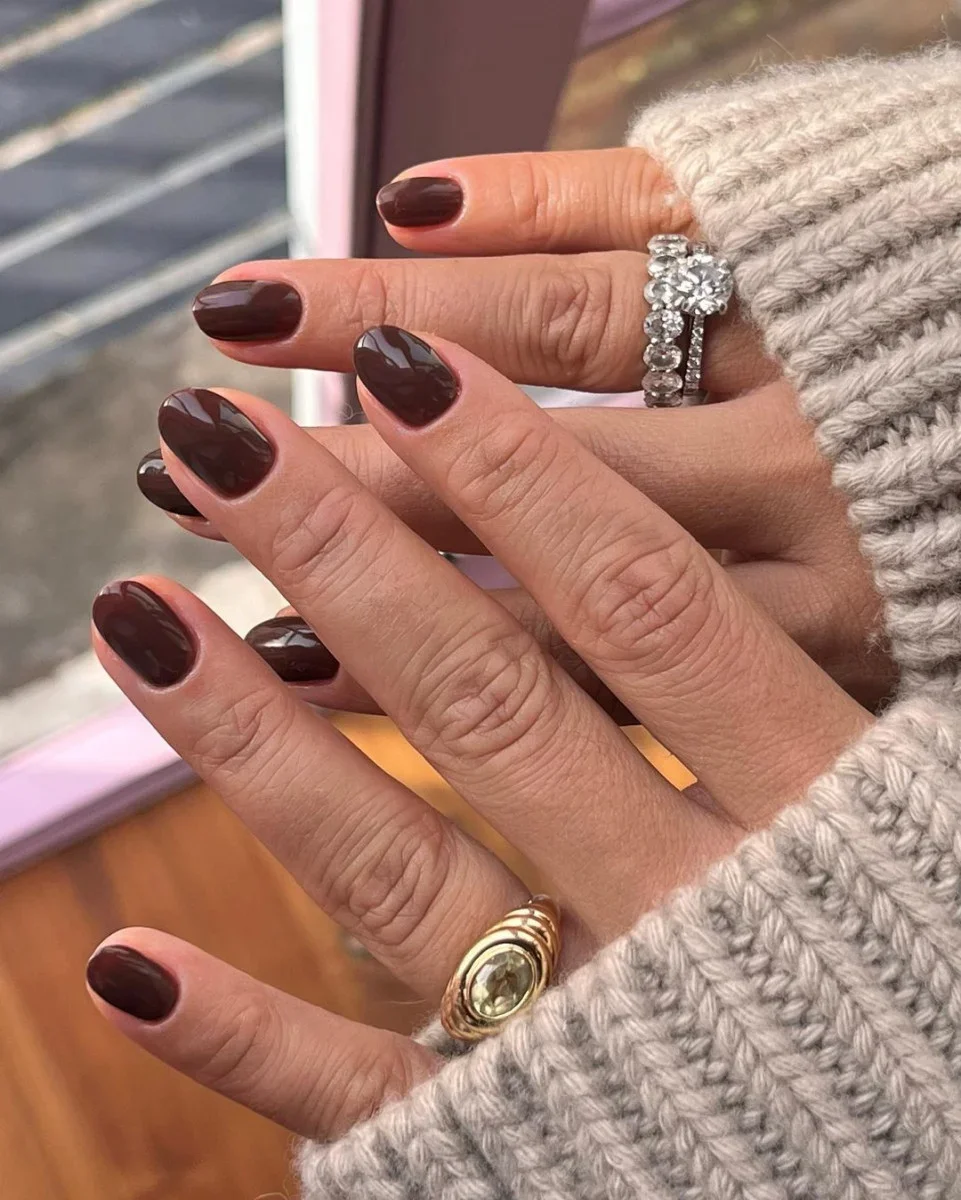
I would choose a creamy espresso or dark cocoa polish with a smooth, self-leveling formula. OPI, CND, Essie, and Sally Hansen all offer brown families that can work for this style, depending on whether I want a warmer reddish chocolate or a cooler coffee brown. A glossy top coat is essential because the shine is what gives a short manicure its polished finish.
At home, I would keep the nails relatively short, file them into a soft rounded shape, and gently tidy the cuticles before applying color. Two thin coats usually give me much better control than one thick coat, especially with dark brown polish. I would finish with a glossy top coat and add cuticle oil once the manicure is completely dry or cured.
I keep coming back to this length whenever I want something practical but still stylish. Short chocolate nails work beautifully with sweaters, denim, office outfits, and even a simple white T-shirt. They are the kind of manicure that quietly makes the entire look feel more intentional.
Chocolate Brown French Tips With a Glossy Negative Space Base
This manicure plays with contrast instead of covering the entire nail in brown. A soft taupe-brown matte-looking base sits in the center of each nail, while the outer edges remain glossy and transparent, creating an unusual French-inspired border. The rounded shape keeps the design delicate, and the mixture of matte and shine gives even a neutral palette a sophisticated twist.
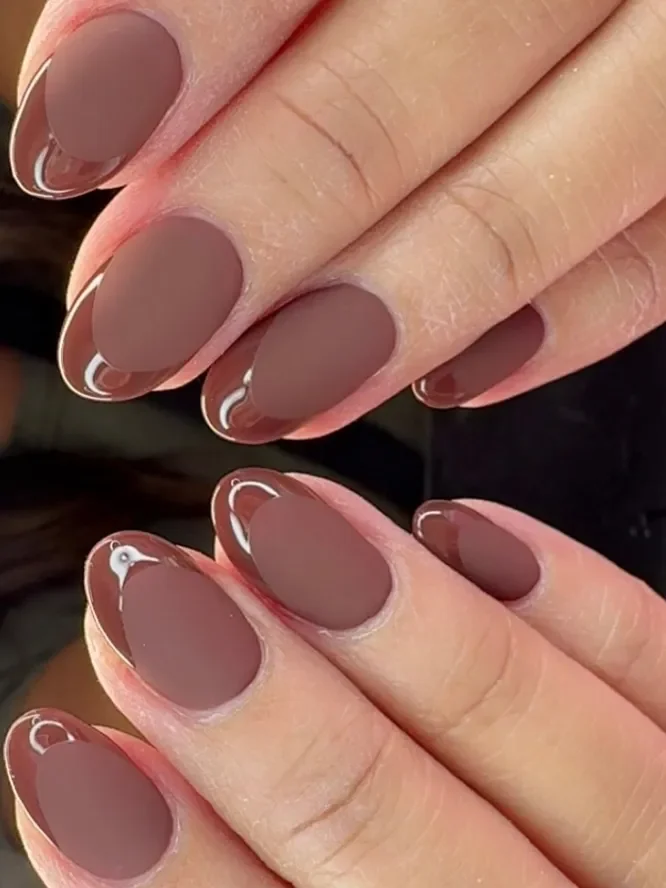
I would use a muted mocha or mushroom-brown polish for the central area and a clear glossy top coat for the exposed-looking border. A thin French-tip brush would make the curved edges easier to control. I would probably choose a slightly warm brown rather than a gray-brown because the warmer undertone makes the manicure feel softer and more seasonal.
To create it, I would first apply a sheer neutral base and cure it. Then I would carefully paint the rounded brown sections while leaving a narrow transparent border around the outside. Once the shape is even on each nail, I would cure the color and apply gloss strategically so the contrast between the satin center and shiny border remains visible.
I love this version when I want something understated but not predictable. It would be especially pretty with cream knitwear, chocolate accessories, or a tonal brown outfit. Would I choose it for someone who usually wears minimalist nails? Absolutely. It gives a classic neutral manicure a little fashion-editorial twist.
Marbled Chocolate Brown Nails With Autumn Swirls
This manicure turns chocolate brown into a small piece of abstract art. Warm brown, caramel, cream, and translucent tones twist together across the almond-shaped nails, creating a marbled effect that resembles swirled chocolate and coffee. Each nail has its own variation, which keeps the design from looking overly uniform. The result is rich, warm, and wonderfully connected to the colors I naturally associate with fall.
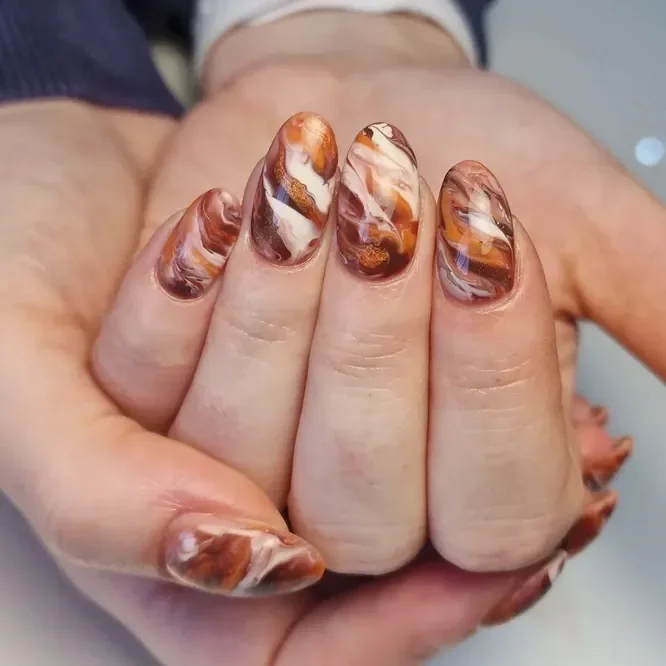
I would use several gel colors rather than trying to find one premixed polish: deep chocolate, medium caramel, creamy beige, and a touch of warm amber. A sheer neutral base would help soften the colors, while a thin liner brush or dotting tool could create the flowing movement. I would choose glossy top coat because it makes the marble look almost liquid.
The trick is not overworking the design. I would apply a thin neutral base, place small amounts of the brown, cream, and caramel shades onto the nail, and gently pull them together with a fine brush while they are still uncured. I would stop as soon as the colors begin to flow naturally and then cure the design before finishing with top coat.
This is the manicure I would save for a weekend when I want my nails to feel like an accessory. It has the warmth of fall without relying on predictable leaf motifs or seasonal illustrations. And honestly, who can resist a manicure that looks a little like melted chocolate?
Mocha And Chocolate Nails With Sheer Nude Details
Here the chocolate palette becomes softer and more modern through the use of sheer nude nails. Deep brown appears alongside translucent neutral sections, with delicate curved details adding movement across selected nails. The almond shape lengthens the fingers visually, while the combination of solid and transparent areas keeps the overall design light. It is a lovely example of how brown can feel elegant without becoming visually heavy.
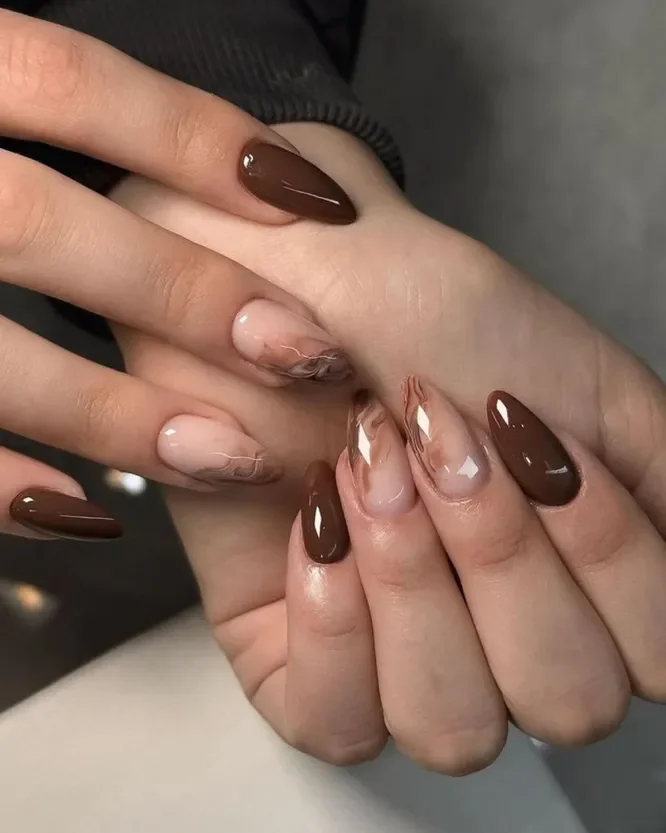
For this look, I would use a deep cocoa gel, a sheer pink-beige or milky nude, and a fine brown liner shade for the delicate accents. A glossy top coat would enhance the transparent areas, while a thin detailing brush would help create the subtle curved shapes. If I wanted a slightly more luxurious finish, I might add a tiny amount of neutral shimmer to one of the sheer nails.
I would start by applying the nude base to the nails chosen for the transparent design and cure it thoroughly. The chocolate nails can then be completed separately, while the accent nails receive thin curved strokes or abstract lines. I would keep those lines deliberately delicate because the beauty of this design comes from the amount of negative space around them.
I think this is one of the easiest chocolate-brown ideas to adapt for different occasions. The dark nails give it definition, while the sheer sections make it feel fresh enough for daytime. I could wear this to work, dinner, or a fall event without feeling like the manicure was tied to only one outfit.
Chocolate Brown Zebra Accent Nails
For anyone who thinks brown nails need a little attitude, this combination is hard to beat. Several nails are finished in glossy chocolate brown, while selected nails use a soft nude base with thin, irregular dark-brown stripes. The pattern has a zebra-inspired rhythm, but because the colors remain neutral, it feels much more sophisticated than a loud animal print. The rounded almond shape adds to the polished effect.
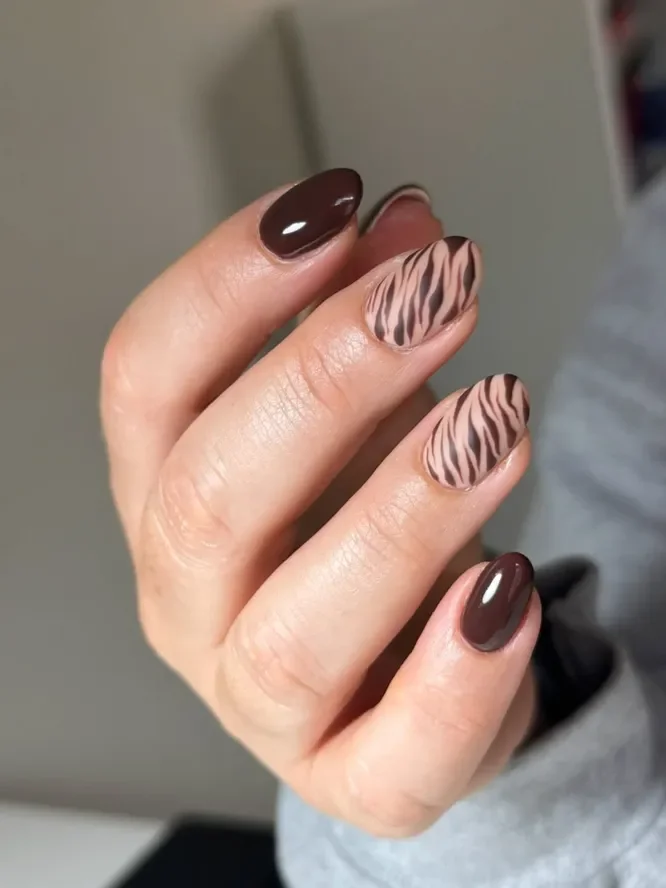
I would choose a glossy espresso-brown polish for the solid nails and a warm nude or beige for the patterned ones. A thin nail-art brush is the key tool here because the stripes need to taper and curve rather than look like perfectly parallel lines. I would use a highly pigmented brown for the pattern so that each stroke stays crisp against the lighter base.
After applying the nude base, I would cure it and then draw the stripes one at a time, varying their thickness and direction. I would avoid making every stripe identical because natural movement is what gives this pattern its charm. The solid chocolate nails can then be finished with a glossy top coat, while the patterned nails receive the same finish for consistency.
This is my choice when a classic brown manicure starts feeling a little too safe. The animal-inspired detail adds personality without forcing the entire manicure into statement territory. With a simple black sweater, denim, or even a chocolate-brown coat, it becomes a surprisingly chic fall accent.
Reflective Espresso Chrome For A Dark Fall Statement
The final look takes chocolate brown somewhere much more futuristic with a reflective chrome finish. The almond nails are coated in an extremely deep brown that catches the light with a metallic, mirror-like reflection. Rather than looking like traditional glitter, the finish has a smooth liquid quality, almost like polished espresso under a spotlight. It is dark, sleek, and easily the boldest interpretation of chocolate brown in this collection.
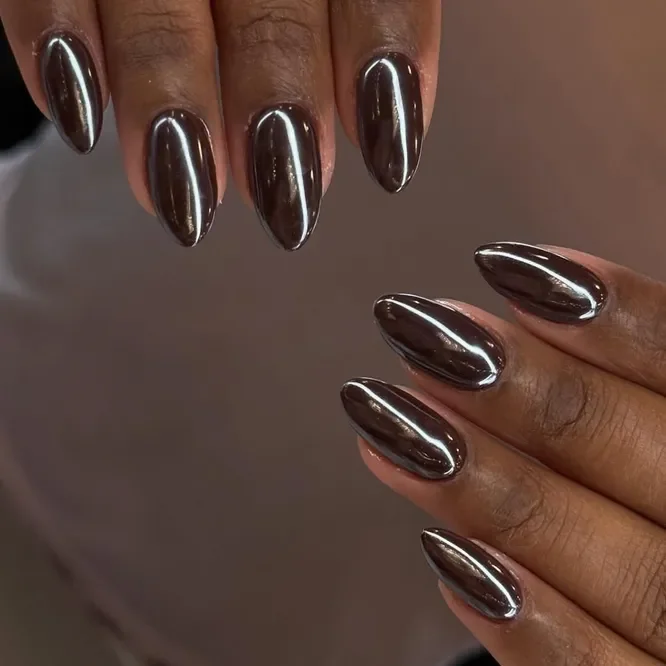
To recreate the effect, I would use a deep brown gel base followed by a brown, bronze, or neutral chrome powder. A no-wipe top coat is typically used beneath chrome products so the powder can be buffed into a smooth reflective surface. I would keep the underlying brown very dark because that gives the metallic finish greater depth and prevents it from looking simply silver or bronze.
I would begin with carefully shaped almond nails and apply the brown base in thin, even coats. After curing, I would follow the instructions for the selected chrome system, gently buffing the powder across the nail until the reflective surface develops. The final sealing layer is important because it protects the finish and keeps the manicure looking smooth.
I would save this manicure for the moment when I want my nails to become the accessory. It feels particularly beautiful in late fall, when darker clothing and evening lighting make reflective finishes come alive. Chocolate brown has always had a cozy side, but this version reminds me that it can be sleek, dramatic, and surprisingly modern, too.
Chocolate brown nails are one of my favorite ways to bring a warm, polished fall feeling to any look. From deep espresso shades to soft mocha tones, these designs feel versatile, sophisticated, and effortlessly seasonal. I love that this rich palette works beautifully with different nail shapes, finishes, and personal styles. For fall 2026, I’d choose a chocolate brown manicure when I want something timeless with a fresh, modern edge. Ultimately, the perfect design is the one that makes you feel confident every time you look down at your hands.

