I swore I was done with nail charms after a rhinestone snagged my sweater last fall. Then the bow trend came back — hearts, pearls, gold leaf — and I started screenshotting instead of scrolling past.
So here are 22 Coquette Nails, from whisper-thin sheer to statement burgundy. I tested them on short squares for my stubby nail beds, on almonds for when I want reach, and one stiletto that actually stayed chip-free through a taco Tuesday. There is a level here for everyone, even the former charm skeptic.
Milky White Almond Nails with Gold Leaf
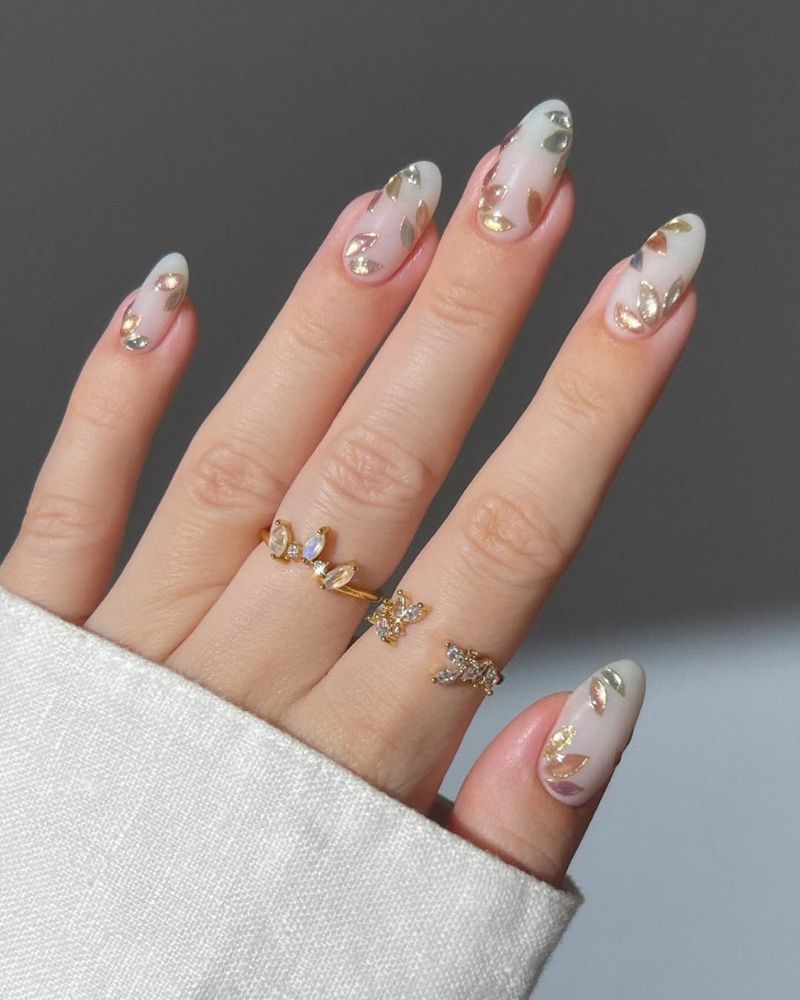
I was expecting something fussy. Instead, this design looks like it cost three times what it did. The milky white almond nails are barely there, a sheer nude with a glossy finish that catches light like wet porcelain. Then the gold leaf happens. Just a few flakes, placed where the light hits naturally. It’s not a pattern. It’s almost accidental, which is the point.
Deep Red French Tip Nails with Hearts
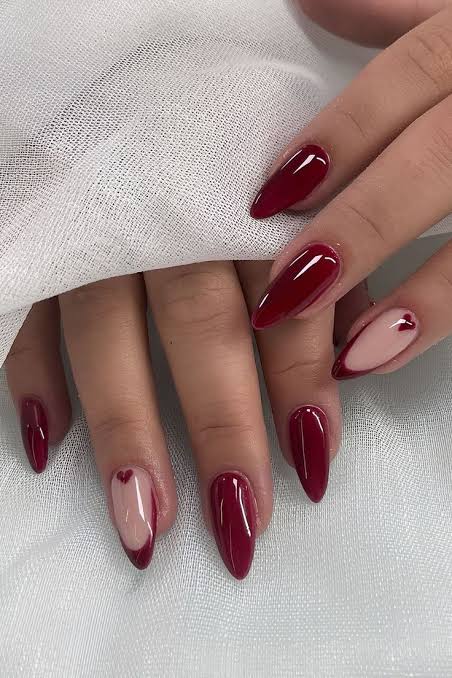
These were the nails that finally got me back into stilettos after a broken one six months ago. The deep red french tip nails are glossy and dramatic, with the red starting high up the nail, almost halfway. On two fingers, a tiny heart accent in the same red over a sheer pink base. It feels like a wink. I wore them to a dinner where I spent most of the night gesturing. People noticed. The red is so saturated it reads almost black in low light. The heart is subtle enough not to be cutesy. That’s the trick: keep the shape sharp and the heart tiny.
Teal French Tip Fawn Print Stilettos
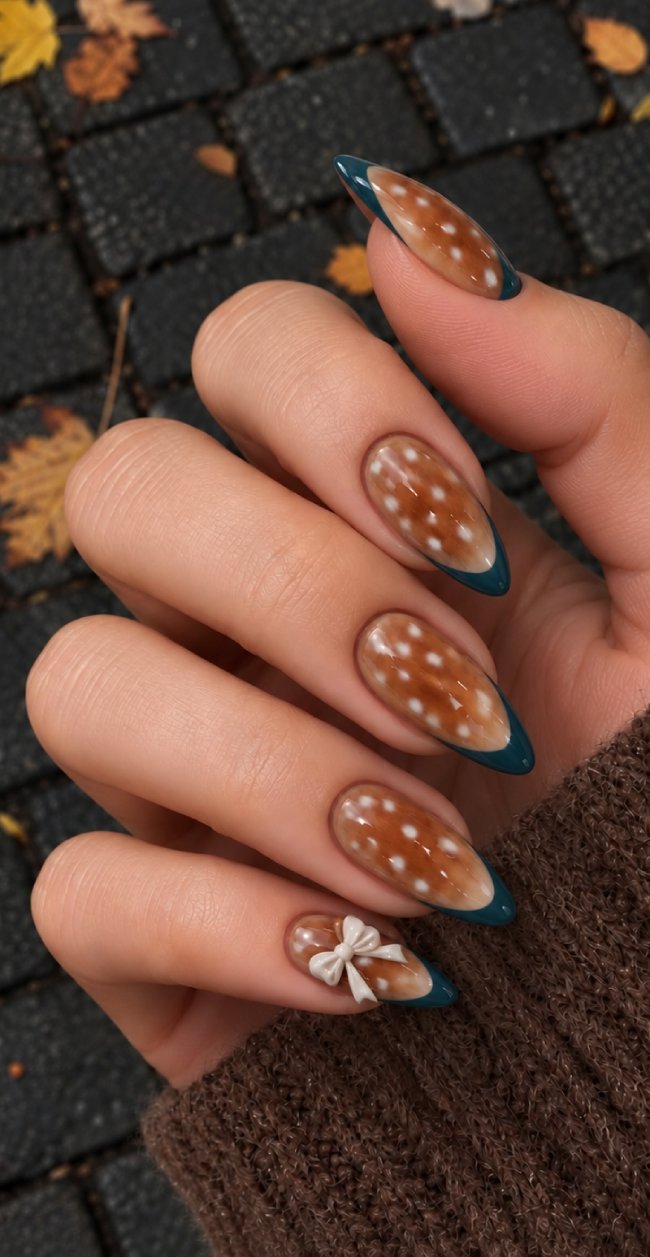
Most people get the scale wrong. The fawn print needs to be small, almost delicate, so it doesn’t overwhelm the stiletto shape. I’ve seen this attempt at a salon where the spots were large and clogged the nail. The proportions mattered. The teal french tip is the frame. The fawn print is the art. If you make the print too big, the nail looks crowded.
The fix is straightforward. Ask your tech for a thin teal line at the tip, and use a tiny dotting tool for the fawn spots. Place them sparsely, leaving negative space. The bow on the accent nail should be flat, not 3D, to avoid snagging. And keep the base sheer to let the nail breathe. That’s the mistake most people make: too much going on. Coquette nails are about restraint, even when whimsical.
Red French Tip Oval Nails with Gold Bow Charms
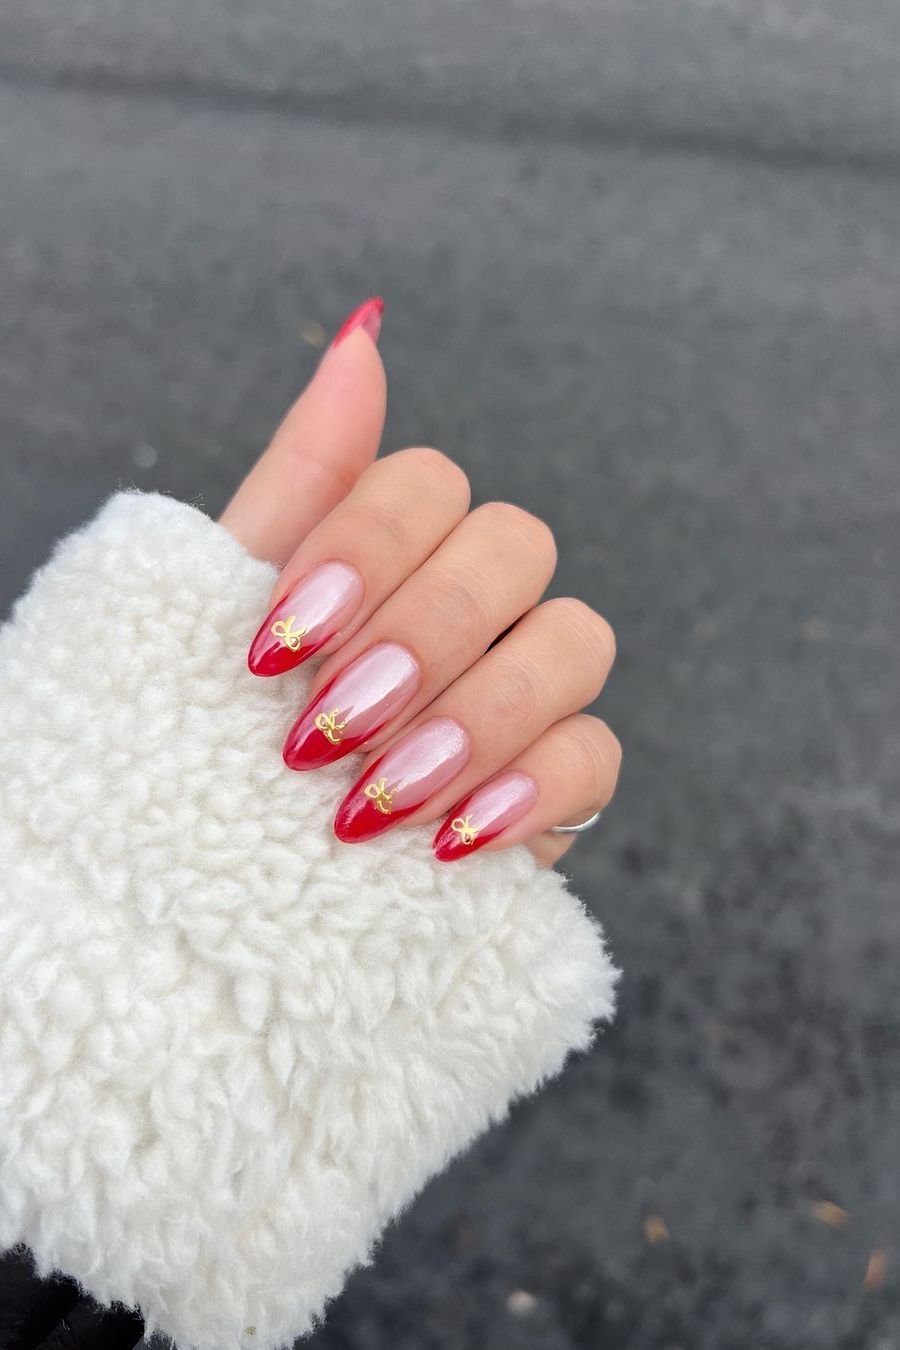
Which is more coquette: a classic red french tip or one with gold bow charms? I used to think the plain version was the purest take, but the charms add a playful edge that feels more intentional. The sheer pink base keeps it light, the red tip stays bold, and the gold bow charms catch the light without overpowering. The medium oval shape keeps it elegant. The bows give it that coquette flourish without losing the classic shape.
Light Pink Pearlescent Almond Nails with Bows
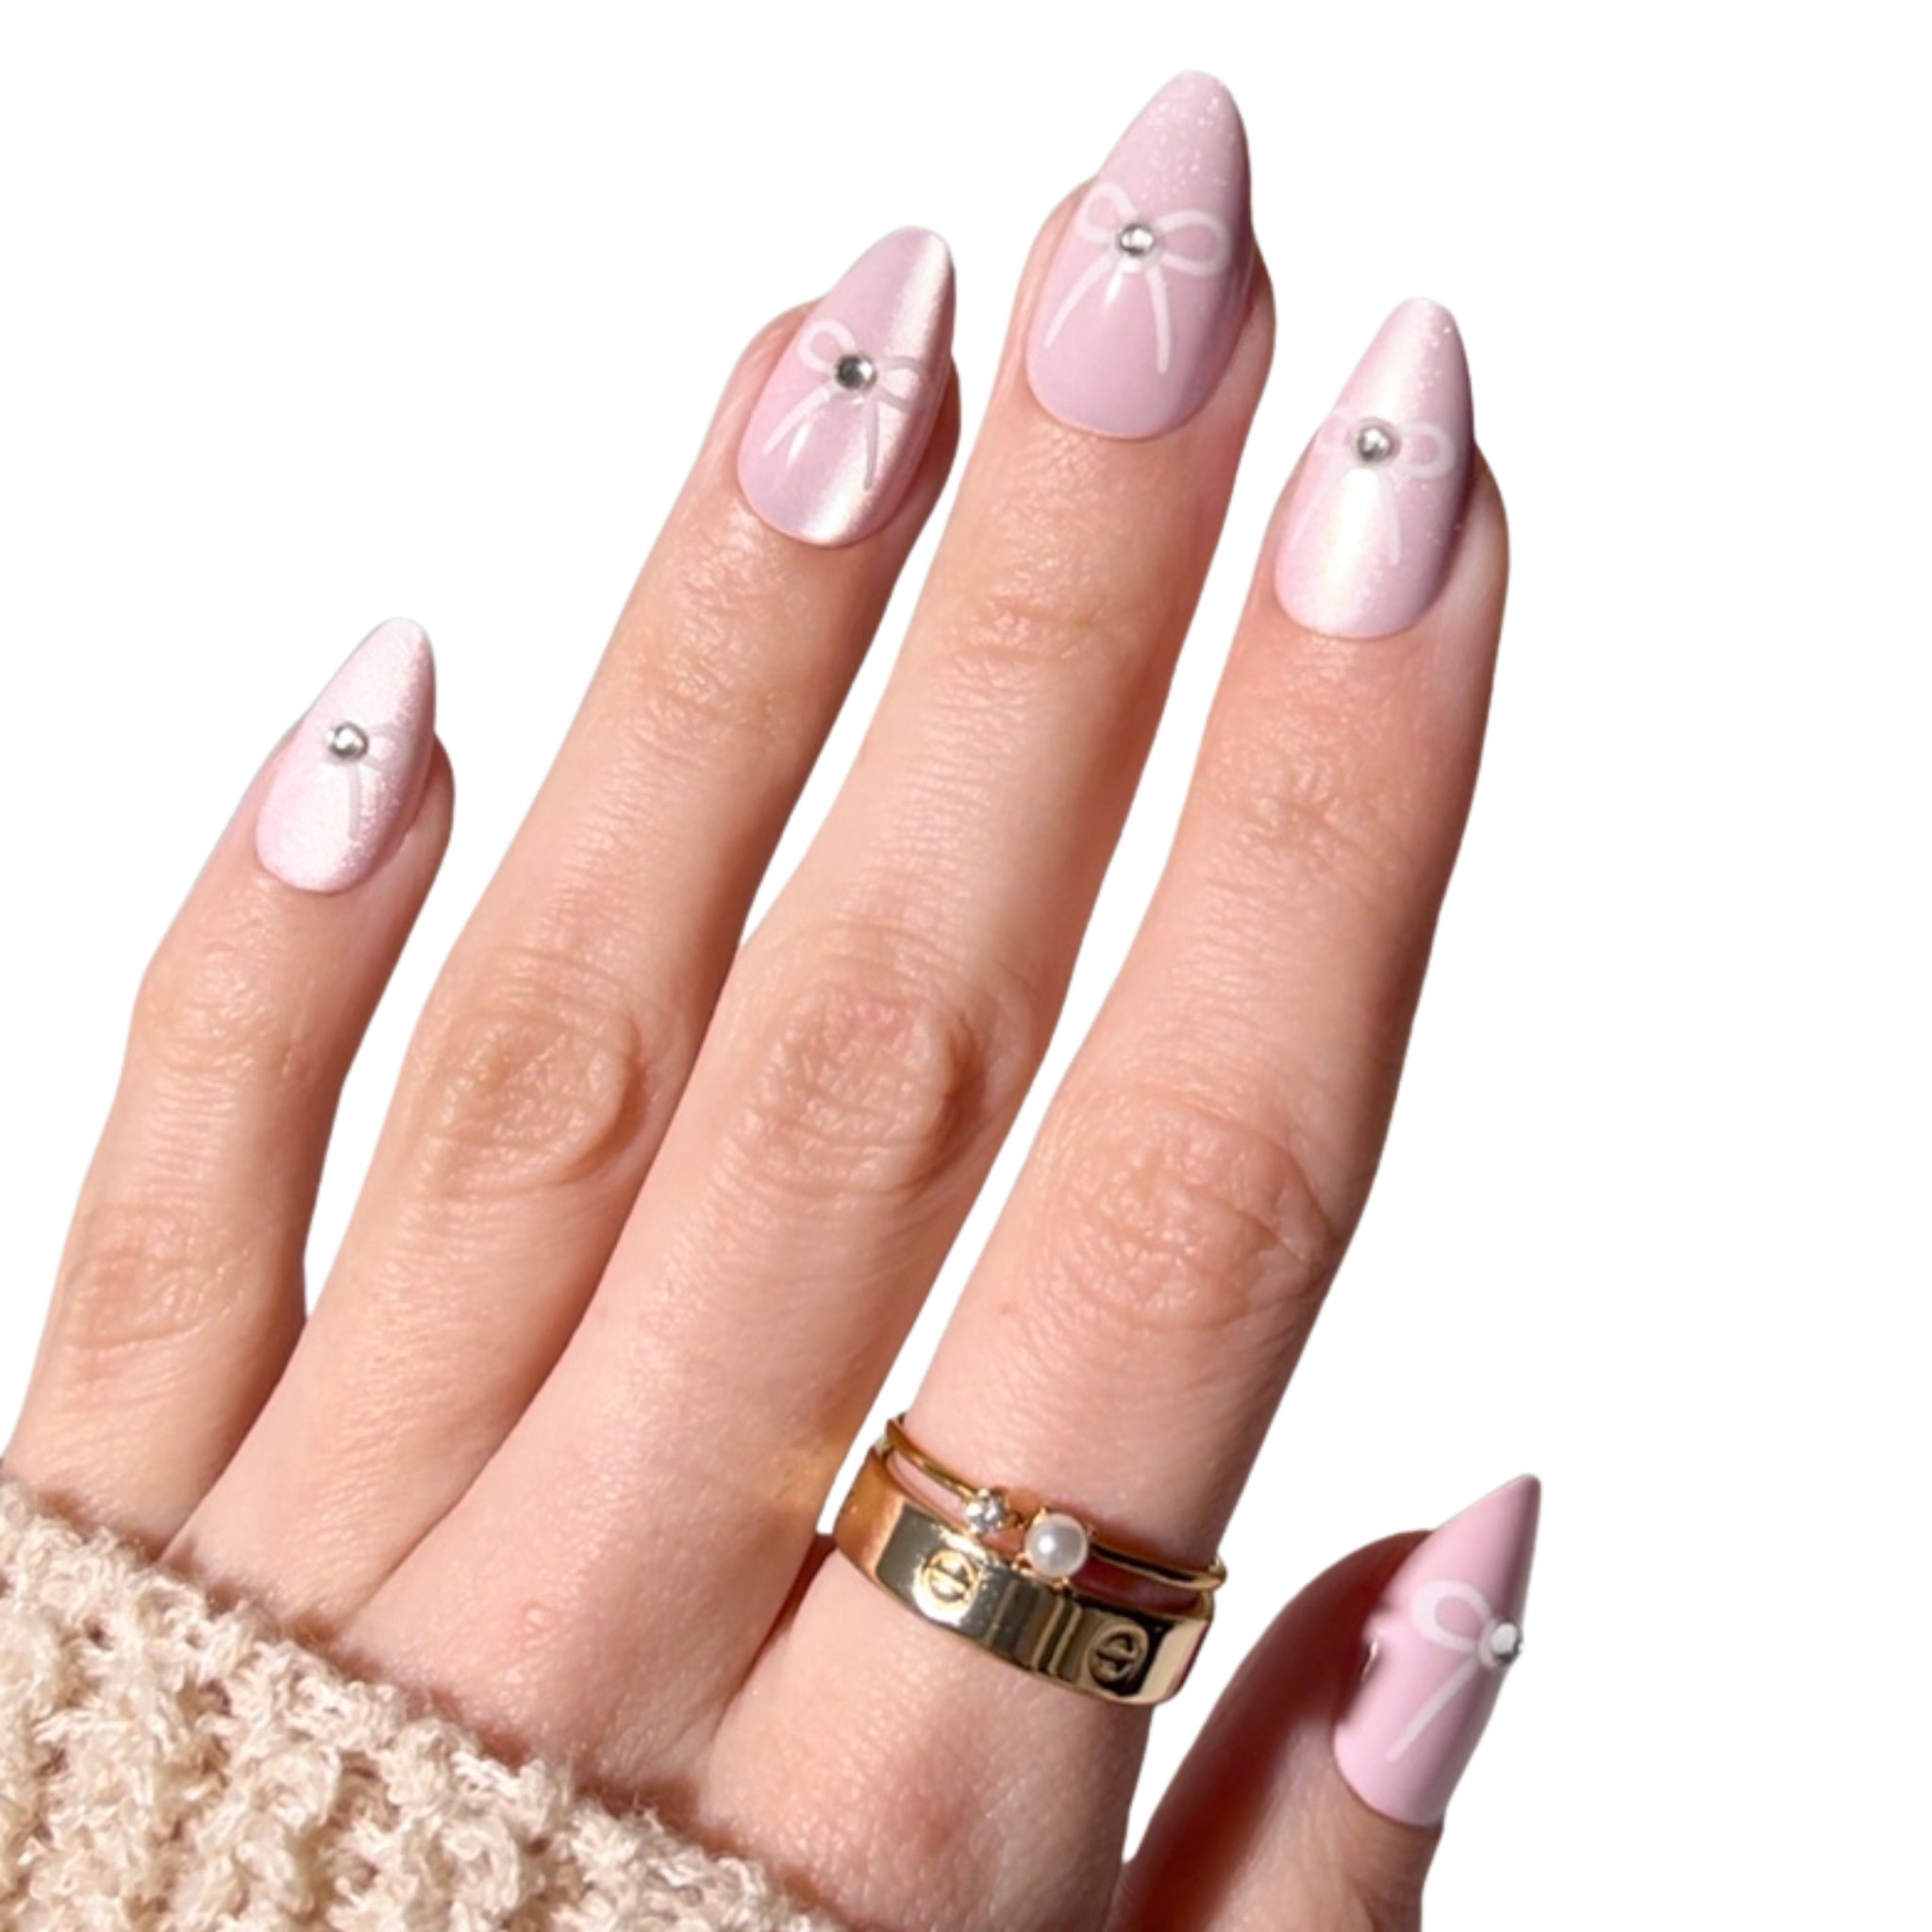
I’ll admit, I usually skip pearlescent finishes because they can look dated, especially in bright light. But this light pink pearlescent nails set changed my mind. The pearlescent shimmer is subtle enough to feel modern, not like a throwback, and the white bows with small rhinestones add a sweet detail that feels intentional. This look genuinely flatters anyone with cool or neutral undertones who wants a soft, romantic nail without going full Barbie. If you prefer matte or bold colors, this won’t be your favorite. The execution requires precision, so book a salon appointment for the bow details — the rhinestones need careful placement.
Sheer Base Oval Nails with Pink Bows
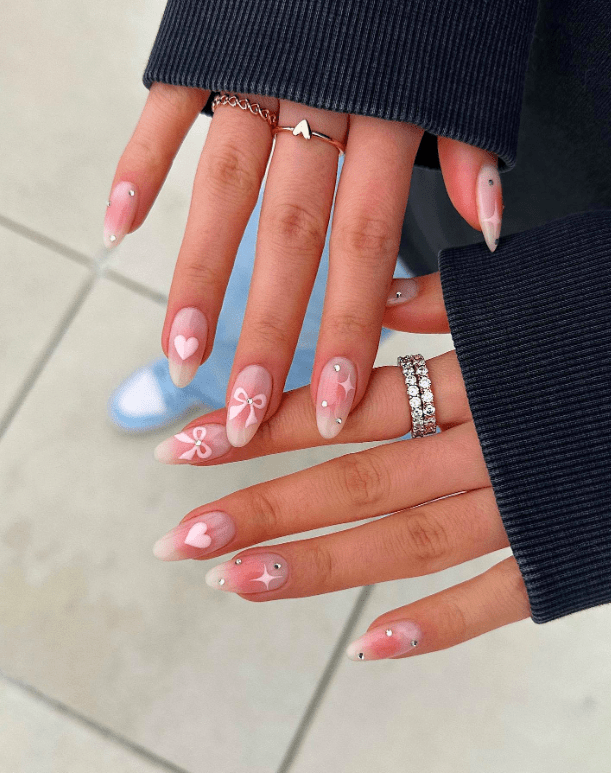
I saw these from across the room and immediately wanted to know if the bows would survive a week of typing. They’re medium oval, sheer pink base with glossy finish, and each nail gets a tiny pink bow, a heart, or a rhinestone — sometimes all three. The coquette energy is undeniable.
By day three, the sheer base showed wear around the cuticle — that’s the trade-off for a translucent look. The bows snagged on a sweater sleeve by day five, but a quick top coat refresh kept them from lifting entirely. The tiny pink hearts stayed put the longest, no snagging at all. I expected to lose a gem by day two; instead, they held through a full week of typing and dish duty. The key was sealing the edges of each embellishment with a thin layer of top coat during application. That extra step made all the difference. If you’re gentle with your hands, these will last a solid seven days before any bow starts to look tired.
Short Square Nails with Matte White Bows
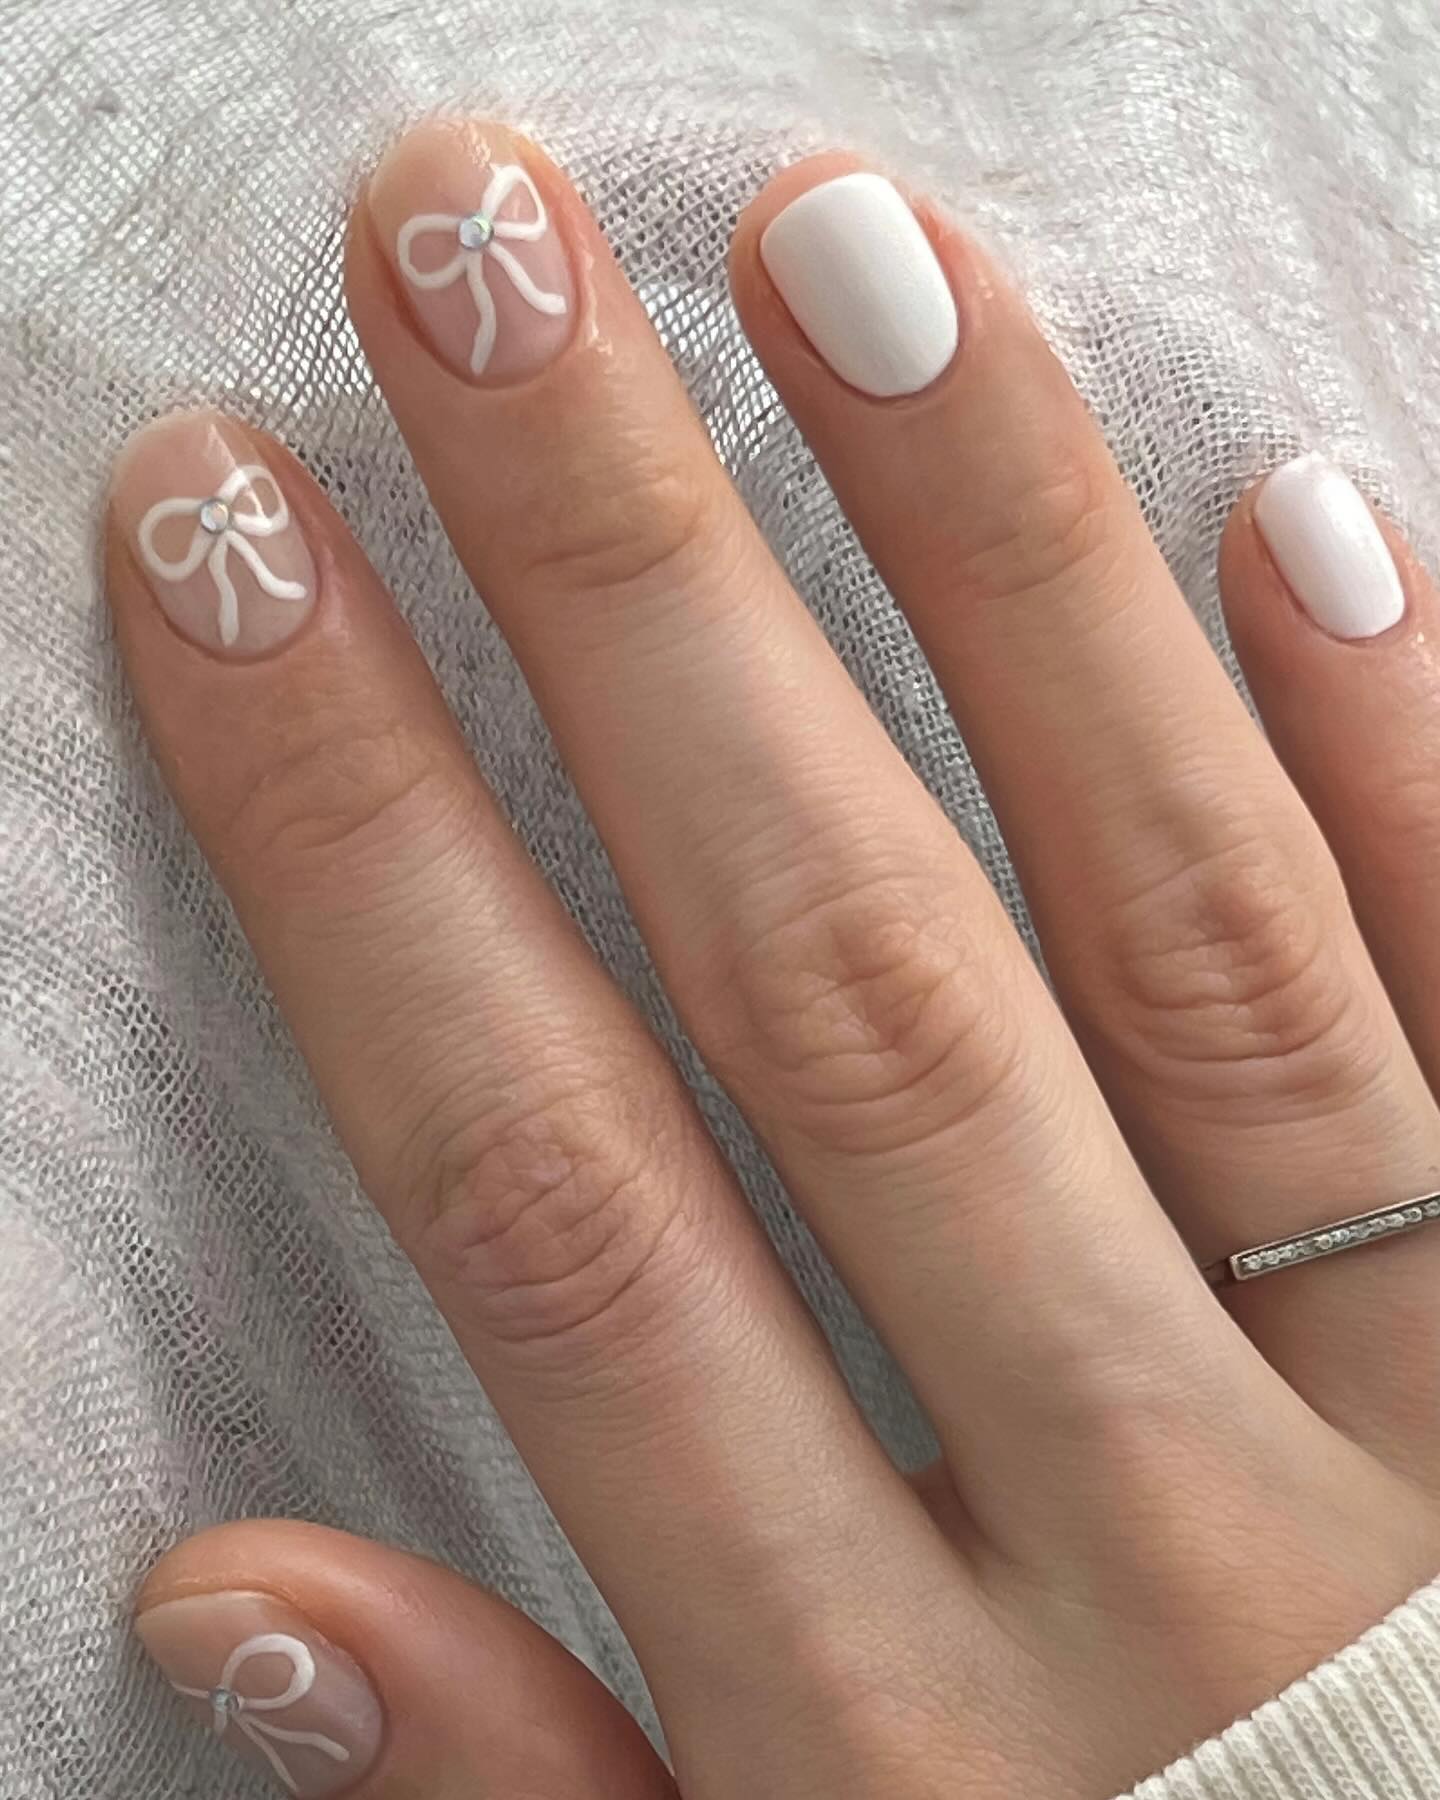
My first thought was, how long did that take? The short square matte nails have delicate white bows and small clear gems on accent nails — fine art details that require a steady hand and patience. Expect to be in the chair for at least 90 minutes, and that’s with a tech who knows matte finishes. The result is understated but the effort is not. The matte white bows are the star, but the glossy nude accent nails add a subtle contrast that makes the whole set feel intentional.
Burgundy Oval Nails with Pink French Tip
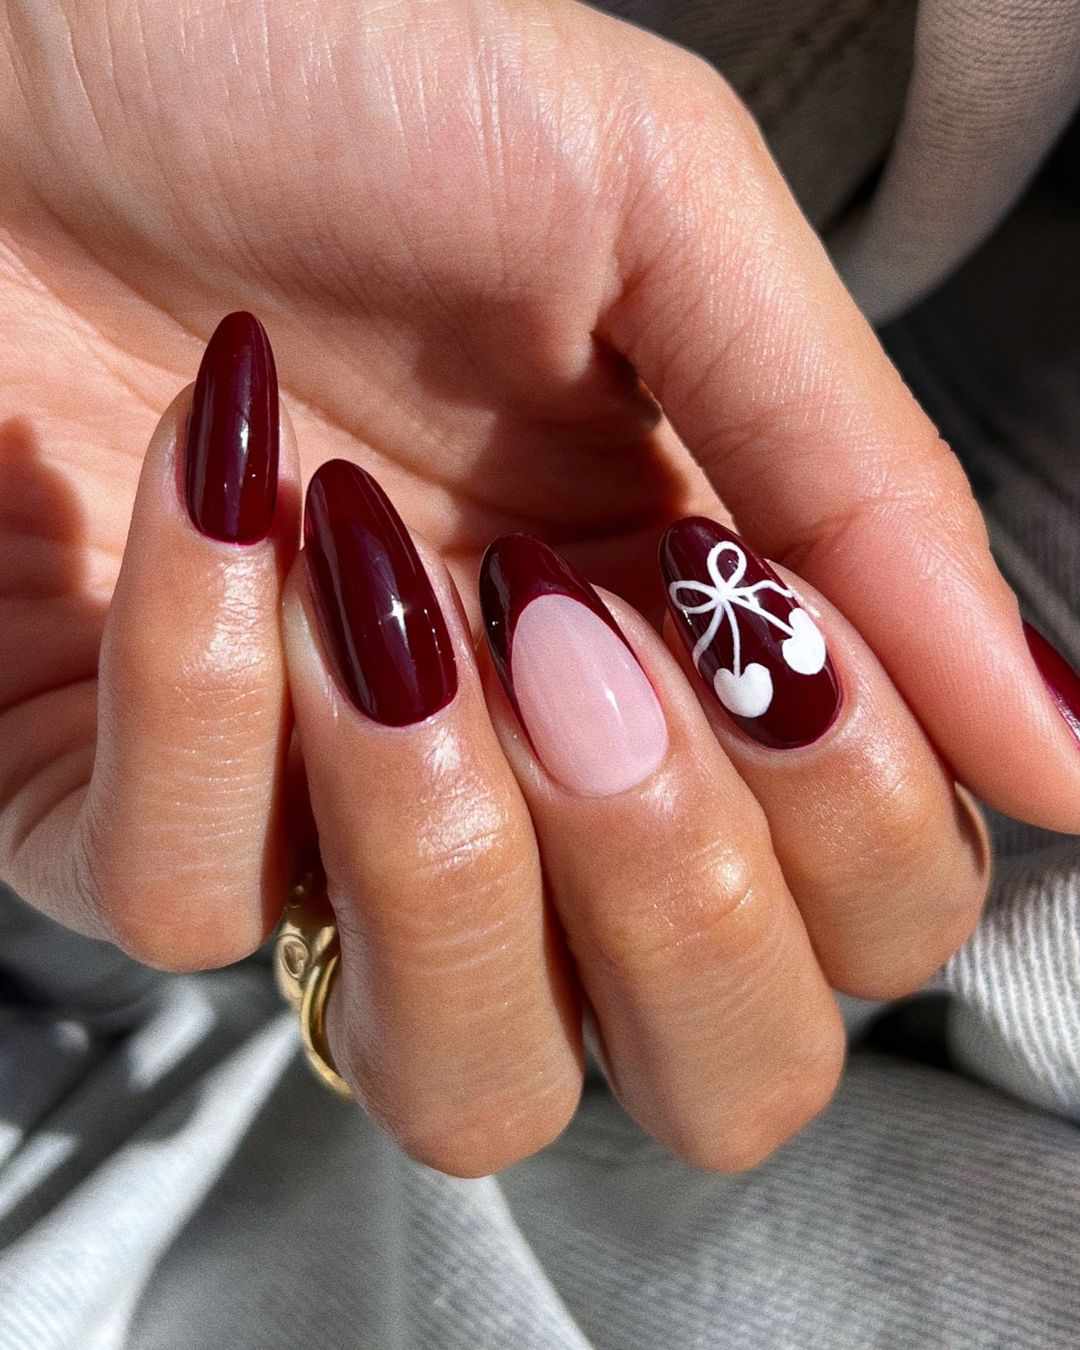
This is the design that makes me want to wear burgundy in spring. The medium oval nails are deep glossy burgundy, with one accent nail featuring a pale pink French tip and another a white cherry motif with a tiny bow. It’s dark and romantic but the cherry and pink keep it from feeling heavy. The burgundy oval nails anchor the set, while the pink tip and cherry add a coquette softness that works for transitional weather — think early fall evenings or late winter afternoons. The glossy finish catches the light, and the cherry detail is delicate enough that it doesn’t overpower.
Black Oval Nails with Silver Heart Outlines
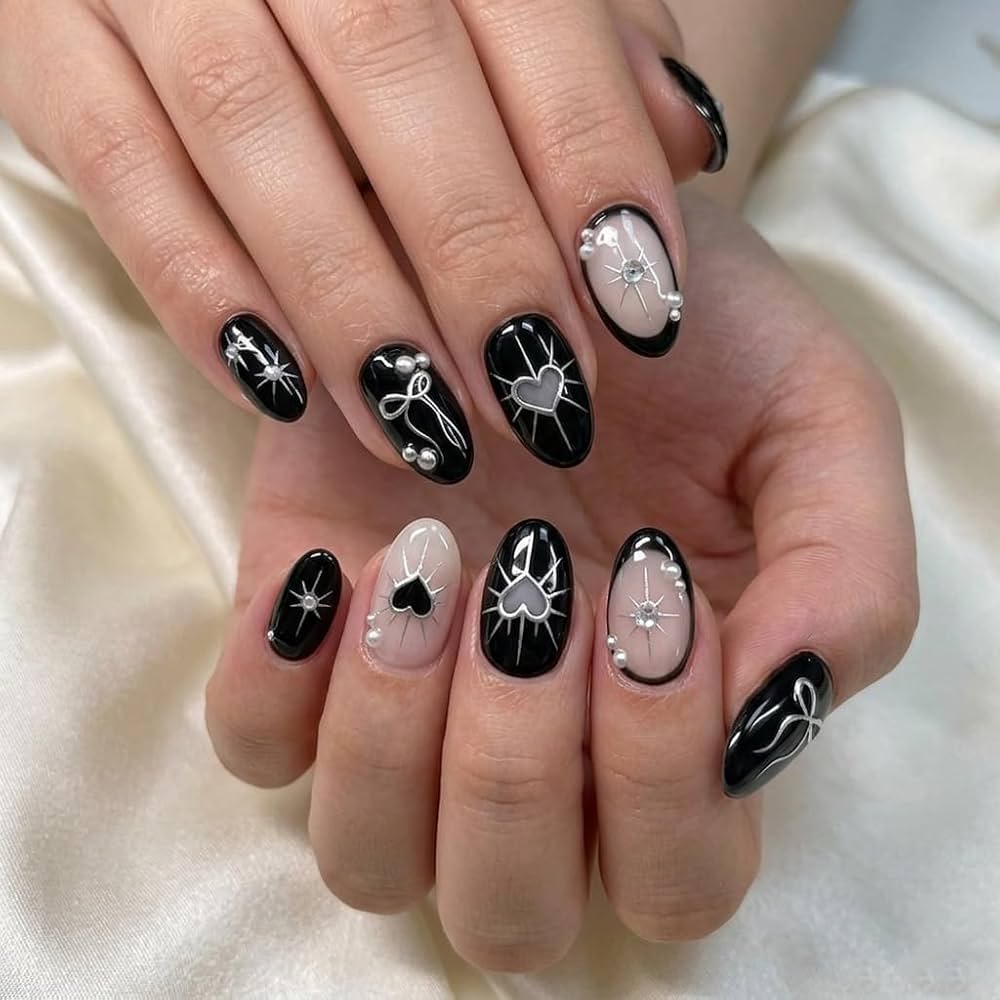
The silver heart outlines are hand-painted, not stamped, and you can see it in the slight variation of line thickness. These medium oval nails are glossy black with nude and pale pink accents — one nail gets a silver heart outline, another a star, another a bow, all with tiny pearl accents applied individually with glue. The technique requires a steady hand and a fine brush; the silver outlines are painted over the black base in thin, even strokes, then sealed with a layer of top coat to protect the edges.
The precision of the cuticle work and even polish application is what makes this design work. Without clean lines, the black would look messy and the silver would bleed. The silver outlines are delicate enough that they catch the light without overpowering the dark base. The pearls add a subtle texture that contrasts with the glossy finish. This is a design that rewards a skilled tech — it’s not a quick set, but the result is worth the extra time in the chair. The black silver coquette nails feel edgy but the hand-painted details keep them romantic.
Short Nude Nails with Black Bows
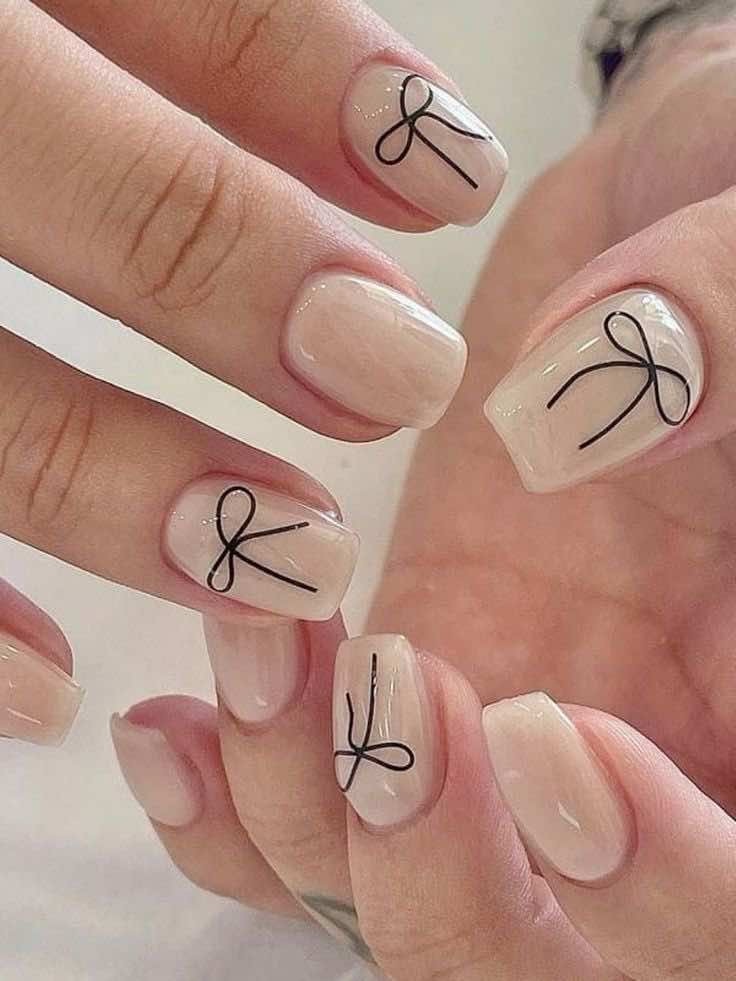
Can you do this at home? The short nude bow nails have delicate black bow line art on a glossy sheer nude base. The bows are hand-painted, not stickers, so you’ll need a fine brush and a steady hand. Start with a sheer nude polish, let it dry completely, then paint the bow using black polish and a thin brush. Seal with a glossy top coat. It’s not quick, but with practice you can get close to the salon look.
Visual Idea
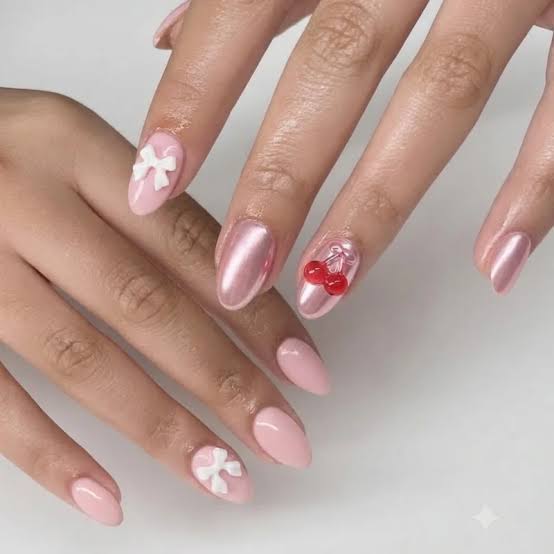
I’ll confess: I was ready to dismiss this as too cutesy. Then I saw the metallic rose gold bows and cherries on a pale pink base, and the glossy finish made them look almost elegant. The medium oval shape keeps it from veering into costume territory. The 3D bows are delicate, not bulky, and the cherry motif is subtle enough that it doesn’t scream ‘fruit salad.’ The metallic rose gold adds a warmth that softens the pink. It’s a coquette nail that knows when to stop. Still, I’m not entirely sold; part of me thinks this is a look you have to commit to fully, or it reads as half-hearted.
Glossy Visual Idea
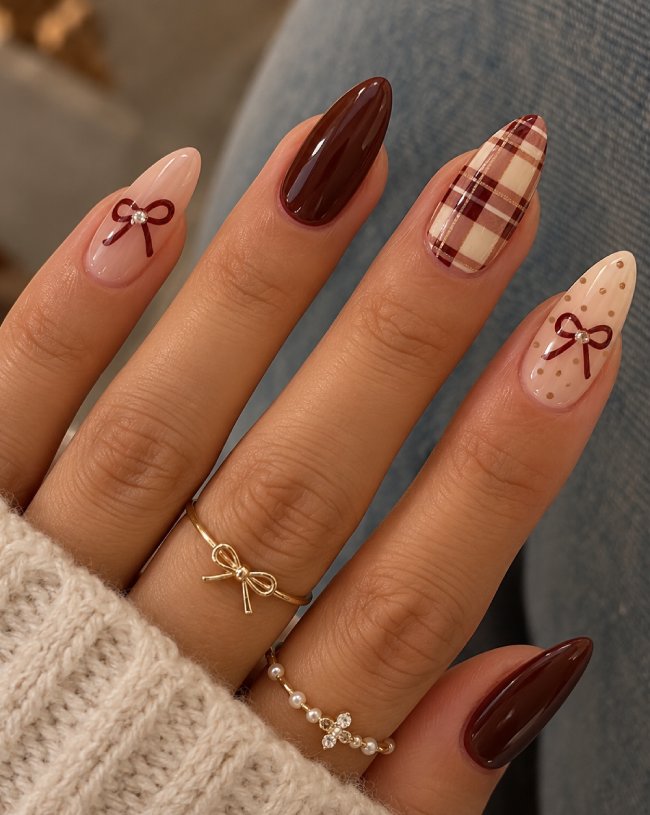
A deep brown bow sits on a nude nail, while the next nail shows a plaid pattern in burgundy and cream. The glossy finish ties the disparate elements together. The medium almond shape provides a classic canvas. The plaid accent adds a fall feel without being too literal. The brown bow is small and precise, not overwhelming. The color palette of deep brown, burgundy, cream, and nude is sophisticated and grounds the coquette theme in something more grown-up.
The combination works because each element has its own space. The plaid is on one nail, the bow on another, and the rest are nude with a glossy sheen. This prevents visual clutter. It’s a coquette nail that doesn’t shout; it invites a closer look.
Velvet Glossy Visual Idea
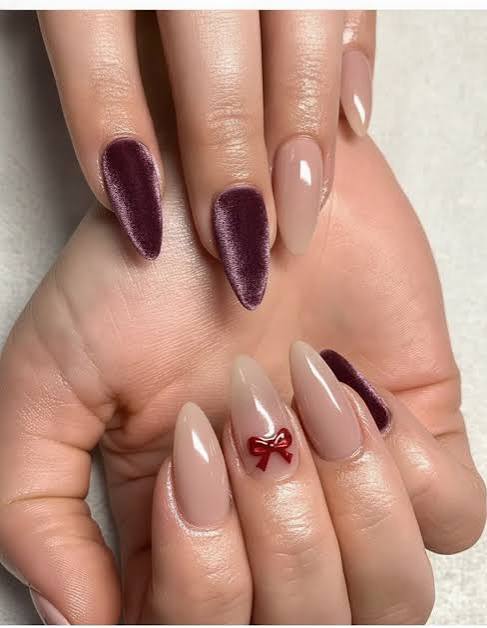
My first thought was: velvet on nails? That’s going to look fuzzy. But when I saw the deep plum accent with a velvet texture, I changed my mind. The long stiletto shape gives it an edge, and the small red bow on the ring finger is the perfect pop of coquette. The nude base keeps it from being too dark. This is a fall look that feels luxurious, not costume.
Small Pearls Scattered On All Nails Visual Idea
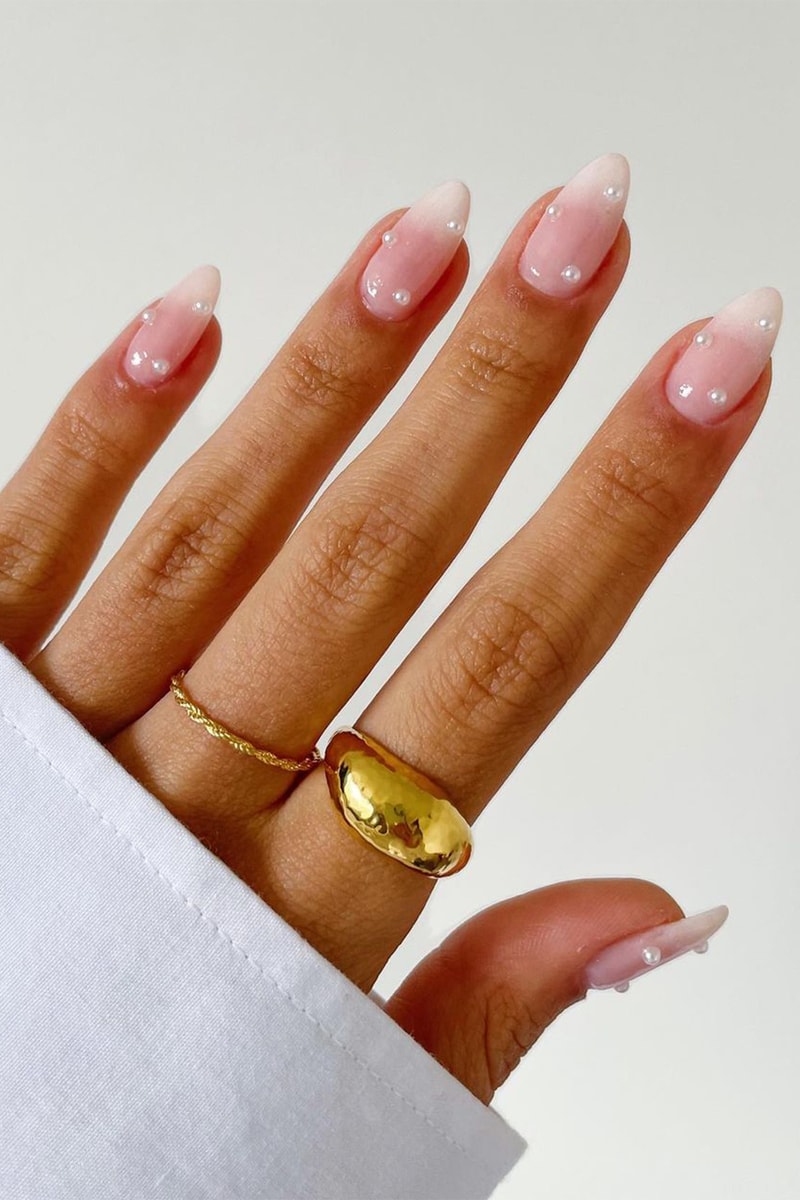
The biggest mistake with scattered pearls is using too many. On a pink-to-clear gradient base, medium almond nails, the small pearls should be sparse, a few per nail, not a full crust. The glossy finish makes the pearls pop, but overcrowding turns delicate into clunky. The trick is to place them asymmetrically, letting the gradient show through. I’ve seen nails where every pearl is packed together, and it loses the airy coquette feel. Keep it to three or four per nail, varying sizes, and leave some nails bare. The gradient base does the heavy lifting.
Not Visible Visual Idea
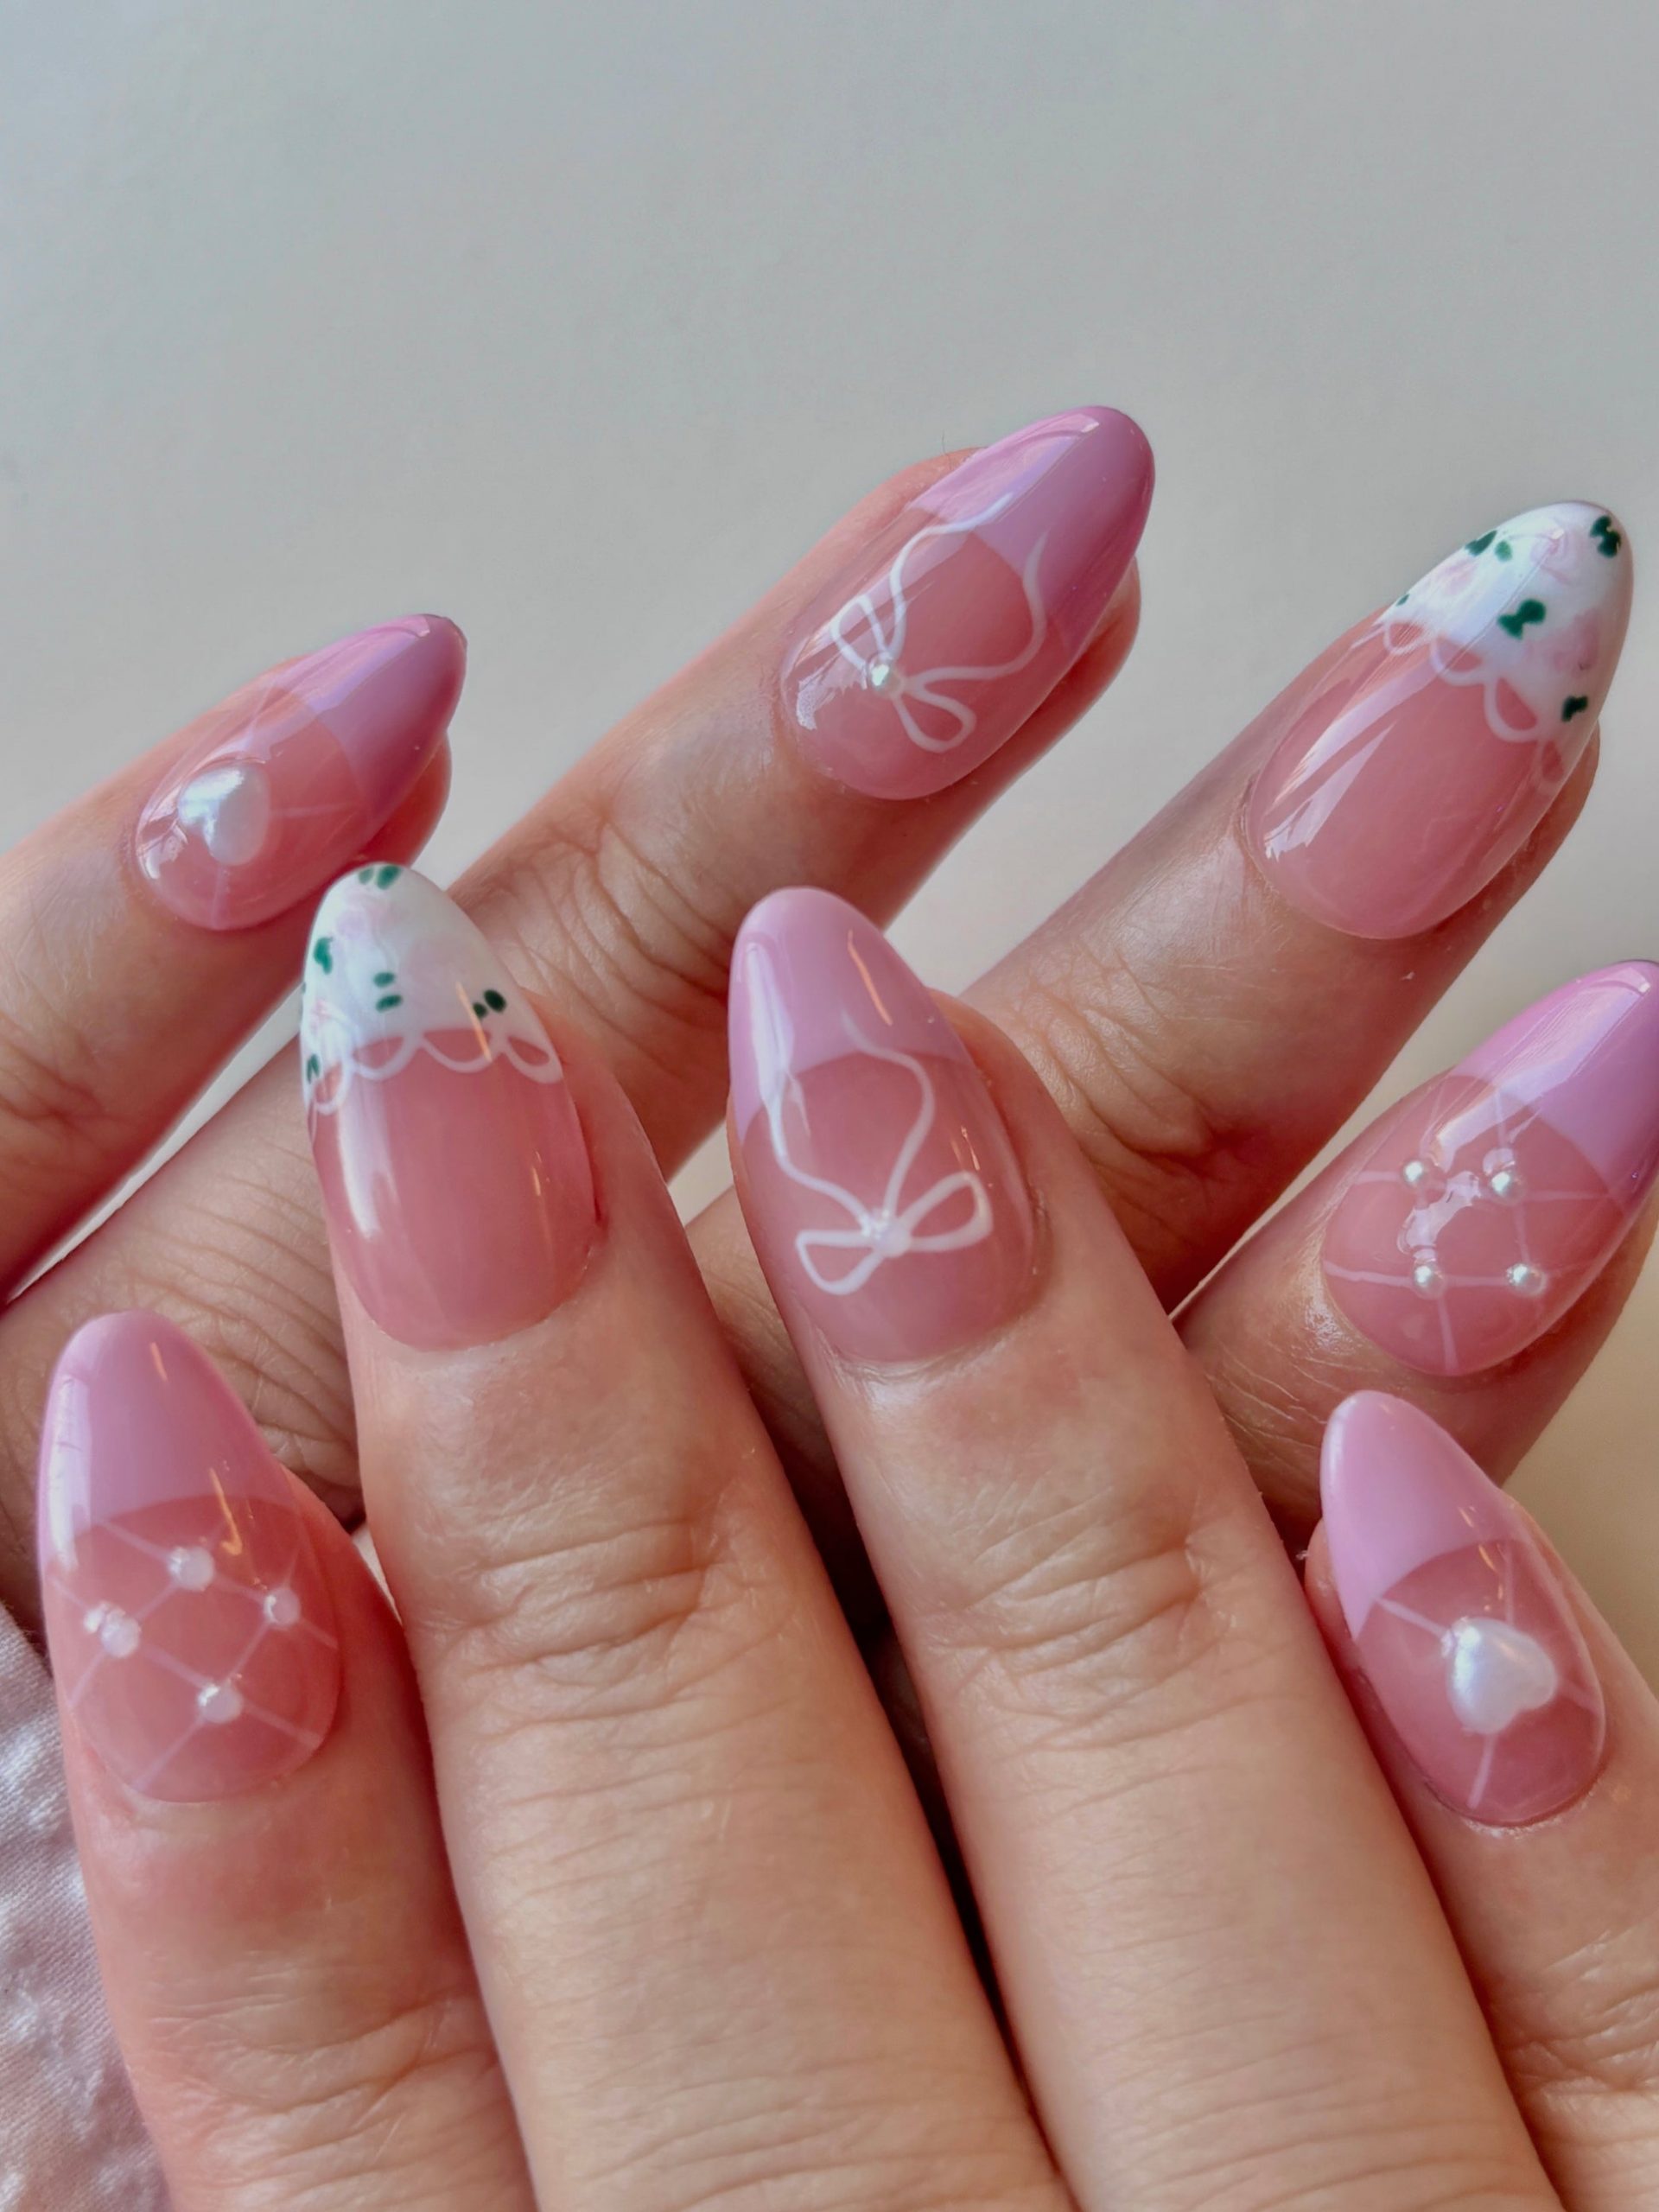
White line art bows and hearts on a pink base, it’s almost the same as the classic French tip with a twist, but here the line art is finer and more whimsical. The alternative might be a solid bow decal, but the line art feels lighter and more hand-drawn. The pearl dots add a subtle texture. The medium oval shape is forgiving. I’d pick this over a solid decal any day because it breathes.
The pink base is sheer enough to let the natural nail show through, which keeps the look from feeling heavy. The white line art is delicate, almost like a doodle. It’s a coquette nail that feels personal, not mass-produced.
Glossy With Glitter Visual Idea
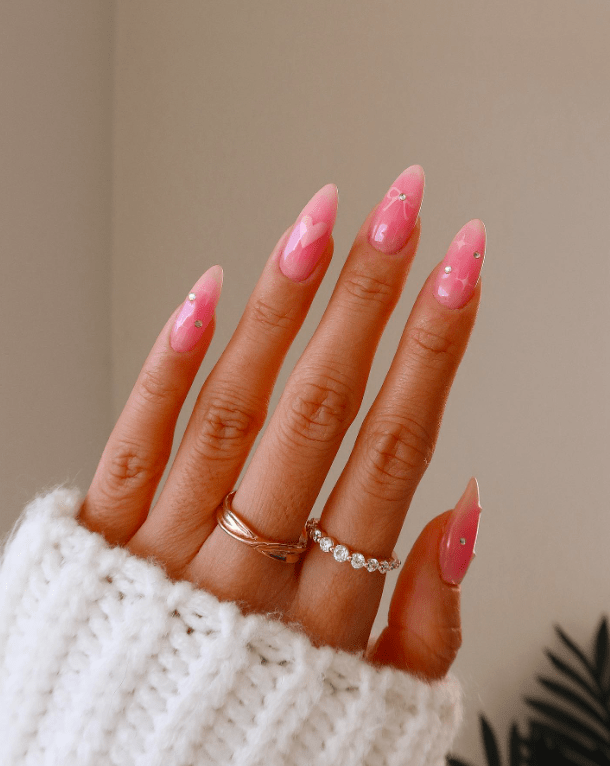
Are you drawn to sheer pink but still want to catch the light without going full disco? This version layers fine glitter into a glossy, sheer base, so the sparkle reads as a soft shimmer rather than a party leftover. The long almond shape keeps it elegant, and the scattered rhinestones and tiny bows feel playful without tipping into costume. That said, if you prefer a matte or completely bare look, skip it — this one announces itself. It flatters anyone who wants a girly, luminous finish without choosing between delicate and fun.
Gold Bow Charms On All Nails Visual Idea
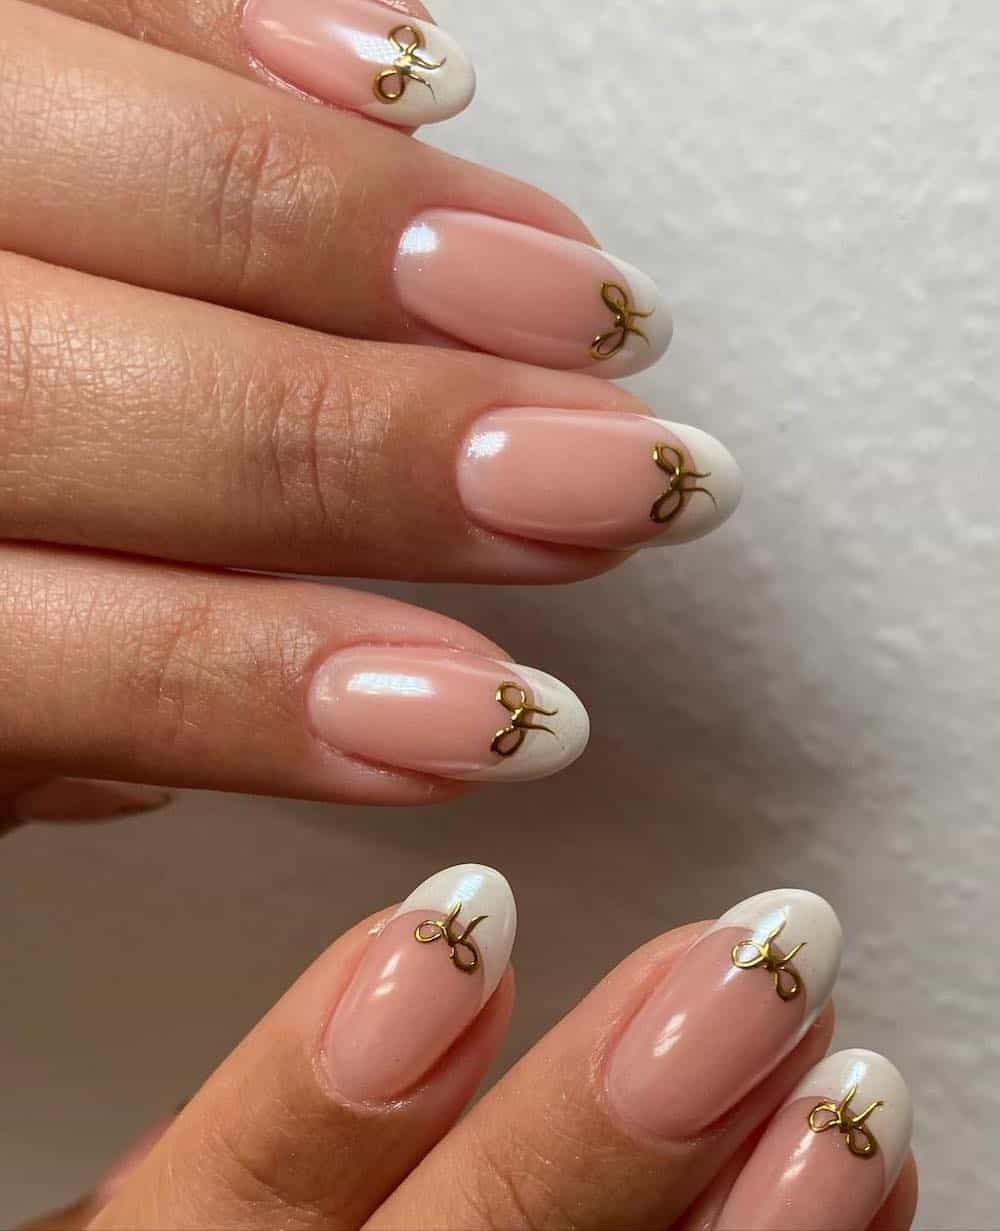
I’ll admit I thought gold bow charms on every nail would feel like a hazard waiting to catch on everything. The reality is more forgiving than I expected. These are flat-backed charms, set into the glossy top coat, so they sit nearly flush with the nail surface. They don’t snag on sweater knits or catch on hair when you brush it back. The short oval shape helps — less overhang means fewer opportunities for the charm edge to lift. On a sheer pink base with white tips, the bows read as delicate jewelry rather than bulky decoration. Typing and buttoning jeans feel normal, which is more than I can say for some 3D designs I’ve tried.
Heart Accent Nail Rhinestone Heart Visual Idea
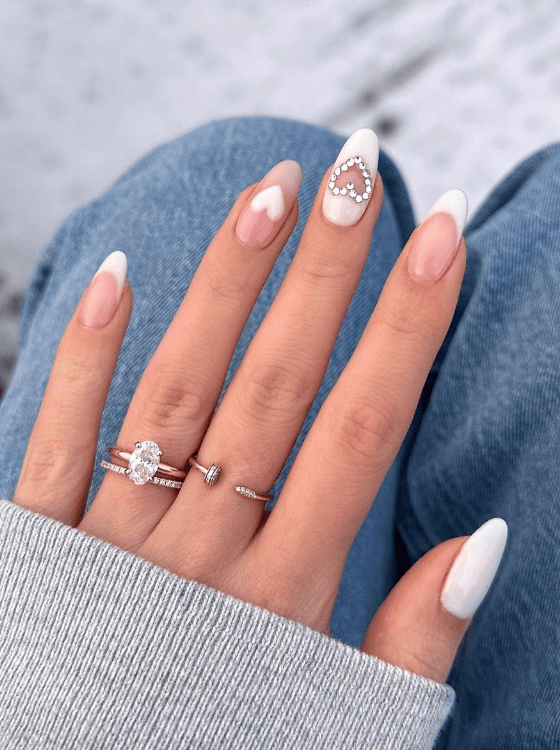
You arrive with a reference photo: one nude base, white tips, and a pink heart formed entirely of clear rhinestones on the ring finger. The nail tech studies it, then asks if you have an hour and a half. This is not a 45-minute set. Each tiny stone is picked up with a wax pencil and placed one at a time into the still-tacky gel. The heart accent alone takes about 15 minutes if the tech is quick. The rest of the nails follow with a pink heart painted freehand and sealed under gloss.
The time investment is real, but so is the payoff. When the light hits that rhinestone heart, it throws tiny prisms across the table. You will notice it every time you reach for a glass or type a message. This is the kind of set you book when you have a stretch of weekend or a slow Wednesday. Not one for a lunch break.
Glossy With Matte Sheer Overlay Visual Idea
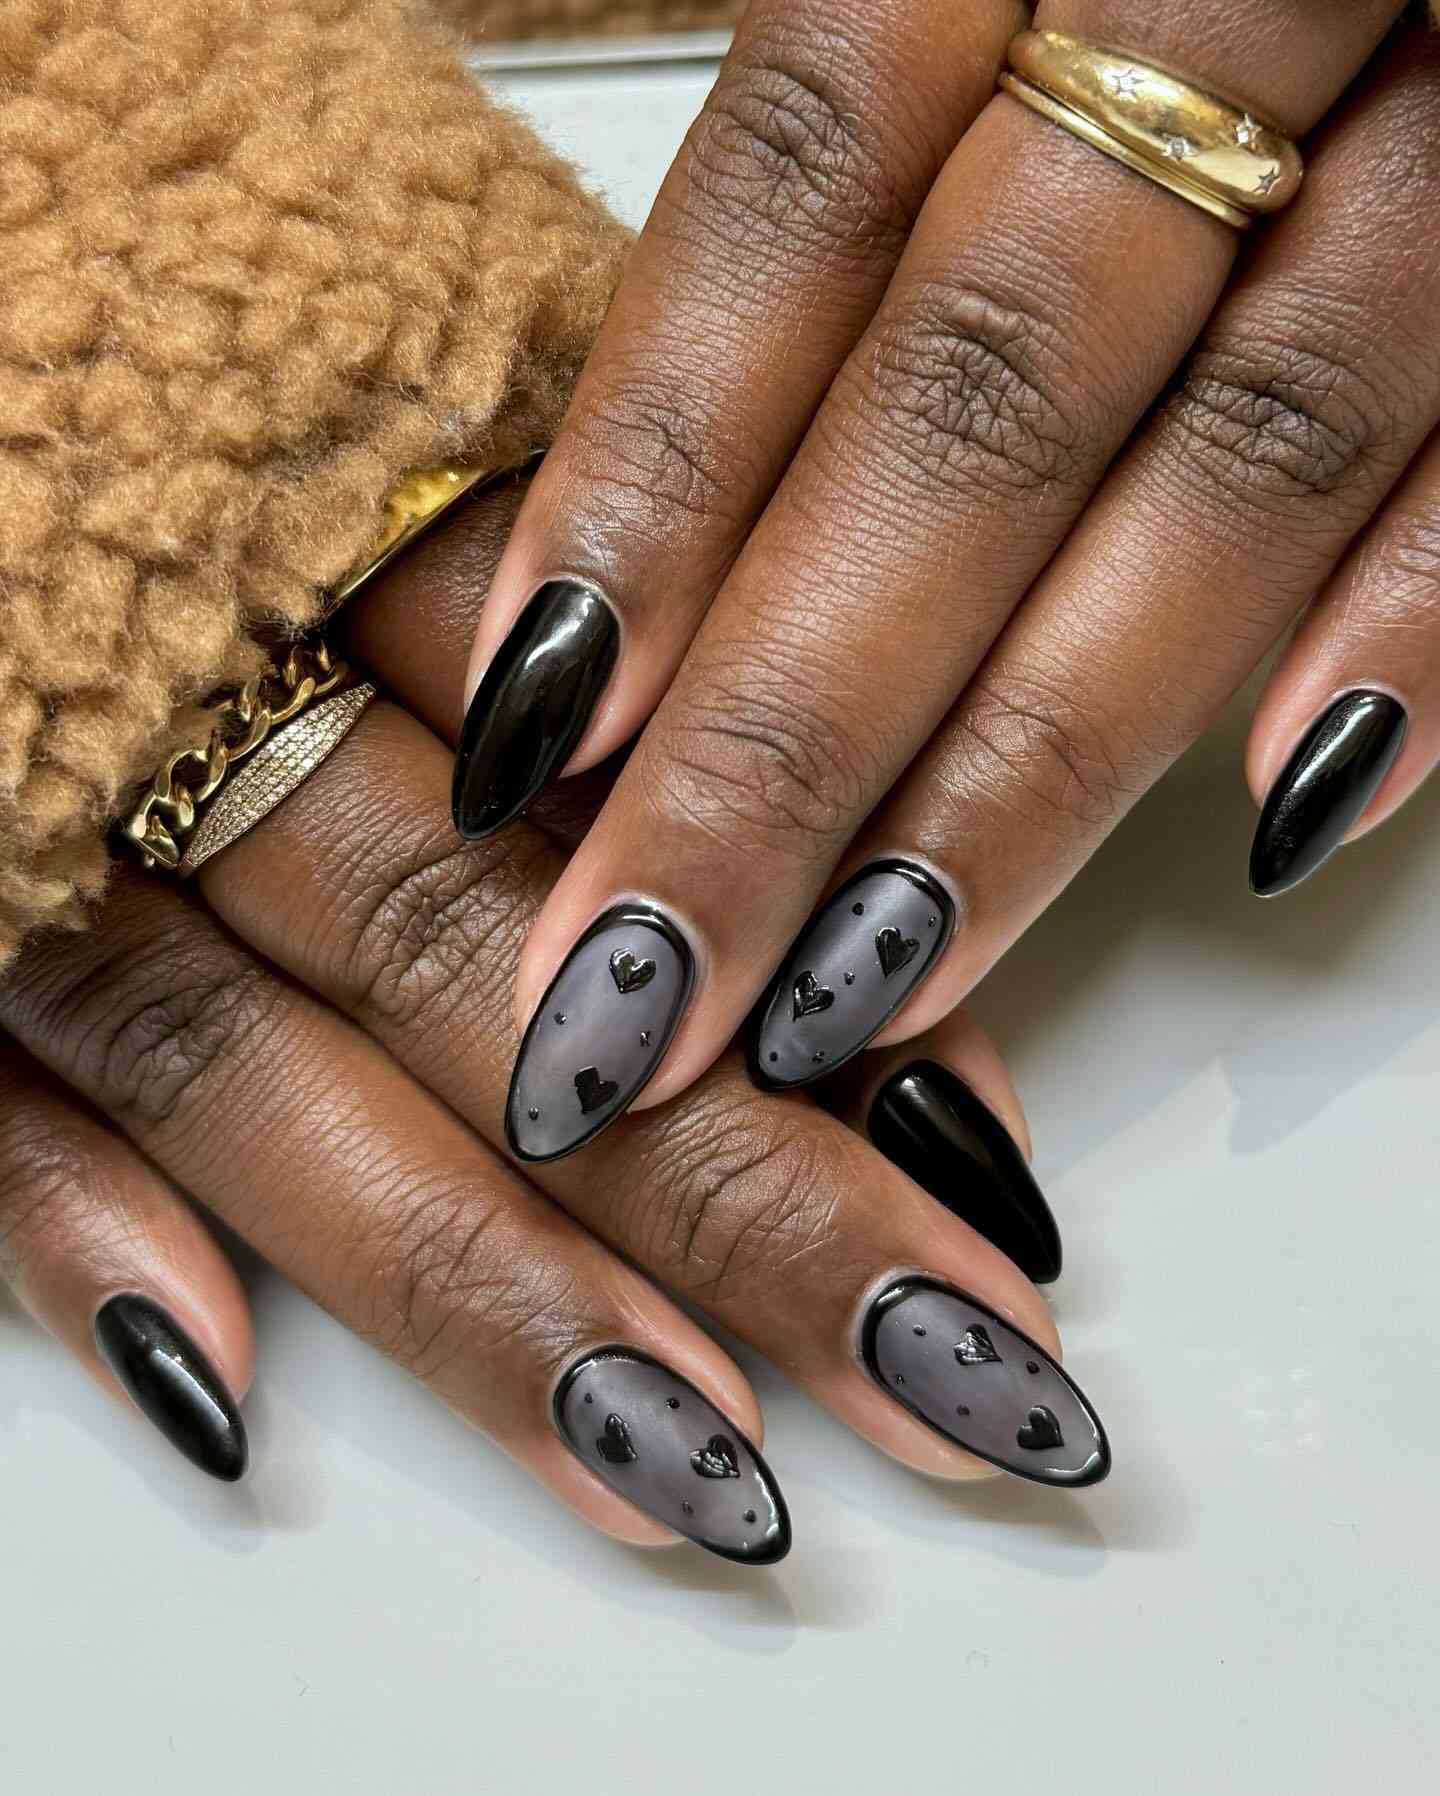
My first thought was that this looks like a moody autumn afternoon poured onto nails. The sheer nude base keeps it light, while the small black hearts add a touch of something darker. What makes it work for this season is the matte sheer overlay. It takes the glossy shine down just enough to feel cozy — think cashmere rather than satin. The medium almond shape keeps the overall silhouette soft. This design suits the moment when you want to acknowledge fall without committing to full burgundy or black. It’s gothic-lite, and I mean that as a compliment.
Visual Idea — Long Almond Nails With A Pale Pink Base
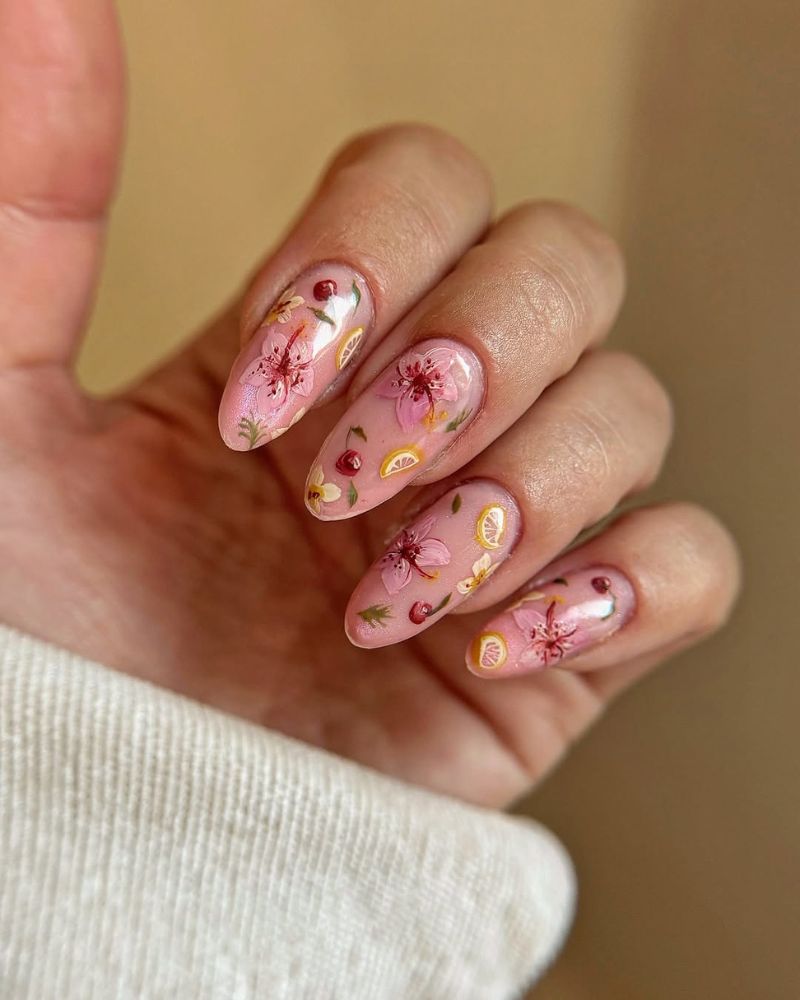
This is the most technically ambitious look in the batch, and it’s the execution that makes or breaks it. The pale pink base is a sheer jelly, not opaque, so it needs two or three thin coats to build depth without looking streaky. Then the real work begins. Each nail features a custom decal or hand-painted element: tiny floral sprigs, miniature cherries, and paper-thin slices of lemon. These are laid into the still-tacky gel and encapsulated under a layer of clear gloss. That sealing step is critical — if the top coat is too thick, it blurs the details; too thin, the decals lift. The result is a smooth, glassy surface with dimensional art suspended inside.
Clean Cuticle Work Even Application Visual Idea
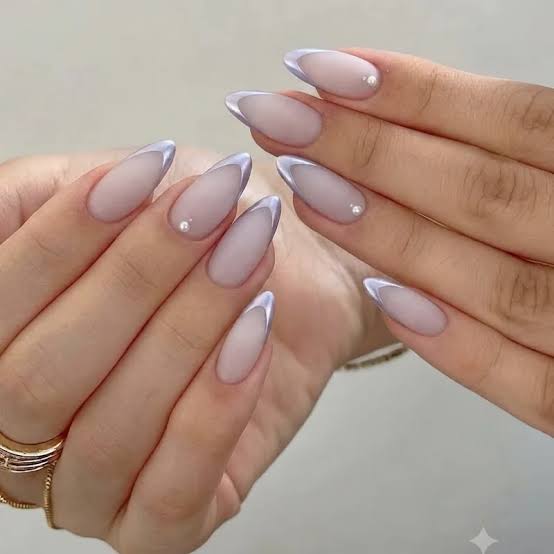
What separates a salon manicure from a home attempt is rarely the color, it’s the cuticle work. Here the cuticles are so tidy the nail bed looks longer, and the application is even enough that the sheer nude base reads as skin, not polish. The metallic lavender tips are precise, but that precision is the whole trick.
To get close at home, push back your cuticles after a shower, not before, and use a rubber base to even out the nail surface. Then paint the tip with a thin brush, one stroke per side, and clean up any wobble with a brush dipped in remover. The pearls on the accent nails are the forgiving part, they hide a multitude of sins. It’s not a quick job, but it’s a doable one.
The Metallic Silver Foil Abstract Design Visual Idea
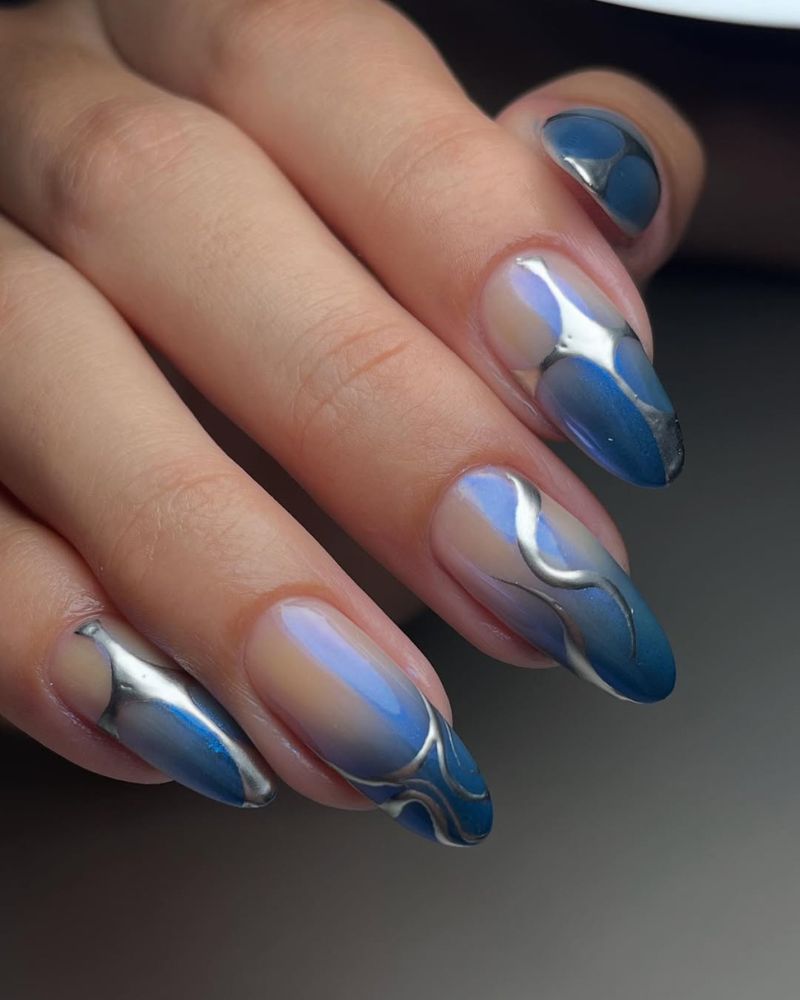
Can abstract foil ever look intentional, or does it always read as a happy accident? This one lands on the right side, because the silver foil sits on a gradient that moves from sheer nude to medium blue to dark blue, so the metal catches light differently at each stage. The iridescent shimmer on the blue sections ties it together, and the foil placement is sparse enough to feel designed. It’s a salon ask, precise foil application and blending, but the result is worth the appointment.
Final Thoughts
I started this roundup suspicious of anything that might catch on a sweater. I am ending it with a standing appointment for that deep red french with gold bows. The bow is not a phase — it is a tool. And I will take mine with a glossy top coat.