I kept seeing the same thing at two weddings last summer: a Dutch braid that actually stayed put past cocktail hour. Not a fishtail, not a French braid. Something with structure that didn’t look like I spent an hour on it. I was wrong about that last part.
This is 20 Dutch braid ideas that work across textures and lengths, from five-minute versions to the kind you book a friend for. Fine hair that goes flat by 4 pm can hold the shape. Thick hair can handle the volume without looking heavy. The trick is matching the finish to your actual morning.
Classic Double Dutch Braids
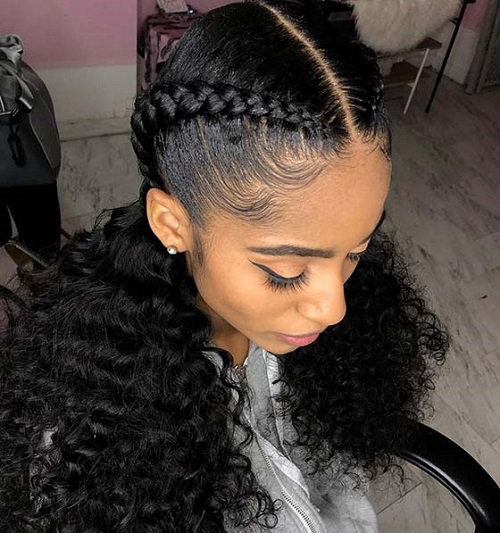
Straight, thick hair gives a double dutch braids a different kind of architecture. The raised sections — that intricate pattern you see in salon work — stay crisp because each strand has enough weight to hold its line. The subtle highlights in the black base add dimension without screaming for attention. For this mid-back layered cut, the braid sits evenly from the middle part to the ends. This is the style for someone whose hair doesn’t slip out of a braid by noon. Thick, straight texture is the secret. Without it, the braid flattens into a ribbon. No bangs, no fuss, and the hold lasts through a full day of movement.
Voluminous Single Dutch Braid
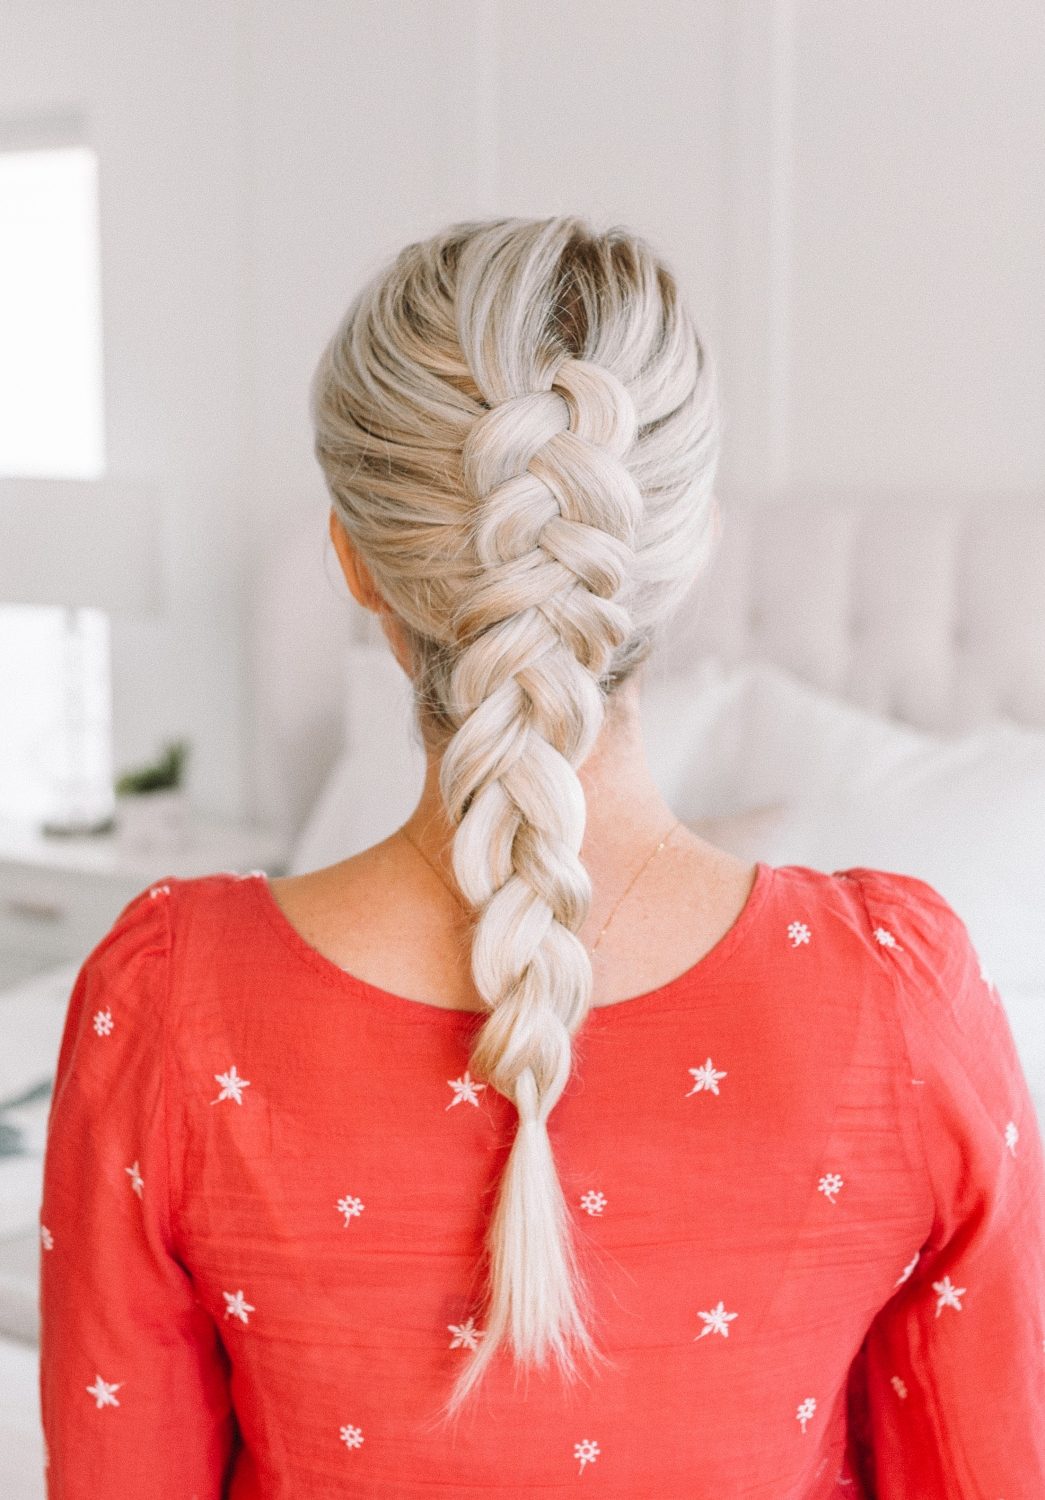
How do you get a single voluminous dutch braid to look like it has twice the hair it actually does? The trick starts at the crown. Take large sections, weave tightly from the middle part, and keep consistent tension all the way down the mid-back length. The ash blonde colour helps — lighter tones catch the light between each loop, making the braid feel wider.
The real volume comes after. Gently tug on the outer edges of the braid, pulling each section apart just enough to soften the weave. Start at the top and work down. A texture spray gives grip if your hair is too smooth. With thick, straight hair and a perfect middle part, this holds its shape all day. Fifteen minutes of careful work, and it stays.
Defined Dutch Braids on Coily Hair
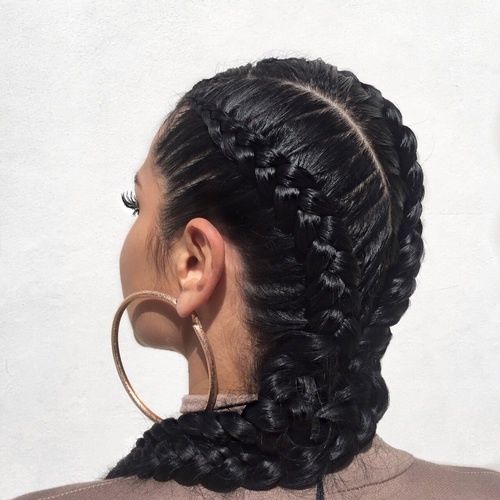
Coily hair wins the definition contest, no debate. These coily dutch braids look carved, every ridge a clean right angle. On straighter textures, the braid softens into a rounded curve. Here, it stays graphic — sharp lines that read as deliberate. The black colour against the braid’s natural lift makes each section pop. Mid-back length, double braids from a middle part, and a layered cut that lets the ends taper neatly. This is a salon job for the cleanest result; the stylist’s tension work is everything. Thick coily texture gives the braid a hold that doesn’t budge. No bangs needed. It’s not soft. It’s architectural.
Classic Dark Brown Dutch Braid
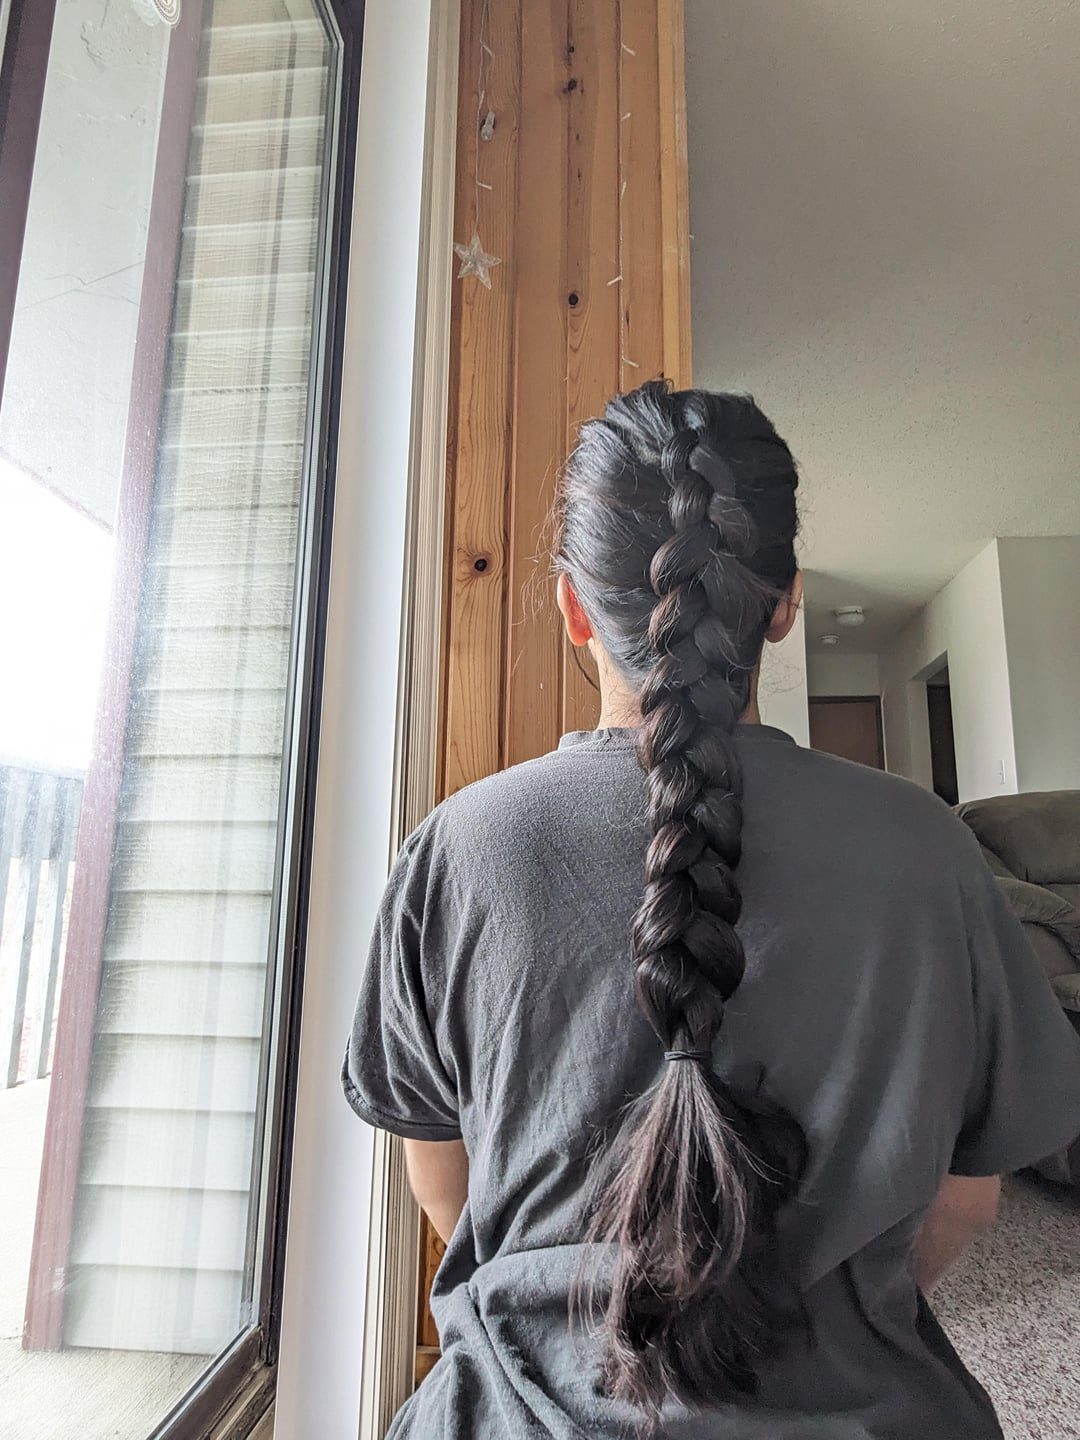
I confess: I wore this dark brown dutch braid for three days straight. The tightly woven structure held through sleep, a light workout, and a commute. The colour — flat dark brown — hides any minor fuzz or flyaway at the crown. Large, defined stitches mean you don’t have to panic about a strand escaping. Mid-back, thick, straight texture. By day three, I smoothed the edges with a dab of water and called it done. That’s the real wear reality: it doesn’t need a daily redo.
Vibrant Rainbow Streaked Dutch Braids
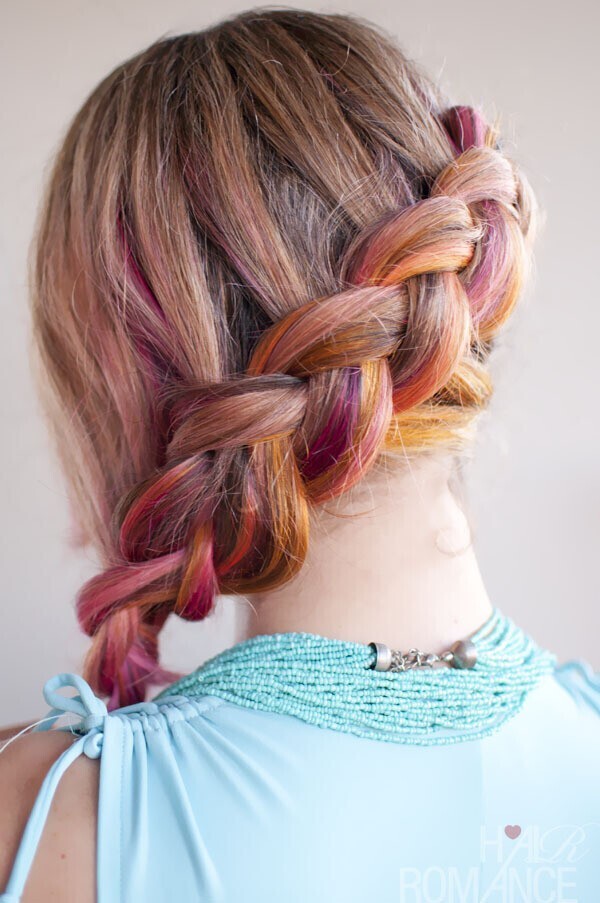
A gut reaction: rainbow dutch braids are a lot. But they earn their keep in the right season. These are made for summer festivals, pride marches, or a birthday when beige is banned. The vibrant streaks — pink, orange, purple — cut through the wavy thick texture like highlighter on a page. Double braids from a middle part keep the colour organized, each streak visible as the braid wraps.
Mid-back length gives enough canvas for the rainbow to read. The layers help the streaks show from every angle. The hold through a long outdoor day is surprisingly solid — the thickness of the wavy hair grips the weave. This is strictly a salon project: the color work needs a pro, and the braiding takes patience. But for a sun-drenched afternoon, it lands exactly right.
Collarbone Length Side Dutch Braid
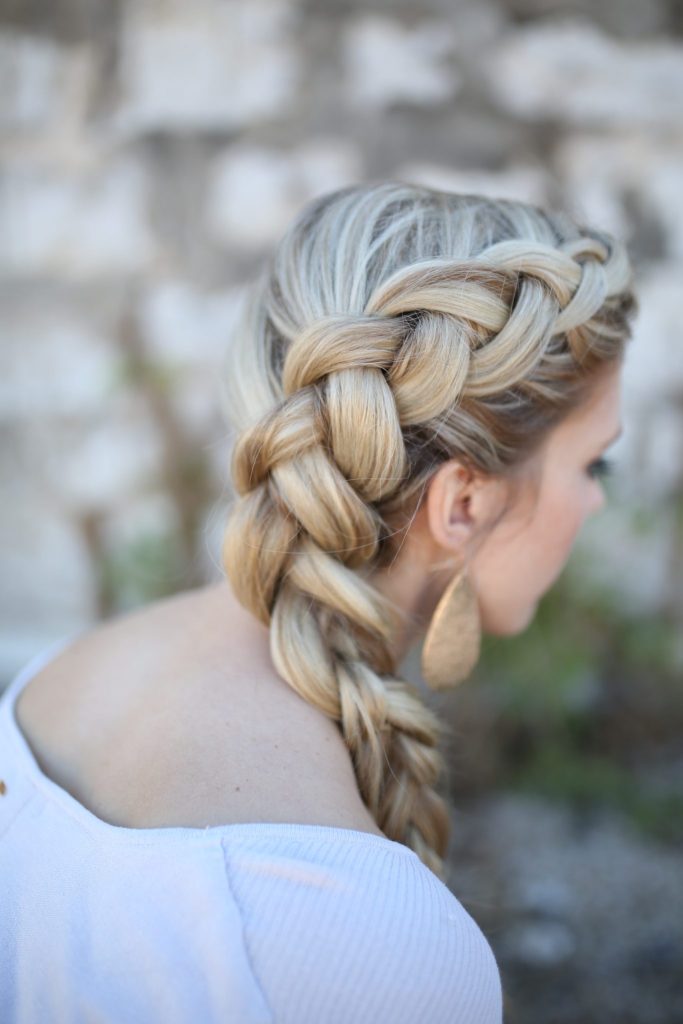
Do you have hair that hits your collarbone and a deep side part already? This collarbone dutch braid might be your match. The side parting lifts the root on one side, giving fine hair a visual volume boost without backcombing. Thick, wavy textures get a chunky woven look; anyone with fine hair should expect a tighter, flatter braid. The ash blonde base with subtle highlights catches light in the stitches. Hold is reliable for a full day on medium to thick density, but my fine strands slipped by hour six. Face shape? This side placement softens a square jaw and widens a long oval.
Textured Shoulder Length Side Braid
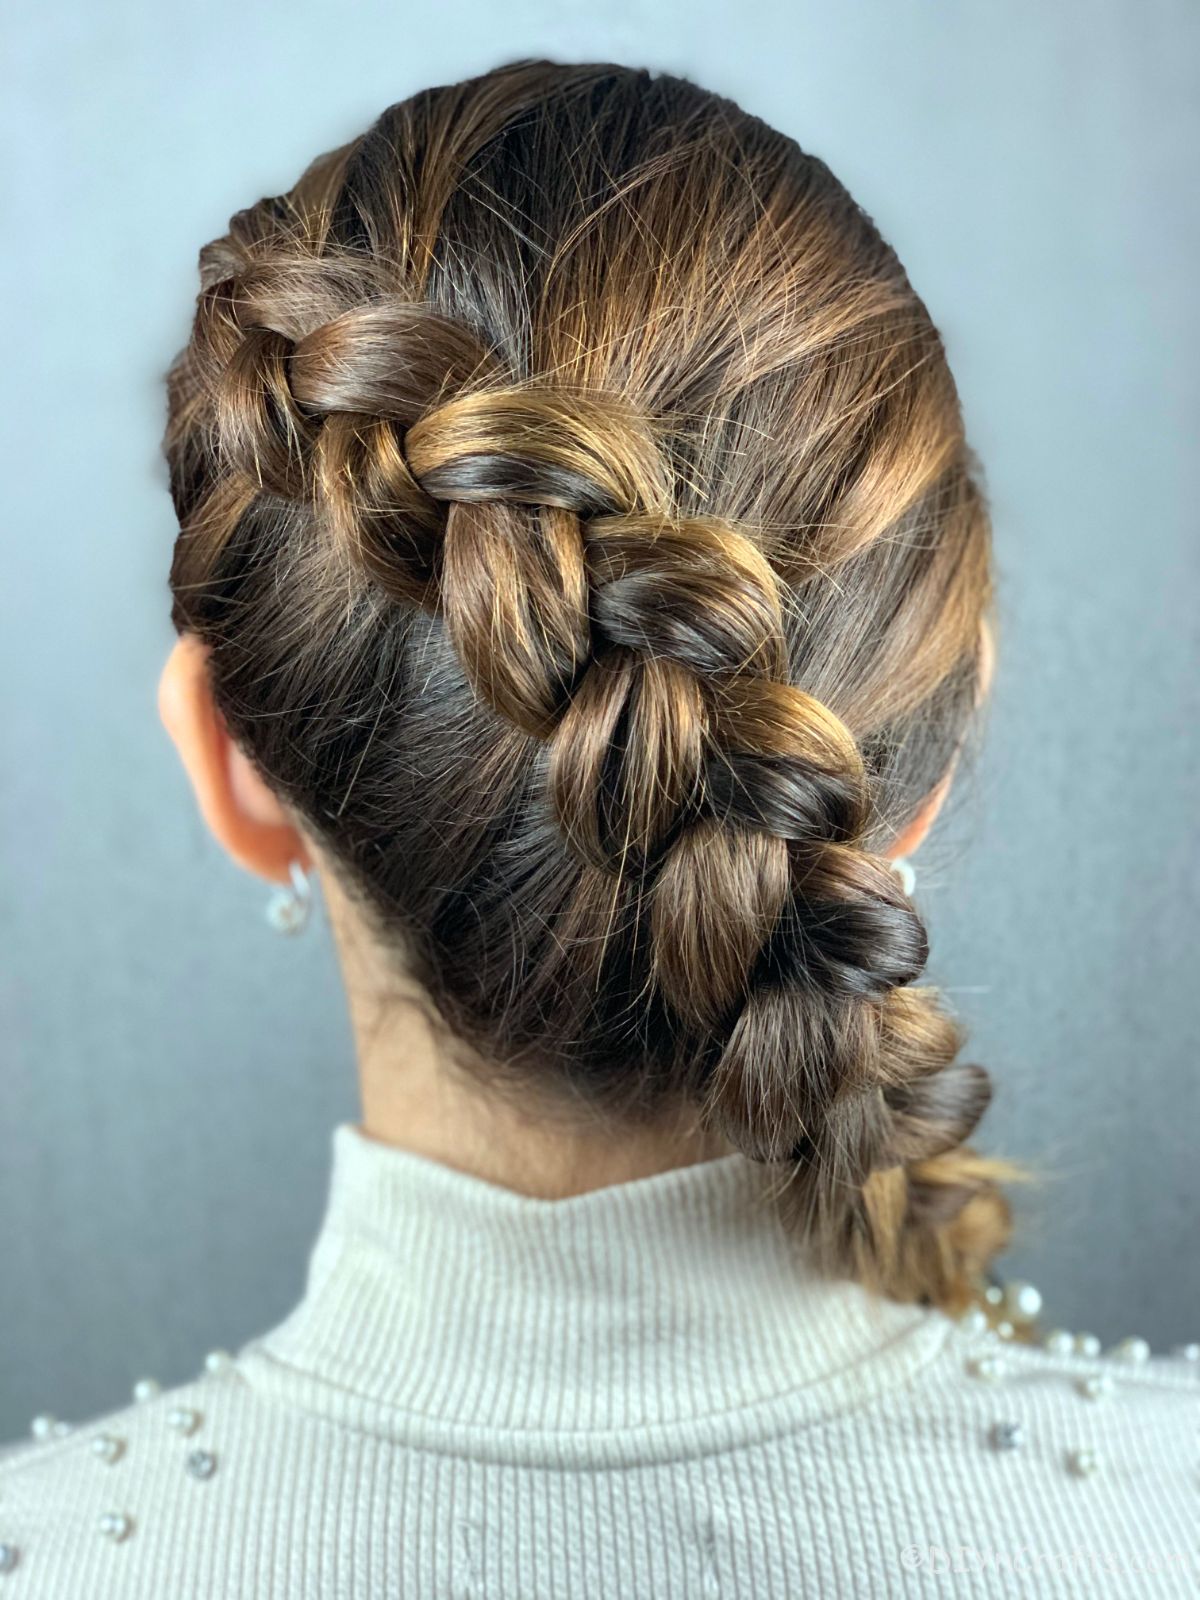
Wavy, medium density hair gives this shoulder length dutch braid its best life. The texture picks up the cross-section with zero effort. I braided second-day hair in about fifteen minutes. The loose strands come free naturally within two hours of wear, which is fine if you want casual, annoying if you wanted clean. The warm highlights in the brown base add dimension, each turn of the braid visible even in low light. Hold is moderate for wavy hair, about six hours before the bottom third slackens. Upkeep means re-braiding the next morning or calling it a loose side braid. The honest downside: this length fighting to stay in a side position will slip toward the center by noon.
Prominent Dark Brown Side Braid
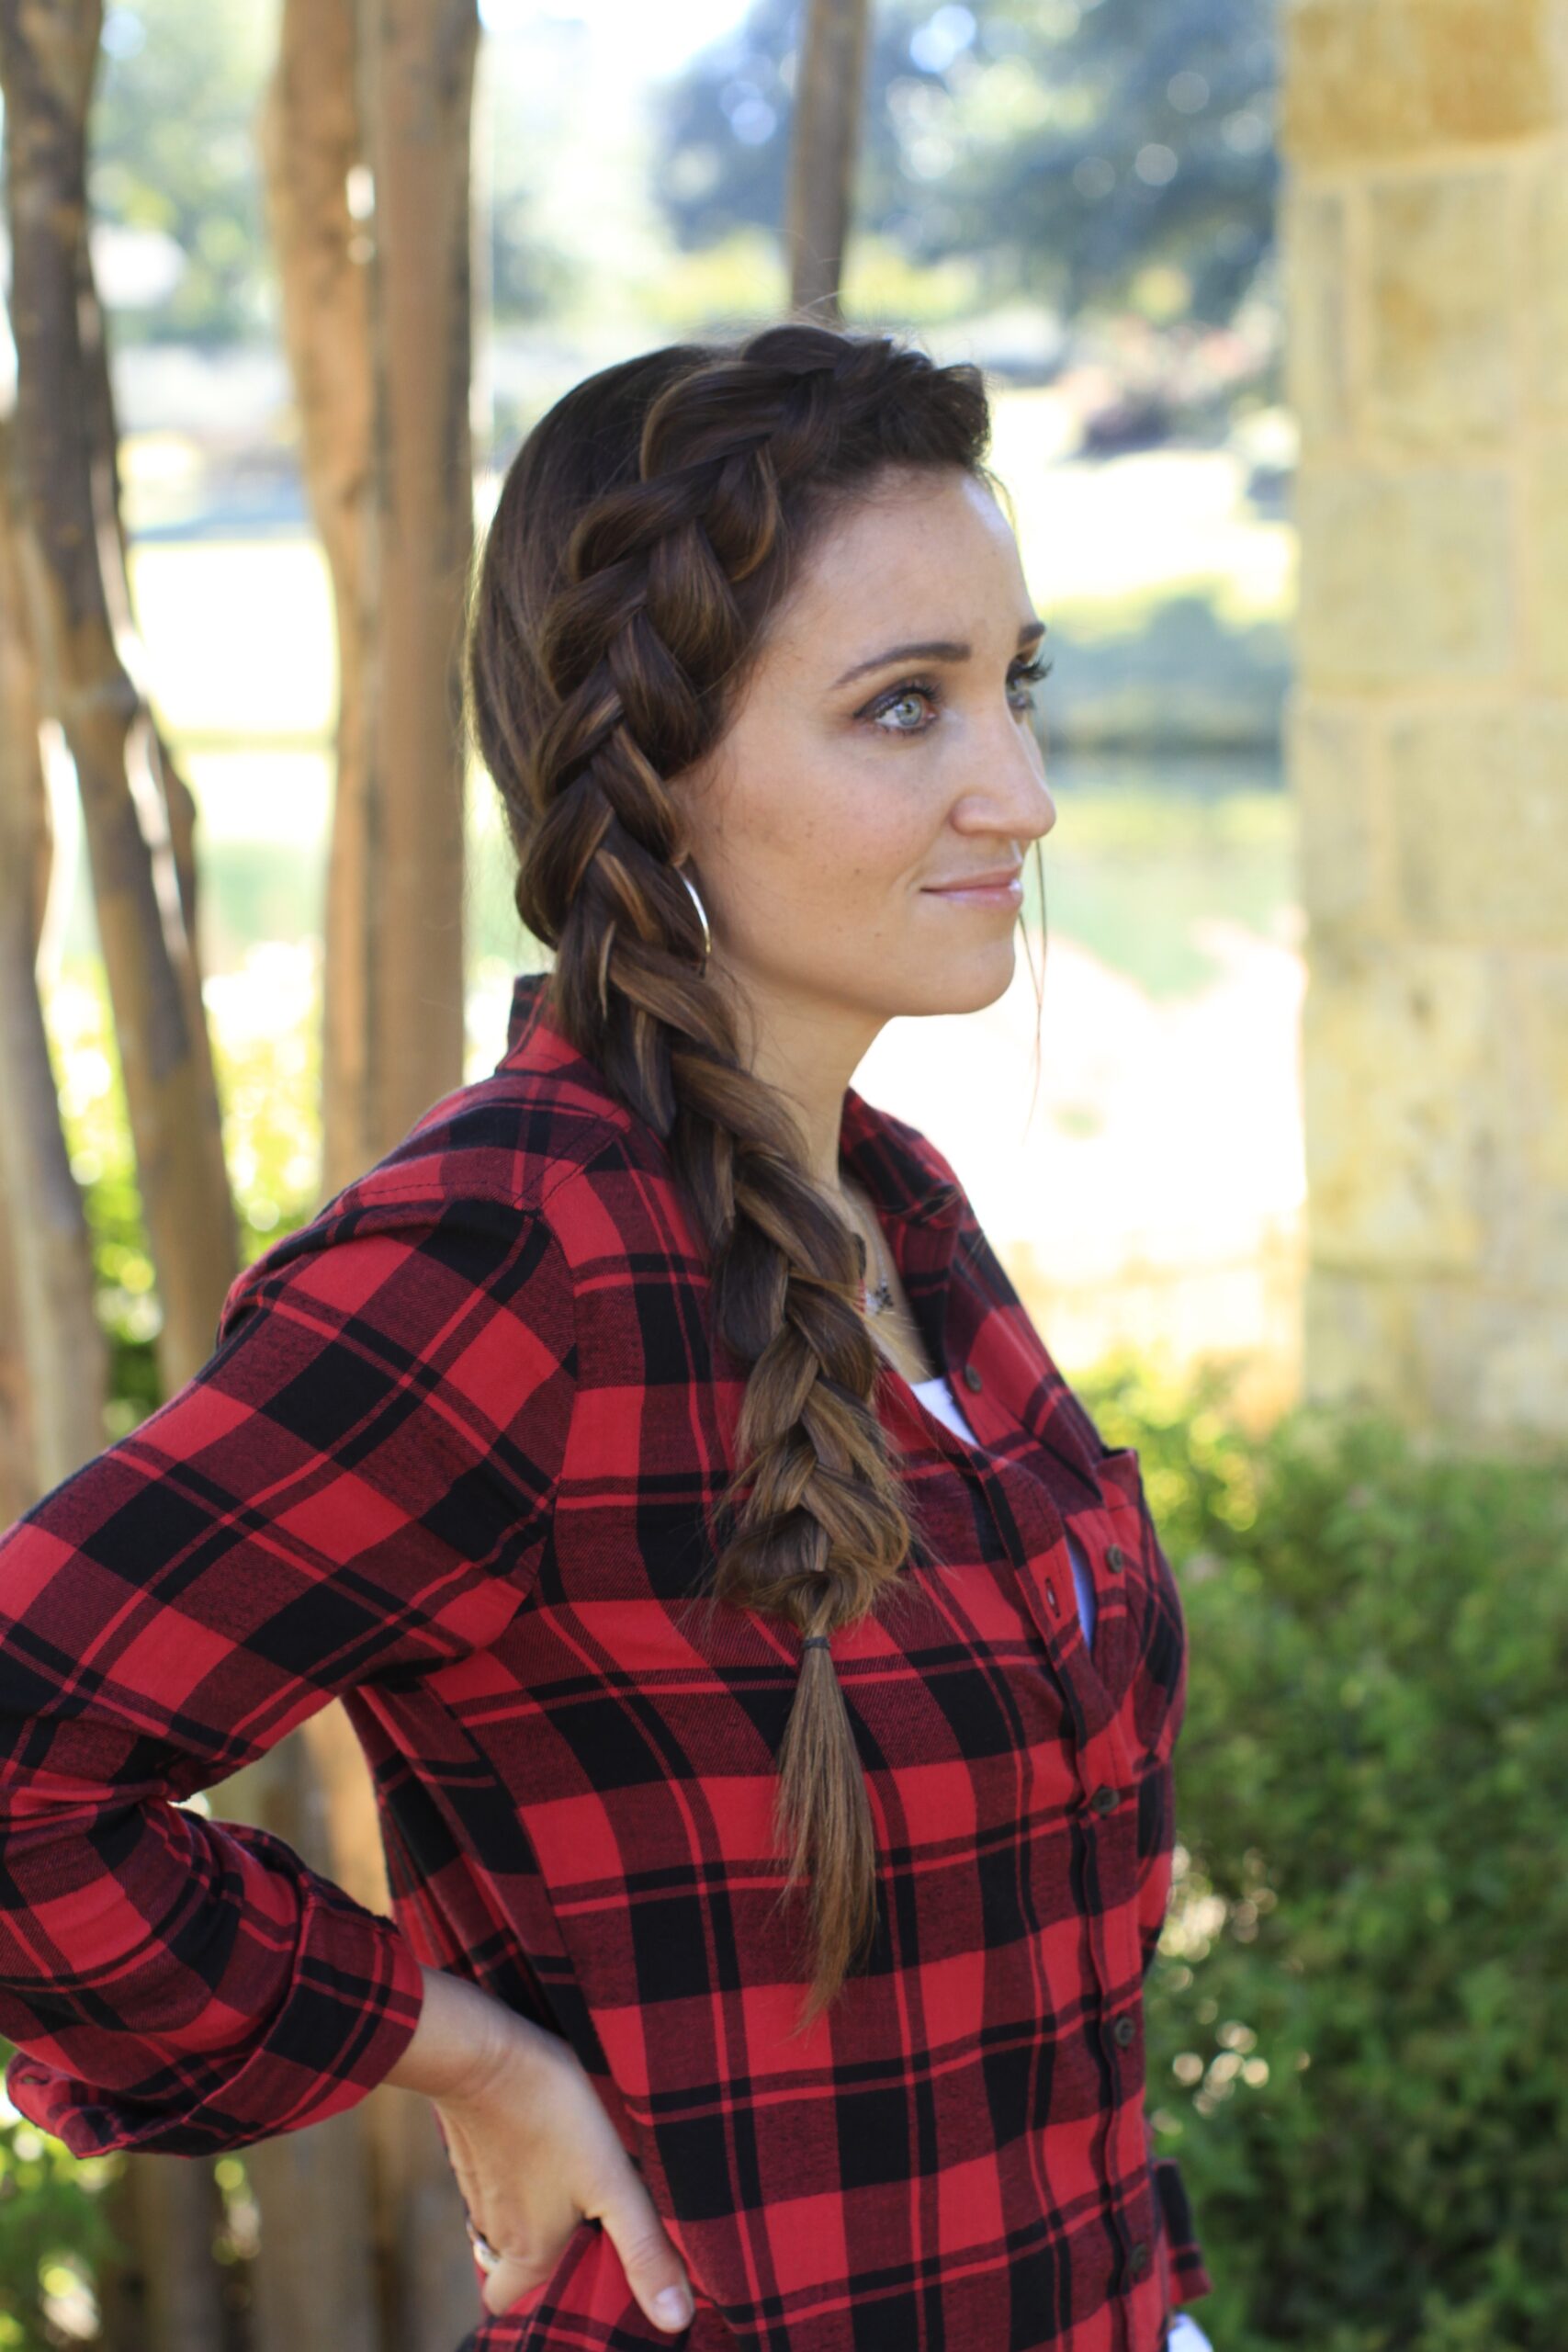
This one looks like you spent thirty minutes in the mirror. In reality, the dutch side braid on thick dark brown hair takes about twenty with practice. The middle parting keeps the two sides balanced and the braid centered on the shoulder. Straight, thick texture is ideal here because each stitch stays defined without unraveling. A smoothing serum before braiding cuts the frizz. This is a salon-leaning skill level; the tension needs to be consistent from crown to ends or the braid goes lumpy. You can DIY it with a handheld mirror for the back, but expect to redo the top section at least once. The subtle lighter tones in the brown add depth to each crossover.
Loose Textured Double Dutch Braids

I was skeptical of loose dutch braids on thick hair. Thought they would just look sloppy. Then I saw how the textured waves soften the whole thing. The ash blonde base helps, the lighter colour makes the pulled-out pieces read as intentional volume instead of flyaways. Here is what to ask for: a middle part, braids that start at the hairline not the crown, and a loose tension that lets the wave peek through. The stylist should braid with slightly damp hair, then go back and tug each section outward once the braid is secured. That creates the volume without loosening the foundation. Wavy, thick hair holds this shape all day. Fine hair would lose the texture by lunch.
Chunky Platinum Blonde Dutch Pigtails

Would you rather have fine, delicate dutch braid pigtails or chunky, defined ones? Chunky wins every time. The platinum blonde against the dark roots creates a contrast that makes each section read as its own shape. Fine braids in this colour would blur into a white blob from three feet away. The chunky sections give the eye something to follow. The loose waves in the unbraided hair are not an afterthought, they balance the structure of the pigtails. Without them the look is too severe. This is a salon booking, the platinum needs a professional hand and the braiding tension on thick, wavy hair takes practice. The dark root shadow is intentional, it adds depth that keeps the braids from looking like a wig.
Multiple Detailed Dutch Braids
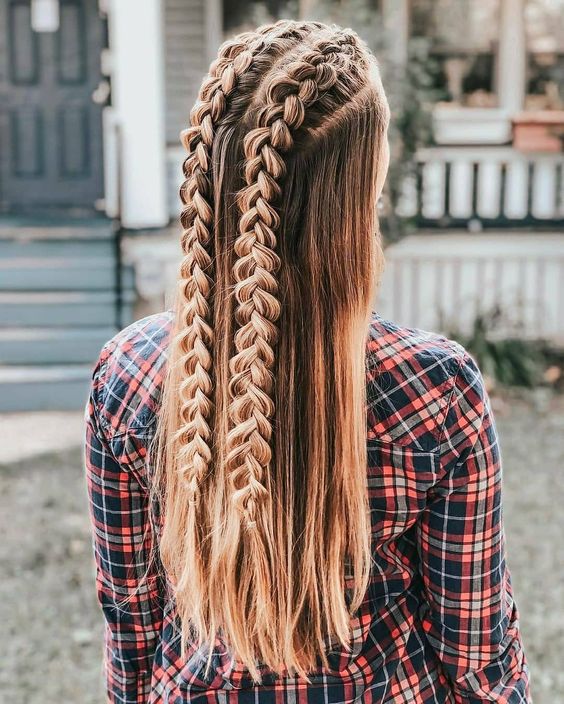
The back view tells the real story here. These are not the loose Dutch braids you finish in ten minutes before the school run. The intricate pattern starts at the crown with a precise middle part, then splits into four or five distinct sections that weave around each other. Straight, thick hair with blonde highlights gives each crossing maximum visibility, the contrast between the dark base and the light streaks making the geometry readable from across a room. This is a look that requires a second set of hands and a solid hour of patience. You sit. Someone else works. The hold is, frankly, better than anything I have ever done to my own head.
Textured Caramel Highlighted Braid
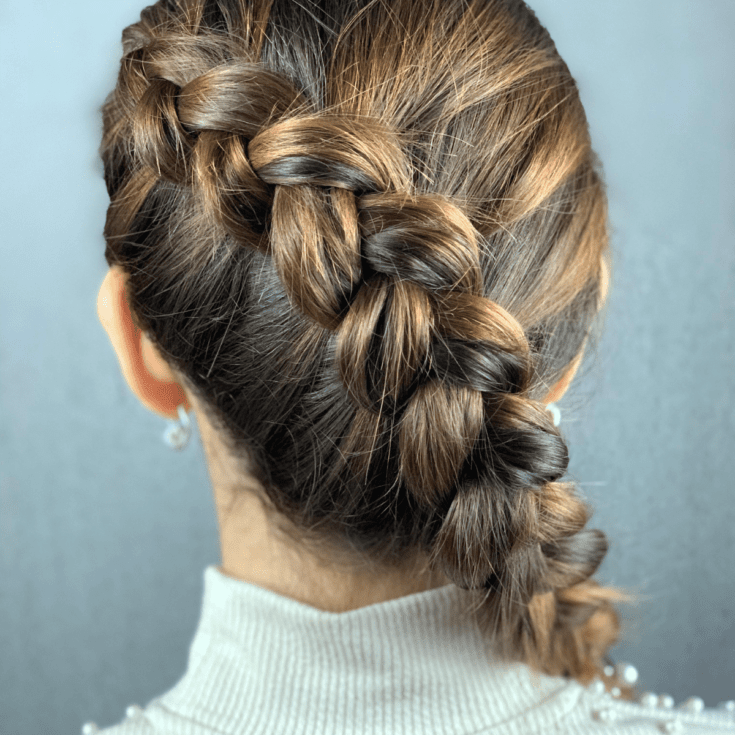
I will confess: I expected the caramel highlight braid to blur into a muddy single tone once it was plaited. It does not. The subtle caramel ribbons sit on top of the weave, catching light exactly where you want it, while the medium brown base disappears underneath. On collarbone length wavy hair, the Dutch braid sits high and visible, not lost at the nape. The honest downside: those caramel pieces need toning every six weeks or they shift toward brassy copper. And wavy texture means the braid loosens by hour six, so I rewrap the tail once. Still worth it for the way the colour reads dimensional rather than flat.
Dutch Braids Merged Into Ponytail
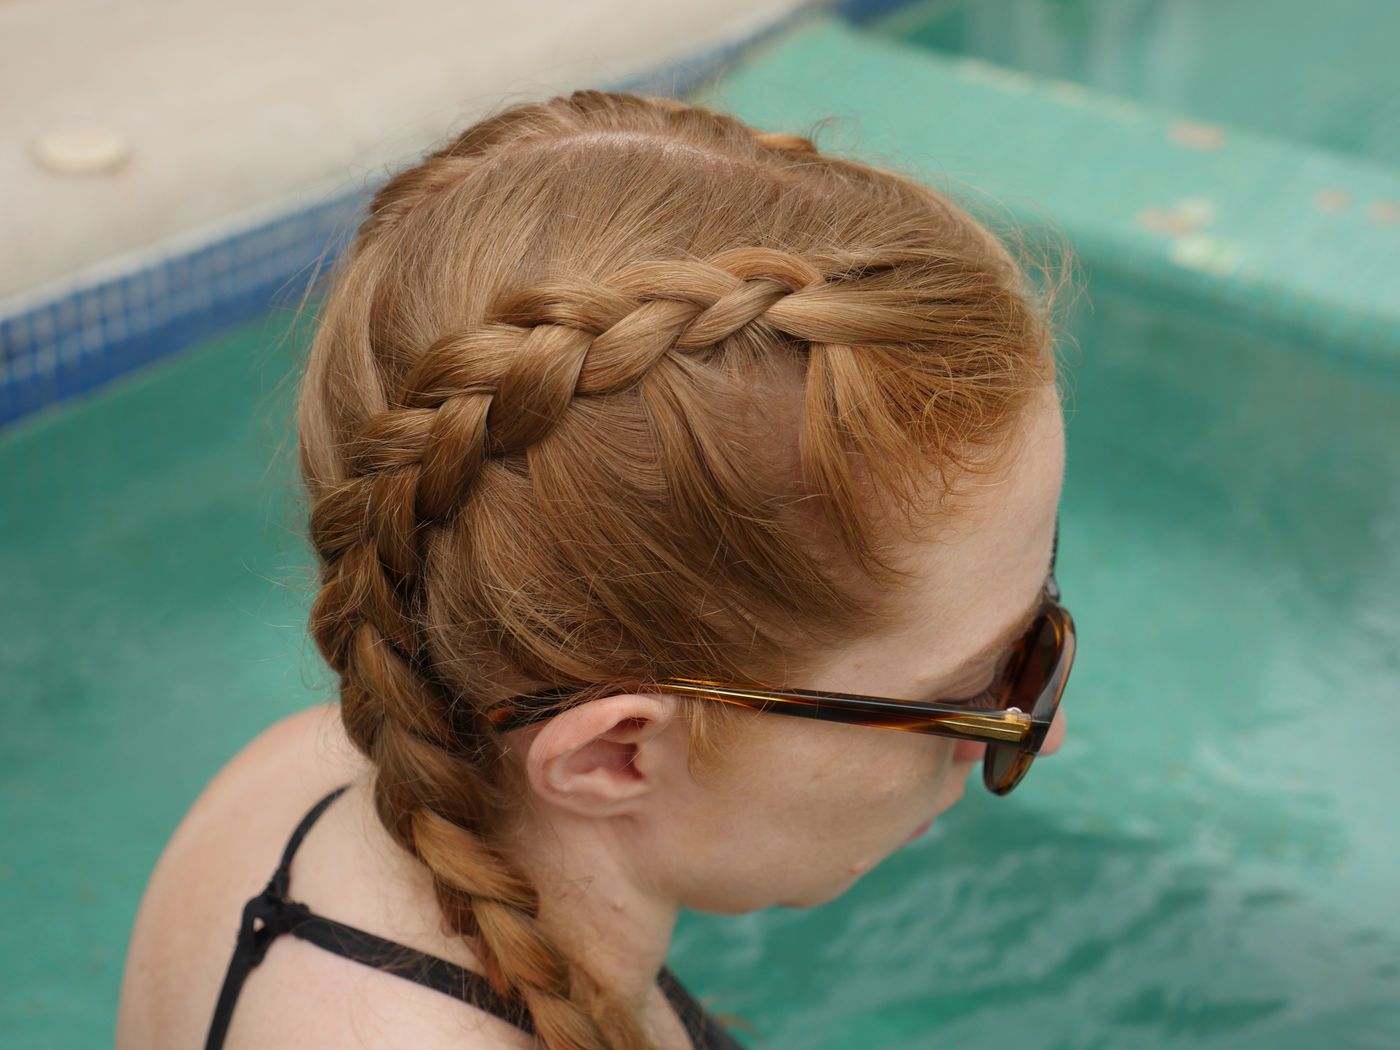
My gut reaction to a double Dutch braid into a ponytail is always: that is a lot of work for gym hair. Then I wore one.
The structured look works because the two braids frame the crown while the ponytail takes all the bulk off the neck. On thick, straight, mid-back length dark brown hair, the braids sit tight against the scalp, no bumps, no pulling. The middle part keeps both sides even. This is a warm-weather style that survives a bike ride, a farmers market crowd, or a humid afternoon without collapsing. It takes real tension to make it hold past lunch, but once it is set, it stays set. The ponytail moves, the braids do not.
Dutch to Bubble Braid Combo
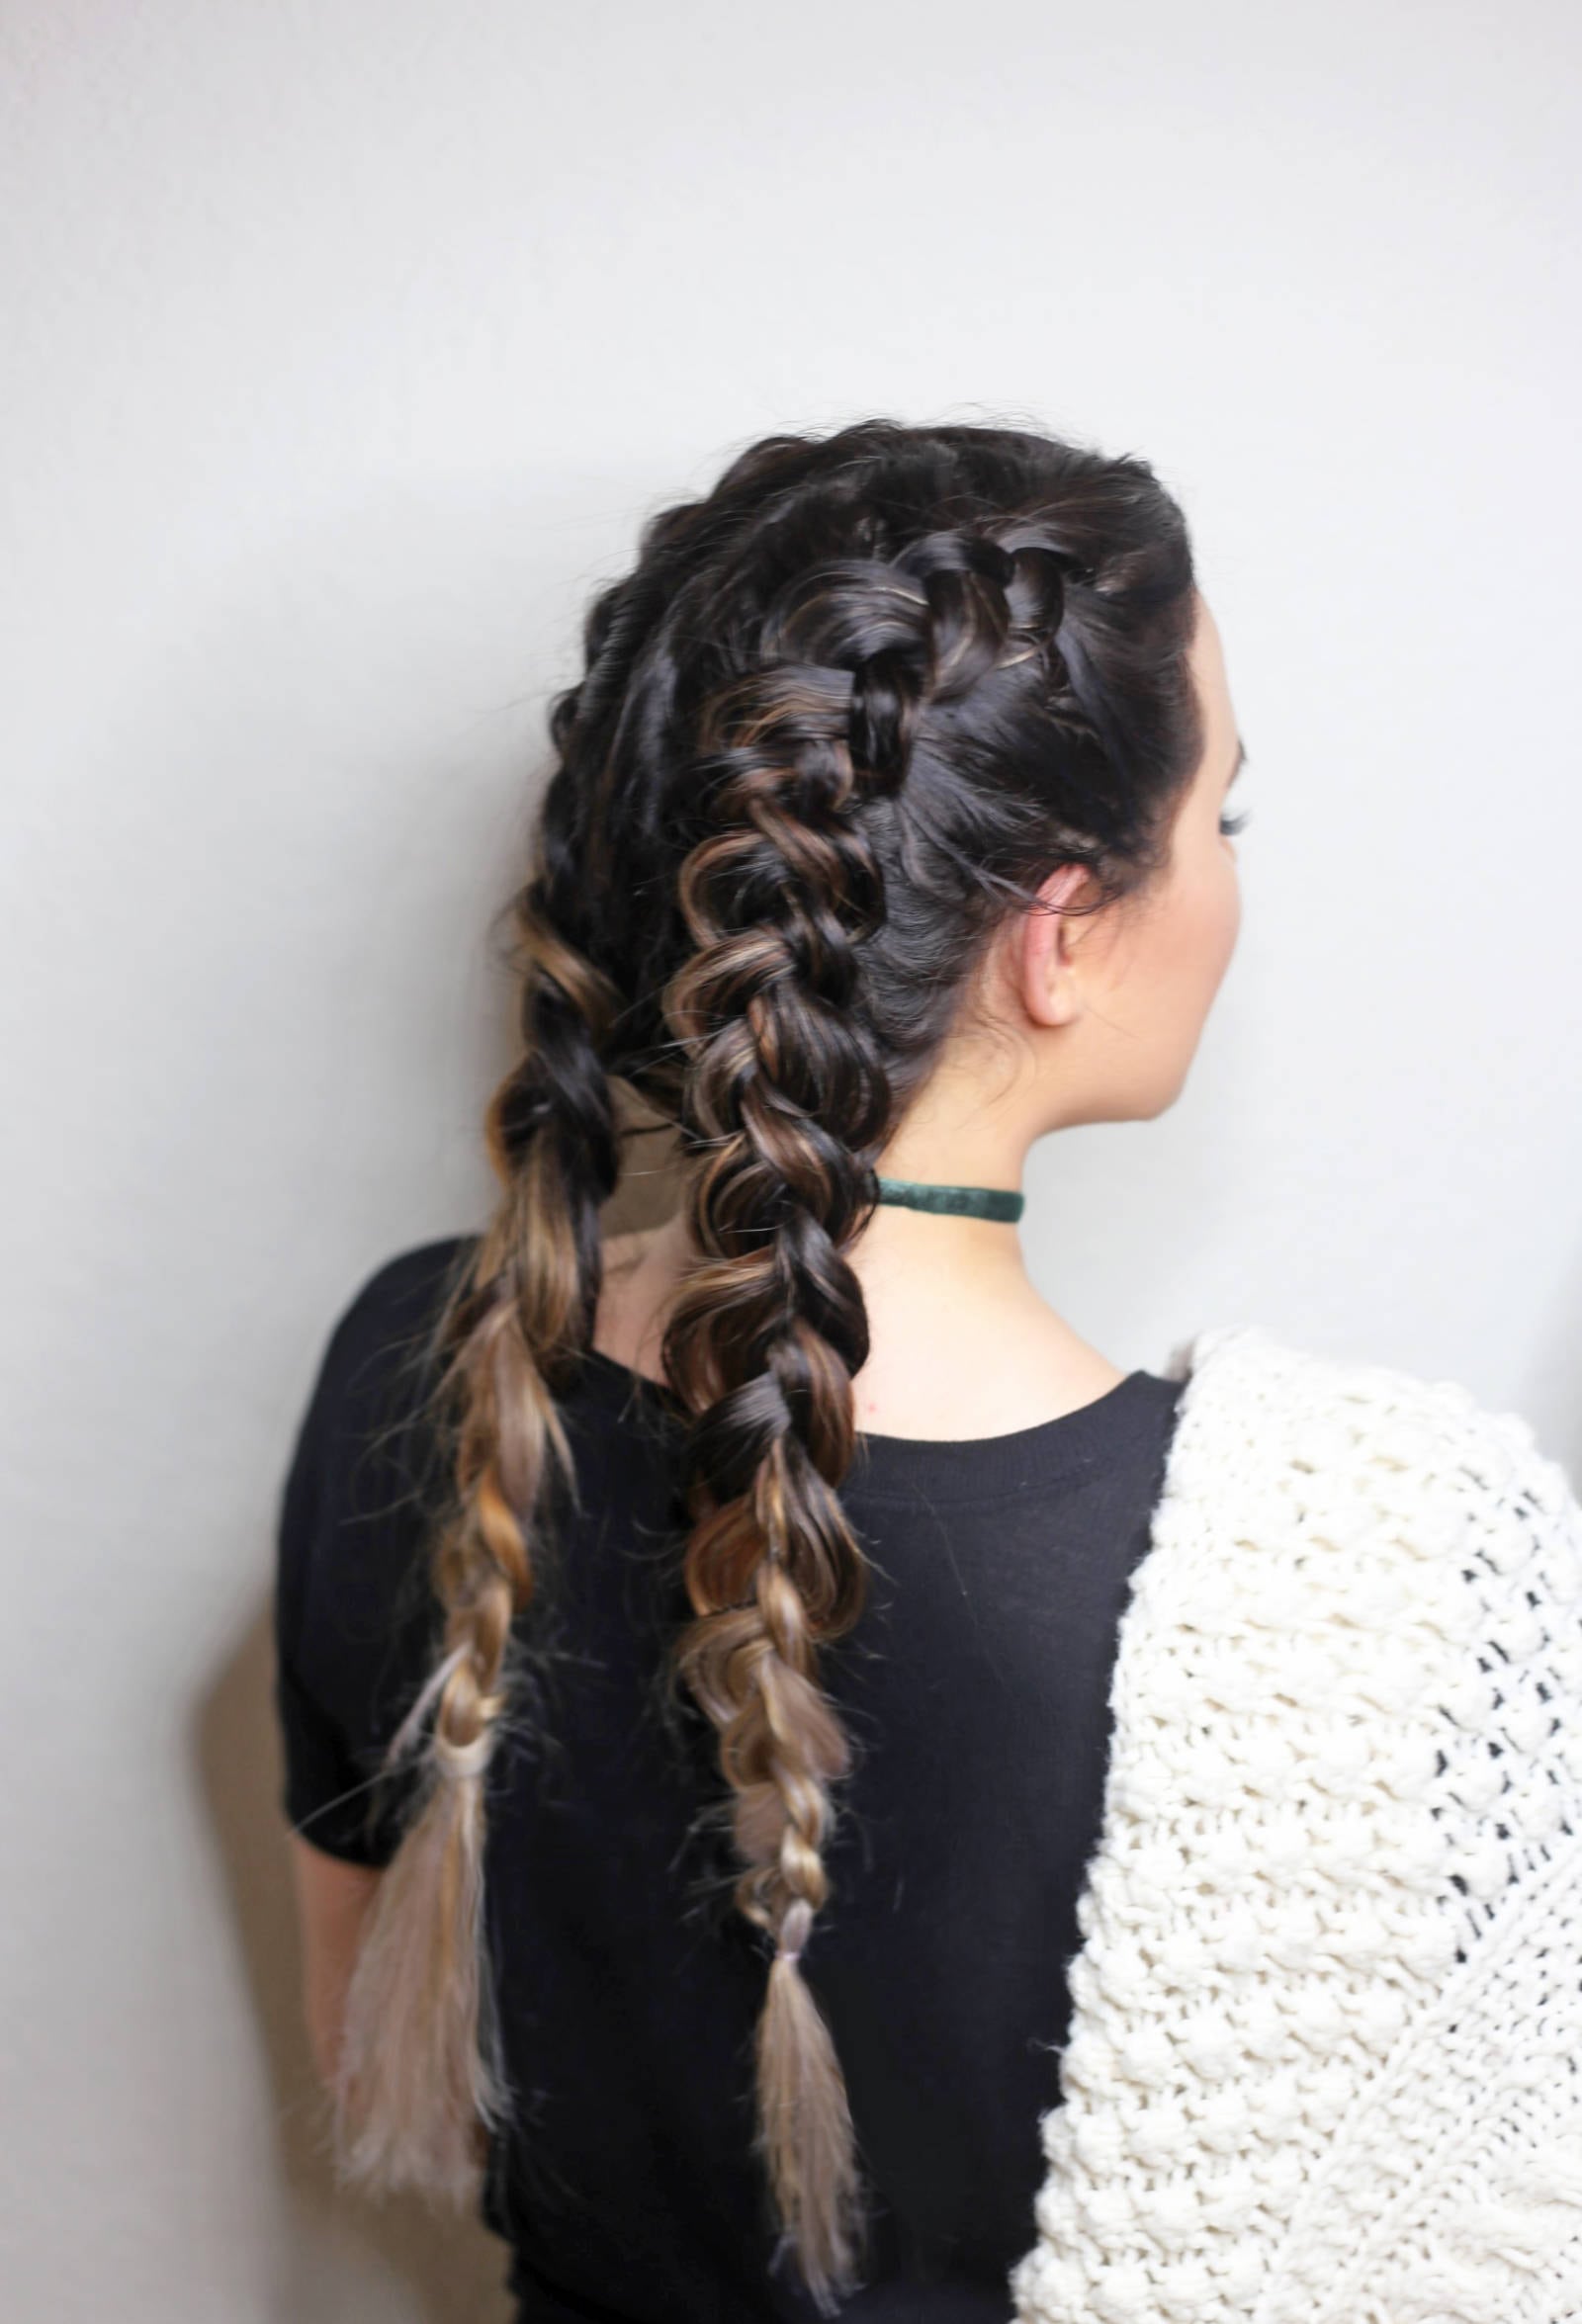
Have you tried switching from a Dutch braid to a bubble braid mid-strand? The common mistake is pulling the sections too tight in the Dutch part, leaving no slack for the bubbles above. With a blonde ombre transition on dark brown straight hair, the shift in technique is visible: tight, defined Dutch at the crown, then elastic sections below that puff the mid-back length tail. This is not a bathroom mirror job. You need a second mirror, a comb, and someone who understands that bubbles need room to expand. The hold is solid for a full day because the Dutch base anchors everything.
Collarbone Elegant Dark Brown Side Braid
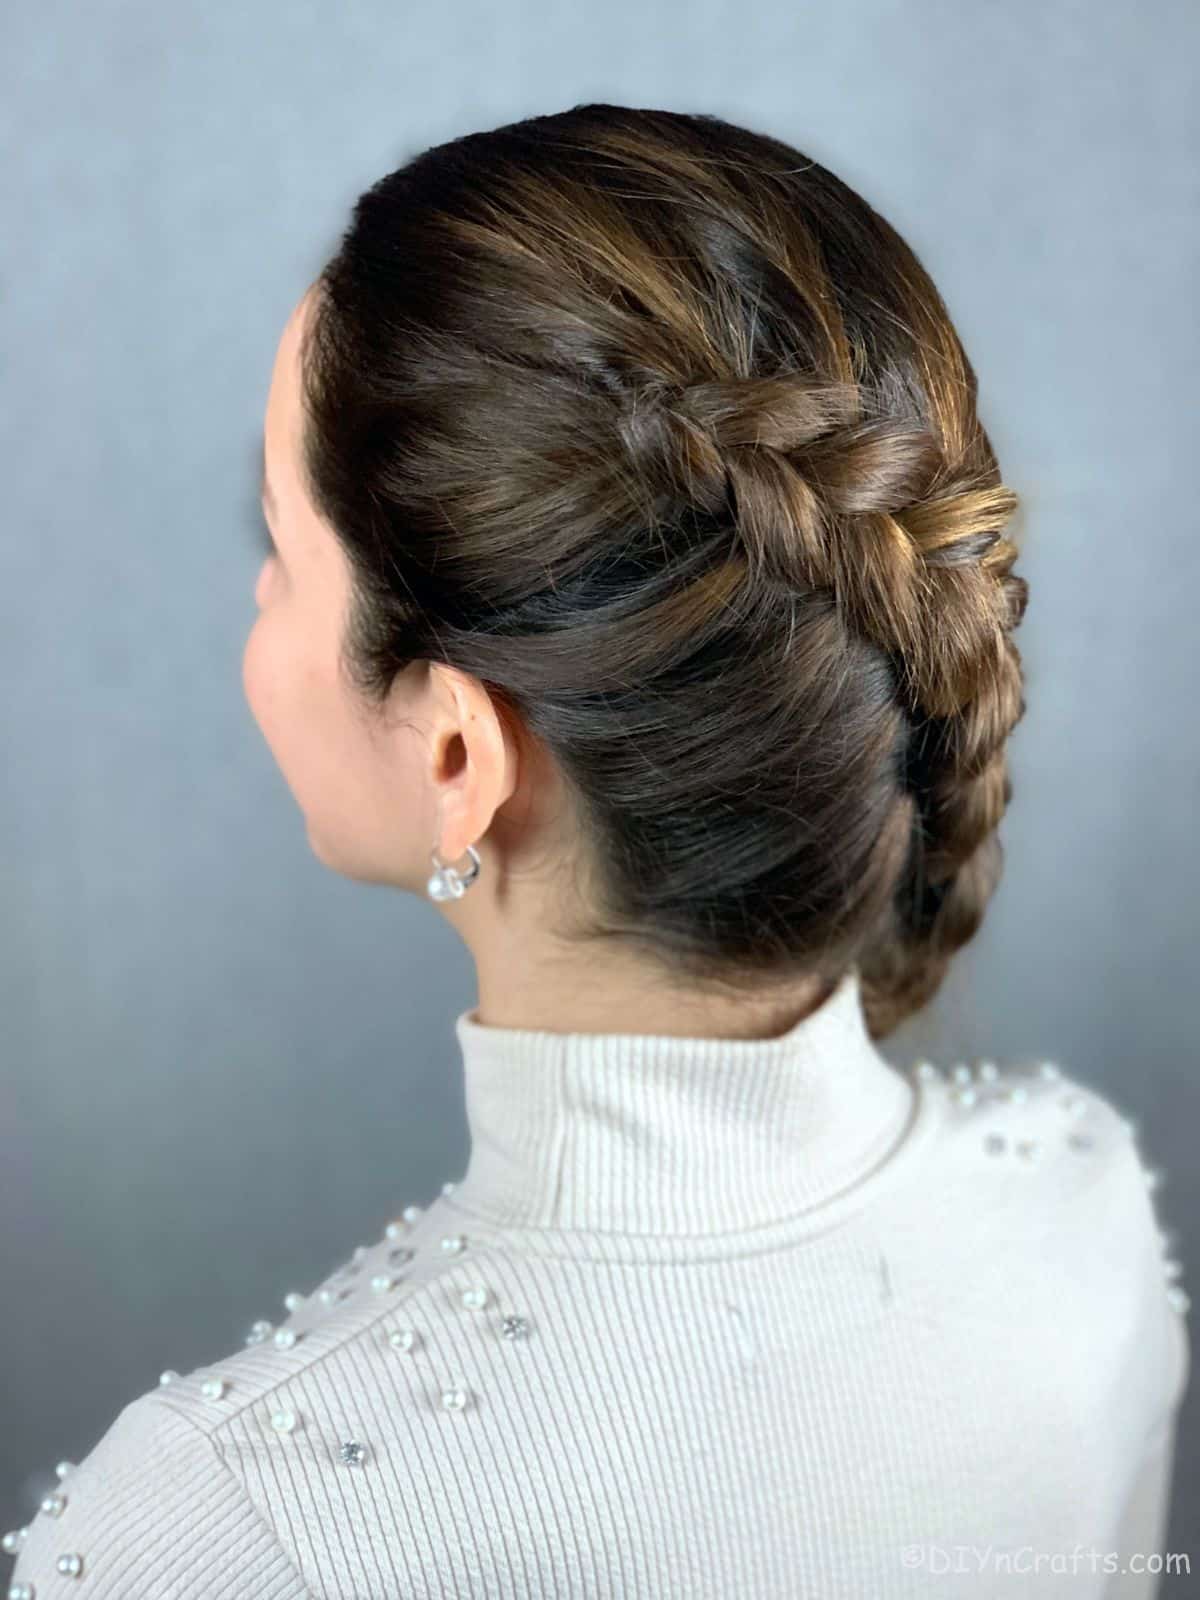
The elegant dutch braid on collarbone length hair is the one you book for a wedding guest dress and a sincere fear of updos. Dark brown with subtle caramel highlights, straight thick texture, a middle part that curves into a tight side weave. It flatters oval and heart face shapes because the braid sits high on one side, drawing the eye diagonally rather than straight down. If you have a broad jaw or very fine hair, the density required for this pattern will highlight thin spots rather than hide them. The hold is structured, almost formal, and it stays that way through dinner.
Contrasting Color Double Dutch Braids

The two-tone thing works because the Dutch braid keeps each colour in its lane. One side platinum, the other dark brown, and the contrast is sharp enough to read from across the room. Mid-back length, thick and wavy, the braids sit heavy and defined. The middle part splits the colours cleanly, no blending.
Upkeep means a purple shampoo for the platinum blonde dutch braid side and a gloss for the dark brown dutch braid side. A root shadow every six weeks keeps the line from blurring. And the braids themselves need re-braiding every couple of days to stay tight.
Loose Dutch Braid With Flowers
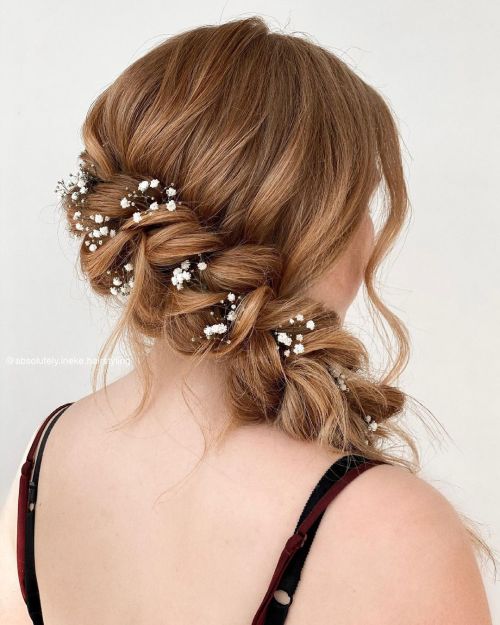
I used to think flowers in hair were for Pinterest boards only. Then I tried a loose Dutch braid with baby’s breath. Medium brown with subtle highlights, mid-back length, the braid is pulled apart slightly so the stems tuck in without slipping. Wavy texture helps the flowers stay nestled. It lands perfectly at a late summer wedding or an outdoor dinner, and the hold is soft but reliable for an evening. The colour reads warm next to the white petals, no contrast drama, just a romantic drift.
Dutch Braid Into Neck Bun
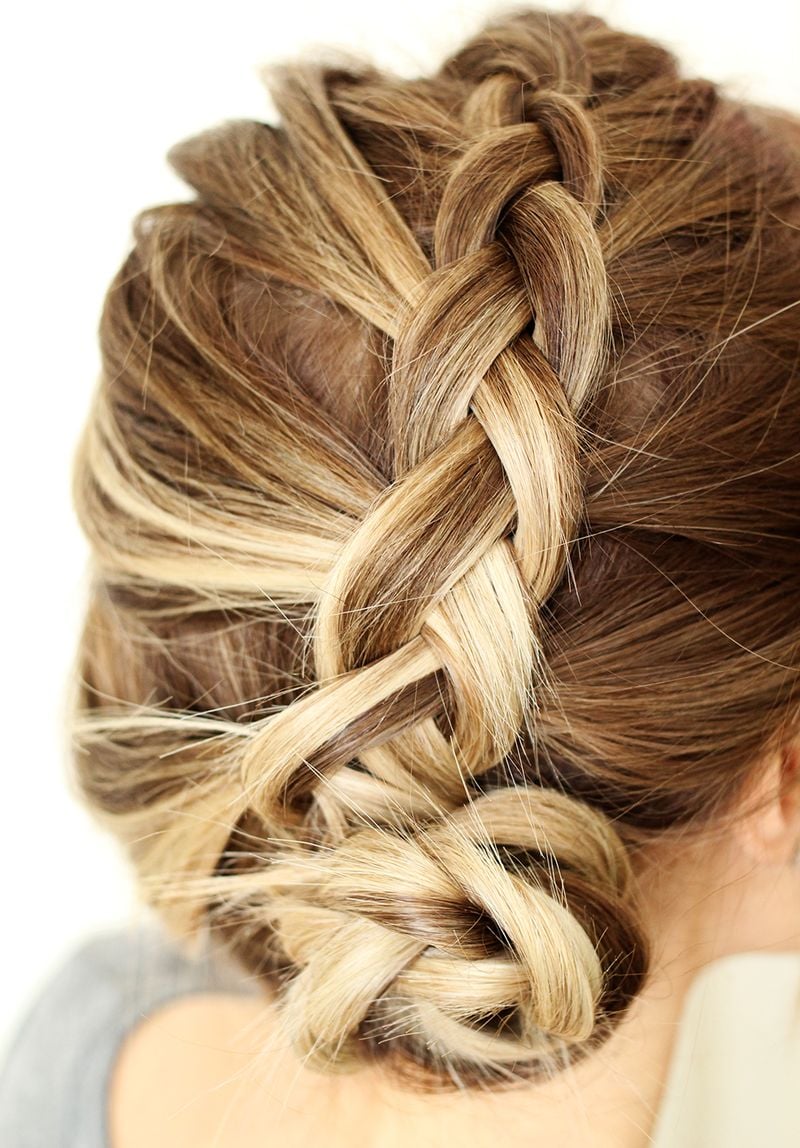
How long does a Dutch braid bun actually last? Through a full workday if you pin it well, but by evening the collarbone length means flyaways at the nape. Dark blonde with highlights, thick and wavy, the braid coils into a tidy bun that holds shape without hairspray. The downside is the front layers: they slip out by hour six, and re-pinning only buys you another hour. Still, for a dinner or a meeting, it stays put.
Thick Textured Blonde Dutch Braid
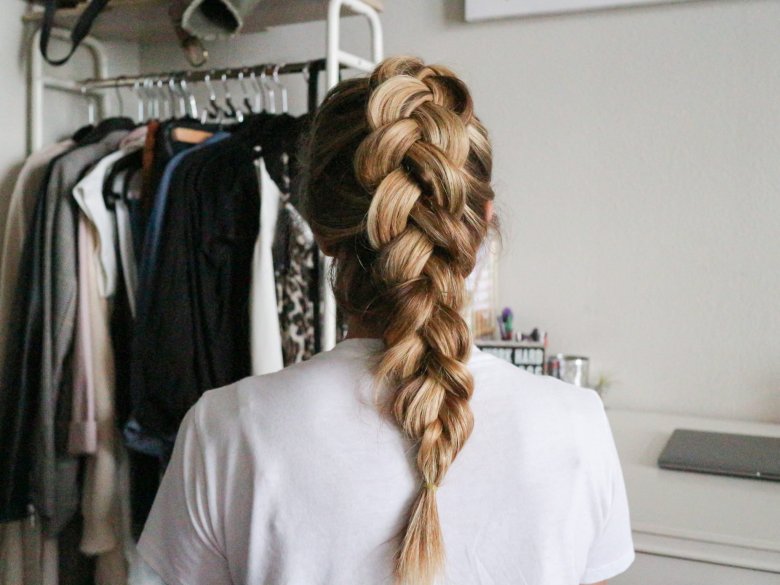
The thick Dutch braid is a statement of abundance. This is not a braid that disappears into the nape of your neck. The wavy blonde hair here has layers that give it movement, and the mid-back length provides enough heft to make the braid substantial. The Dutch braid technique lifts the sections over the middle, which creates a raised, 3D effect that a standard French braid cannot match.
- Length: Mid-back gives the braid enough weight to feel substantial.
- Technique: Dutch braiding over the center strand creates the raised, 3D ribbon effect.
- Texture: Wavy, thick hair grips the sections naturally and adds internal volume.
- Styling: Tug the outer edges gently after braiding to double the width.
- Ask your stylist: Keep layers long enough so the braid does not taper too quickly.
The hold is almost passive. The thickness and wave lock the strands in place without a single pin. It takes about twenty minutes to braid, but it stays intact through a full day. This is the Dutch braid that actually looks like it took effort, even when it just held itself together.
Deep Side Part Dutch Braid
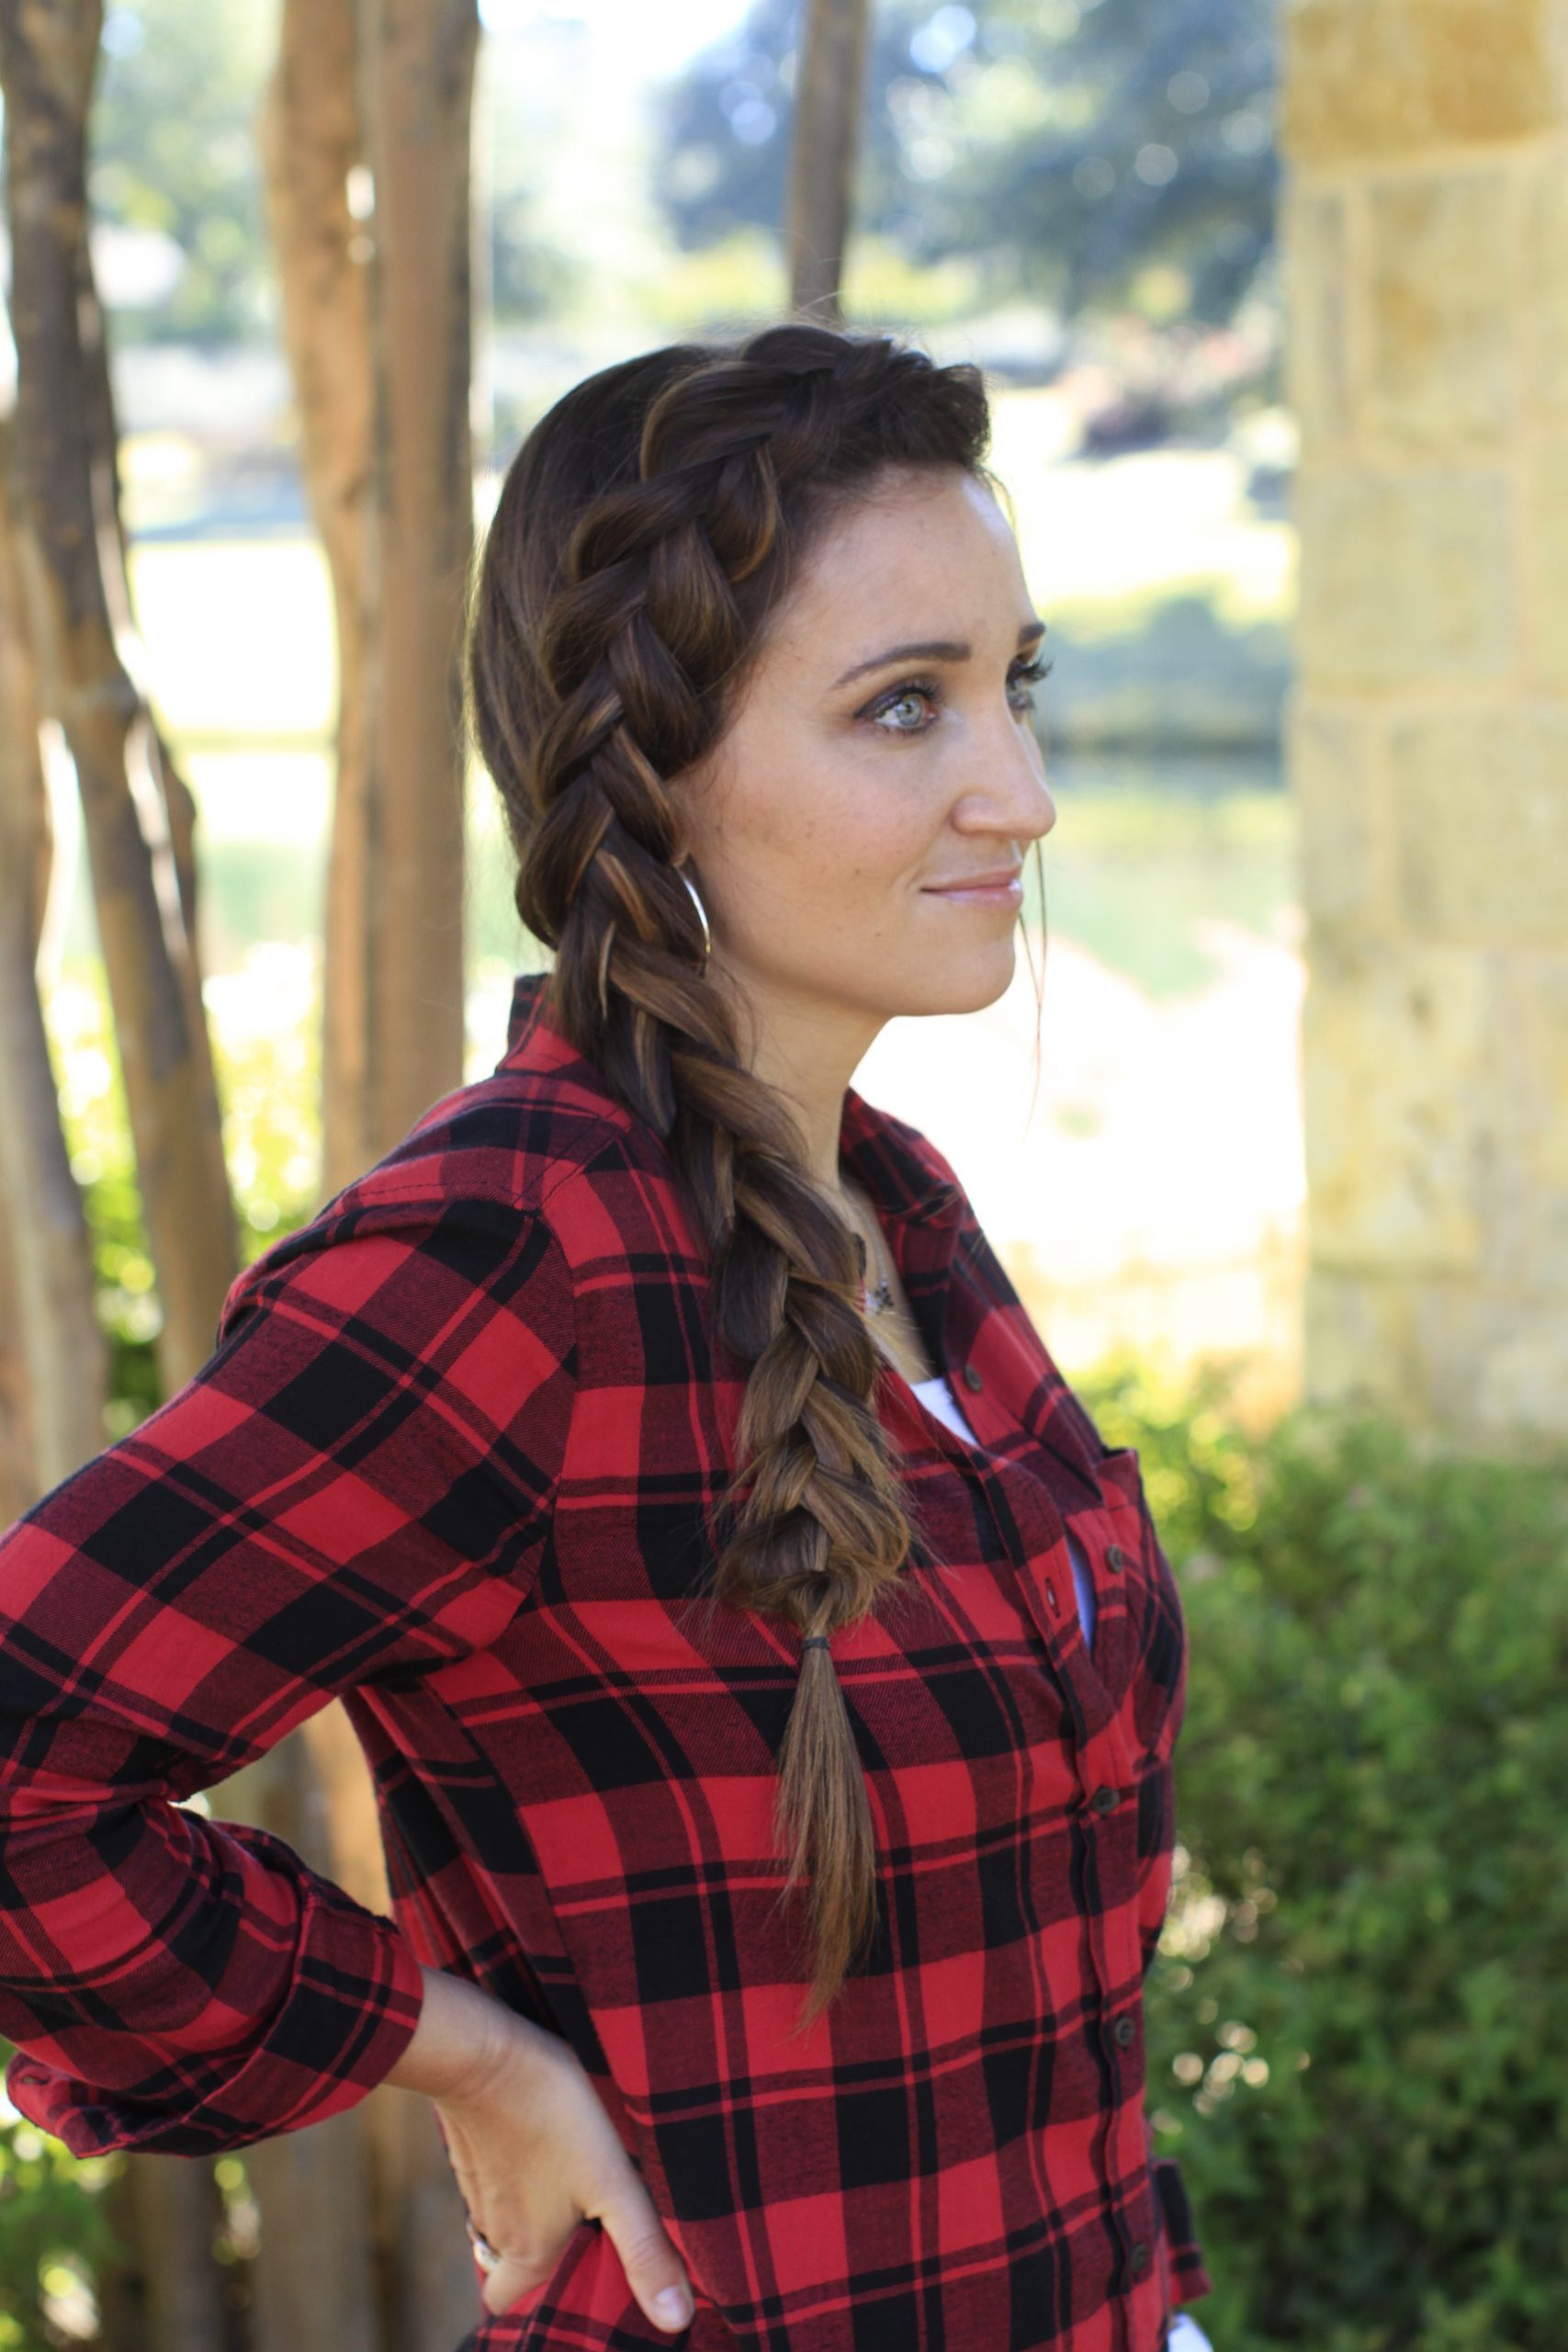
A deep side part does half the work of creating volume before you start braiding. The side part Dutch braid relies on that dramatic weight shift for its lift. The dark brown color reads as a solid block, so every uneven section shows. The shoulder length and wavy texture make it a tricky combo: short enough to slip, long enough to look intentional. This is one of those styles that looks deceptively simple. Getting the part to stay clean and the braid to lie flat takes a steady hand and a lot of clips. I have attempted this in my bathroom mirror. It is not a five-minute thing. The hold is excellent if you get the tension right, but a salon visit guarantees the crisp part. The result is a casual, polished look.
Final Thoughts
After writing all 20, one thing is clear: the Dutch braid is not a single look. It is a shape that bends to your texture, your schedule and your willingness to stand in front of a mirror for an extra ten minutes.
- Trim the ends every ten weeks if you braid regularly
- Moisturize coily or curly hair the night before braiding
- Sleep on a silk pillowcase to preserve the raised sections
- Refresh the front pieces on day two, not the whole braid
I am booking the side part version next week. It stays put and I do not have to even out my part.