
I’ve always loved nail looks that feel polished without trying too hard, and glazed donut nails are exactly that kind of manicure. Their soft, pearly finish catches the light beautifully, while a chrome effect adds that extra touch of shine. This combination can make even the simplest nail shape look instantly more refined and modern. I especially like how the finish shifts subtly as you move your hands, creating a smooth, almost glass-like glow. Whether you prefer short natural nails or longer almond tips, this trend is surprisingly easy to make your own. Here are some of the prettiest glazed donut nails with a chrome finish effect to inspire your next manicure.
Soft Champagne Chrome on Almond Nails
I love how this almond manicure takes the classic glazed effect in a slightly warmer direction. The nails are long and softly tapered, with enough length to make the shape elegant without turning it into an overly dramatic stiletto. The base looks sheer and neutral, while a champagne-pearl chrome layer creates that beautiful wet-metal glow. Depending on the light, the finish shifts between creamy beige, soft silver, and a hint of warm gold.
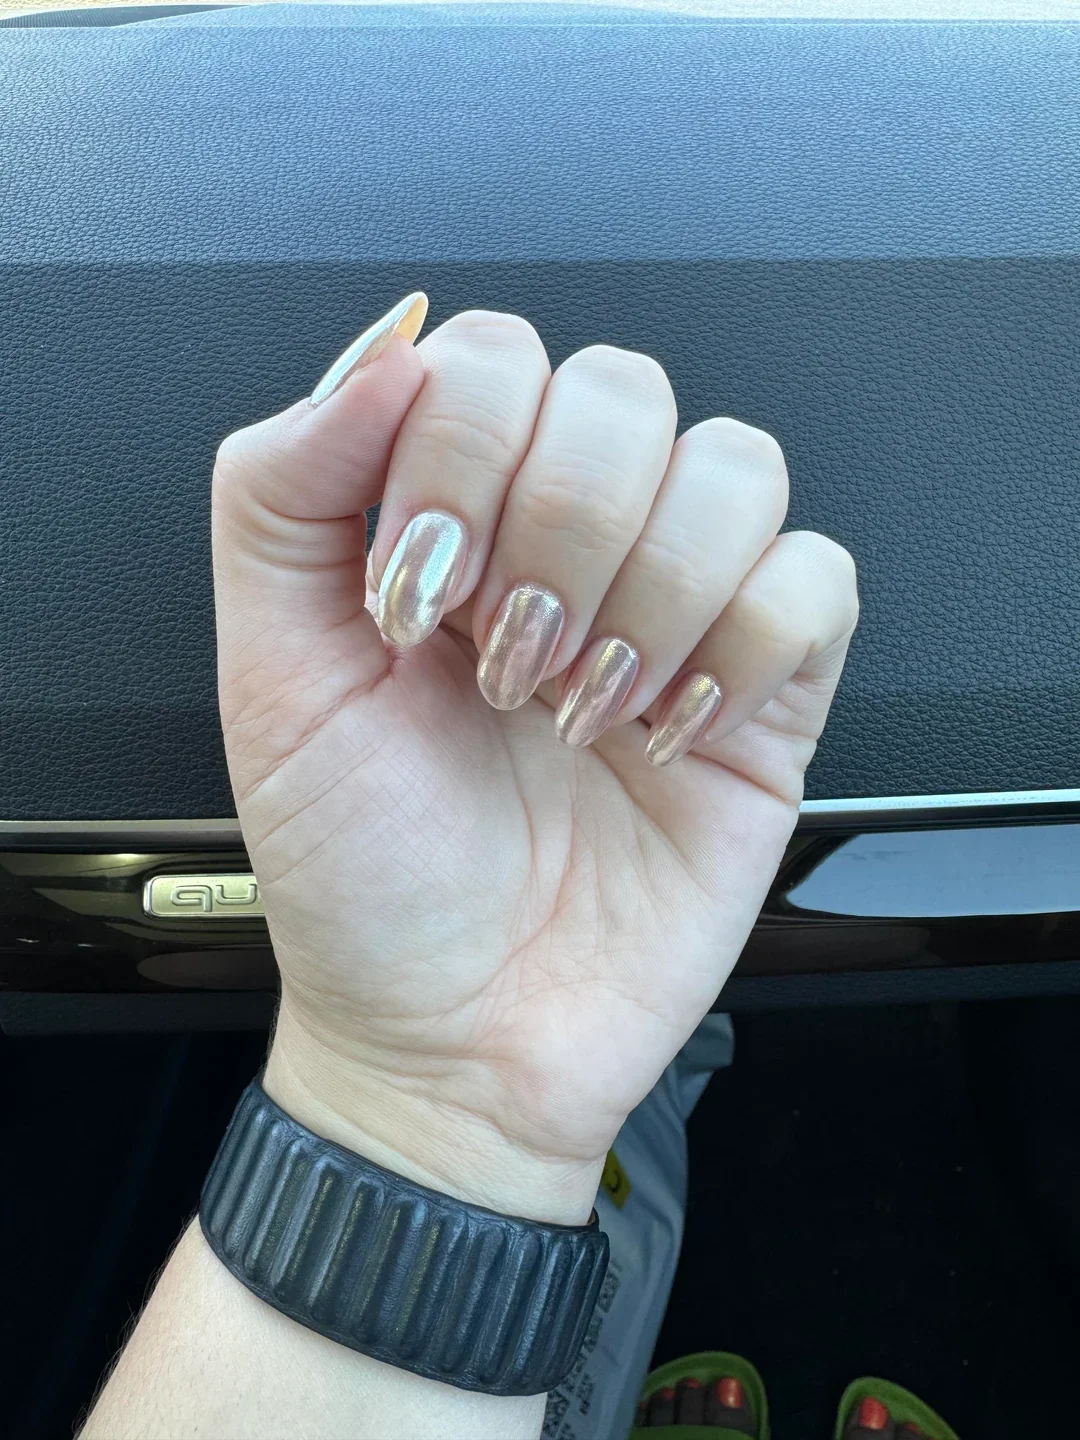
For this kind of manicure, I would start with a sheer milky nude gel polish and add a very fine pearl chrome powder over the cured surface. A neutral rubber base can help even out the nail before color, especially if the natural nail has visible ridges. For the reflective layer, I prefer an ultra-fine chrome pigment rather than chunky shimmer because the goal is a smooth glazed surface, not glitter.
At home, I would shape the nails into a balanced almond first, keeping both sides symmetrical and the tip softly rounded. After prep and base coat, I would apply one or two thin layers of sheer nude, cure each layer properly, and then add the chrome powder with a soft applicator. I would buff it gently until the surface looks almost liquid, remove excess pigment around the cuticle, and finish with a glossy gel top coat.
This is one of those manicures I could wear for weeks without getting bored. The champagne undertone makes it especially pretty for summer evenings, weddings, vacations, or simply those days when I want my hands to look pulled together without choosing an obvious color. It has that quiet little flash of glamour that appears whenever the light hits it.
Sheer Pearl Glow With a Natural Almond Shape
This manicure is much softer, but that is precisely what makes it appealing. The almond-shaped nails are coated in a translucent nude-pink base with a subtle pearlescent reflection running across the surface. There is no strong white edge and no obvious metallic contrast, so the result feels incredibly clean. I especially like how the sheer finish allows the natural warmth of the nail to remain visible underneath.
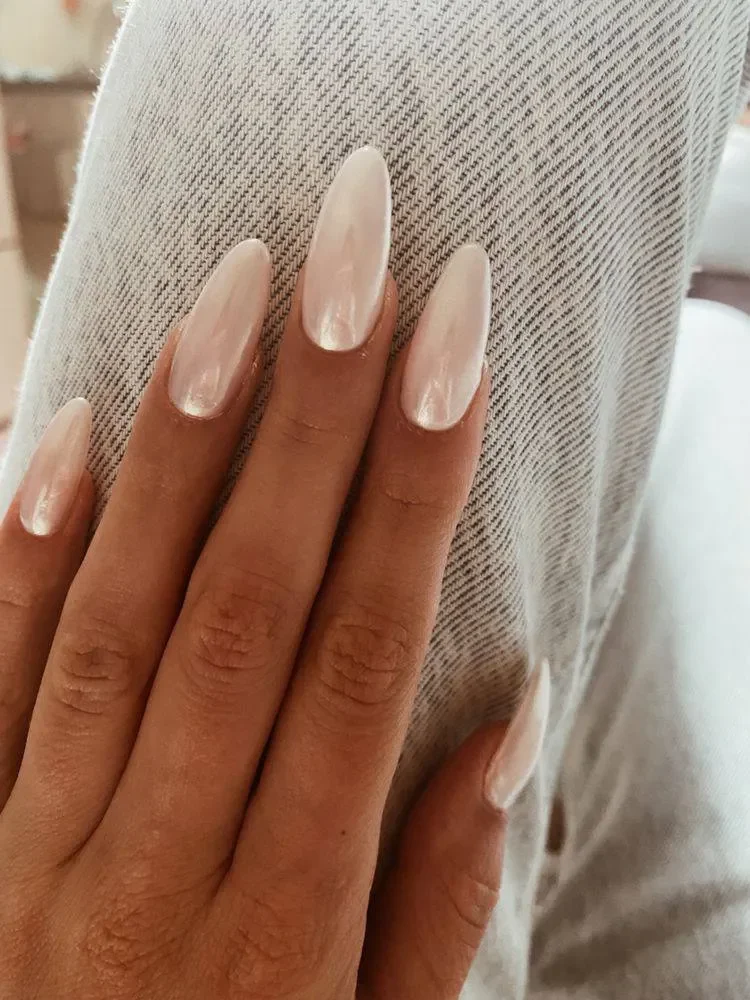
I would recreate this look with a translucent pink or blush gel, followed by a white-pearl chrome pigment. Products in shades described as sheer pink, milky blush, pearl, or glazed nude are particularly useful here. I would avoid a heavily opaque base because the beauty of this version comes from the layers working together rather than one solid color dominating the manicure.
My approach would be simple: carefully prep the nails, refine the almond shape, apply a thin sheer base, and cure it before adding the pearl pigment. I would use very little chrome powder at first because it is much easier to build the glow than to tone down an overly reflective layer. Once the finish looks smooth and luminous, I would seal everything with a high-gloss top coat.
I think this is one of the easiest glazed donut variations to live with. It feels feminine but not overly sweet, and the neutral pink works beautifully with everything from denim to a white summer dress. If I wanted the manicure to look polished at a meeting and still feel pretty at dinner, this would be high on my list.
Opalescent French Tips With a Glazed Base
Here, the glazed effect gets a more recognizable French manicure twist. The base remains translucent and softly pink, while the tips become creamy white with an iridescent chrome reflection. The almond shape gives the design a graceful silhouette, and the transition between the pink base and pale tips is deliberately soft rather than sharply graphic. The result feels like a modern French manicure filtered through a pearly glaze.
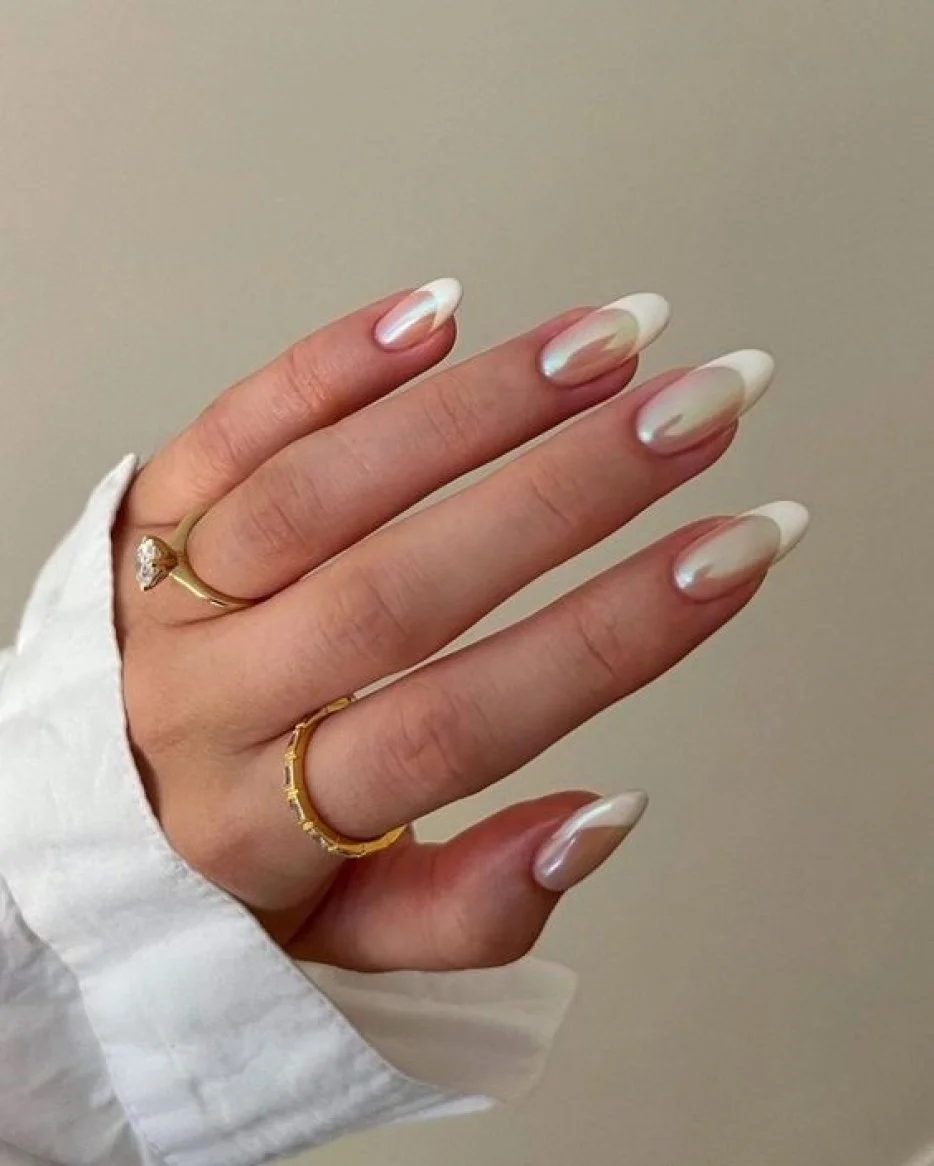
I would use a sheer pink builder or gel base, a soft white gel polish for the tips, and a pearl chrome pigment to bring the entire surface together. A non-wipe glossy top coat is useful when working with chrome powders because it gives the pigment an even surface and helps preserve that smooth, reflective finish. I would keep the white tip relatively thin so the manicure stays delicate.
To create it, I would first build and shape the almond nails, then apply the sheer pink base. After curing, I would paint a slim curved French tip on each nail and cure again. A light layer of pearl chrome over the finished color can soften the contrast and give the manicure that characteristic glazed appearance. The final top coat should be applied evenly from cuticle to tip.
I keep coming back to this combination because it feels familiar but never completely ordinary. The French tip gives me structure, while the chrome glaze keeps it current. For summer, it has an almost seashell-like quality, and I can easily see it working for a beach vacation as well as a more dressed-up occasion.
Milky Pearl Nails With a Minimalist Finish
The appeal here is all about restraint. The nails have a medium almond shape and a translucent milky base that lets a delicate white-pearl reflection move across the surface. There is no nail art competing for attention, and there is barely any color contrast. Instead, the manicure relies on clean shaping, a smooth application, and the reflective quality of the glaze.
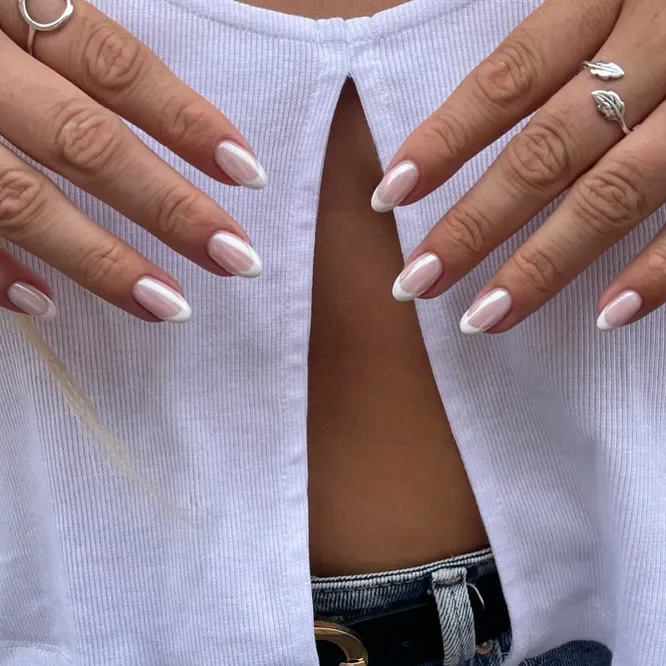
I would reach for a milky white gel polish that is slightly translucent rather than completely opaque. A soft pearl chrome powder can then be layered over the cured base to create the luminous finish. For someone whose nails have a naturally uneven tone, I would use a sheer builder base underneath to create a smoother canvas before adding the milky color.
I would keep the application thin and controlled. After nail prep, I would shape the free edge into a soft almond, apply the builder or base layer, and cure it. One or two sheer coats of milky white would follow, depending on how much natural nail I wanted showing through. The pearl powder goes on last, and I would buff it lightly until there are no visible patches or rough areas.
This is the manicure I would choose when I want my hands to look effortlessly neat rather than obviously decorated. It has a fresh quality that feels especially right during the warmer months, but the color is neutral enough to transition straight into fall. Sometimes the most convincing manicure is the one that makes people wonder whether your nails naturally look that good.
Hot Pink Chrome With a Summer Glow
Now we move from barely-there pearl into something much more playful. These short-to-medium almond nails use a saturated hot pink base with a reflective chrome layer that creates flashes of golden and coral light. The color is bold, but the smooth glazed finish keeps it looking sophisticated rather than flat. I particularly like how the reflective surface changes the personality of the pink whenever the nails move.
For this version, I would choose a vivid pink gel polish with a warm undertone and pair
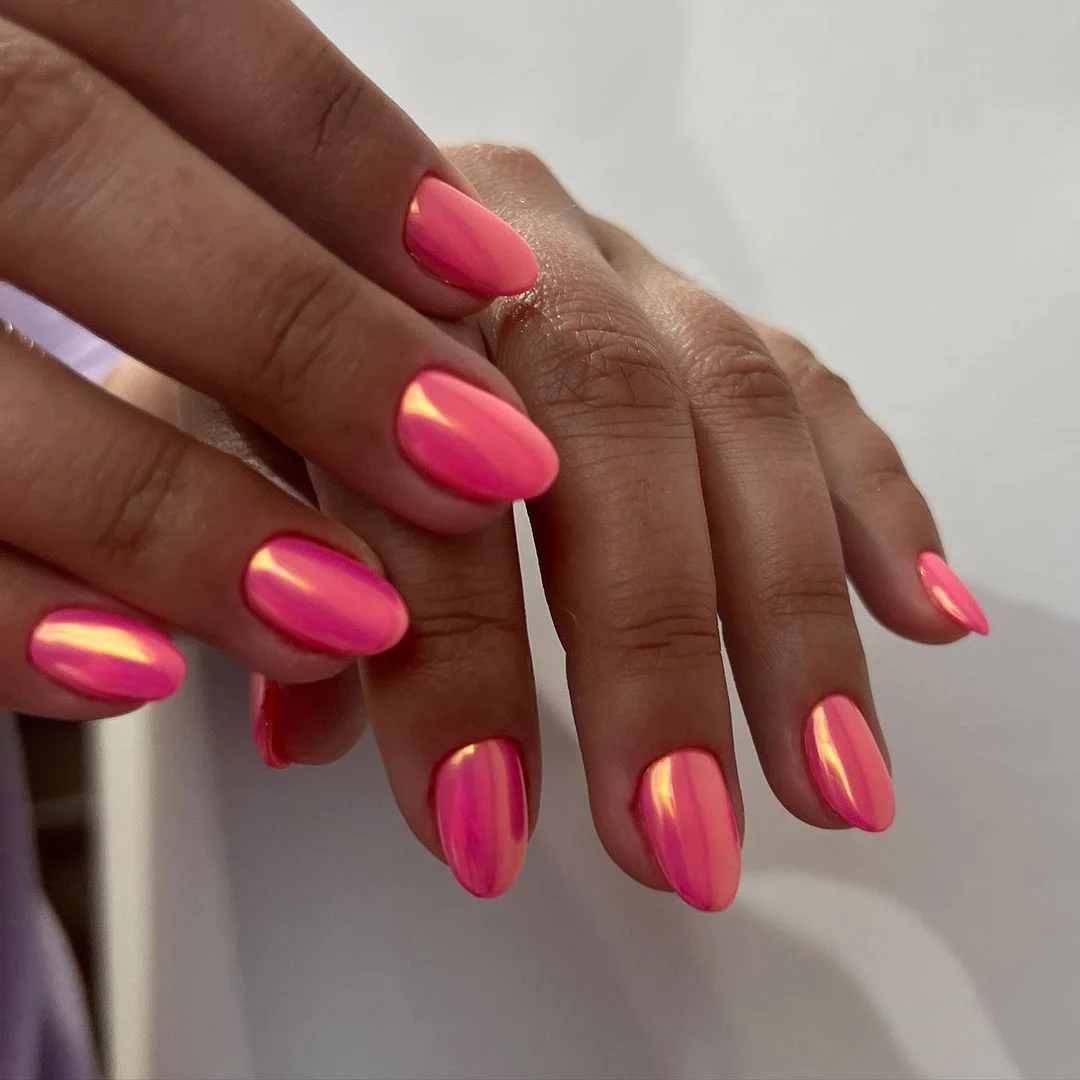 it with an aurora or pink-gold chrome pigment. The exact chrome powder can dramatically change the result, so I would test a small amount over the cured pink before coating every nail. A glossy top coat is essential because the finish depends on a seamless reflective surface.
The application is straightforward once the base color is perfect. I would prep and shape the nails, apply two thin layers of hot pink gel, and cure each one. After creating the chrome surface according to the product instructions, I would buff the pigment until the color looks almost illuminated from within. A final glossy top coat locks in the effect and gives the manicure its smooth, glassy appearance.
I would wear this when a neutral manicure feels a little too safe. There is something wonderfully energetic about hot pink chrome in summer, especially against simple outfits where the nails can become the accessory. If you usually live in beige, white, or denim, this is an easy way to add a little attitude without changing your entire look.
Blush Pink Glaze With a Pearly Reflection
This manicure returns to the softer side of the trend with a delicate blush-pink glaze. The nails are almond-shaped and moderately long, and the color has a translucent quality that keeps the overall effect light. A pearly reflection sits over the pink, giving the surface a subtle glow rather than an obvious metallic finish. It is feminine, clean, and wonderfully easy to style.
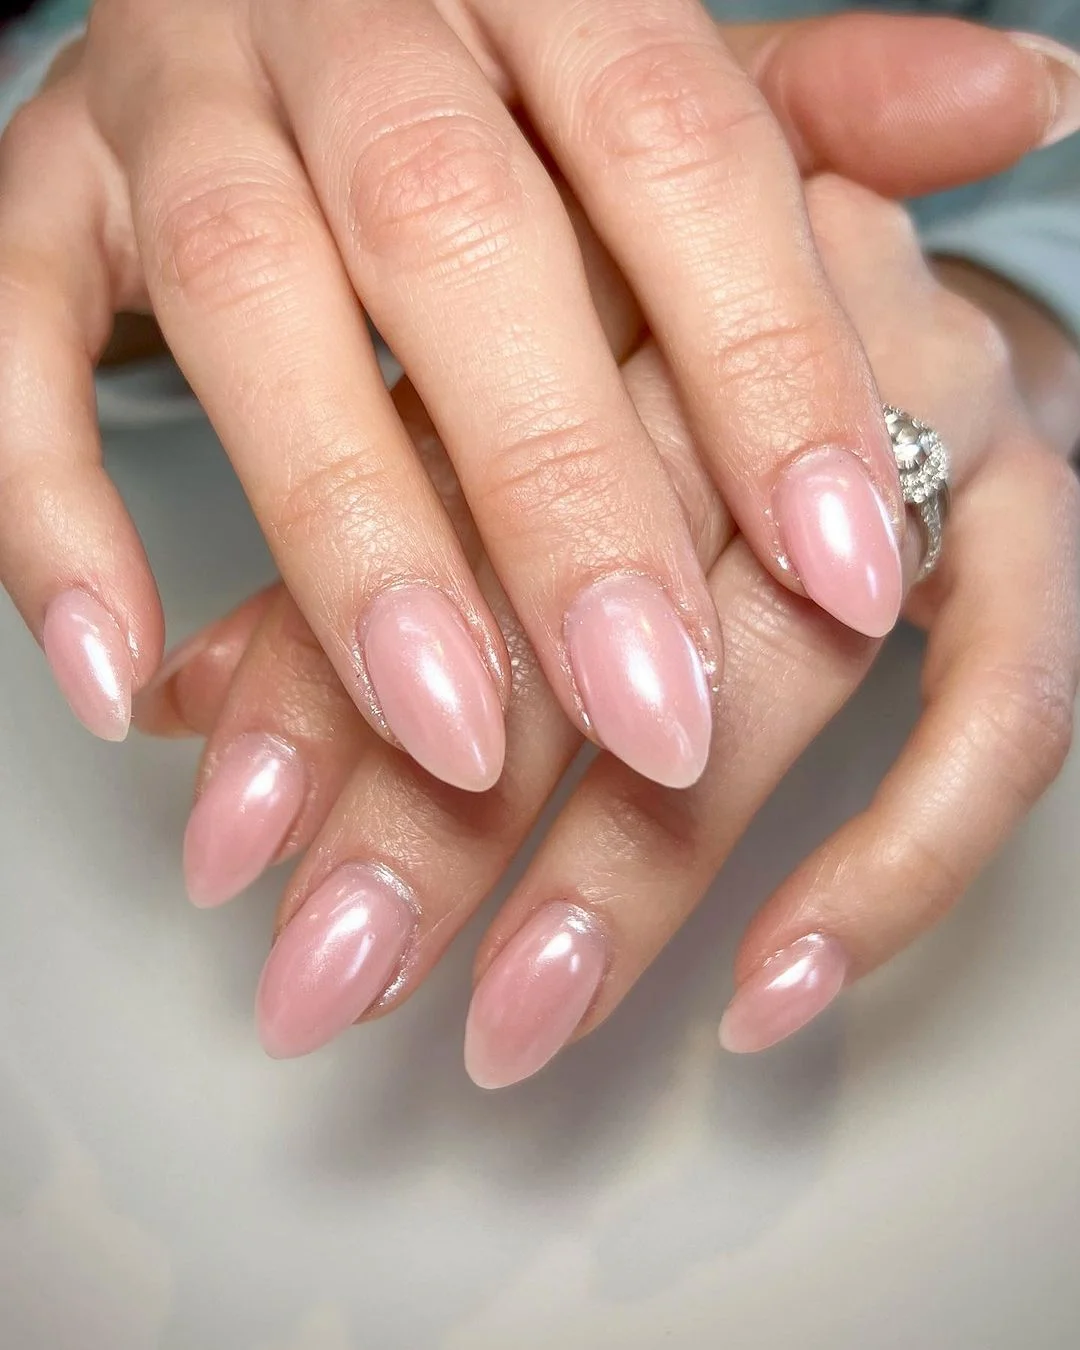
I would use a sheer pink gel as the foundation and a fine white or pink-pearl chrome powder for the reflective layer. A neutralizing base can be helpful if I want the pink to look especially even across every nail. I would also keep the top coat extremely glossy because a dull finish would take away much of the glazed effect.
My preferred method is to build the color gradually. I would start with nail prep and a thin base, then add a translucent pink layer and cure it. If the color still looks too sheer, I would add another very thin coat rather than applying one heavy layer. Once cured, the pearl pigment can be buffed over the surface, followed by a glossy top coat to bring everything together.
I think this is one of the most versatile versions in the entire glazed family. It has enough color to make the manicure feel intentional, but it remains subtle enough for everyday wear. When I want my nails to look pretty in close-up without shouting for attention across the room, this is exactly the balance I look for.
Classic Glazed Donut Pink With a Glassy Finish
The classic glazed donut aesthetic is at its prettiest when the base stays soft and the chrome remains almost weightless. These almond nails combine a pale pink foundation with a luminous pearl finish that makes every nail look smooth and freshly polished. The effect is glossy rather than glittery, with a gentle white reflection that gives the manicure its signature glazed quality.
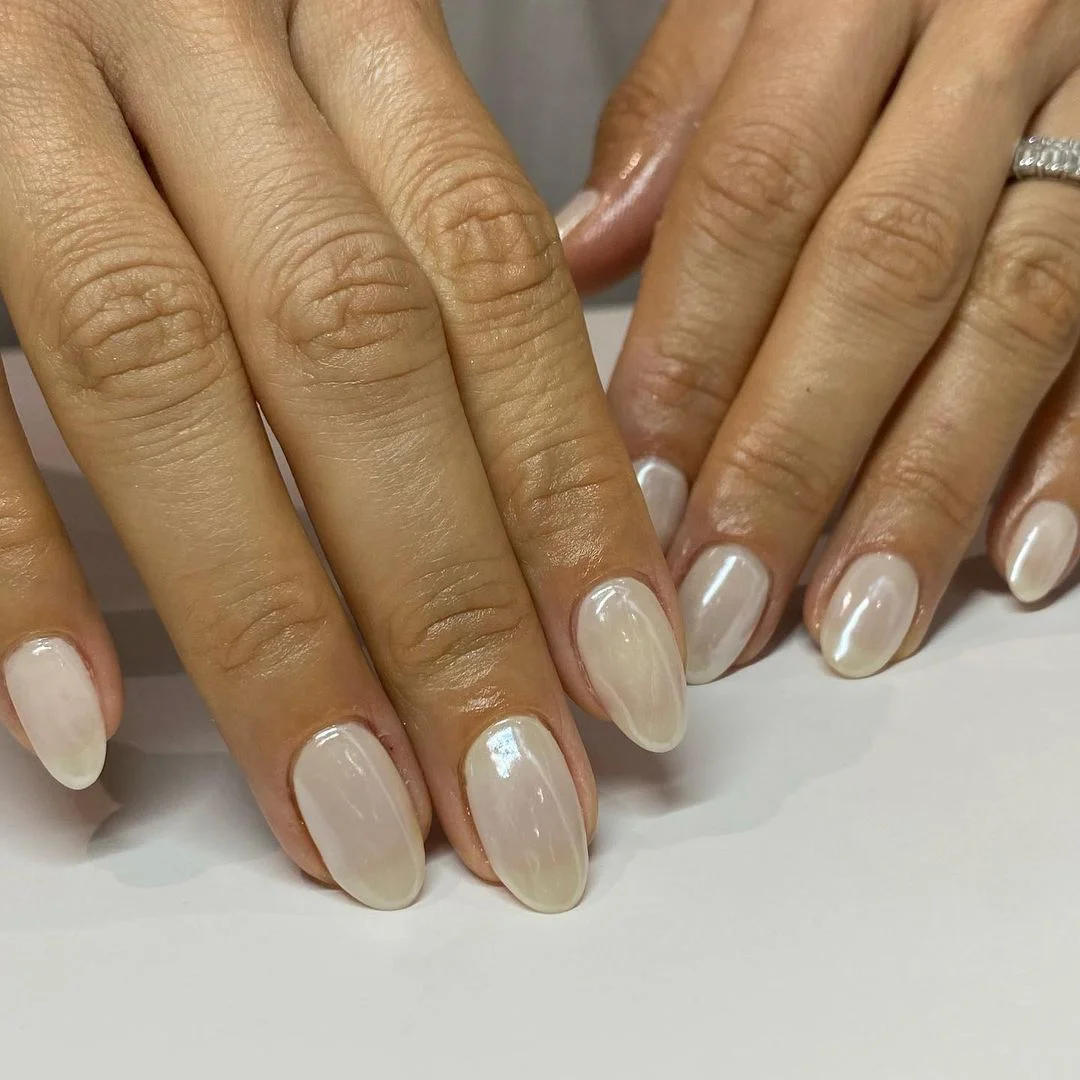
For this look, I would use a translucent pink-beige gel polish and a fine pearl chrome pigment. A good glossy top coat is just as important as the color because the reflective finish needs a smooth surface to look convincing. I would also choose a pigment with a very fine texture; coarse shimmer can make the manicure look sparkly instead of softly glazed.
I would begin with careful cuticle preparation and a clean almond shape, then apply the sheer base in thin coats. Once cured, I would rub the pearl pigment over the entire nail, concentrating on creating an even layer from the cuticle area through the tip. Any excess powder should be brushed away before the top coat goes on, especially around the sidewalls.
This is still the version I would recommend to someone trying glazed nails for the first time. It is trendy enough to feel fresh but neutral enough that you do not have to rethink your wardrobe around it. There is also something wonderfully low-maintenance about a color that remains attractive as it grows out.
Creamy White Chrome With a Soft Almond Shape
This variation leans toward creamy white rather than pink. The nails are long and almond-shaped, with a translucent ivory base and an almost pearly chrome reflection. Instead of looking like a solid white manicure, the color has depth because the reflective layer allows hints of the base tone to show through. The finish is smooth, glossy, and softly luminous.
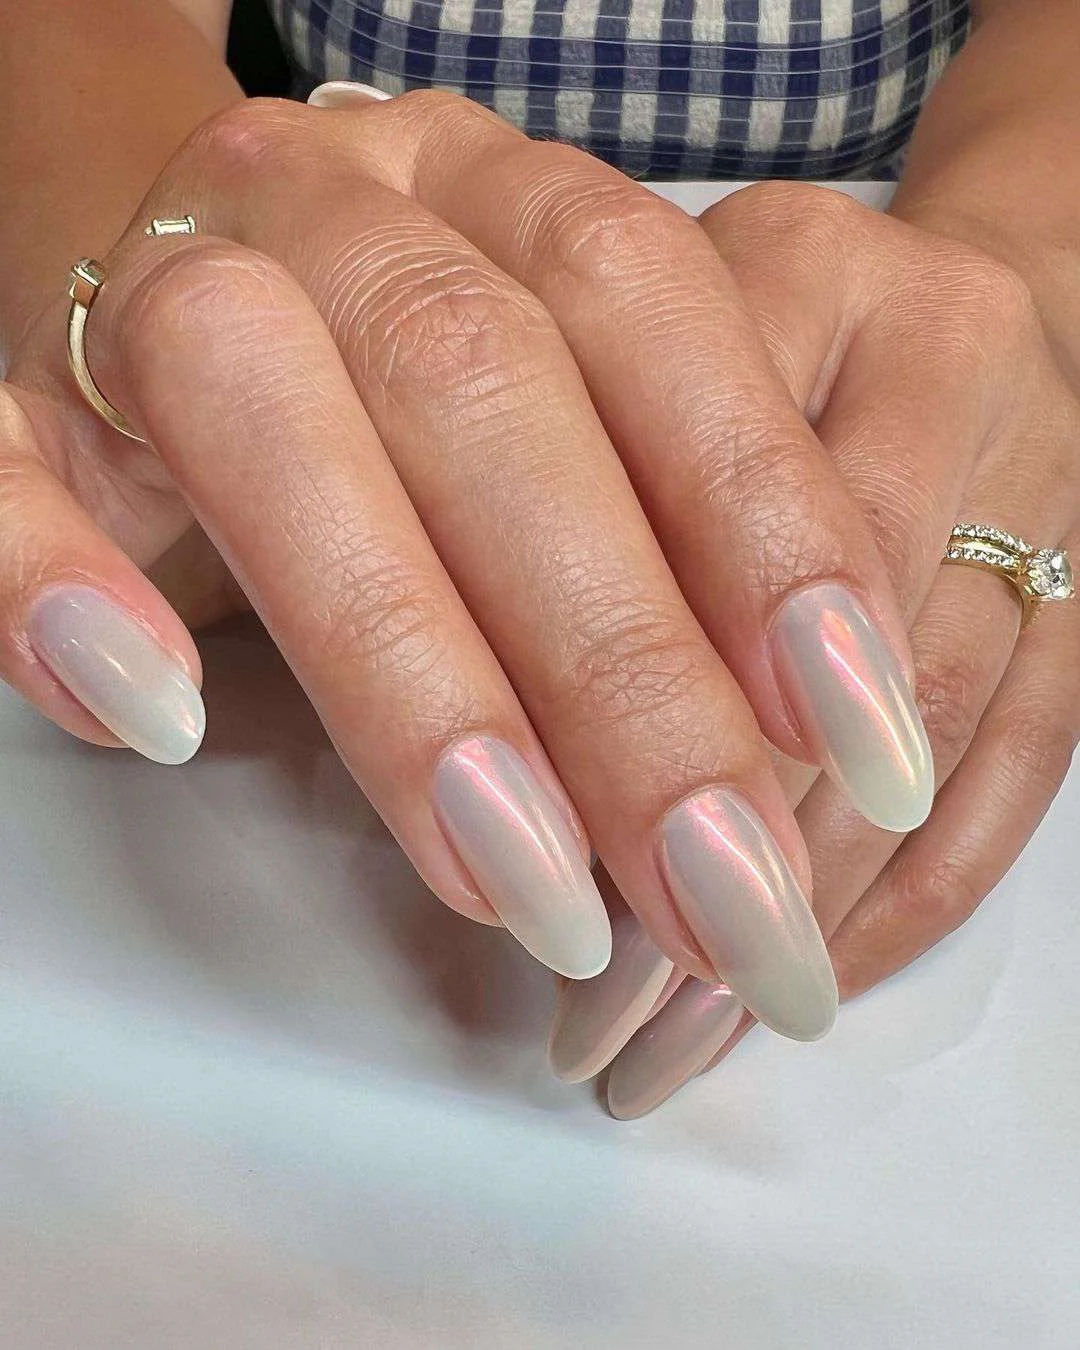
I would reach for a sheer ivory or creamy-white gel polish, paired with a pearl or soft silver chrome pigment. If the natural nail is very pink, a neutralizing base underneath can help the ivory read more evenly. I would avoid stark white unless that is specifically the desired result, because a slightly softened shade makes the manicure look much closer to the glazed effect.
The technique is essentially about controlling opacity. I would apply a thin neutral base, cure it, and then build the creamy color with one or two delicate coats. After curing, I would work the chrome pigment into the surface using gentle pressure, making sure the reflection is consistent from nail to nail. The final top coat should leave the surface completely smooth and reflective.
I love how fresh this color feels during summer, particularly when paired with linen, denim, or simple gold jewelry. It gives me that clean manicure feeling without becoming a traditional white nail. And because the chrome is understated, the result can easily move from daytime errands to an evening out.
Pink-Iridescent Chrome With a Cool Shift
This version has a more noticeable iridescent shift, with a pale milky base reflecting soft pink and cool pearly tones. The almond shape keeps the manicure elegant, while the chrome finish adds movement whenever the nails catch direct light. I like that the effect is not tied to one obvious color; it looks different from one angle to another, which makes the manicure feel more dimensional.
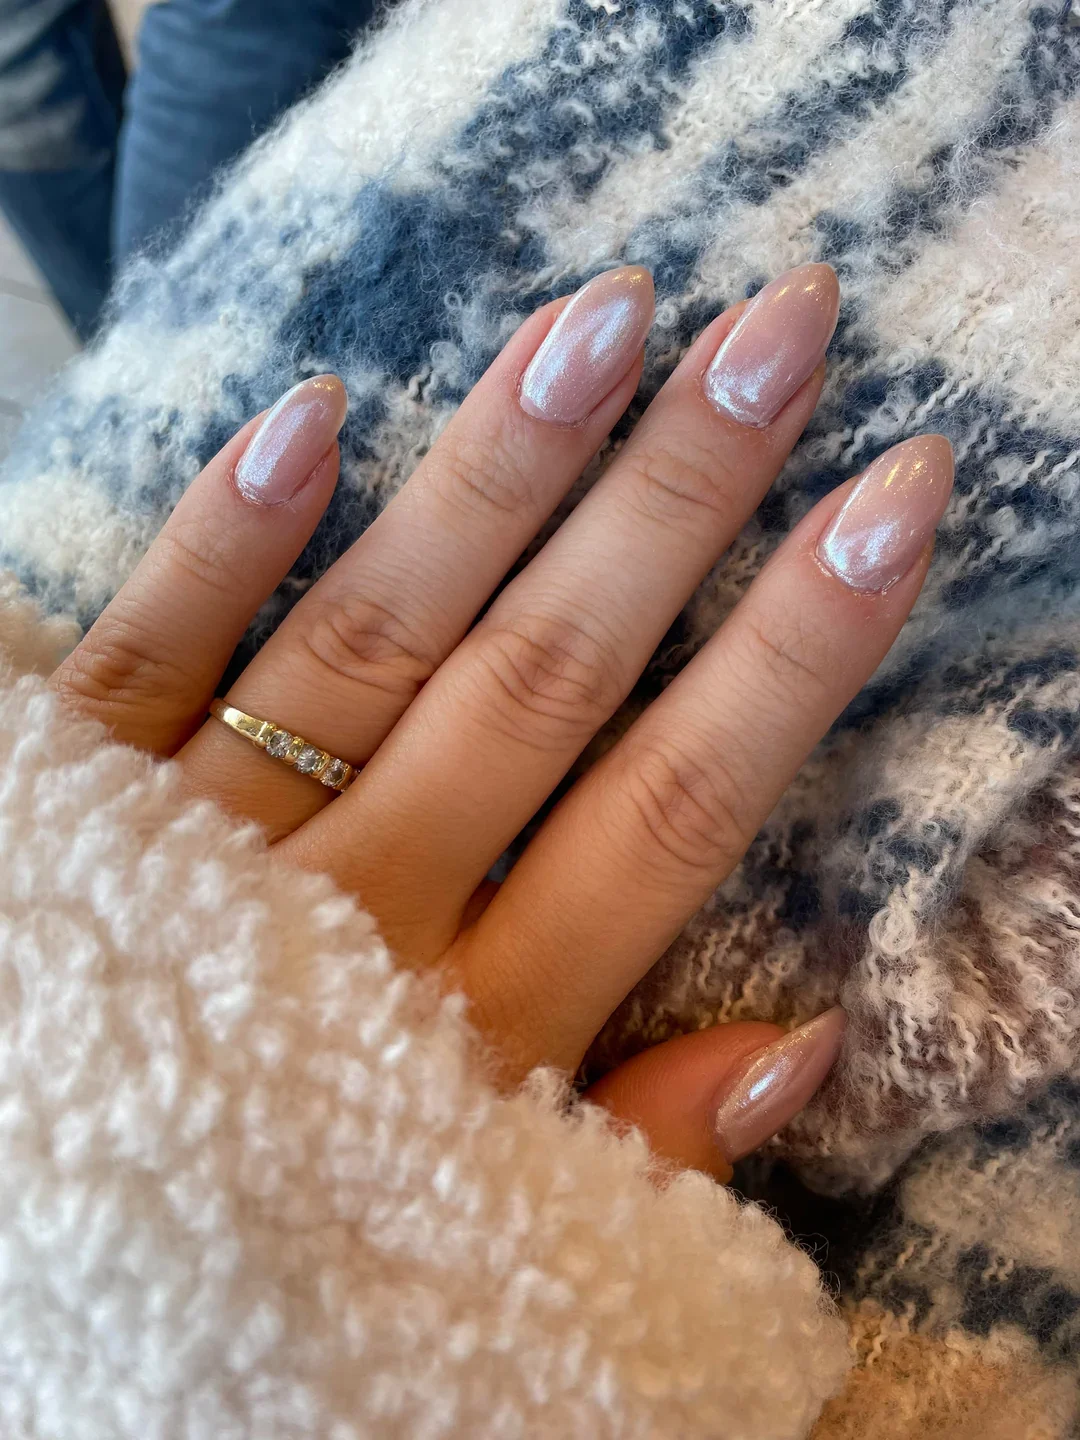
For the base, I would choose a translucent pink-white gel and layer a cool-toned aurora chrome pigment over it. Some chrome powders lean blue, some pink, and others almost lavender, so testing the pigment over the chosen base is worth the extra minute. The right combination should create a veil of color rather than a heavy metallic coating.
I would prep the nails carefully, shape the almond tips, and apply the translucent base in thin layers. After curing, I would add the chrome pigment sparingly and buff it until the color shift becomes visible but remains soft. A high-gloss top coat completes the manicure and intensifies the reflective quality.
This is the version I would choose when I want something subtle at first glance but more interesting once the light hits it. It has a little bit of magic without becoming costume-like, which is a tricky balance to get right. For a summer event, vacation dinner, or even a weekend when I simply want to feel a little more put together, this finish has plenty of charm.
Soft Pink Pearl for an Effortless Everyday Manicure
The final look keeps the glazed donut idea incredibly wearable. The nails have a soft almond shape and a delicate pink-beige base that is finished with a subtle pearly sheen. The reflection is visible enough to create dimension, but the manicure never becomes intensely metallic. The overall impression is clean, feminine, and quietly polished.
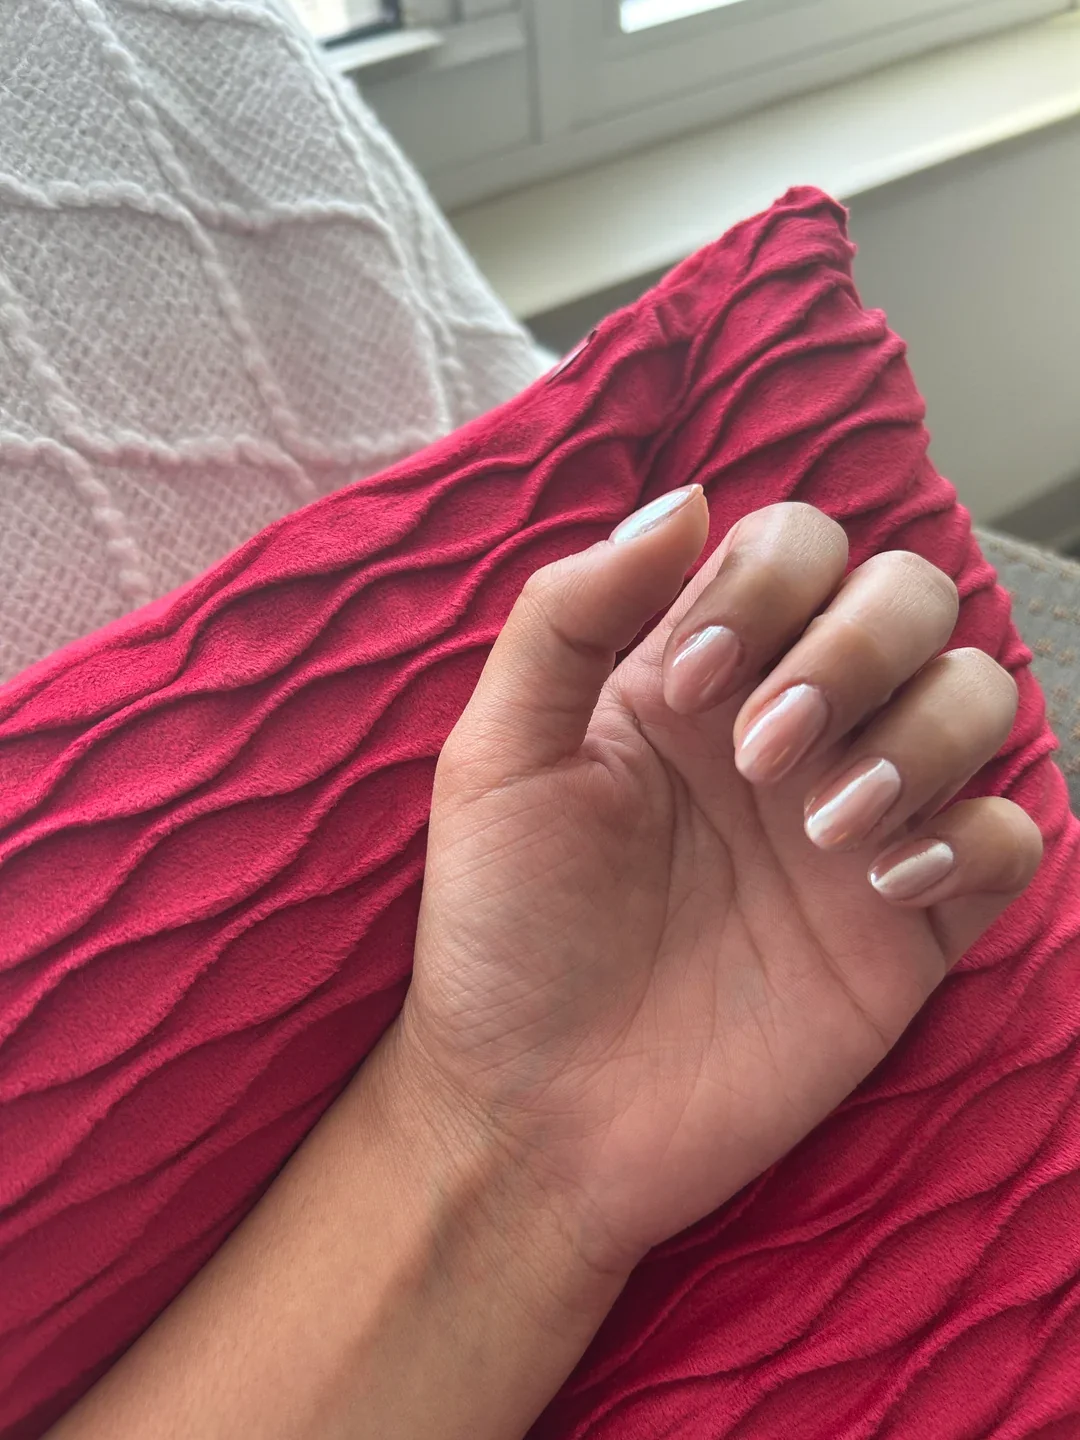
I would use a translucent blush or pink-nude gel, followed by a soft pearl chrome pigment. If I wanted a slightly warmer result, I would choose a champagne-pearl powder instead of a bright white pearl. The important part is keeping the base sheer and the chrome layer fine, because too much pigment can cover the delicate depth that makes this manicure work.
At home, I would focus more on preparation than decoration. A carefully shaped nail, neat cuticles, and an even base will make this minimalist design look far more polished. After applying the sheer pink and curing it, I would add just enough chrome to create a smooth pearly veil, then seal it with a glossy top coat and allow the manicure to cure completely.
Soft Pearl Glaze With A Barely There Shine
I love how delicate this version of glazed donut nails feels. The nails have a softly rounded almond shape with a sheer nude-pink base that allows some of the natural nail to remain visible. Instead of looking like a solid chrome manicure, the surface has a translucent pearly finish with fine vertical reflections that appear almost brushed across the nails. The effect is especially pretty in daylight because the chrome catches the light without overpowering the soft base.
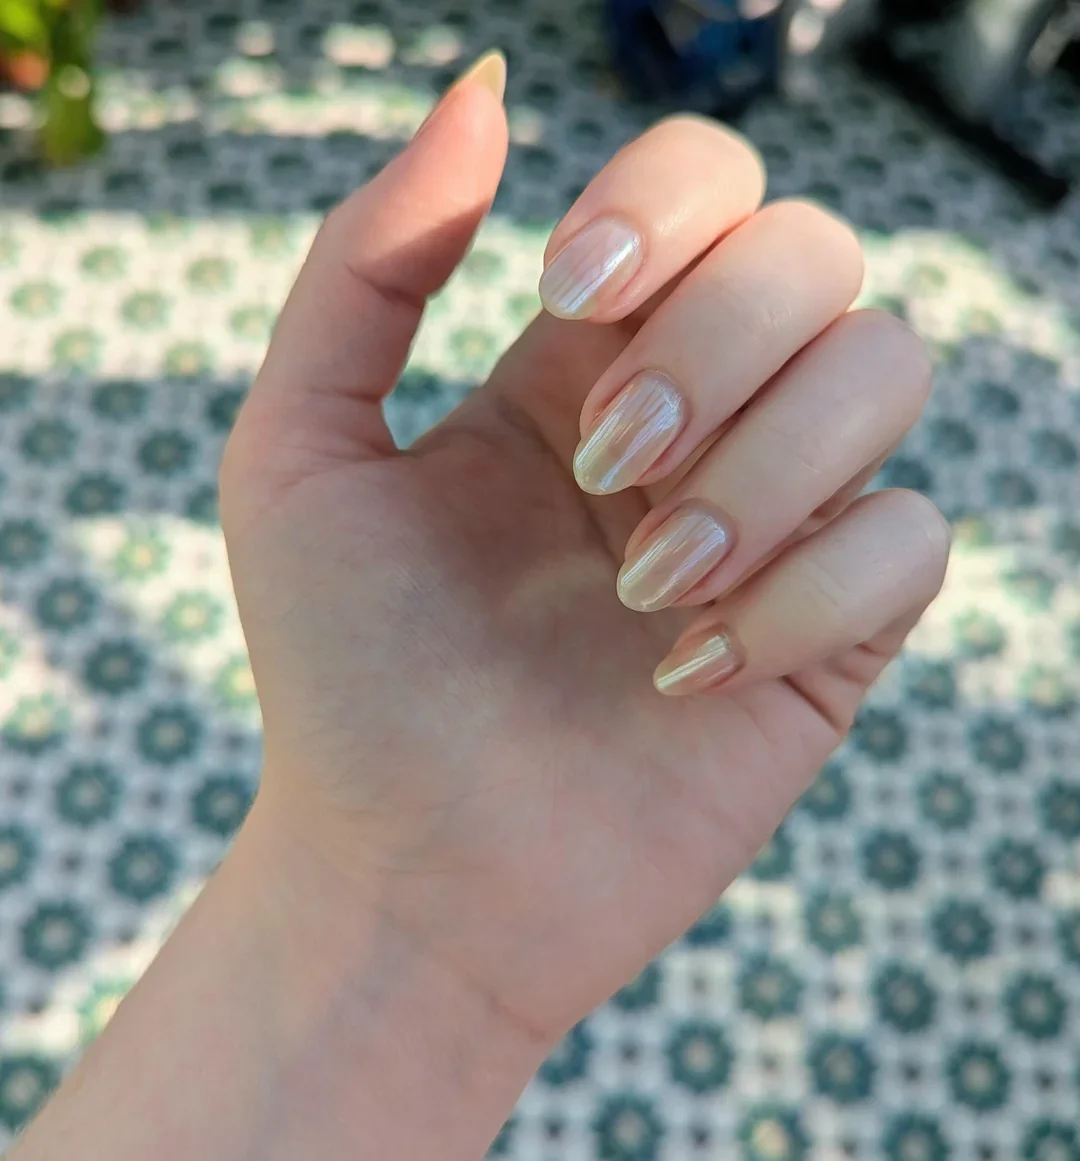
For this kind of manicure, I would start with a sheer pink or neutral gel such as OPI Funny Bunny, CND Shellac Romantique, or a similar translucent nude. I would then use a very fine pearl or white chrome powder over a no-wipe gel top coat. The goal is not to create a mirror finish. I want a delicate iridescent veil that gives the nails that glazed, freshly moisturized appearance.
At home, I would shape the nails first and keep the almond tip relatively soft rather than extremely pointed. After cuticle preparation, I would apply a thin layer of sheer nude gel, cure it according to the product instructions, and add another thin layer if I wanted slightly more coverage. Once the color is cured, I would apply the no-wipe top coat, cure it, and gently buff a tiny amount of chrome powder over the surface before sealing everything with another glossy top coat.
This is one of those manicures I would choose when I want my hands to look finished but still very natural. I can easily see it working with a white summer dress, denim, or even a simple tank and tailored trousers. The little flashes of pearl keep it interesting, while the translucent base makes the entire look feel effortless rather than overly decorated.
Glossy Taupe Glaze For A Richer Nude Finish
This interpretation takes glazed donut nails in a slightly warmer and more sophisticated direction. I see a smooth almond shape covered in a creamy taupe-beige nude with an almost liquid shine. The color has enough pigment to look intentionally polished, but the reflective surface keeps it from feeling flat. It is the kind of neutral I could wear for weeks because it has more personality than a basic beige while remaining remarkably easy to style.
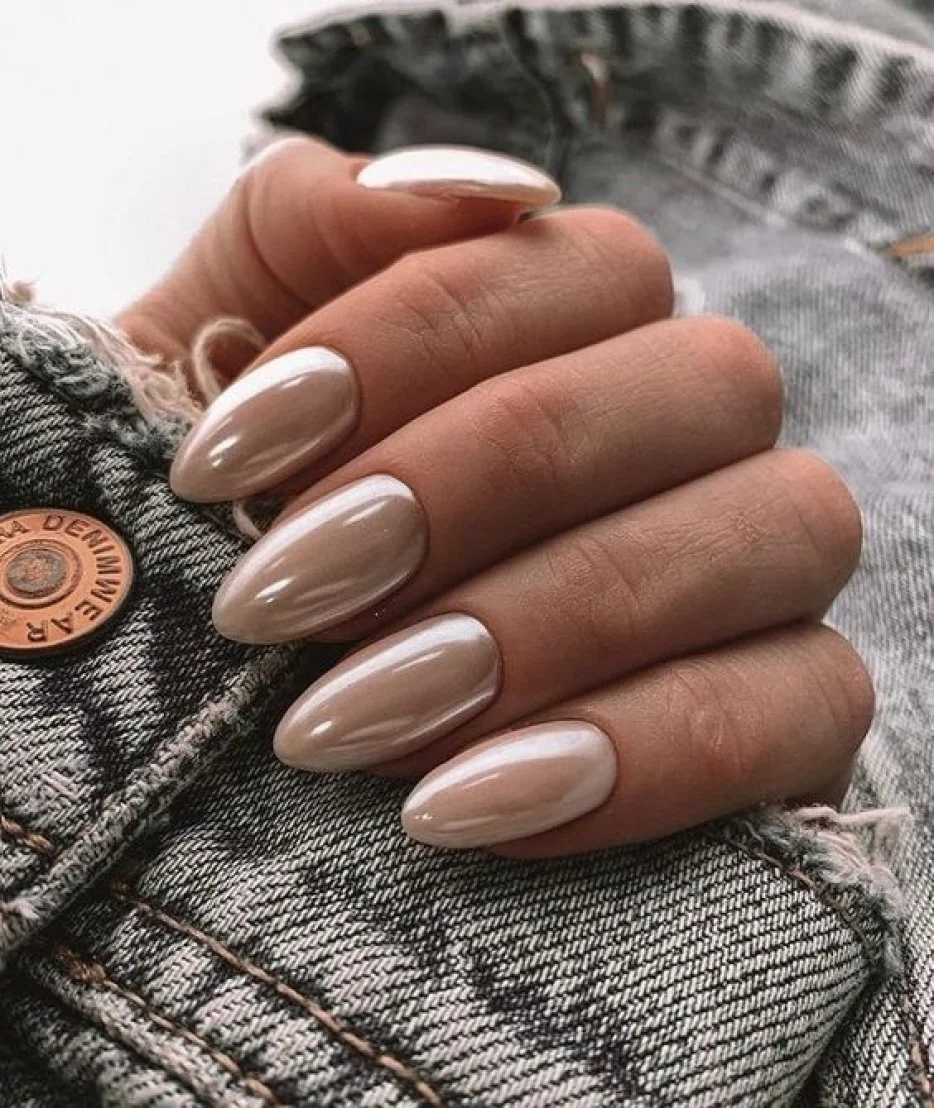
I would reach for a warm beige or muted taupe gel polish, preferably one with a slightly translucent quality rather than a completely opaque formula. Essie Gel Couture in a soft nude family can work for a similar mood, while a gel manicure can be finished with a champagne or neutral pearl chrome powder. I like using a cooler pearl over warm nude because the contrast creates that characteristic glazed effect instead of making the nails look simply brown or beige.
My approach here would be very simple. I would refine the almond shape, smooth the nail plate, and apply the nude color in thin, even layers. After curing, I would add a no-wipe top coat and cure it according to the manufacturer’s instructions. Then I would rub a small amount of pearl chrome into the surface, concentrating on achieving an even glow rather than maximum reflectivity. A final glossy top coat brings the whole manicure together.
I especially like this version for late summer when I am ready for something a little more grounded but not quite ready to abandon light colors. It has the softness of a glazed manicure with the depth of a classic nude. If a sheer pink feels too delicate for your wardrobe, this taupe variation is the one I would try next.
Milky Pink Almonds With A Glassy Pearl Veil
This manicure is almost the definition of understated glazed donut nails. The almond-shaped nails are coated in a translucent milky pink that gives the natural nail a healthier, more even appearance. The chrome effect is subtle enough that the base still feels soft, but when the light hits the surface, a pearly reflection appears across the nail. I particularly like the balance between the warm pink underneath and the cool shine on top.
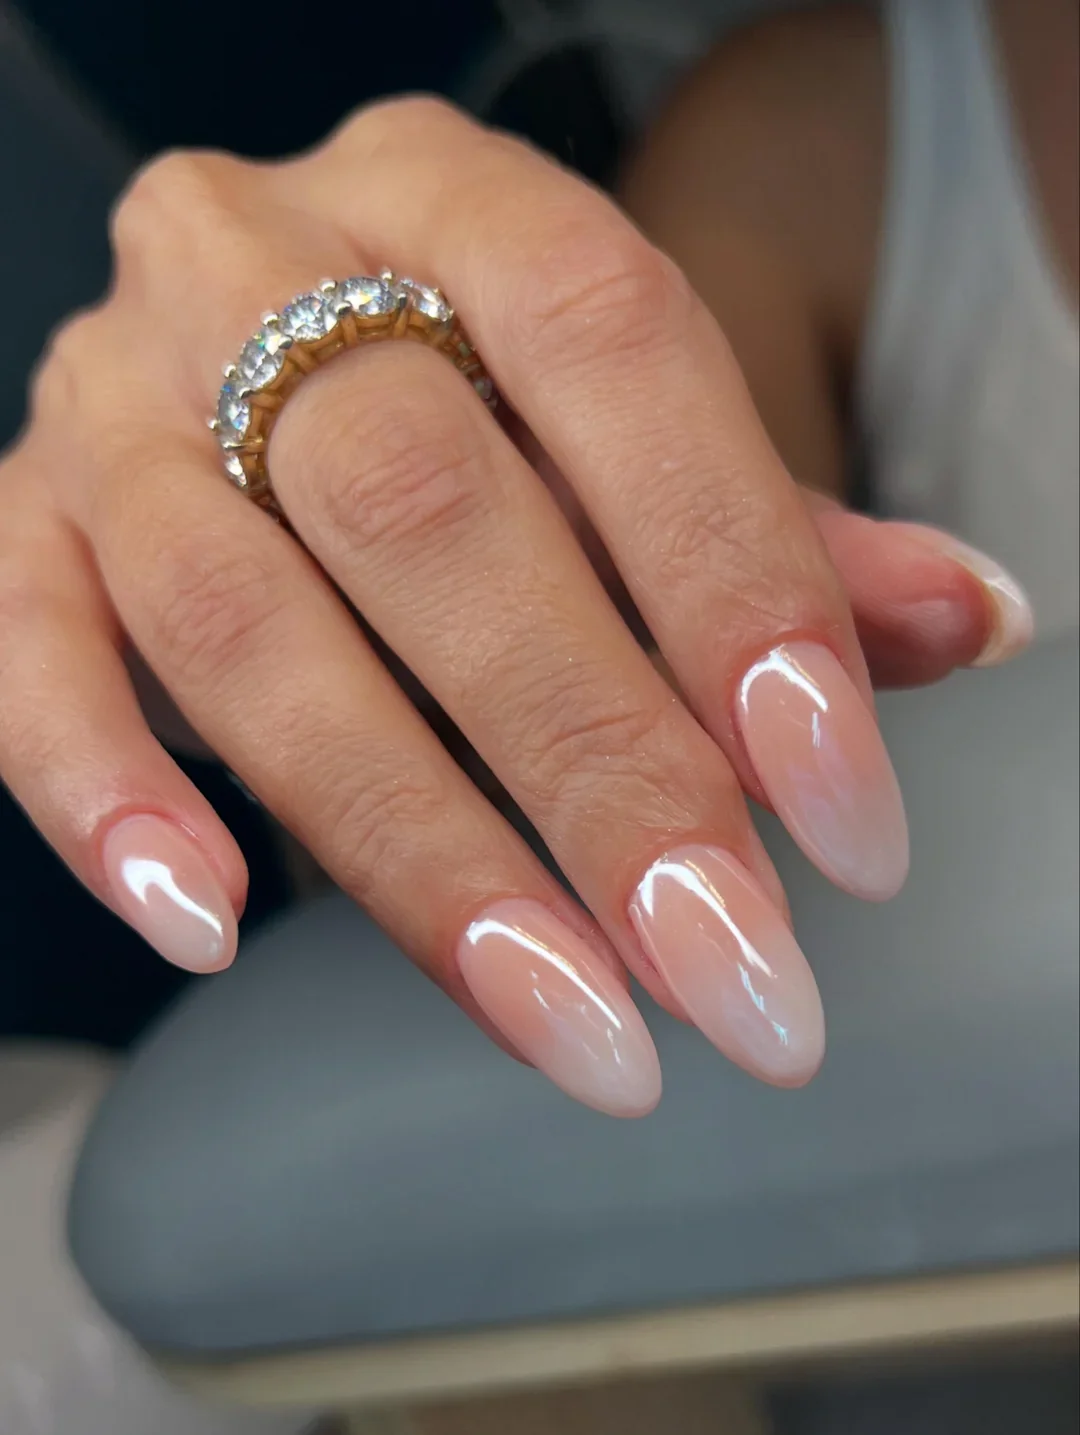
I would use a sheer blush or milky pink gel as the foundation. OPI Bubble Bath is an easy reference for the color family, although I would choose a slightly more translucent formula if possible. For the finish, I would use a white pearl chrome powder rather than a strong silver chrome. A no-wipe top coat is also essential if I want the powder to glide smoothly across the cured surface.
When I recreate this style, I prefer to keep the layers thin. I would prepare the nails, gently shape the sides into an almond silhouette, and apply one sheer coat of pink. If I need additional coverage, I would add another very thin layer rather than one heavy coat. After curing, I would add the glossy top coat, cure it, rub in the pearl powder, dust away the excess, and finish with another layer of top coat.
For me, this is the manicure that proves you do not need nail art to make your hands look special. The soft pink keeps everything feminine and fresh, while the chrome veil adds just enough dimension to catch someone’s eye. I would happily wear this for everyday errands, a dinner date, or one of those summer weekends when every outfit somehow ends up being white, cream, or denim.
Pearl White Chrome For An Elegant Statement
Here the glazed effect becomes more noticeable, but it still stays within that clean, sophisticated family. The long almond nails have a pale milky-white foundation with a luminous pearl finish. The chrome catches the light across the curved surfaces, creating soft silver and pink reflections rather than a harsh metallic shine. The longer length gives the manicure more presence, while the pale color prevents it from feeling heavy.
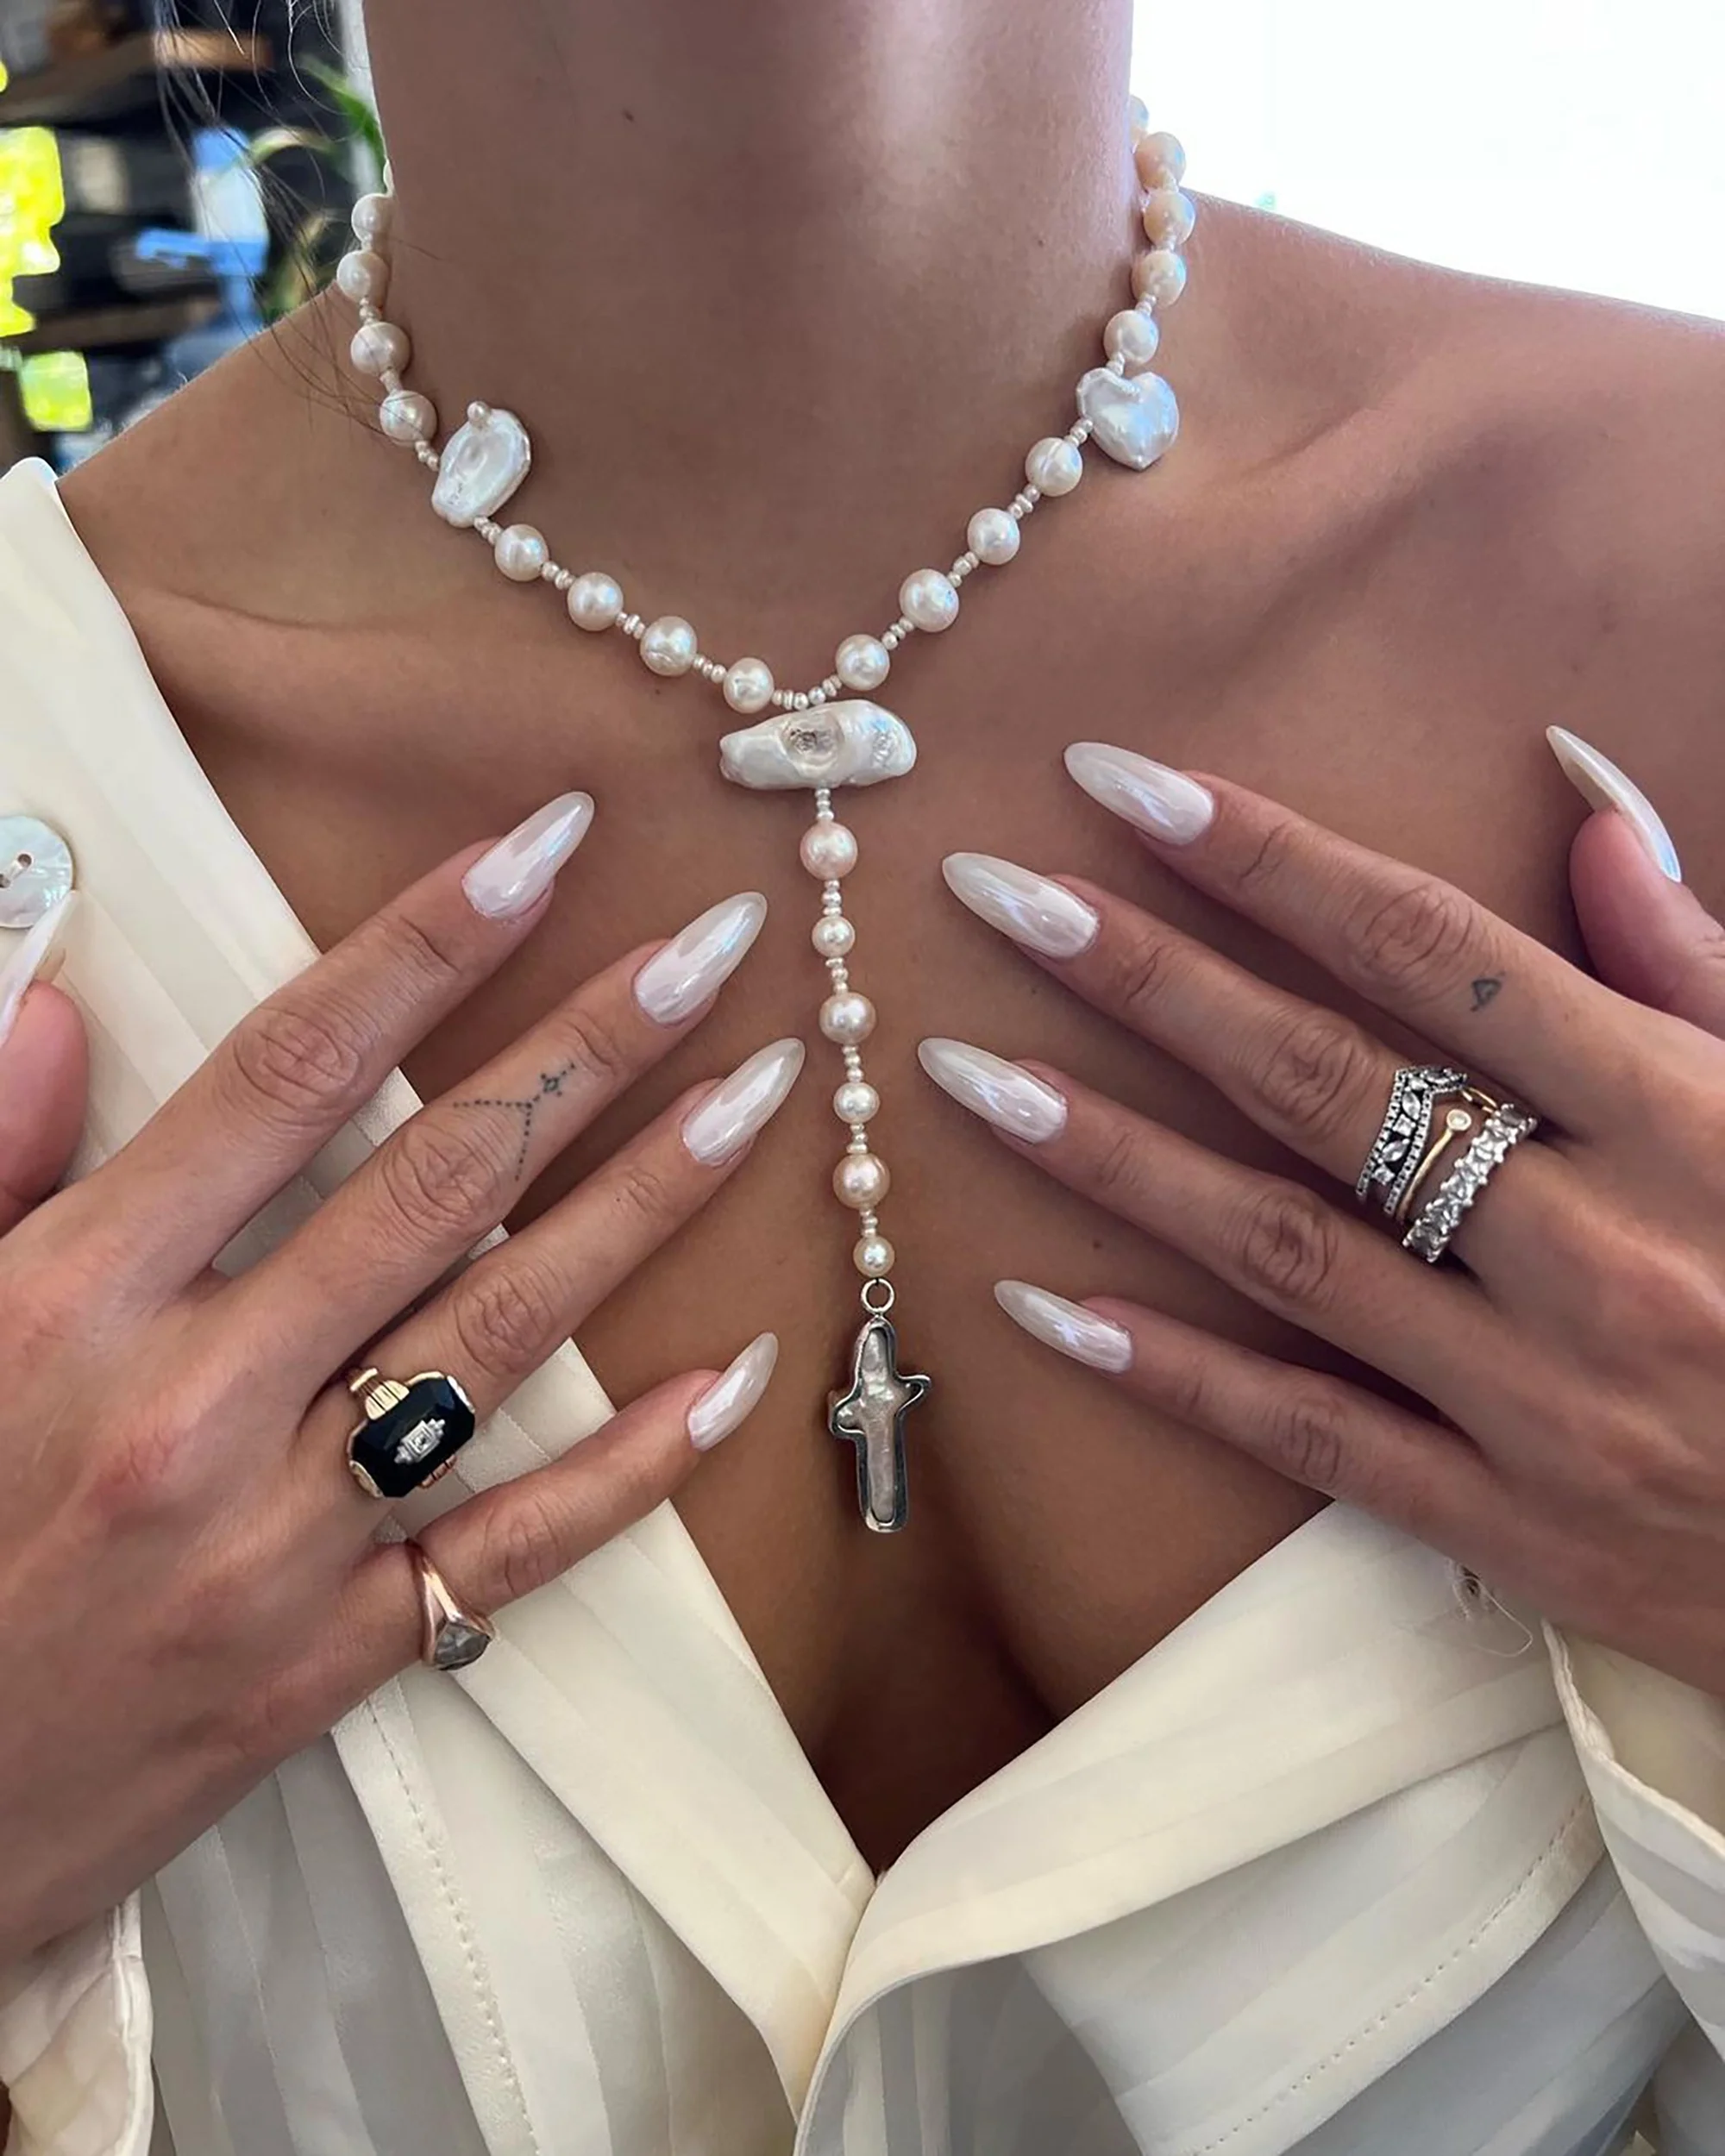
For this look, I would combine a milky white gel with a sheer pearl chrome. A shade such as OPI Funny Bunny can create the soft foundation, especially when applied in a thin layer. I would pair it with a white or icy pearl chrome powder and a high-gloss no-wipe top coat. If I wanted the finish to lean slightly warmer, I could use an opalescent powder with a subtle pink shift.
I would prepare the almond shape carefully because longer nails make symmetry much more noticeable. After applying the milky white base, I would cure it completely and check the surface for unevenness before moving on. The chrome should be applied lightly and evenly, using a small applicator to buff it into the top coat. I would seal the free edge and finish with a glossy top coat so the manicure has that smooth, almost wet-looking surface.
This is where I would let the accessories stay simple. A pearl necklace, delicate rings, or an ivory outfit can echo the manicure without competing with it. I like that the nails can feel bridal without actually being limited to a wedding. They have that special-event polish, but I could easily wear them on vacation or for a summer celebration when I want my manicure to do a little more talking.
Short Iridescent Nails With A Futuristic Glow
I love seeing the glazed effect on shorter nails because it changes the entire personality of the trend. These nails have a compact, rounded shape and a translucent base that shifts between soft pink, white, and silvery pearl depending on the light. The chrome is more visible here, yet the short length keeps the result practical. Nothing feels excessive, which is exactly why this version appeals to me for everyday wear.
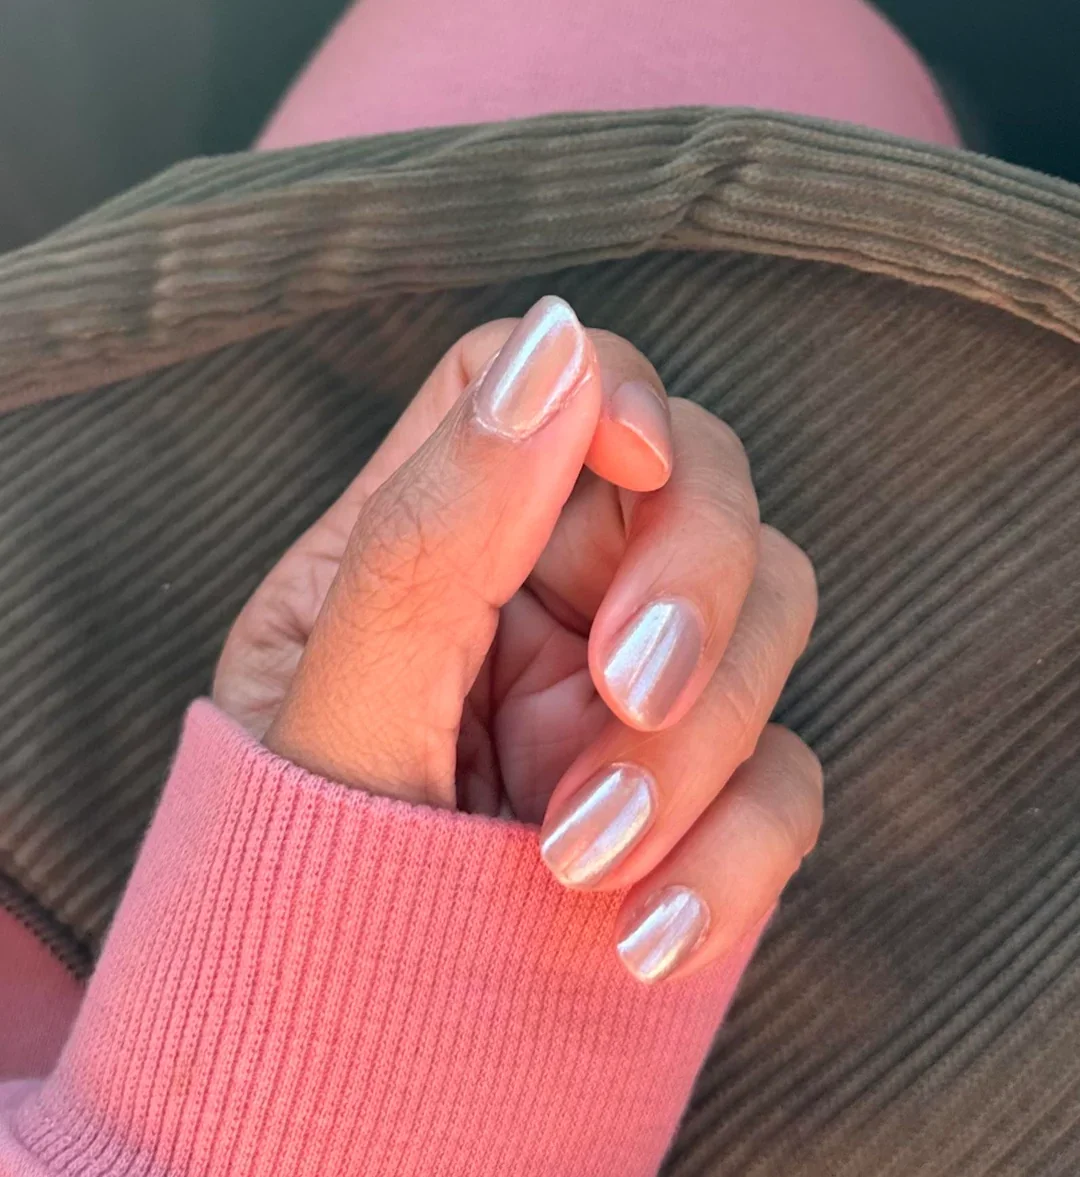
I would choose a sheer pink-beige gel as the foundation and pair it with an iridescent pearl chrome. A product similar to OPI Bubble Bath can create the soft pink base, while a chrome pigment with a white, pink, or slightly blue shift can give the surface its multidimensional glow. I would avoid a strongly mirrored silver because the charm of this manicure comes from its translucent quality.
At home, I would file the nails into a short oval and gently smooth the free edges. After applying the sheer base, I would cure it and add the glossy top coat required for the chrome system. I would then use a sponge applicator to buff the pearl pigment over each nail, checking the reflection from different angles. Once I am happy with the glow, I would seal everything with another thin layer of top coat.
This is probably the easiest version for someone who loves the glazed trend but has never felt comfortable with long nails. I have always thought that a manicure should fit real life, and short iridescent nails make that argument beautifully. They still give me that little flash of something special whenever I move my hands, but they do not get in the way.
Milky Almond Chrome With A Cozy Summer Feel
This manicure has a soft, creamy quality that makes glazed chrome feel surprisingly cozy. The nails are shaped into medium-length almonds and covered with a milky white base that allows a faint pink tone to peek through. The pearlescent chrome sits delicately on top, creating a satin-like reflection. The result feels clean and luminous rather than icy, which makes it particularly easy to transition from summer into early fall.
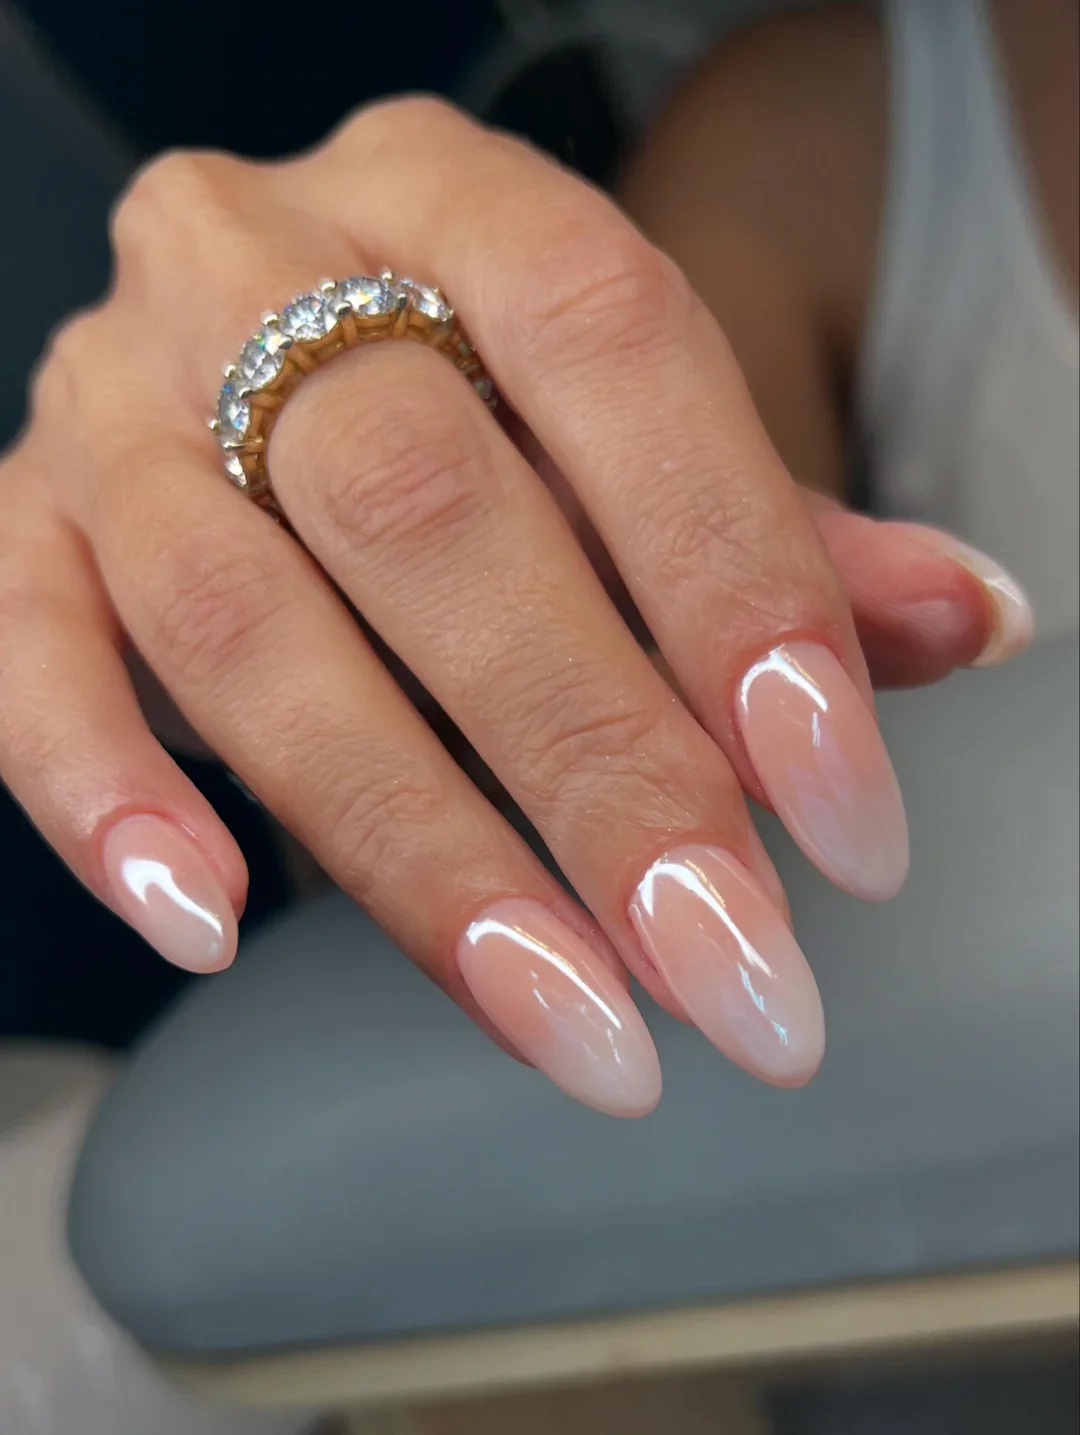
I would use a milky white gel that is slightly translucent instead of a stark white polish. OPI Funny Bunny is again a useful starting point, although the final effect depends on the number of coats. For the chrome, I would choose a soft white pearl pigment with a fine texture. A glossy no-wipe top coat completes the reflective surface and helps the manicure look smooth rather than glittery.
I would keep the application controlled from beginning to end. First, I would shape the nails into balanced almonds and make sure the sidewalls are even. Then I would apply the milky base in thin coats, cure each layer, and inspect the finish before adding the chrome. I would lightly buff the pearl pigment over the cured surface and finish with a top coat, paying particular attention to the tips because that is where everyday wear tends to show first.
I can imagine wearing this manicure with an oversized knit, soft trousers, and simple jewelry once the evenings start getting cooler. That is part of what makes glazed donut nails so versatile: the finish can feel summery in bright sunlight and cozy under softer indoor lighting. I would choose this version when I want my manicure to quietly bridge two seasons.
Classic Glazed White With A Clean Almond Shape
This look keeps the concept beautifully straightforward. The almond nails have a pale nude base with a creamy white finish concentrated toward the tips and a soft pearl reflection across the surface. The result sits somewhere between a traditional nude manicure and a glazed French-inspired design. The white does not create a sharp French line; instead, it melts into the translucent base, which makes the manicure look softer and more modern.
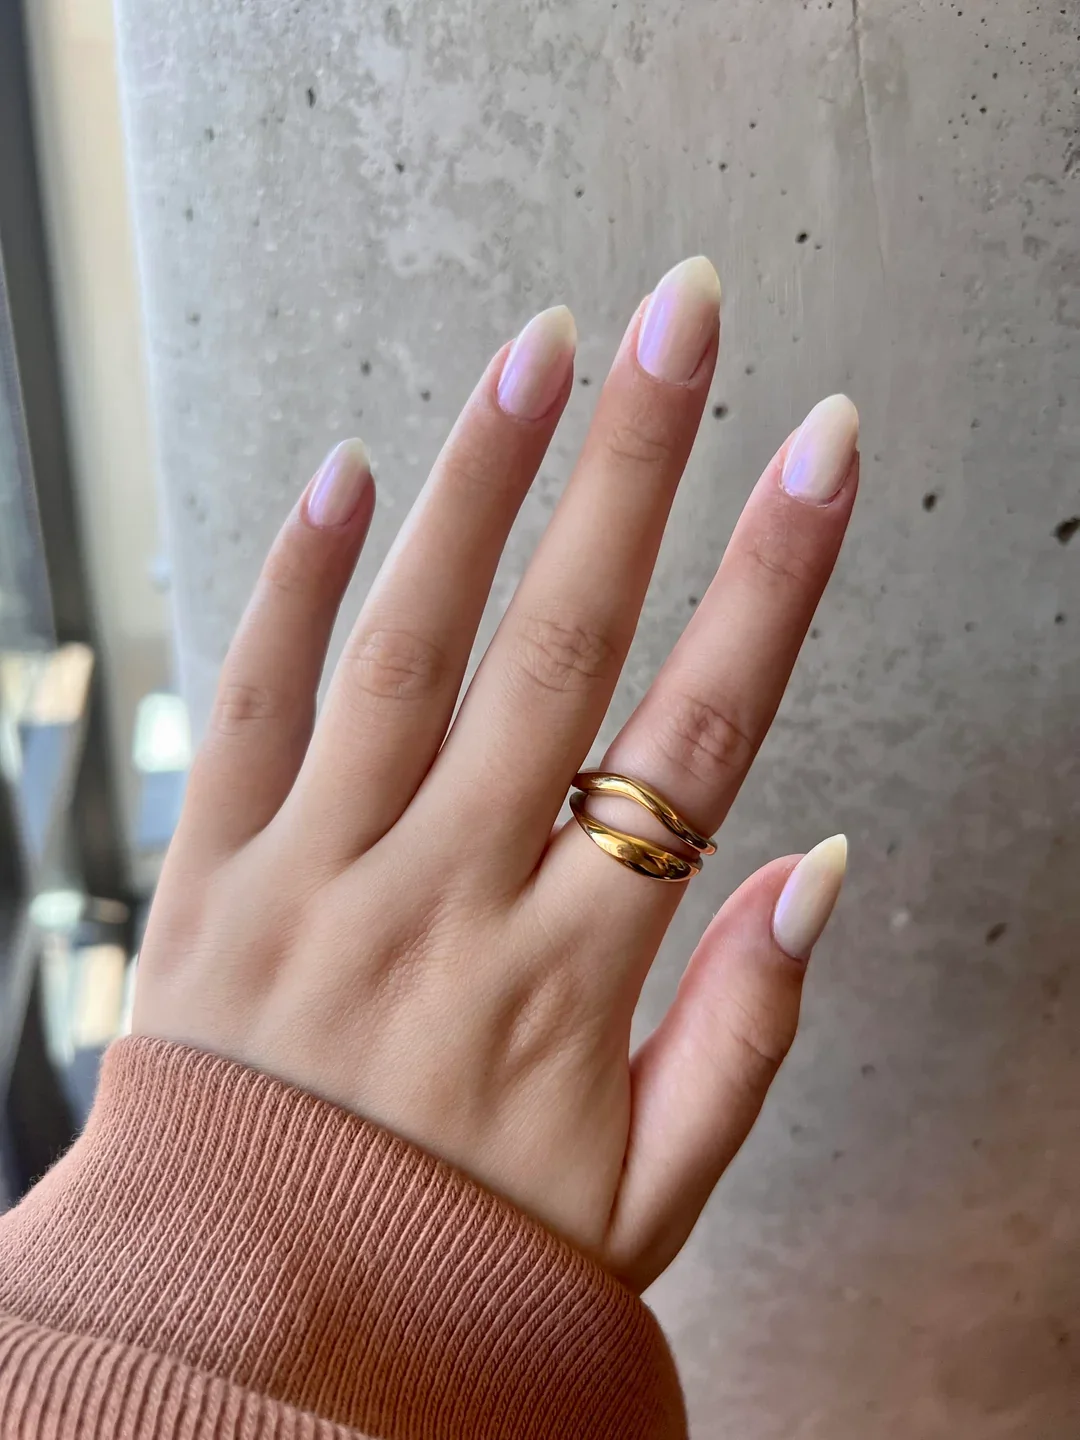
I would reach for a sheer nude-pink gel, a milky white polish, and a pearl chrome pigment. The base could be something in the OPI Bubble Bath family, while the white layer should remain sheer enough to preserve the natural-looking quality. I would use a fine pearl powder rather than a chunky shimmer because the surface needs to stay smooth and glasslike.
For a home version, I would start with the nail shape because the elongated almond silhouette is an important part of the finished effect. After applying the sheer nude base, I would add a very thin milky white layer, keeping the application even from cuticle to tip. Once cured, I would use pearl chrome sparingly across the entire nail rather than concentrating it in one area. A glossy top coat gives the manicure its final glazed finish.
I like this version when I want the elegance of a French manicure without committing to the crisp white tip. It feels softer, especially during summer, and it works with practically every neutral in my closet. Would I choose it for a wedding? Absolutely. But I could just as easily wear it on an ordinary Tuesday and enjoy that little bit of polish every time I reach for my coffee.
Peachy Pearl Chrome With A Sunlit Finish
This version has a warmer personality, with a soft peachy-pink base underneath a luminous chrome finish. The nails are kept relatively short and rounded, which makes the color feel fresh and wearable. Under the light, the surface shifts into pale pink, white, and subtle iridescent tones. I especially like how the warmth of the base prevents the chrome from looking too cool or metallic.
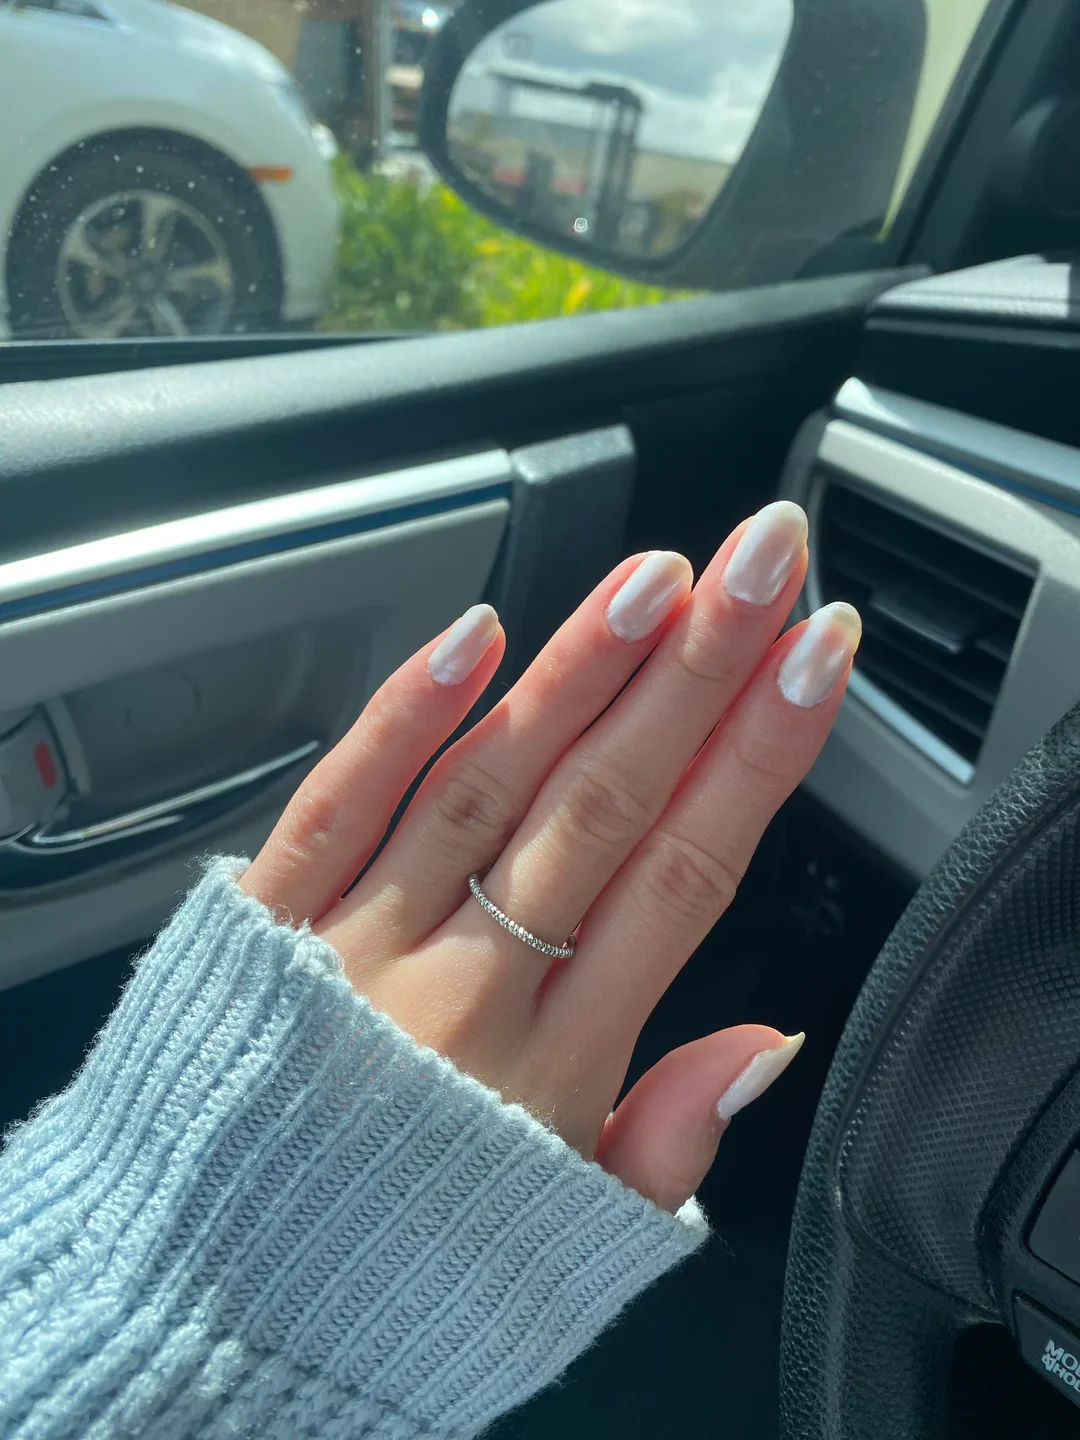
For the foundation, I would choose a translucent peach or warm blush gel. A soft pink such as Essie Ballet Slippers can provide a similar sheer color direction, while a dedicated gel formula will be necessary for a gel-based chrome system. I would finish it with an opalescent pearl powder that has a gentle pink or champagne shift. The less glittery the pigment, the more refined the final result will look.
My application would start with short, softly rounded nails and a thin layer of peachy nude. After curing, I would add a second sheer layer if the natural nail needed more evenness. The next step would be a suitable no-wipe top coat, followed by a light layer of chrome pigment. I would buff until the surface looked luminous rather than mirrorlike, then seal the finish with a final glossy coat.
This is the version I would save for those bright late-summer days when everything feels warmer and softer. The peach undertone gives the manicure a healthy glow, while the chrome adds movement. It is subtle enough for work but pretty enough to make me want to photograph my hands every time the sunlight hits them.
Soft Pink Glaze With An Opalescent Shift
The appeal here comes from the combination of a natural-looking pink base and an almost wet-looking pearly finish. The nails are elongated without becoming dramatically long, and the almond shape keeps the manicure elegant. The glaze shifts gently between pink, white, and cool pearl depending on the light. I would describe the overall effect as polished but dreamy, without drifting into obvious glitter or traditional metallic nail art.
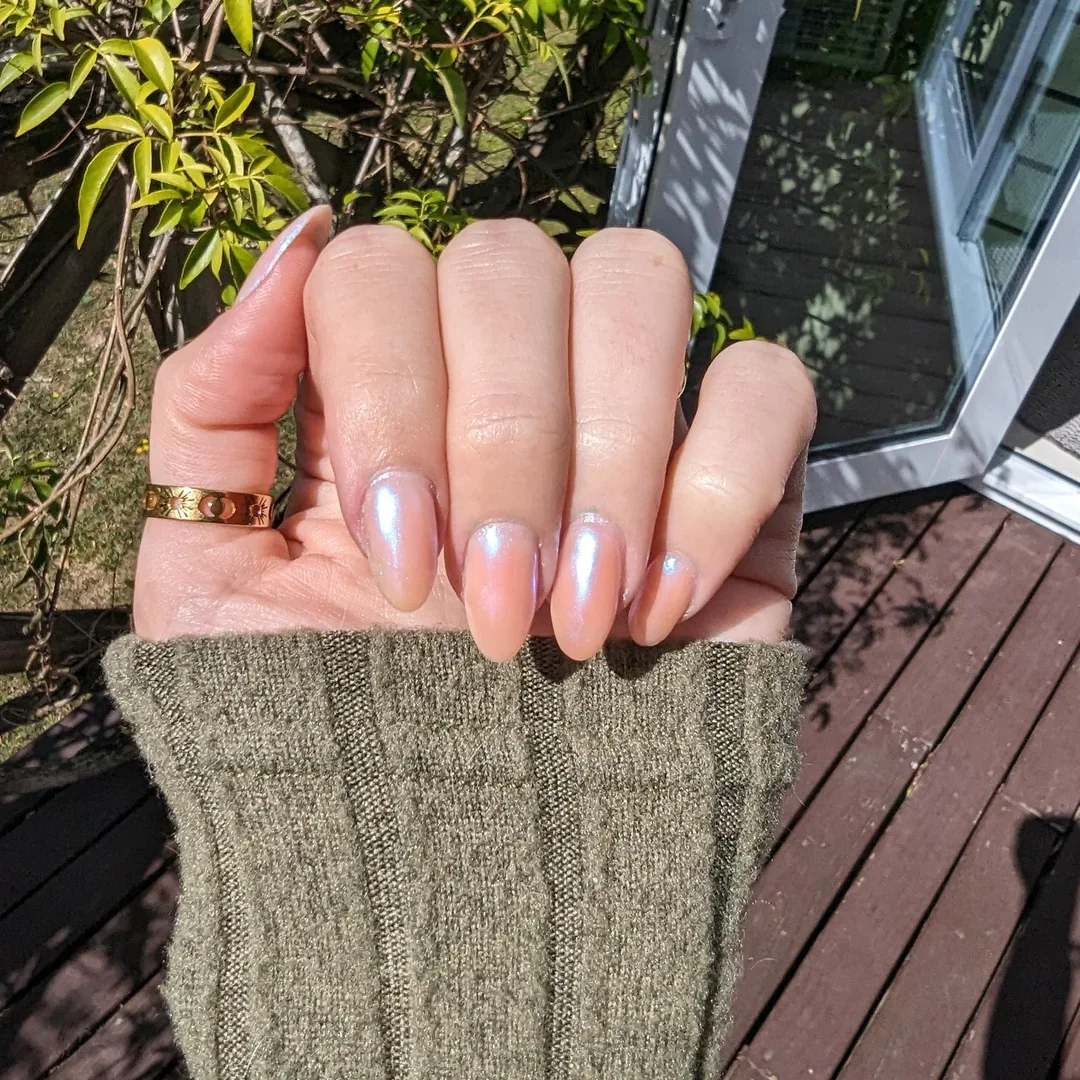
I would build this manicure with a sheer pink gel, a high-shine top coat, and a fine opalescent chrome pigment. A soft blush shade similar to OPI Bubble Bath would work well underneath, while a chrome powder with a pink-blue or white pearl shift would give the surface its changing reflection. I would keep the pigment extremely fine because chunky particles can take away from the smooth glazed appearance.
The technique is uncomplicated, although patience makes a difference. I would shape the nails into a consistent almond silhouette, apply the sheer pink base in thin coats, and cure each one properly. After the color is even, I would apply the chrome-friendly top coat and cure it according to the system requirements. Then I would buff in the powder with light pressure, remove excess pigment around the cuticle, and finish with a glossy seal.
I would choose this manicure when I want something that looks different every time I move my hands. That little color shift is what keeps the style from becoming predictable. It feels romantic enough for an evening out but relaxed enough for everyday life, which is exactly the balance I look for when I am choosing a manicure that needs to work beyond one occasion.
Long Milky Chrome Almonds With Maximum Shine
This final look leans into the most recognizable side of glazed donut nails: long almond nails, a milky base, and a highly reflective pearl surface. The nails appear almost porcelain-like, but the translucent quality keeps them from looking completely opaque. The chrome creates a smooth glow across the curved nail plate, making the almond shape look even longer and more elegant. It is polished, feminine, and definitely not shy about catching the light.
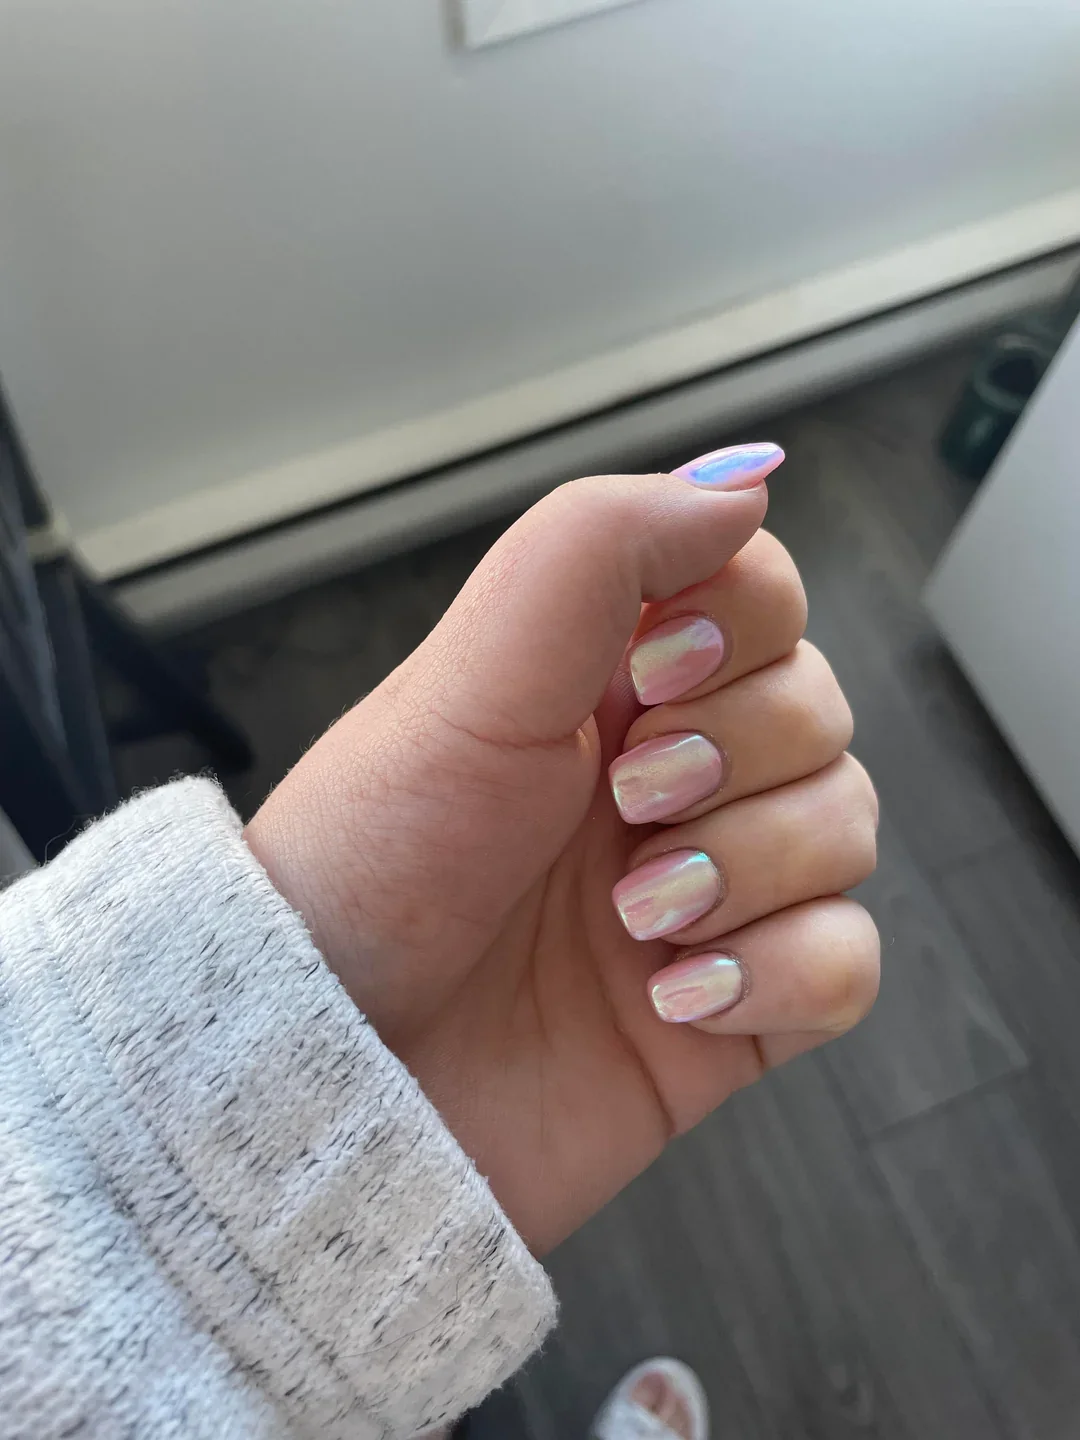
I would use a sheer milky white or very pale pink gel, followed by a fine white chrome powder. OPI Funny Bunny is a useful color reference for the base, while a professional pearl chrome pigment can provide the reflective finish. I would also use a no-wipe gel top coat compatible with the chrome system and a separate glossy finishing coat if the product instructions call for it.
I would take extra care with the nail structure here because longer almond nails need a balanced shape. After preparing the natural nails, I would apply the milky base in thin layers and cure thoroughly. The chrome should be buffed over a suitable cured surface until the color looks evenly glazed from cuticle to tip. I would then seal the edges and apply the final top coat, checking the nails from several angles before finishing.
This is the version I would choose when I want the manicure to become part of the outfit rather than simply complement it. It has enough shine for a special occasion, yet the pale palette keeps it incredibly versatile. Glazed donut nails work because they do not demand one particular aesthetic from me. I can make them minimal, warm, pearly, short, long, soft, or slightly futuristic and still keep that unmistakable luminous finish at the center of the look.
Glazed Silver Chrome on Short Oval Nails
I keep coming back to this version of glazed donut nails because the finish feels polished without looking overly complicated. The short oval nails are covered in a reflective silver chrome that shifts between soft pearl, cool gray, and almost mirror like highlights as the light moves across the surface. On a deeper skin tone, that icy metallic effect creates beautiful contrast, while the rounded shape keeps the manicure wearable and refined. It has that clean summer glow I want when I am wearing simple jewelry, a white shirt, or anything with a little shine.
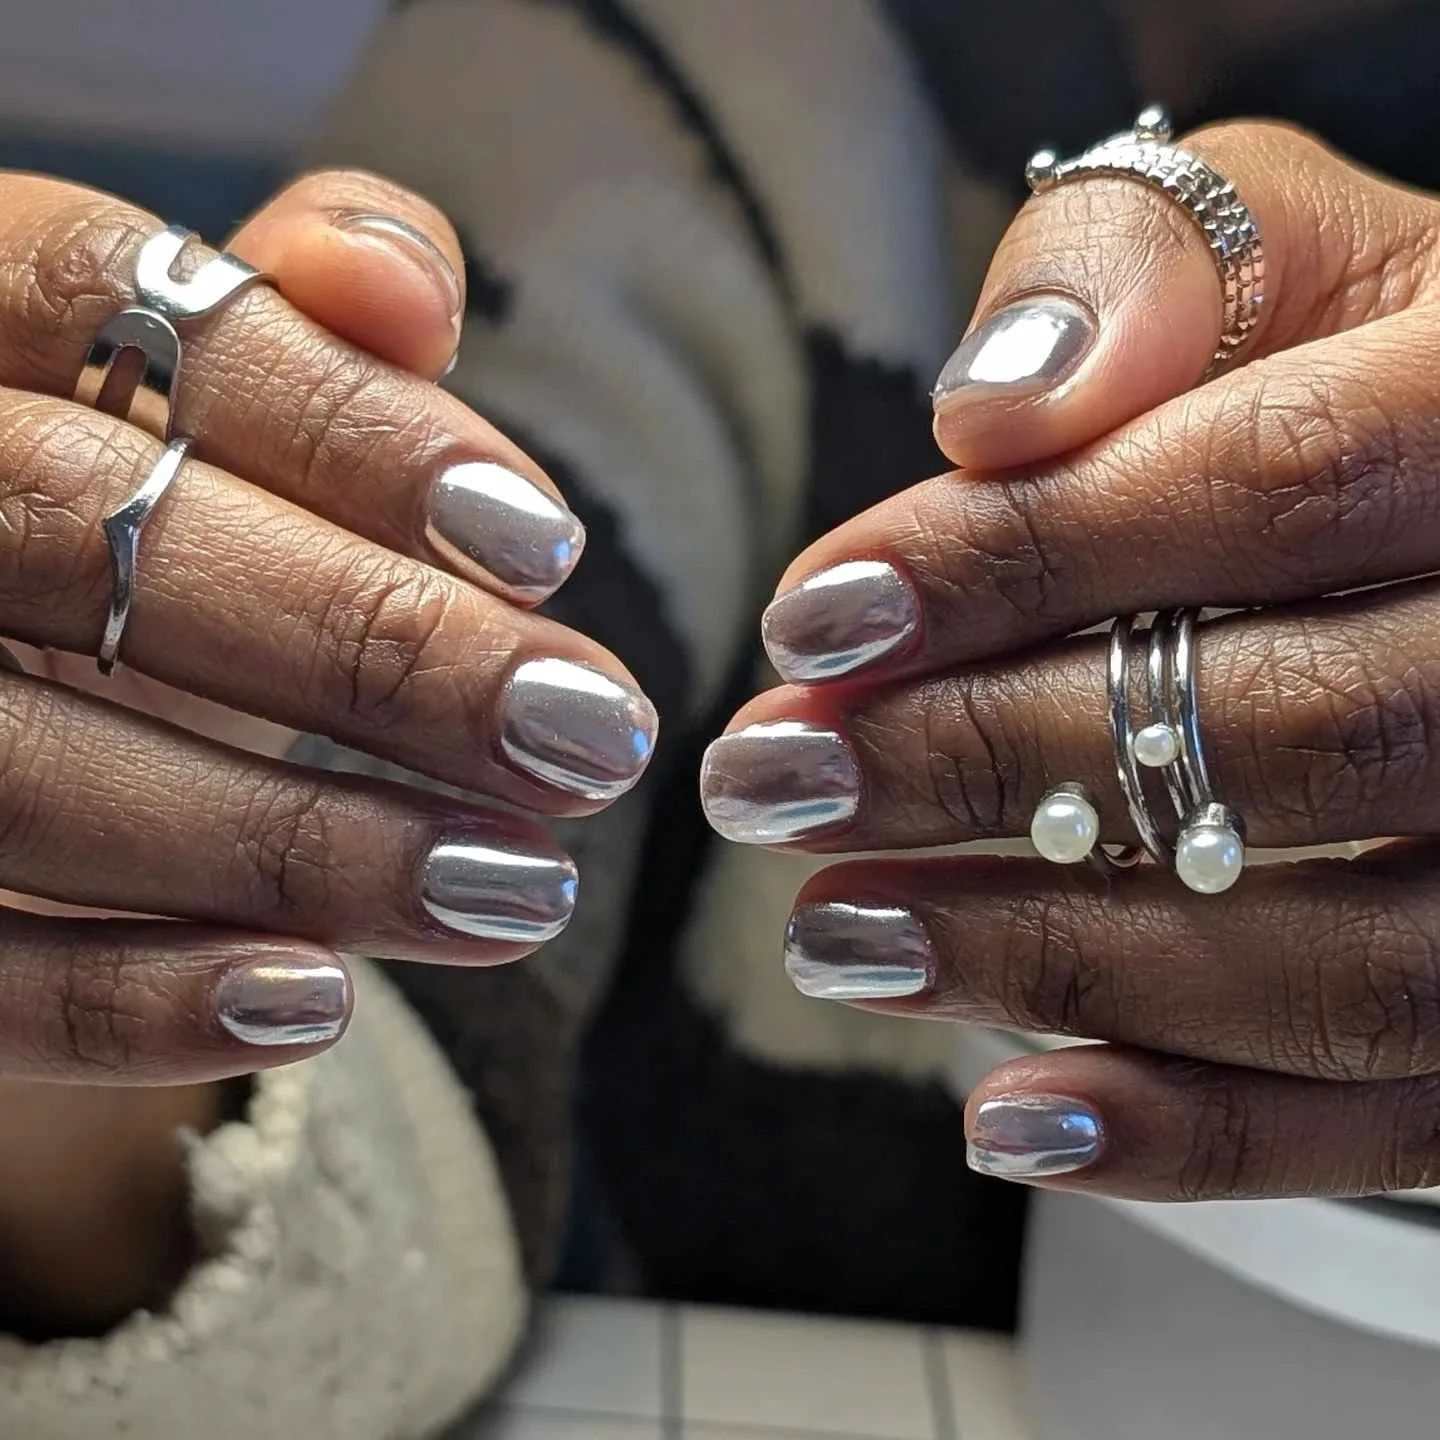
To recreate the look, I would start with a sheer milky base such as OPI Funny Bunny or a similar translucent white gel polish, followed by a chrome powder in a cool silver or pearl shade. A no wipe gel top coat is important because chrome powder adheres best to the right smooth surface. I would also keep a small silicone applicator or sponge tipped chrome tool nearby, plus a soft brush for removing excess powder around the cuticles. The goal is not a thick metallic layer but a thin reflective veil over the milky base.
I would shape the nails into a soft oval first, keeping the length short enough for everyday wear. After cuticle preparation and base application, I would add one or two thin layers of translucent milky polish and cure each layer according to the product instructions. Once the surface is ready, I would rub the chrome powder gently over the entire nail until the finish becomes smooth and reflective, paying particular attention to the sidewalls. After removing loose powder, I would seal everything carefully with top coat. I have found that a neat edge around the cuticle makes this kind of manicure look much more expensive.
What I love most here is the balance. The chrome is unmistakable, but the rounded silhouette prevents it from feeling too futuristic or costume like. For late summer, this is exactly the kind of manicure that works from a daytime coffee run to an evening dinner without needing a change of mood. If you like metallic nails but usually worry that they will be too much, this softer glazed version is an easy place to start.
Soft Pearl Glaze With a Fresh Milky Finish
Sometimes the prettiest manicure barely announces itself. These short oval nails have a translucent milky white base with a delicate pearlescent sheen that catches the light without turning into a strong metallic statement. The surface looks smooth, luminous, and almost creamy, while the subtle pink undertone keeps the white from feeling stark. I especially like how fresh this finish looks against the natural skin tone and how easily it could work with everything already hanging in a summer wardrobe.
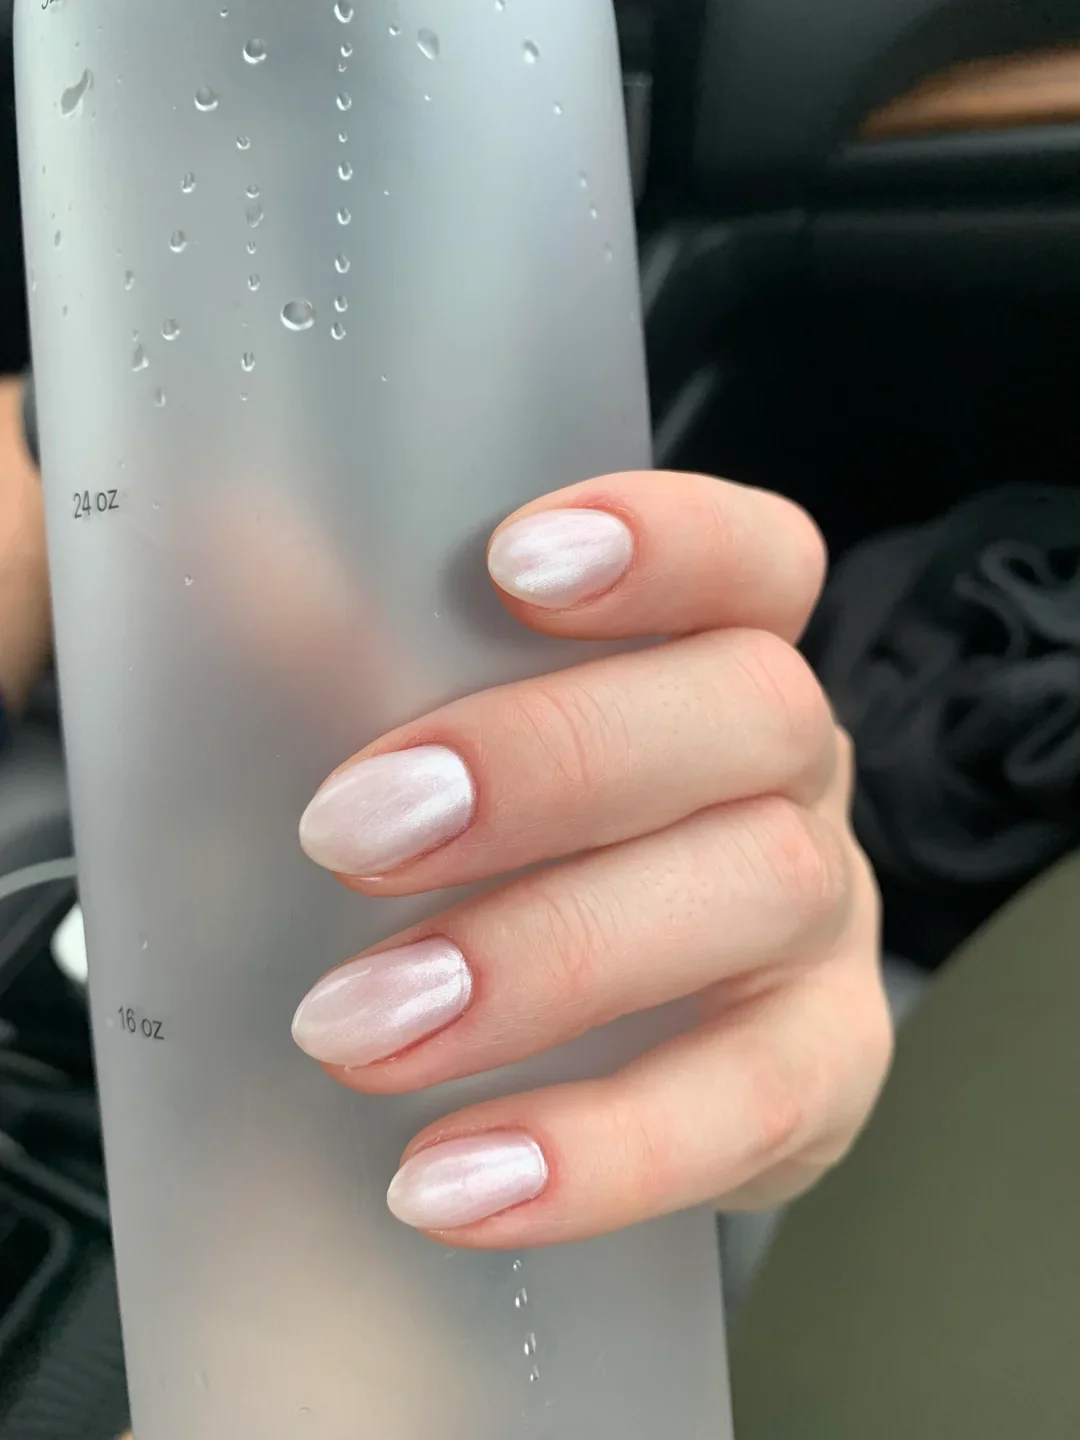
For this version, I would reach for a sheer white gel polish, a soft pearl chrome powder, and a glossy no wipe top coat. OPI Funny Bunny, CND Shellac Romantique, or another sheer neutral can work as the foundation depending on how transparent I want the result to be. For the chrome layer, I would choose an extremely fine pearl pigment rather than a dense silver chrome. That small distinction matters because the finished manicure should glow from within rather than look like polished metal.
I would begin by giving every nail the same soft oval shape and gently refining the free edge. After the base coat, I would apply a thin milky layer and cure it before adding another sheer coat if more opacity is needed. Then comes the fun part: a small amount of pearl powder is buffed over the surface, concentrating on an even application from the cuticle area toward the tip. I would finish with a generous but controlled layer of glossy top coat. When I do a minimalist manicure like this, I pay extra attention to the cuticle line because there are no decorations to distract from uneven application.
This is the glazed donut look I would choose when I want my hands to look instantly neat but still interesting. It feels especially right for summer because the finish resembles the soft reflection of sunlight on glass or satin. And honestly, there is something wonderfully practical about a manicure that can disappear into your outfit while still making your hands look finished.
Pink Iridescent Glaze With a Playful Summer Shift
Here the glazed donut effect takes a more playful direction, with a translucent pink base layered with an iridescent chrome that flashes hints of aqua, lavender, and pearly white. The nails are short to medium in length with a softly rounded shape, so the color remains the star of the manicure. I love this interpretation because it proves that glazed nails do not have to stay strictly white or silver. A little color underneath the chrome can completely change the personality of the finish.
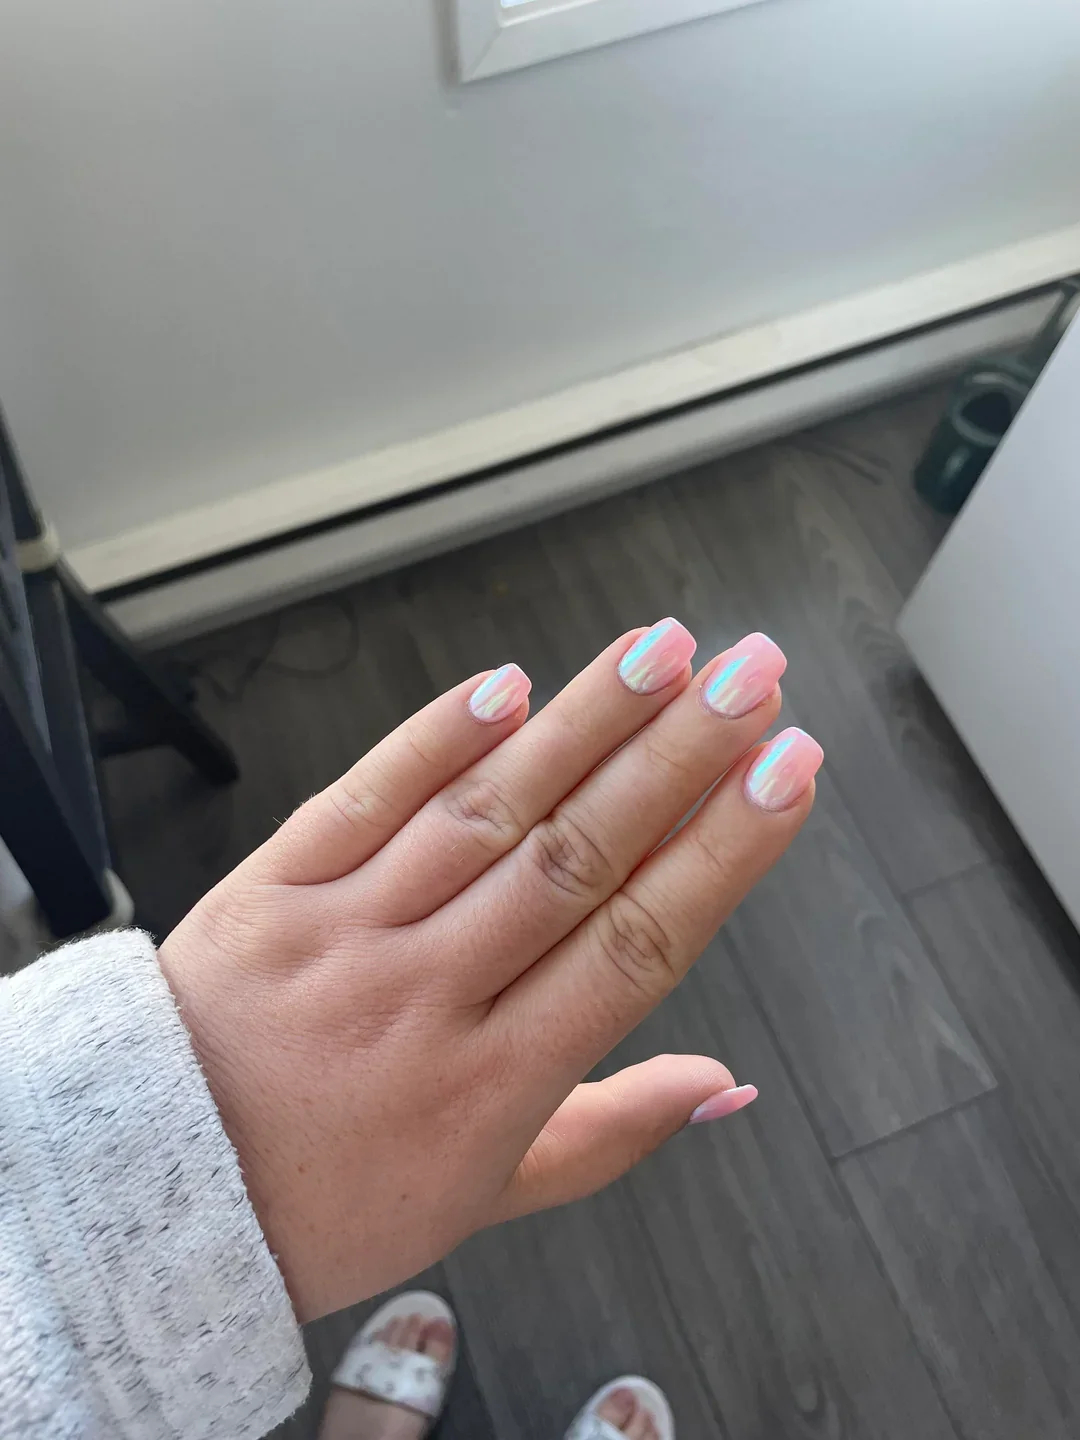
I would use a sheer blush or baby pink gel polish as the foundation, followed by an iridescent chrome powder with a subtle multicolor shift. A product with a pearl or aurora effect would work particularly well here. I would also use a smooth base coat and high shine no wipe top coat to preserve the glassy surface. If the pink base is too opaque, the chrome may lose some of its delicate dimensional quality, so I would keep the color fairly translucent.
My approach would be simple. I would shape the nails evenly, prepare the cuticles, and apply a thin pink base before curing. Depending on the strength of the color, I might add a second sheer coat rather than one heavy layer. After curing, I would lightly buff the iridescent powder across the nail until the blue and pink reflections begin to appear. I would check the nails from different angles before sealing them because the chrome shift can look completely different under warm and cool lighting. A final glossy top coat brings back that wet looking glazed finish.
This version feels like the carefree cousin of classic glazed donut nails. I can see myself wearing it with a white sundress, denim, or even a simple neutral manicure on the toes for a coordinated summer look. The color shift gives the nails movement, but the soft base keeps everything sophisticated. Want something recognizable but not predictable? This is the one I would save to my manicure folder.
Sheer Blush Glaze for an Effortless Everyday Manicure
There is a reason sheer pink continues to dominate minimalist manicure inspiration. These almond shaped nails combine a translucent blush base with an extremely subtle glazed reflection, creating that fresh, healthy looking finish that makes the natural nail appear beautifully polished. The color is close enough to the skin tone to feel understated, yet the glossy surface adds just enough dimension. I especially like the slightly elongated shape because it gives the fingers a graceful appearance without relying on heavy nail art.
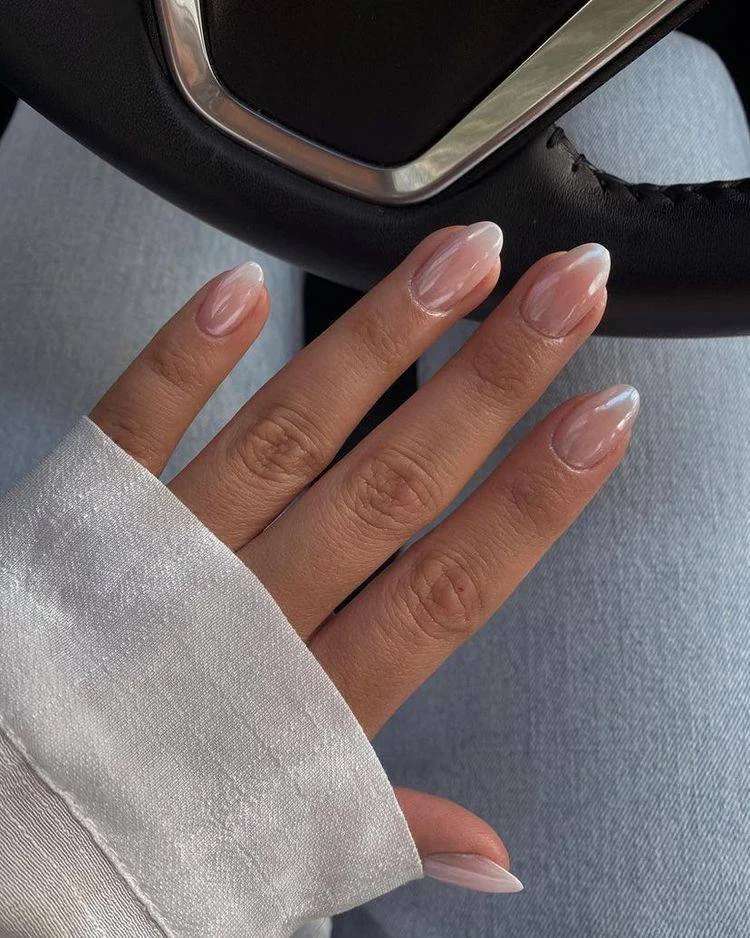
For the base, I would choose a sheer pink or nude gel that allows some natural nail depth to remain visible. CND Shellac Romantique, OPI Bubble Bath, or a similar soft blush shade would be a good starting point, although the exact color can be adjusted according to the skin tone. A very fine pearl chrome powder can add the glazed effect, while a high gloss top coat creates the smooth finish that makes the manicure look fresh. There is no need for chunky glitter or obvious decoration here.
I would carefully refine the almond shape first, making sure the sides taper evenly toward the tip. Then I would prep the nail, apply a thin base, and build the blush color gradually rather than trying to create full coverage in one coat. Once cured, I would add the lightest touch of pearl powder and buff it until the surface has a soft reflective quality. I would finish with top coat and carefully seal the free edge. With such a minimal manicure, small details like consistent shaping and clean cuticle work make a noticeable difference.
This is probably the easiest style in the group for me to imagine wearing every day. It works for an office, a weekend away, a wedding guest look, or those weeks when I simply want my hands to look put together without thinking too hard about them. Sometimes I want a manicure that whispers rather than shouts, and this sheer blush glaze gets that mood exactly right.
Reflective Taupe Chrome With a Cool Metallic Glow
A deeper chrome can make the glazed donut concept feel completely different. These almond nails have a cool taupe and silvery metallic surface that reflects light vertically along the center of each nail, creating a sleek elongated effect. The color sits somewhere between champagne, pewter, and soft mocha, which gives it more depth than a traditional white chrome. Against lighter skin, the metallic finish feels sophisticated and slightly unexpected, especially when paired with a simple ring stack.
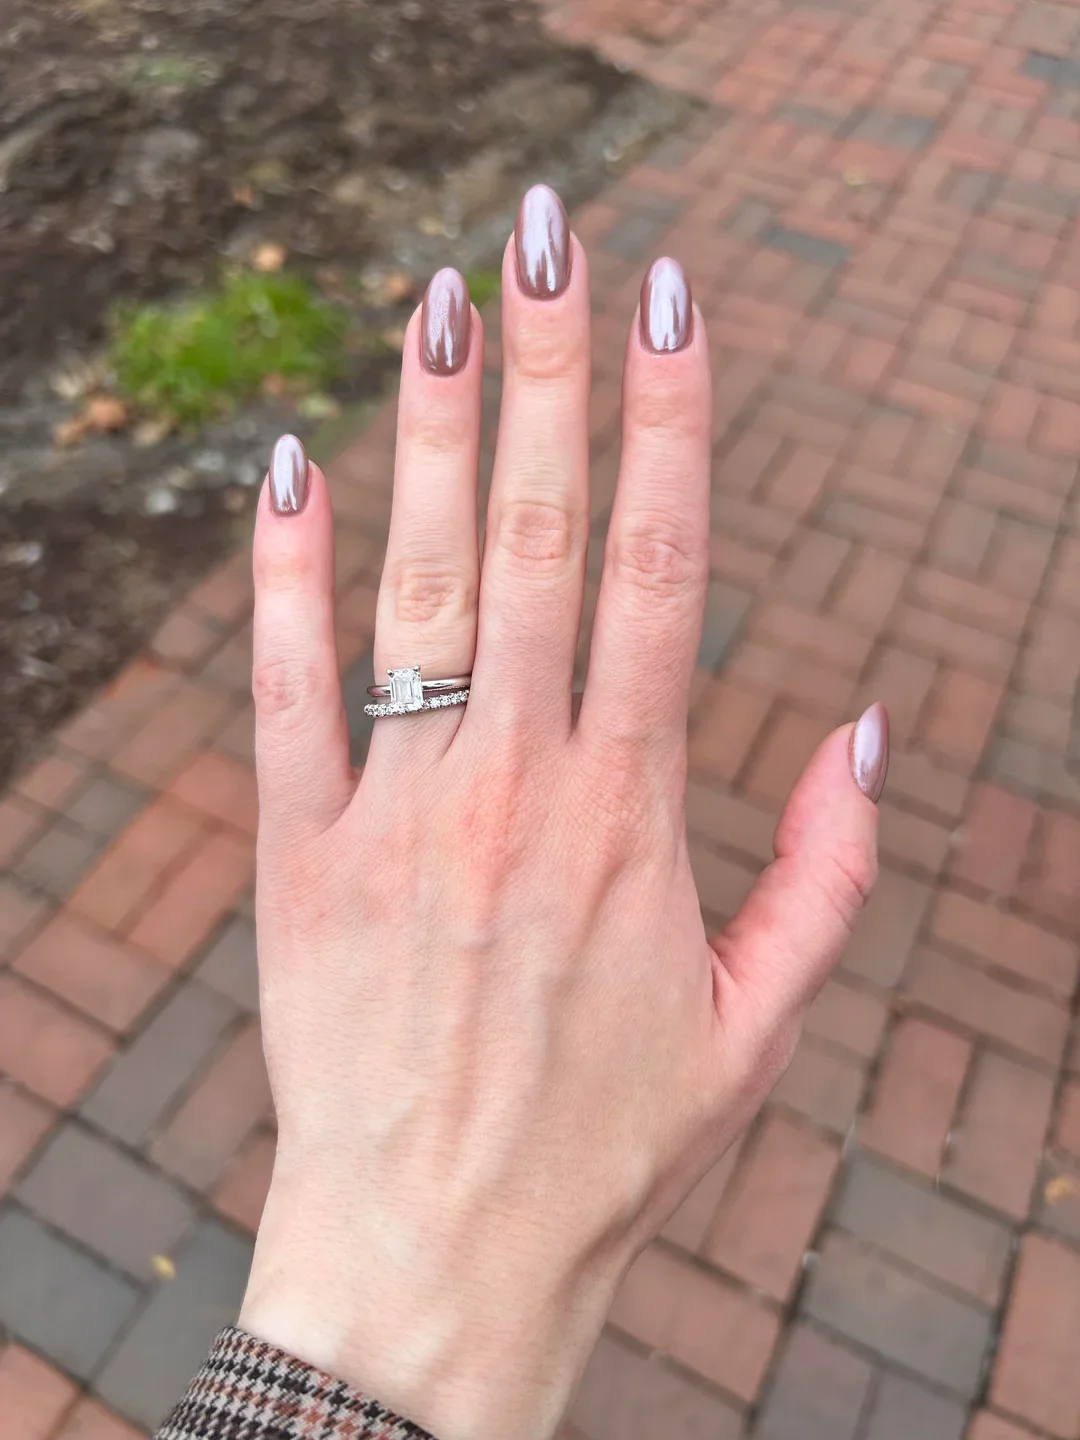
For this look, I would use a sheer beige or taupe gel base followed by a neutral chrome powder with silver and champagne undertones. I would avoid a strongly yellow gold pigment because the beauty of this manicure comes from its cooler balance. A no wipe top coat, chrome applicator, and soft cleanup brush would complete the basic kit. If I wanted a slightly moodier result for the end of summer, I could deepen the taupe base before applying the chrome.
I would shape the nails into a clean almond silhouette and make sure the length is consistent before beginning the color application. After prepping and applying the base, I would layer a thin taupe nude shade and cure it thoroughly. The chrome powder can then be rubbed over the surface with light, even pressure until the reflective effect becomes uniform. I would remove excess pigment from the skin, seal the tips, and finish with a glossy top coat. The smoother the underlying surface, the more convincing the chrome reflection will be.
This is the version I would pick when I want glazed nails with a little more attitude. It still has the clean, glossy quality that makes the donut glaze so appealing, but the taupe undertone gives it a sophisticated transition toward early fall. That makes it surprisingly versatile right now: light enough for summer, grounded enough to work with the richer neutrals that tend to return as the season changes.
Glazed donut nails with a chrome finish are proof that a simple manicure can still feel incredibly chic. I love how the pearly glow catches the light without looking overly complicated or flashy. From short, natural nails to elegant almond shapes, this finish works beautifully with different styles and lengths. If you’re looking for a manicure that feels fresh, polished, and easy to wear, this is definitely one to keep in mind. I’d happily choose this look whenever I want my nails to have that subtle, glossy glow.

