
A great manicure starts with one simple question: which nail shape actually suits your style, routine, and mood? From short rounded nails in glossy red to elegant almond silhouettes and bold coffin shapes, the right form can completely change the way a manicure looks and feels. But shape is only half the fun—how do you choose a design that feels fresh without becoming difficult to wear? I love mixing timeless colors with unexpected details, whether that means delicate geometric lines, playful accents, rich chocolate tones, or graphic black tips. These ideas show how small changes in length, shape, color, and finish can create a completely different effect for every season and occasion. So, which of these popular nail shapes and design ideas will make it onto your next manicure appointment?
Glossy Cherry Red On Short Rounded Nails
I love how effortlessly polished this short red manicure feels. The nails have a compact, softly rounded shape that follows the natural contour of the fingertips, while the intense cherry-red polish gives them a rich, glossy finish. There is something wonderfully confident about this combination because the color does all the talking without requiring elaborate nail art. The high-shine surface also makes the red appear deeper and more dimensional, especially against the natural warmth of the skin.
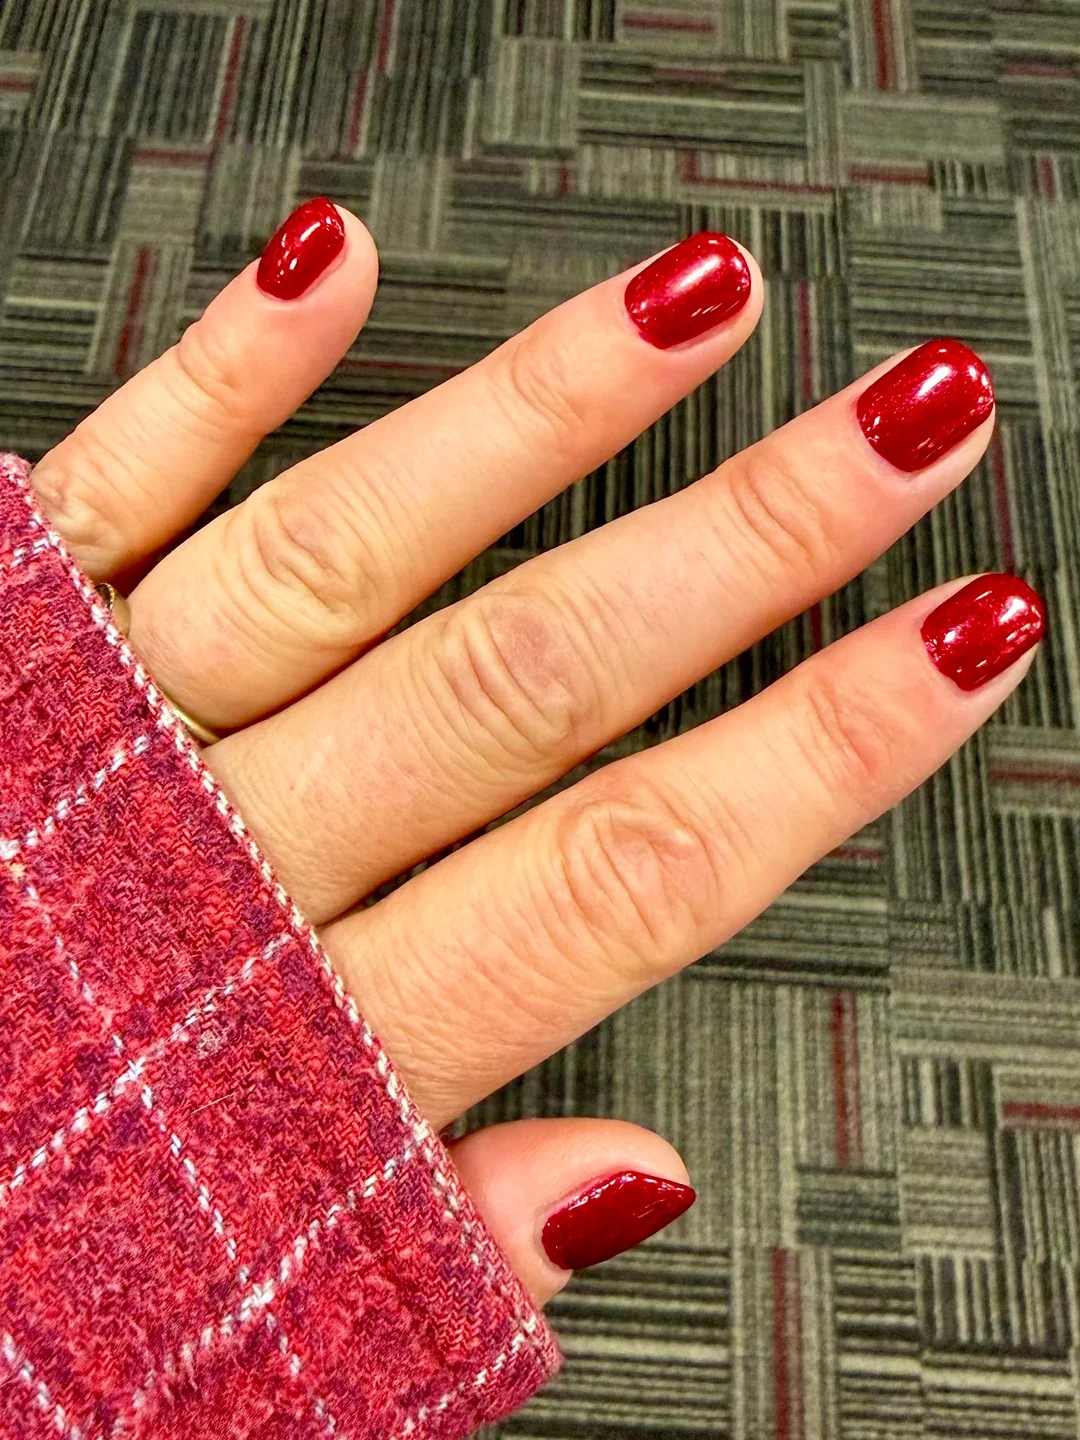
For this look, I would reach for a classic saturated red gel polish with a cool-to-neutral undertone, a quality base coat, and a high-gloss top coat. Shades similar to OPI Big Apple Red, Essie Forever Yummy, or CND Shellac Wildfire can create that unmistakable red effect, although the exact shade can be adjusted depending on your skin tone. I also like keeping a glass file nearby because short rounded nails look especially neat when every edge is evenly shaped.
At home, I would first trim the nails to a comfortable short length and gently round the corners rather than filing them into a sharp curve. After prepping the cuticles and lightly smoothing the surface, I would apply a thin base layer, two thin coats of red, and a glossy top coat. Thin layers matter here. Too much polish can make a short nail look bulky, while controlled application keeps the finish sleek and clean.
This is one of those manicures I would happily wear when I want my hands to look instantly put together without thinking too hard about them. Red works beautifully with denim, black, cream, and even a simple white tee, so I never feel restricted by it. And honestly, when the calendar gets busy, a manicure this uncomplicated is a lifesaver.
Milky White Almond Nails With A Soft Finish
A long almond shape instantly creates a more elongated appearance, and the milky white color makes the result feel soft rather than overly dramatic. I particularly like the slightly translucent quality of this manicure because it allows a hint of the natural nail to show through. The pointed-but-rounded almond tip gives the fingers a graceful line, while the creamy white finish keeps everything fresh and understated.
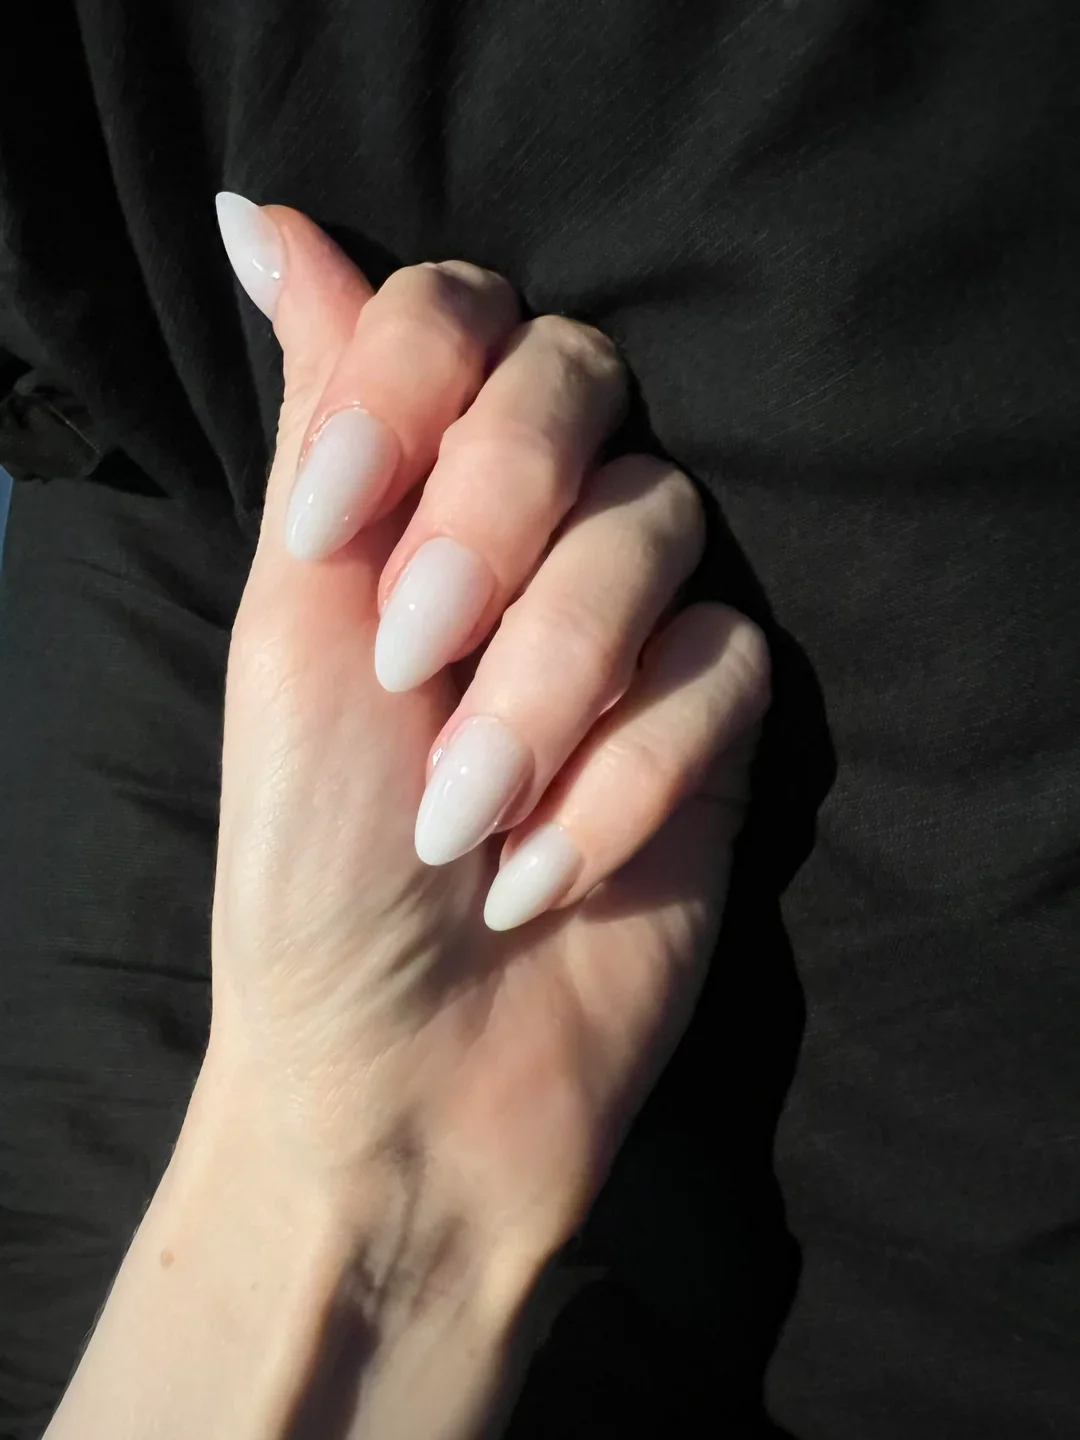
I would use a sheer milky white builder gel or gel polish, depending on the natural nail length and strength, followed by a glossy top coat. OPI Funny Bunny or a similar semi-sheer white can create a comparable effect, while a slightly warmer ivory works beautifully on warmer skin tones. For the almond shape itself, I prefer a fine-grit file because precision matters more than speed when refining both sides of the nail.
To create the silhouette, I would first establish the sidewalls and gradually taper them toward a centered tip. The key is avoiding an excessively sharp point; I want the end to remain softly rounded so the shape looks elegant and wearable. Once the structure is right, I would apply the milky color in thin layers, allowing each coat to settle evenly before finishing with top coat.
I keep coming back to this style whenever I want something that feels clean but still special. It works particularly well for weddings, vacations, dinners, and those weeks when I want my hands to look refined with almost every outfit. If bright white feels too stark, this sheer version is such an easy compromise.
Minimal Nude Nails With Geometric White Lines
Minimal nail art can be surprisingly expressive, and this manicure proves it. The almond-shaped nails begin with a translucent nude base that keeps the overall look delicate, while crisp white geometric lines create small abstract compositions across selected nails. I like that the decoration is intentionally uneven from nail to nail instead of repeating the exact same motif. That little bit of asymmetry gives the manicure a modern editorial quality.
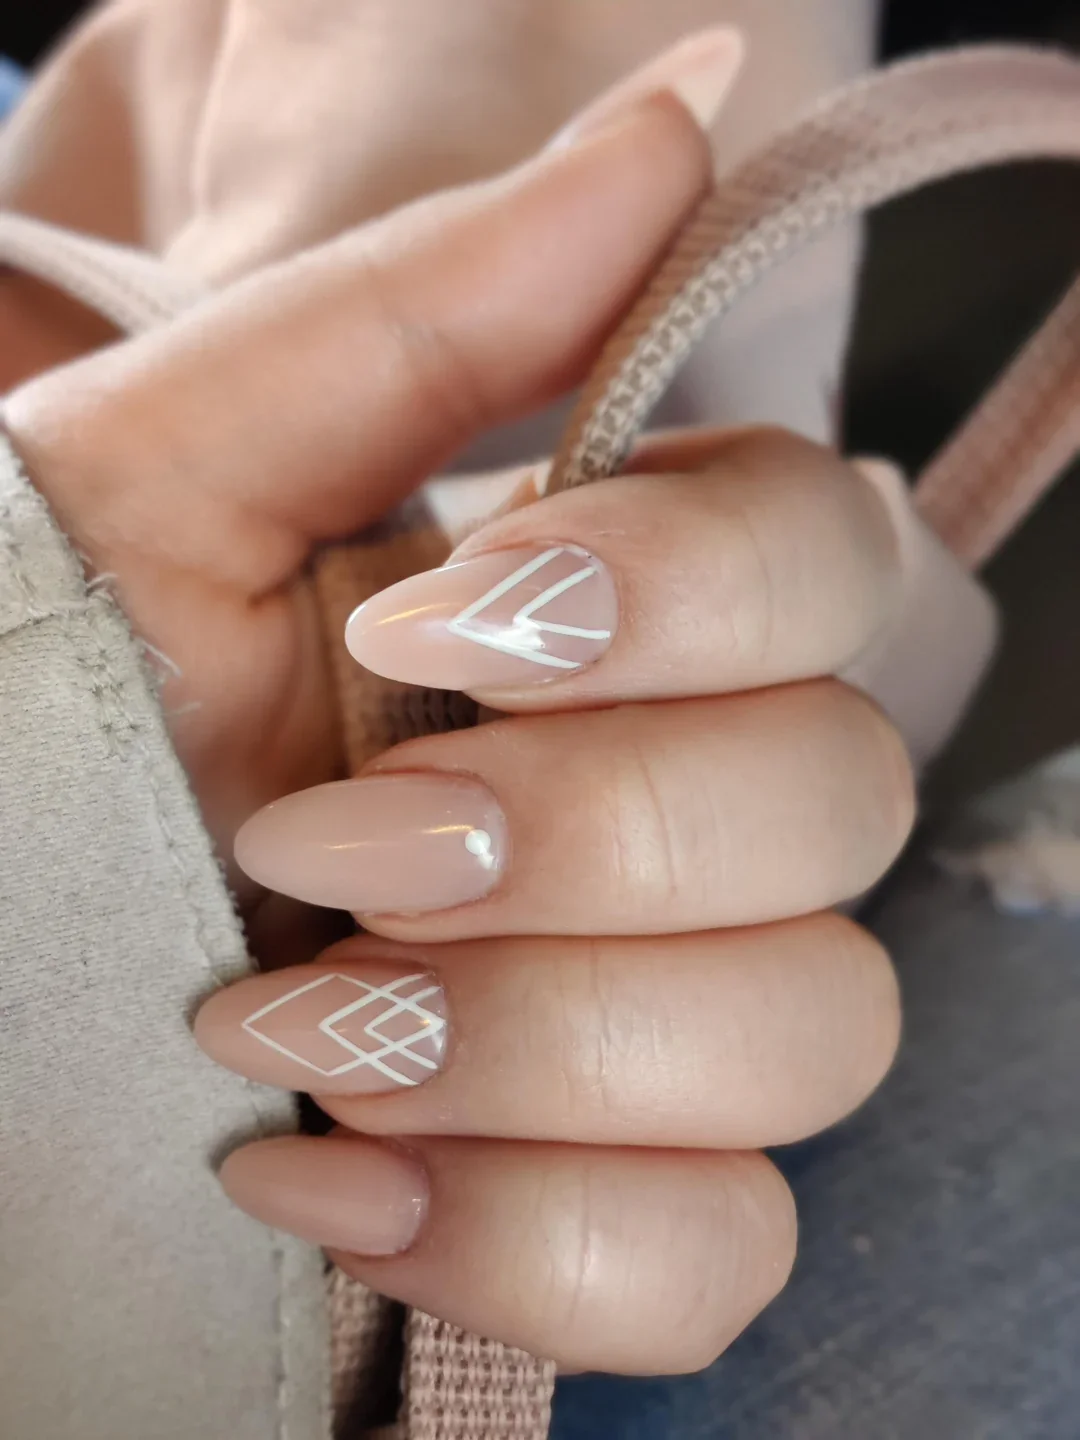
For the base, I would choose a neutral pink-beige gel polish that is close to the natural nail but slightly more polished. A fine white nail-art gel or highly pigmented white polish is essential for creating the narrow lines, along with a detail brush or liner brush. I would also keep a cleanup brush and a small amount of acetone or gel cleanser nearby because precise geometric work leaves very little room for messy edges.
I would begin with the nude base and cure it completely before attempting the artwork. Then I would use a very fine brush to draw angular lines, overlapping shapes, and small directional details on only a few nails. I would not try to make every line perfectly identical; instead, I would concentrate on keeping the line weight consistent. A final glossy top coat seals the design and makes the white details stand out beautifully.
This is exactly the kind of manicure I would choose when I want nail art without feeling like I am wearing a full-on statement set. The nude foundation makes it easy to wear, while the white geometry gives me something interesting to notice whenever I look down at my hands. It is subtle, but definitely not boring.
Chocolate Tortoiseshell Almond Nail Art
Deep chocolate tones bring a completely different mood to the almond shape. Here, translucent nude areas mingle with dark brown and reddish-brown tortoiseshell effects, while a few nails feature more concentrated chocolate color and tiny crystal accents. I especially like the variation in opacity because it prevents the manicure from looking flat. The elongated almond shape gives the rich pattern plenty of space to move across the nail.
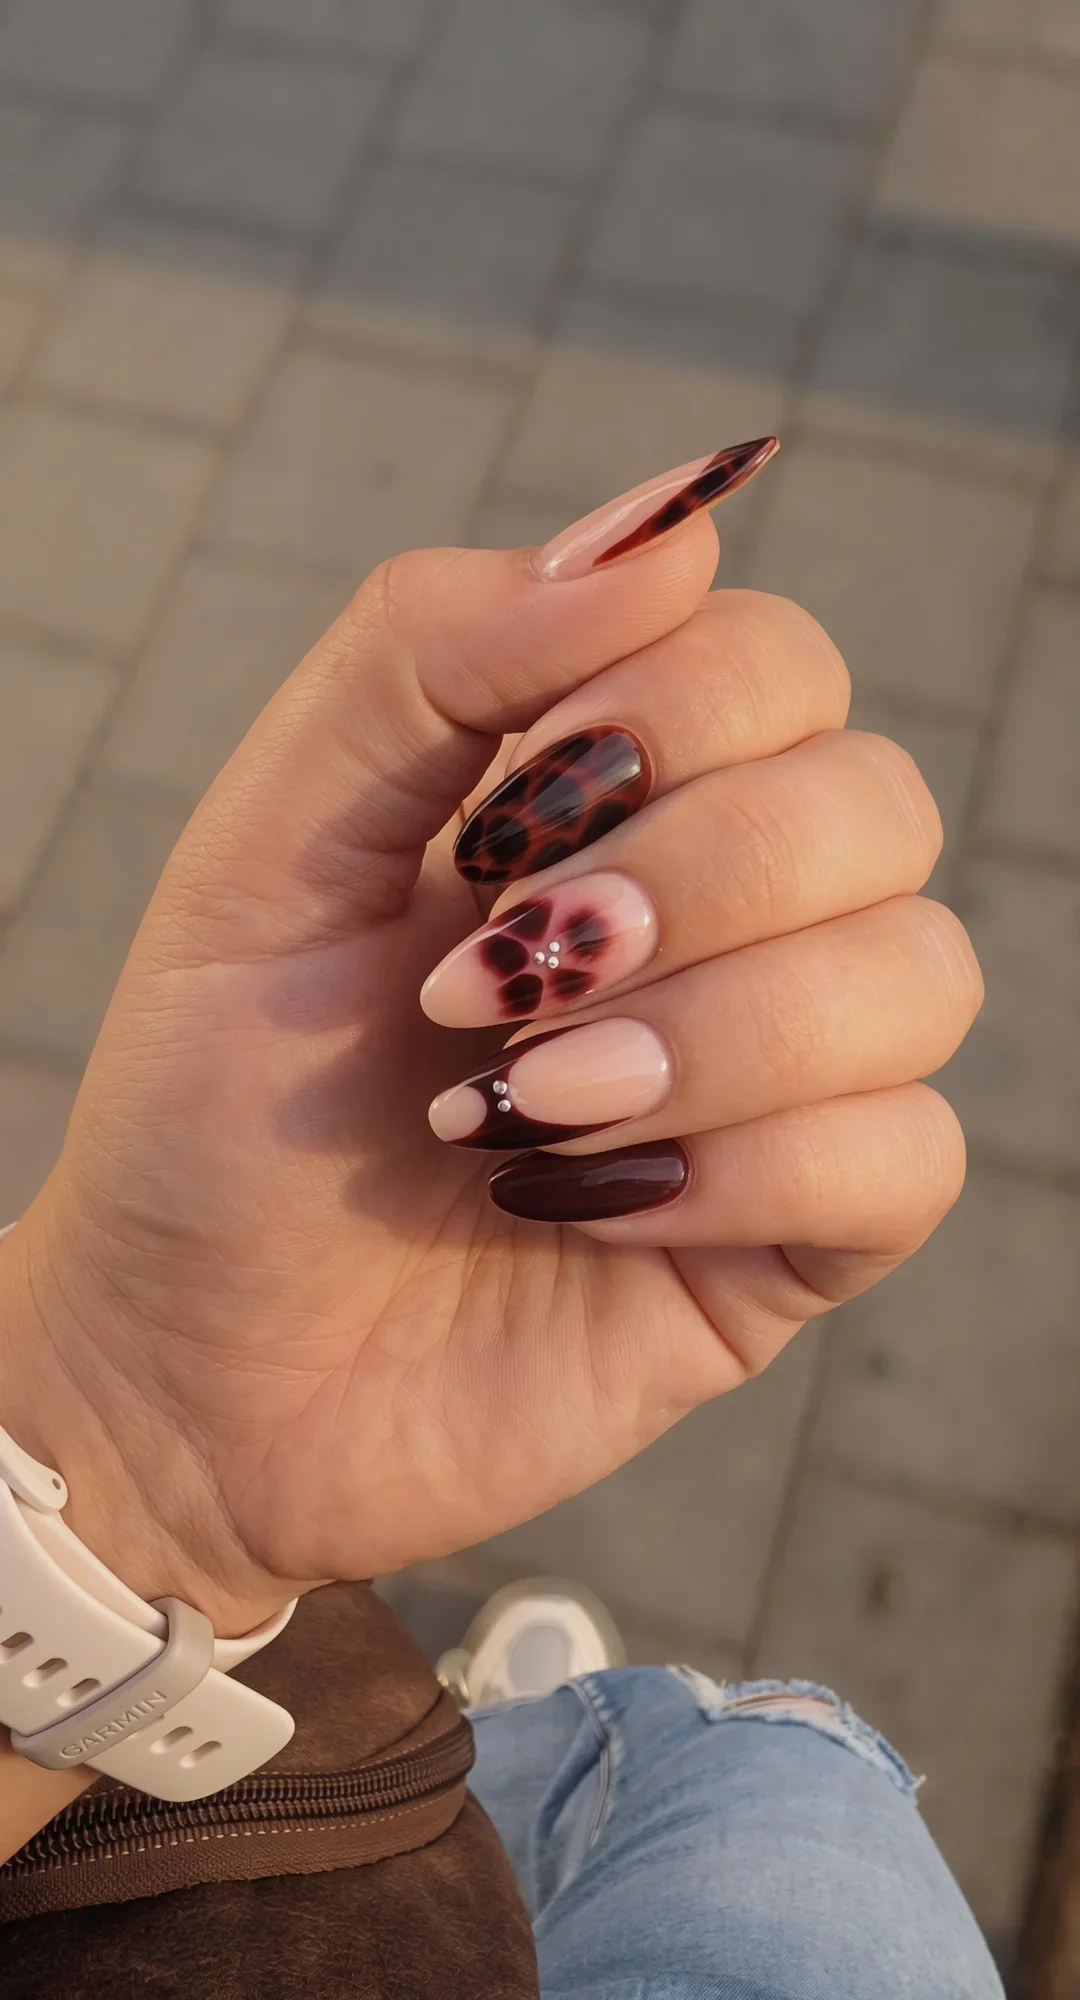
To recreate this effect, I would start with a sheer nude or beige base, then use several shades of brown, including espresso, chocolate, caramel-brown, and a touch of warm reddish brown. A glossy top coat is important because tortoiseshell looks best when the layers appear almost glassy. For the tiny accents, miniature rhinestones or small nail gems can be added with nail adhesive or builder gel.
The technique is more forgiving than it looks. I would apply irregular patches of brown over the sheer base, slightly blur their edges, and layer darker spots over the lighter areas before curing. The goal is controlled randomness rather than identical shapes. On the nails with the strongest pattern, I would keep the surrounding nails simpler so the design has room to breathe.
I think this is a gorgeous transition manicure when I want something richer than nude but do not necessarily want a single dark color on every nail. The chocolate palette feels sophisticated without being predictable, and the tiny embellishments add just enough sparkle. I could easily see this working with denim, knitwear, a tailored blazer, or an evening outfit.
Playful Periwinkle Nails With Tiny Eye Details
This manicure takes a soft periwinkle-purple shade and turns it into something much more playful. Several nails are covered completely in the cool purple color, while others use the shade as small graphic shapes over a nude base. Tiny black-and-white eye details sit inside those shapes, giving the manicure a quirky little personality. The almond shape keeps the design elongated and polished, so the playful artwork never becomes too chaotic.
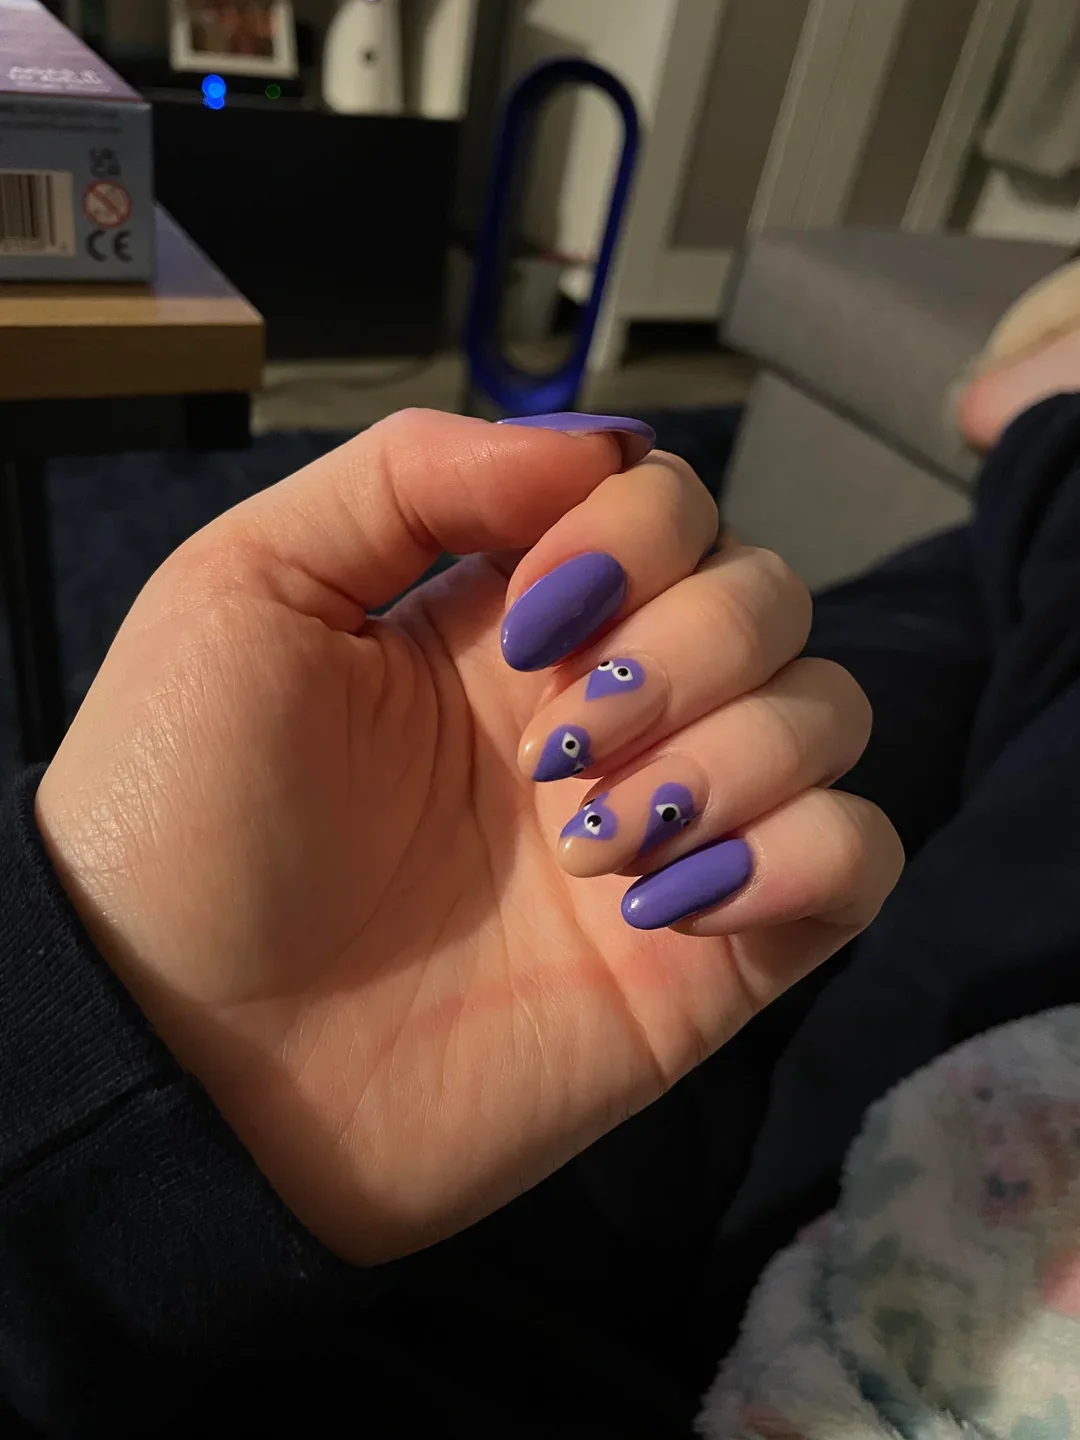
I would use a creamy periwinkle or lavender-blue gel polish for the solid nails and the graphic details, paired with a neutral nude base. A highly pigmented black polish, white polish, and a dotting tool would make the tiny eyes much easier to create. I prefer a glossy finish for this design because it intensifies the purple and gives the small details a crisp, almost sticker-like appearance.
After applying the nude base to the accent nails, I would create small purple curves or rounded shapes with a detail brush. Once cured, I would add white dots followed by smaller black centers to form the eyes. The fully purple nails can be painted separately, and everything should be sealed carefully with top coat. I would take my time with the eyes because even a tiny change in their placement can alter the expression.
I would wear this when I am in the mood for something cheerful but still coordinated. It has that fun Pinterest energy without requiring an entire collection of unrelated colors. If your everyday manicure usually leans neutral, adding a few tiny illustrated details like these can be an easy way to shake things up.
Black French Tips With Delicate Floral Details
The classic French manicure gets a graphic update here with black tips instead of white. The base remains a sheer pinky nude, creating a beautiful contrast with the dark curved edges. Small black floral motifs appear across several nails, each centered with a tiny white accent that adds dimension. I like the balance: the French tips provide structure, while the flowers soften the overall composition.
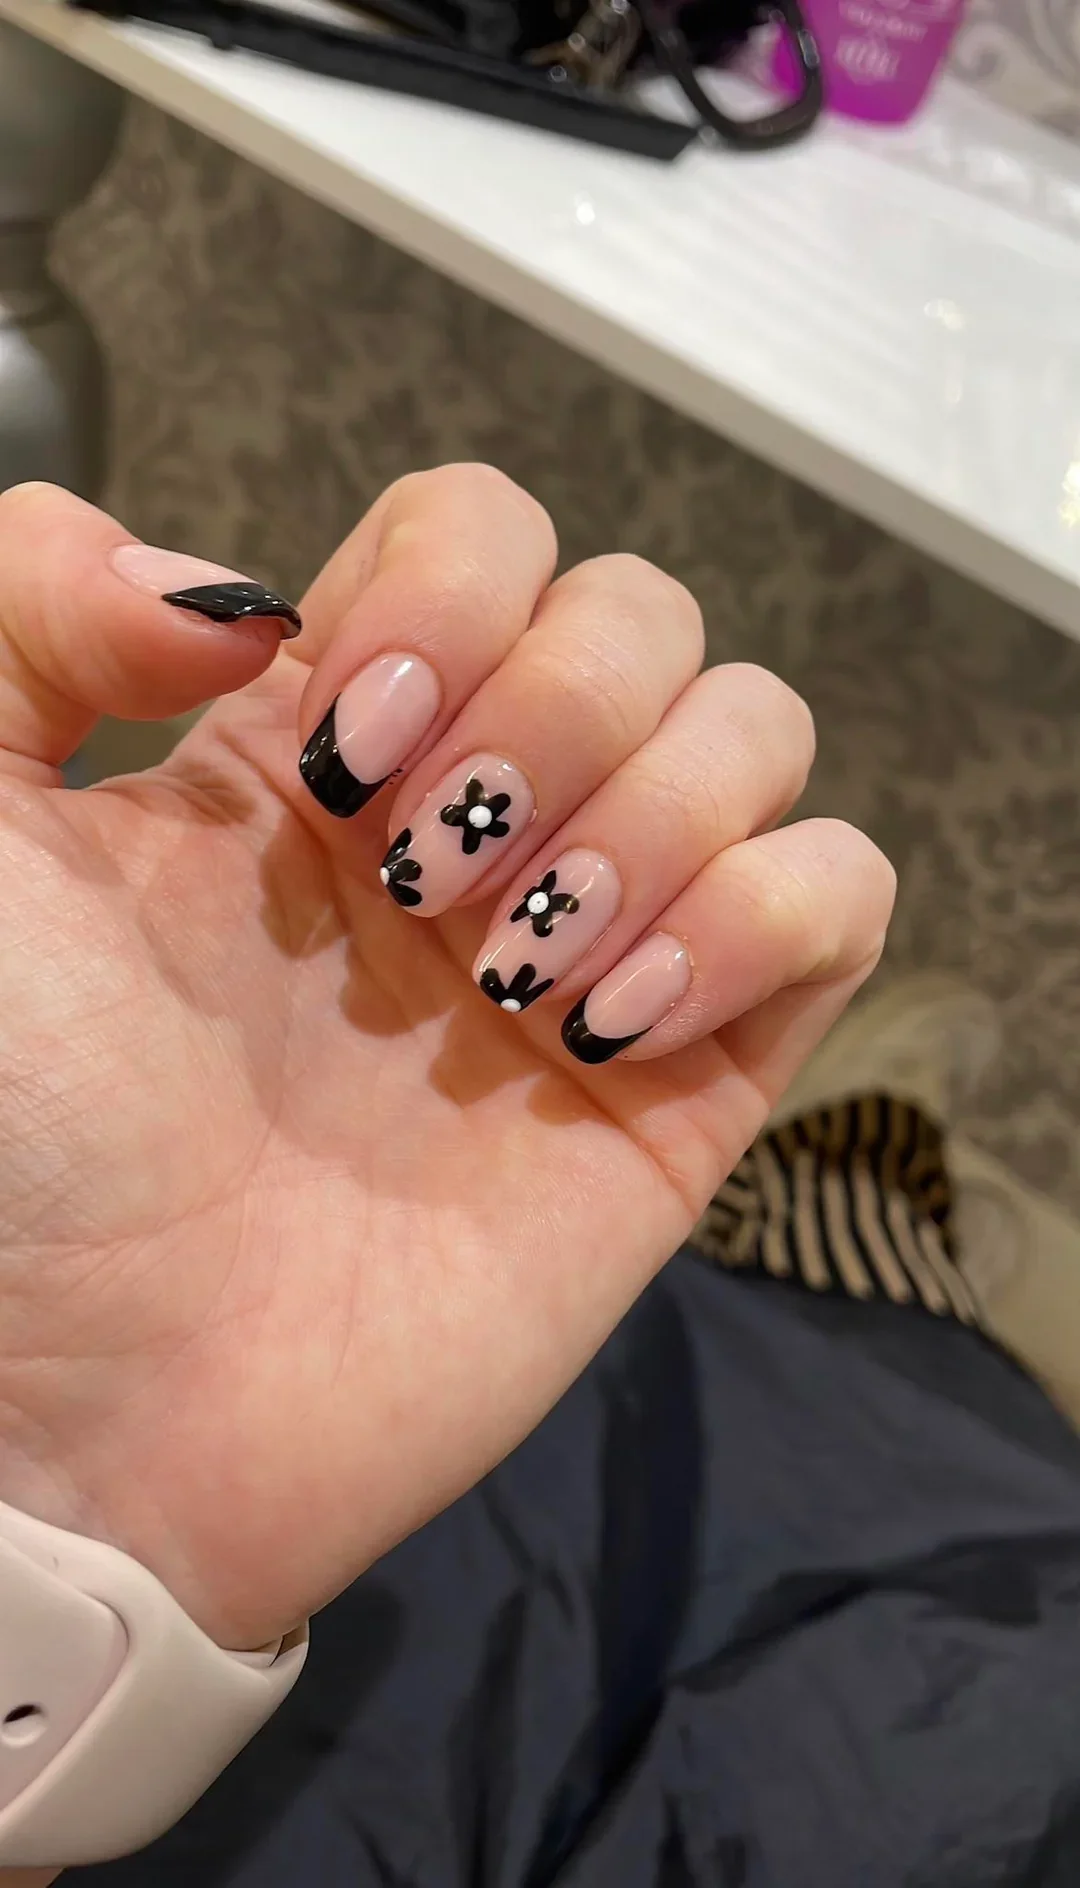
For this manicure, I would choose a sheer nude-pink base, an opaque black gel polish, and a small amount of white polish for the flower centers. A fine liner brush and dotting tool are useful for both the French tips and the tiny floral shapes. Because black can reveal imperfections quickly, I would also use a clean-up brush to sharpen the curves before curing.
I would start with the nude base and map out the black French tips using either a thin liner brush or a French-tip guide. After curing, I would add simple four- or five-petal flowers with tiny black strokes and finish them with white centers. The flowers do not need to be identical; slight differences make the manicure feel hand-painted rather than mass-produced.
This is one of my favorite ways to make French tips feel less predictable. The black gives the manicure a sharper edge, but the flowers keep it feminine and approachable. I would especially choose it for a dinner date, a weekend event, or anytime a traditional French manicure feels just a little too safe.
Graphic Nude And Black Swirl Coffin Nails
Long coffin-shaped nails give this manicure a completely different canvas. The foundation is a warm nude, while glossy black borders and flowing white-and-black lines create an abstract graphic effect. Some nails remain relatively restrained, while others feature denser swirling patterns. I love the contrast between the long architectural silhouette and the softer, organic movement of the lines.
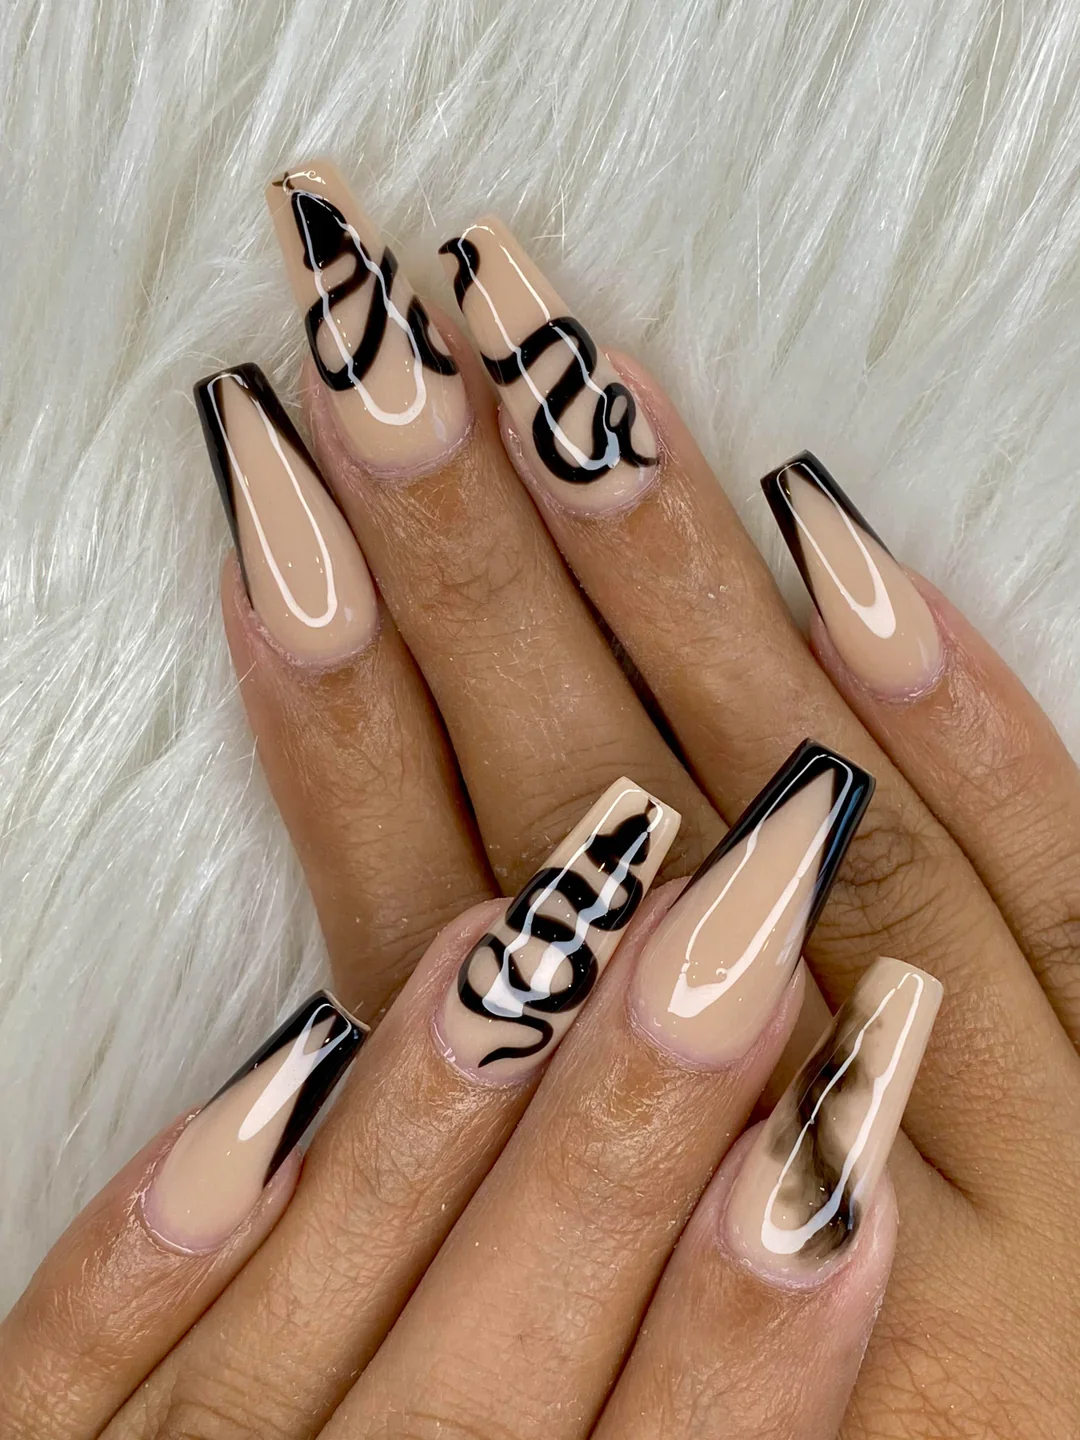
I would use a nude gel polish that complements the natural skin tone, a strongly pigmented black gel, and an opaque white liner gel. Because the nails are long and the design relies on clean curves, a long, flexible liner brush is worth having. A high-gloss top coat is also important because the black and white elements look most striking when the surface is completely smooth.
I would first perfect the coffin shape by keeping the sidewalls straight and the tip evenly squared. After applying the nude base, I would outline selected edges in black and then build the abstract curves with black and white liner. I would vary the thickness of the lines so the design has movement instead of looking like a grid. Once everything is cured, one smooth layer of top coat brings the separate elements together.
I see this as a manicure for the days when subtlety is not really the assignment. The neutral base keeps it wearable, but the graphic artwork makes it unmistakably fashion-forward. I would probably pair it with a simple outfit and let the nails take the spotlight.
Glossy Taupe Almond Nails For Everyday Elegance
A monochromatic taupe manicure can be incredibly chic, especially when the color is paired with a long almond shape. The shade here sits somewhere between muted pink, beige, and soft brown, giving the nails a sophisticated neutral appearance. The glossy surface adds enough dimension to prevent the color from looking flat, while the elongated shape makes the hands appear graceful and refined.
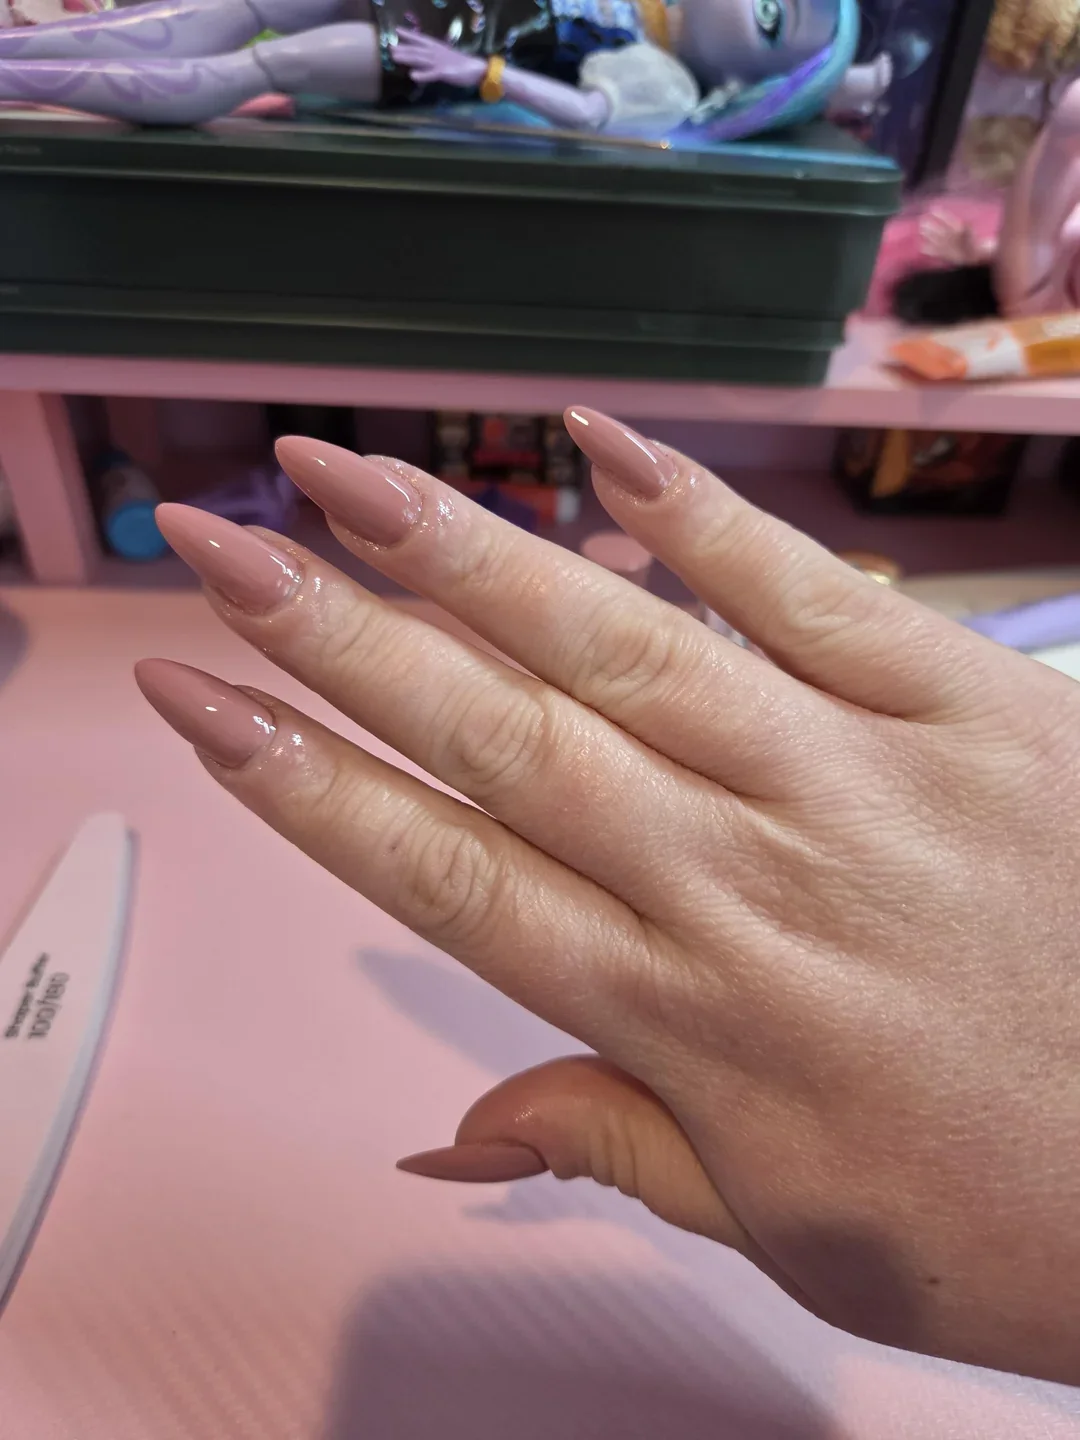
For this look, I would choose a creamy taupe or rosy beige gel polish with a glossy top coat. Shades in the family of OPI Tiramisu for Two, Essie Clothing Optional, or similar muted nude-brown colors can work depending on the undertone of your skin. I would also use a strengthening base if my nails need additional support, particularly when wearing a longer almond shape.
I would carefully shape the nails into a symmetrical almond silhouette, checking the center point of each tip before applying color. After cuticle prep and base coat, I would apply two thin layers of taupe, curing between coats if I am working with gel. A glossy top coat finishes the manicure and gives that smooth, almost lacquered appearance.
Teal Chrome Stiletto Nails With A Dark Edge
I love how this long stiletto manicure plays with contrast. The base appears almost black, while a luminous teal-blue effect sweeps across the upper portion of each nail, creating a glassy, almost metallic transition. The sharply tapered shape makes the color shift even more noticeable because every highlight follows the elongated silhouette. One accent nail gets an extra dose of attitude with a silver-toned chain detail near the cuticle, turning an already bold manicure into something that feels intentionally styled.
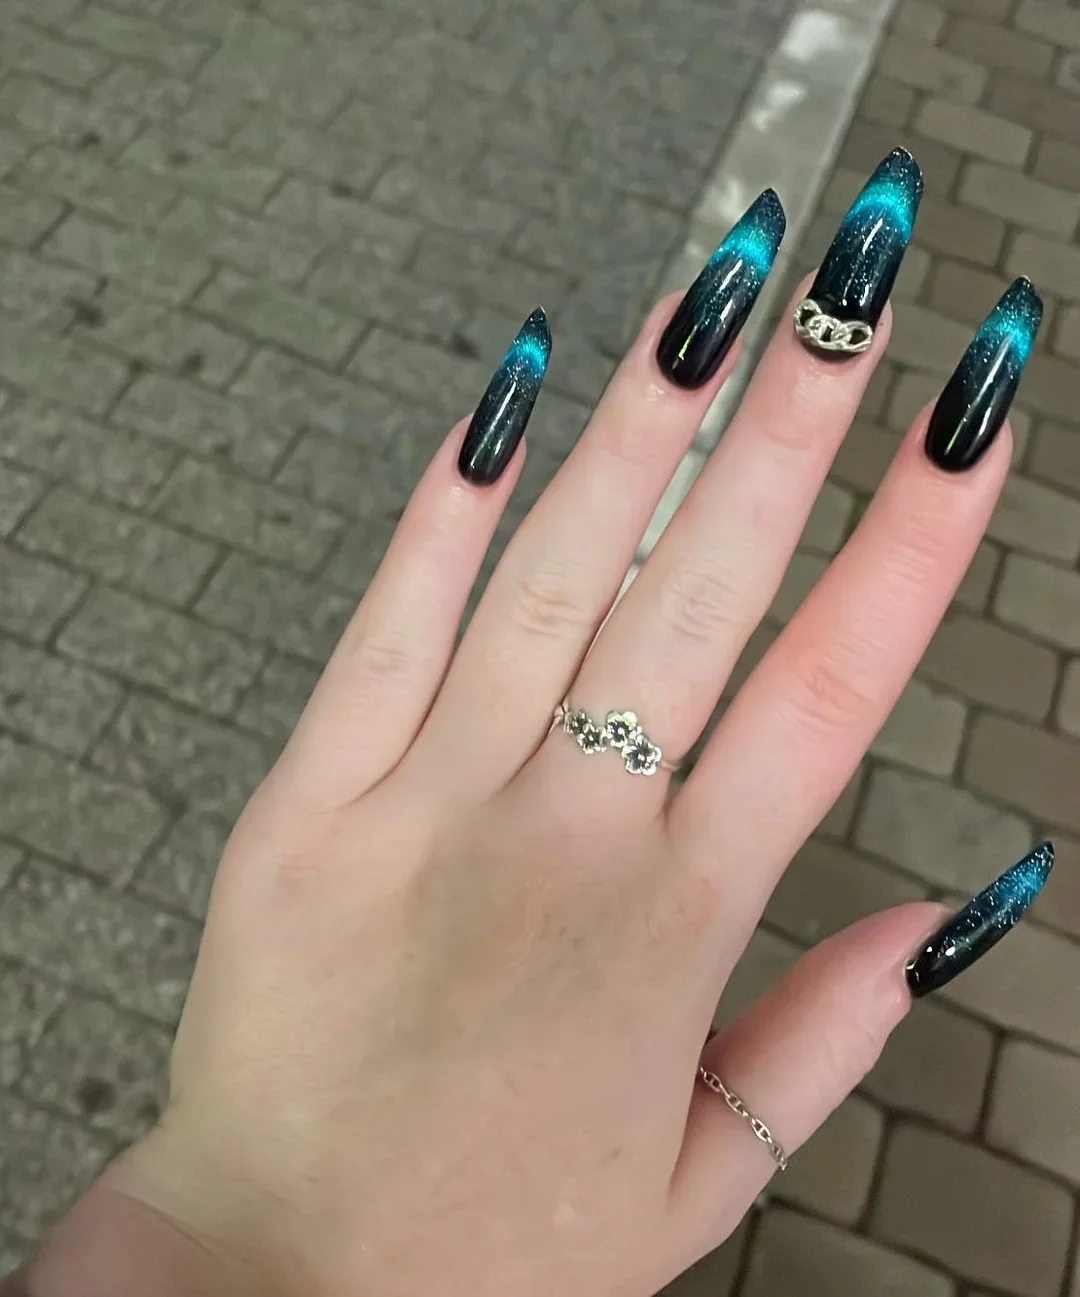
For a similar result, I would start with a black gel polish and add a highly reflective teal or blue-green chrome powder. A no-wipe top coat is useful for the chrome application, while a sculpting gel or builder gel can help create and reinforce the long stiletto shape. For the metallic accent, I would choose a small silver chain or jewelry-style nail charm and secure it with thick gel adhesive. The exact shade of teal can be adjusted depending on whether I want more ocean blue or a deeper emerald-blue effect.
I would first shape the extensions into a clean, symmetrical stiletto, making sure both sides taper evenly toward the point. After applying the black base and curing it, I would add the teal pigment selectively toward the upper section rather than covering the entire nail. That creates the dimensional gradient instead of a flat metallic finish. I would finish with top coat and carefully attach the chain detail while the adhesive is still workable. With a design this long, I always pay extra attention to structure because beautiful nails are much easier to enjoy when they are comfortable.
This is the manicure I would save for a night out, a concert, or one of those weekends when a basic manicure simply will not do. The combination of black and electric teal feels especially striking under evening lighting, and the reflective surface catches movement beautifully. I also like that the jewelry detail does not need to be repeated on every nail. One statement element is enough to give the whole set personality.
Short Black French Tips With Tiny Sparkle Details
Short nails can have just as much personality as long extensions, and this manicure is proof. I see a soft pink-beige base paired with rounded black French tips, creating a sharp contrast without overwhelming the natural length. Tiny white dots and star-like accents are scattered across the dark tips, giving the manicure a playful celestial feeling. The short square shape keeps everything practical, while the glossy finish makes the black look especially crisp.
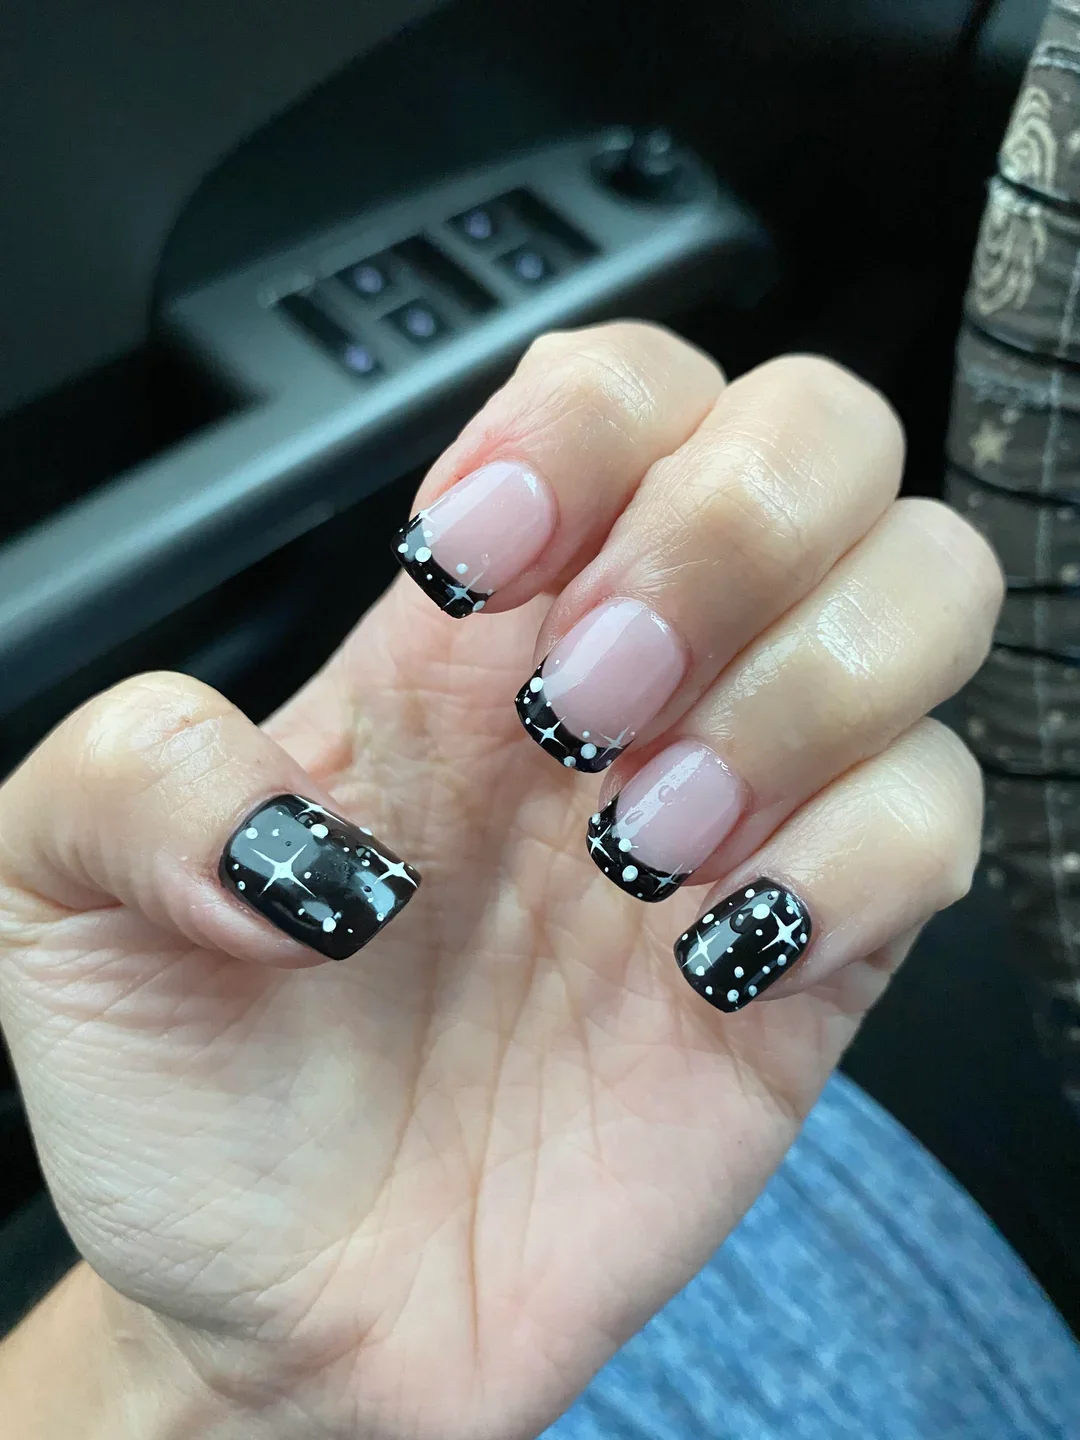
For this version, I would use a sheer pink or nude gel polish for the base and a rich black gel for the French tips. A fine liner brush makes it easier to create the curved edge, while a dotting tool can produce the tiny white circles. For the star details, I would use a very thin nail-art brush and opaque white polish. A glossy top coat pulls everything together and gives those little accents the polished finish they need.
I would begin with a short square shape and gently soften the corners so they do not look too severe. After applying the sheer base, I would create the black tips one nail at a time, keeping their depth consistent. Once cured, I would add small dots and four-point star details in different positions rather than making every nail identical. That little bit of asymmetry keeps the manicure feeling handmade and lively.
I particularly like this shape for someone who wants nail art but still uses her hands constantly. It is neat enough for everyday life, yet the black tips make it far more interesting than a plain nude manicure. I could easily wear this to the office and then keep it for dinner afterward. Sometimes that is exactly what I want from nail art: a little secret detail that becomes more noticeable when someone looks closer.
Royal Blue Nails With Colorful Leaf Accents
This saturated blue manicure immediately changes the mood. The short square nails are covered in a deep royal-blue base, while several nails feature delicate elongated leaf shapes in pink, yellow, green, lavender, and light blue. The colorful details stand out beautifully against the darker background, creating a graphic botanical-inspired effect without making the nails look overly busy. I also like the decision to leave one nail almost entirely blue because that solid color gives the decorated nails room to breathe.
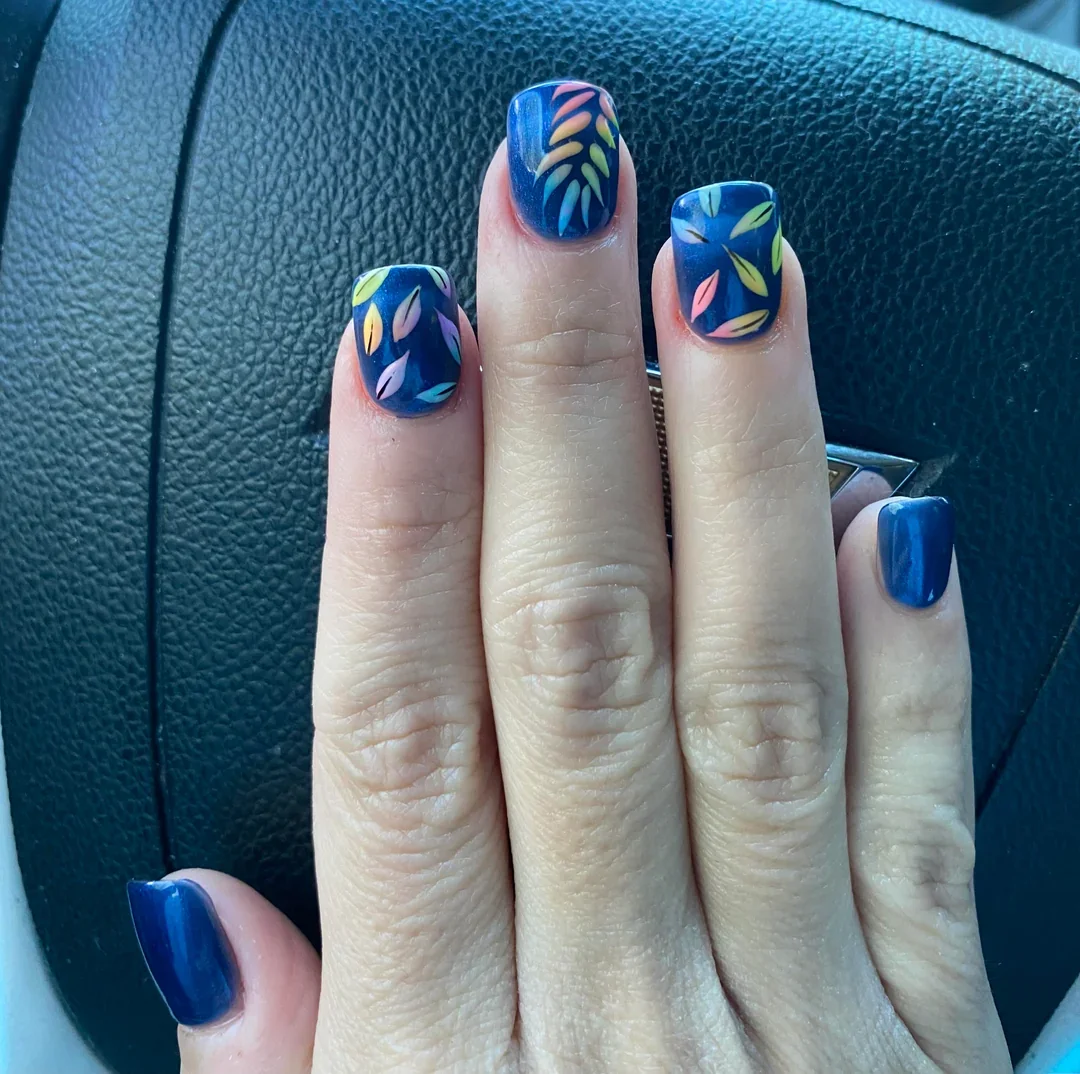
I would reach for a highly pigmented royal-blue gel polish as the foundation, then collect several contrasting shades for the leaf details. A fine detail brush is essential because the shapes are narrow and curved rather than broad blocks of color. I would also use a glossy top coat to enhance the depth of the blue and keep the tiny painted elements smooth. There is no need for glitter here; the color contrast does all the work.
To create the design, I would apply two thin coats of blue, curing each layer completely. Then I would use a detail brush to paint small curved leaf shapes, changing the direction and color from nail to nail. I would avoid making every leaf identical because slight variations give the manicure more movement. Once the art is cured, I would seal everything with a generous but controlled layer of glossy top coat.
This is such a fun choice for summer because the blue feels cool and energetic while the multicolor details bring in that carefree vacation mood. I could see myself wearing it with denim, a white shirt, or even a simple swimsuit and letting the manicure provide the color. If you enjoy nail art but do not want complicated illustrations, this kind of repeated little motif is a great middle ground.
Long Milky White Square Nails With A Clean Finish
There is something incredibly satisfying about a perfectly uniform white manicure. These long square nails use a soft milky-white shade rather than a stark, chalky white, which gives the set a smoother and more wearable appearance. The straight sidewalls and squared-off tips create a strong architectural silhouette, while the glossy surface keeps the color looking fresh. Nothing else is competing for attention, and honestly, that restraint is the whole appeal.
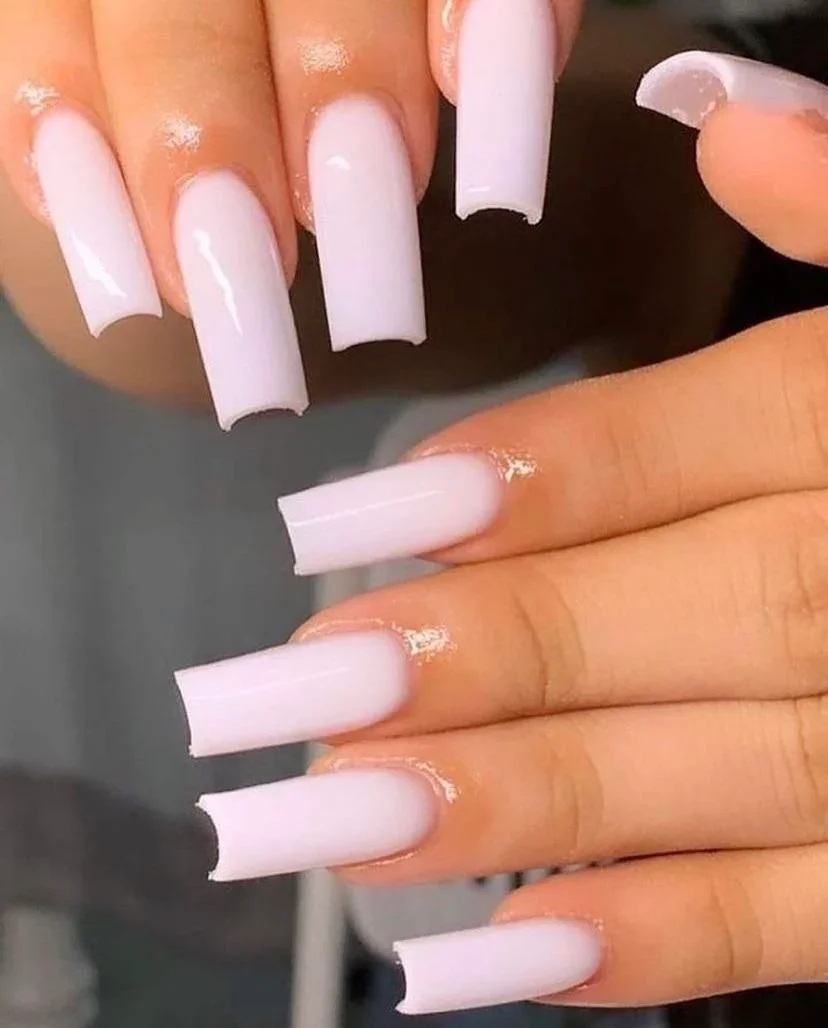
For this look, I would choose a milky-white gel polish with good coverage but enough translucency to avoid looking heavy. If the natural nails are not long enough, full-cover tips or sculpted extensions can create the length. I would also use a quality base coat, a strengthening builder layer when needed, and a high-gloss top coat. The key is not adding more products but choosing formulas that level smoothly and cure evenly.
I would shape the extensions carefully before applying color because the square outline needs to be symmetrical from every angle. After preparing the nail plate, I would apply the milky polish in thin coats, allowing each layer to level before curing. I would inspect the sidewalls before finishing because any unevenness becomes very noticeable on long square nails. A final glossy layer gives the manicure that smooth, almost freshly polished appearance.
I find this shape especially striking when the rest of the styling is simple. Long square nails already make a statement, so a single creamy shade can actually feel more sophisticated than elaborate art. It is also the kind of manicure I would choose when I want my accessories, outfit, or makeup to take center stage while the nails quietly make everything look more finished.
Soft Pink Oval Nails With A Delicate White French Tip
The classic French manicure gets its effortless appeal from proportion, and this version gets that balance right. The nails have a soft oval-to-almond shape with a translucent pink base and slim white tips that follow the natural curve. The result is clean, feminine, and incredibly versatile. I especially like the glossy finish because it gives the pale base a healthy-looking depth rather than making it appear flat.
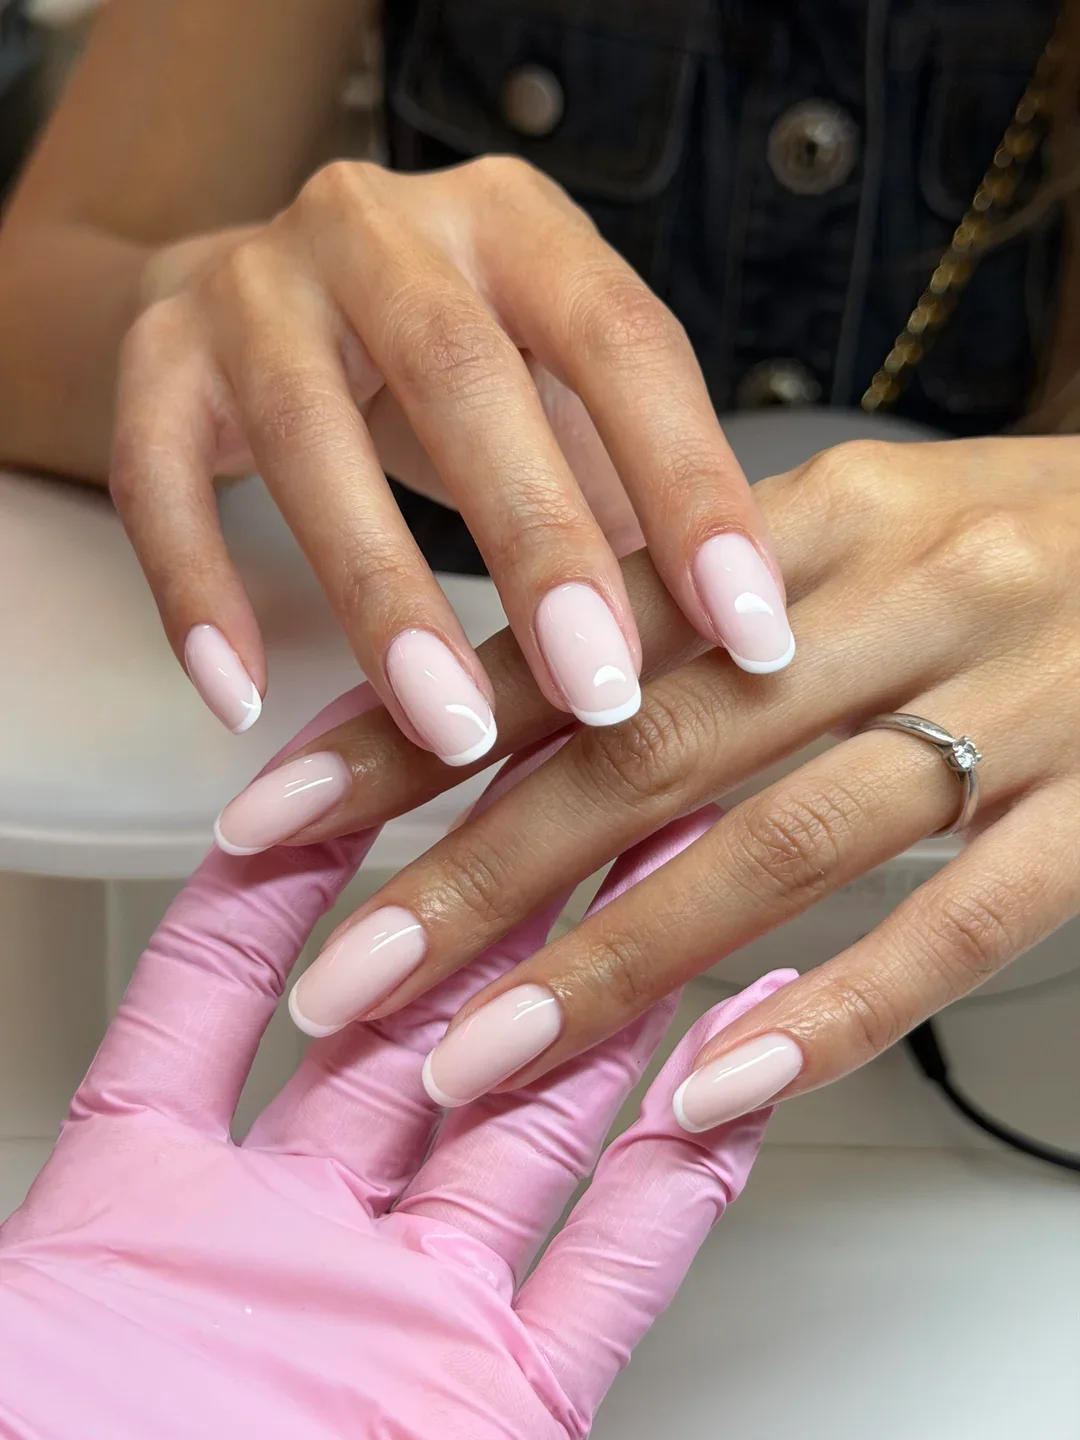
I would use a sheer blush-pink or neutral gel polish, followed by an opaque white gel for the tips. A thin French brush or a fine liner brush can help create the curved edge, while a glossy top coat adds the final shine. For anyone who wants a softer result, I would choose a white that is slightly creamy rather than an extremely bright optical white.
I would start by filing the nails into a balanced oval shape, keeping the tip slightly narrower than the widest point of the nail. Then I would apply the sheer pink base and create the white tips with a controlled curved line. I like working from the sides toward the center because it helps keep the smile line even. After curing, one glossy top coat is enough to make the whole manicure look beautifully seamless.
This is the manicure I come back to whenever I cannot decide what I want. It works with jeans, a cocktail dress, workwear, and pretty much everything between those extremes. The shape also has a lengthening effect on the fingers without requiring an exaggerated extension. Sometimes the most timeless option really is the one that makes getting dressed easier.
Bright Blue Nails With Delicate Gold Foil
A vivid turquoise-blue manicure becomes instantly more interesting with tiny fragments of gold foil. The nails are short and rounded, which keeps the strong color approachable and practical. Instead of covering the entire surface with metallic decoration, the gold appears in small irregular pieces concentrated toward the lower and side areas of the nails. That contrast gives the manicure a relaxed, almost hand-painted character.
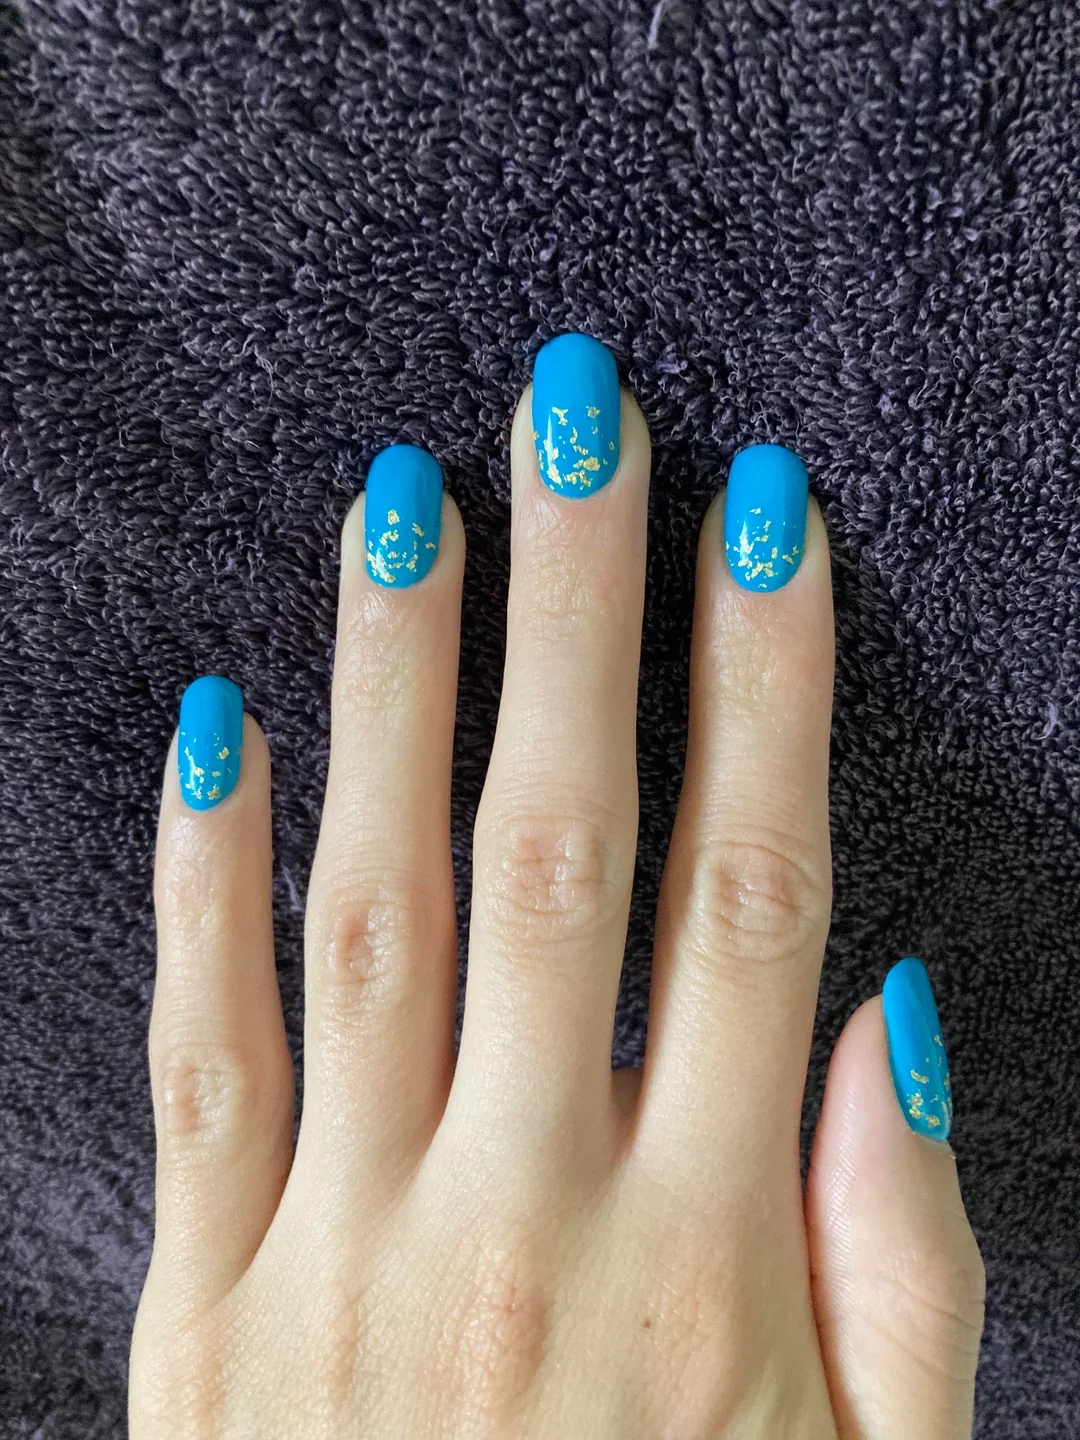
I would use a bright turquoise or cyan-blue gel polish, gold foil flakes, foil adhesive if required by the chosen product, and a glossy top coat. A small silicone tool or fine tweezers can help position the foil without disturbing the base. I would keep the foil pieces intentionally uneven because perfectly matching fragments would take away from the spontaneous effect.
After shaping the nails into a short rounded-square silhouette, I would apply the blue base in two thin layers. Once cured, I would place tiny gold foil fragments selectively, concentrating them in a loose pattern rather than creating a symmetrical design. A layer of top coat seals the foil and smooths out any raised edges. The finished result should look dimensional without feeling bulky.
I love this combination for warm-weather manicures because turquoise instantly feels energetic, while gold adds just enough glow. It is an easy way to make a single-color manicure feel special without committing to detailed nail art. And because the nails are short, I would not hesitate to choose this design for travel, busy weekends, or everyday summer plans.
Sheer Pink Almond Nails With A Soft Raspberry Fade
This almond manicure takes a much softer approach to color. The base remains translucent and rosy near the cuticle, while richer pink and raspberry tones gradually appear toward the tips. The almond shape elongates the fingers and gives the gradient a graceful canvas to follow. I particularly like the blurred transition because there is no harsh line separating the colors, so the manicure feels almost watercolor-like.
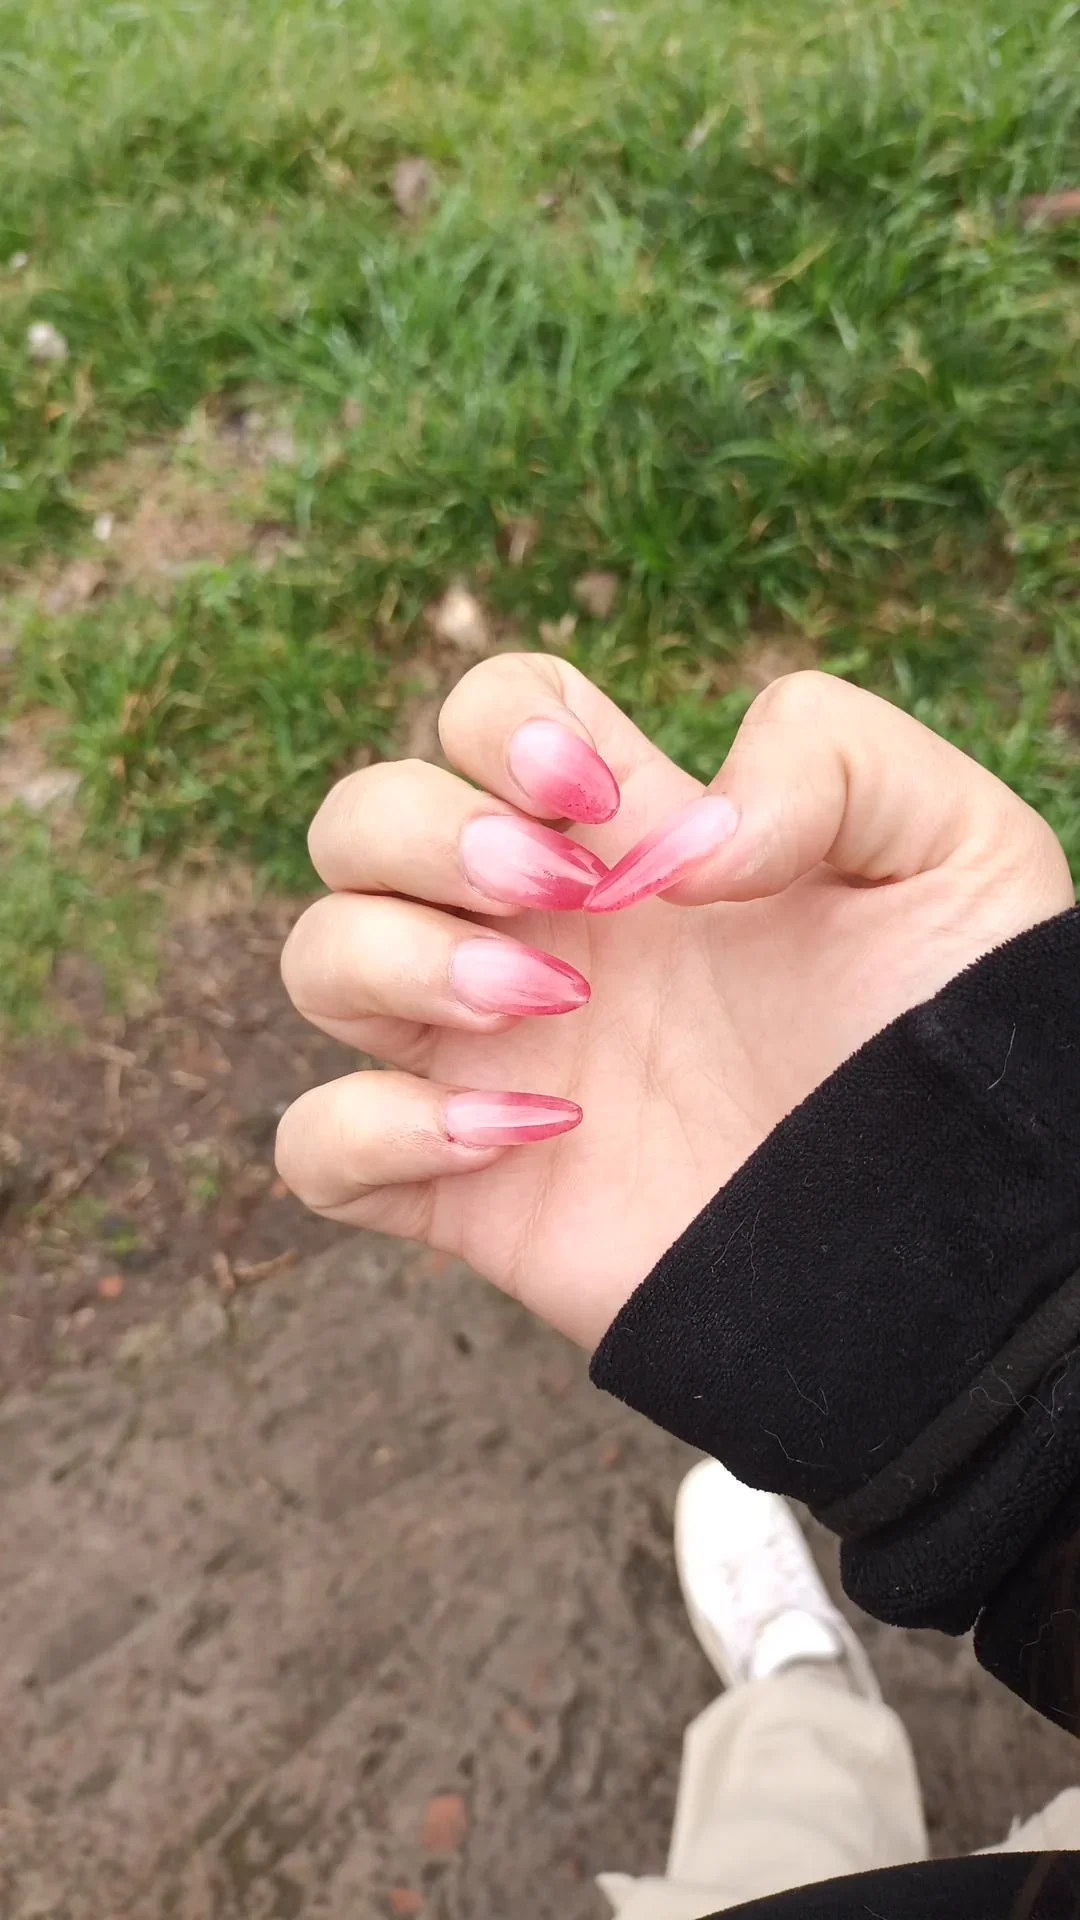
I would use a sheer pink gel as the foundation and a medium raspberry or hot-pink gel for the gradient. A small sponge, ombré brush, or airbrush can help diffuse the stronger shade depending on the technique available. I would also keep a glossy top coat nearby because the shine makes the color transition appear smoother and more fluid.
I would first shape the nails into an even almond, paying attention to keeping the central point aligned with the finger. After the sheer base is cured, I would add a very small amount of pink pigment near the tip and blend it upward in light layers. Building the color slowly is the trick here. If I apply too much at once, the gradient can become muddy instead of translucent.
For me, this is a lovely transitional manicure when I want color without feeling tied to a very specific shade. The pink looks playful enough for summer but soft enough to carry into early fall. I would especially choose it when I want longer-looking fingers without relying on heavy decoration. It has that effortless quality that makes people wonder whether the color is natural or carefully designed.
Blush Almond Nails With A Playful Pink Dot Detail
The final design keeps the base beautifully simple and lets a tiny repeating motif create the personality. The nails are almond-shaped and coated in a glossy translucent blush-pink shade. Along several nails, small rounded dots move from the lower edge toward the center, shifting through red, raspberry, and hot-pink tones. The placement creates a subtle visual rhythm, almost like a miniature trail of candy-colored beads.
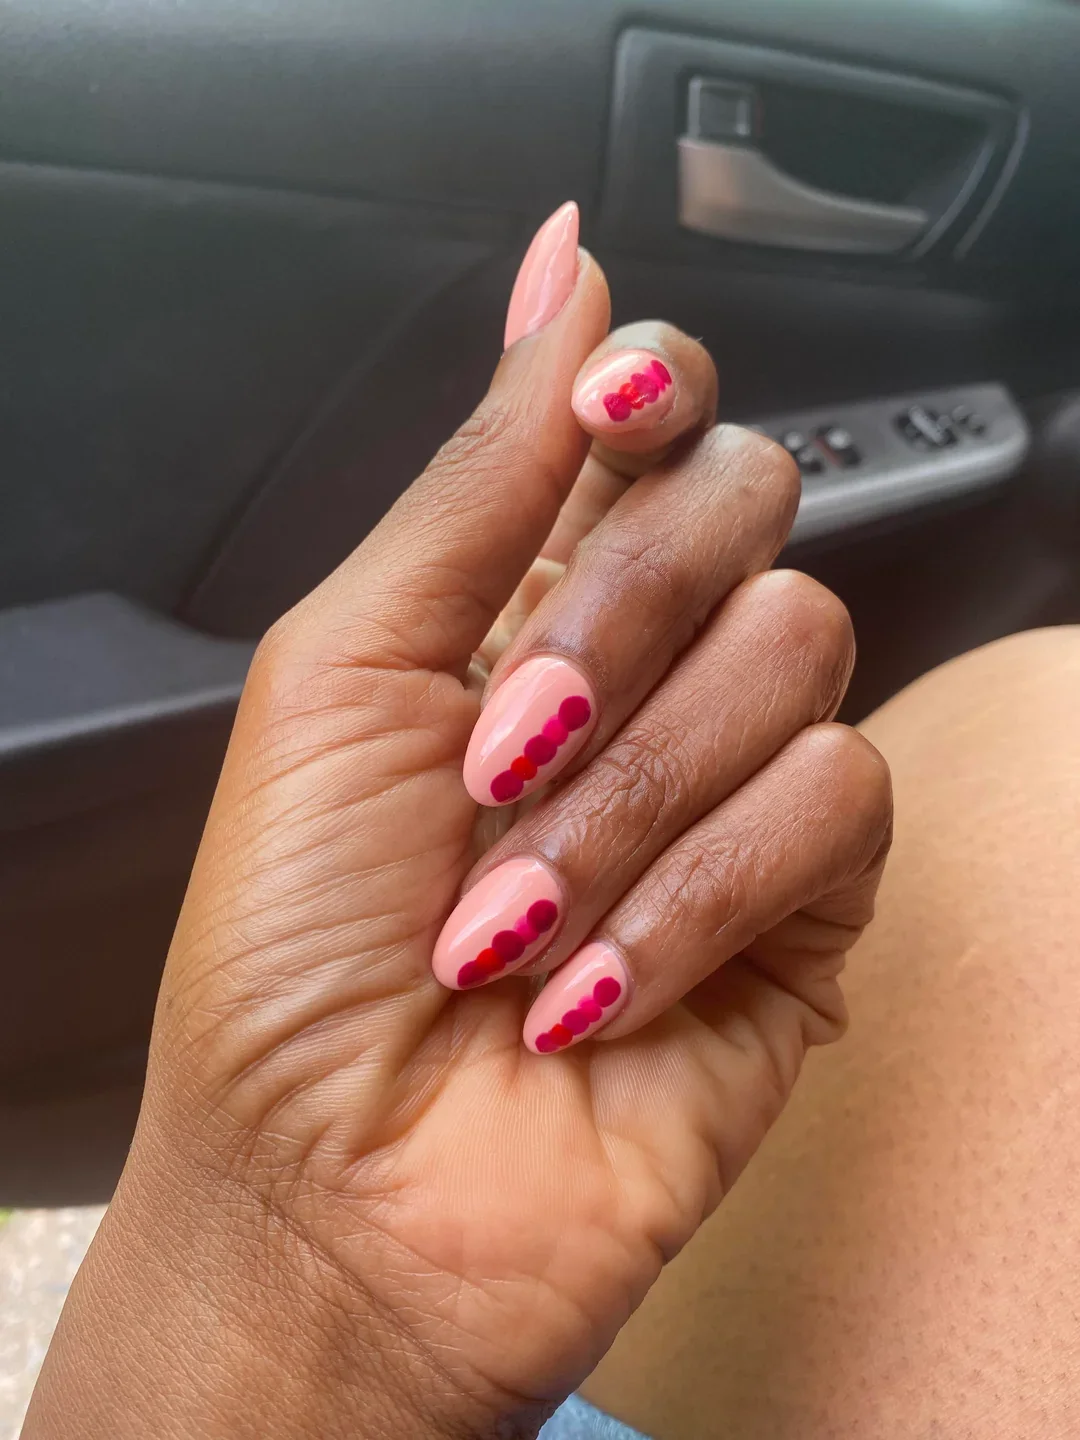
I would recreate this with a sheer blush or pale pink gel and several shades of pink and red for the dots. A small dotting tool is the easiest way to keep the circles clean and similarly sized. I would also use a glossy top coat to maintain the wet-look shine visible across the manicure. Because the design depends on small details, highly pigmented polish is preferable to watery formulas.
I would shape the nails into a soft almond first, then apply the sheer pink base. Once cured, I would use the dotting tool to place the circles in a gentle diagonal or curved progression, alternating shades as I move toward the center. I would not worry about making the pattern mathematically perfect; slight differences in spacing keep it charming. After curing the details, I would seal the entire manicure with top coat.
This is exactly the kind of nail art I would recommend when someone says she wants something cute but not complicated. The blush base keeps it polished, while the colorful dots add a tiny surprise when you look closer. It would be especially sweet for a summer lunch, vacation, birthday weekend, or simply one of those ordinary weeks when a little color can lift the mood. And really, why should nail art wait for a special occasion?
Champagne Almonds With Crystal Details
I love how this almond manicure turns a soft champagne nude base into something much more striking without relying on a heavy design. The long pointed shape creates an elegant silhouette, while the subtle shimmer gives the nails a pearly, almost glass-like finish. One nail adds a slender metallic silver tip, another has a delicate silver band near the free edge, and tiny rhinestones are scattered across the little-finger nail. The result feels polished, feminine, and just a little bit unexpected.
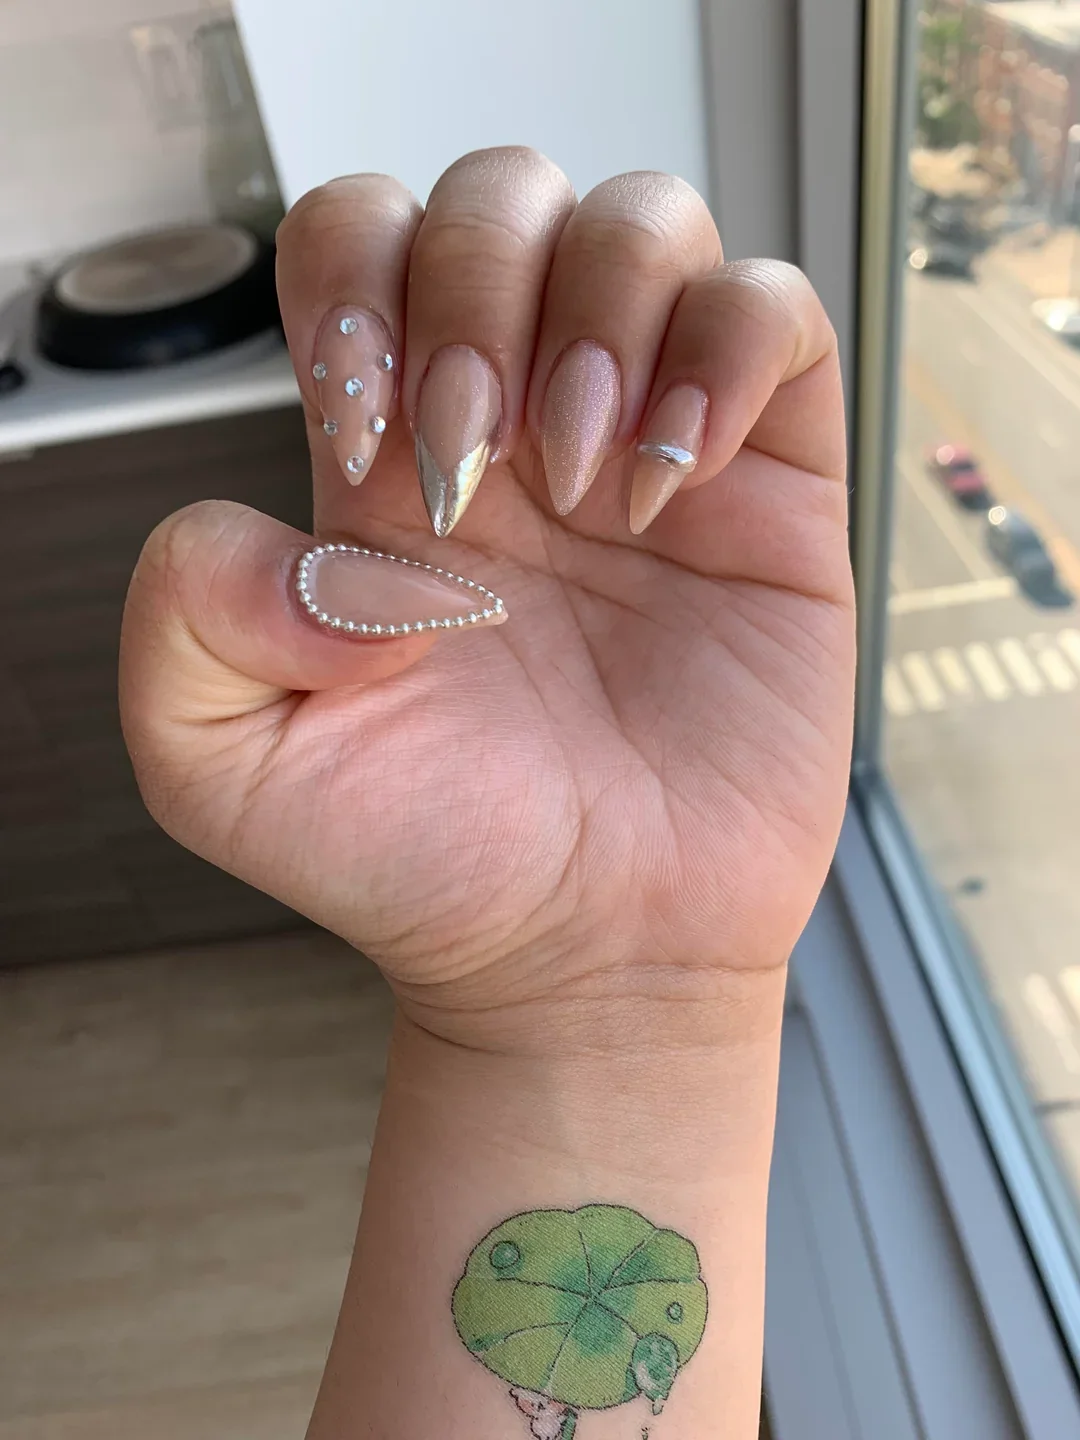
For this look, I would start with a sheer nude or blush gel polish with a fine champagne shimmer. A thin silver chrome polish or metallic gel works beautifully for the reflective accents, while small flat-back crystals provide the sparkle. I prefer keeping the embellishments tiny because the almond shape already creates plenty of visual interest.
At home, I would shape the nails into a balanced almond, making sure both sides taper evenly toward the tip. After applying the nude base and curing it, I would add the shimmer layer, then use a very fine nail-art brush for the metallic details. I would place the crystals with nail adhesive or builder gel and finish with a glossy top coat around, rather than heavily over, raised embellishments.
This is one of those designs I would save for a special dinner, wedding guest outfit, or simply a week when I want my hands to feel extra put together. The champagne tone is easy to wear, while the metallic details catch the light whenever I move. Sometimes that tiny flash of sparkle is all a manicure needs.
Soft Almond Nails With Curved Aqua Tips
I see a completely different mood in these elongated almond nails. The base stays close to the natural nail with a sheer peachy nude finish, while thin aqua curves sweep across the tips and sides. Instead of a traditional French manicure, the lines feel fluid and slightly playful. I especially like how the design leaves plenty of negative space, because that keeps the longer shape looking light rather than overly decorated.
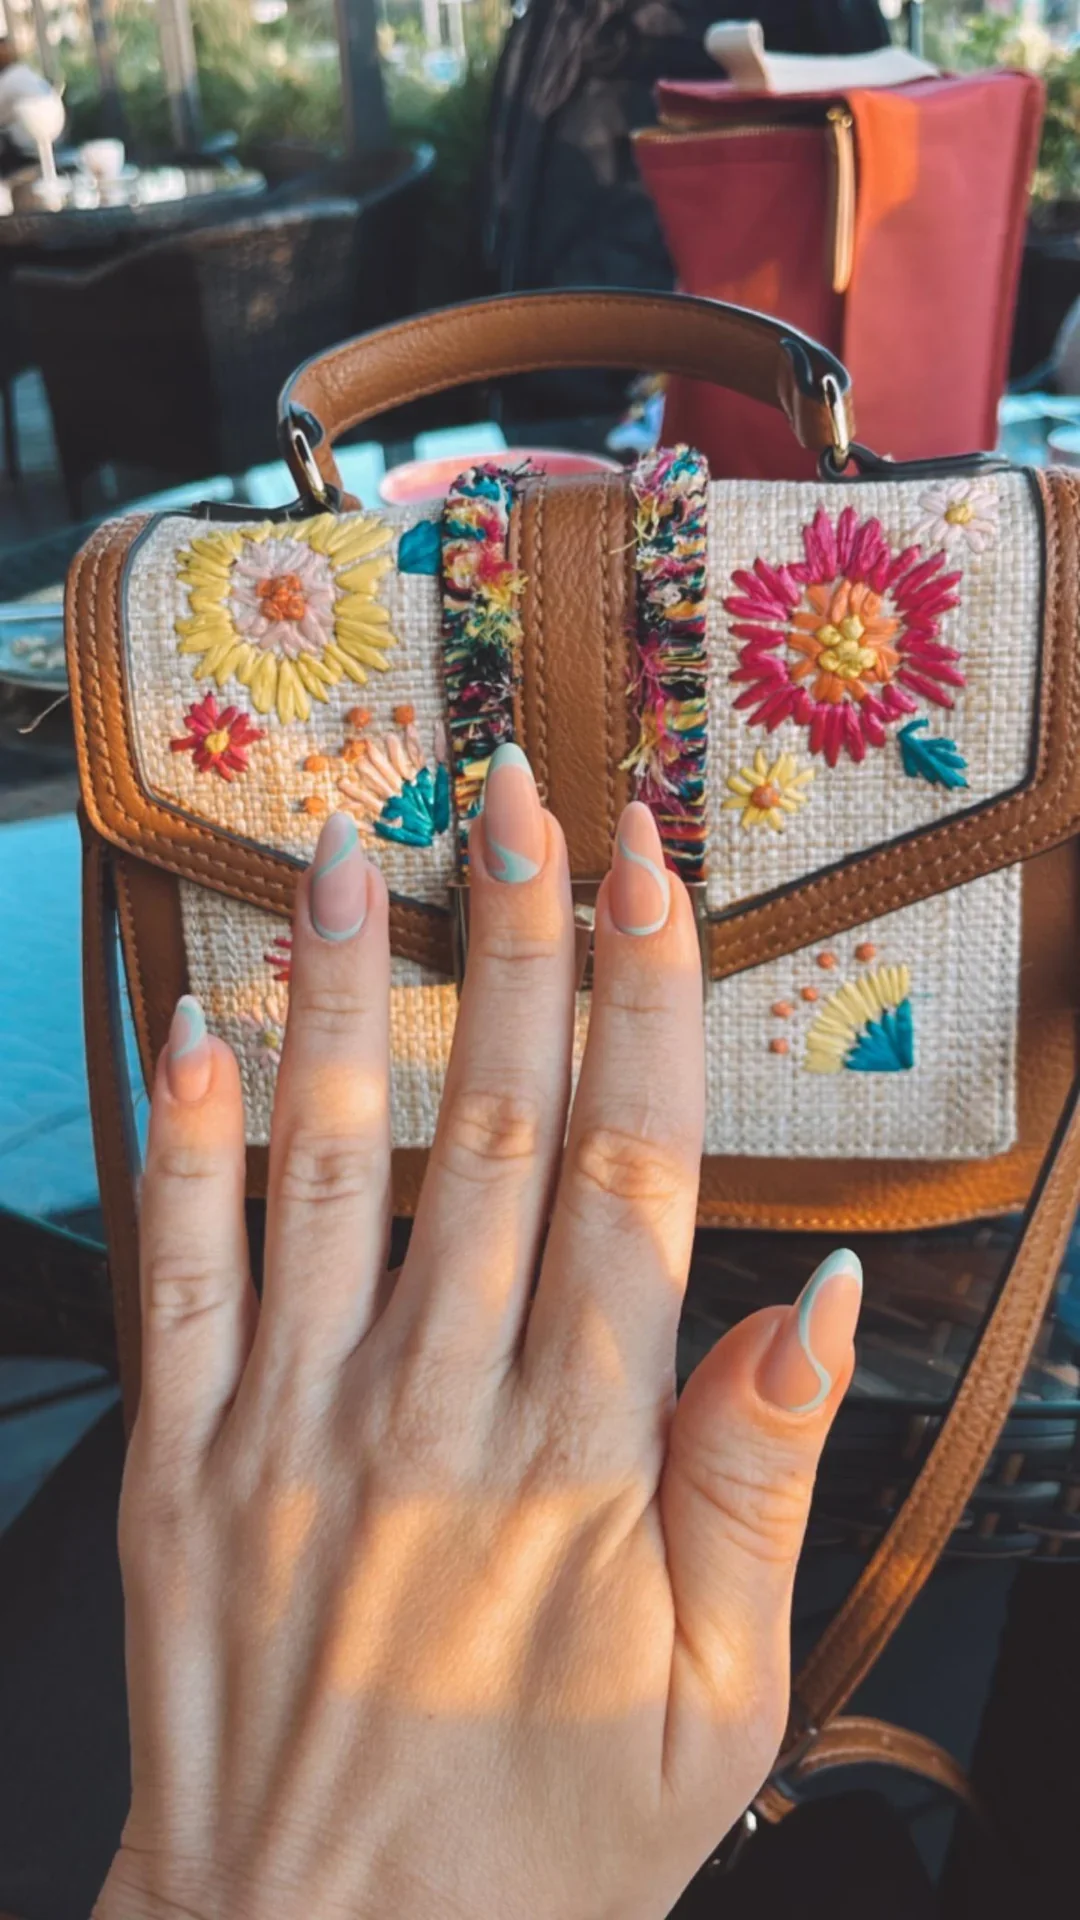
I would use a translucent nude gel as the foundation and a muted aqua or pale turquoise gel for the curved lines. A fine liner brush is essential here because the appeal depends on the precision of those narrow arcs. A glossy top coat brings everything together and gives the color a clean, almost wet-looking finish.
I would first refine the almond shape and apply two very thin layers of the nude base. Once cured, I would draw each aqua curve slowly, beginning near one side of the nail and following the natural contour toward the tip. I would cure each nail as I work rather than trying to finish the entire hand at once. That little bit of patience makes a big difference with delicate lines.
I would wear this manicure when I wanted something summery but not predictable. The aqua detail has a fresh vacation feel, yet the neutral base makes it surprisingly easy to pair with everyday clothes. And if you are nervous about colorful nail art, this is a lovely way to test the waters without committing to a full-color manicure.
Glossy Berry Nails With Tiny White Stars
I cannot help but smile at this playful combination of hot pink, cherry red, and juicy orange. The short-to-medium almond shape keeps the manicure practical, while every nail gets its own saturated shade and a glossy finish. White stars, tiny dots, curved lines, and soft cloudy accents give the colors a whimsical finish that reminds me of summer skies, candy, and those spontaneous manicure ideas that somehow become favorites.
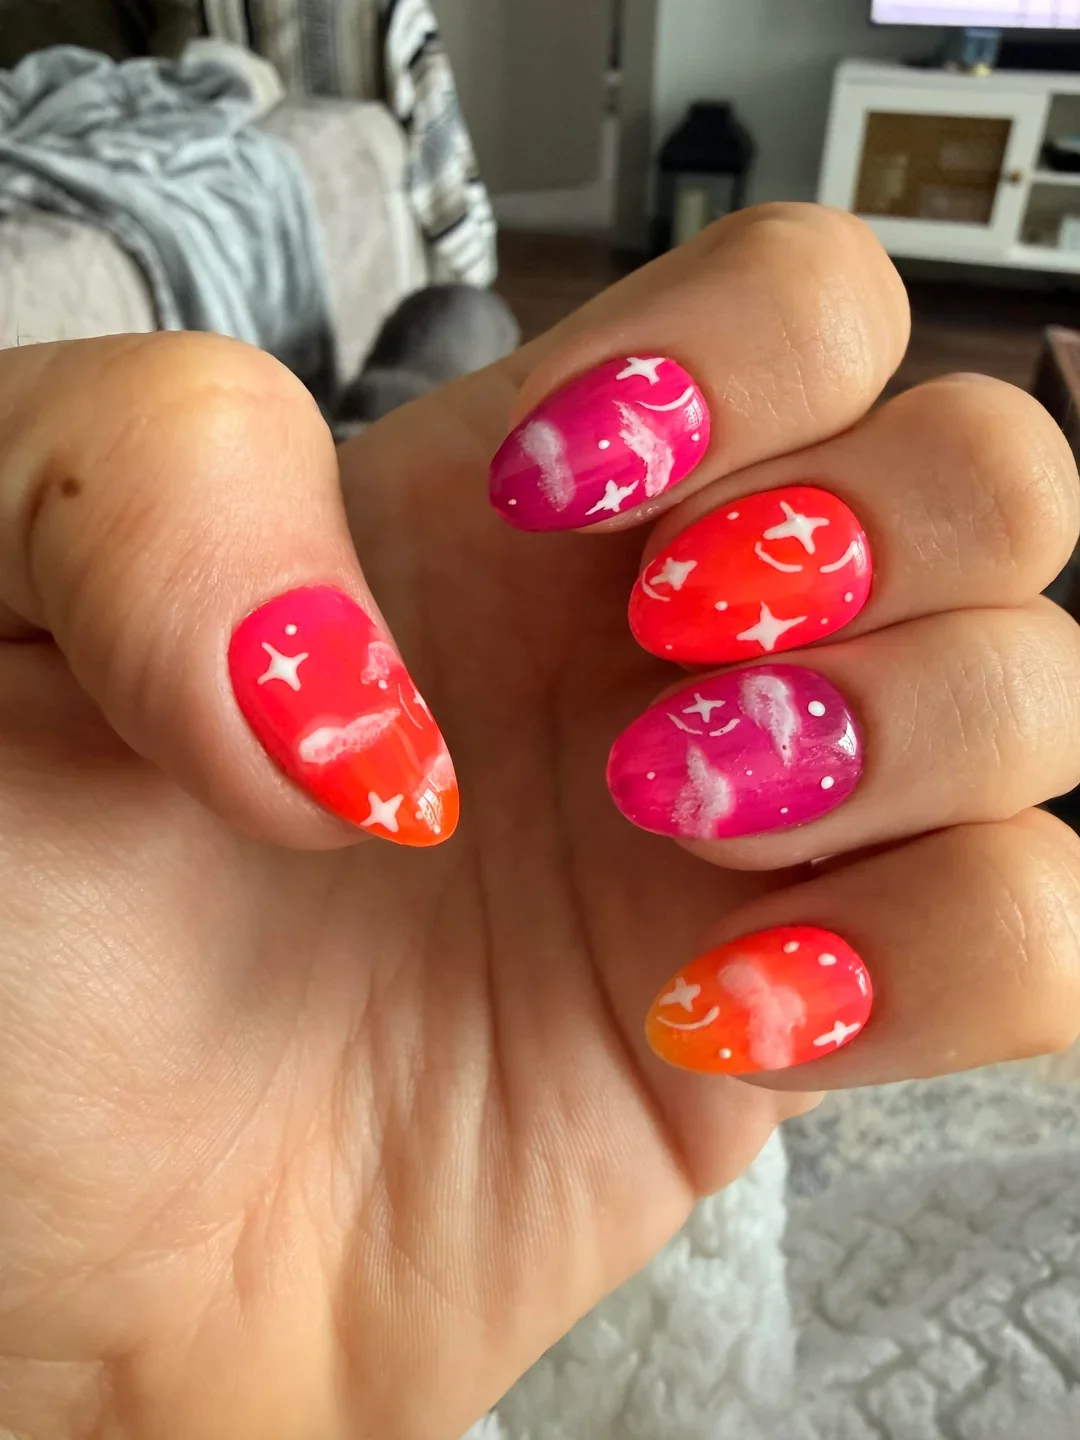
I would reach for bright pink, true red, and warm orange gel polishes, plus a crisp white nail-art gel for the stars and tiny details. A sheer milky white can be useful for creating the soft translucent patches, while a high-shine top coat is essential because the design looks especially lively when the surface is completely glossy.
I would begin with the colored bases, giving each nail a slightly different shade rather than forcing perfect symmetry. After curing, I would add the stars and dots with a dotting tool or fine brush, then create the cloudy white areas with a small detail brush and a very light touch. I would finish with a generous but controlled layer of glossy top coat to smooth everything out.
This is the manicure I would choose when I am tired of taking my nails too seriously. Why should every set be minimalist? Sometimes bright color and tiny stars are exactly the mood. I could easily see this working for a beach weekend, a summer concert, a birthday trip, or any day when a little extra color feels right.
Sheer Pink Almonds With Floating Gold Leaf
I keep coming back to sheer pink nails because they make the hands look instantly refined, and this version adds just enough artistry to keep things interesting. The elongated almond shape is covered in a translucent blush base with a delicate pearly sheen. Several nails feature irregular pieces of gold leaf layered over milky, almost marble-like details, creating a soft dimensional effect without overwhelming the manicure.
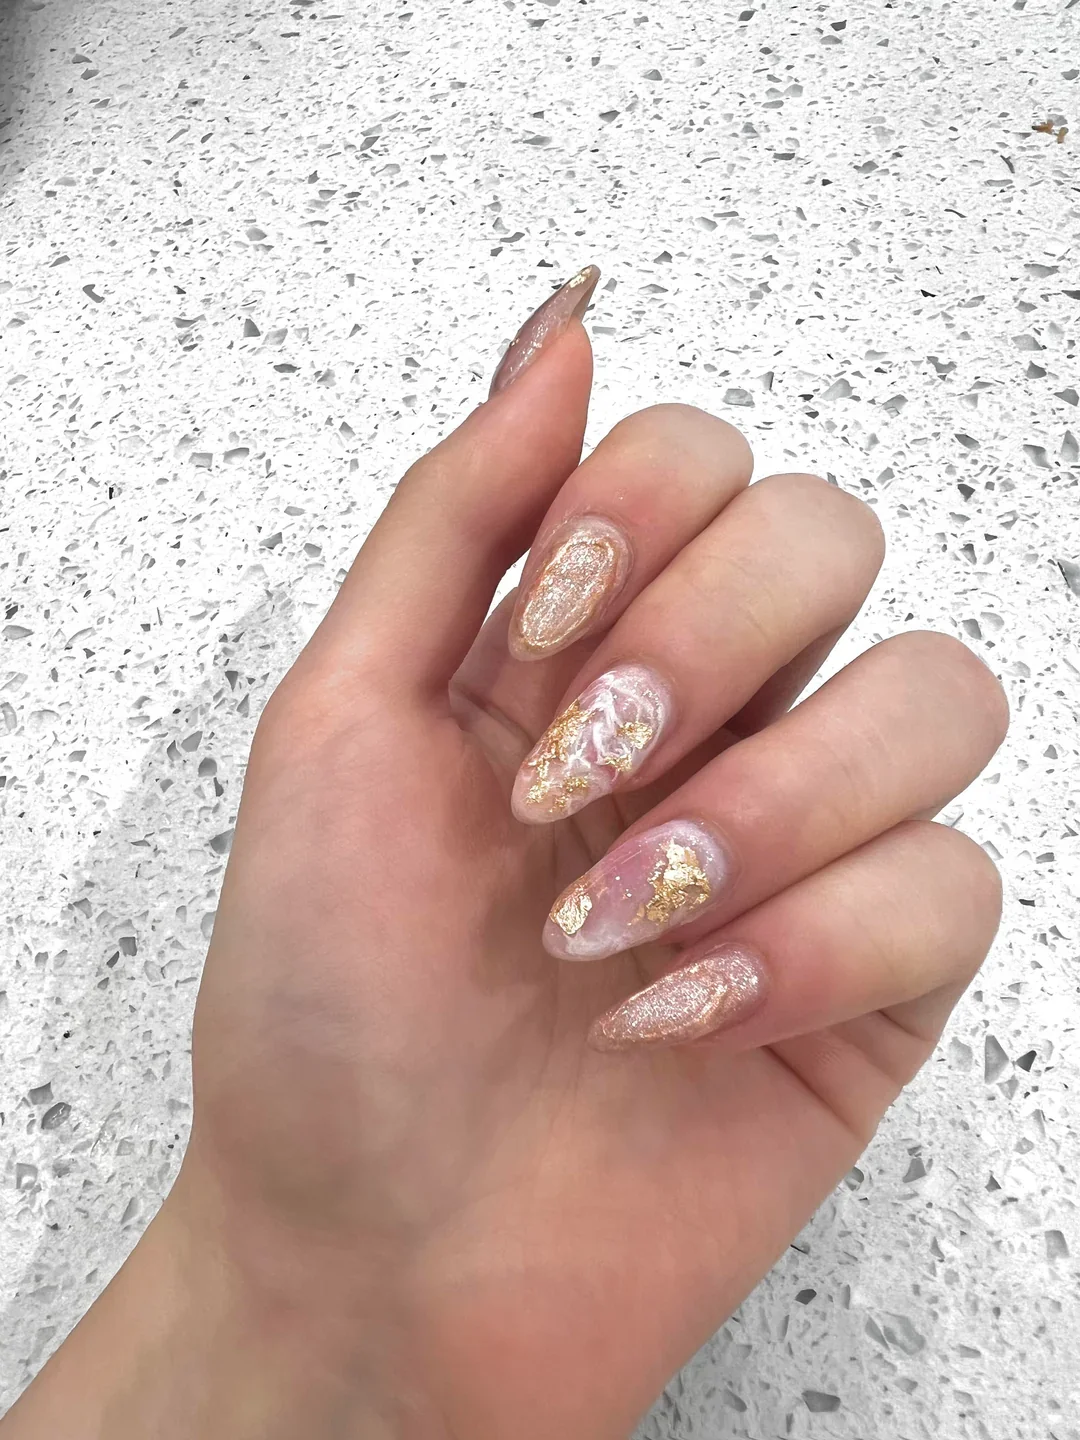
For materials, I would use a translucent pink-beige gel, a sheer milky white, fine cosmetic gold leaf, and a subtle pearl or champagne shimmer. I would also keep a clear builder gel or nail-art gel nearby to secure the gold pieces before applying the final top coat. The trick, in my opinion, is choosing a gold that looks delicate rather than chunky.
I would apply the sheer base first and cure it thoroughly. Then I would add wispy touches of milky white, allowing some of the nude background to remain visible, and place small pieces of gold leaf while the design layer is still workable. Once everything is cured and secured, I would seal the surface with a glossy top coat. I would avoid adding too much product because the beauty of this design comes from its translucent layers.
This feels like a quiet-glamour manicure to me. It works beautifully when I want my nails to look special but still coordinate with everything in my closet. The gold also makes the design particularly pretty for late summer evenings, celebrations, or those transitional days when I am ready for something a little more sophisticated.
Deep Blue With Minimal Silver Accents
A deep blue manicure can look incredibly chic when the color is allowed to do most of the talking. Here, the nails are kept in a compact rounded shape and coated in a rich blue-gray polish with a glossy surface. Two narrow silver stripes cross one nail, while another nail receives a textured metallic gold accent. I like the contrast because the cool blue creates a calm foundation and the metallic details add just enough drama.
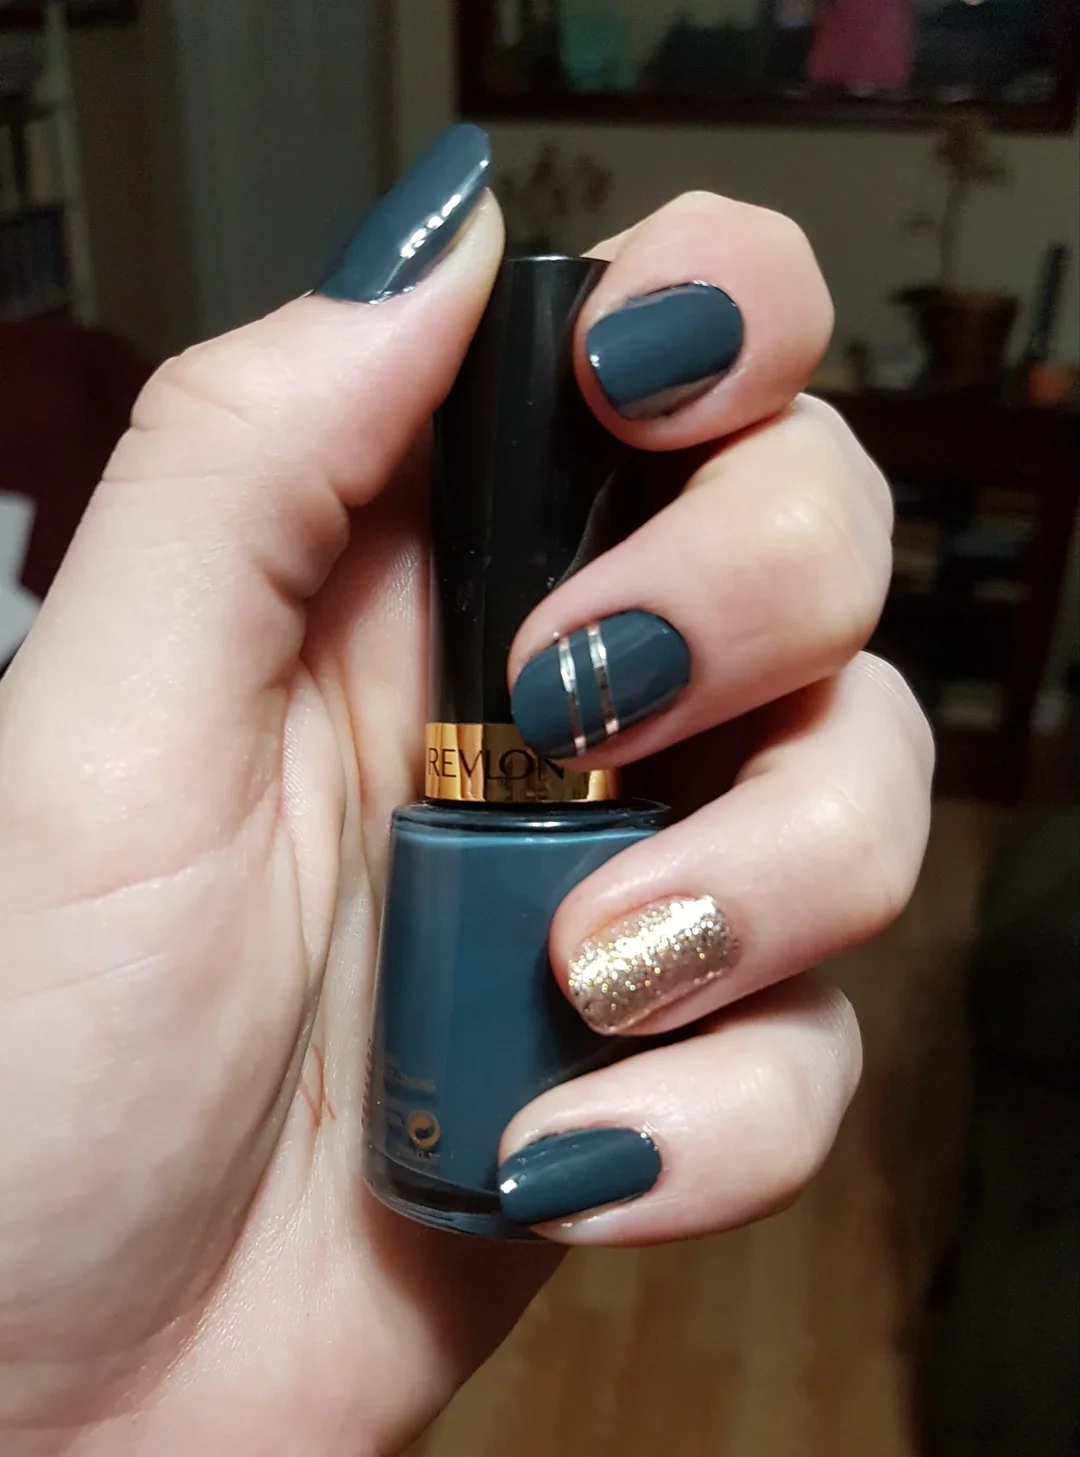
I would choose a deep slate-blue or blue-gray gel polish with strong pigmentation, a metallic silver striping polish, and a textured gold glitter or chrome product for the accent nail. A glossy top coat would keep the blue looking saturated and make the metallic elements stand out. If I wanted an easier version at home, I would use ultra-thin nail-art tape for the silver bands.
I would keep the application straightforward: prep the nails, apply the blue polish in thin layers, and cure between coats. For the silver detail, I would position two narrow lines across one nail and make sure they sit parallel before curing. The gold accent can be applied to a single nail for balance, followed by a carefully placed top coat.
I especially like this direction for the shift from summer into fall, when deeper colors begin to feel more natural but I am not ready to abandon lighter, glossy finishes. It is sophisticated without feeling formal. I could wear it with denim and a sweater just as easily as with a sleek evening outfit.
Nude Nails With Blue Butterfly Accents
I find this manicure charming because it combines a calm nude foundation with tiny blue and purple butterfly details. The nails have a medium length and softly squared shape, giving the design a more casual feel than a long almond or stiletto manicure. Small butterflies appear alongside delicate botanical-style lines and scattered reflective accents, creating the feeling of miniature jewelry across the nails.
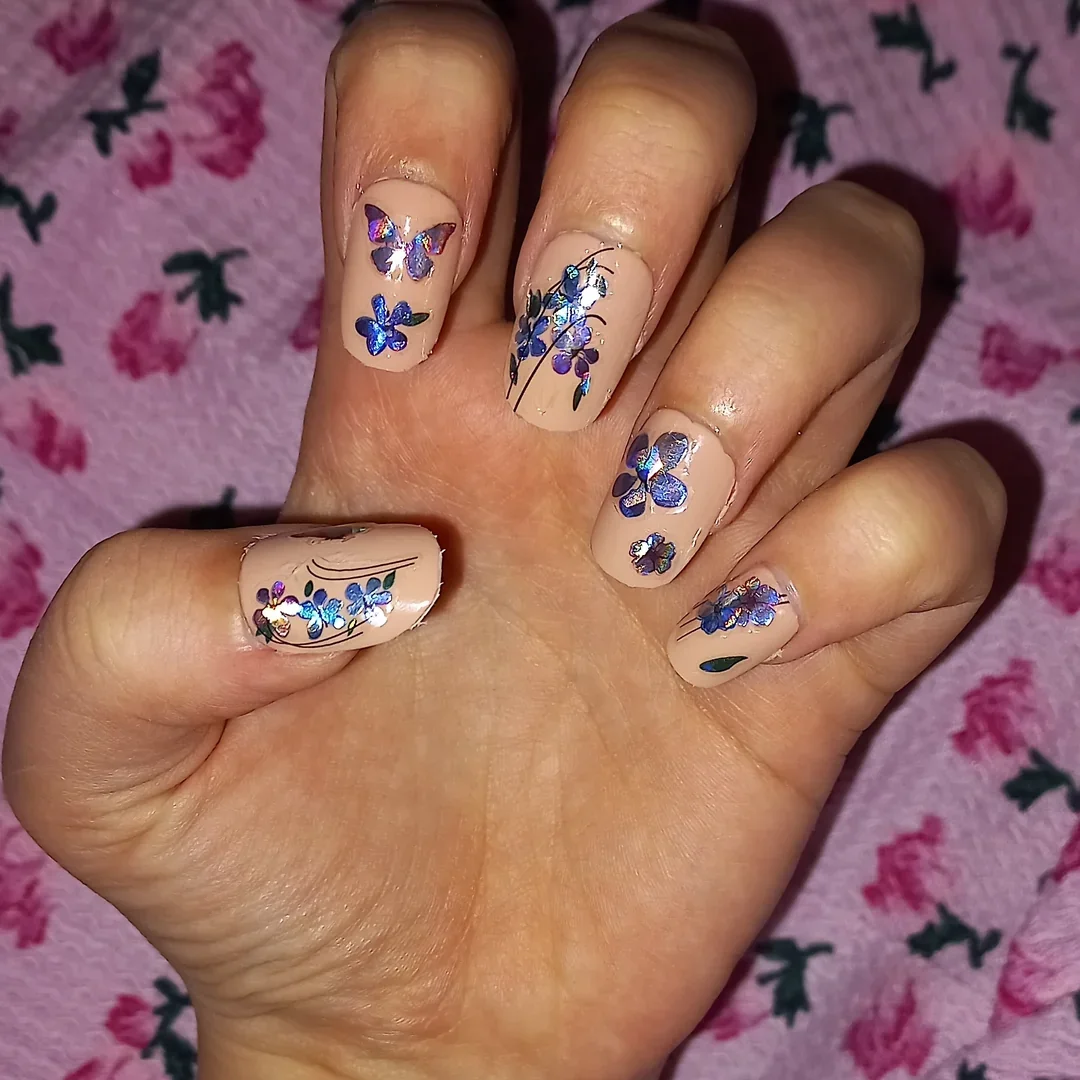
I would use a warm nude or beige gel as the base, followed by blue and violet butterfly decals or hand-painted nail art. Tiny metallic flakes can add the reflective touches, while a very fine black or dark-blue liner brush can create the delicate stems and outlines. For a quicker at-home version, quality nail stickers are an easy shortcut and can still look polished when carefully positioned.
I would start by creating a completely even nude base and curing it before adding the decorative elements. I would vary the placement rather than putting identical butterflies in the same position on every nail. After securing the details, I would add a thin glossy top coat and make sure the edges of any decals are completely sealed.
This design has a nostalgic little charm, but I would style it in a cleaner way than the butterfly manicures of years past. The neutral base keeps it grown-up, while the blue and violet accents provide the personality. If I wanted a manicure that could make an ordinary day feel a little more cheerful, this would absolutely make my shortlist.
The best manicure is not always the most complicated one—it is the one that feels right for you. Whether you prefer short rounded nails, elegant almond shapes, or statement-making coffin silhouettes, there is a design to match every mood and occasion. I love how a simple change in color, finish, or tiny detail can make a familiar nail shape feel completely new. Take your favorite idea, make it your own, and let your next manicure be a small but satisfying style refresh.

