I have been seeing buns everywhere this summer, not the rushed ones you twist on a Tuesday morning, but ones that look intentional. The kind that take ten minutes and still hold through a humid afternoon. I am not mad about it.
These 18 Natural Hair Bun ideas range from five-minute twists to styles that need a mirror and some patience. They work for fine hair that goes flat by 4 pm, thick coils that need structure, and every texture in between. I tested them on my own grow-out phase, the one where the bleach line shows at week five, and found which ones actually stay put.
Textured Crown Bun With Face-Framing Curls
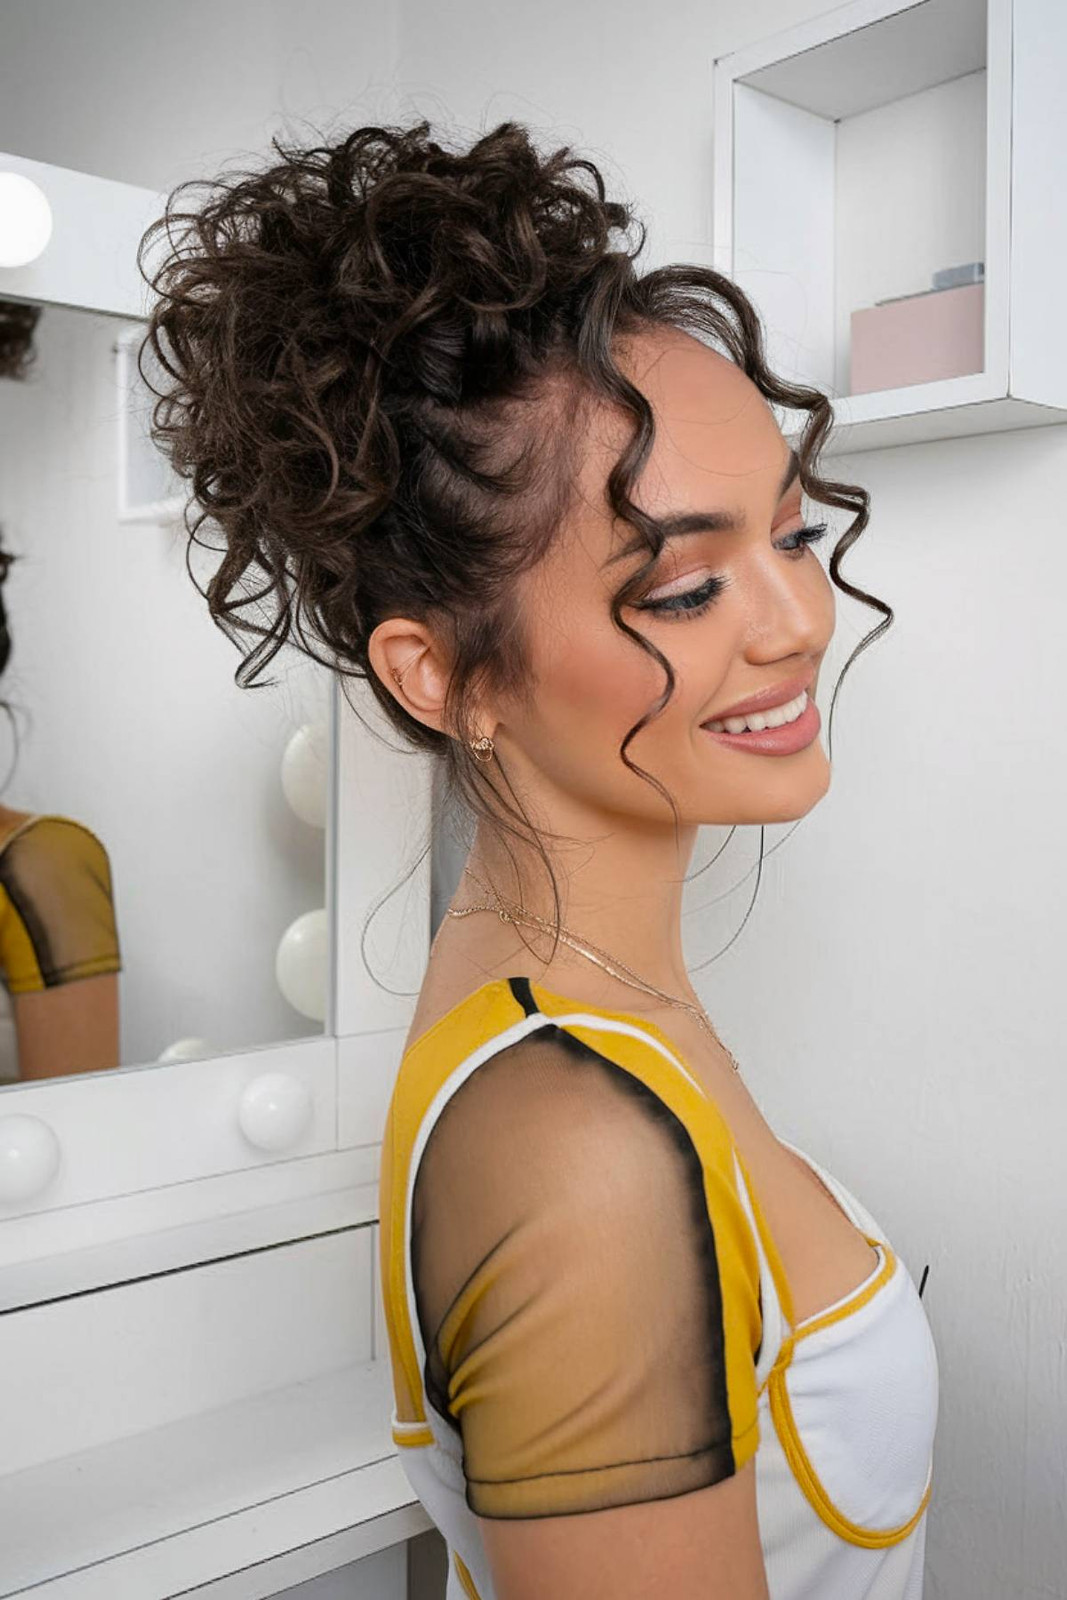
The loose curls do the heavy lifting here, softening what could read as a severe crown bun into something romantic. For thick, curly hair, this is the rare style that works with your texture instead of fighting it. Gather hair loosely at the crown, pinning without pulling too tight, then let the face-framing curls fall where they want. The middle part widens a round face, so consider a slight zigzag if that’s a concern. The dark brown base keeps the focus on the shape, and the mid-back length gives you enough weight to hold the bun without it slipping. This is a salon-leaning style, not because the technique is hard, but because the layers need to be cut so the curls land exactly at the cheekbone. Get that right and the textured bun with face framing curls holds its shape all day.
High Voluminous Bun With Curtain Bangs
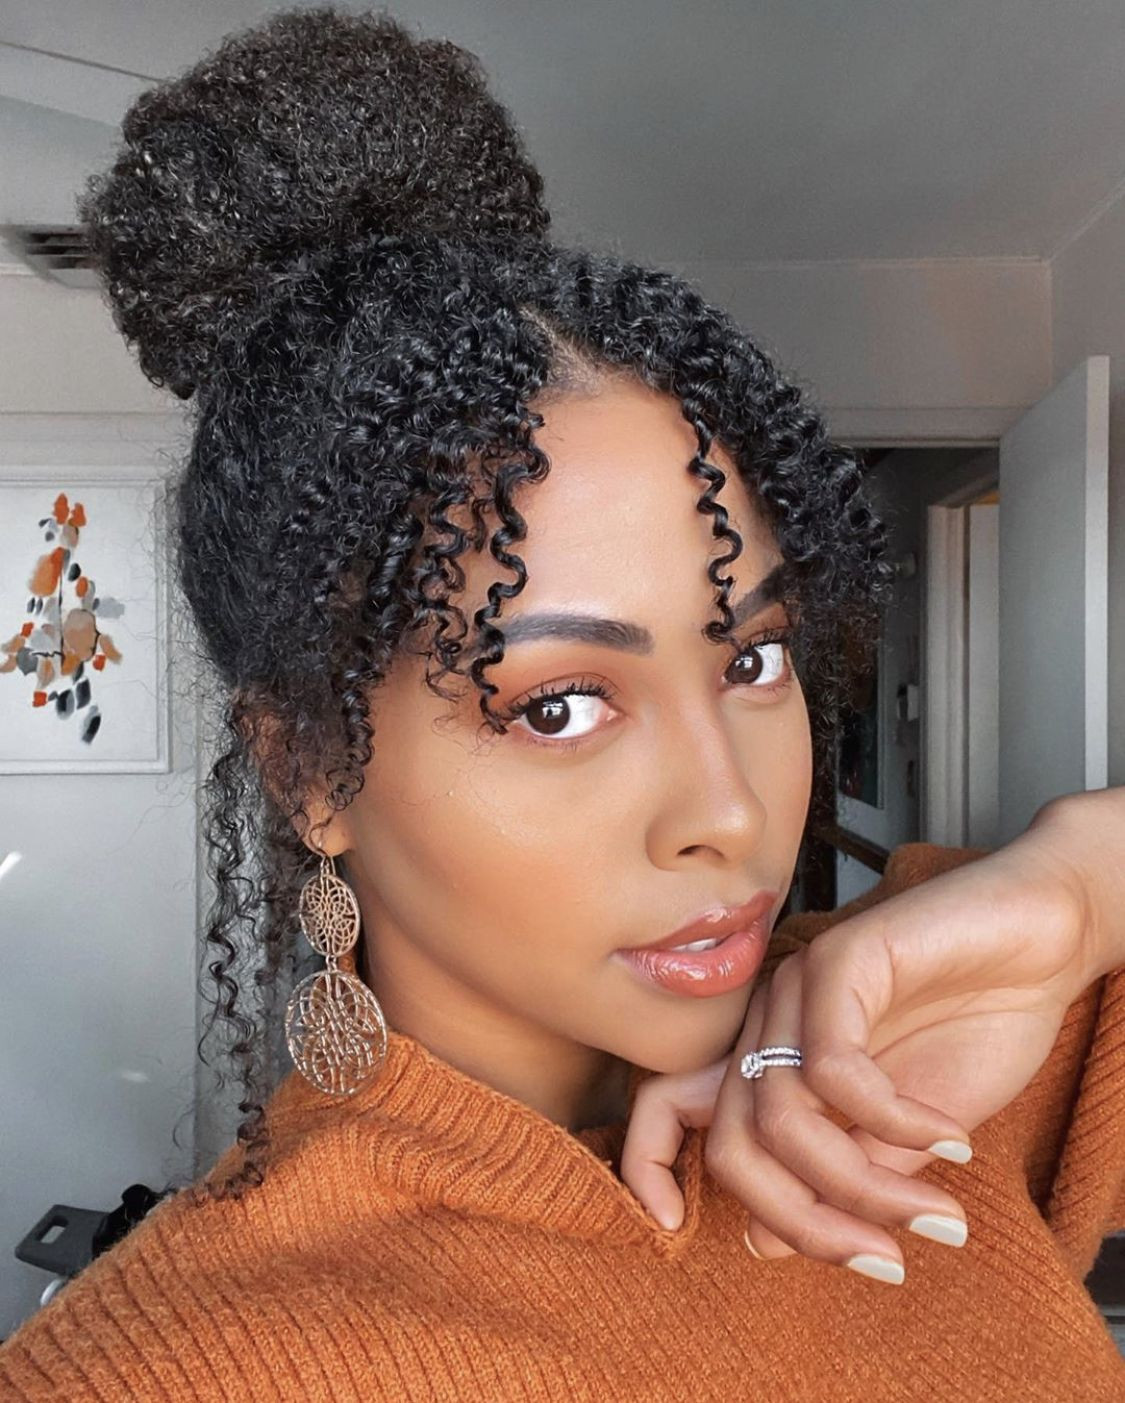
What does it take to get a high bun that actually looks voluminous instead of deflated by noon? Start with clean, fully dry hair, because damp curls collapse before you finish pinning. The curtain bangs need to be defined first, either with a diffuser or by twisting them around your finger while they air dry. Then gather everything high on the crown, securing with pins at the base, and let the length spiral into a loose coil rather than a tight knot. The volume comes from the layers, so don’t flatten them down as you wrap.
The key is the curl definition. If your curls are undefined, the bun reads as frizzy, not full. Use a strong-hold hairspray before you gather, and again after, to keep the shape from drooping. The dark brown mid-back length gives you enough hair to build a bun that sits like a crown. A middle part keeps the curtain bangs symmetrical, but a deep side part adds drama if that’s your mood. This high bun with curtain bangs is bold, glamorous, and surprisingly stable once the pins are in right.
Sleek High Rolled Bun With Side Bangs
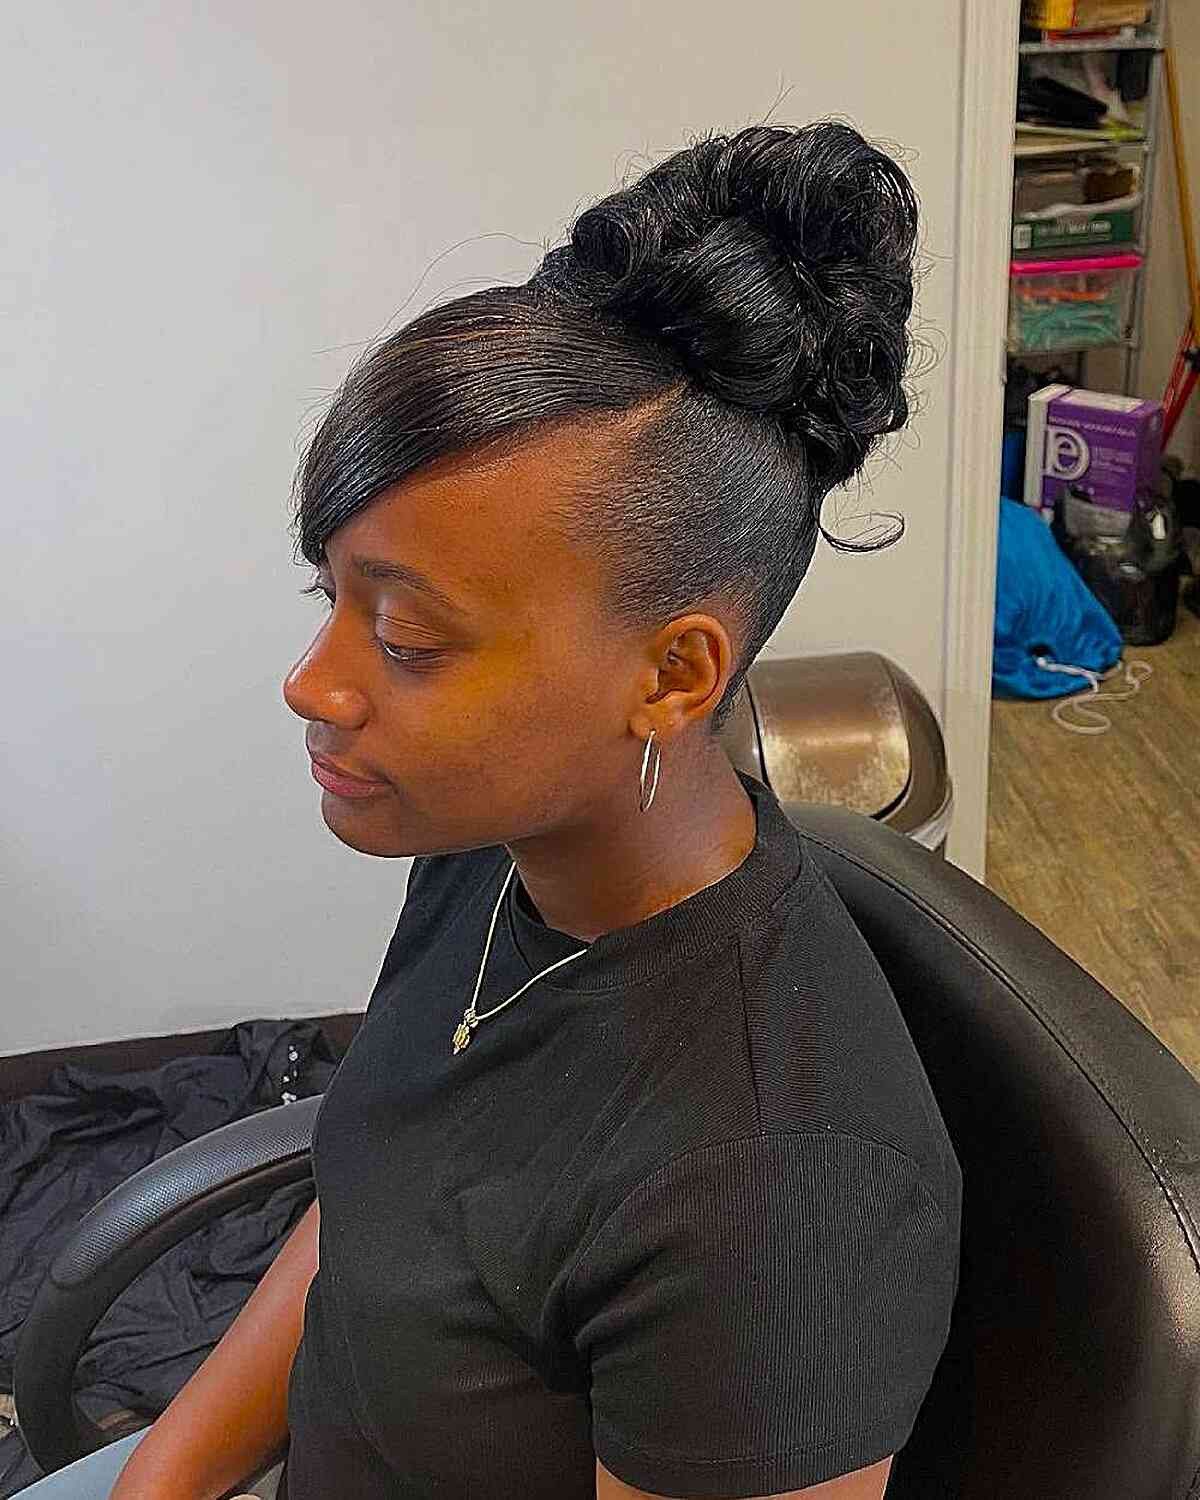
I’ll admit, I’ve spent more time smoothing flyaways on this style than I’d like to own up to. The sleek high bun with side bangs is elegant, but it’s also a commitment. For straight, thick hair, the roll needs a strong gel to stay slick, and the side-swept bangs need to be pinned just right or they’ll separate by lunch. The collarbone length keeps it sharp, but only if you trim every six to eight weeks, otherwise the ends fray and the whole polished effect falls apart. The black colour is unforgiving, every bump shows. Still, when it holds, it holds with a clean, editorial finish that a messy bun can’t touch.
Low Bun With Soft Face-Framing Tendrils
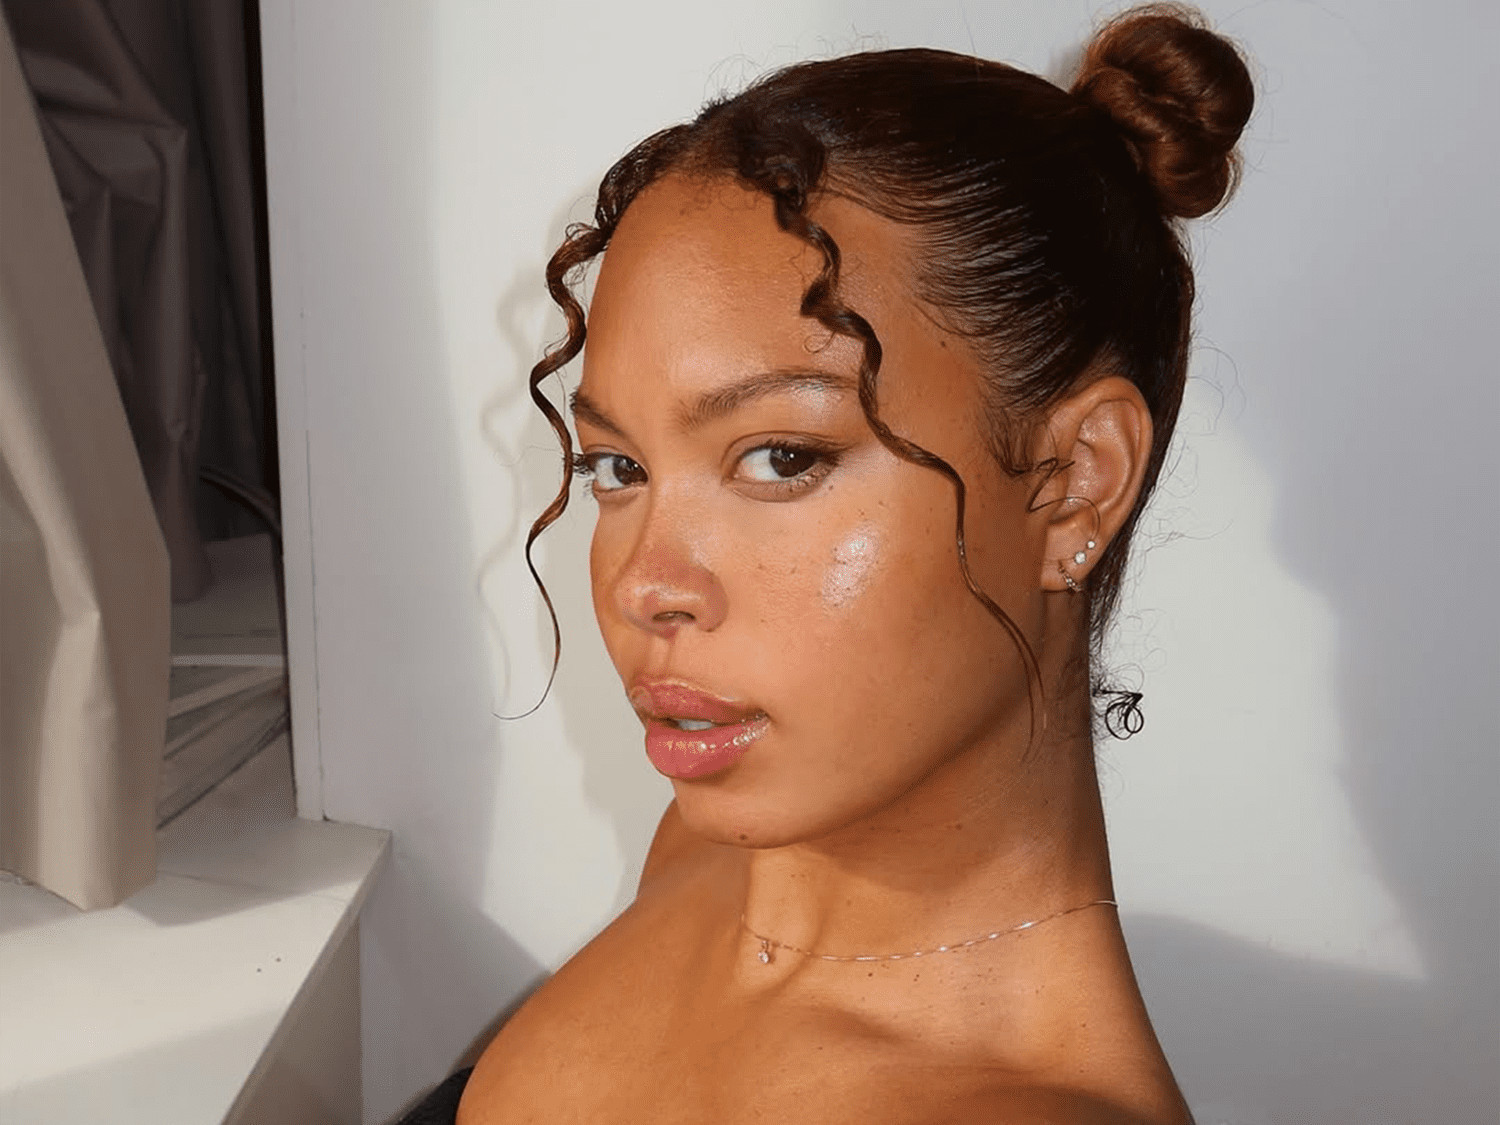
This is the one you can do at home, no round brush required. The low bun with face tendrils is forgiving in a way the sleek versions aren’t. Gather shoulder-length hair into a loose bun at the nape, pin it without fussing, then pull out a few strands around the face and twist them with your fingers. The wavy, fine texture means the tendrils fall naturally, no heat needed. A middle part keeps it soft, and the brown colour blends any imperfection. It’s not trying to be sculpted, and that’s exactly why it works.
High Braided Bun With Slicked Back Sides
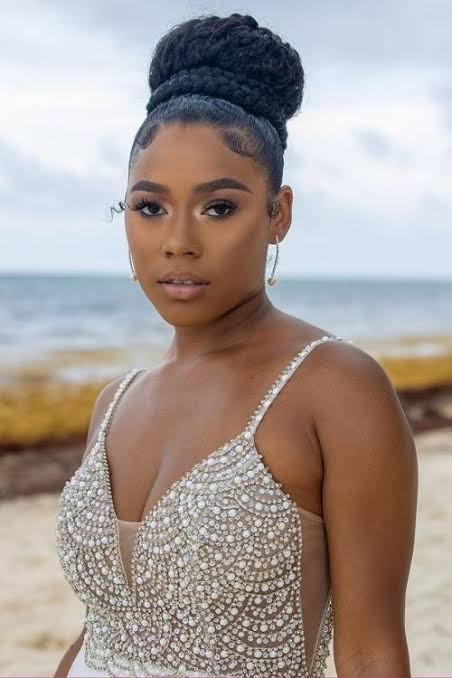
The intricacy of the braid is the whole story here, and it’s not a bathroom-mirror job. The high braided bun sits at the crown with a slicked back finish that requires edge control and a steady hand. For coily, thick hair, this is a protective style that can last through a week of events, from a wedding to a work presentation. The black colour makes the braid pattern pop, and the mid-back length gives enough material for the braid to wrap into a substantial bun.
The technique is about tension. The sides need to be pulled tight enough to stay smooth, but not so tight that they pull at the hairline. The braid itself should be three-strand, started at the nape and worked upward, then coiled into a flat bun and pinned at the base. This is a salon-leaning style, so book a braider who knows how to work with coily texture without causing breakage. Wear it for a formal occasion, or just because you want to feel like you have your life together.
Textured High Bun With Full Fringe
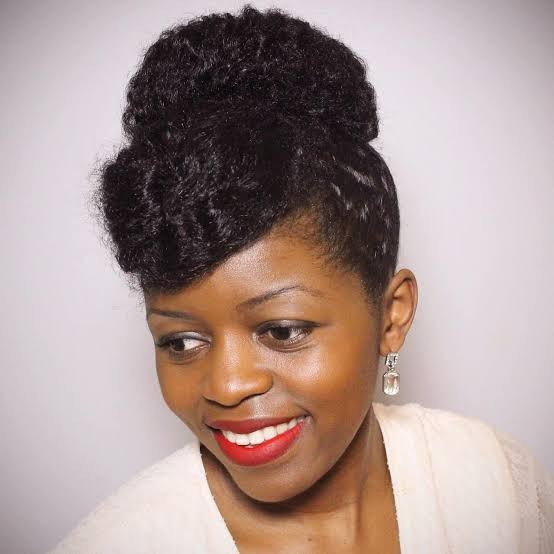
Have you ever looked at a full fringe and thought, that is a lot of commitment for one haircut? Pair it with a textured bun with full fringe and the math changes. The thick, coily texture here is doing the heavy lifting — that fringe sits defined because the hair has memory. Black, mid-back length gathered high, the bun reads as deliberate, not desperate. The honest downside: you style the fringe separately, every time. No pulling it back when you are late. A middle part keeps the weight even across the forehead, and the layers in the cut give the bun shape without trying too hard. This is a salon-leaning job for the precision up top. The hold is excellent, provided you set the fringe first.
High Top Knot With Defined Edges
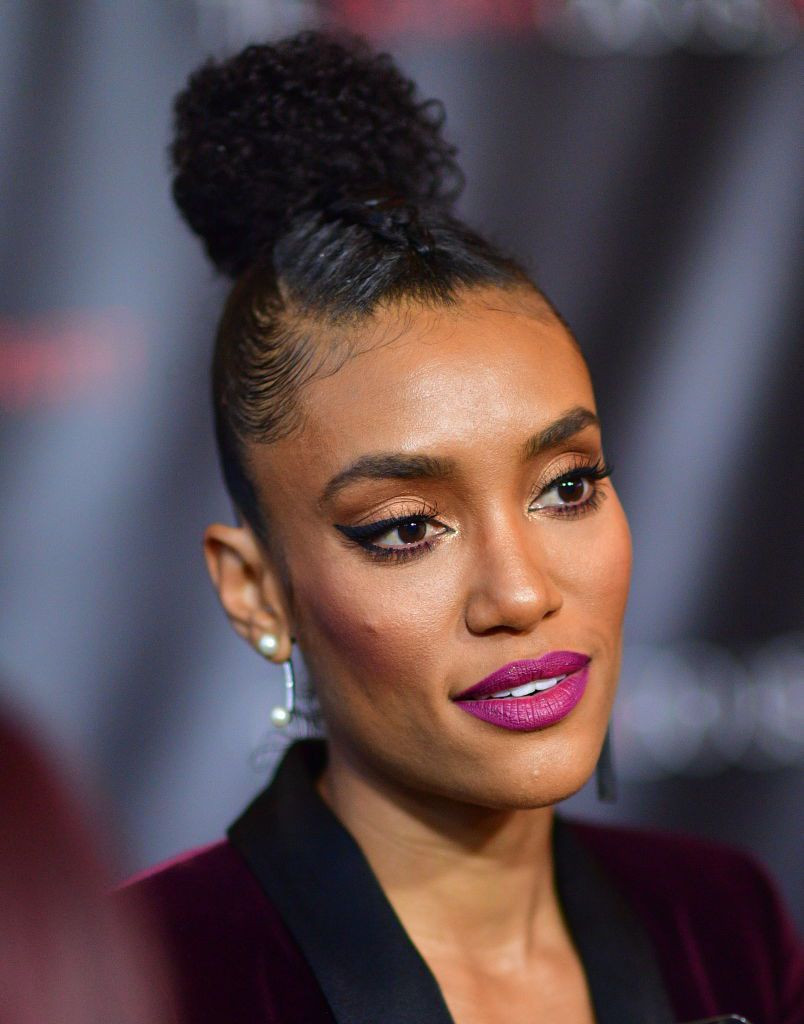
Sunday night, clean hair, nowhere to be. That is when I reach for a high top knot bun. The defined edges here are not an accident — they take a gel or pomade and a fine-tooth comb, applied to damp hair before the bun goes up. This is curly, thick hair at mid-back length, no bangs, a middle part that runs clean to the nape. The bun sits high, the edges stay sharp, and the hold lasts through a workday and a commute.
Upkeep is the real story. Day one, it is perfect. Day two, a spritz of water and a re-slick of the edges buys another day. By day three, the texture at the crown softens, and the bun shifts from polished to intentional. That is the window. You wash or you refresh. The layers in the cut help the bun keep its volume without looking overworked. Second-day hair grips better than fresh-washed, so plan accordingly.
Voluminous Nape Bun With Loose Tendrils
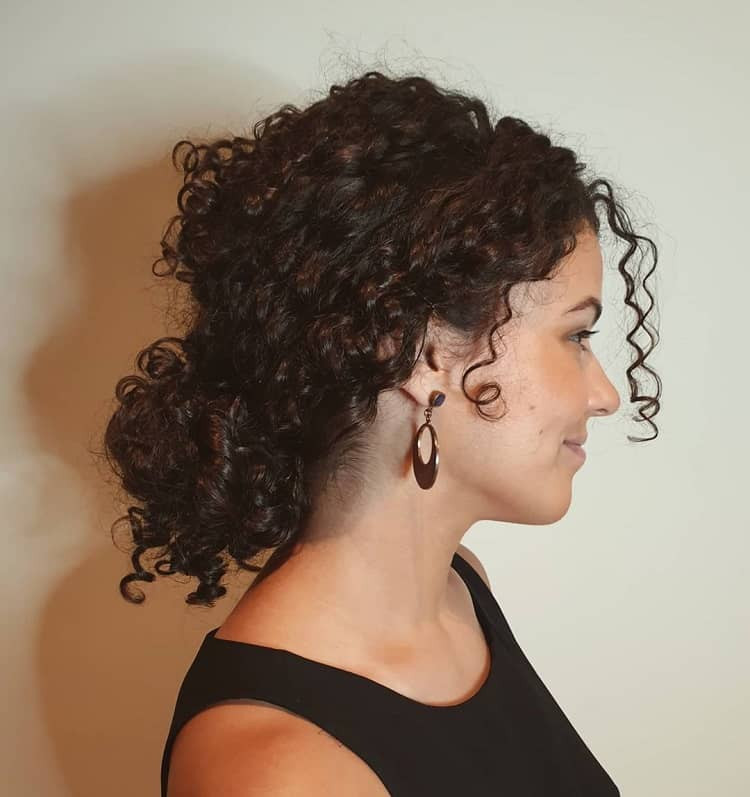
I will confess: I used to pull every strand into a nape bun and wonder why it looked severe. The mistake is leaving no softness. A voluminous nape bun with loose tendrils needs those curls around the face and neck to land right. Dark brown, mid-back, thick and curly, gathered low with a middle part — the volume comes from the texture, not from teasing. The tendrils are the risk. Without a texturizing spray or a curl cream, they separate into flyaways by mid-morning. The honest downside is that loose strands need redefining, not just releasing. Tuck them once, let them set, and the bun holds its romantic shape all evening.
Collarbone High Voluminous Bun With Curly Bangs
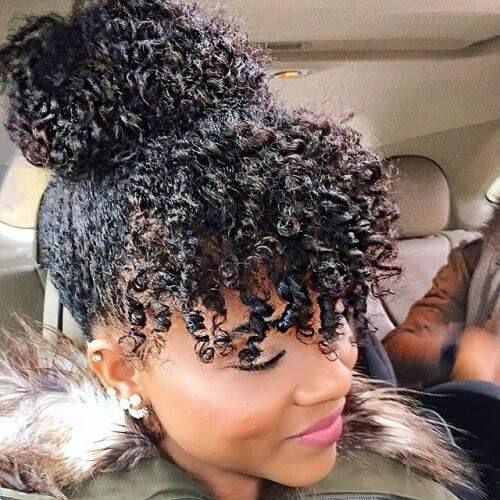
My gut said a high bun with curly bangs at collarbone length would not work. Too short to gather, too much fringe to tame. Then I saw it on a friend who diffused her curls, pinned the length high, and let the curtain bangs fall forward. Black, thick, layered — the texture held the bun without a single pin slipping. The middle part kept the bangs symmetrical, and the collarbone length meant the bun sat compact, not droopy. She styled the bangs first, then gathered the rest. That order matters. The hold was solid through dinner, and the bangs stayed defined because she set them with cool air before leaving the house.
Voluminous High Bun With Natural Texture
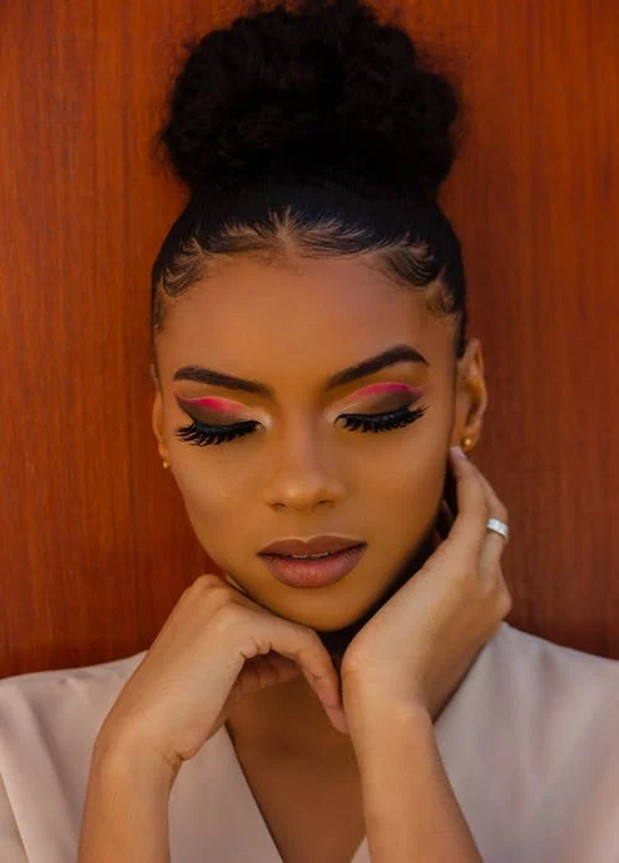
A voluminous high bun is for people whose hair does the work. Curly, thick, mid-back, no bangs, a middle part that lets the texture spread evenly. This is not a style you wrestle into submission. You gather at the crown, twist, pin, and the natural texture fills the shape. The layers in the cut prevent the bun from looking like a single solid mass — they create peaks and soft edges. Who it suits: anyone with enough density to hold a twist without collapsing. Who should pass: fine, straight hair that needs teasing and a dozen pins to fake volume. That is a different bun for a different day. This one trusts the curl.
Sleek Low Bun With Defined Center Part
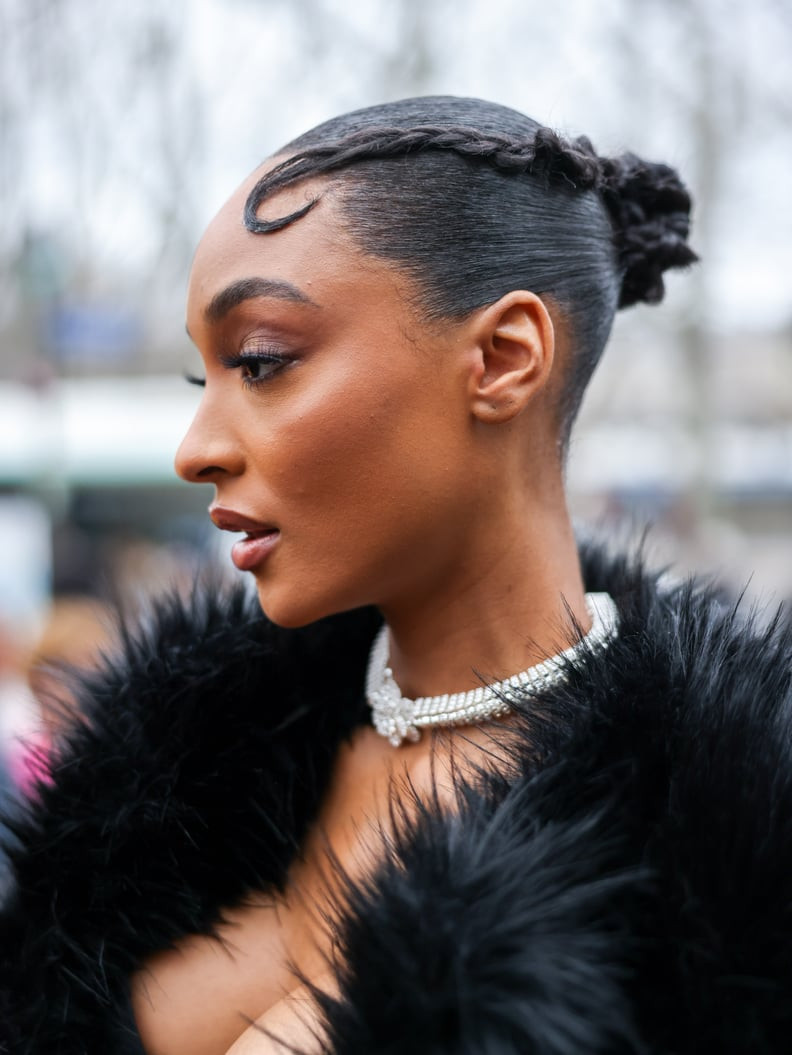
How much product is too much product? With a sleek low bun and defined center part, the answer is more than you think. My fine, straight hair needs a smoothing serum and a fine-tooth comb to get that sharp middle line, and yes, I reapply a light gel every morning. The black colour reads polished, not flat, because the part creates a clean break. The hold lasts about eight hours before the nape starts to soften. A quick finger-comb and a spritz of water reset it. Daily styling takes seven minutes. That is not bad for a bun that looks like it took twenty.
High Voluminous Bun With Soft Lighting
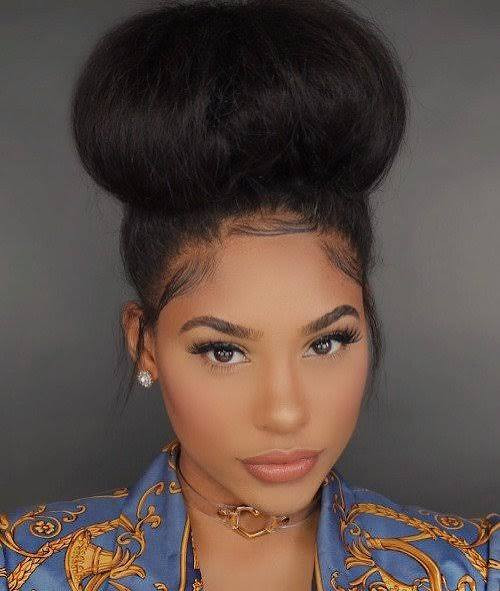
The high voluminous bun under soft lighting looks like it fell together effortlessly. It did not. Compared to a low bun you can twist in your sleep, this one demands a salon-level hand. The curly, thick texture at mid-back length needs to be gathered to the crown and twisted with intention, every strand pinned before it escapes. A texturizing spray gives the grip that keeps the volume from dropping by noon. I can get close at home, but the final shape, the one that does not sag on one side, that is a stylist’s job. The black layers catch the light differently when a professional sets the height. DIY gets you 80 percent there. That last 20 percent is why I book.
Sleek Low Bun With Smooth Finish
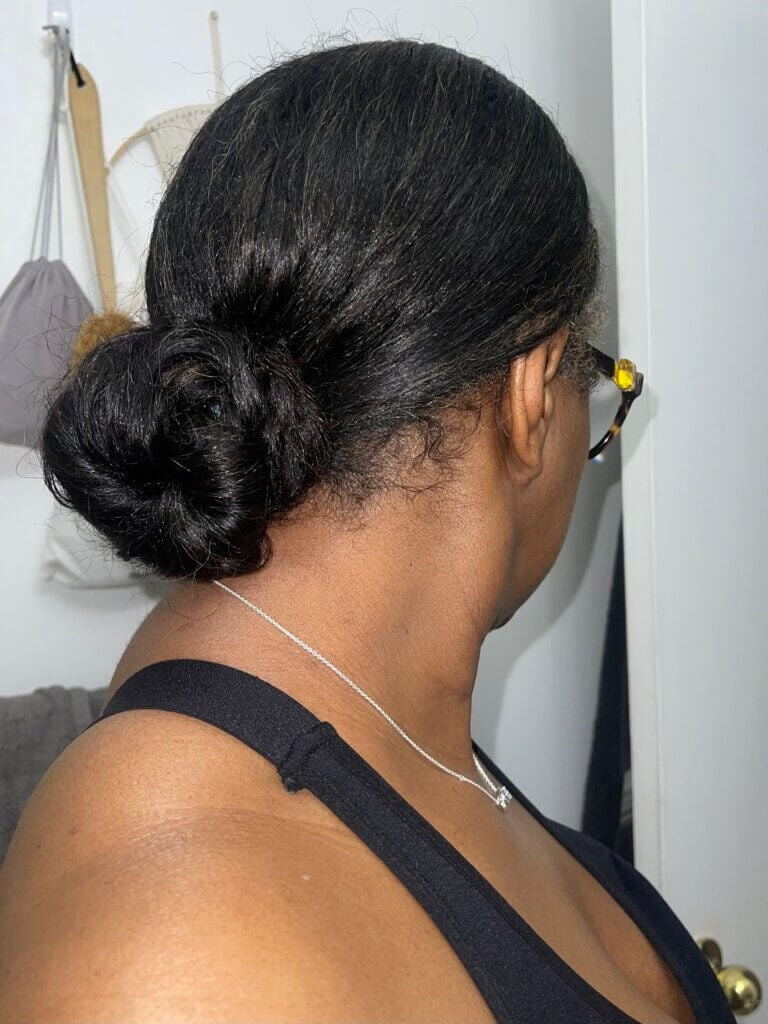
A sleek low bun with a smooth finish looks incredible in the first hour. I am not convinced it stays that way. The back view shows thick, straight black hair pulled into a perfect low shape, every layer tucked, no flyaways. That takes gel, pomade and a strong-hold hairspray, plus a fine-tooth comb for a middle part that does not waver. The honest downside: by hour four, the nape hairs escape. By hour six, the crown has a soft halo of new growth. If your hair is thick and straight like mine, you will be smoothing and re-pinning by mid-afternoon. It is a ten-minute look that needs a five-minute refresh. Worth it for the first half of the day.
Messy Bun With Decorative Scarf
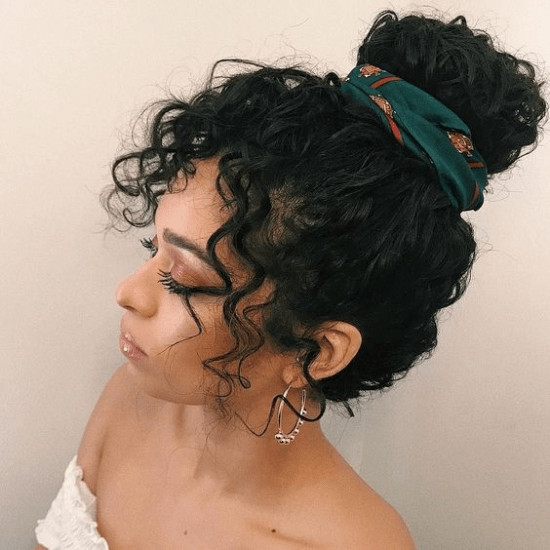
You grab a scarf, wrap it around a loose bun and call it done. The mistake is making the bun too neat first. A messy bun with scarf works because the texture is already loose and curly, so the scarf has something to grip. Thick, mid-back length hair twists into a bun that stays without a single pin if you tuck the ends under the scarf. The black colour disappears behind a patterned silk, which is the whole point. This is a DIY win: two minutes, no mirror, no product. The scarf hides day-old hair and adds personality. Just do not tighten the bun first. Let it fall where it wants.
Double Bun Formation With Side Part
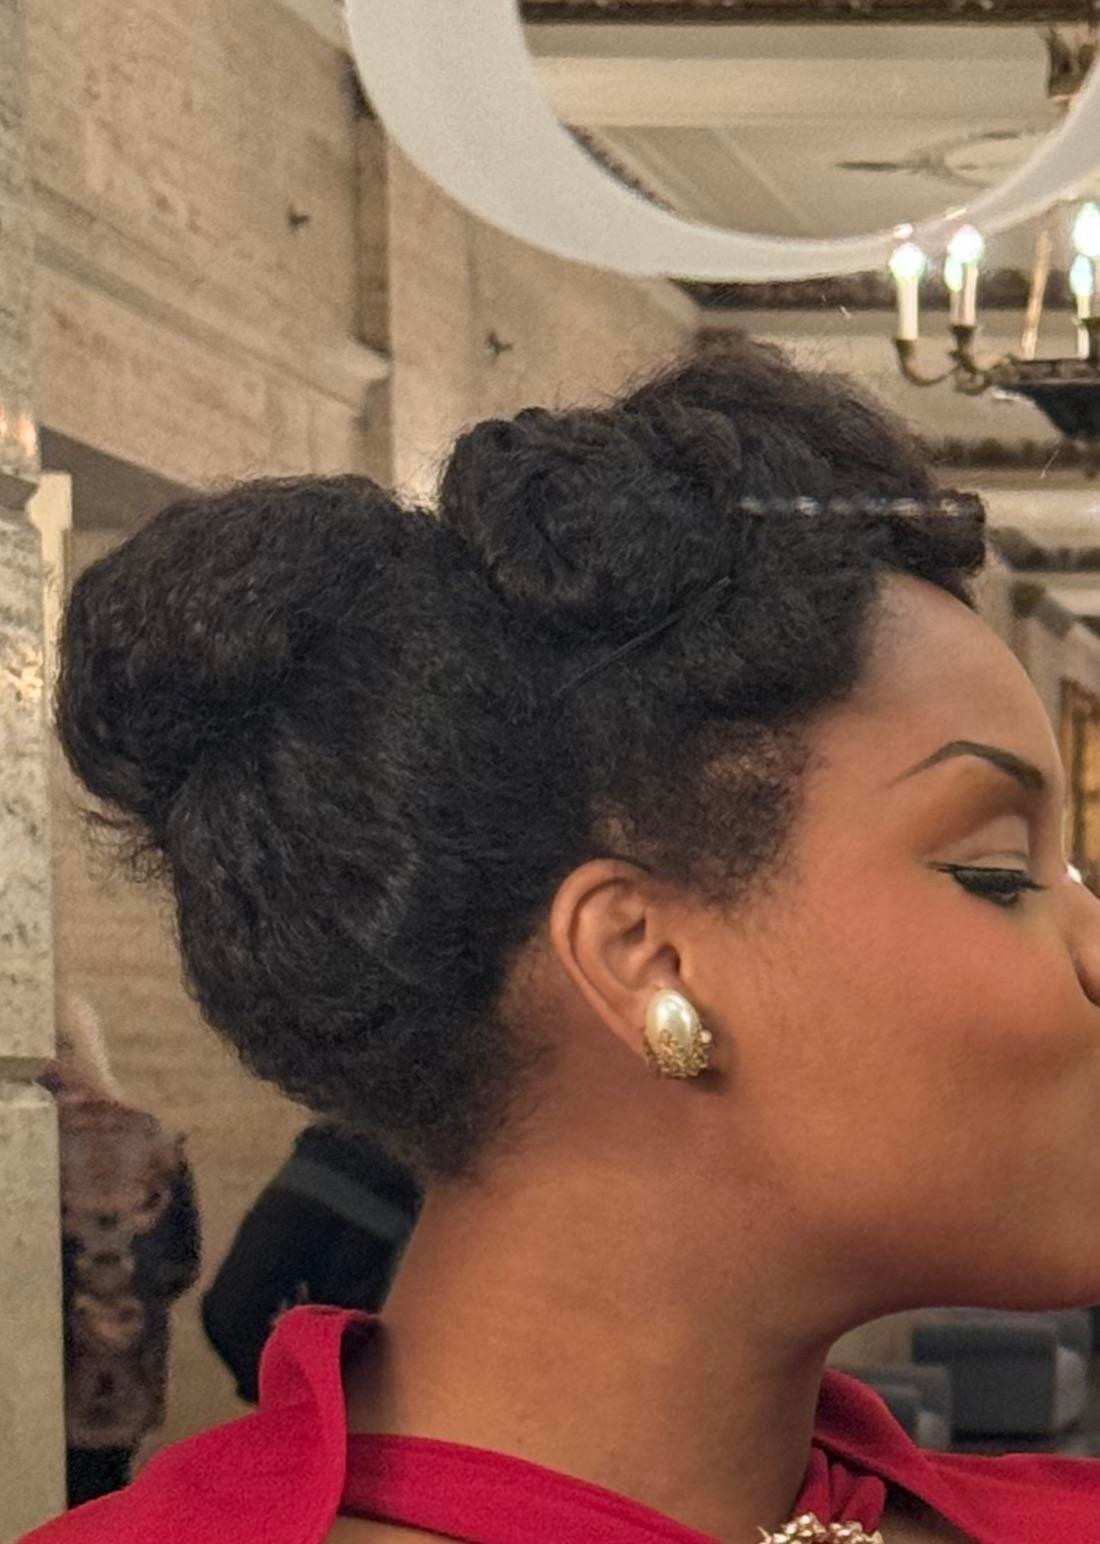
Can you split your hair into two equal sections without a mirror? For a double bun formation with side part, the technique starts with a deep side part that divides the hair unevenly. Coily, thick texture at collarbone length holds each bun without slipping. You take each pigtail, twist it around itself and pin the ends under. The side part keeps the two buns from looking like symmetrical space buns. One sits higher, one lower, both secured with the same number of pins. The black colour reads as two distinct shapes because the coils catch the light differently on each side. No gel, no heat, just a comb and eight pins. It is a ten-minute style that lasts a full day.
Textured Bun With Gold Hair Cuffs
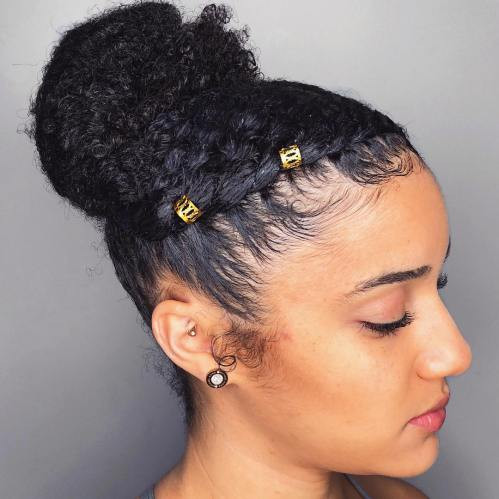
Mid-back, layered, curly and black, this is a textured bun that starts with a middle part and builds upward. The gold hair cuffs are the whole point, placed along the hairline and tucked into the bun itself, catching light from every angle. Ask your stylist for a layered cut with enough weight left in the crown to hold the bun, then add the cuffs on clean, dry hair. Secure each one with a pin if it shifts. This is a holiday dinner or a wedding guest look, the kind that makes you feel dressed without trying to look like you tried.
Large Textured Bun With Dense Coils
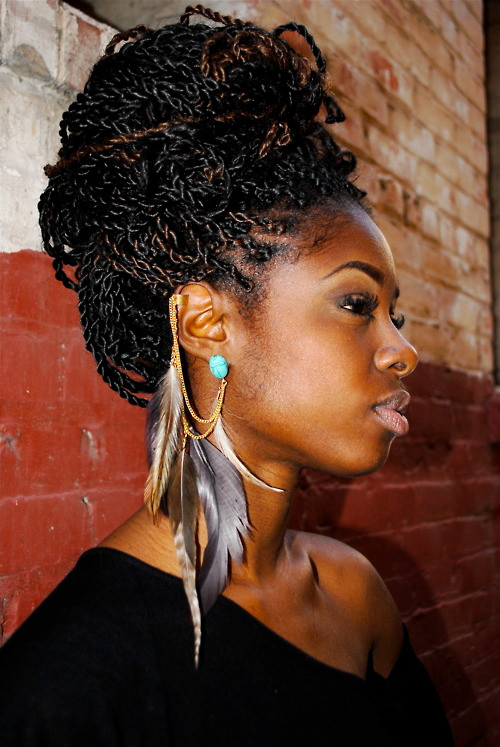
I will admit this: I have never gotten a large textured bun to last a full day on my own hair. On dense coils, it is a different story. The photo shows a front-view, mid-back length, middle part, black, layered cut pulled into a big bun at the crown. The hold comes from starting on damp hair with a strong-hold mousse or gel, twisting each section before pinning it up.
Here is the honest downside. Shrinkage pulls the bun tighter as it dries, so what looked full at 18 am can look half the size by noon. Frizz creeps in around the hairline by late afternoon. It is not a set-it-and-forget-it style. But the volume when it is fresh, that dense, coiled mass sitting high, is worth the midday touch-up with a pick and a spritz of water.
High Updo With Braids and Beads
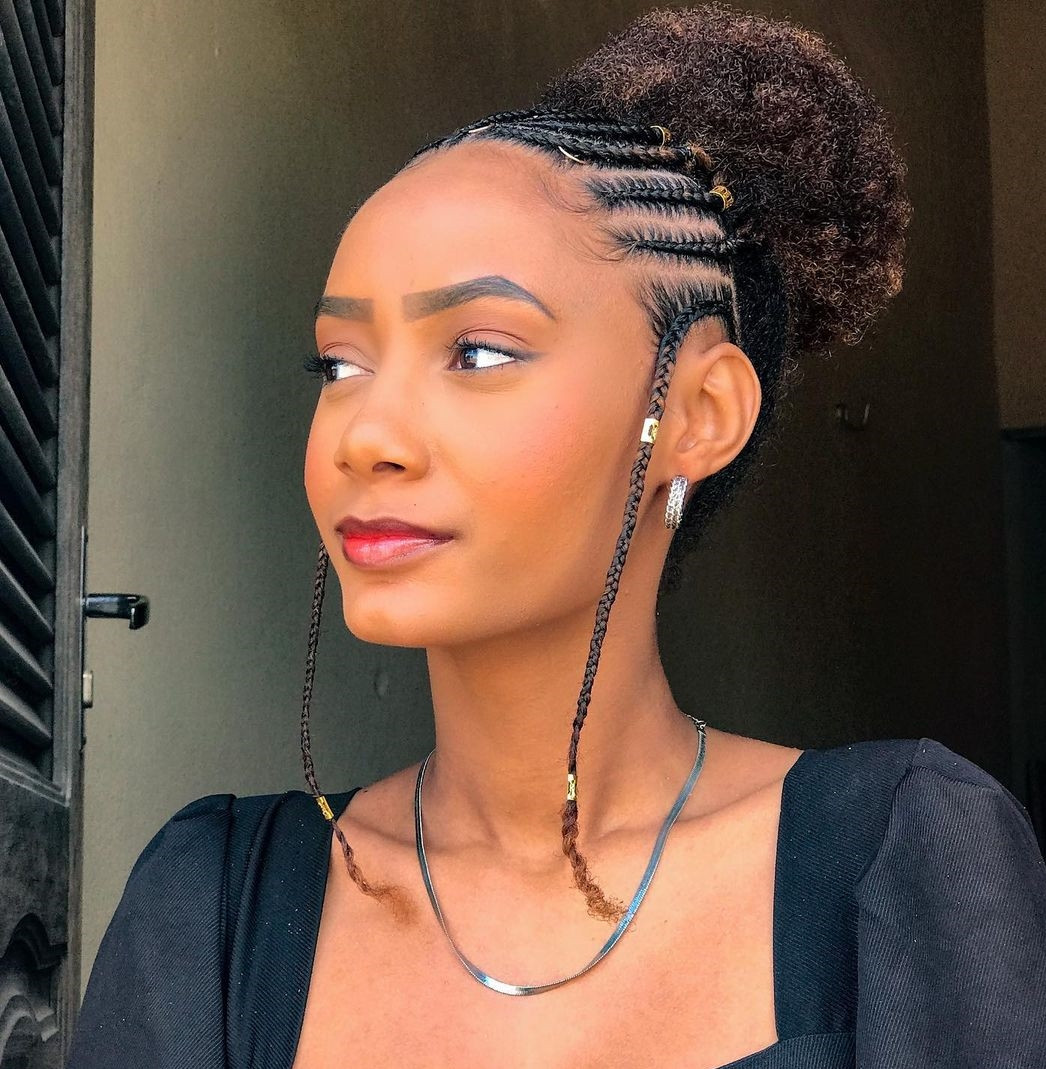
This one stopped me. Collarbone length, coily, black, layered and pulled into a high updo with braids and gold beads woven in from root to end. The beads are added during the braiding, not after, which means each one is locked in place and will not slide or clank. A middle part keeps the front clean while the braids wrap upward into a gathered crown. The technique is precise: small, even sections, consistent tension, beads threaded onto the braid before the next twist. This is not a bathroom-mirror job. Book a skilled braider, bring reference photos, and expect to sit for a few hours. The result is a protective style that holds for a week or more with a satin scarf at night.
Final Thoughts
After writing all 18 of these, I noticed something. The buns I used to skip because they looked too simple were the ones that held best through a full workday. The sleek low bun with a center part? That one surprised me. I am booking it for next week.