
I started seeing camo nails everywhere around March, which is usually when I start ignoring trends. But then I spotted a matte olive stiletto on someone at the grocery store checkout, and I had to admit it looked better than it had any right to.
So I spent a month testing Camo Nails across 27 different designs, from short squares to extra-long stilettos, matte to glossy, classic greens to neon waves and pastel blends. If you have short nail beds or you type for a living, I found versions that won’t make you regret your choices. This is the honest breakdown of what actually works and what chips by day three.
Classic Matte Green Camo Coffin Nails
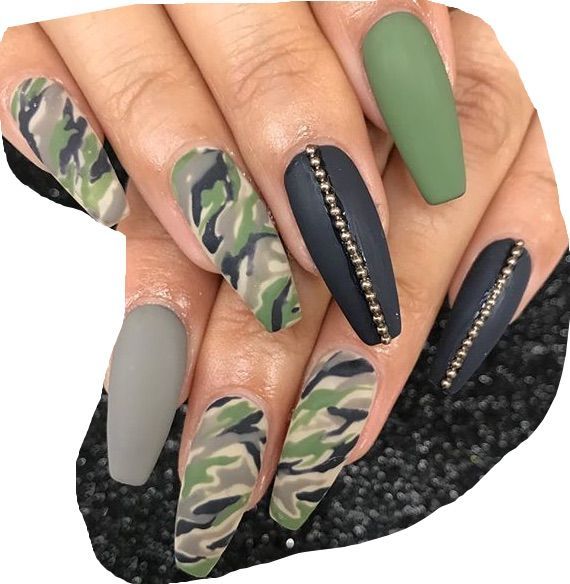
A matte finish on a classic camouflage pattern is a specific kind of restraint. The green, grey, black and beige sit flat, no shine, no reflection. On a long coffin shape, that flatness makes the whole thing read more architectural than tactical. Matte green camo nails like these rely on that exact contrast. The pattern itself is chaotic, but the matte topcoat locks it into something deliberate. Every edge of the camo stays crisp because there is no gloss to blur the lines. This is not a print you wear to blend in. It is a print you wear because you know exactly what you want. It’s a look that works because it refuses to try harder.
Matte Olive Stiletto Abstract Camo
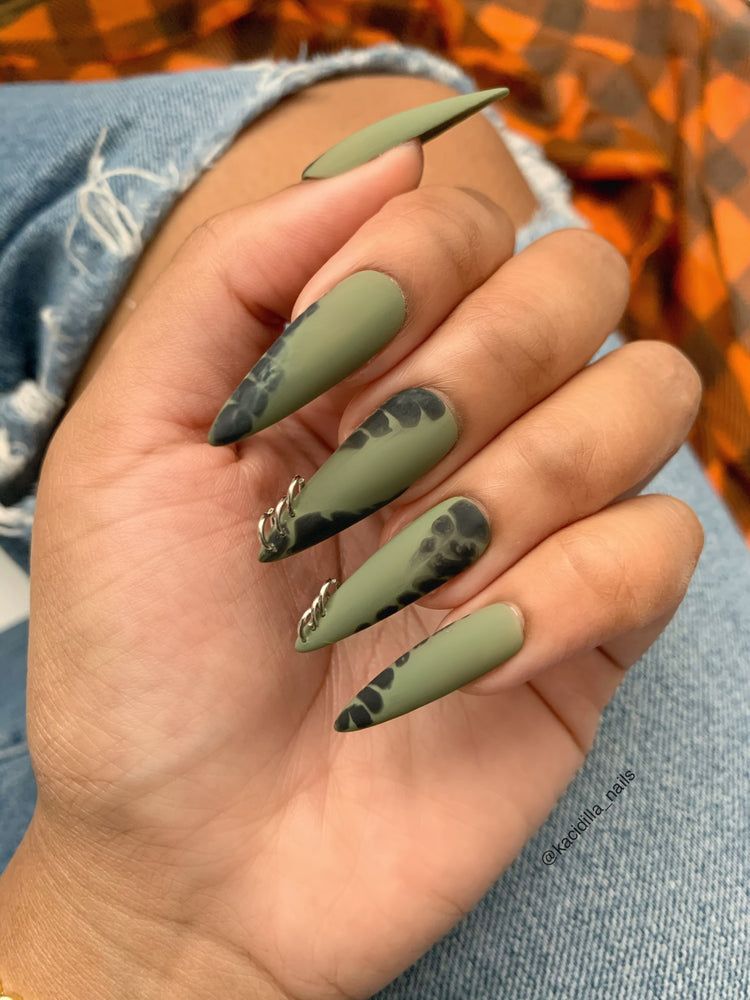
Can your nail shape handle a pattern that doesn’t follow the curve? These abstract camo stiletto nails with silver ring charms demand a certain confidence. The pattern breaks the rules of traditional camo, which means the shape has to be strong enough to ground it. Stiletto does that work. The olive base keeps it from feeling costumey. If your nail beds are short or your daily life involves a lot of typing, this length will test your patience. It is not for the faint of wrist.
Glossy Green Brown Camo Cross Coffin
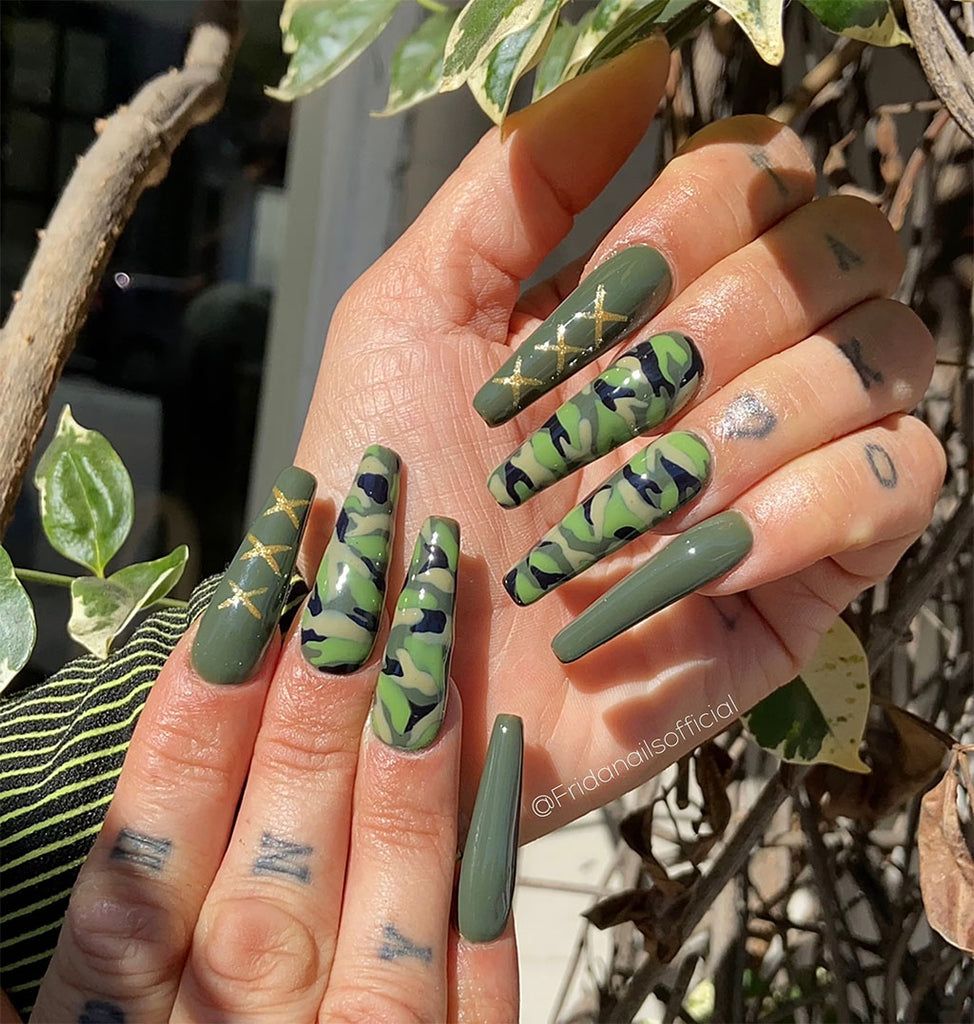
If matte camo is restraint, glossy camo french nails with gold cross embellishments is the loudspeaker version. Where the matte versions stay quiet, this one announces itself. The gloss amplifies the green and brown, making the pattern read almost wet. This is a holiday party or a concert nail, not a Wednesday meeting.
- Long coffin shape
- Green, black and brown full camo
- High-gloss finish
- Gold cross accents on accent nails
- Salon-level precision required
The gloss is what sells it. Without it, the gold crosses might feel heavy. Together, they balance.
Camo French Tip Almond Nails
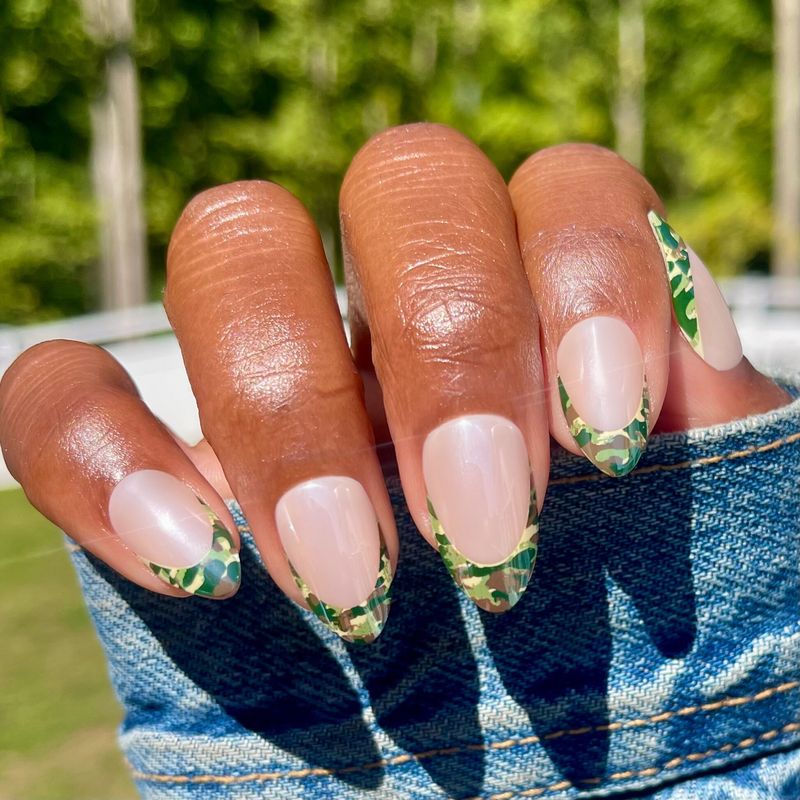
The camo is only on the tips, which means the line between nude and pattern has to be exact. The sheer nude base does the heavy lifting. It extends the wear window because regrowth blends into the nude, not a stark color block. The camo french tip nails require a steady hand to pack the green, brown and black into that small space without it turning into a blob. This is a salon ask. A DIY attempt with a thin brush and a prayer will likely end in frustration. The precision of the tip line is what makes it read as intentional. A good tech makes this look simple. It is not.
Matte Green White Grey Camo Almond
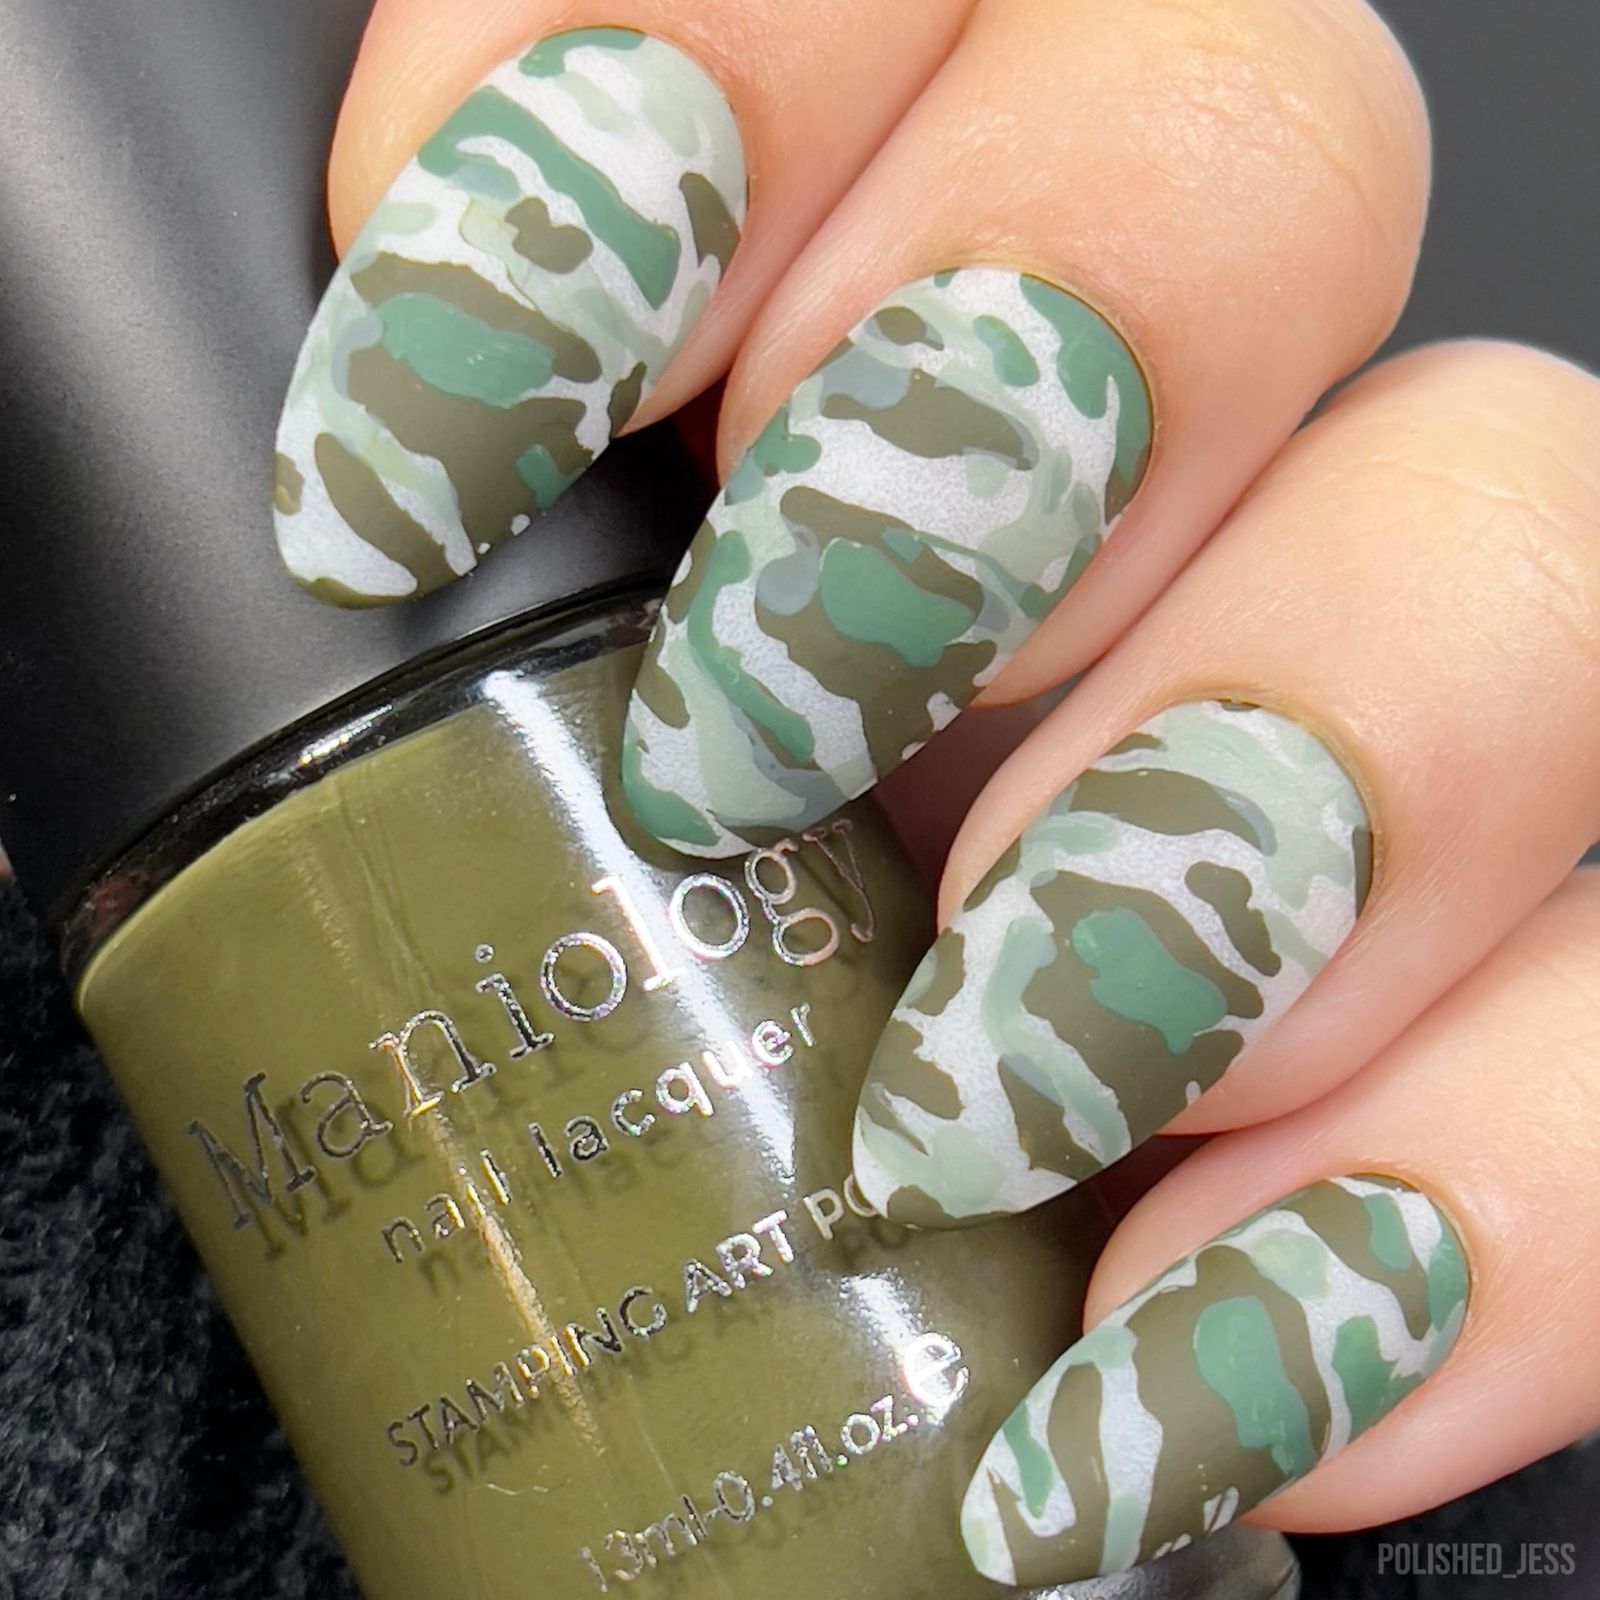
I will admit I underestimated how much a matte topcoat demands from a daily routine. These matte camo almond nails in green white grey show every bit of hand cream and cuticle oil. The matte finish soaks up the oil and darkens in patches by day three. A quick wipe with alcohol or a matte top-up coat keeps them fresh. The medium almond length is practical enough for typing and contact lenses. They look great. You just have to maintain the illusion.
Mint and Olive Camo with Silver Glitter
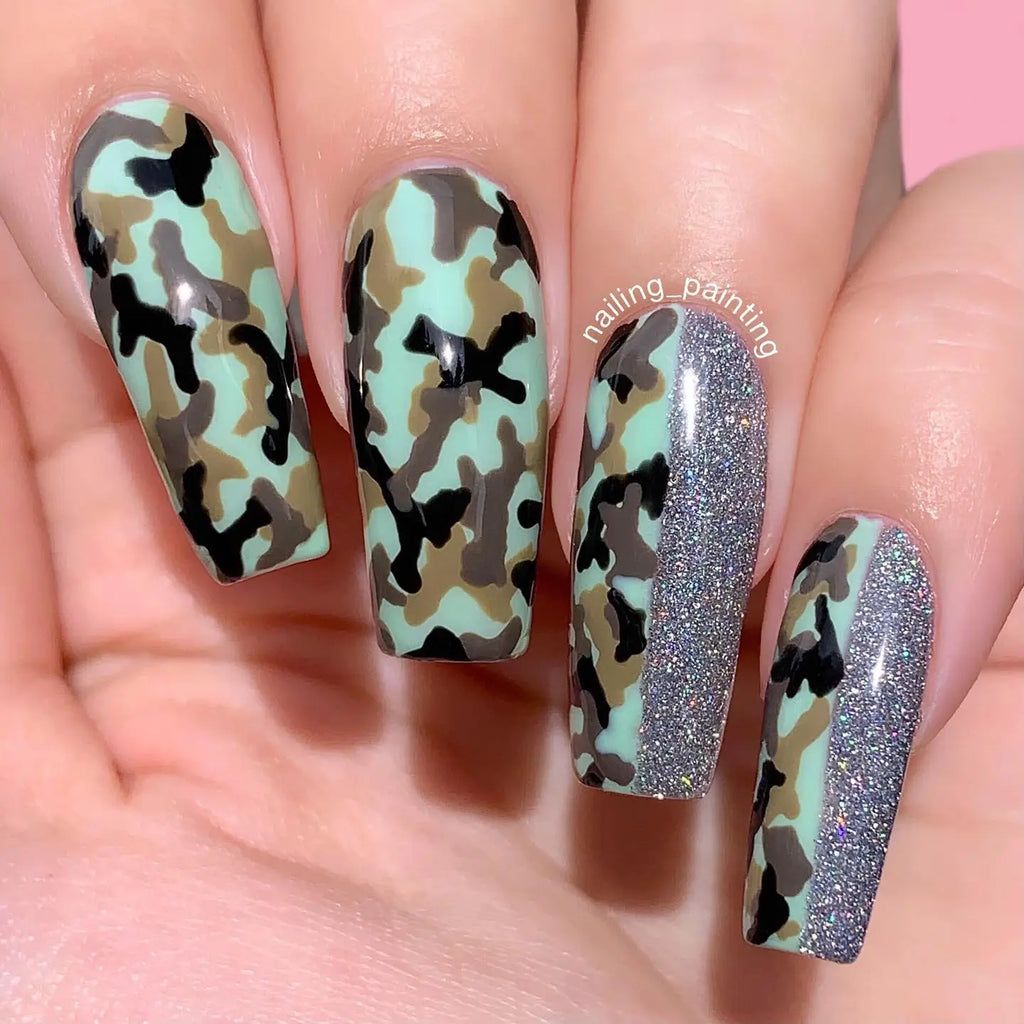
I wasn’t planning to recommend glitter camo nails. Then I saw this one. The mint and olive base keeps the classic camouflage pattern grounded, and the silver glitter accent on the long coffin shape catches the light without trying too hard. It’s the execution that sells it: the brown and black spots are crisp, not muddy. The mint green reads fresh against the olive, a combination that keeps the camo from feeling heavy. The silver glitter accent nail is a single pop, not an overload. This is the kind of detail work that makes a salon visit worth it. A detailed pattern that reads clean and intentional. Best glitter camo in this roundup.
Leopard-Inspired Camo Short Square
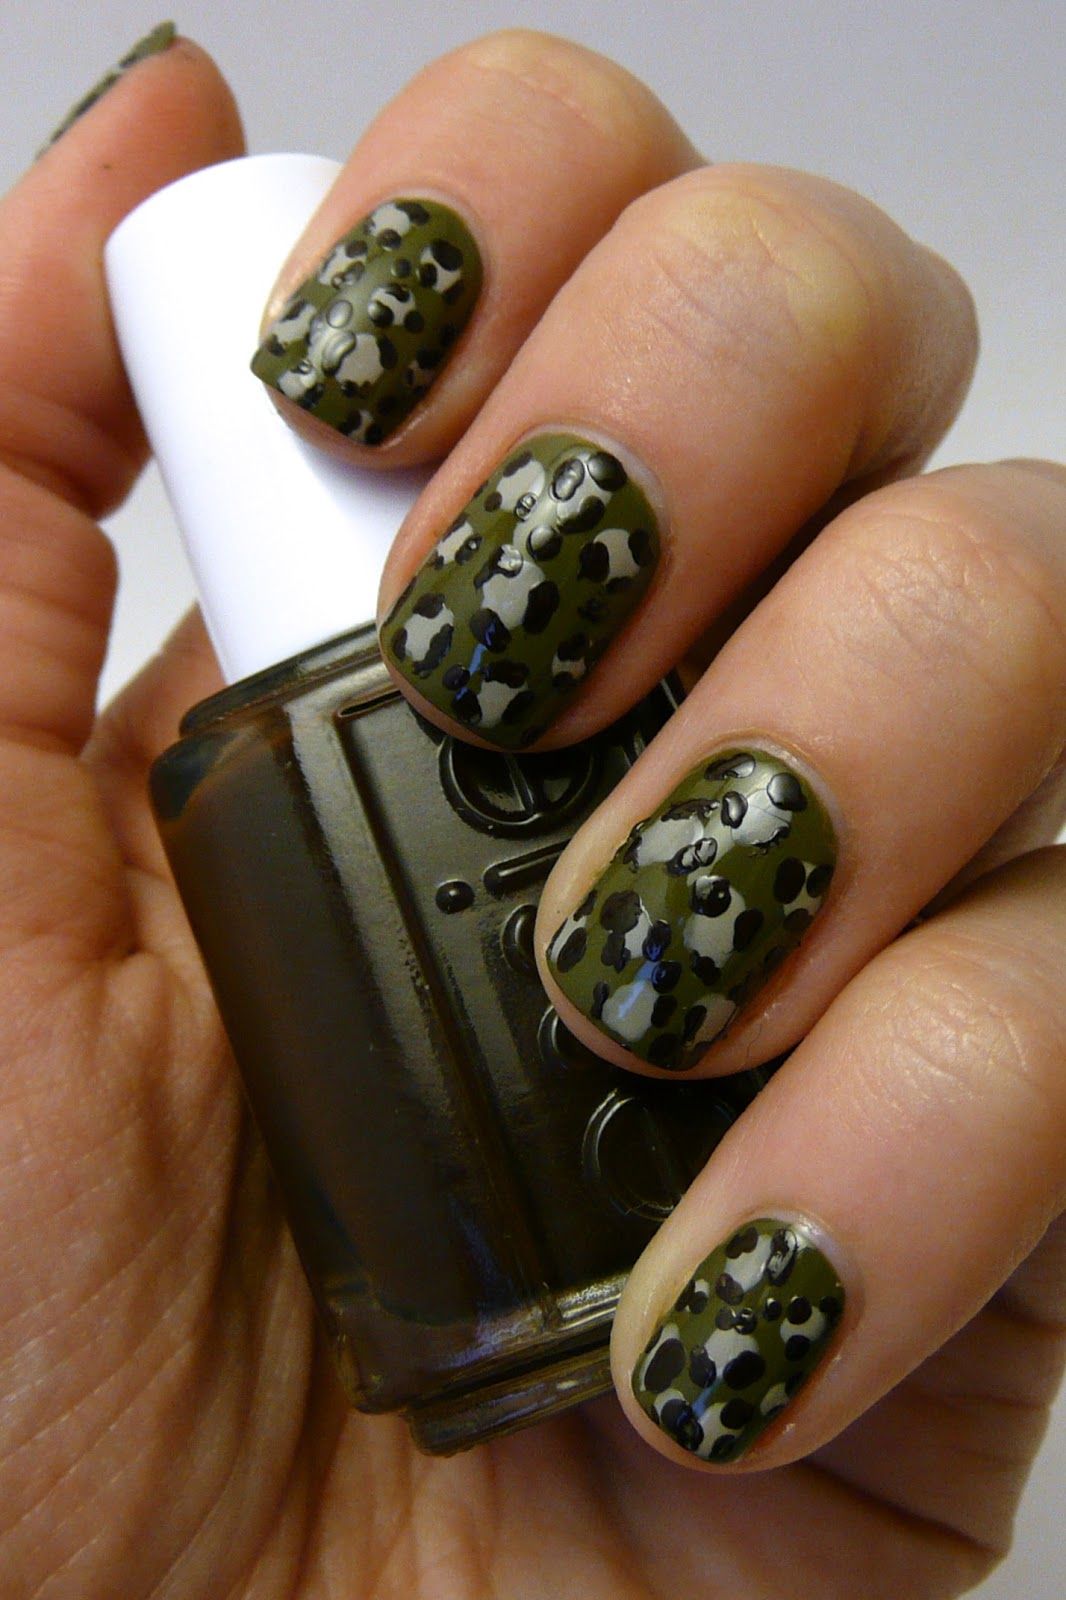
Is this leopard camo nails or just leopard print in camo colors? The olive green base with black and grey spots gives it a unique camouflage pattern that leans more animal than army. The short square shape keeps it practical, but the pattern can blur at a distance: it doesn’t read as camo immediately. Up close, the visible texture in the design is impressive. Unique, but not for purists.
Metallic Camo Oval Nails
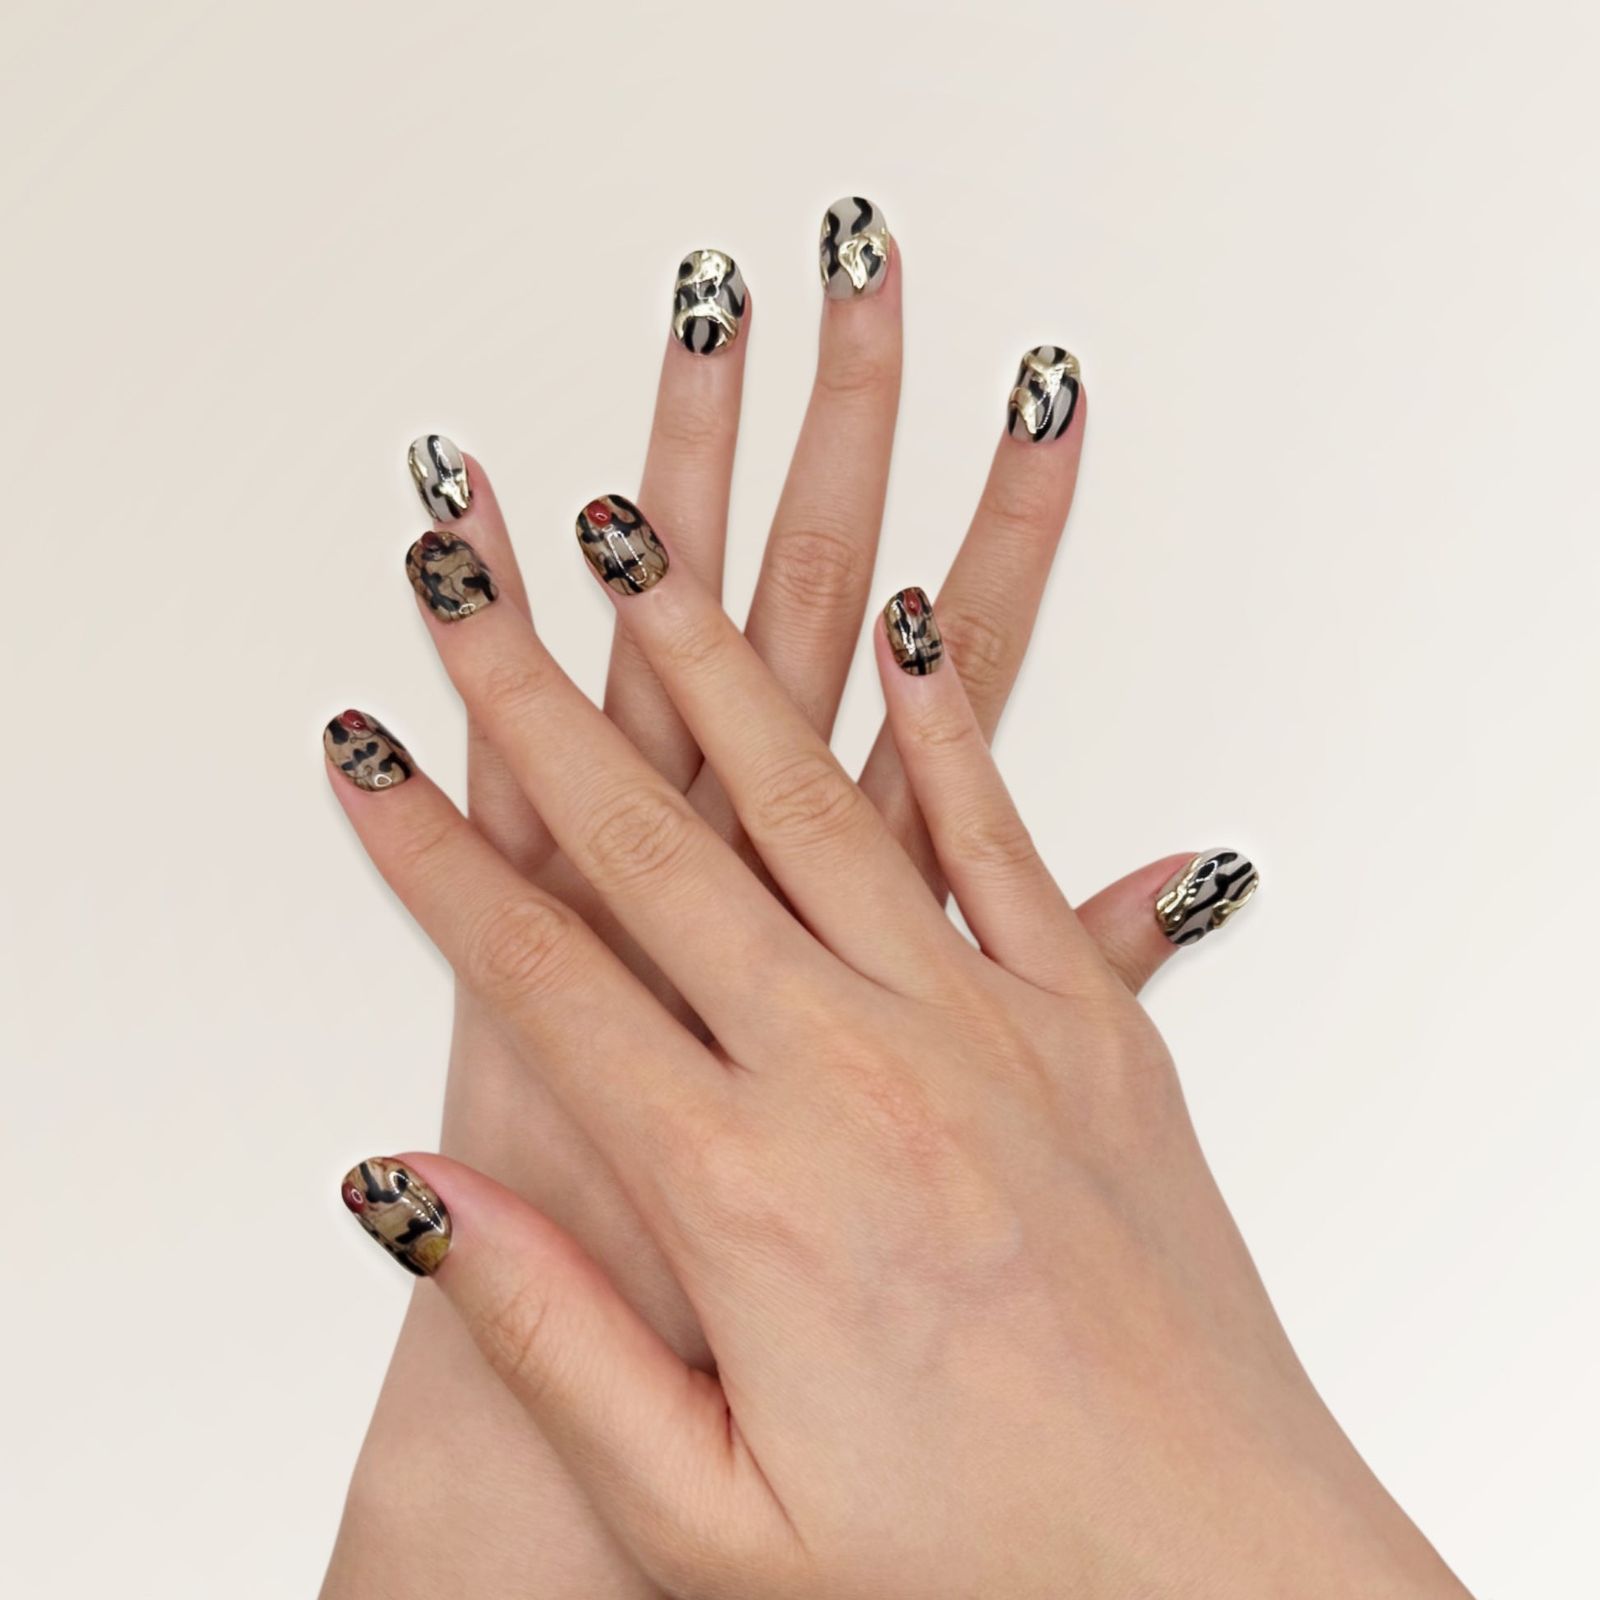
You walk into the salon with a reference photo of metallic camo nails. The medium oval shape provides a generous canvas for the metallic green, brown, and black camouflage pattern. The glossy finish with gold and silver tones catches the light without overwhelming the pattern. The execution matters here: line cleanliness and cuticle work make the difference between a luxury look and a messy one.
For a DIY attempt, start with a dark brown base. Sponge on green and black patches, then dab gold and silver metallic foil or pigment over the edges. The key is to keep the metallic accents sparse: too much and the camo pattern disappears. Tell your tech: thin layers of metallic chrome over the camo spots, not a full overlay. Ask for a dark olive green, a warm brown, a flat black, and a gold and silver chrome pigment. This is a salon-level design, but with patience and a good metallic pigment, you can get close at home.
Classic Matte Khaki Beige Camo Stiletto
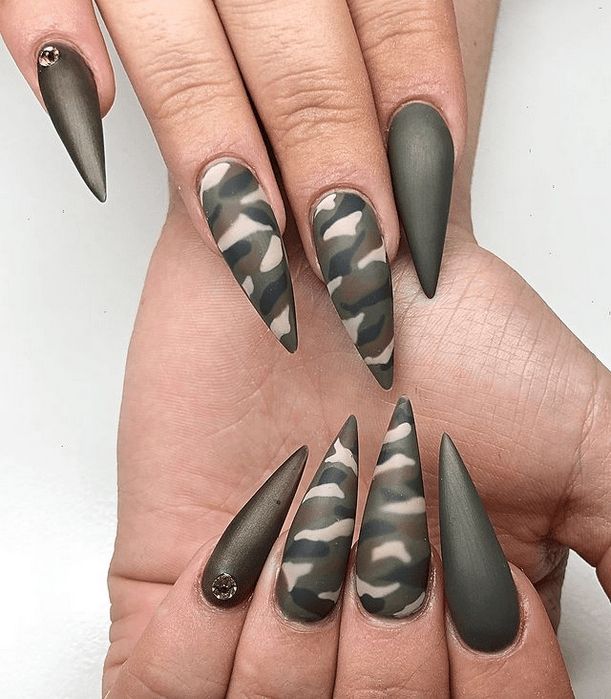
This is the camo you think of when someone says military surplus, but with a manicurist’s precision. The long stiletto shape demands commitment — skip it if you type all day or have short nail beds. For autumn foliage hikes or a casual outdoor wedding, it reads as intentional. The matte khaki camo nails lean warm on olive and tan skin tones because the khaki pulls yellow, not gray. The classic camouflage pattern covers every nail, so there is no break from the theme. This is not for anyone who wants subtlety. It announces itself. Suits anyone with a straight nail plate who can handle length. The earthy palette matches flannel season without trying too hard.
Matte and Glossy Camo Mix Coffin
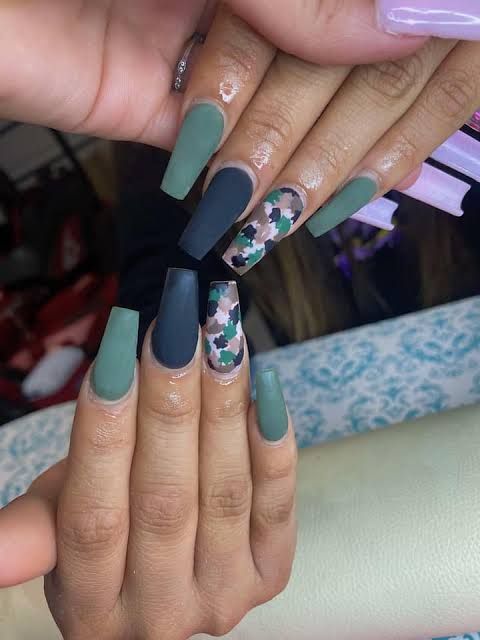
The mixed finish camo nails hit you with textural contrast before the pattern registers. Matte green base, gloss on the black patches — it is a deliberate play of light. The long coffin shape gives enough surface for the contrast to read. The downside: the glossy sections catch fingerprints by lunch, and they wear differently from the matte, so by week two the difference softens. Is the first-week wow worth the mid-week maintenance? For me, yes.
Stiletto Camo Mix with Glitter and Gems
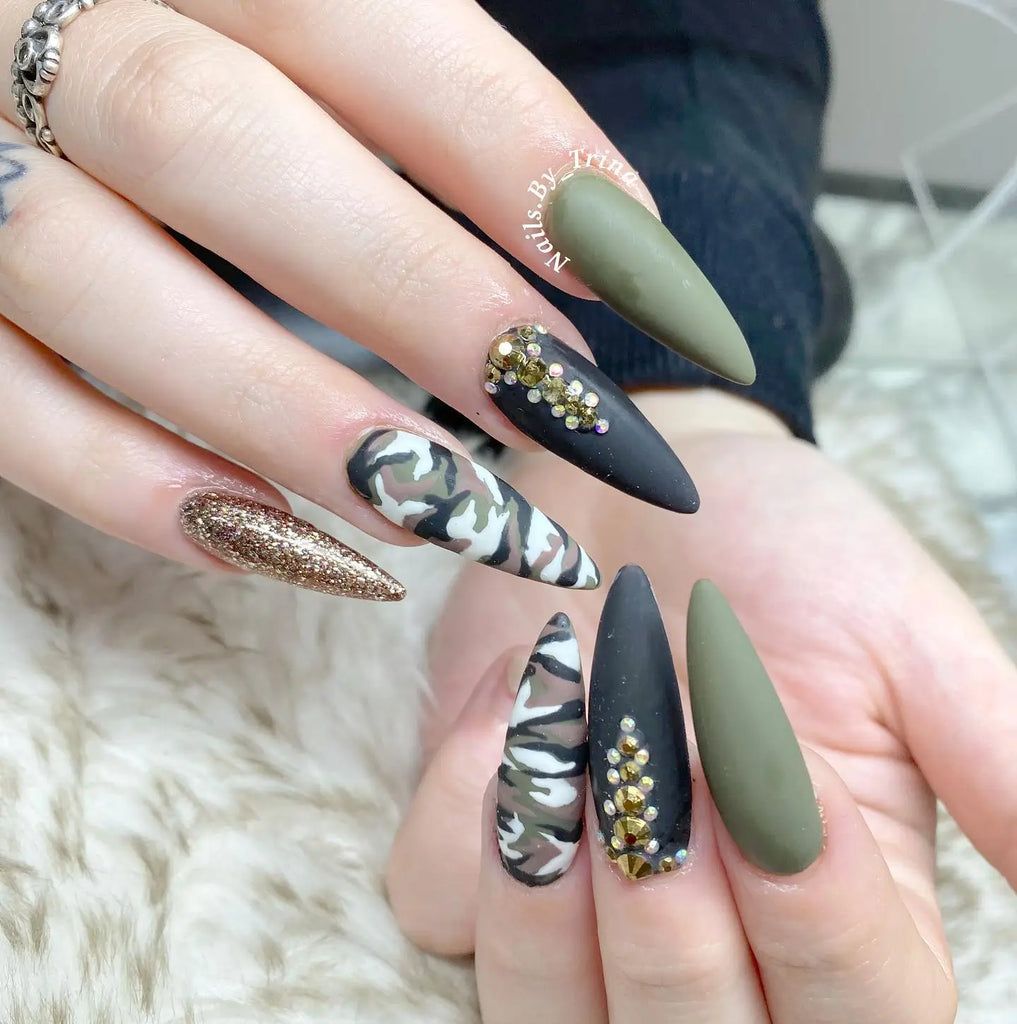
I’ll admit it: I was skeptical a stiletto could carry this much hardware. But the mix of matte olive patches, glossy black blobs, and gold glitter over beige base somehow doesn’t tip into costume. These camo nails with gems catch light without overwhelming the pattern.
- Long stiletto shape, filed to a sharp point
- Greens, black, white, and beige in organic patches
- Glossy, matte, and glitter finishes layered
- Gold glitter dusted over the lighter areas
- Clear rhinestones placed at the cuticle line
Two weeks of wear if you treat them like fine china. One snag on a sweater and a rhinestone goes flying. The glitter layer is tough but the gems are not. Gel removal is non-negotiable — acetone soak won’t budge that glitter. This is a salon booking, not a Sunday experiment. The payoff is real, but the upkeep is specific. I wore mine through a week of typing and lost one gem by day five. Plan for touch-ups.
Matte Blue Grey Abstract Camo Oval
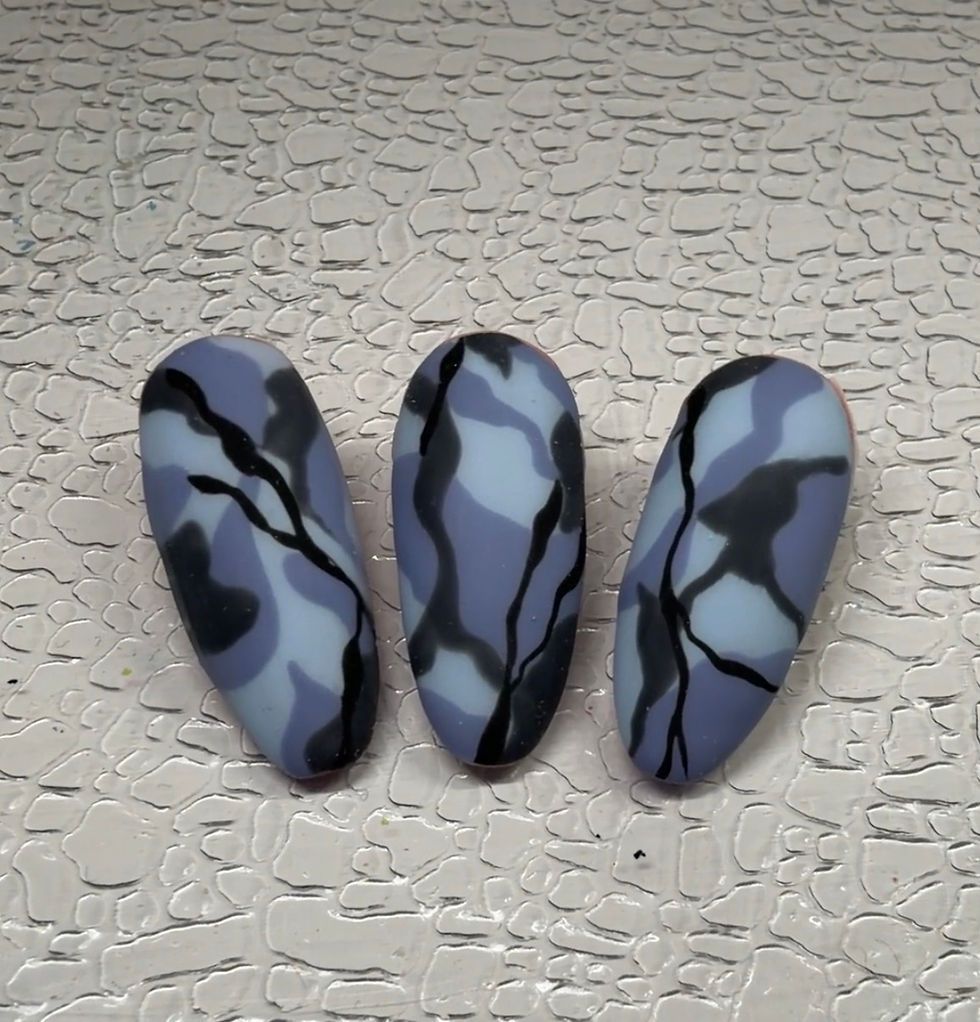
The blue grey camo nails swap earthy greens for a cooler palette: light blue, grey, and black. The abstract camouflage pattern relies on soft-edged blobs rather than sharp military shapes. A matte top coat seals the look and hides any slight unevenness in the layering. This is a salon-level design — the tech needs to control the opacity of each shade to keep the camo readable without muddying the blue.
Vertical Green Camo with Gold Shimmer
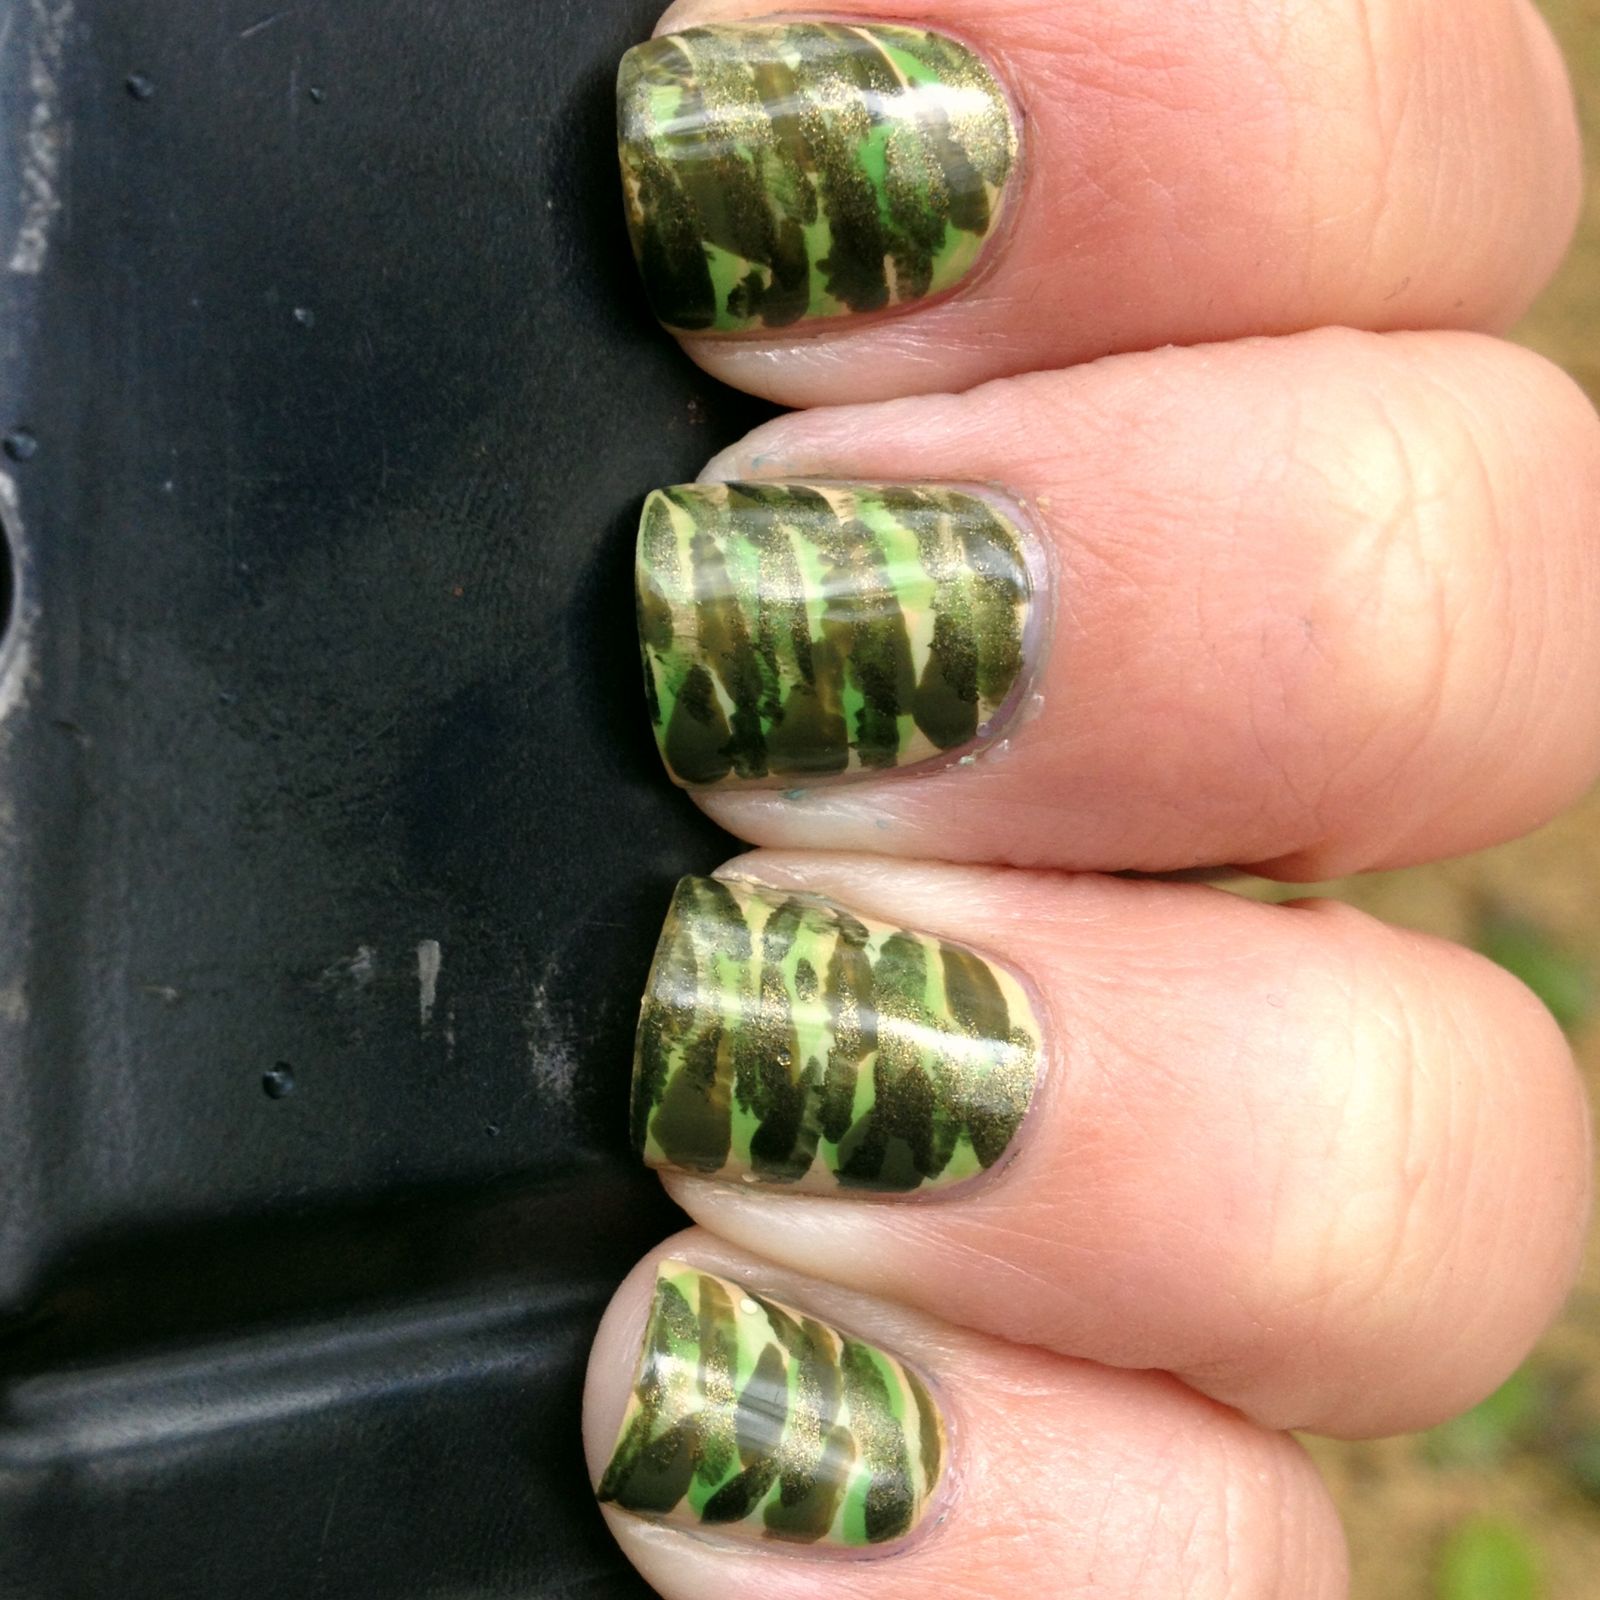
The gold shimmer camo nails caught me off guard. The shimmer is subtle, a fine gold dust that catches light without overwhelming the greens. The vertical camouflage pattern uses brushstroke-like strokes of dark green, light green, and gold, running from cuticle to tip. This is surprisingly DIY-friendly: a thin brush and a steady hand can pull off the vertical lines. The tricky part is the gold shimmer layer — it needs to be dusted on while the base is tacky, or it won’t adhere evenly. A glossy top coat seals everything and adds depth. I’d still book it for the first try, then attempt at home.
Extra-Long Camo with Neon Orange Waves
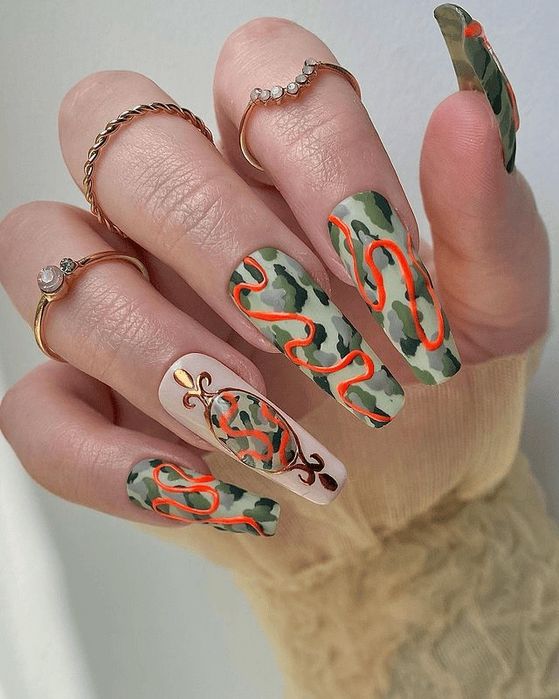
Can neon camo nails survive a real week? The neon orange wavy lines are the whole point here, bright against the army green and beige camo base, and that glow is the star. It’s also the first thing to go. Neon pigments are notoriously unstable under top coat and UV exposure.
- Extra-long coffin shape, filed to a clean point
- Abstract camo in army green, olive, black, beige
- Neon orange wavy lines on thumb, index, middle
- Gold foil accent on the ring finger
- Glossy top coat over everything
The gold foil holds up, and the camo stays sharp, but the neon orange wavy lines are the star and the first to dull. Just know what you’re signing up for.
Pastel Pink Purple Blue Camo
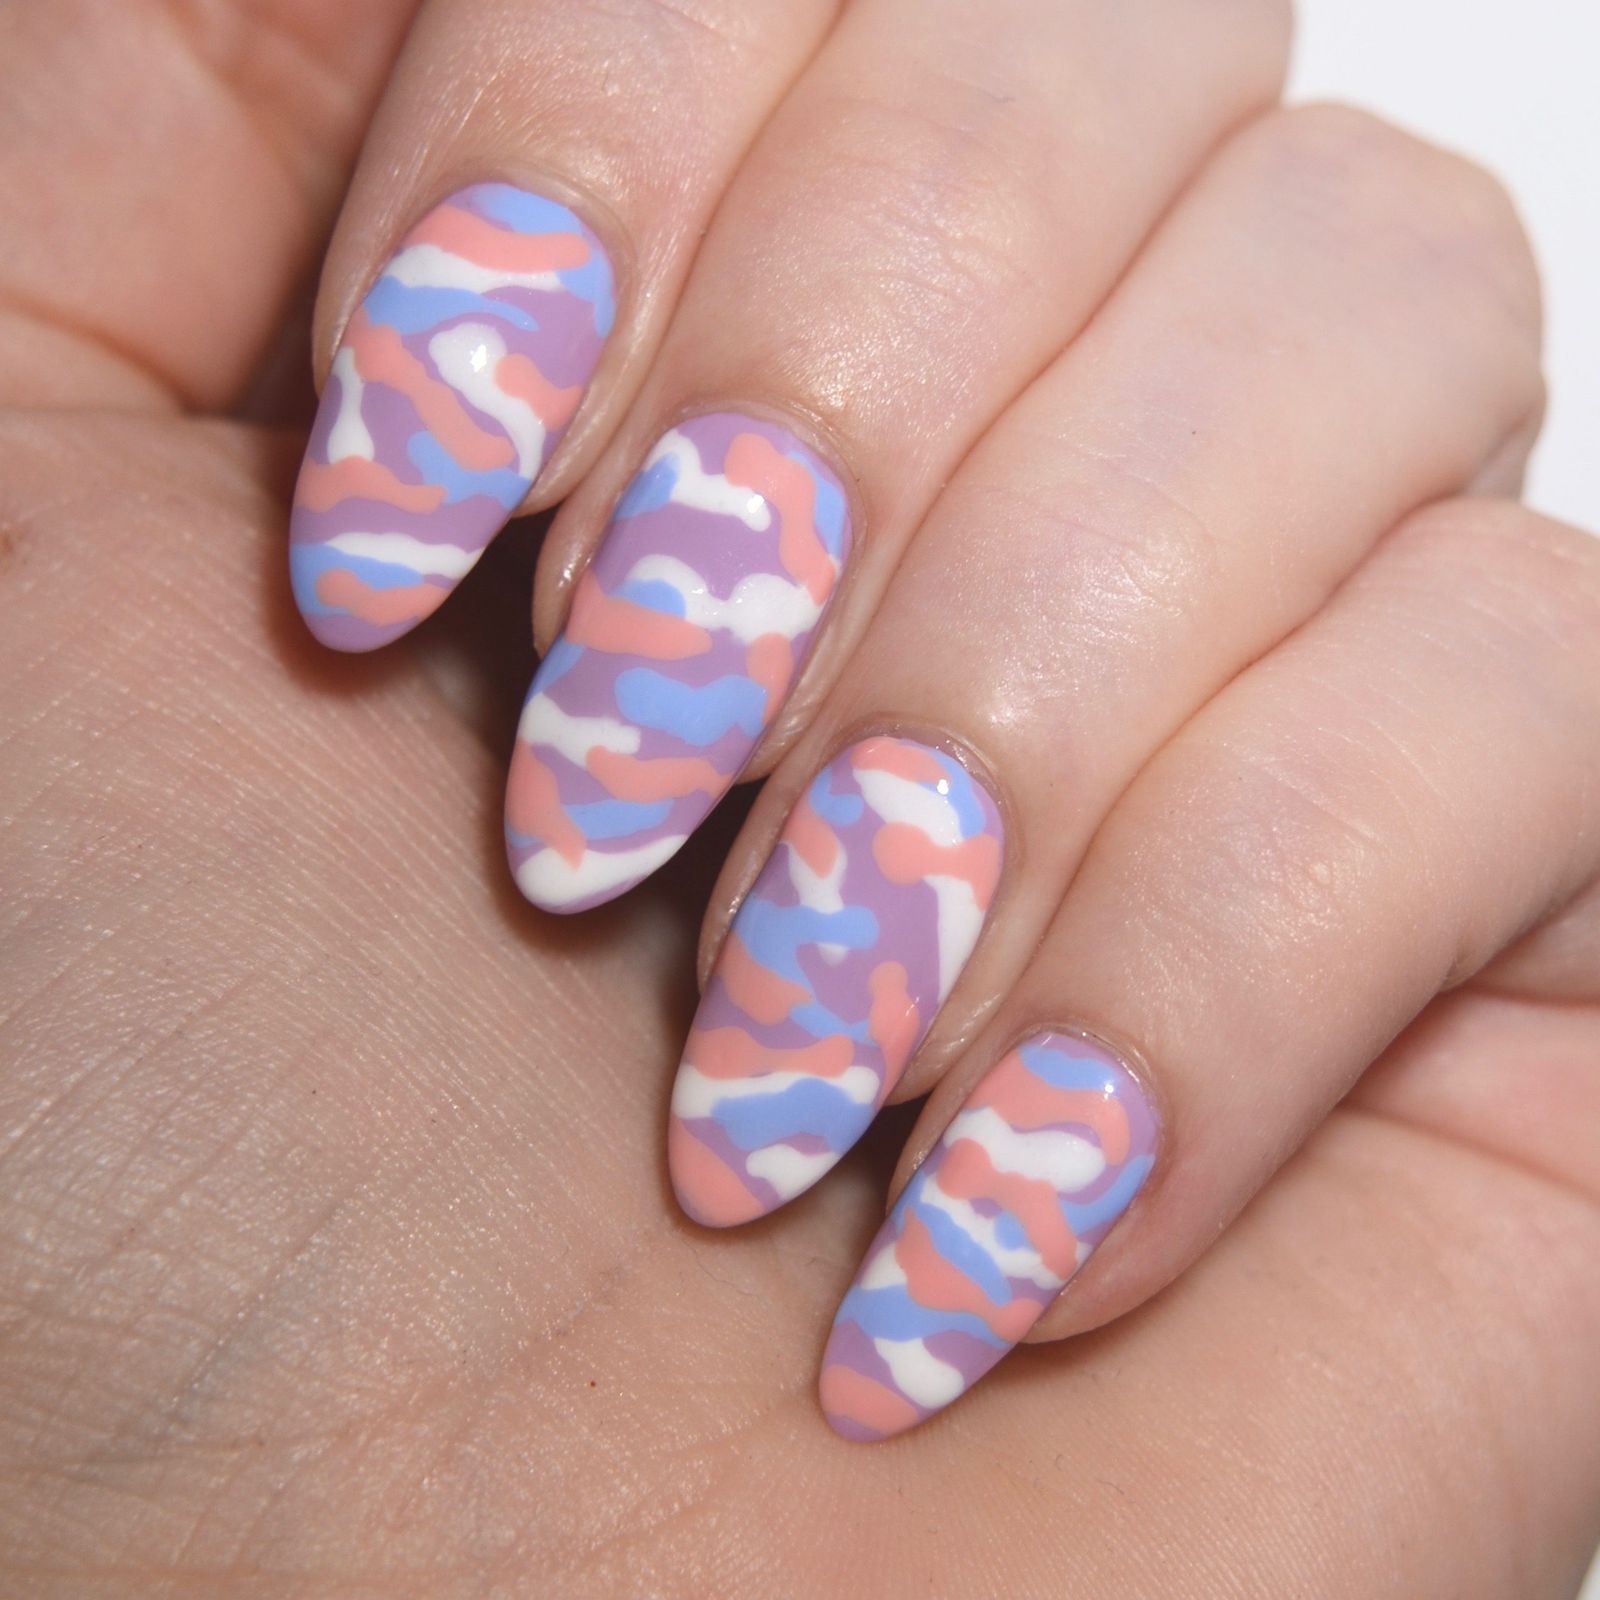
This is the camouflage that got me. Soft pastel camo nails in pink purple blue, and it works. The glossy finish over medium ovals keeps it from reading like a toddler painted them. Pastel pink, pastel purple, pastel blue, white blobs that somehow land as intentional. It flatters warm and cool undertones equally because the white base pulls everything neutral. If you have very yellow or very red skin, skip it. The pastels will fight you. For everyone else, this is the most unexpected compliment magnet in the roundup.
Matte Camo Mix with Glitter Accents
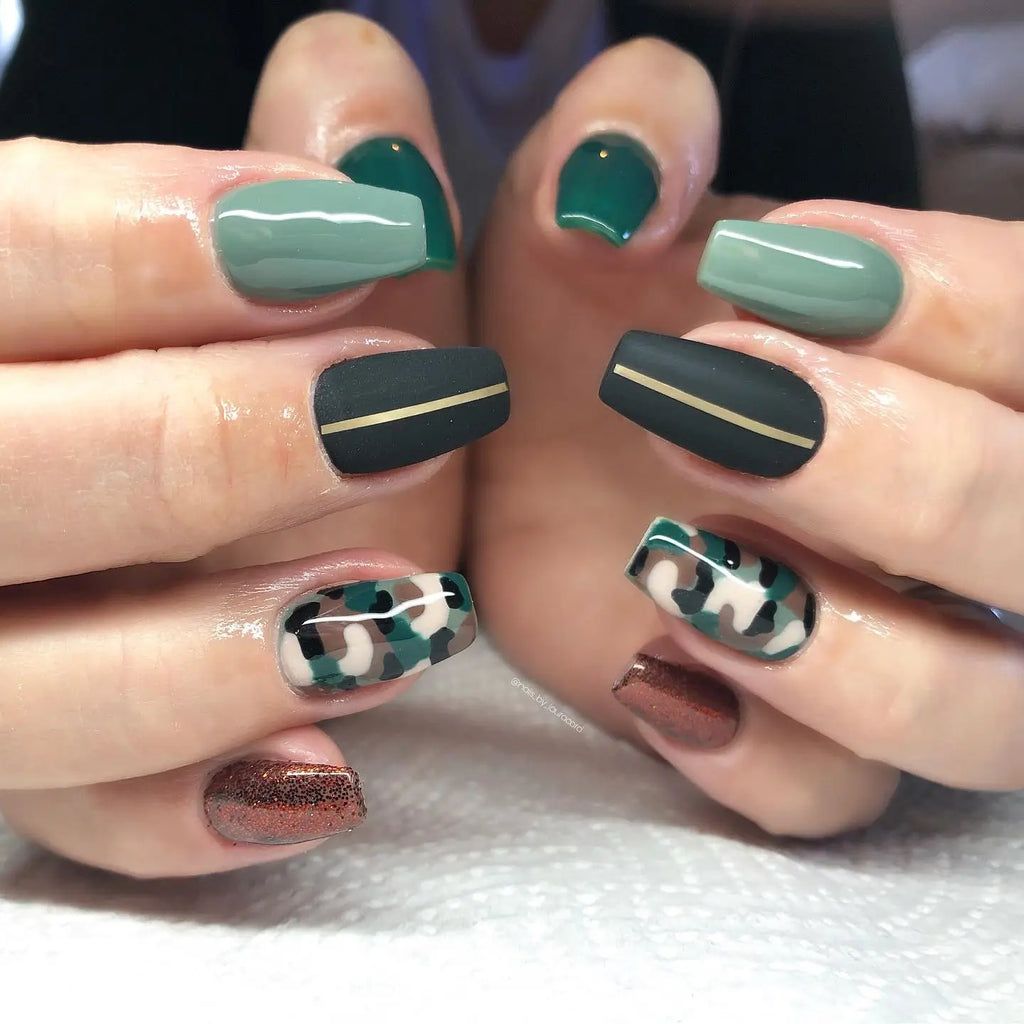
You saw the photo. Now here is how to get close at home without crying. Start with a rubber base on short square or coffin nails. Paint two accent nails with a brown glitter polish, thin layers, let each dry. On the rest, use a sponge to dab matte green, matte grey, matte black and matte beige in random patches. Do not overblend. The matte camouflage glitter nails effect comes from the contrast between the flat camo and the brown glitter finish. Seal everything with a no-wipe top coat. Let it cure fully before touching anything. The glitter will feel slightly textured. Accept it.
Abstract Grey Beige Camo with Gold Swirls
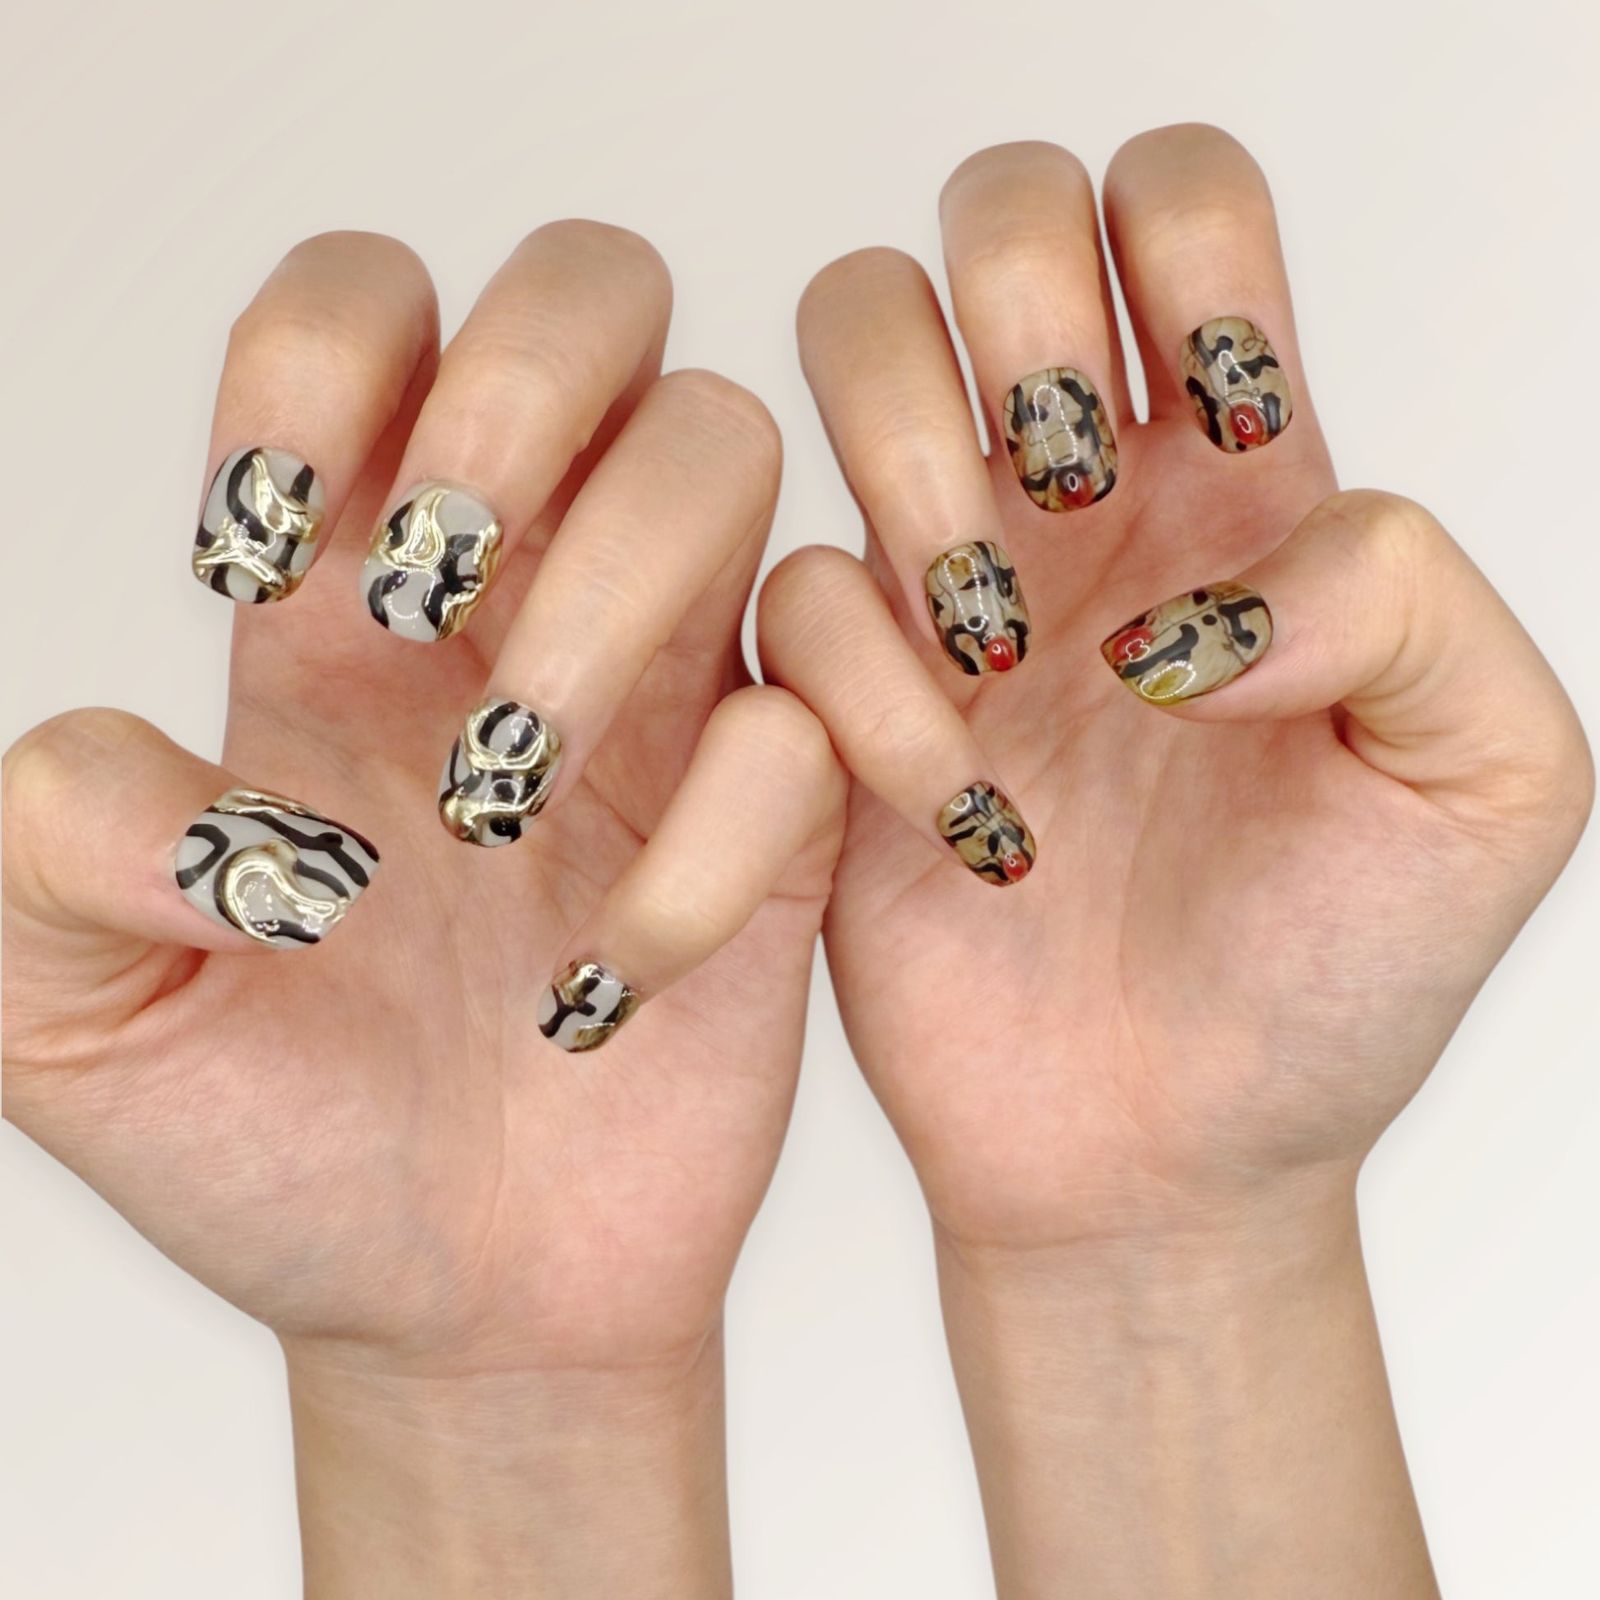
The metallic gold swirls catch light on day one. By day three, they catch everything else. Abstract camo gold nails with metallic gold swirls on medium almond look incredible in photos. In real life, the gold is a dust magnet. I wiped mine twice daily. The glossy finish helps, you can buff off surface grime without damaging the art. The grey and beige base hides regrowth well, but the gold does not. At week two, the swirls start looking dull instead of reflective. Keep cuticle oil nearby and avoid digging in your bag.
Camo French Tips with Glitter Accents
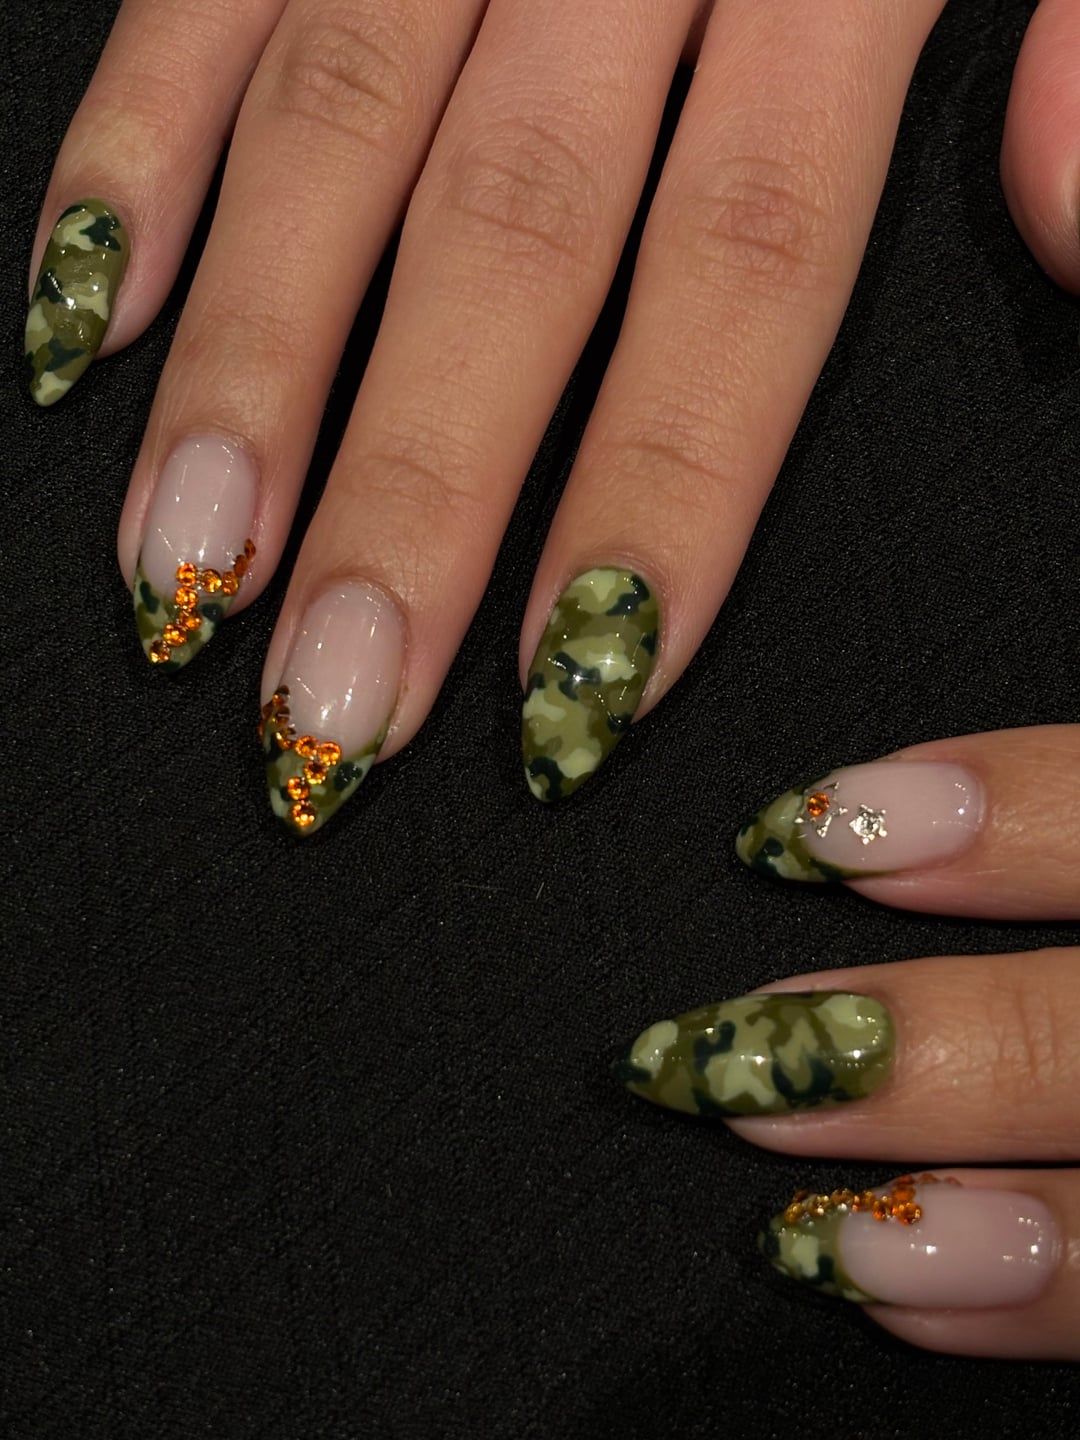
I will admit it. I tried this at home and the glitter placement looked like a kindergartner sneezed. Camo glitter French nails on medium stiletto require a steady hand and a very thin brush. The sheer pink base is forgiving, any mistake shows through. The trick is to paint the camo pattern first on the entire nail, then apply the sheer pink over it, leaving the tips exposed. Orange and silver glitter go on last, just on the index and ring finger tips. One thick glitter layer, not two thin ones. The glitter will be slightly textured. Do not file over it.
Digital Purple Blue Camo with Glitter
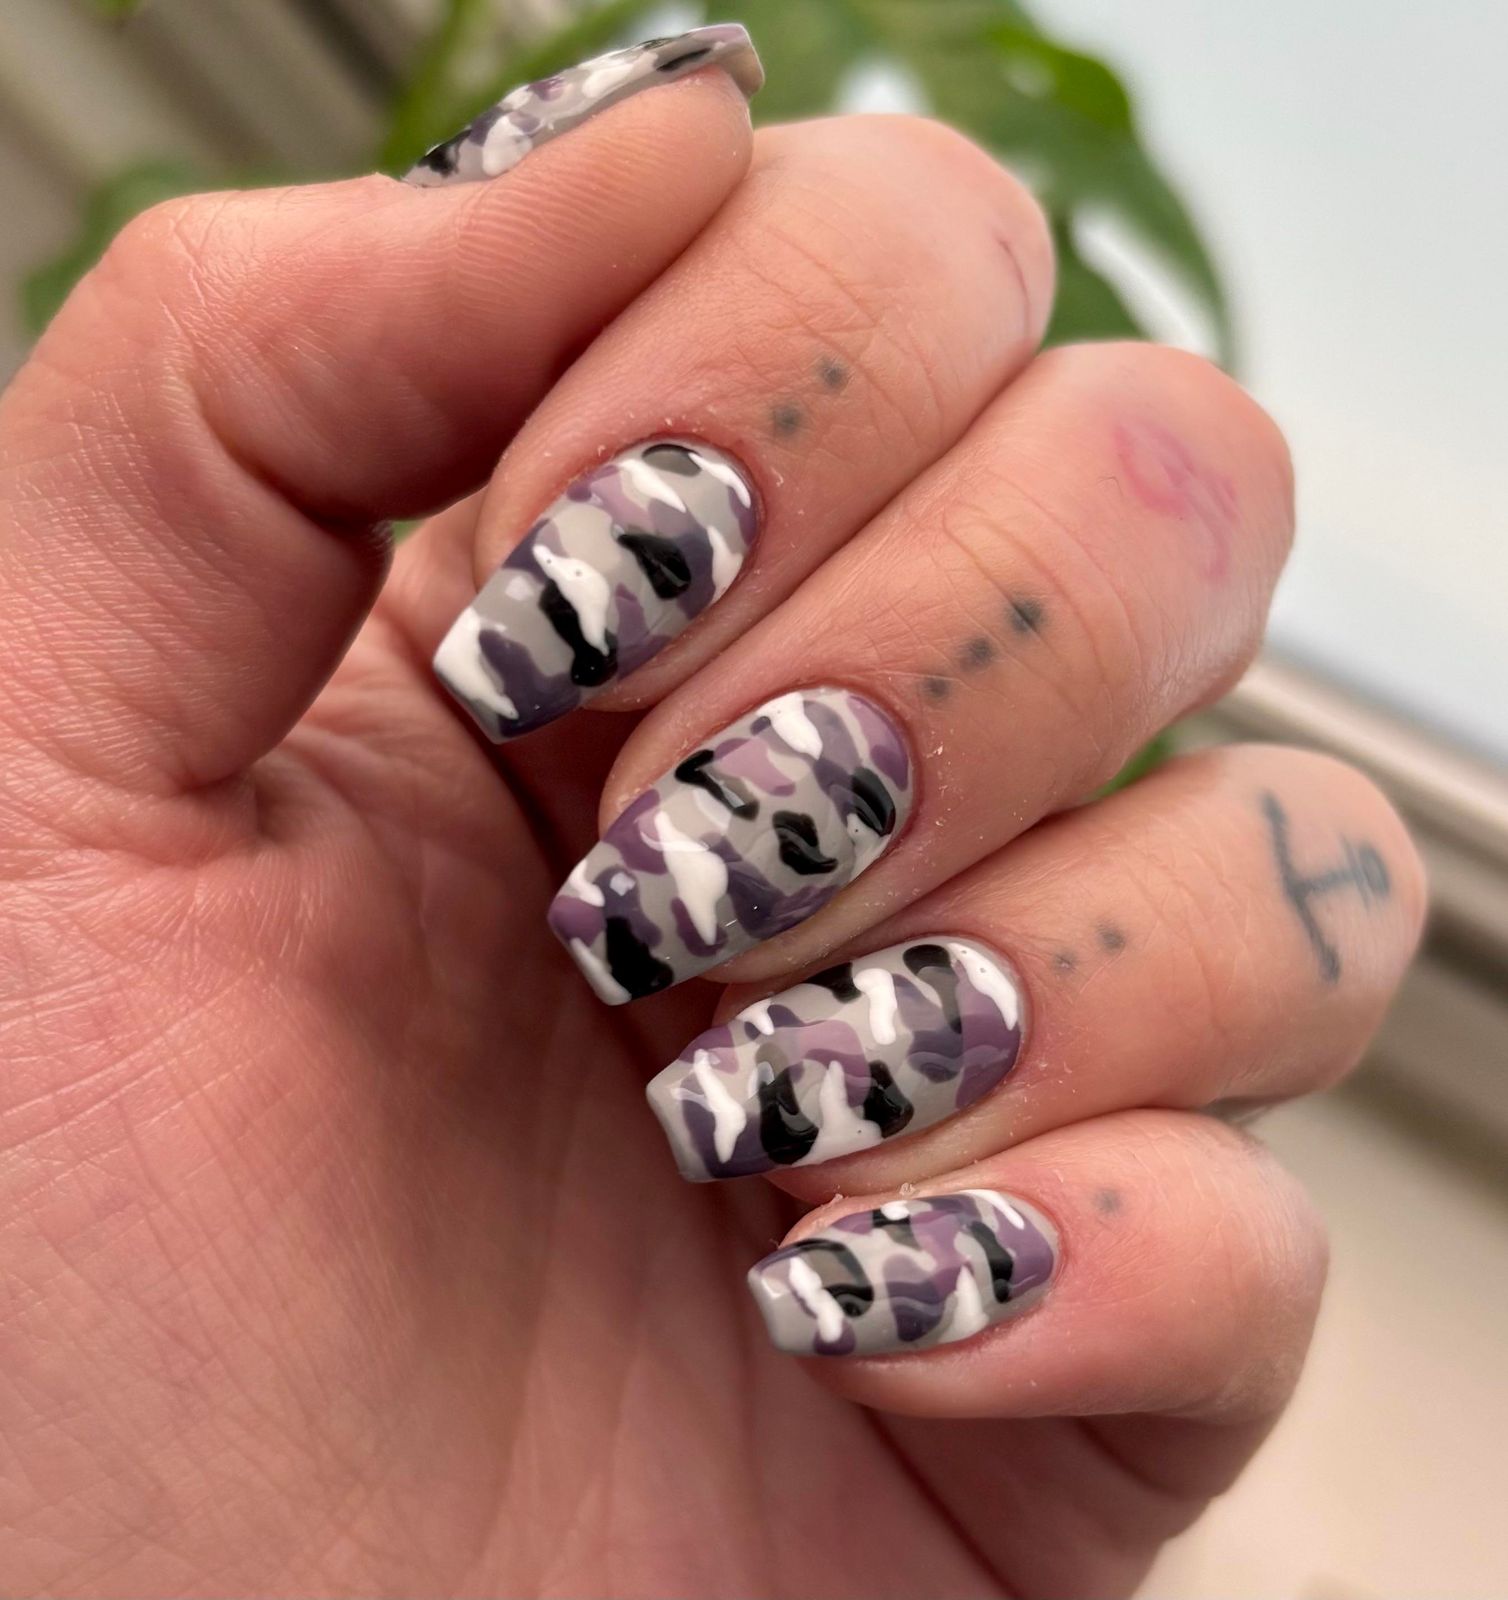
Why does pixelated camouflage feel more modern than the organic kind? Digital camo nails in purple blue on medium oval use sharp-edged blocks instead of soft blobs. The subtle glitter in the glossy finish keeps it from looking like a screen grab. Purple, blue, light blue, each square placed with precision. It reads cool on fair skin, electric on medium, icy on deep. The straight lines mean regrowth is obvious by day ten. Do not stretch this past two weeks. The pattern fights any grown-out nail bed.
Visual Idea
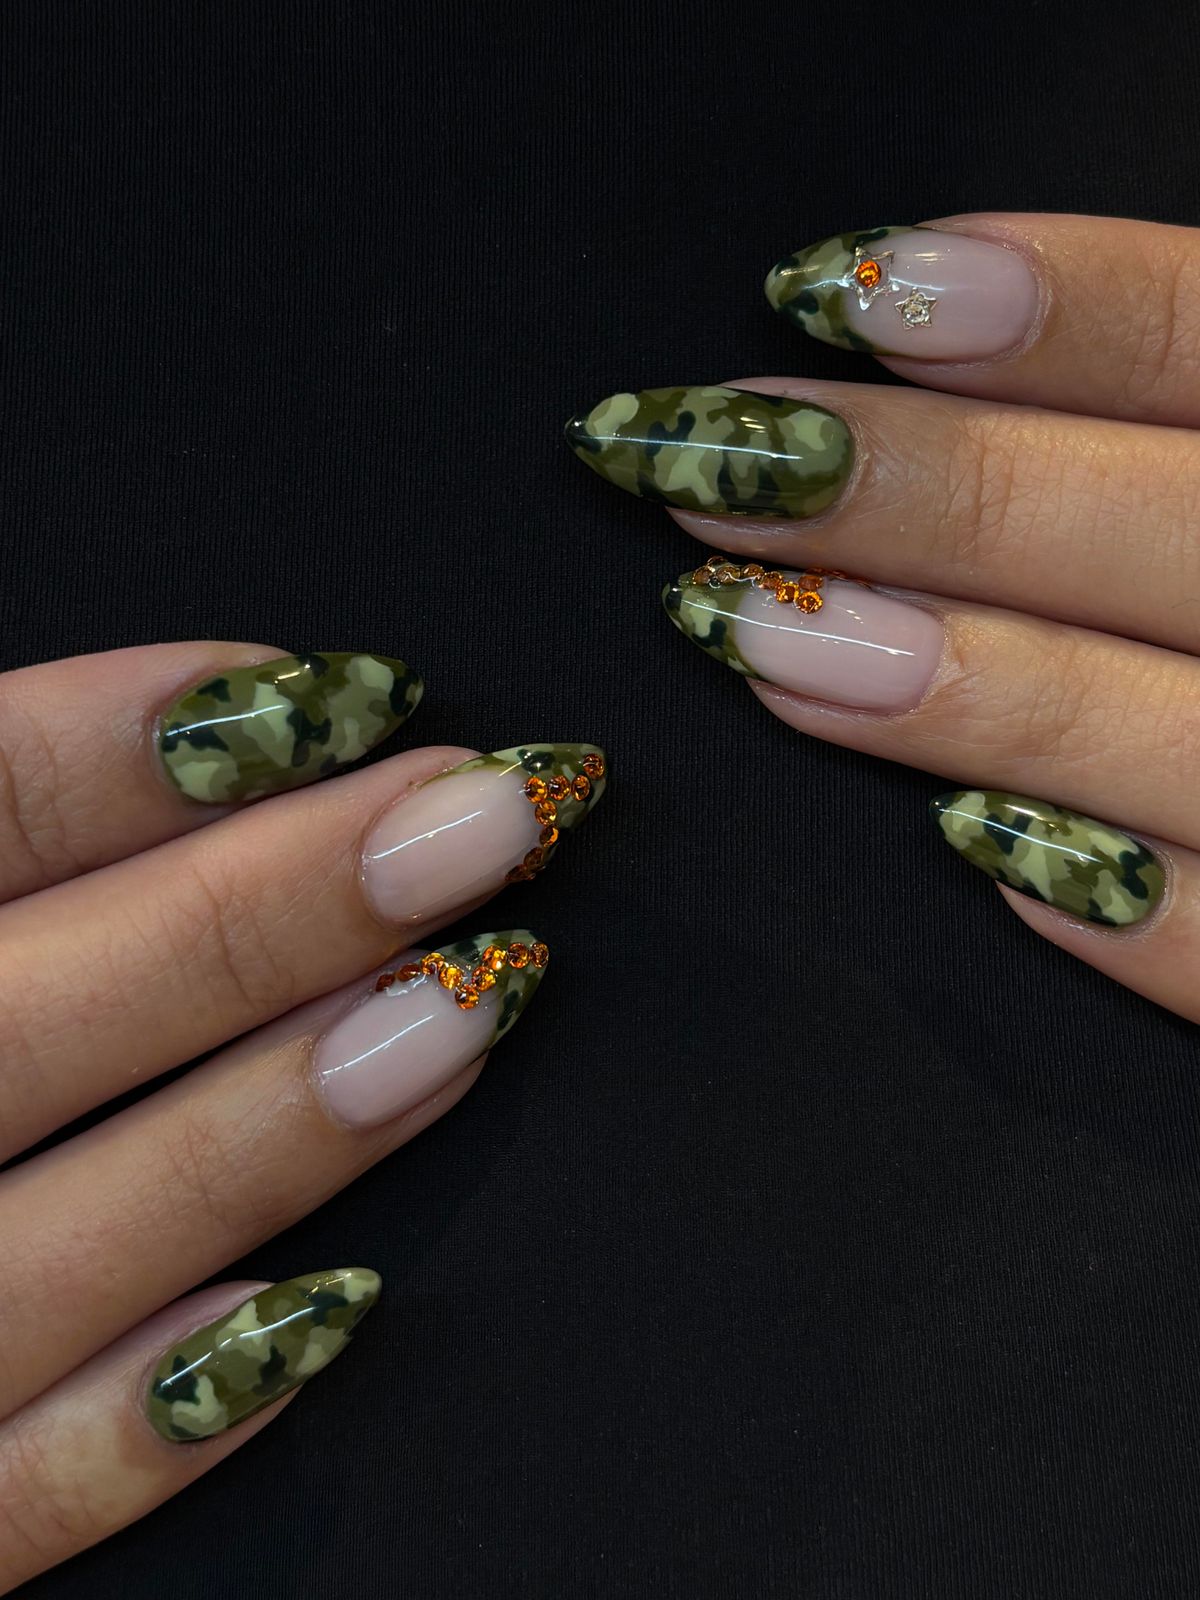
Camo French tips beat plain French tips every time. Instead of a predictable white curve, you get organic green and brown patches over a sheer pink base — it’s French with a point of view. The almond shape keeps the pattern from looking squat, and the rhinestones and gold glitter add texture without overwhelming. Can you DIY it? Technically yes, with camo nail stickers and a glossy top coat. But the cuticle precision and even glitter placement are finicky. One uneven patch and it reads as a mistake, not a design. For the clean transition between camo and sheer, book the appointment.
Glossy Visual Idea
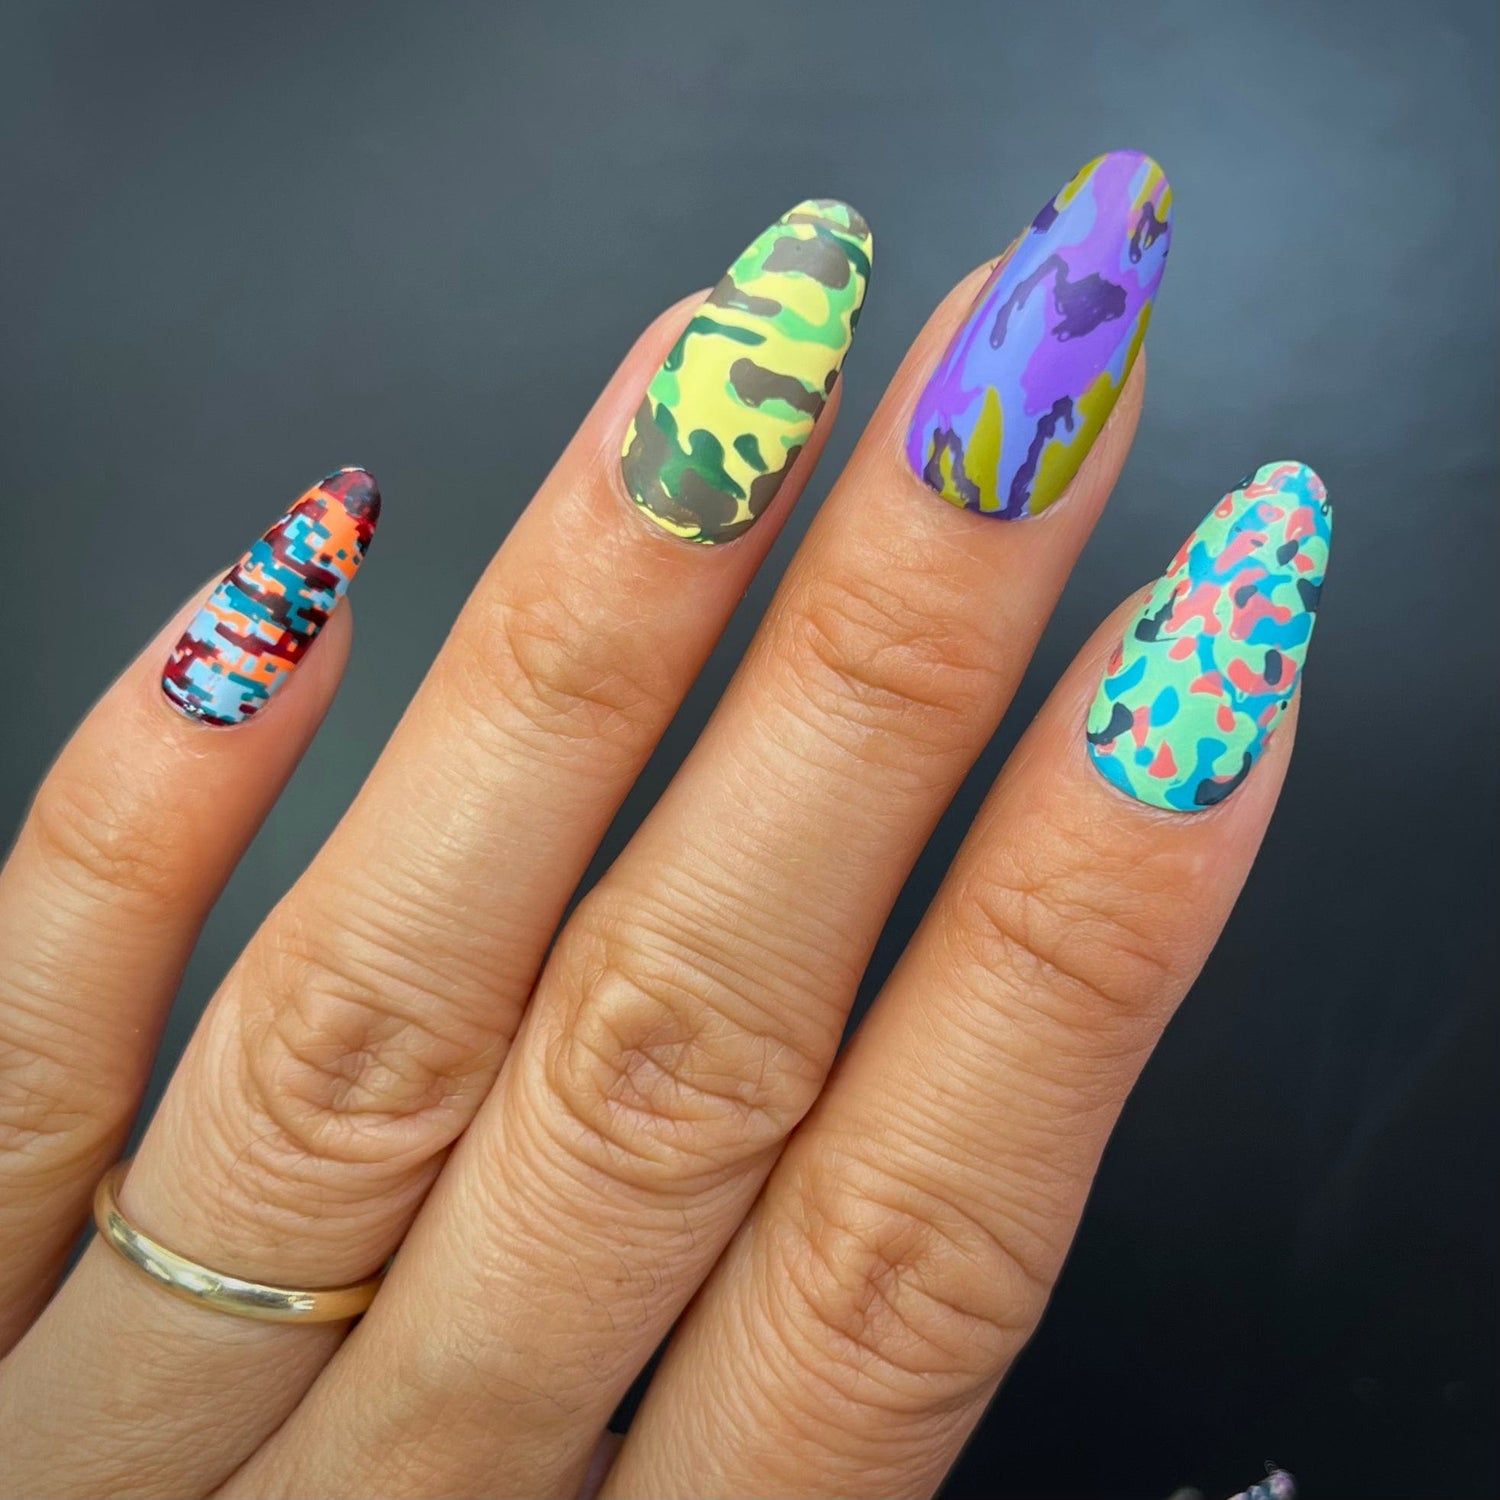
This camo demands a person who doesn’t flinch at color. Green, yellow, purple, blue, orange — all glossy and all on one hand. It suits someone who treats nails as a canvas, not an accessory. The medium almond shape keeps the chaos contained, and the glossy finish unifies the rainbow. If you prefer tonal palettes or single accent nails, this will feel like too much. But if your wardrobe is neutral and your nails are where you break rules, this is exactly your speed.
The Single Detail A Reader Notices First Visual Idea
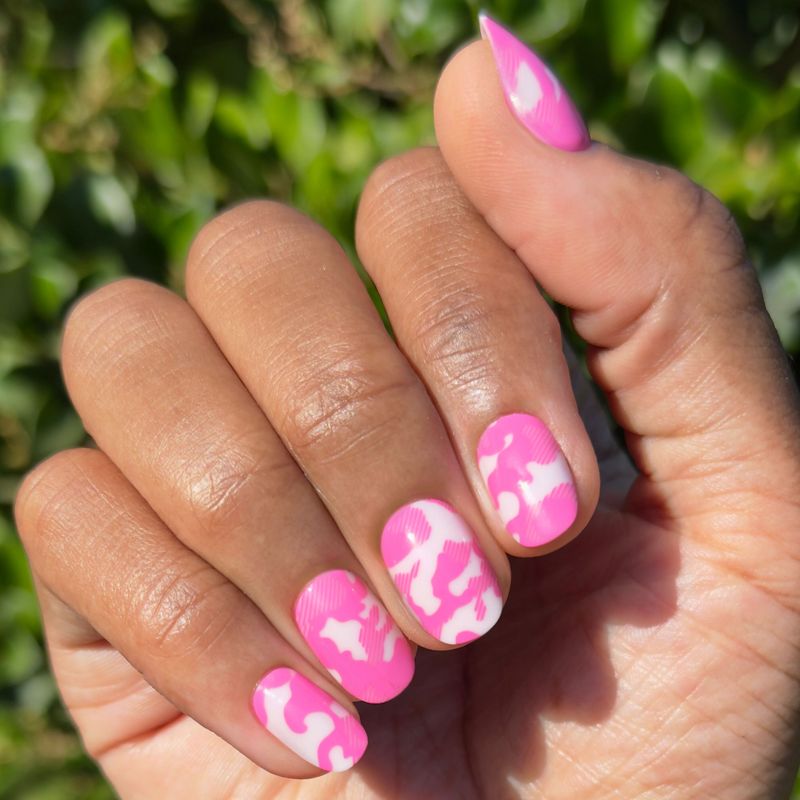
You walk into a meeting and everyone stares at your thumb. That single detail — a foil accent, a dot cluster, a sticker that catches light — becomes the focal point of the whole manicure. The rest of the design supports it, but that one nail does the talking.
Wear reality: the standout detail is also the first thing to chip. Foil edges lift by day three if not sealed properly. Dots rub off on sweater cuffs. Stickers catch on hair. The upkeep means babying that one nail — extra top coat at night, no picking at cuticles. The honest trade-off is that a design this complex demands maintenance. If you type for a living or wash dishes without gloves, expect that star nail to fade before the rest. It’s beautiful on day one, but day five tells a different story.
Classic Camouflage Pattern On All Nails Visual Idea
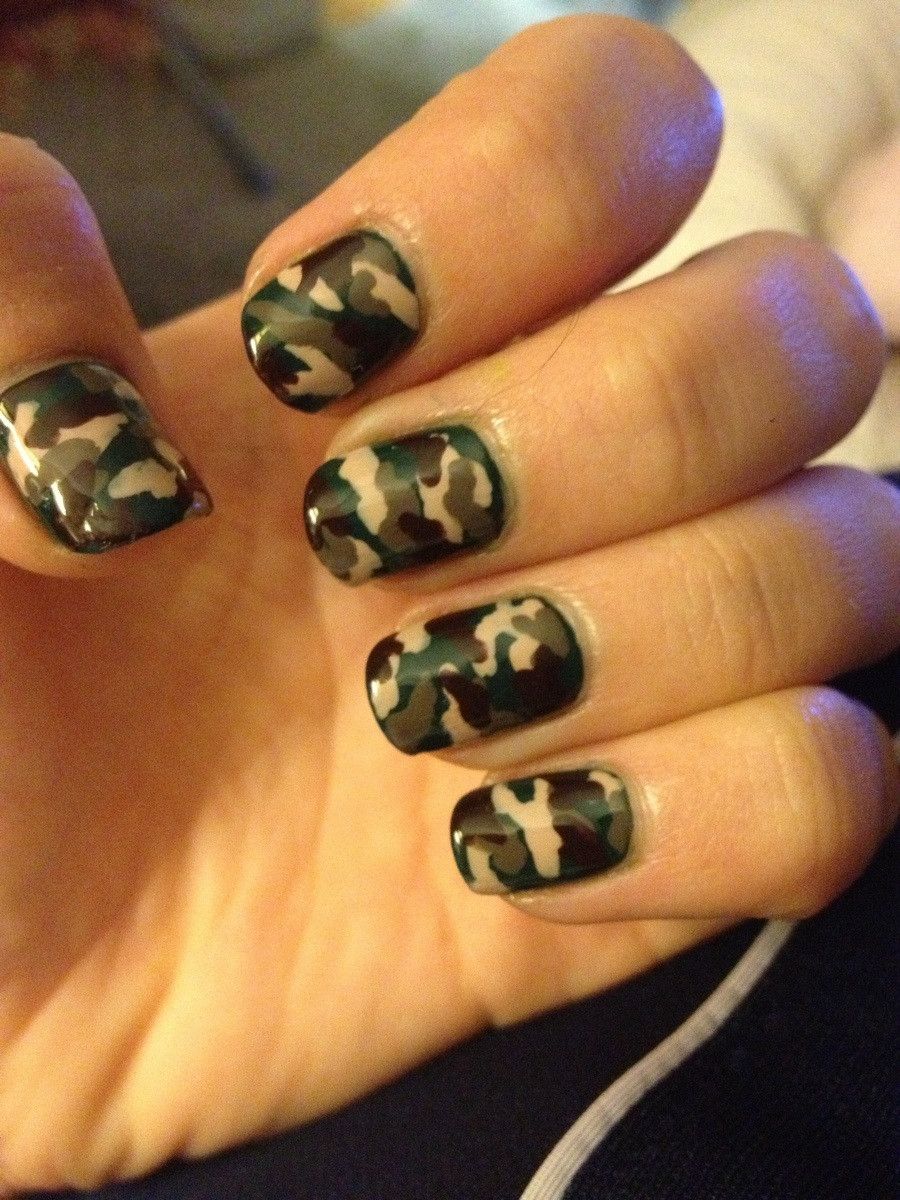
I saw this and immediately wanted to trace the pattern. Classic green, brown, and black camo on every nail, glossy, on a medium coffin shape. The precision is what gets me — each patch blends into the next without muddying. The technique requires layering: base color, then the first camo color in random splotches, cure, then the second, cure, then the black outlines. One wrong brush stroke and the whole thing looks like a bruise. The coffin shape helps — the flat tip gives the pattern room to breathe. This is not a slap-it-on design. It’s a deliberate, methodical application that rewards patience.
Matte Glitter Visual Idea
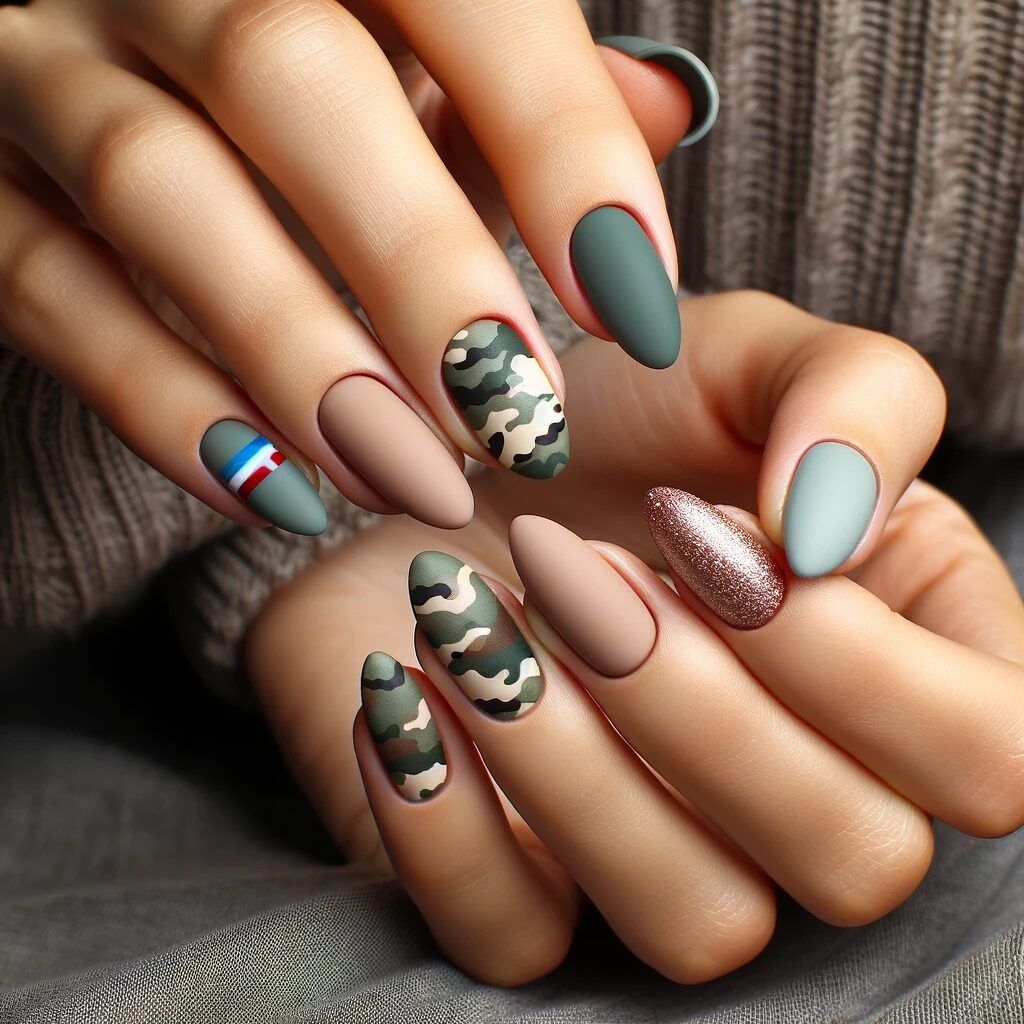
Can matte and glitter really share a nail? This design tries — matte olive, taupe, grey, and a glittery rose gold camo accent. The balance is tricky: matte absorbs light, glitter reflects it. The downside is that the matte sections show every fingerprint and oil smudge within hours. The glitter catches every snag. If you’re okay with wiping down your nails twice a day, the contrast works. If not, the matte will look dirty before the glitter even chips.
Casual Visual Idea
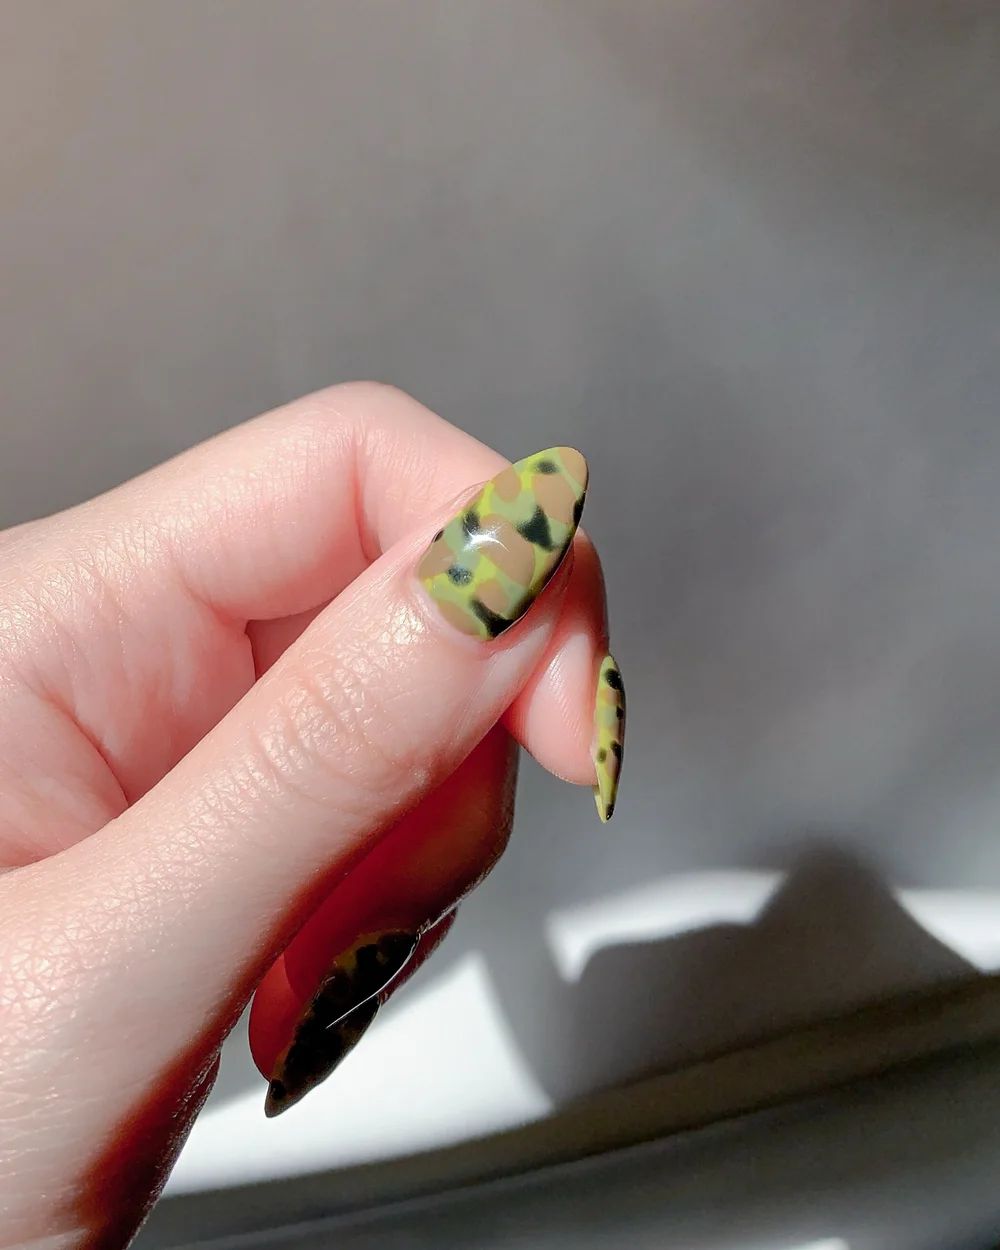
Calling this a casual design is a stretch. The camouflage print is meticulously applied in olive, khaki, brown, and black, with each patch sharply defined against a glossy finish. It’s the kind of detailed pattern that demands a second look, not the one you wear to grab coffee without thought. The realistic camouflage print is the standout, but it’s far from low-effort. The medium oval shape keeps it wearable, but the print itself is anything but relaxed. The glossy top coat only amplifies the precision, making it feel more polished than laid-back. You don’t just wake up and choose this; you plan for it. That’s not casual, that’s a commitment.
Nature Outdoor Visual Idea
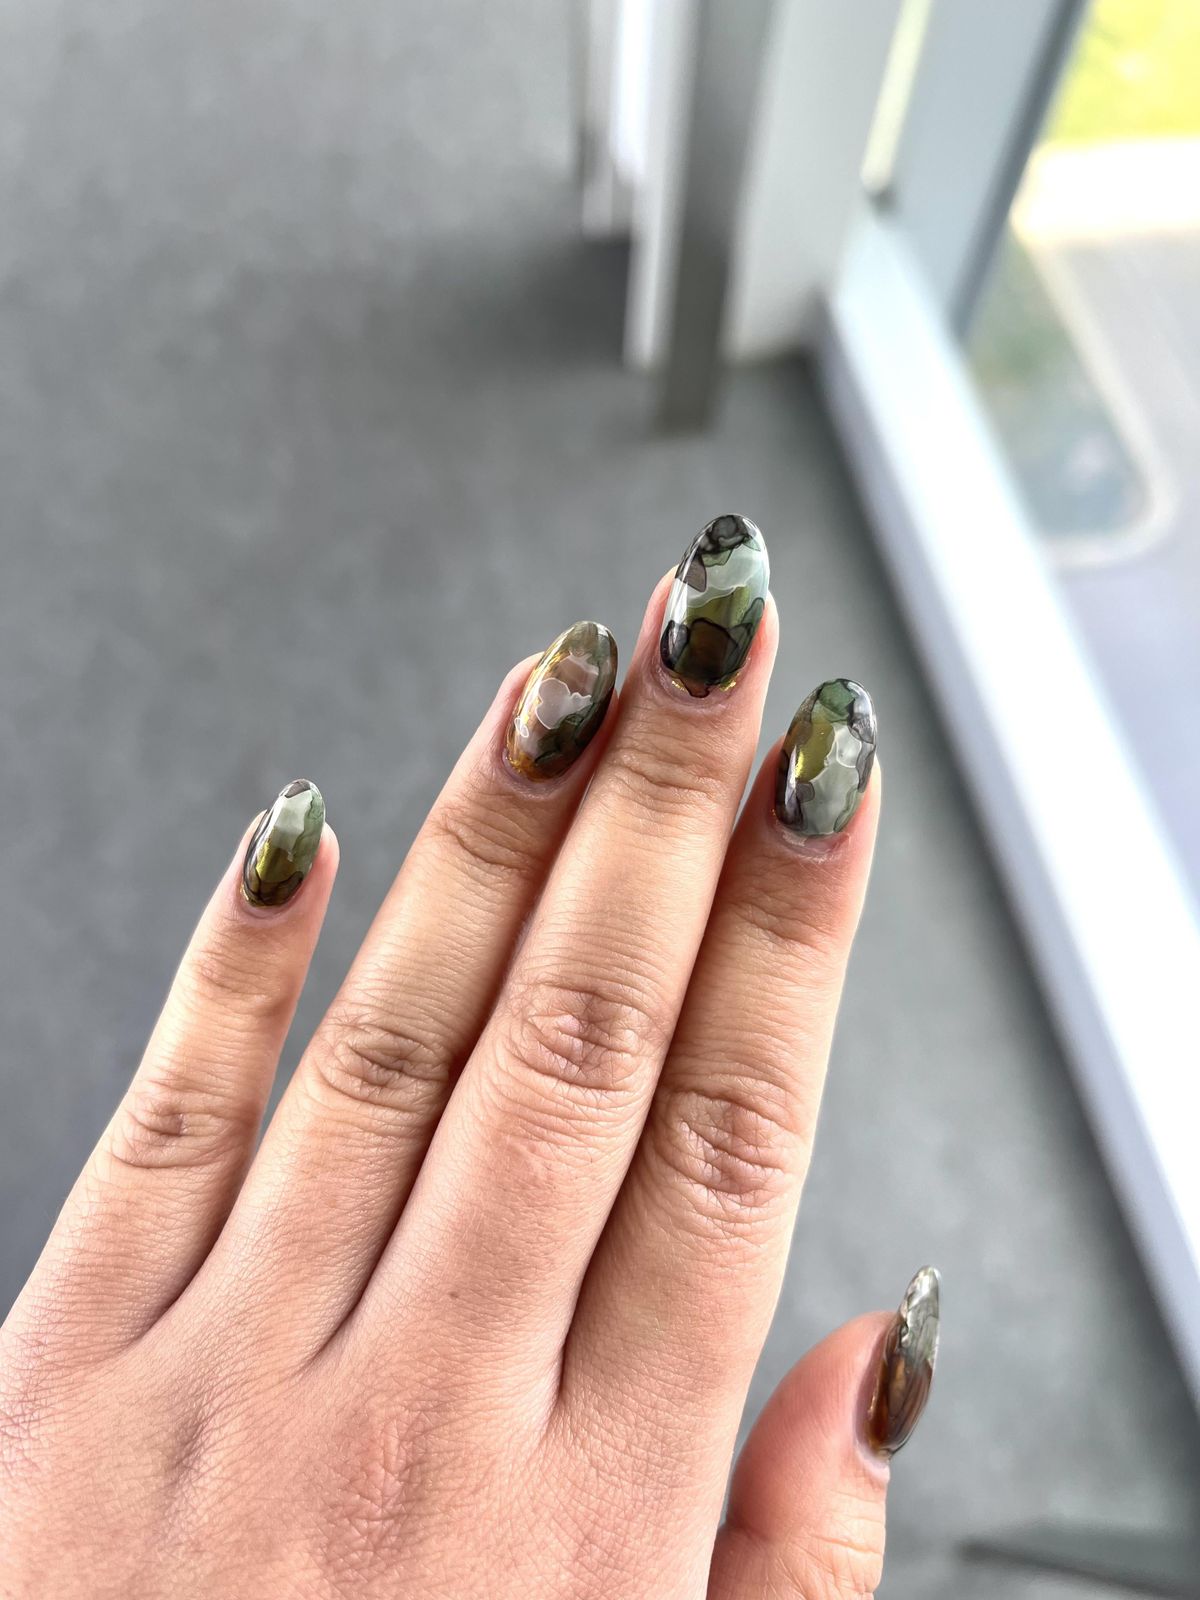
The greens and browns in this abstract camo match the forest floor after a rain, with hints of grey for depth. It’s the kind of design that belongs on a hiking trail, not a city sidewalk, making it ideal for fall outdoor adventures. The stiletto shape adds edge but requires care around zippers and backpack straps. The glossy finish shows every smudge, so a quick wipe with alcohol-free remover can refresh them.
To keep this look fresh while you’re actually outdoors, a few simple habits help. Apply a generous layer of clear top coat before any trip to seal the edges. Pack a mini cuticle oil in your bag to combat dryness from wind and sun. After a dusty hike, wipe the nails with a damp cloth to restore the gloss. And if you’re camping, avoid using your nails as tools for opening anything. A quick touch-up of top coat every few days keeps the pattern from dulling. The camo pattern actually helps disguise minor dirt, which is a bonus.
Camo Pattern On All Nails Visual Idea
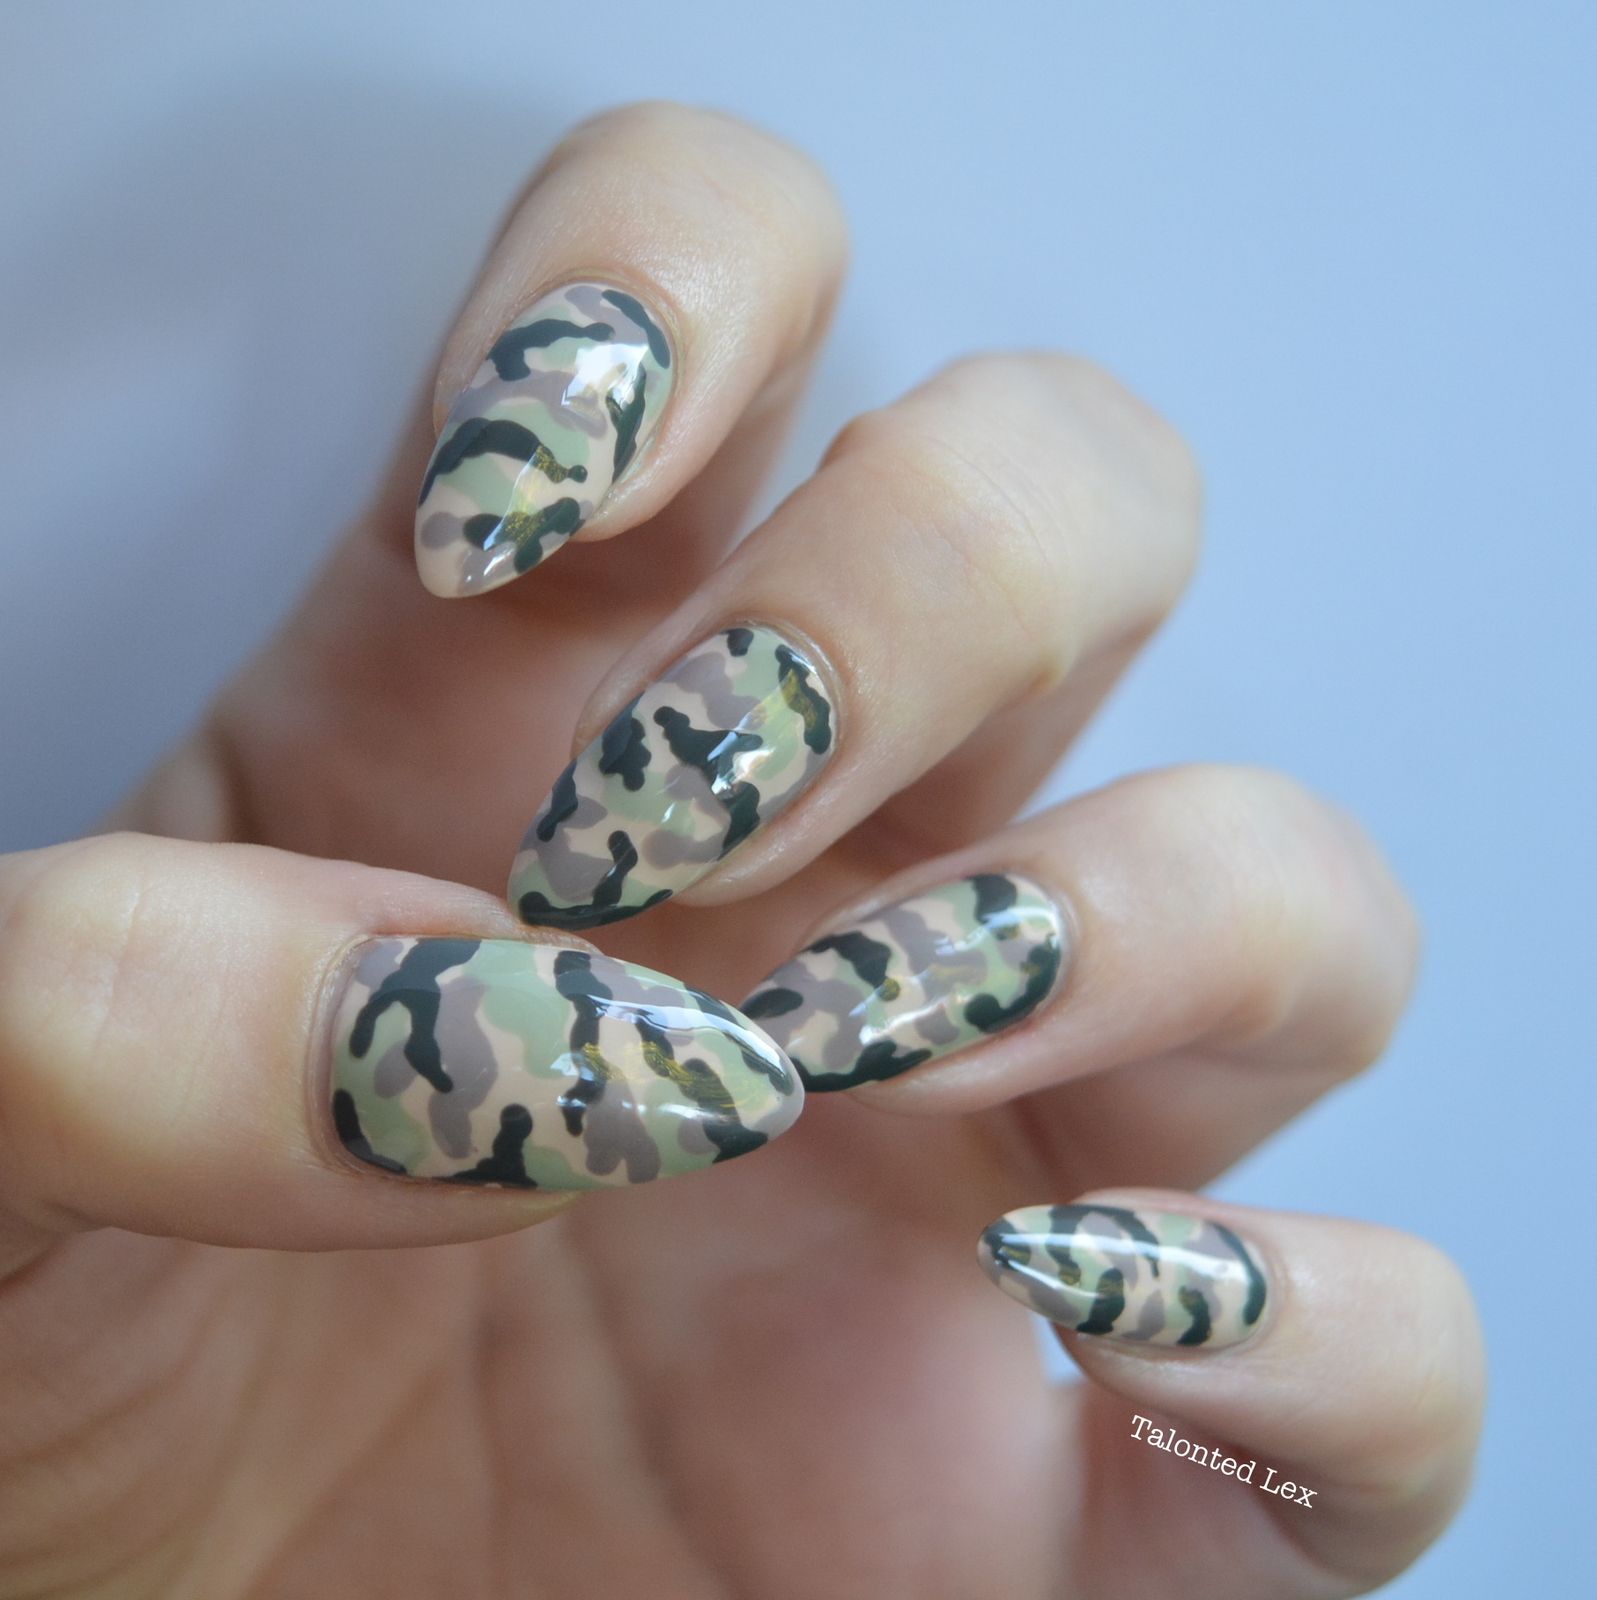
I’ll admit, the realistic camo pattern on all nails is visually stunning in the macro shot. But after a week of typing and washing hands, the small details start to blur. The medium almond shape is practical, but the pattern doesn’t forgive chipped edges. The glossy finish helps, but the pattern requires careful upkeep to stay crisp. If you work with your hands, this pattern will show wear faster than a solid color. It’s a look that demands attention, and that attention includes maintenance.
Final Thoughts
After 27 designs, I still think camo nails are having a moment that makes more sense than I expected. The ones I keep coming back to are the matte olive stiletto and the leopard-inspired short square, both of which survived a full work week without drama.
- Cuticle oil twice a day, no excuses
- Top coat refresh on day 7
- Avoid soaking in hot water for first 24 hours
- Thin layers prevent chipping at the tips
I’m booking the matte olive stiletto for my next appointment. That one earned its spot.

